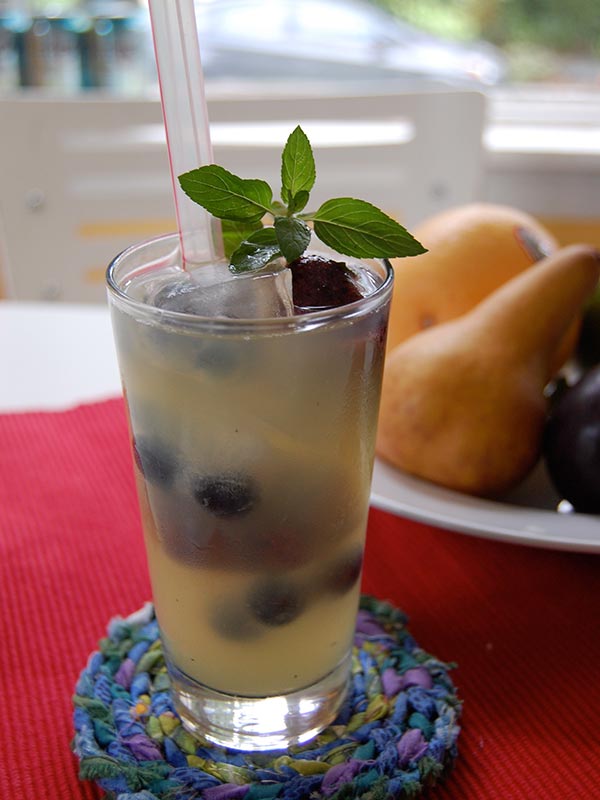
Combine cucumber, honeydew and lime juice and salt.
Blend most of the blueberries (reserve a handful) with ½ cup of water.
Strain the blueberry purée into an ice cube tray, filling up half of the molds. In each of the other molds, place 3-5 whole blueberries (from the reserved handful) and fill with water. Put in freezer to set for about two hours.
To serve, arrange the blueberry ices in a glass alternately and top with juice. Garnish with sprig of mint. If desired, sugar or other sweetener can be added. Enjoy!
1 Melon (Gala for light sweet/Honey Dew for more sweet)
4 teaspoon lemon juice
1/2 teaspoon chilli flakes
2 teaspoon ginger juice
Salt and Pepper to Taste
2 teaspoon sugar (Optional, depending on taste)
1/2 Cup water
For Cheese Crackers:
3-4 Savory Crackers of your choice
3-4 thick cut feta cheese cubes
2 tablespoons of Green, Red and Yellow Bell Peppers
few Coriander leaves
4-6 Black Olives
Salt and Pepper for Seasoning
For garnish:
1 Tablespoon feta cheese to sprinkle
2-4 Olives
1 inch cube of melon cut into 4 small parts
Coriander leaves to decorate
1 Tablespoon of mixed bell Peppers cubes
4 Toothpicks
Instructions
Method
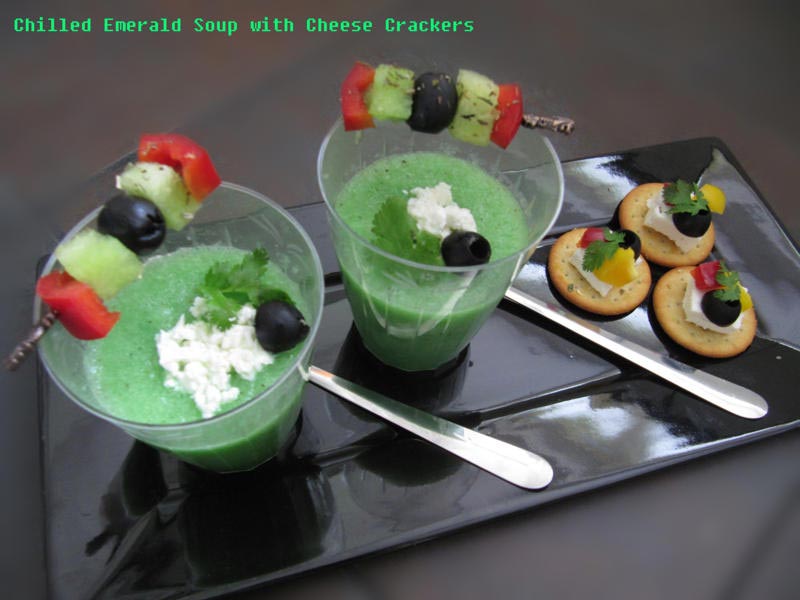
Cut the Melon (leave a 1 inch cube aside for decoration later) into medium pieces and marinate with the lemon juice, ginger juice, chilli flakes, salt and pepper in the refrigerator for half an hour. It is good to marinate the melon slices in the spices to assimilate all the flavors well, but if you don't have time to marinade you can make the soup instantly as well.
Blend the marinated melon in a mixer with about half cup water.
Pour the Soup into Serving Cups and Garnish with crumbled cheese, coriander and olives.
In a small bowl make a mixture of small cubes of bell peppers, olives and melon and season with salt and pepper. Take a toothpick, skew the small pieces onto it. Decorate on the glass.
Take 3-4 savory crackers, Gently keep the cube of feta cheese on top and garnish with olives, peppers and season. Serve beside the soup as a teaser.
Relish as a snack drink or a refreshing starter.
Notes
Variations:
This soup can be made with any melon variety of your liking. You may also add mint for freshness.
As a serving suggestion, this soup can also be served in half cut scooped out shells of the melon.
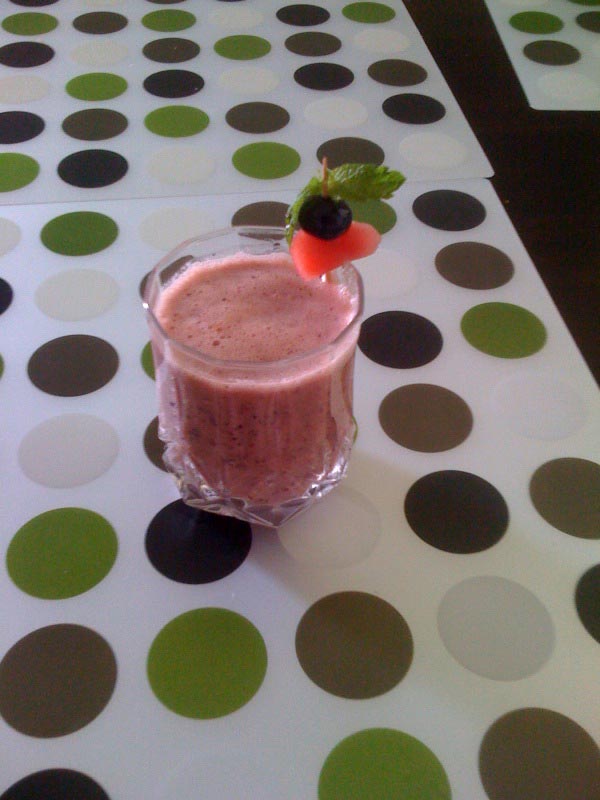
soak almonds and cashew nuts both in a small cup of water for 20 minutes and then remove the skin of almonds and keep aside
remove seeds in dates and soak them in water for 20 minutes and keep aside
now blend soy milk, watermelon pieces, strawberries, banana, apple, vanilla essence, soaked almonds, cashew nuts and dates. (number of dates can be adjusted according to taste)
add crushed ice and blend again and pour in tall glass.
now add watermelon cubes into glass and stir it with spoon once.
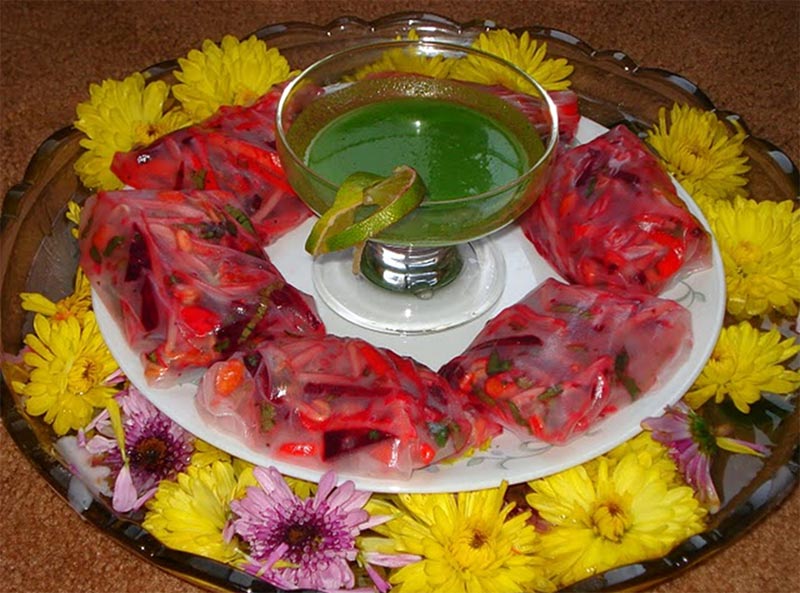
This Bean Sprouts Salad Spring Roll recipe is Vietnamese cuisine inspired salad. I give credit to my very dear friend Anaya for this recipe and she in turn gives credit to her friend and food network. No matter what changes we make, this spring roll is tasty, healthy, very filling, very colorful, and quick & easy to make. It has always been a very big hit whenever I have taken to potluck. Hope you all enjoy it. This versatile spring roll can be eaten with mint sauce or cilantro. I have used mint dressing in this recipe. I especially like this since it is not fried, tasty and a healthy salad which I like to skip a meal and eat this instead.
In a mixing bowl take 3 cups of bean sprouts and set aside.
Cut carrots and beets into thin strips and add to bean sprouts. Chop cilantro and green chilies finely and add to the bowl.
Dry roast 1/3 cup of peanuts without oil and mix it in.
Add I tsp of black sesame oil, salt, pepper powder, lime juice and set aside for 15 minutes.
Now take the rice paper wrapper (Available in all Chinese/Vietnamese grocery store) and follow the instructions on the wrapper to fold it.
Divide the salad into 10 equal parts or stuff in a handful at a time.
Most of the rice paper needs to be soaked in water for 2-3 minutes and put the stuffing in and roll it. Once put in water it becomes very soft and pliable.
Notes
Tips
Tastes best when served immediately after the salad is wrapped.
If planning to make for a party, make the stuffing ready and wrap it 30 minutes before or if wrapped at an earlier time, roll each wrap in saran wrap so that it does not stick to each other.
Be innovative and add vegetables and nuts as per your taste.
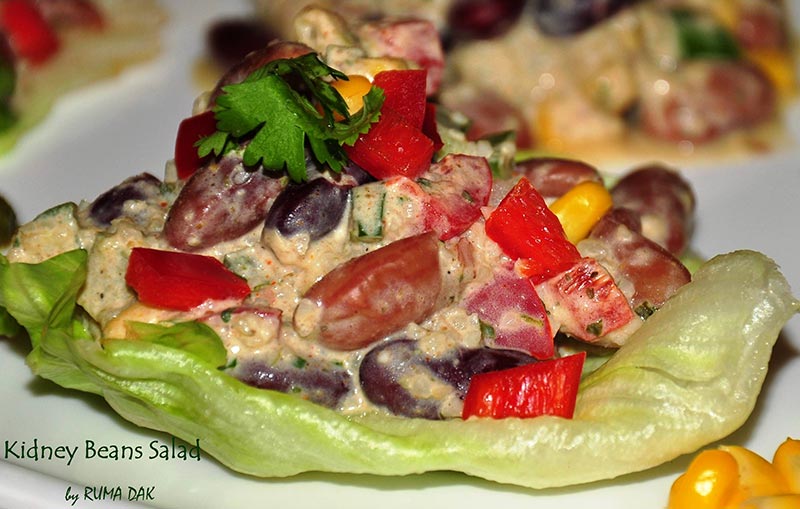
A healthy bean salad with an Indian twist is something that can bring you accolades at a party. This high-protein-packed salad brings with it the goodness of fresh and colorful veggies. Couscous adds to the fiber content of the salad while the minty yogurt gives it an Indian touch and that extra zing!, keeping the calories under count too. At times this can also serve a full meal on its own! The veggies for this salad are chosen such that you can make this salad ahead of time ( to lessen that last-minute hush) and it will not turn soggy/watery or have that oniony smell. What more can you ask from a simple salad recipe!
1 cup Kidney Beans (I used a mix of the dark and light variety)
1 cup finely cut veggies: red, green and yellow capsicum, boiled corn kernels, celery.
1/4 – 1/2 Cup couscous (as per your choice)
Lemon juice – to taste
For the Dressing:
1 Cup yogurt (I used Greek style Yoghurt)
1 Cup fresh mint leaves
Handful of fresh coriander leaves
Chopped tomato – half
Garlic cloves and ginger – to taste (optional)
Chaat masala, salt, black salt, red chili powder, black pepper powder, green mango powder, anardana powder – To taste.
For Garnishing and serving:
Fresh Coriander and mint leaves
Lettuce leaves
Some chopped capsicum, boiled corn etc.
Instructions
Method
Wash and soak kidney beans overnight in sufficient water. Pressure cook or boil them till cooked. The beans should retain the shape and should be well cooked. Set aside for cooling.
Wash and drain cous cous properly. Add enough warm water to soak it and leave aside for 10-15 minutes.
Grind together mint leaves, coriander, and garlic, ginger, chopped tomato, all spices for the dressing. You can add green chilies if you like your salad hot.
Mix the above with hung yoghurt. Make sure the yoghurt is thick as we do not want the salad to turn watery.
In a big bowl, add the boiled beans (just press them little so that they open up a bit; this will help the dressing seep into the beans and impart them some flavor but make sure they still retain their shape). Now add cut vegetables and the minty yoghurt dressing and well.
Fork through the cous cous so that the grains separate. Add this to the salad bowl and give it a good mix. Finally add some lemon juice and mix. Do a taste test and adjust salt if needed.
For an eye catching presentation, serve a portion each on Lettuce leaves such that the leaf serves as a plate as well for individual serving! Sprinkle some cut veggies and mint and cilantro leaves!
Notes
Variations and tips:
If you have mint chutney on your menu with some starter, this salad is a must! Just mix green chutney and yogurt, throw in some more spices and Voila! You have the dressing ready in a jiffy.
Although capsicum and celery are enough to give a crunch, but still if you really do want to have onions, add them just before serving. It will look fresh as well as avoid that smell. Tomatoes are also grinded and not added directly as they tend to release water and the salad can’t be made ahead of time.
This can be made with only coriander if mint is not at hand. But adding mint makes it unique and so very flavorful! Try using dried mint instead but you will lose on the flavor.
Yogurt should not have extra water; else the salad will go runny.
Instead of yogurt, you can make a simple cream/sour cream dressing as well but that adds to the calorie count too!
You can use sprouted moong, moth instead of kidney beans but it tastes great with kidney beans; you will have to take my word for that.
You can use dried herbs as well like oregano, parsley or herb mixture of your choice. Options are endless!
Serving Options:
Serve it as a starter with corn chips.
It goes very well with Rice/Biryani or even bread or chapattis for that matter.
Use it as a noteworthy addition to your next scrumptious party menu.
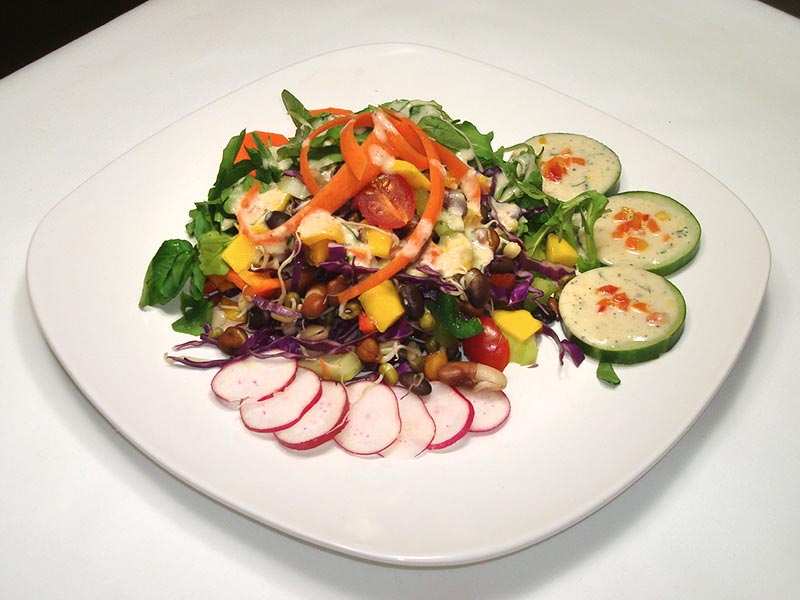
Mixed Sprouts and Arugula Green Salad with White Bean Dressing
My recipe for this month's contest is Mixed Sprouts and Arugula Green Salad with White Bean Dressing. I have been following your website for some time and I learned many recipes from you (as well as recipes from every month contest winners). This time I got chance to participate in the contest and I am very excited. This is a healthyvegansalad with all the right nutrients to give a boost to ones health.
4-5 tablespoonQuarter cup sprouted Kala channa (Bengal gram)
Quarter cup sprouted Red Kidney beans
Quarter cup sprouted Black beans
Quarter cup sprouted Moong beans
10 cherry tomatoes cut into two pieces
1/2 cup Red Cabbage chopped
1/4 cup of Poblano Pepper chopped bite size
1 carrot cut into bite size
2 Sweet Red Mini peppers chopped into bite size
2 Sweet Yellow Mini peppers chopped into bite size
2 Sweet Orange Mini peppers chopped into bite size
1 seeded and chopped green chili
1 stick of celery chopped
1 small Mexican mango cut into bite size
2 cup of arugula green (I also mixed a small amount of watercress green)
1 teaspoon of olive oil
1 teaspoon of cumin seed
For Salad Dressing:
4-5 tablespoonQuarter cup white beans washed and soaked in about 1 cups of water overnight.
1/2 tablespoon black pepper
1 and 1/2 teaspoon Salt, adjust to taste
1 teaspoon Red chilly powder
1/2 tablespoon vinegar
10 dashes of Balsamic vinegar
1 tablespoon lemon juice, adjust to taste
1 tablespoon ginger juice or adjust to taste
2 tablespoon olive oil
1 Orange
1 Zest of orange
1/2Zest of Lemon
Sweet Mini peppers – 1/2 of Red, 1/2 of Yellow and 1/2 of Orange, chopped very finely.
1 and 1/2 tablespoon fresh Dill
1/2 cup of water
For Garnish
Slices Cucumbers, Radish, and Carrot
Instructions
For Dressing
Drain the white bean and wash it.
In a pressure cooker add white beans with 1 and 1/2 cup of water.
As pressure cooker starts steaming turn the heat down to medium low, cook for about 10- 12 minutes.
Turn off the heat and wait for 10 min. Now open cooker and check white bean, they should be soft. Drain the white beans and allow it to cool for 10 -15 min.
Next, in a food processor add white bean, 2 tablespoon of olive oil and 3 tablespoons of water. Make a paste.
In bowl add white bean paste and add rest of water to make it dressing like consistency (this depends upon one's own choice).
Next add orange zest and the juice of a orange. Stir.
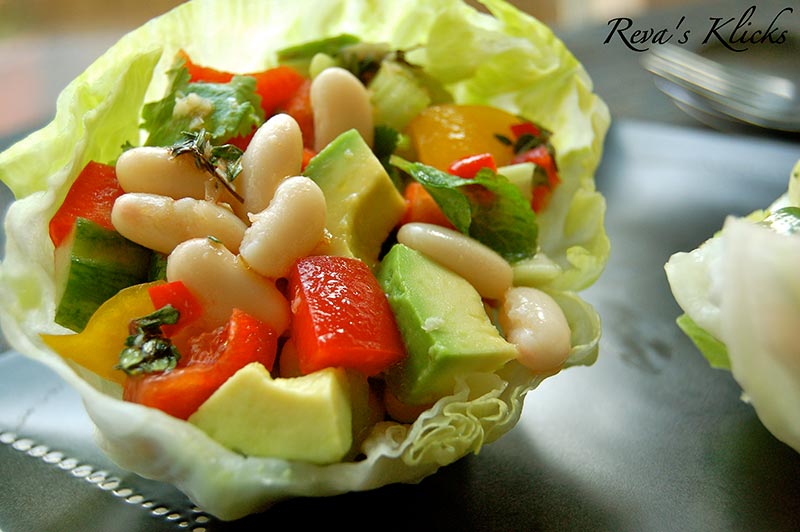
Hot and Cold Bean Salad in Lettuce Cups with Tomato Lime Dressing
This Hot and Cold Bean Salad in Lettuce Cups with Tomato Lime Dressing recipe is full of color and bursting with flavors and textures. The best way to serve this salad is both hot and cold at the same time. Confused!? Well, don't be.One ingredient is warm and the rest of them are cold. The best thing is that the cup in which it is served can also be eaten (so minimal washing after). That is a well deserved bonus for all the busy bees out there along with the recipe being a healthyvegan and a great meal for those who are diet conscious.
3-4Whole iceberg lettuce leaves or gem lettuce leaves :
Wash and trim the edges of the leaves.
1/2 hour before serving time, take a large bowl of cold water and add ice cubes.
Plunge the lettuce leaves in this ice cold water.
Instructions
Method
Wash and chop the veggies. Keep the chopped avacado in a seperate bowl. Refrigerate rest of the veggies.
Wash the mint and coriander leaves and chop coarsely
Grate the garlic finely.
De-seed and chop the red chili.
Finely chop the lemon thyme sprigs.
Mix all the ingredients given for the salad dressing and refrigerate.
Assemble and serve:
In a large bowl add the chopped veggies except avocado, mint and coriander leaves.
Add half the dressing and mix two to three times.
Drain and rinse the beans to get rid of the excessive salt. Add fresh water (just enough to barely cover the beans).
Cook in microwave high for 4-5 mins until pipping hot.
Add this to the veggie mix along with the avacado and toss once.
Serve immediately in the chilled lettuce cups along with the reserved salad dressing.
Notes
Notes:
Avocado can turn mushy if mixed at the beginning and will not look and taste nice.
It is important to serve the dressing chilled even if the salad is at room temperature. The reason being, flax seed oil contains more than 50% of good fats (omega 3 and omega 6) which gets destroyed when heated. Even though this is a healthy oil,1-2 tbsp is enough as it does comes with more or less the same amount of calories as the others. If this oil is unavailable, please kindly use olive oil or peanut oil for a smoky tasty.
Points to remember:
Buy fresh vegetables and cut them before 20 minutes or so before serving time.
Refrigerate all the vegetables added in this salad before and after cutting them until serving time.
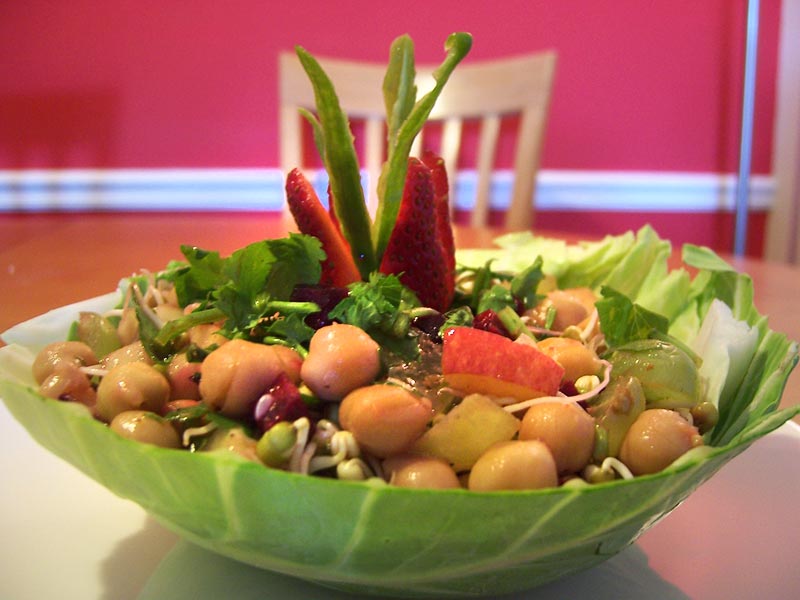
My recipe for this month's contest is Crunchy Bean salad with beetroot and fruits. It is a fresh and healthysalad, and also very quick & easy to prepare. The fruit give this salad a sweet taste.
Ground Almonds( without skin)- 40 g/ just less than 2 oz
1 tspGrated zest of orange
2Eggs
3 tbspFreshly squeezed orange juice-
Butterscotch sauce:
1/2 tbspButter
2 tbspBrown sugar
75 mlCream
1 tbspHoney
1/2 tspVanilla extract
Pistachio Praline:
1 tbspPistachio without shell
2 tbspBrown sugar
1 tspLemon juice
Instructions
For the Sponge:
Melt the butter and keep it separately.
Beat the eggs and sugar in a large bowl until it looks fluffy.
Add the orange juice and zest, mix well.
Sift the flour, baking powder, bicarbonate of soda and almonds into the egg mixture.
Fold gently without any lumps.
Finally fold the butter into the mixture.
Grease 4 ramekins with butter and dust it with flour. Pour the mixture equally into the ramekins.
Preheat the oven to 180 degree Celsius.
Take a large tray, fill with boiling water and then place the ramekins inside that.
Bake it in the preheated oven for 25 minutes or until a skewer inserted comes out clean.
Note: The cooking time might vary according to the size of the dish you are using.
For Butterscotch sauce:
Heat together butter, sugar and honey in a heavy based pan in medium to low heat.
Once everything is melted completely, heat it for 2 to 3 minutes stirring continuously.
Take it off from heat, add the extract and cream little by little, stirring continuously.
For Pistachio Praline:
Heat the pistachio, sugar and lemon juice in a pan, stirring continuously.
When it reaches a consistency of 1 string consistency, take it off from heat and pour it in a baking parchment paper.
After it hardens, bash it with a rolling pin to crumble into pieces.
Note: To check the one string consistency, wet your hands with cold water. Take a small amount of syrup between your two fingers, when you press and release, you should see a small thread between your two fingers.
Notes
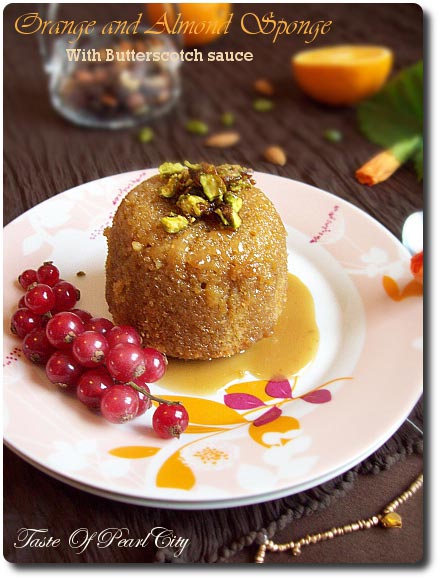
To Serve:Place the sponge in individual serving plates, pour the warm sauce on top. Finally top it up with pistachio praline.To enjoy the real taste of this dessert, serve while they are still warmAdditional Notes:
You can replace brown sugar with caster sugar for sponge.
For the butterscotch sauce, you can use caster sugar and brown sugar mixed.
For the praline also you can replace with caster sugar.
Indulge in the perfect blend of almonds and cashews with this delectable dessert. This recipe features roasted and ground almonds combined with creamy butter and a touch of cinnamon, forming the base of delightful almond bakes. Dipped in a rich, cardamom-flavored cashew paste, this sweet snack is not only gluten-free but also incredibly healthy. Ideal for those seeking a nutritious yet indulgent treat, this dessert is a wonderful addition to any gluten-free diet and perfect for satisfying sweet cravings.
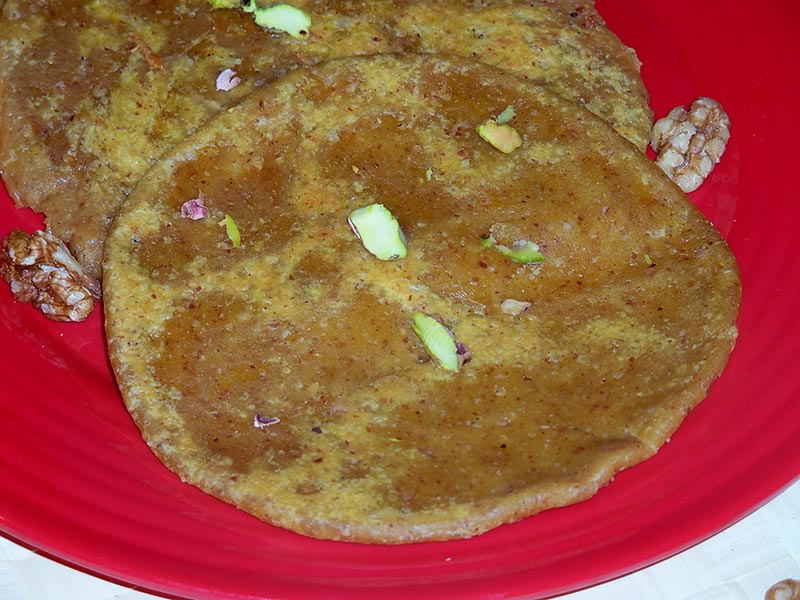
The Almond Poli with Walnut Khoya Filling is a delightful fusion of traditional Indian flavors and healthy ingredients. This unique recipe features a rich and creamy khoya filling, enhanced with the nutty goodness of walnuts, all encased in a soft, almond-based outer layer. The combination of these elements creates a dessert that is not only delicious but also packed with nutritional benefits.
Mix in all the ingredients listed under "for outer covering" to form a soft, non-sticky dough. Knead this dough for at least 10 minutes and let it sit for 30 minutes to 1 hour before making the poli. Meanwhile lets make the filling.
Heat milk in a wide pan and bring it to boil. Now add sugar, cardamom, walnut powder and let the mixture cook on a medium flame.
Cook the mixture until it reduces to khoya consistency or when the mixture solidifies and starts leaving the pan. It can also be referred to as halwa consistency.
Turn off the heat and walnut khoya filling is ready. This filling by itself is a great dessert. I could not stop munching on this filling while making my polis..
Now divide the dough into 5-6 medium sized balls. Pat the ball with your fingers into a small circle and place 2 tablespoons of walnut filling into it. Now seal the filling with the dough and roll into a chapati. We can make thinner or thicker polis as we wish, but take care not to tear the outer covering. No flour is required for rolling the dough, because its so elastic and non sticky.
Repeat the same with rest of the dough and filling. Now cook the poli on a hot non-stick pan with few drops of ghee if desired on a low flame. Cook on each side for 2-3minutes until golden brown spots appear on each side.
Warm polis are ready to be enjoyed with a splash of ghee on it.
Macaroons are special soft cookies usually made with egg whites, sugar and coconut. Here is an eggless version, made with few ingredients and very easy to put together. Perfect for the holidays as a sweet tasty snack and can be even savored as a dessert post any kind of meal.
Line a cookie sheet with parchment and grease with cooking spray. This step is very important as it prevents the cookies from sticking to the sheet.
In a bowl, mix the coconut all purpose flour, cardamom powder, and salt.
Add the condensed milk and vanilla to the coconut mixture and mix well till everything is well blended.
Cover the mixture and refrigerate for 20 mins.
After 20 mins., with a teaspoon or using your hands make small balls and spread the cookies on the cookie sheet. These cookies won’t spread and you can arrange them closely.
Press a mini milk chocolate morsel in the middle of the macaroon and bake for 15 20 mins. or till golden.
Take the cookie sheet out of the oven and let the macaroons cool for a few minutes on the parchment paper.
Remove the macaroons and let them cool on a wire rack.
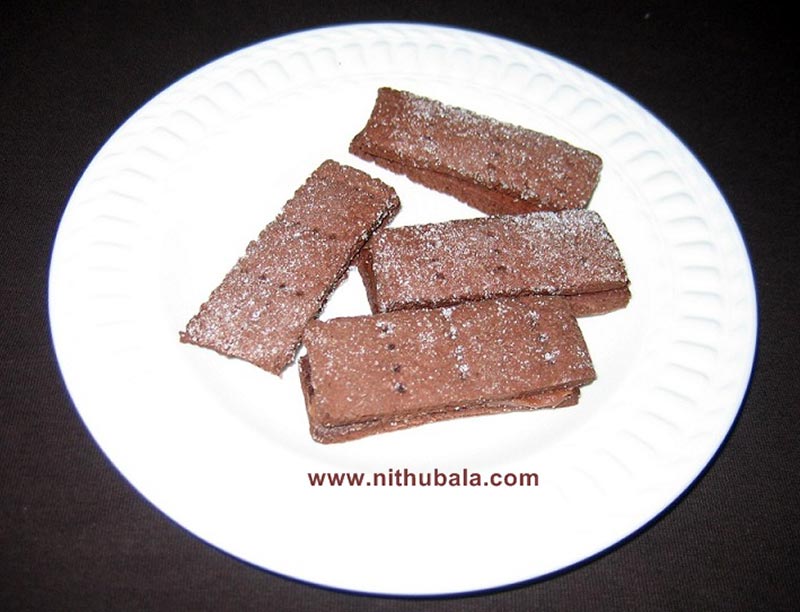
The Bourbon Biscuits recipe is a delightful treat made with simple ingredients like flour, butter, sugar, cocoa, and vanilla essence. While this specific recipe is not vegan or gluten-free, it is a versatile snack that can inspire creative variations for those with dietary preferences. Enjoy these homemade biscuits as a delicious dessert or snack option.
The Vanilla Chocolate Triangles recipe on Manjula's Kitchen is a delightful treat that perfectly combines the rich flavors of vanilla and chocolate. These triangles are ideal for serving as desserts or enjoying as snacks. The recipe involves creating distinct vanilla and chocolate layers, making it both visually appealing and delicious. While it is not inherently vegan or gluten-free, it offers a versatile base for customization to suit various dietary needs.
In a bowl, mix the flour, sugar,salt and Add soft butter to make soft dough
Divide the dough into two equal parts.Take one part of dough and add vanilla extract.Mix well.
Now take second part of dough and add cocoa powder.Mix well again.
Keep both dough in refrigerator for half an hour.
After half an hour,Take the both dough and roll out into flat rectangles of 1/4" thickness on a plastic sheet( trim the edges to make them into equal sized rectangles).
Now place the chocolate layer on top of the vanilla layer showing just 1/4" of the vanilla layer on top(This will help you get a clean swirl when you roll it)
After placing it, gently start rolling the layers until you form a log and press the dough on three sides to get triangle shape. Now cover it again with plastic sheet and refrigerate for half an hour. This will make the dough firm and will be easy to cut.
After half an hour remove it from the fridge and cut them into slices of 1/4" thickness.
Place the sliced cookies on a baking tray and bake for 10 – 12 mins. Check after ten mins to note if the vanilla part has turned into light golden color.
If done, remove the cookie sheet from the oven. Let the cookies cool down for two to three minutes before taking them off the cookie sheet.
Notes
Note:
Try to make different shapes like squares, spiral, semi circle, heart shapes.
To make heart shapes,roll the dough from both sides in direction of center(after step 5) and keep in refrigerator.
I like chocolate cookies so i use cocoa powder but you can also try different Jam(like strawberry, raspberry), dates and figs (finallychopped) instead of using chocolate dough.