Easy Indian Recipes: Quick and Delicious Vegetarian Dishes
In today’s fast-paced world, we often find ourselves seeking meals that are quick to prepare but still bursting with flavor. Indian cuisine, known for its rich and aromatic spices, offers a plethora of options that are both easy to make and incredibly satisfying. Let’s explore some easy Indian recipes vegetarian, perfect for any occasion, ensuring that you can enjoy delicious easy Indian recipes without spending hours in the kitchen.
Paneer Bhurji
Paneer Bhurji is a delightful scramble made with crumbled paneer (Indian cottage cheese) and a mix of vegetables and spices. This dish is a staple in many Indian households and is a fantastic example of easy Indian recipes. It comes together quickly, making it ideal for a weeknight dinner or a hearty breakfast. Serve it with a side of warm roti or toast for a complete meal.
Vegetable Pulao
For a one-pot wonder, Vegetable Pulao is a go-to choice. This dish features rice cooked with a medley of vegetables and fragrant spices. It’s a shining star among easy Indian food recipes due to its simplicity and the minimal effort required. Pair it with a cooling cucumber raita from the Raita Recipes category for a refreshing touch.
Aloo Jeera
Aloo Jeera, or cumin-spiced potatoes, is a quick and flavorful dish that exemplifies Indian food recipes easy. The potatoes are sautéed with cumin seeds and a handful of spices, resulting in a dish that’s both comforting and satisfying. This recipe is perfect for those times when you need something delicious without a lot of fuss.
Enhancing Your Quick and Easy Menu
To elevate your menu, why not include some delectable options from other categories? Indian Breads like chapati or naan can be quickly prepared and make a perfect accompaniment to any meal. For those with a sweet tooth, Indian Desserts Recipes such as a speedy coconut burfi or a delightful mango lassi can provide a sweet finish to your meal. Incorporating dishes from the Healthy Recipes section, such as a simple and nutritious palak dal or a crisp salad from the Soups and Salads Recipe category, can add a healthy balance to your table.
More Easy Indian Recipes
Chana Masala
Chana Masala is a popular dish featuring chickpeas cooked in a spiced tomato gravy. This dish is not only delicious but also quick to prepare, making it a favorite in the realm of easy Indian recipes vegetarian. Serve it with basmati rice or naan for a complete meal.
Moong Dal Khichdi
For a comforting and nourishing option, Moong Dal Khichdi is a must-try. This simple dish made from rice and yellow moong dal (split yellow lentils) is seasoned with basic spices and is incredibly easy to make. It’s perfect for those days when you want something light yet satisfying.
Sweet and Simple Endings
Sheera
Sheera is a traditional Indian dessert made with semolina, ghee, and sugar. It’s a quick and easy dessert that fits perfectly into the category of easy Indian food recipes. The best part? It takes just a few minutes to prepare, making it a great option for last-minute sweet cravings.
Coconut Ladoo
Another sweet treat that’s both simple and delightful is Coconut Ladoo. Made with grated coconut and condensed milk, these sweet balls are a favorite among easy Indian recipes vegetarian. They’re perfect for festivals or just as a quick dessert to satisfy your sweet tooth.
Frequently Asked Questions (FAQs)
Q: What are some popular easy Indian recipes vegetarian?
A: Some popular easy Indian recipes vegetarian include Paneer Bhurji, Vegetable Pulao, Aloo Jeera, Chana Masala, Moong Dal Khichdi, Sheera, and Coconut Ladoo. These dishes are quick to prepare and full of flavor.
Q: How can I make traditional Indian food recipes easy?
A: To make traditional Indian food recipes easy, look for recipes that require minimal ingredients and cooking time. Dishes like Paneer Bhurji, Aloo Jeera, and Moong Dal Khichdi are great examples of easy and quick Indian recipes.
Q: What are some easy Indian food recipes for beginners?
A: Some easy Indian food recipes for beginners include Vegetable Pulao, Chana Masala, and Coconut Ladoo. These recipes are straightforward and don’t require advanced cooking skills, making them perfect for those new to Indian cooking.
Q: Can I prepare easy Indian recipes in advance?
A: Yes, many easy Indian recipes can be prepared in advance. Dishes like Vegetable Pulao and Chana Masala can be made ahead of time and stored in the refrigerator. Simply reheat before serving.
Q: What are some quick Indian desserts?
A: Some quick Indian desserts recipes include Sheera and Coconut Ladoo. These desserts are easy to make and require minimal preparation time, making them perfect for when you need a sweet treat in a hurry.
Conclusion
Easy Indian recipes vegetarian offer a world of flavors and aromas without the lengthy preparation time.
Whether you’re looking for easy Indian recipes, easy Indian food recipes, or specific Indian food recipes easy, these dishes bring convenience and deliciousness to your table.
So, gather your ingredients, try out these recipes, and enjoy the rich and diverse world of Indian cuisine. Happy cooking and happy eating!
By incorporating these dishes into your menu, you’ll be able to enjoy a wide variety of delicious and nutritious foods. Whether you’re looking for quick snacks, main courses, or desserts, there’s an easy Indian recipe to suit every taste.
Don’t forget to check out Manjula’s Kitchen for more inspiration and culinary delights. Happy cooking and happy eating!
Macaroons are special soft cookies usually made with egg whites, sugar and coconut. Here is an eggless version, made with few ingredients and very easy to put together. Perfect for the holidays as a sweet tasty snack and can be even savored as a dessert post any kind of meal.
Line a cookie sheet with parchment and grease with cooking spray. This step is very important as it prevents the cookies from sticking to the sheet.
In a bowl, mix the coconut all purpose flour, cardamom powder, and salt.
Add the condensed milk and vanilla to the coconut mixture and mix well till everything is well blended.
Cover the mixture and refrigerate for 20 mins.
After 20 mins., with a teaspoon or using your hands make small balls and spread the cookies on the cookie sheet. These cookies won’t spread and you can arrange them closely.
Press a mini milk chocolate morsel in the middle of the macaroon and bake for 15 20 mins. or till golden.
Take the cookie sheet out of the oven and let the macaroons cool for a few minutes on the parchment paper.
Remove the macaroons and let them cool on a wire rack.
This is one of my mom's cherished recipes, known for being quick and easy to make. My brothers and I used to whip these up when we were in elementary school. If I had to rename them, I'd call them "Quick Cookies" because they truly live up to the name. They take about 3 minutes to prepare and 15 minutes to bake. Another great aspect of this recipe is that it's vegan-friendly, as it's entirely egg-less. These cookies are perfect for anyone looking for a speedy, egg-less treat.
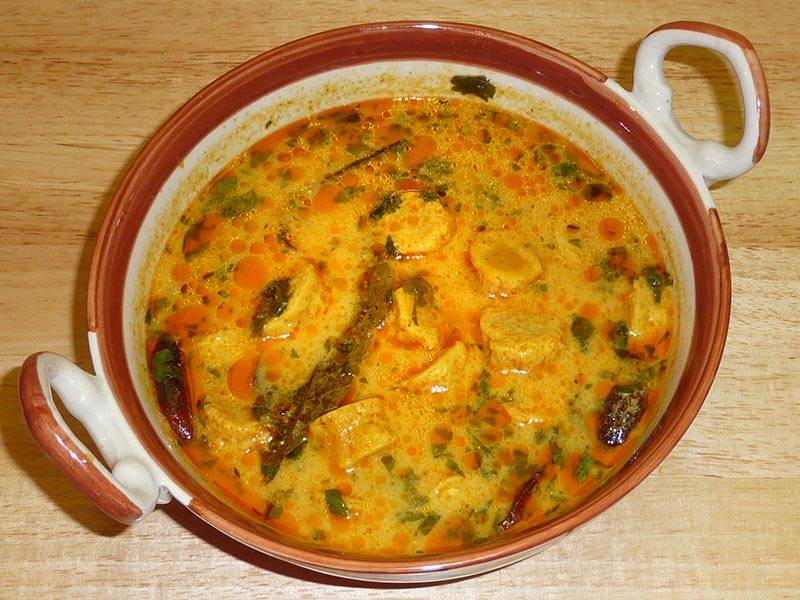
Steamed gram-flour dumplings cooked in spicy gravy is a popular North Indian dish from the Indian state of Rajasthan. This mouth-watering dish will surely tantalize your taste buds with its rich, spicy flavors and delightful texture. Ideal for those who crave a hearty and flavorful meal, this Rajasthani delicacy is both satisfying and memorable. Enjoy the authentic taste of Rajasthan with every bite!
1 1/4 cups besan (gram flour) (available in Indian grocery stores)
1/2 teaspoon chili powder adjust to taste
1/2 teaspoon salt
1/8 teaspoon turmeric (haldi)
3 tablespoons yogurt (dahi)
3 tablespoons oil
For the kadhi
1 cup yogurt (dahi)
1 tablespoon besan (gram flour)
1/4 teaspoon turmeric powder (haldi)
1/4 teaspoon chili powder adjust to taste
1 tablespoon coriander powder (dhania)
1 teaspoon salt adjust to taste
2 tablespoons oil
1 teaspoon cumin seeds (jeera)
1/2 teaspoon mustard seeds (rai)
1/8 teaspoon asafetida (hing)
4 whole red chilies
1 bay leaf (tejpat)
1 black cardamom optional
1/2 teaspoon paprika (dagi mirch)
For Garnish
2 tablespoons chopped cilantro
Instructions
For Gattes
Mix all the ingredients in a mixing bowl and gather into a soft dough, adding a little water if needed. At this point the dough will be a bit sticky; wetting your fingers with oil or water will help.
Divide the dough into four or five parts. Roll each one between your palms into a long, smooth log, approx. five” in length and ¾” in diameter. You will need to oil your palms to prevent the dough from sticking.
Bring three cups of water to a boil in a pot. Gently drop the gatte logs into the boiling water and cook for four to five minutes, or until they begin to float up to the surface.
Remove the cooked Gatte logs from the water and let them cool.
Slice the logs into approx. ¾ inch pieces. Set the Gatte aside.
For The Kadhi
Mix yogurt and gram flour into a smooth paste. Add turmeric, chili powder, and coriander powder to the yogurt paste.
Pour the oil into a saucepan over medium heat. Test the heat by adding one cumin seed to the oil. If the cumin seed cracks immediately, the oil is ready. Add the cumin seeds, mustard seeds, and asafetida.
When seeds crack add the whole red chilies, bay leaf, cardamom, and paprika. Stir for a few seconds.
Pour in the yogurt paste and stir for two minutes. Add three cups of water and stir until the gravy comes to a boil. Add salt to taste.
Add the gatte to the gravy. Cover and cook over low-to-medium heat for 20 minutes or longer. Turn off the heat.
Add cilantro and cover the pot for a few more minutes.
Now you are ready to serve!
Notes
Other Suggestions
A slice of gatte can be cooked in advance and added to the gravy later. Gatte can be frozen for up to a month or refrigerated for a few days.
Slices of gatte are used to make a wide variety of dishes, including subji (cooked dry vegetables), rice pulao, etc.
A slice of gatte can be fried and served as a snack.
A slice of gatte can be used to make raita (mixed with yogurt).
Gatte Ke Kadhi is a traditional North Indian dish made primarily with chickpea flour (besan) dumplings cooked in a tangy yogurt-based curry/gravy. The dish is gluten-free and suitable for individuals observing a gluten-free diet. It is often prepared during festive occasions like Karwa Chauth, a Hindu festival where married women fast for the well-being and longevity of their husbands. The addition of lentils (Dal) and vegetables enhances the nutritional value of the dish, making it a wholesome and flavorful option for a vegetarian meal.
Gatte ki kadhi, also known as gatta kadhi or gatte ki sabji, is a traditional Rajasthani dish that combines chickpea flour dumplings (gatte) with a tangy yogurt-based curry (kadhi). This hearty and flavorful dish is a staple in Rajasthani cuisine and is often enjoyed with rice or roti. In this recipe, we’ll show you how to make Rajasthani gatte ki kadhi from scratch, so you can enjoy the authentic flavors of Rajasthan in the comfort of your own home.
Step 1: Preparing the Gatte:
To start, we’ll prepare the gatte, which are the chickpea flour dumplings that give this dish its unique texture. In a mixing bowl, combine chickpea flour (besan), yogurt, salt, red chili powder, turmeric, and a pinch of asafoetida (hing). Knead the mixture into a smooth dough, adding water as needed to achieve the right consistency. Divide the dough into small portions and shape them into cylindrical dumplings.
Step 2: Boiling the Gatte:
Next, we’ll boil the gatte to cook them through before adding them to the kadhi. Bring a pot of water to a boil and gently add the gatte to the boiling water. Let them cook for about 10-12 minutes, or until they float to the surface and are cooked through. Once cooked, remove the gatte from the water and set them aside to cool slightly.
Step 3: Preparing the Kadhi Base:
While the gatte are boiling, we’ll prepare the kadhi base. In a separate bowl, whisk together yogurt, chickpea flour, turmeric, red chili powder, and salt until smooth. This mixture will form the base of the kadhi and give it its creamy texture. Be sure to whisk out any lumps to ensure a smooth consistency.
Step 4: Tempering the Kadhi:
In a large pan, heat oil and add mustard seeds, cumin seeds, fenugreek seeds, and dried red chilies. Let the seeds splutter and release their aroma, infusing the oil with flavor. This tempering adds depth and complexity to the kadhi, enhancing its overall flavor.
Step 5: Cooking the Kadhi:
Once the tempering is ready, pour in the yogurt-chickpea flour mixture and stir well to combine. Add water to adjust the consistency of the kadhi and bring it to a gentle simmer. Let the kadhi cook for about 10-15 minutes, stirring occasionally, until it thickens slightly and the raw taste of the chickpea flour is cooked out.
Step 6: Adding the Gatte:
Once the kadhi is cooked to perfection, it’s time to add the boiled gatte to the curry. Carefully slice the gatte into bite-sized pieces and add them to the kadhi. Let them simmer in the kadhi for a few minutes to absorb the flavors of the curry and heat through.
Step 7: Finishing Touches:
Before serving, garnish the gatte ki kadhi with freshly chopped cilantro leaves for a pop of color and freshness. You can also sprinkle some roasted cumin powder on top for extra flavor. Serve the kadhi hot with steamed rice or roti for a comforting and satisfying meal.
Tips for Making Perfect Gatte Ki Kadhi:
Ensure the Gatte are Firm: Make sure the gatte dough is kneaded well to avoid any cracks or breakage while boiling.
Adjust the Consistency: If the kadhi is too thick, add more water to thin it out. If it’s too thin, let it simmer for longer to thicken.
Taste and Adjust Seasoning: Taste the kadhi before adding the gatte and adjust the seasoning as needed with salt, red chili powder, or other spices.
Variations of Gatte Ki Kadhi:
Vegetable Gatte Ki Kadhi: Add diced vegetables such as carrots, peas, and potatoes to the kadhi for added texture and nutrition.
Paneer Gatte Ki Kadhi: Substitute paneer cubes for the gatte to create a rich and creamy variation of the dish.
Spinach Gatte Ki Kadhi: Stir in chopped spinach leaves to the kadhi for a vibrant green color and earthy flavor.
Benefits of Including Gatte Ki Kadhi in Your Diet:
Rich in Protein: The combination of chickpea flour and yogurt in gatte ki kadhi provides a good amount of protein, essential for muscle repair and growth.
Probiotic Benefits: Yogurt used in the kadhi is rich in probiotics, which promote a healthy gut microbiome and aid digestion.
Nutrient-Dense: Gatte ki kadhi is packed with vitamins, minerals, and antioxidants from the spices and ingredients used, contributing to overall health and well-being.
Frequently Asked Questions (FAQs) about Gatte Ki Kadhi:
Q: Can I make gatte ki kadhi in advance?
A: Yes, you can make the kadhi base in advance and store it in the refrigerator for up to 2 days. Add the gatte and simmer just before serving.
Q: Can I freeze gatte ki kadhi?
A: While you can freeze gatte ki kadhi, the texture of the gatte may change slightly upon thawing. It’s best enjoyed fresh or stored in the refrigerator for a few days.
Q: Can I adjust the spice level of gatte ki kadhi?
A: Yes, you can adjust the amount of red chili powder and green chilies according to your taste preferences. If you prefer a milder kadhi, reduce the amount of spice used.
For more delicious Rajasthani recipes, visit Manjula’s Kitchen. Explore a variety of traditional dishes from Rajasthan, including dal bati churma, laal maas, and more, to experience the rich flavors and culinary heritage of the region.
When I saw that the ingredient was rice for the contest, I remembered one of my childhood favorites (Ila Ada and Kozhukatta). Both have the same dough and the same filling, but that they are in different shapes. Ila ada is made by spreading the dough thinly onto banana leaves and has a sweet filling in the center, while kozhukkatta is just the rice dough shaped like a ball with the same sweet filling stuffed in the center. Both are steamed, hence making both very healthy and light.
1 cup Grated jaggery (can also use sugar instead of jaggery)
8 5"x5" Banana leaves (can also substitute with aluminium foil if you don't have banana leaves)
Pressure cooker or steamer
Instructions
Method
Mix together the grated coconut, grated jaggery, cardamom powder, and jeera. Keep aside.
Boil the water and add salt and ghee(optional).
Add the rice flour and mix well without forming lumps. The mixture should not be too loose…It shoud be able to hold shape in the form of a ball.
Divide the mixture into 8 balls and keep aside.
For Ila Ada:
Place each ball in the center of each banana leaf and flatten it out with your fingers to spread as thin as possible. You can wet your finger tips with water to help in spreading. Place the sweet filling in the center and fold the banana leaf over and press the ends along the edges.
Now steam them in pressure cooker or steamer – might take 10 to 12 minutess to cook.
Enjoy warm.
For Kozhakatta:
Place each ball in the center of your palm and press with the other hand to flatten it. Now fill the flattened dough with the sweet filling of jaggery and mould the dough back into shape by bringing the ends together.
Now steam them in pressure cooker or steamer – will take around 15 minutes to cook.
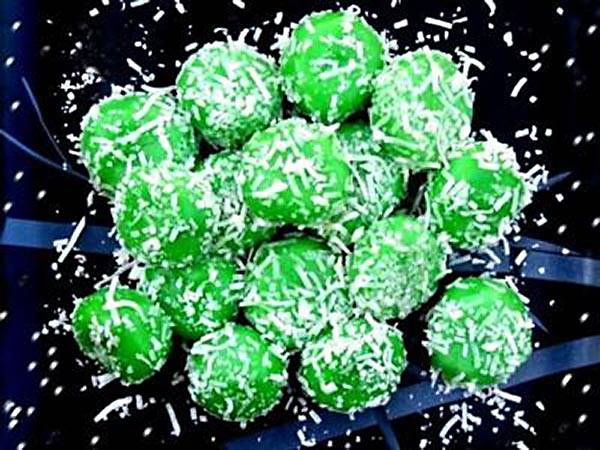
This recipe is called Sweet Rice Balls set for this coming Diwali, and I hope that you will also like it. It's a simple delicious dessert made with coconut milk and rice flour.
1/3 to 1/2 can coconut milk (make it sweet by adding some sugar in it)
1 cup (approx) brown sugar
1/2 cup dried shredded Coconut
1/2 tsp oil
Food Colour (Any colour, I used green)
Instructions
Method
Start by adding 1/3 of a can of coconut milk. Stir the coconut milk into the flour to form a dough.
You may need to add slightly more coconut milk, or more flour depending on how thin your coconut milk is. The dough should be quite stiff, It shouldn't stick to your hands (if it does, it requires a little more flour). If it doesn't stick together, it's too dry – add a little more coconut milk.
Add green colour (up to 1/2 tsp.). It will turn the dough bright green
Stir well to distribute throughout the dough.
Take a little of the dough in your hands. Now roll it between your palms until you've made a ball (like you did when you were a kid with play dough).
Now indent the sticky rice ball with your thumb or finger.
Place about 1/2 tsp. brown sugar in the rice ball. Gently pat the sugar down with your finger. (This sugar will later melt and become a liquid center.)
Pinch the sides to cover the brown sugar and close it. Now take this rather flat rice ball back into your palms. Gently roll it once again to return it to its former ball shape. Place on a plate or cutting board dusted with rice flour.
Now repeat these steps with the rest of the dough until you have lots of sticky rice balls filled with brown sugar, and all of the dough is used up.
Place some water in a large pot on the stove over high heat. When the water is boiling, drop the rice balls into the pot. They will sink to the bottom at first, then gradually rise to the surface.
Now turn the heat down to medium or medium-high, just high enough to keep the water bubbling nicely. Once the balls have risen to the surface of the water, continue cooking for 2 more minutes (3-4 minutes in total).
While the rice balls are cooking, prepare a clean surface on which to place them (a cutting board or your counter will work . Pour a few drops of oil over this surface (up to 1/2 tsp.) and "grease" it as you would a cake pan, or the balls with stick and you won't be able to remove them later
Using a slotted spoon or small strainer, remove the rice balls from the water and place on your prepared surface.
Place the dry coconut in a bowl or spread on a plate. Roll the sticky rice balls in the coconut to coat.
Place the finished rice balls on a plate – OR you can give each one a colorful wrapper by placing them in muffin papers (small or medium size). These balls can be eaten while still warm, or at room temperature.
Notes
Storing Instructions: Do not store in the refrigerator – this will only dry them out. Cover leftovers, or place in a cookie jar or other container on the counter. Try to eat your rice balls as soon as you can – within 24 hours if possible, or they will begin to harden.
Pal Kozhukattai is a popular chettinad sweet dumpling made from rice flour. It's typically prepared on special occasions on Ganesh chaturti. It is also known as milk modak. It can be prepared in many ways. Some recipes use jaggery instead of sugar & normal milk instead of coconut milk. Either way, it tastes delicious.
2 tsp – Cashews (optional, usually we don’t required cashews)
4 Cardamom (peel the skin & powder the seed)
1 tsp Ghee
1/2 tsp Salt
Instructions
For Rice dumpling:
Boil 2 cups of water with salt & ghee.
Low the flame & add rice flour little by little to this boiling water.
Keep stirring without any lumps till it forms a dough consistency.
Turn off the stove and allow it to cool.
Knead the dough gently & rest it for 5 mines.
Grease your palm with little oil & make small balls like gooseberry from the dough.
Rest it for 5-7 mins.
Steam the rice balls for above 5 mins in idly plate or in steamer.
For Milk:
Take 1/2 of the coconut cream & mix with 1/2 cup water and take it as 1st extract.
Mix remaining 1/2 of the coconut cream with 1 1/2 cup of water and take it as 2nd extract.
Notes
Preparation: ( Timing : 1to 1 1/2 hours)
In a pan add 2nd extract milk and rice balls together & allow it boil for 10mins in medium flame.
When the balls float on top add 1 extract and sugar & stir it.
After 5 mins add cardamom powder & turn off the stove.
Transfer to serving bowl & garnish with grated coconut & cashews before serving.
Can be served Hot or Chill.
Note: We can also use fresh coconut. Grind 1/2 medium size coconut with 1/2 cup of water & extract thick milk and keep it as a 1st extract. Again add 1 1/2 cup of water & extract thinner milk and keep it as a 2nd extract. Above procedure can be done using this milk. We can also use Half & Half)
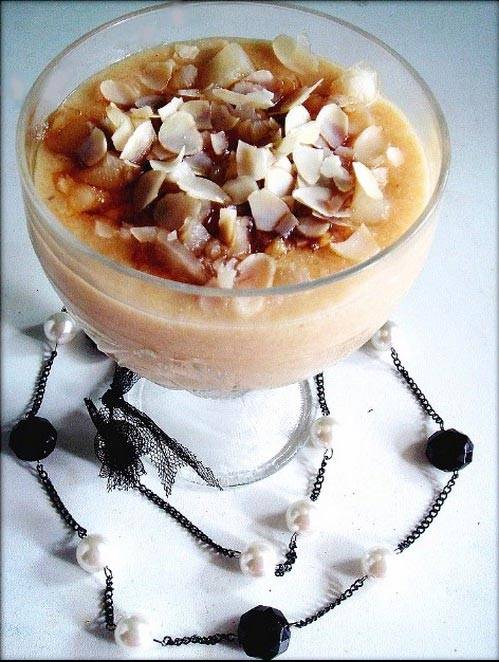
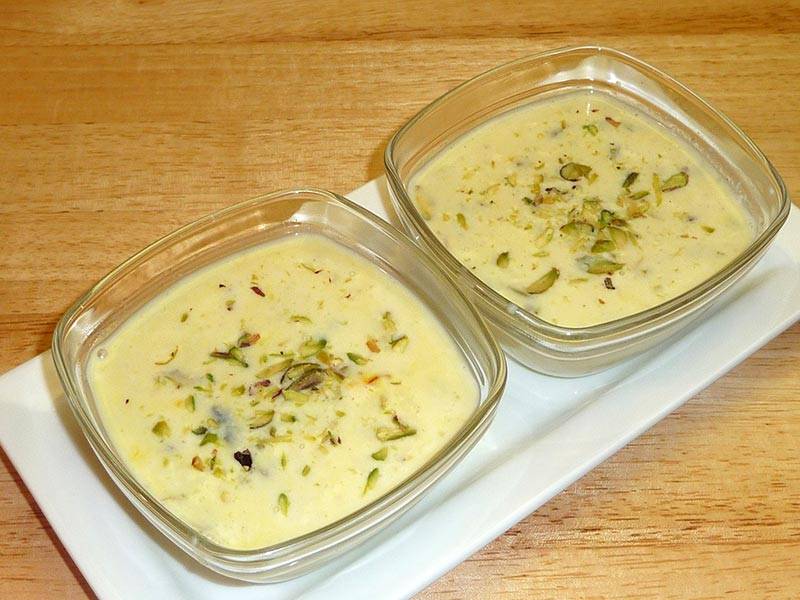
I love phirnis, but this time I wanted to make them with a twist using fresh pineapple chunks. I had some leftover fresh pineapple chunks and also home made caramel syrup, so I decided to combine both together to create this beautiful looking phirni, which is a rich and wonderful dessert. If you are a bit lazy or don't prefer to make your own caramel syrup, you can definitely get a store bought one. This fruity rice phirni tastes amazing when they served chilled, but you can also enjoy them warm. Adding cream is completely optional.
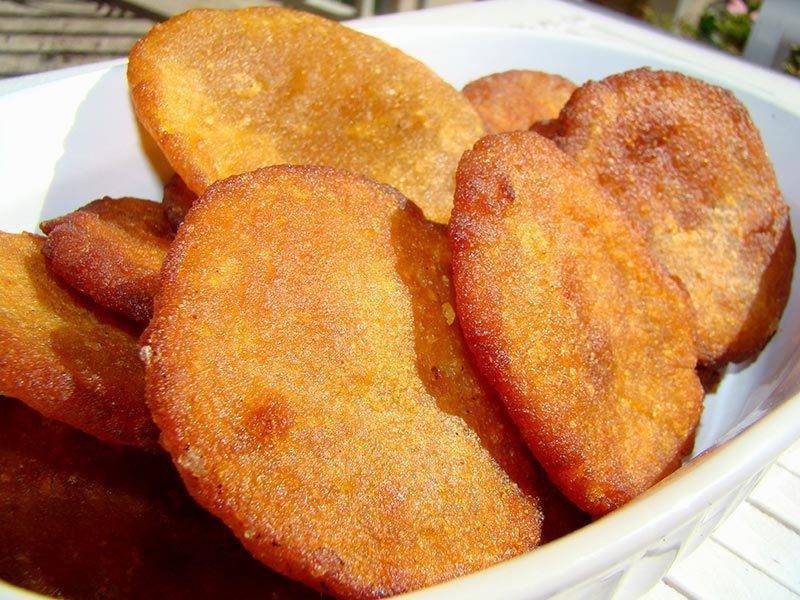
Appalu are an Authentic dessert in Andhra Cuisine which are famous for their soft texture and color and of course being not overly sweet snack. This is an item the whole family can relish and forces you to make again… I bet!. Its often made during festive seasons such as Ganesh Chaturthi.
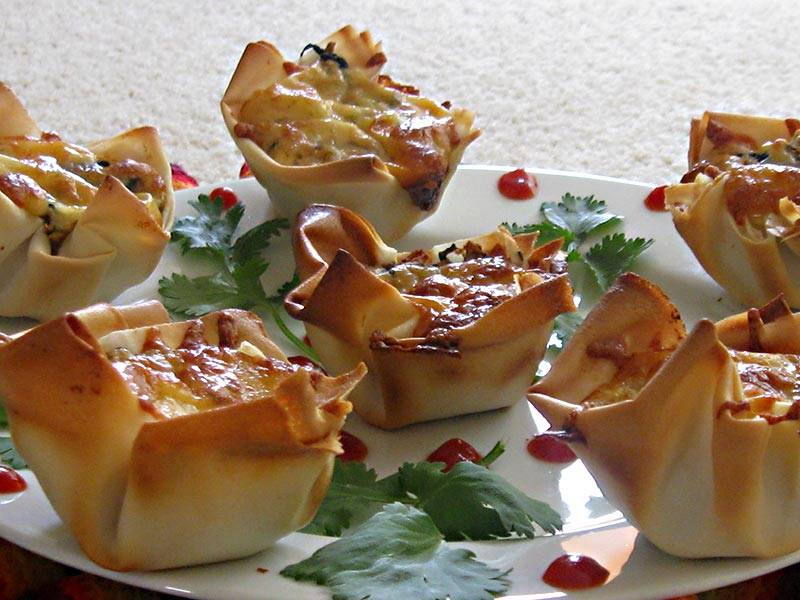
While searching for different recipes, I came across a quiche recipe with crescent rolls. This sparked my desire to create a quiche with an Indian twist. Since potato was the main ingredient for this contest, I was even more inspired to experiment with my own version of an Indian-style quiche. I'm excited to present this unique recipe to you all. It's a delightful snack or appetizer that you must try!
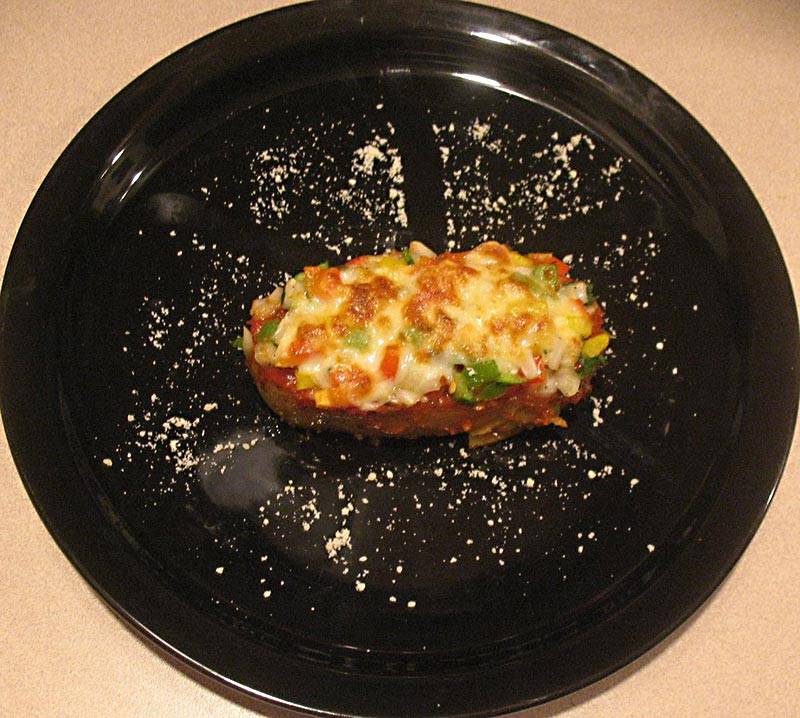
The inspiration for this recipe came from visiting Manjula’s website, where she was hosting a recipe contest for September 2010. The challenge was to create a recipe using potatoes. Intrigued, I decided to participate if I could come up with a unique idea. I pondered all week, brainstorming beyond the usual curry or sabji. I scoured Google for new potato recipes and stumbled upon an interesting blog post: "pizza with potato?" I thought, "Why not?" This led me to try the recipe with my twist. Here is my innovative take on it, which I’m excited to share with you. A low-fatsnack recipe that is surely going to be loved by all.
3 large and even sized Baking Potatoes/Russet potatoes
3 multi colored Bell Peppers (I used Red, yellow and green), chopped finely
1 small Onion chopped
2 tbsp Capers
1/4 cup parsley chopped
3/4 cup Pasta sauce (used sweet basil pasta sauce)
Salt to taste
1/2 tsp Black pepper powder
1/4 tsp Red pepper flakes
1/4 cup Parmesan cheese
1/2 cup Fresh mozzarella cheese grated/ Fontana cheese (I used Fontana cheese)
1 tbsp Olive oil
Instructions
Method
Boil the potatoes in pressure cooker for 2 whistles or until they are cooked almost 3/4th. Cool the potatoes and peel off the skin and cut into 3, one (1) inch slices on the lengthier side. Cut thin slice on the edge slices so that they have a flat bottom.
Preheat the oven for about 400F.
In a bowl mix 3/4 tbsp olive oil, salt and pepper. Whisk it well. Spread this mixture on the potatoes so that they coat well and arrange them on a baking sheet and bake them for about 10 mins.
Meanwhile, in a bowl add the chopped onions, chopped bell peppers, capers, salt, pepper and parsley, crushed red pepper flakes and remaining olive oil and mix them well. (you can add any toppings of your choice….like creating your own pizza)
Take the potatoes out of the oven, spread the pasta sauce evenly on top of the potatoes, place the mixed veggies on top so that it covers all the pasta sauce,
Add some Fontana/mozzarella cheese on top and sprinkle with Parmesan cheese and pop this into oven for more 5-7 mins or until the cheese it melted.
Enjoy the yummy pizza without all the fat and meat!
Notes
Additional Notes
You can also broil it for about 2 mins to get a light brown crust on top of the cheese and veggies.
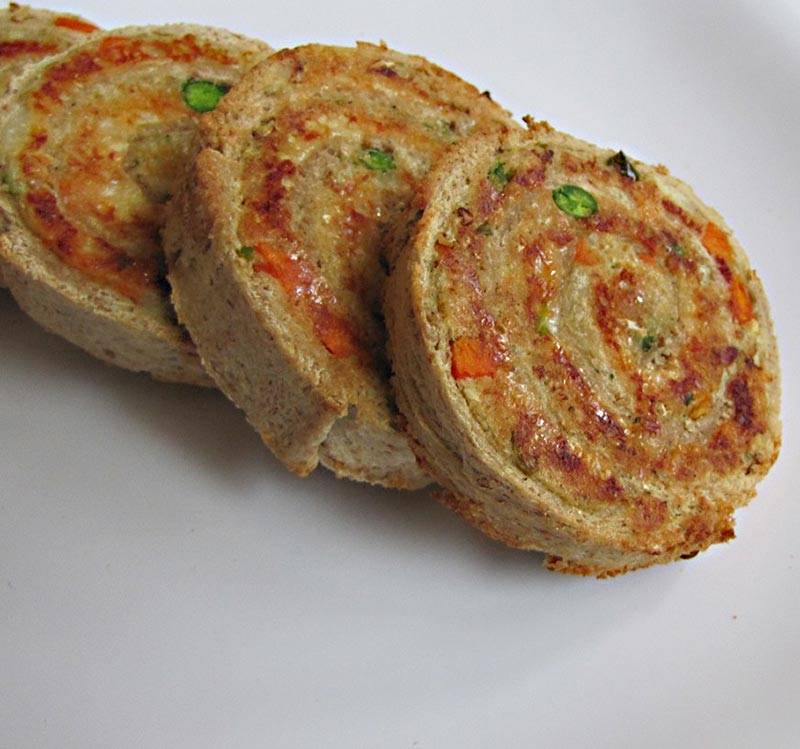
These bread swirls are a healthy delightful appetizer. In most of my parties when kids are invited they need something that is easy to hold and filling too. Kids don't like to carry their food on plate so I got this idea for them but it became a party hit with adults too! Potato is a versatile veggie that can be eaten in different forms. These bread swirls are crispy on the outside with a soft and cheesy potato stuffing.
3/4 cup chopped boiled veggies(carrot,peas,cauliflower)
2 chopped green chilli
1/2 tsp chat masala
1/2 tsp channa masala
3 tbsp mozzarella cheese
salt to taste
Instructions
For Stuffing
Mash all the above ingredients except bread and cheese to a smooth paste and keep aside.
Preparing the Bread Sheet
Remove the sides of the bread n join them with little water edge to edge overlapping 1 cm.
Now use a rolling pin flatten the bread gently.
Preparing the Bread Swirls
Now spread the stuffing evenly on the bread sheet and leave the last 1 cm for sealing.
Sprinkle the cheese on the stuffing n roll it slowly from one end and seal
the end gently with little water.
Then wrap it plastic sheet n freeze for 30 min.
After 30 min unwrap it n cut the roll into thin slices of 1 cm thickness.
Notes
Toast each slice on a tawa with medium flame till golden brown on both the sides or in a preheated oven at 375F for 15 min.Then bake for 7 mins each side or till golden brown.You delightful bread swirls are ready and can be served with tomato ketchup.
Wash and soak the tapioca in about 1/3 cups of water for at least two hour, Sabudana will soak up most of the water and become light and fluffy.
Boil the milk in heavy bottom pan after milk comes to boil let it boil for about another 8 to 10 minutes making sure stirring occasionally so milk does not burn in bottom of the pan.
Add the tapioca cook until tapioca is soft and has become translucent this should take about 4 minutes.
Next add sugar, cardamom, pistachios, and saffron and boil for 2 to 3 minutes. Turn off the heat. As kheer will cool become little thicker in consistency.
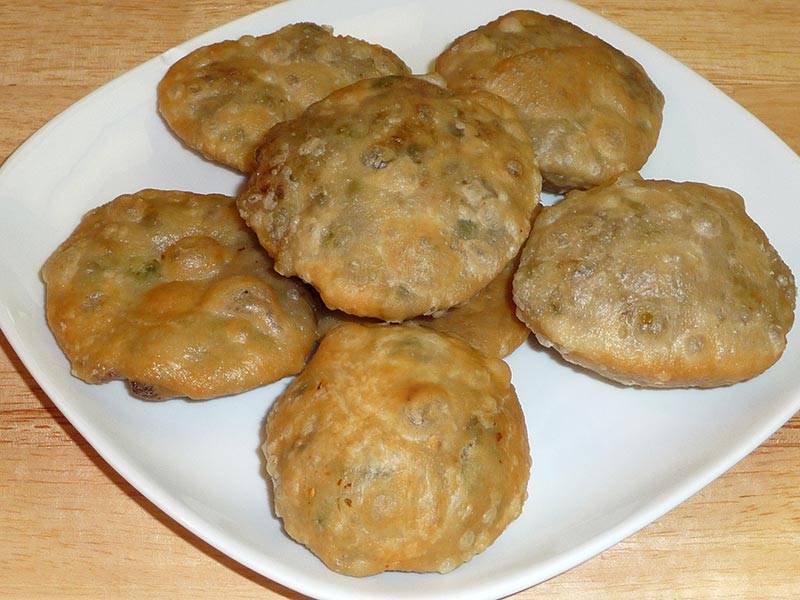
Mattar Kachori is a delicious, fried puff pastry filled with spicy green peas. This mouthwatering snack also can be served as part of any main course meal.
Add the flour, salt, and oil to a bowl and mix it well.
Add the chilled water slowly, mixing with your fingers as you pour the water. Do not knead the dough. The dough should be very soft but not sticking to fingers. Cover the dough and let it sit for at least fifteen minutes.
To Make Filling
Heat the oil in a frying pan, add green peas, stir-fry until peas are tender.
Add ginger, coriander powder, fennel seed powder, chili powder, mango powder and salt, stir fry for another few minutes.
While stir frying the peas mash them with spatula.
Let the filling cool to room temperature.
To Make Kachoris
Take the dough and lightly knead it. Divide the dough in twelve equal parts.
Take one part of the dough and with your fingers flatten the edges and make it into about a 2-inch circle. Leaving the center, a little thicker than the edges around. Mold the dough into a cup and place about 1 teaspoon of filling in the center. Pull the edges of the dough to wrap the filling. Proceed to make all 12 balls.
Let the filled balls sit for 3 to 4 minutes before pressing.
Set the filled balls on a clean and dry surface with the seam facing up. Using the base of your palm, slowly flatten them into about 3 inches circle.
Heat about 1-1/2 inches of oil in a frying pan on medium heat. To check if the oil is ready put a little piece of dough in the oil. It should sizzle, and come up very slowly.
Do not overcrowd the kachoris in a frying pan, fry them on medium heat. After they are puffed, slowly turn them over.
It will take about 3 minutes to fry from each side. Fry until golden-brown on both sides.
If the kachoris are fried on high heat, they will get soft and will not be crispy.
Notes
Serving suggestionsKachoris can be served plain, with Boondi Ka Raita, or with Aloo Dum.
Keyword Appetizer, Breakfast, Lunch Box, Main Dish, Mattar Kachori, Party Food, Stuffed Puri
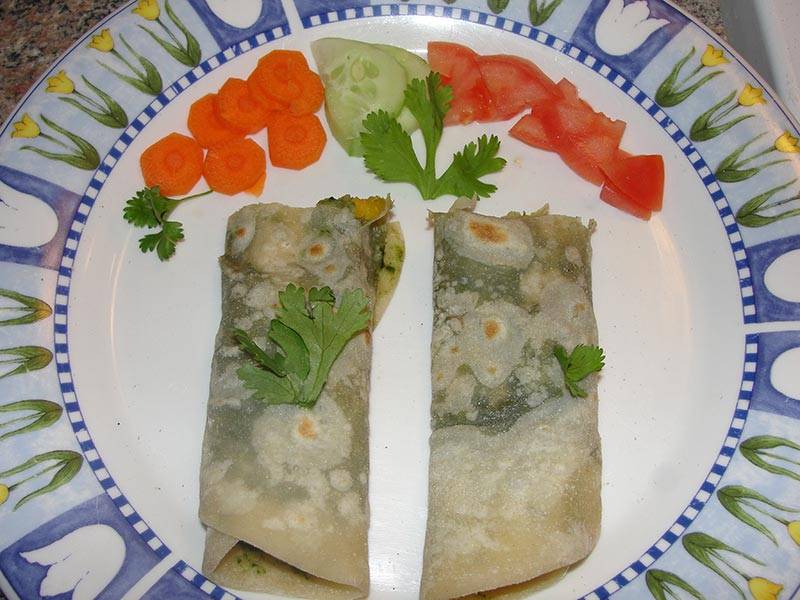
Me and my husband love to try different kinds of food and I enjoy trying out new recipes. Manjula aunty’s recipes are my favorite. I love the Malai Kofta recipe the most and I recommend all my friends to try her recipes. It comes out really well and tastes amazing. She never uses onion but I add them where ever I feel like as my husband loves onions. One day I registered myself for the free newsletter and got this email to participate in the contest. I explored the rules and noticed that I had to make a cold or hot wrap using roti or tortilla. I thought of this recipe as we have kathi roll in restaurants all the time and it tastes yummy. I tried it using my own style of ingredients and veggies along with Indian chutney. It came out really well and my family enjoyed it very much. I hope everyone else like it too. Its healthy meal for kids and I hope you enjoy it.