Tag: Vegetarian Appetizers

Vegetarian Appetizers to Start Your Meal Right
Introduction
When hosting a gathering or simply enjoying a meal at home, having a variety of vegetarian appetizers can set the tone for an enjoyable dining experience. Indian vegetarian recipes offer a plethora of easy vegetarian appetizers that are both flavorful and satisfying. This article explores some of the best vegetarian appetizers that are easy to prepare and perfect for any occasion.
Classic Indian Vegetarian Appetizers

Paneer Tikka: Marinated paneer cubes grilled to perfection. This dish is a favorite among Indian vegetarian appetizers and can be served with mint chutney.
Samosas: Crispy pastry filled with a spiced potato mixture. These are not only one of the most popular vegetarian appetizers but also very easy to make in large batches.
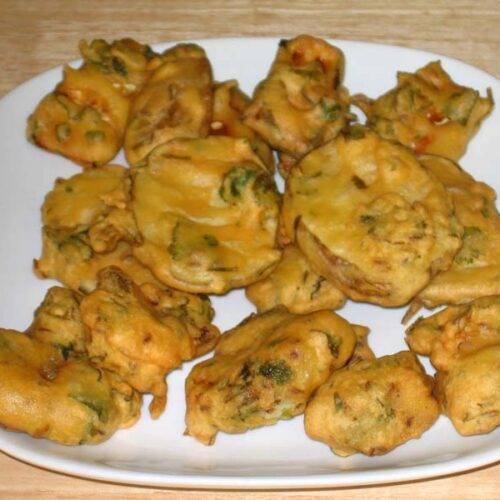
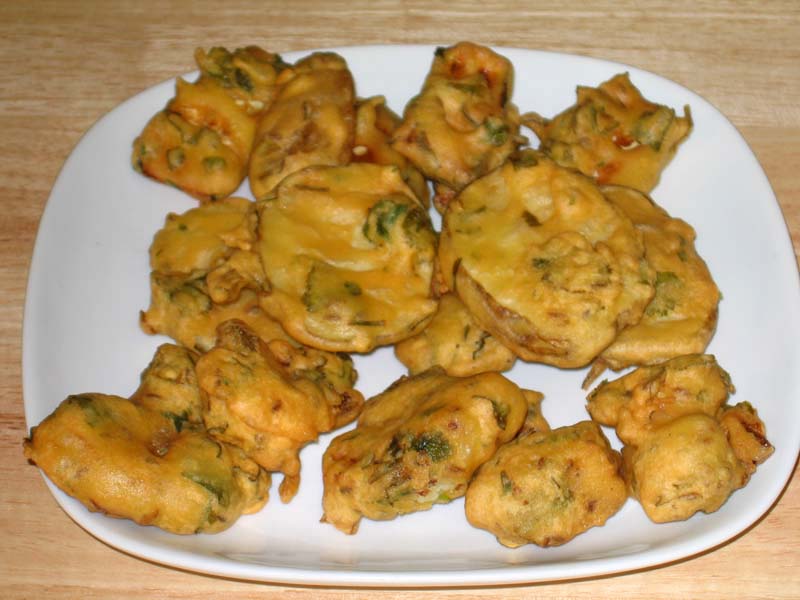
Vegetable Pakoras: Mixed vegetables coated in a chickpea flour batter and deep-fried. These fritters are one of the best vegetarian appetizers and are great with indian chutney such as tamarind chutney.
Dhokla: A savory steamed cake made from fermented rice and chickpea batter. It’s a light and fluffy appetizer that is quintessentially Indian.
Aloo Tikki: Spiced potato patties that are shallow-fried until crispy. These are a great example of vegetarian appetizers easy to prepare and serve.

Quick and Easy Vegetarian Appetizers

Hummus with Veggie Sticks: A healthy and quick option, hummus can be paired with carrot, cucumber, and bell pepper sticks. It’s one of the most versatile easy vegetarian appetizers.
Caprese Skewers: Simple skewers with cherry tomatoes, mozzarella balls, and basil leaves, drizzled with balsamic glaze. These are visually appealing and perfect for any gathering.
Stuffed Mushrooms: Mushrooms filled with a mixture of cheese and herbs, baked until golden. These vegetarian appetizers are both elegant and delicious.
Guacamole and Chips: Freshly made guacamole served with tortilla chips is a classic and easy appetizer that everyone loves.
Bruschetta: Toasted bread topped with a mixture of tomatoes, basil, and olive oil. This Italian classic is one of the best vegetarian appetizers for any occasion.

Innovative Indian Vegetarian Appetizers

Chili Paneer: Indo-Chinese style paneer cubes stir-fried with bell peppers, and a spicy sauce. This fusion dish is a hit at parties.
Mini Uttapams: Small, savory pancakes made from rice and lentil batter, topped with vegetables. These are not only healthy but also one of the indian vegetarian appetizers easy to make.
Pani Puri: Hollow puris filled with spicy, tangy water and chickpeas. This street food favorite is a must-try among Indian vegetarian appetizers.
Sev Puri: Crispy puris topped with potatoes, chutneys, and sev (crunchy chickpea noodles). It’s a delightful mix of flavors and textures.
Stuffed Bell Peppers: Bell peppers filled with a spicy potato mixture and baked. These are both colorful and tasty, making them one of the best vegetarian appetizers.

Healthy Vegetarian Appetizers

Cucumber Sandwiches: Slices of cucumber sandwiched with herbed cream cheese. These indian sandwich are light, refreshing, and one of the easy vegetarian appetizers.
Greek Salad Cups: Mini cups filled with Greek salad ingredients like olives, feta, and tomatoes. These bite-sized salads are perfect for parties.
Fruit Skewers: Skewers with a variety of fresh fruits drizzled with honey and sprinkled with mint. These are a healthy and sweet option among vegetarian appetizers.
Quinoa Balls: Baked quinoa and vegetable balls served with a yogurt dip. These are nutritious and one of the vegetarian appetizers easy to prepare in advance.
Spinach and Feta Rolls: Puff pastry filled with a mixture of spinach and feta cheese, baked until golden. These are a great blend of flavors and textures.

Vegetarian Appetizers for Special Occasions

Stuffed Dates: Dates filled with cream cheese and nuts, drizzled with honey. These are elegant and one of the best vegetarian appetizers for special occasions.
Cheese and Olive Platter: A selection of cheeses paired with olives and crackers. This simple platter is always a crowd-pleaser.
Roasted Veggie Platter: An assortment of roasted vegetables served with a dipping sauce. This is a colorful and healthy option among vegetarian appetizers.
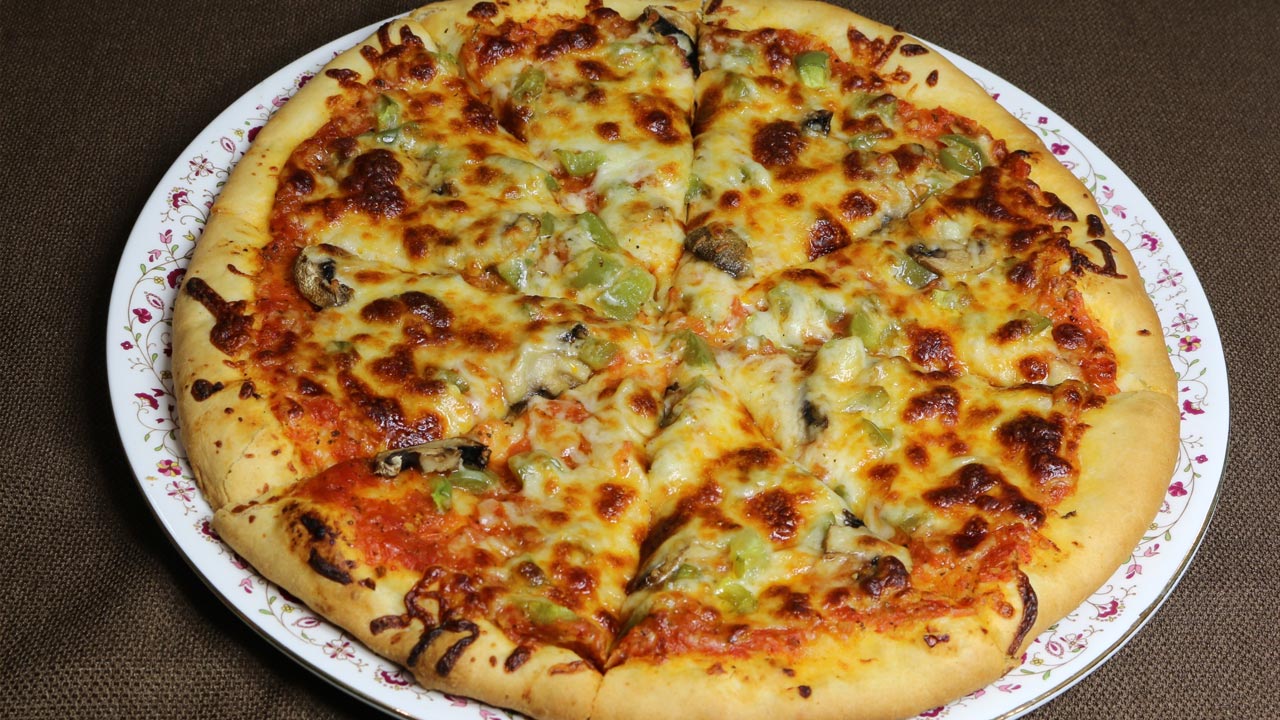
Mini Pizzas: Small pizzas topped with a variety of vegetables and cheese. These are fun to make and can be customized to your guests’ preferences.
Mango Chutney with Papad: Sweet and tangy mango chutney served with crispy papad. This is a unique and flavorful appetizer that is sure to impress.

FAQs
Q: What are some quick and easy vegetarian appetizers?
A: Some quick and easy vegetarian appetizers include hummus with veggie sticks, caprese skewers, stuffed mushrooms, and guacamole with chips.
Q: Can I prepare vegetarian appetizers in advance?
A: Yes, many vegetarian appetizers like samosas, pakoras, and stuffed bell peppers can be prepared in advance and reheated before serving.
Q: What are some healthy vegetarian appetizer options?
A: Healthy vegetarian appetizers include cucumber sandwiches, Greek salad cups, fruit skewers, quinoa balls, and spinach and feta rolls.
Q: Are there any innovative Indian vegetarian appetizers?
A: Yes, innovative Indian vegetarian appetizers include chili paneer, mini uttapams, pani puri, sev puri, and stuffed bell peppers.
Q: What are some vegetarian appetizers for special occasions?
A: Special occasion vegetarian appetizers include stuffed dates, cheese and olive platters, roasted veggie platters, mini pizzas, and mango chutney with papad.
Conclusion
Exploring the world of vegetarian appetizers opens up endless possibilities for delicious and satisfying starters. 

From easy vegetarian appetizers to Indian vegetarian appetizers, there’s something for everyone. 

These best vegetarian appetizers not only enhance your dining experience but also ensure that your guests are delighted with every bite. Enjoy the variety and richness of flavours that these appetizers bring to your table.

Explore more recipes on Manjula’s Kitchen and discover the joy of cooking nutritious and delicious food.

  • Vegetable Pakoras

    Vegetable Pakoras

    Vegetable Pakoras

    Vegetable Pakora

    Pakoras are an all-time favorite snack in India. They are perfect for a rainy day, and delicious paired with a cup of hot spicy Indian chai. Pakoras are made with a variety of vegetables dipped in a spicy besan (gram flour) batter and deep-fried. This recipe uses potatoes, cauliflower and zucchini.
    4 from 4 votes
    Prep Time 10 minutes
    Cook Time 20 minutes
    Total Time 30 minutes
    Course Appetizer
    Cuisine Indian
    Servings 4 people

    Ingredients
      

    • 1 small potato, sliced thin
    • 8 cauliflower sliced
    • 1/2 zucchini, sliced thin
    • 1 cup besan gram flour
    • 3 tbsp rice flour optional
    • 1 tbsp coriander coarsely ground dhania
    • 1 tso cunin seeds jeera
    • 2 green chilies chopped
    • 2 tbsp cilantro chopped hara dhania
    • 1 tsp salt
    • 3/4 cup water, use as needed

    Instructions
     

    • Mix all the dry ingredients together: besan, rice flour, coriander powder, cumin seeds, and salt. Tip: rice flour adds to the crispness.
    • Add the water slowly to make a smooth batter (batter should be consistency of pancake batter or dosa batter).
    • Add the green chilies and cilantro. Mix well.
    • Heat at least one inch of oil in a frying pan over medium high heat. To test, put one drop of batter in the oil. The batter should form a small ball on the surface of the pan, but not change color right away.
    • Dip the vegetable slices into the batter one at a time, making sure each slice is completely covered by the batter. Then drop the slices slowly into oil in the frying pan.
    • Fry the pakoras in small batches, three to four minutes per batch. Fry the pakoras, turning occasionally, until both sides are golden brown. Repeat this process for the remaining batches.

    Notes

    Tips:  If oil is too hot the pakoras will not be crisp; if the oil is not hot enough, the pakoras will be very greasy, make sure when you are putting the pakora in oil, oil should sizzle and pakora slowly float. 
    Variations:  You can use almost any vegetable when making these pakoras, such as eggplant,  cabbage, bell pepper, and different kinds of chilies! Feel free to experiment!
    Serving Suggestions:  The vegetable pakoras are best dipped in a cilantro chutney, tamarind chutney, or sprinkled with chat masala.
    Pakoras taste best when they are served hot.
    You can make the pakoras one day in advance. Do not refrigerate. When ready to eat, place on a cookie sheet and heat in a 300°F oven.
    Leftover pakoras make good sandwiches.
    Tried this recipe?Let us know how it was!

    Crispy and Flavorful Vegetable Pakora

    Vegetable Pakora are crispy and flavorful Indian fritters made with a variety of vegetables coated in a spiced chickpea flour batter. This vegetable pakora recipe is perfect indian appetizers or even a side dish. These pakoras are quick to make and can be enjoyed with your favorite chutneys or sauces.

    The Essence of Vegetable Pakora

    The essence of vegetable pakora lies in their crispiness and the blend of spices used in the batter. A variety of vegetables can be used, making them a versatile and customizable indian snack. The chickpea flour (besan) batter is seasoned with spices such as cumin, coriander, and turmeric, adding to the rich flavor of these Indian vegetable fritters.

    Origin and Popularity

    Pakoras are a popular snack in Indian cuisine, enjoyed across the country in various forms. They are especially loved during the monsoon season, often paired with a cup of hot tea. These vegetable pakoras are a delightful way to enjoy a variety of vegetables, making them a favorite among both adults and children.

    Why You’ll Love This Recipe

    • Crispy and Delicious: The perfect combination of a crispy exterior and flavorful interior.
    • Easy to Make: Simple ingredients and quick preparation.
    • Versatile: Use your favorite vegetables to customize the pakoras.
    • Perfect for Any Occasion: Great as a snack, appetizer, or side dish.

    Variations of Vegetable Dry Recipes

    Exploring Manjula’s Kitchen reveals a treasure trove of other delicious vegetable dry recipes that you might enjoy. Here are some related dishes that you might find interesting:

    Variations of Recipes from Manjula’s Kitchen reveal a treasure trove of other delicious recipes that you might enjoy. Here are some related recipes that you might find interesting:

    1. Methi Thepla: Spiced flatbreads made with fenugreek leaves, ideal for breakfast or as a snack. Recipe: 
    2. Aloo Paratha: Stuffed whole wheat flatbreads filled with a spiced potato mixture, perfect for breakfast or lunch. Recipe: 
    3. Punjabi Kadhi: A tangy yogurt-based curry with gram flour dumplings, seasoned with aromatic spices. Recipe: 
    4. Vegetable Curry: Vegetable curry in color and taste compliment any meal. This is a simple recipe but delicious and filled with flavors. Good way to incorporate a variety of vegetables in your meal.
    5. Besan Puda: Savory gram flour pancakes spiced with herbs and spices, perfect for a nutritious breakfast. Recipe: 

    Explore more delicious recipes on Manjula’s Kitchen

    Serving Suggestions

    Vegetable pakora can be enjoyed in various ways:

    • With Chutneys: Serve with mint chutney, tamarind chutney, or yogurt for a burst of flavor.
    • As a Snack: Perfect for tea-time or as an evening snack.
    • As an Appetizer: Great for parties and gatherings.
    • With Indian Meals: Pair with rice, dal, or any curry for a complete meal.

    Tips and Tricks

    To perfect your vegetable pakora recipe, consider these helpful tips:

    • Use Fresh Vegetables: Fresh vegetables provide the best texture and flavor.
    • Consistent Batter: Ensure the batter is thick enough to coat the vegetables without being too runny.
    • Hot Oil: Fry the pakoras in hot oil to ensure they are crispy and golden brown.
    • Drain Excess Oil: Place the fried pakoras on paper towels to drain any excess oil.

    FAQs

    Can I Bake Pakoras Instead of Frying? 

    Yes, you can bake pakoras in a preheated oven at 375°F (190°C) for about 20-25 minutes, flipping halfway through.

    How Long Do Vegetable Pakoras Last? 

    Vegetable pakoras are best enjoyed fresh, but you can store them in an airtight container in the refrigerator for up to 2 days. Reheat in the oven or on a skillet before serving.

    Is Vegetable Pakora Gluten-Free? 

    Yes, this recipe is naturally gluten-free as it is made with chickpea flour.

    Can I Add Other Vegetables? 

    Yes, you can add any of your favorite vegetables like bell peppers, spinach, or eggplant to the batter.

    What Can I Serve with Vegetable Pakora? 

    Vegetable pakoras pair well with various chutneys, yogurt, or even as a side to a main meal like rice and curry.

  • Sweet Potato Chaat

    Sweet Potato Chaat

    A plate of Sweet Potato Chaat garnished with pomegranate seeds and fresh coriander

    Sweet Potato Chaat, Shakarkandi

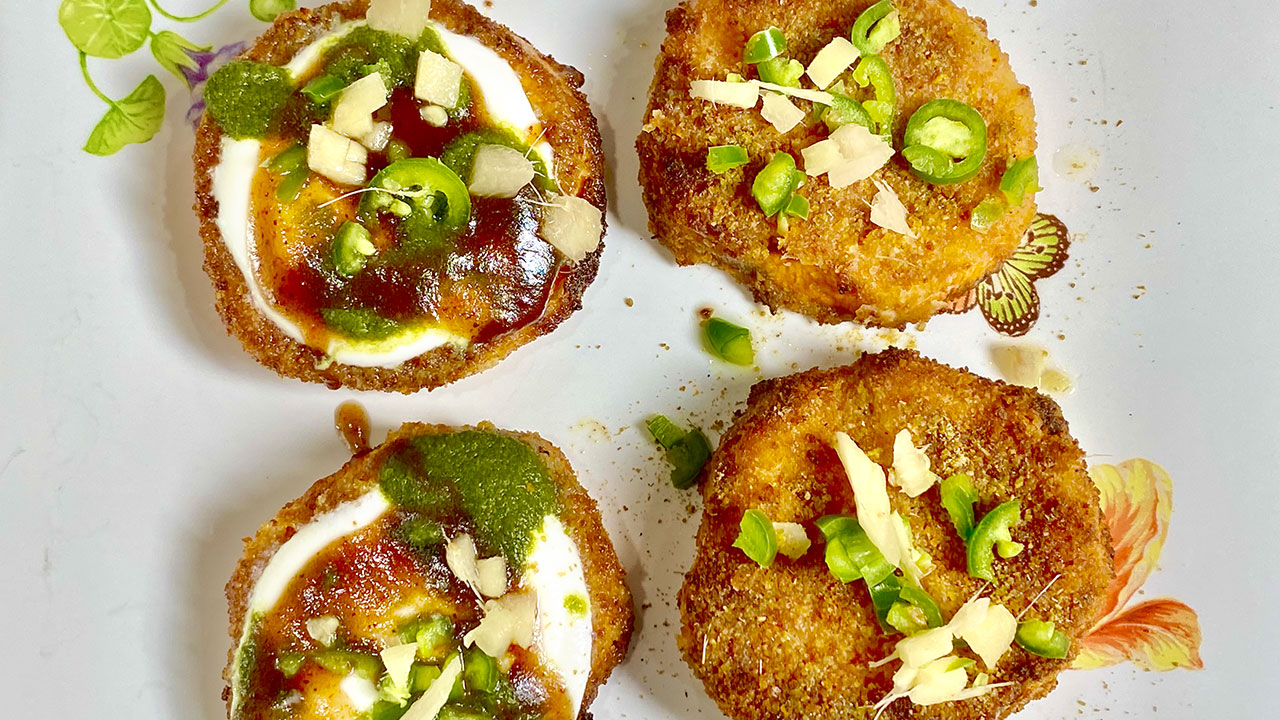
    I have been wanting to make a sweet potato chaat (Shakarkandi Chaat) for some time now. It's a savory and flavorful chaat, which also happens to be a very popular Delhi street food. I have tried to make this recipe many times but never quite perfected it! Last weekend I had the honor of being a guest judge for a cooking contest which was conducted virtually over Zoom! The contest was for the best air fryer recipe. The winner of this contest, Rashmi Sabjur, happened to make an eggplant chaat. While she was discussing her creative recipe, I got the idea of making a sweet potato chaat in the air fryer. Many people ask me how I am inspired to come up with new recipes…well the answer is people like Rashmi, and of course you all, my viewers! Traditionally, sweet potatoes are cooked over coal, cut into small pieces, and drizzled with lemon juice and spices to make it delicious and flavorful. This spicy chaat is also had a nice crunch. Try this recipe out soon! A special thank you to Rashmi for inspiring me to perfect sweet potato chaat!
    This recipe is also vegan.
    This recipe will serve 6.
    5 from 1 vote
    Prep Time 10 minutes
    Cook Time 25 minutes
    Total Time 35 minutes
    Course Appetizer
    Cuisine Indian
    Servings 6 people

    Ingredients
      

    • 1 large sweet potato sliced in thick rounds

    For Batter

    • 1 ½ Tbsp all purpose flour plain flour, maida
    • 1 ½ Tbsp corn starch corn flour or arrowroot powder
    • ½ tsp salt
    • ¼ tsp black pepper
    • cup water approx
    • Oil spray

    For Breadcrumbs

    • ½ cup bread crumb plain unflavored
    • ½ salt
    • ¼ black pepper

    For Garnishing

    For Garnishing (optional)

    • lemon juice sprinkle over chaat
    • chaat masala powder
    • green chili finely chopped
    • ginger finely chopped

    Instructions
     

    • Use a large, sweet potato. Wash and peel and slice them in rounds of about ¼ inch thick. Keep aside.
    • In a bowl take breadcrumbs, add ½ tsp salt and ¼ tsp black pepper, and mix it all well.
    • In another bowl mix all-purpose flour, corn starch, ½ tsp salt, and ¼ tsp black pepper. Add the water slowly and make it into a thick batter. I used about 1/3 cup of water.
    • I am using parchment paper over air fryer baking tray oil the parchment paper.
    • Coat both sides of a sweet potato slice in the flour batter and then in the breadcrumb mixture. Shake off any excess breading and transfer the sweet potato slices to an airfryer baking sheet. Repeat with the remaining sweet potato slices.
    • Spray the slices with oil.
    • Bake in air fryer for 10 minutes (on 325-degree Fahrenheit). Then turn the sweet potato slices and bake it again for 10 minutes. Maybe you will have to adjust the time and temperature according to your air fryer.
    • The sweet potatoes will have a nice crunch. You may serve them hot or at room temperature with your favorite garnishing. I prefer with yogurt and chutney.

    Notes

    Serving Suggestions
    Sweet potatoes have nice crunch, my favorite way to serve this chaat, is to drizzle with yogurt, little cilantro chutney and top it with tamarind chutney if you like hot and spicy sprinkle with finely chopped green chilies and ginger. I have done cilantro chutney and tamarind chutney recipes earlier; you can find these recipes on my website.
    Tried this recipe?Let us know how it was!
  • Apple Banana Pakora

    Apple Banana Pakora

    A plate of crispy Apple Banana Pakoras

    Apple Banana Pakora

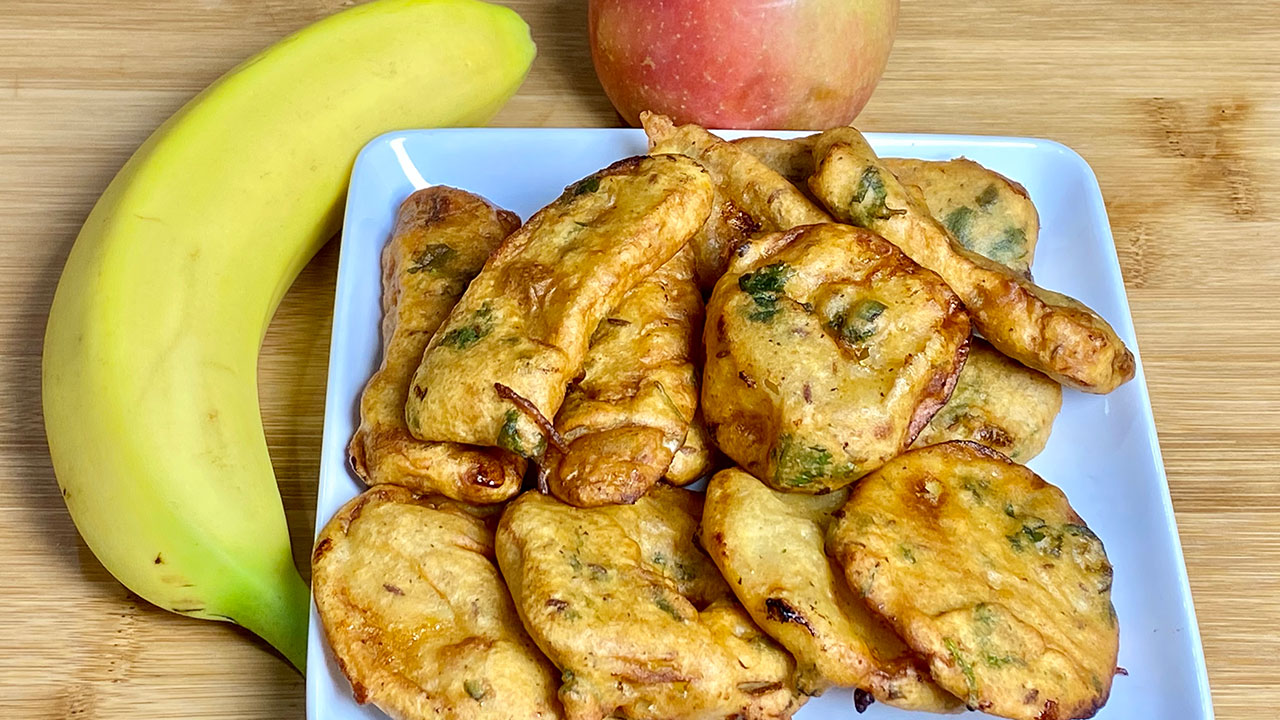
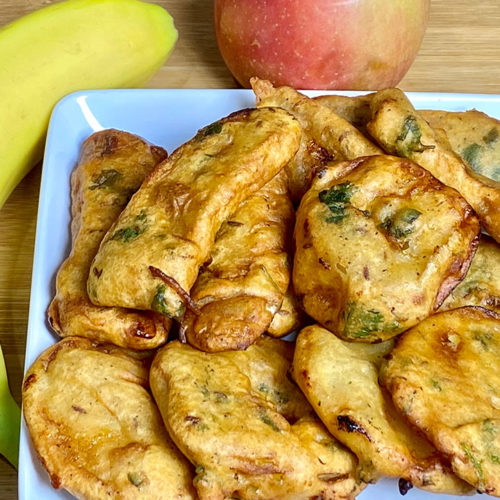
    Apple and Banana Pakoras! Pakoras are an all-time favorite snack amongst everyone. Pakoras are made in so many ways using a variety of vegetables and lentils. Apple and Banana Pakoras were suggested by my friend Rajni from India. It sounds different because I never tried these pakoras. I decided to give it a try. I know she enjoys sweet and spicy combinations of flavors. These pakoras are crispy from the outside and soft from the inside. These Pakoras are also vegan and gluten-free. Give it a try and share your experience. Hope you will enjoy it. This recipe will serve 4.
    5 from 2 votes
    Prep Time 5 minutes
    Cook Time 15 minutes
    Total Time 20 minutes
    Course Appetizer
    Cuisine Indian
    Servings 4 people

    Ingredients
      

    • 6 Apple slices cut into rounds ¼ inch thick
    • 6 banana slices, cut into the long way banana should not be very ripe
    • ½ cup gram flour besan
    • 2 Tbsp rice flour
    • 1 Tbsp corn starch also can use arrow root powder
    • ½ tsp salt adjust to taste
    • ½ tsp cumin seeds jeera
    • ¼ tsp black pepper
    • ½ tsp mango powder amchoor
    • 1 Tbsp sugar
    • 2 Tbsp cilantro finely chopped, hara dhania
    • 1 Tbsp green chili finely chopped

    Instructions
     

    • I am using firm apples. I have sliced the apples in rounds about 1/4 inch thick. Use firm bananas that are slightly less ripe. Do not use fully ripe bananas. I am using 1banana. I sliced the banana in 6 pieces the long way
    • To make the batter, add all the dry ingredients together besan, rice flour, cornstarch, salt, cumin seeds, black pepper, mango powder, and sugar. Mix all the ingredients well.
    • Add the water slowly to make a smooth batter. Consistency of pancake mix. I used about 1/2 cup of water. Now add the green chilies and cilantro, mix it well.
    • Heat the oil in a frying pan on medium-high heat. The frying pan should have about 1 inch of oil. To check if the oil is ready, put one drop of batter in the oil. The batter should come up but not change color right away.
    • Dip the apples and bananas slices into the batter one at a time, making sure it is covered by the batter completely. Then, slowly drop in the slices into the frying pan.
    • Fry the pakoras in small batches, not overlapping. The pakoras will take about 3-4 minutes to cook.
    • Turn them occasionally. Fry the pakoras until both sides are golden brown. If the oil is too hot, the pakoras will brown too fast and not get crispy.
    • The crispy, delicious pakoras are now ready to serve.

    Notes

    They taste delicious with tamarind sweet and sour chutney. I already have this chutney recipe on my blog.
    You would also like to see the recipes for Apple Jalebi, Apple Bread Rolls, Aloo Puri, Tomato soup.
    Tried this recipe?Let us know how it was!
  • Scalloped Potatoes

    Scalloped Potatoes

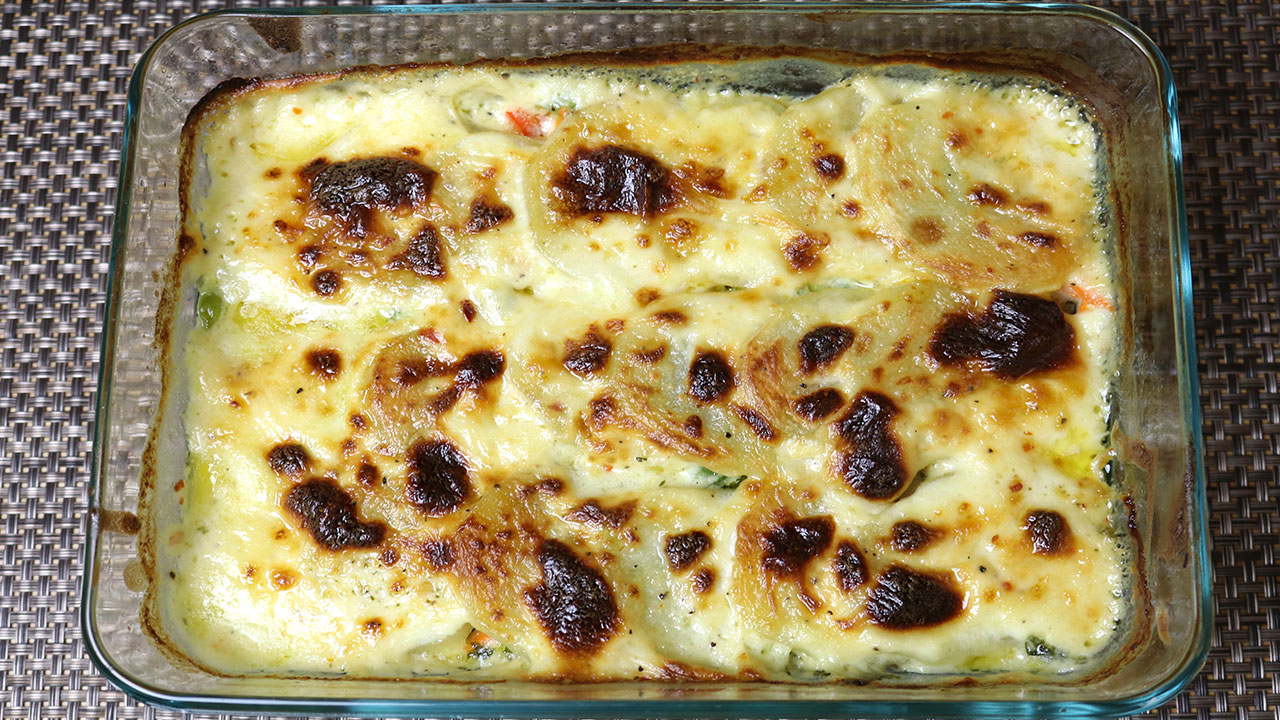
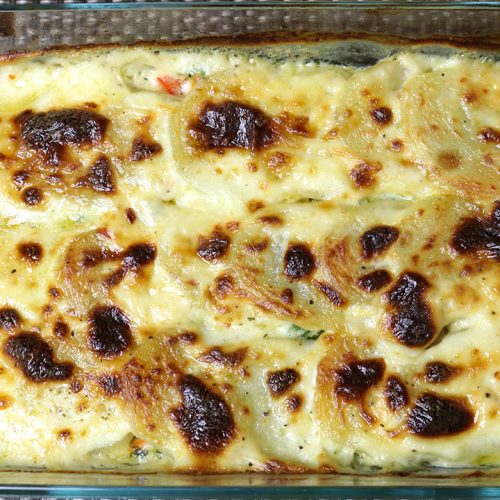
    A glass baking dish filled with golden brown scalloped potatoes topped with a creamy, bubbly cheese sauce.

    Scalloped Potatoes (Spicy Baked Potatoes) in Creamy Sauce

    Scalloped Potatoes are a classic dish with layers of potatoes topped with a delicious creamy sauce! It is the perfect comfort food and side dish to any meal.
    A little background to the origin to this dish: When I first came to the United State, I was fortunate enough to meet a very kind elderly woman named Helen. She was so kind and helped me a lot when I first came to this country. She was the same age as my grandmother, but she wanted me to simply refer to her as Helen. We became so close that she eventually became another grandmother for my kids when I was away from my family and country. She truly was a blessing to our family. Scalloped potatoes was one of her favorite vegetarian favorite dishes to make for us. She would make this as a side dish for Easter and Thanksgiving. The ingredients are simple, and the dish is easy to make. I got inspired to make this dish while going through old photos. It has been 30 years since Helen passed away, but she will never be forgotten. I decided to add a variation to this recipe by adding some veggies and making it little spicy.
    This recipe will serve 4.
    4.50 from 2 votes
    Course Side Dish
    Cuisine American
    Servings 4 people

    Ingredients
      

    • 3 medium sized potatoes peeled and sliced about 1/8 inch thick
    • ¼ cup green peas
    • ¼ cup corn kernels
    • ¼ cup bell pepper chopped
    • ¼ cup carrots shredded
    • 1 Tbsp green chilies finely chopped (this is optional)
    • 2 Tbsp cilantro chopped

    For white sauce

    • 2 Tbsp olive oil
    • 2 Tbsp all-purpose flour plain flour, maida
    • tsp black pepper
    • ½ tsp red chili flakes adjust to taste
    • ½ cup heavy cream
    • 1 ½ cup milk
    • ½ tsp salt

    Instructions
     

    Sauce

    • In a small frying pan, heat the oil over low medium heat and add all-purpose flour, stir for a minute. Add black pepper, chili flakes, and salt, stir for another minute.
    • Reduce heat to low. While stirring slowly add cream making sure there are no lumps. Add a small amount of milk at a time. The mixture will start becoming thick, continue adding a little milk at a time whisking until smooth.

    Assembly

    • Preheat oven to 350 degrees F (190 degrees C). I am using 5” x 7” Pyrex pan to make the Scalloped Potatoes. Grease the pan.
    • layer the potatoes evenly in the pan.
    • Pour cream sauce just covering the potatoes. Now spread the vegetables, bell pepper, carrots, green peas, corn, green chilies and cilantro. Layer the potato again over the vegetables. Pour the sauce making sure covering the potatoes evenly.
    • Bake it for about 40-45 minutes, potatoes should be tender and should be brown from the top.
    • Scalloped Potatoes are ready, nice color. Enjoy.

    Notes

    I prefer Yukon gold or Russet potatoes for this dish. You can use different vegetables of your choice, like broccoli, cauliflower, green beans, spinach.
    You might also like Vegetable Kathi Rolls, Mexican Bhel, Vegan Macaroni and Cheese
    Keyword Baked Potatoes, Baked Vegetable, Cream Sauce, Creamy Butternut squash, Homemade, Main Dish, Quick And Easy, Side Dish, Spicy Baked Potatoes, Spinach Pasta, Vegetable Pasta, Vegetarian, Video Recipe, Zucchini pasta
    Tried this recipe?Let us know how it was!
  • Sauteed Cauliflower

    Sauteed Cauliflower

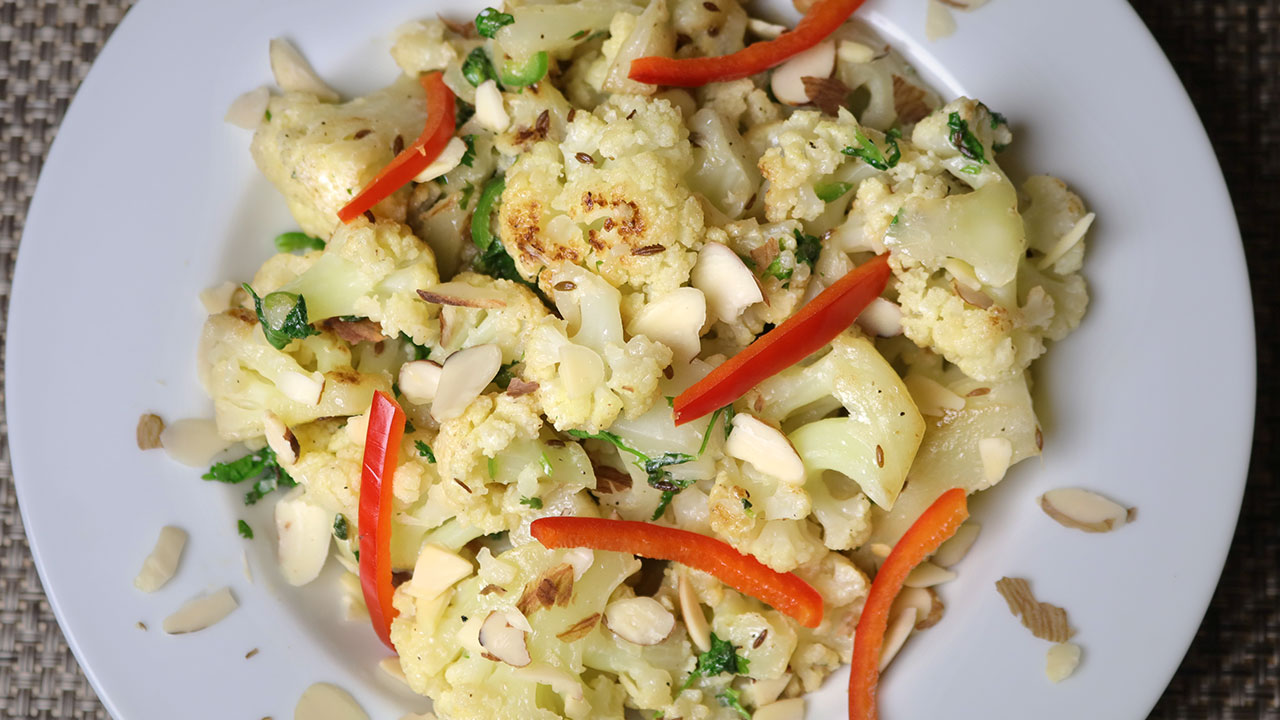
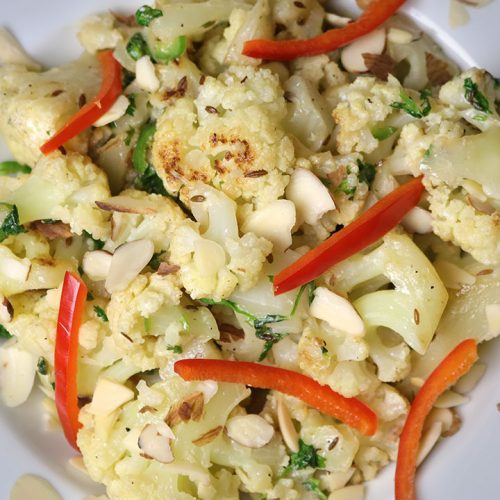
    A plate of sautéed cauliflower garnished with sliced almonds and red pepper strips.

    Sautéed Cauliflower

    Sautéed cauliflower is a simple and delicious side dish. This is my favorite way to serve cauliflower because its simple, quick, and delicious.
    5 from 6 votes
    Course Side Dish
    Cuisine Indian
    Servings 3 people

    Ingredients
      

    • 4 cup Cauliflower cut into florets
    • 1 ½ Tbsp Oil
    • ½ tsp Cumin seeds
    • 3 Tbsp Yogurt
    • 1 tsp Salt
    • tsp Black pepper
    • ½ tsp Sugar
    • 1 tsp Ginger juice
    • 1 Tbsp Green chili finely chopped
    • 1 Tbsp Cilantro finely chopped

    For Garnishing

    • 1 Tbsp sliced almonds
    • few thin slices red bell pepper

    Instructions
     

    • In a bowl mix the yogurt, salt, black pepper, sugar, ginger juice (shred the ginger using fine shredded and squirgreen chili, and cilantro, mix it well and keep aside.
    • Boil cauliflower in a large pot, boil them until cauliflower crisp and tender; drain well.
    • In a large skillet over medium heat, heat the oil. When oil is moderately hot add cumin seeds after seeds crack add cauliflowers Sauté’ the cauliflower and cook a few minutes, stirring, until it becomes lightly golden brown in color.
    • Turn off the heat and add the yogurt mix and mix it well. Add the spice mix just before serving.
    • Sprinkle with almonds and sliced red bell pepper
    Keyword Bhoona Phool Gobhi, Gluten Free, Healthy, Homemade, No Onion Garlic, Phool Gobhi, Quick And Easy, Sattvik Food, Side Dish, Vegetarian
    Tried this recipe?Let us know how it was!
  • Custard Toast Bites

    Custard Toast Bites

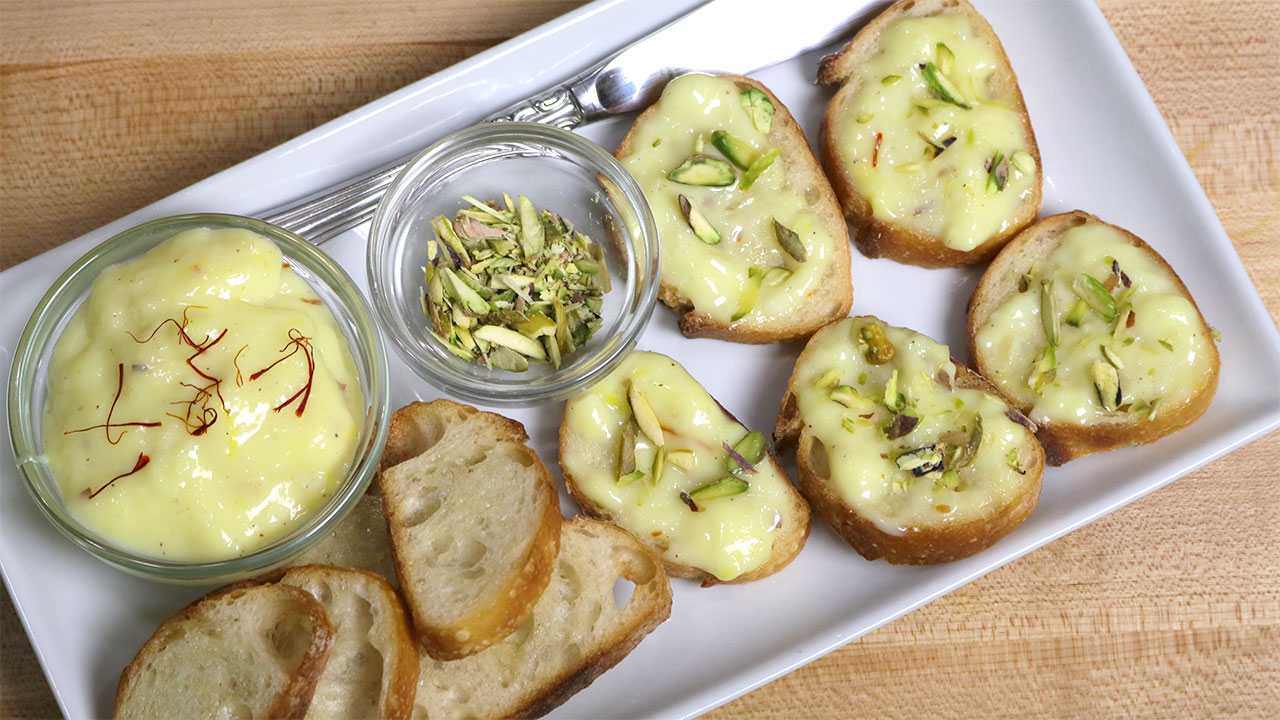
    Slices of toasted bread topped with custard and garnished with sliced pistachios, served with extra custard and a bowl of pistachios on the side.

    Custard Toast Bites

    Custard Toast Bites is custard flavored with saffron and cardamom and served over toasted bread. This recipe is definitely un-traditional but nonetheless a delicious approach. This is super easy to make and you can call this Custard Bruschetta. Custard Toast Bites can be served as a dessert or tea time snack.
    No ratings yet
    Course Appetizer
    Servings 4 people

    Ingredients


    • 12 thin slices of French bread bruschetta or use the regular size bread and cut them to size you will like
    • 2 Tbsp melted butter
    • 1 ¼ cup milk
    • ¼ cup heavy cream
    • ¼ cup sugar
    • 1 ½ Tbsp corn starch
    • Pinch saffron
    • tsp cardamom powder
    • 1 Tbsp sliced almond for garnishing
    • 1 Tbsp sliced pistachios for garnishing

    Instructions
     

    • In a heavy bottom pan; stir in the milk, cream, cornstarch, sugar, cardamom powder and saffron. Make sure the corn flour has dissolved completely, no lumps.
    • Turn the heat to medium and bring the milk mixture to a boil, stirring continuously. Turn the heat to low. Keep stirring until the mixture thickens. It is important to keep stirring continuously to avoid burning and the lumps.
    • Milk mixture should be consistency of thick batter. This should take about 3-4 minutes. Remember as custard will cool of it will become thicker. Turn off the heat and sliced almonds mix it well. The custard is ready.
    • Lightly butter the bread from both sides and toast to make them crisp.

    Notes

    For Serving
    Spread custard generously over toasted bread and garnish with pistachios.
    Keyword Bruschetta, Custard, Dessert, Eggless, Homemade, Quick And Easy, Saffron Custard, Snack, Vegetarian
    Tried this recipe?Let us know how it was!
  • Potato And Cauliflower Gnocchi

    Potato And Cauliflower Gnocchi

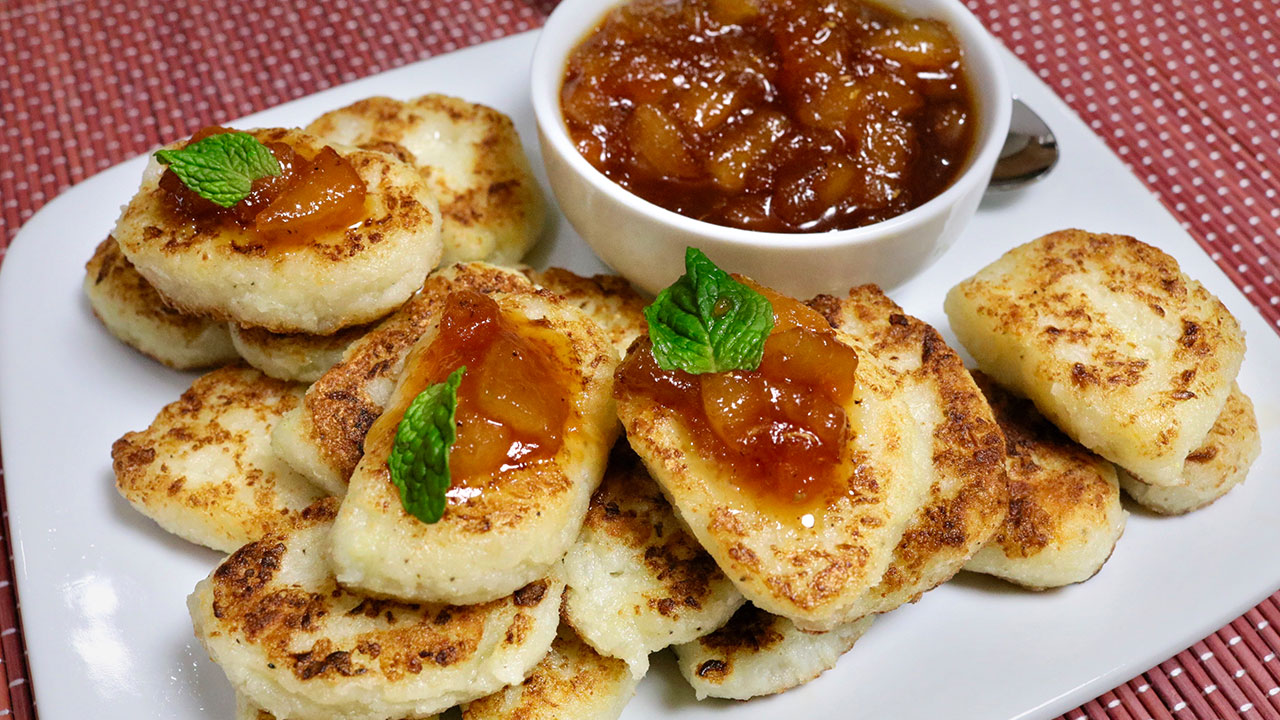
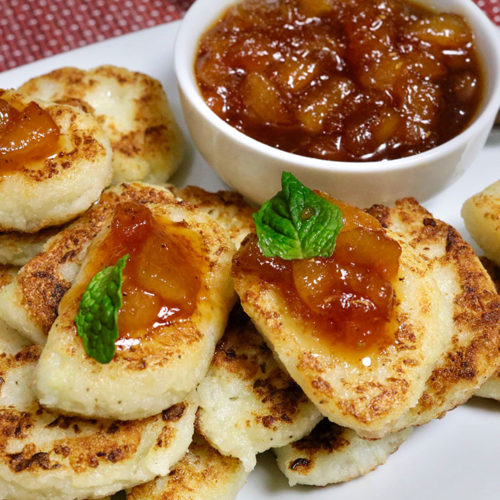
    Potato and Cauliflower Gnocchi

    Potato and Cauliflower Gnocchi

    Gnocchi (pronounced No-chee) is a classic Italian dish. This vegan and gluten free Gnocchi is made with potato and Cauliflower. I have topped it off with a pear sauce to add my own twist to the recipe. This is Crispy on the outside and fluffy on the inside, this recipe is absolutely mouth-watering. This dish was a request from my granddaughter and I’m so glad I gave it a try.
    4.38 from 8 votes
    Prep Time 10 minutes
    Cook Time 20 minutes
    boiling time 20 minutes
    Total Time 30 minutes
    Course Side Dish
    Cuisine Fusion
    Servings 6 people

    Ingredients


    For Gnocchi

    • 2 cup cauliflower florets approximately
    • 1 cup potatoes boiled, peeled and shredded
    • 2 Tbsp corn starch arrow root
    • 2 Tbsp rice flour
    • 1/2 tsp ginger paste
    • 1/2 tsp salt
    • 1/8 tsp black pepper
    • 2 Tbsp oil

    For Pear Sauce

    • 1 pear peeled and sliced
    • 1/4 cup sugar
    • 1 Tbsp olive oil
    • 1/8 tsp black paper
    • 1/4 tsp salt
    • 1 Tbsp lemon juice
    • 1 tsp ginger paste

    Instructions
     

    To make the Pear Sauce

    • Heat the pan on low medium heat, I prefer nonstick pan, cook all the sauce ingredients together, olive oil, pear, sugar, black pepper, salt, lemon juice, ginger, mix it well and cook over medium high heat.
    • Keep stirring until sugar is melted and start caramelizing while stirring keep scraping the sides. This should take about 3-4 minutes.
    • Caramelize sugar has nice aroma and gives sauce a good golden color. Transfer to small bowl and mash it. 

    To make Gnocchi (NOK-EE)

    • Make sure remove the stems, boiled them till they are tender, drain the water squeeze the cauliflower to remove the access water, and pat dry.
    • In a bowl add the cauliflower and potatoes and mash it well, add corn starch, rice flour, salt, black pepper, and ginger paste, mix it well, and knead to make a smooth dough.
    • Divide the dough in 2 equal parts and roll them in one-inch calendar shape, if it is sticking to surface sprinkle some rice flour this will help rolling.
    • Take the sharp knife and slice them about half inch thick
    • Heat the non-stick flat frying pan over medium heat and oil it generously. Spread the Gnocchi do not overcrowd them it will be hard to flip, wait for about two minutes and turn them over, they should be light golden brown, and cook from other side same, Gnocchi should be golden brown both sides.
    • Serve them pear sauce, 

    Notes

    It is important to pat dry the cauliflower or air dry.
    Tried this recipe?Let us know how it was!

  • Khasta Mathri

    Khasta Mathri

    Khasta Mathri

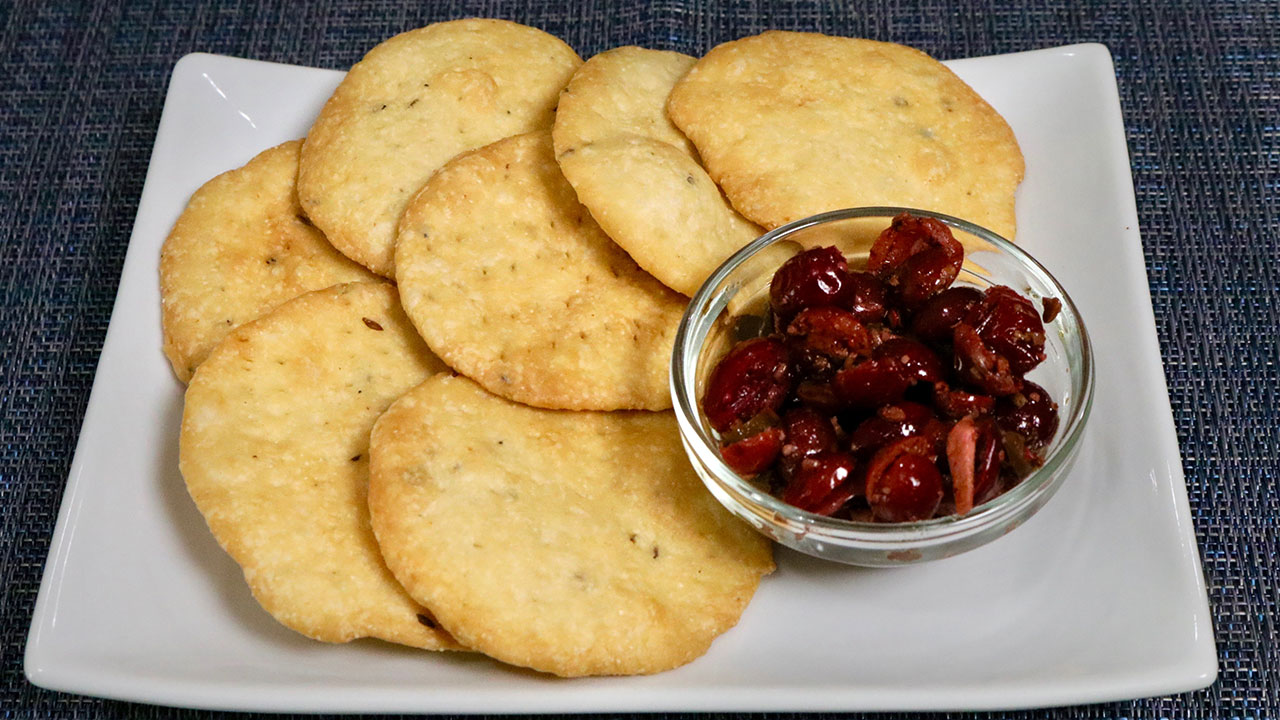
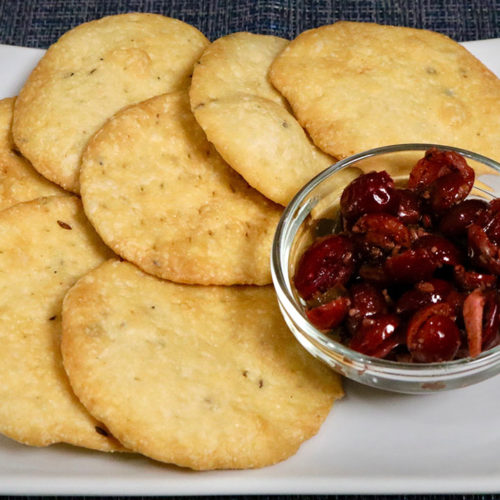
    Khasta Mathri – Indian Savory Crackers

    Khasta Mathri is a popular, classic savory snack. You can serve these Mathries with pickle at tea time or you can enjoy as is! For all the upcoming holidays, Mathries make a good snack to have around to serve to all guests. They also make for a simple but special homemade gift.
    4.67 from 6 votes
    Prep Time 10 minutes
    Cook Time 20 minutes
    Total Time 30 minutes
    Course Appetizer
    Cuisine Indian
    Servings 6 people

    Ingredients


    • 1 cup all-purpose flour maida or plain flour
    • 2 Tbsp sooji semolina flour
    • 1/2 tsp salt
    • 1/4 tsp black pepper crushed
    • 1/4 tsp cumin seeds jeera
    • 2 Tbsp oil canola or vegetable oil
    • 1/2 cup chilled water
    • 2 drops lemon juice
    • oil to fry

    Instructions
     

    • Mix the flour, sooji, salt, black pepper, cumin seeds, lemon drops and oil. Note lemon should be just 2-3 drops, we are not adding this to flavor, lemon is added to give the crispness, also Mathries will absorbed less oil.
    • Add the chilled water slowly, mixing with your fingers as you pour. Do not knead the dough. The dough should be soft.
    • Cover the dough and let it sit for at least fifteen minutes. Divide the dough into about 20 equal parts, I decided to make 14.
    • Take each part of the dough and make a flat ball shape. Roll them into 2-inch circles. Prick each mathri with a fork about 6-8 places, both sides each, to prevent puffing the mathri when frying.
    • Heat the oil in a frying pan on low medium heat. The frying pan should have at least 1 inch of oil. To check if the oil is ready, put a small piece of dough in the oil. The dough should make the oil sizzle and come up slowly.
    • Fry mathri in batches, making sure to place just enough mathri to cover the frying oil. Fry them until both sides are a light golden-brown. This should take about 5-7 minutes. Take them out over paper towel, which will absorb the extra oil

    Notes

    Suggestions
    Serve the Khasta Mathri with cranberry pickle, or Chatpata Aloo
    Khasta Mathris can be stored for a couple of months in airtight containers.
    If the mathris are cooked on high heat, they will be soft.
    Keyword Mathri, Salted Crackers, Tea Time Snack
    Tried this recipe?Let us know how it was!

    Khasta Mathri Recipe: How to make Khasta Mathri

    Khasta Mathri is a popular Indian savory snack enjoyed across India, particularly during festivals, tea-time, or as a crunchy accompaniment to meals. 

    These golden-brown, flaky crackers are known for their irresistible crispiness and rich flavour, making them a favorite among snack lovers of all ages. 

    Made from a simple dough of all-purpose flour, ghee (clarified butter), and spices, Khasta Mathri is deep-fried to perfection, resulting in a crunchy texture and aromatic taste.

    Khasta Mathri for Festive Season

    Crunchy Texture: Khasta Mathri’s signature feature is the crunchy and flaky texture, which provides a delightful snacking experience with every bite. The layers of dough create a light and airy interior, while the deep-frying process gives the crackers a golden-brown exterior that’s irresistibly crispy.

    Rich Flavor: Despite its simple ingredients, Khasta Mathri is packed with flavor, thanks to the addition of aromatic spices such as ajwain (carom seeds), black pepper, and cumin seeds. These spices lend a warm and fragrant aroma to the crackers, enhancing their overall taste and appeal.

    Long Shelf Life: Khasta Mathri has a long shelf life and can be stored in an airtight container for several weeks without losing its crispiness or flavor. This makes Khasta Mathri an ideal snack for travel, picnics, and gatherings, as it can be prepared in advance and enjoyed on-the-go.

    Versatile Snack: Khasta Mathri is a versatile snack that can be enjoyed on its own or paired with various accompaniments. Serve Khasta Mathri with a cup of hot tea or chai for a classic tea-time snack, or pair it with chutney, pickle, or yogurt for added flavor and contrast.

    Other Variations of Mathri:

    • Namkeen Mathri: Mathri (Salted Crackers) are similar to salted crisp crackers and are a very popular afternoon snack. Traditionally, mathris are served with spicy pickles.
    • Aachari Mathri: Achari Mathries, is a traditional staple snack in North India. They are usually served with spicy pickles, but in this recipe we have added mango pickle spices in the dough instead to add a tangy flavor to the mathri itself.
    • Masala Mathri: Enhance the flavor of Mathri by adding a blend of spices and herbs such as garam masala, turmeric, and coriander powder to the dough. Masala Mathri has a complex and aromatic taste that’s sure to impress your taste buds.

    Tips for Making Perfect Khasta Mathri:

    Rest the Dough: Allow the Khasta Mathri dough to rest for at least 15 minutes before rolling and shaping to relax the gluten and improve the texture of the crackers. Resting the dough allows the flavors to meld together, resulting in a more flavorful Khasta Mathri.

    Roll Evenly: Roll out the Khasta Mathri dough into thin, even discs to ensure uniform cooking and crispiness. Use a rolling pin and a dusting of flour to prevent sticking and achieve the desired thickness.

    Fry at the Right Temperature: Fry the Khasta Mathri in hot oil at the correct temperature to ensure that they cook evenly and become golden brown and crispy. Avoid overcrowding the frying pan or kadai to maintain the temperature of the oil.

    FAQs about Khasta Mathri:

    How do I store Khasta Mathri? 

    Store Khasta Mathri in an airtight container at room temperature for up to 2-3 weeks. Line the container with parchment paper or tissue paper to absorb any excess moisture and maintain the crispiness of the crackers.

    Can I freeze Khasta Mathri dough? 

    Yes, you can freeze Khasta Mathri dough for future use. Shape the dough into a ball, wrap it tightly in plastic wrap or aluminium foil, and store it in an airtight container or freezer bag. Thaw the dough in the refrigerator overnight before rolling and shaping.

    What can I serve with Khasta Mathri? 

    Khasta Mathri pairs well with a variety of accompaniments such as chutney, pickle, yogurt, or tea. Serve Khasta Mathri alongside your favorite dipping sauces or enjoy them on their own as a crunchy and flavorful snack.

    Khasta Mathri is a delicious and versatile snack that’s perfect for any occasion. Whether enjoyed as a tea-time treat, party snack, or crunchy accompaniment to meals, Khasta Mathri offers a delightful combination of crispy texture and bold flavors. With its customizable variations, long shelf life, and simple preparation, Khasta Mathri is sure to become a favorite in your snack preparation.

  • Khatta Meetha Chivda

    Khatta Meetha Chivda

    Khatta Meetha Chivda

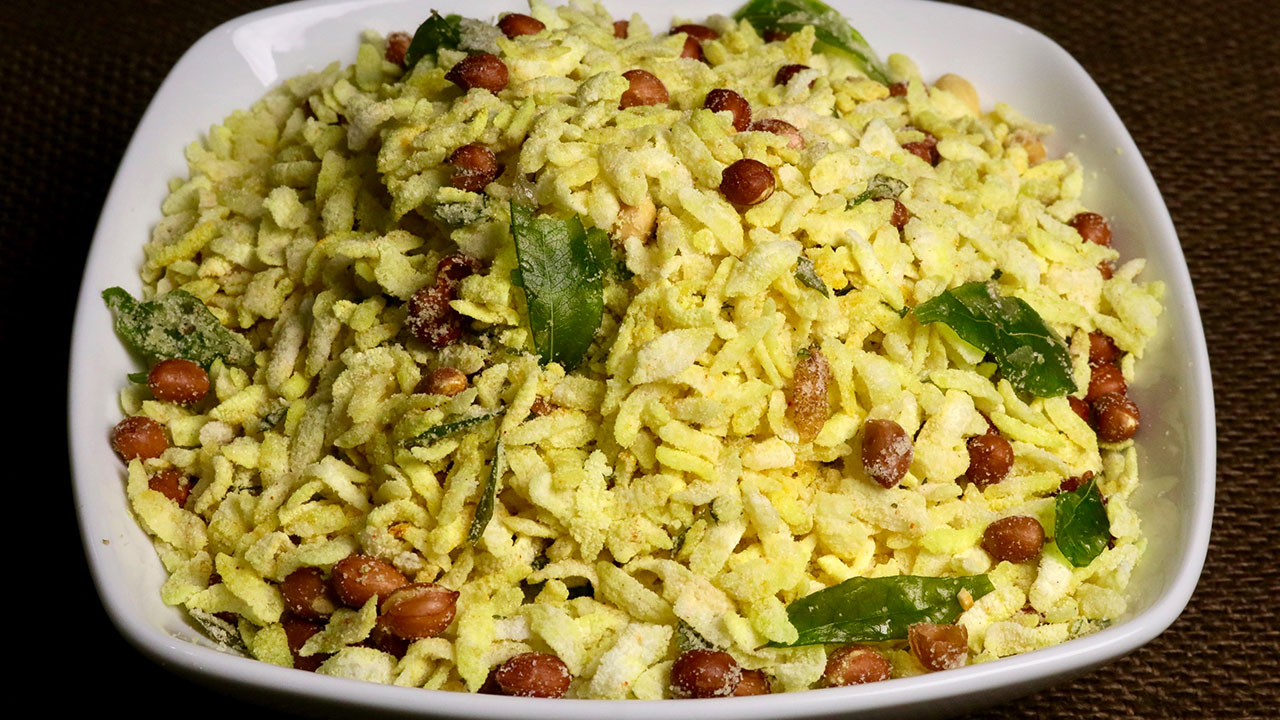
    khatta Meetha chivda

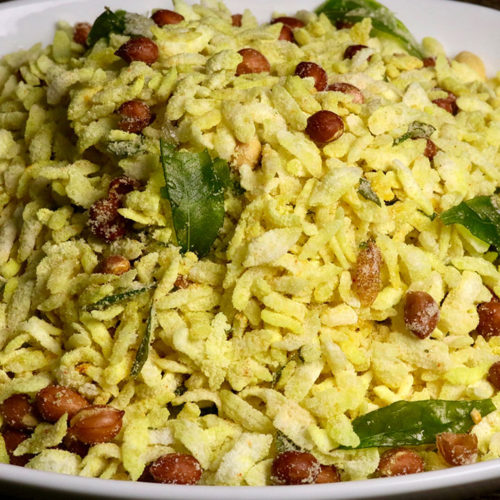
    Khatta Meetha chivda is a popular tea time snack. This delicious sweet and salty snack can be enjoyed by all ages. Chivda is a flat rice, also known as poha.
    5 from 3 votes
    Prep Time 5 minutes
    Cook Time 20 minutes
    Total Time 40 minutes
    Course Snack
    Cuisine Indian
    Servings 8 people

    Ingredients


    • 2 cup chivda or poha available in different thickness, thick, medium, thin or nylon poha, I am using medium
    • 1/2 cup peanuts
    • 1/2 cup sugar
    • 1/4 tsp turmeric
    • 1/2 tsp salt
    • 1/8 tsp citric acid
    • 1/4 tsp red chili powder
    • About 18 curry leaves
    • Also need oil to fry

    Instructions
     

    • Grind sugar, salt, citric acid and red chili powder together making sugar in to powder. And all the ingredients will be mixed evenly. Set aside.
    • Wash and pet dry curry leaves and let it air dry for at least 10 minutes or more.
    • In a frying pan take about 1” of oil and heat on medium heat. Oil should be moderately hot. Put about 1/4 cup of chivda in an oil, chivda should come up right away, (otherwise oil is not hot enough) as soon chivda comes up over oil, lower the heat to low and stir fry chivda till it doubles in size but remains white in color. Take out fried chivda in a strainer to drain out excess oil. Repeat the process and fry the remaining chivda.
    • In the same oil fry peanuts over low heat till they are light brown.
    • Fry the curry leaves until they are crisp.
    • Take another frying pan large enough to hold all the ingredients, put I teaspoon of oil in the pan over low heat. put turmeric stir and put chivda, keep mixing till it is mixed well and chivda will be light yellow turn off the heat and let the chivda come to room temperature.
    • Add peanuts, sugar mix, and crush the curry leaves over. Mix it gently until all the ingredients are incorporated well.

    Notes

    You can store the Khatta Meetha Chivda, in a air tight container for a month. Store it in an air-tight container and enjoy this scrumptious snack for up to 2 months…!!
    Tried this recipe?Let us know how it was!

  • Potato Soup

    Potato Soup

    Potato Soup (Aloo Ki Kadhi)

    Potato Soup (Aloo Ki Kadhi)

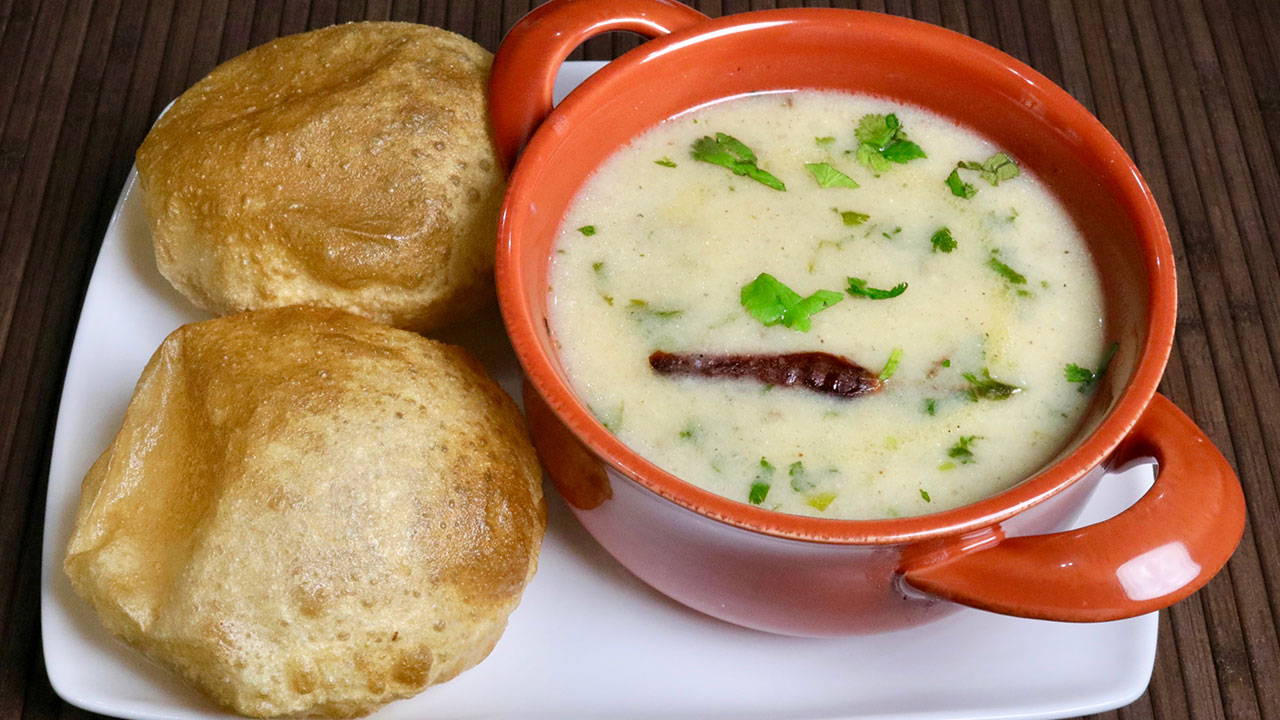
    Potato soup is very comforting and delicious. At my home this was known as Aloo Ki Kadhi. This soup was served with Puri which is an Indian whole wheat fried bread. Potato Soup is mildly flavored and easy to make.
    5 from 1 vote
    Prep Time 5 minutes
    Cook Time 20 minutes
    Total Time 25 minutes
    Course Soup
    Cuisine Indian
    Servings 4 people

    Ingredients
      

    • 1/2 potato boiled, peeled and mashed
    • 1/2 cup yogurt
    • 1 cup potatoes boiled peeled and cut into small pieces
    • 2 Tbsp oil canola or vegetable oil
    • 1 tsp cumin seeds jeera
    • 1 Tbsp all-purpose flour maida or plain flour
    • 1/4 tsp fenugreek seeds dana mathi
    • 1/4 tsp black pepper kali mirch
    • 1 bay leave tajpat
    • 1 dry red chili broken into 2 pieces
    • 2 tsp ginger paste
    • 1 tsp salt
    • 1/4 tsp garam masala
    • 2 Tbsp finely chopped cilantro hara dhania

    Instructions
     

    • Mix mashed potatoes, yogurt, ginger juice, and black pepper well add about 1 cup of water and make a smooth batter. Set aside.
    • Heat the oil in a saucepan over medium high heat. Oil should be moderately hot, when you add the cumin seeds they should crack right of way. Add cumin seeds as they crack add fenugreek seeds, and all-purpose flour, stir for 1-2 minutes until all-purpose flour become very light brown.
    • Add red chili and bay leave, brake in 2 pieces, stir and add yogurt mix and mix it well. Turn the heat to low medium.
    • Add potatoes and about 2 cups of water and let it cook for about 5 minutes. Stir occasionally. Add salt, garam masala and cilantro, lower the heat to low and let it cook for 2 more minutes.
    • Adjust the thickness of the soup to your taste.
    • Potato soup is ready. Enjoy!

    Notes

    This is best served with Puri (puffed fried bread).
    Tried this recipe?Let us know how it was!

  • Masala Paneer

    Masala Paneer

    Masala Paneer

    Masala Paneer

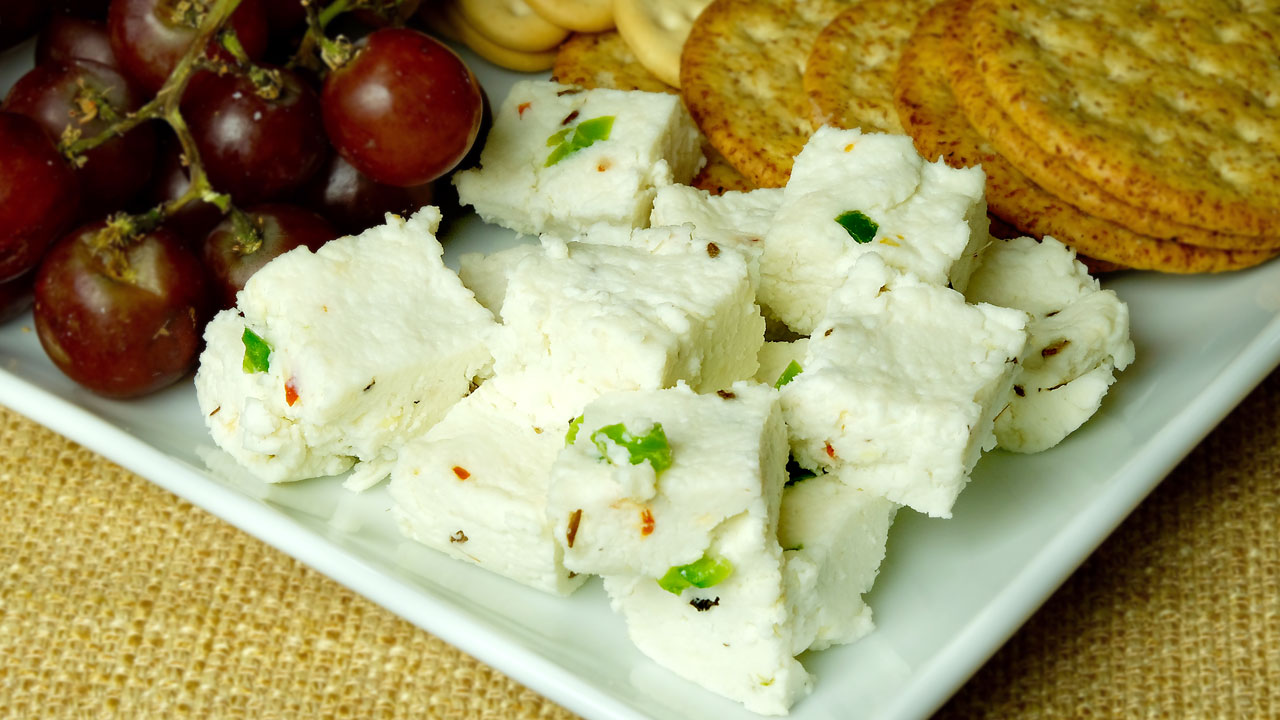
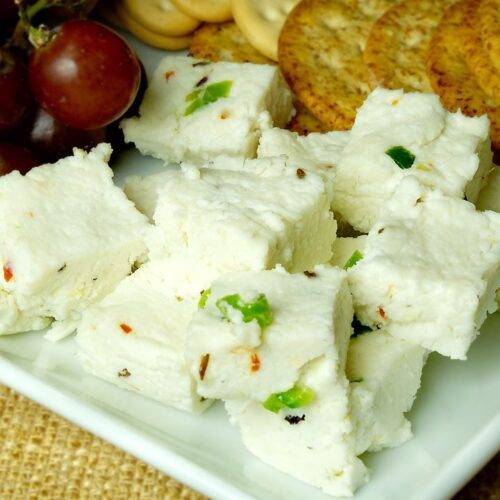
    Need a simple healthy appetizer that is sure to be enjoyed by all? Try serving my "Masala Paneer Cubes" at your next get together! It is homemade paneer mixed with a variety of spices. Serve with crackers, or fruit plate. Masala paneer can be used for many different ways, like paneer pakoras, paneer paratha.
    No ratings yet
    Course Appetizer
    Cuisine Indian
    Servings 8 people

    Ingredients
      

    • 8 cup milk whole milk
    • 5 tbsp lemon juice
    • 1 tbsp salt
    • 10 black pepper crushed
    • 1/4 tbsp red chili flakes
    • 1 tbsp clarified butter, ghee
    • 1/2 tbsp cumin seeds, jeera
    • 1 tbsp ginger finely shredded, or paste
    • 1 tbsp green chili seeded and finely chopped
    • 1 tbsp lemon juice

    Instructions
     

    • Boil the milk in a heavy-bottomed pan over medium heat, first wet the pan to ensure the milk will not burn. Stir occasionally.
    • When the milk comes to a boil, add the lemon juice gradually and stir gently. The curd will start separating from the whey. Turn off the heat.
    • Once the milk fat has separated from the whey, drain the whey using a strainer lined with muslin cloth.
    • Wrap the curds in a muslin cloth, rinse under cold water, and squeeze well.
    • To test whether enough water has been removed from the paneer, rub a little piece of paneer on your palm with your fingers. After rubbing the paneer 15-20 seconds, you should be able to make a firm, smooth ball.
    • In a small frying pan heat the clarified butter (ghee) over medium heat. When ghee is moderately hot add cumin seeds as seeds crack add green chili and ginger, turn off the heat. Stir fry for few seconds and set aside.
    • In a mixing bowl mix the paneer with all the ingredients fried cumin mix, salt, black pepper, chili flakes, black pepper and lemon juice.
    • Mix it well, do not knead the paneer. Put the paneer in a flat bowl and press it to spread evenly. Cover it and refrigerate for at least two hours.

    Notes

    Notes
    For this recipe full fat milk works better otherwise paneer will be too dry.
    Do not knead the paneer that will make paneer little chew.
    Keyword Masala Paneer
    Tried this recipe?Let us know how it was!

    How To Make Paneer Masala At Home Recipe 

    Explore the perfect fusion of flavors with our delectable masala paneer appetizers and snacks. Satisfy your cravings for gluten-free delights featuring the rich essence of paneer. Indulge in these flavorful snacks that redefine the joy of snacking.

    Preparing Masala Paneer at Home: 

    Indulge in the culinary art of crafting masala paneer by following this easy step-by-step guide on how to make paneer masala at home. Begin the process by boiling milk in a heavy-bottomed pan over medium heat, ensuring the pan is wet to prevent burning. Stir occasionally as the milk comes to a boil. Gradually introduce lemon juice to curdle the milk, separating the curd from the whey. This initial step sets the foundation for a delightful paneer butter masala.

    Draining and Squeezing the Curds for Paneer Butter Masala:

    After successfully curdling the milk, the next crucial step in the paneer butter masala recipe involves draining the whey. Employ a strainer lined with muslin cloth to filter out excess liquid. Wrap the curds in the cloth, rinse under cold water, and squeeze thoroughly. Testing the paneer’s water content is key; a firm, smooth ball should form after rubbing it on your palm for 15-20 seconds. This meticulous process ensures the perfect texture for your homemade paneer butter masala.

    Flavor Infusion with Cumin Mix for Masala Paneer:

    Enhance the taste of your paneer butter masala by preparing a flavorful cumin mix. Heat clarified butter (ghee) in a small pan, adding cumin seeds until they crack. Introduce green chili and ginger, stir-frying for a few seconds. This aromatic blend serves as a crucial ingredient in the masala, imparting a distinct and savory touch to your how to make paneer butter masala adventure.

    Mixing and Chilling for the Best Paneer Butter Masala: 

    In a mixing bowl, combine the prepared paneer with the cumin mix, salt, black pepper, chili flakes, and lemon juice. It’s essential to achieve a thorough mix without kneading the paneer. Place the paneer in a flat bowl, press it evenly, and cover it. Allow it to refrigerate for a minimum of two hours. This cooling period not only solidifies the paneer but also intensifies the flavors for an extraordinary paneer butter masala recipe.

    Savoring the Delight of Homemade Paneer Butter Masala: 

    Once refrigerated, your homemade masala paneer is ready to elevate your culinary experience, especially when preparing the tantalizing paneer butter masala. Explore the rich flavors and follow a simple how to make paneer butter masala recipe to create a dish that delights your taste buds and showcases your culinary prowess. Relish the satisfaction of crafting a delectable paneer butter masala from scratch, bringing the authentic taste of Indian cuisine to your dining table.

    If you liked this recipe you should also try our: Corn Bruschetta, Baklava Rolls, Spicy Cashews, Bread Potato Rolls and Kalmi Vada

  • Aloo Bread Pakora Recipe

    Aloo Bread Pakora Recipe

    Potato Bread Pakoras

    Aloo (Potatoes) Bread Pakora

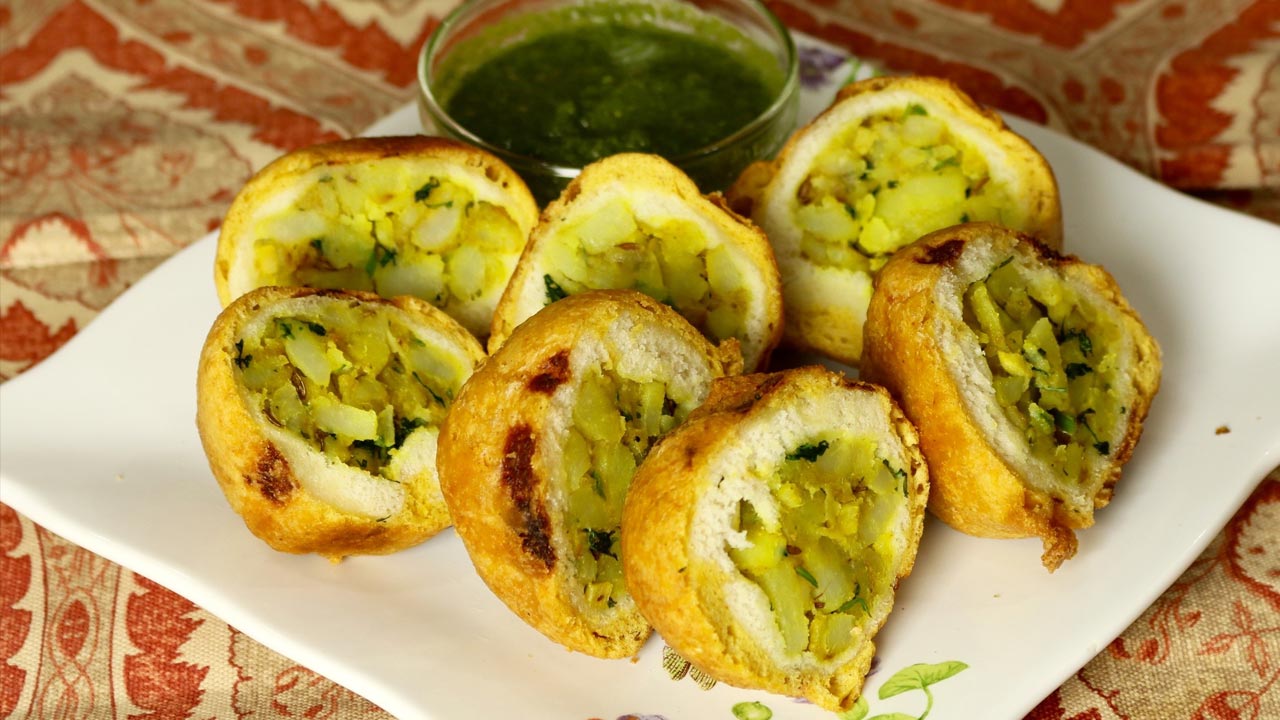
    Aloo bread pakora, bread stuffed with spicy potatoes, coated with gram flour and deep fry. Spicy hot aloo bread pakora is a tasty compliment for afternoon tea or served as an appetizer. Aloo bread pakora is crunchy outside, spicy and soft inside.
    5 from 1 vote
    Course Appetizer
    Cuisine Indian
    Servings 4 people

    Ingredients
      

    • 8 bread slices, I have already trim the edges of the bread slices
    • 3 medium potatoes boiled peeled and finely chopped (this will make 2 cups of chopped potatoes)
    • 1 tbsp oil
    • 1/2 tbsp cumin seeds (jeera)
    • 1/8 tbsp turmeric (haldi)
    • 1/4 tbsp mango powder (amchoor)
    • 1 tbsp finely chopped ginger
    • 1 green chili finely chopped adjust to taste
    • 2 tbsp chopped cilantro (hara dhania)
    • 1/2 tbsp salt adjust to taste

    For Batter

    • 3/4 cup besan, gram flour
    • 1/8 tbsp asafetida (hing)
    • 1/4 tbsp baking soda
    • 1/4 tbsp red pepper
    • 1/2 tbsp salt adjust to taste
    • 1 tbsp oil
    • About 3/4 cup of water

    Instructions
     

    Batter

    • In a bowl mix besan, salt, asafetida, pepper, baking powder and oil. Add water slowly to make a thick and smooth batter. Set aside.

    Filling

    • Heat oil in a frying pan on medium heat moderately.
    • Add cumin seeds as the seeds crack add potatoes, ginger, green chili, turmeric, mango powder, and salt.
    • Stir fry for about 3 minutes over medium heat. Add cilantro mix it well. Turn of the heat.

    Making the Pakoras

    • Trim the edges of the bread slices.
    • Wet your palms with water, place the slice between your palms and press lightly making sure bread is moist, not wet.
    • Roll 1½ tablespoons of the mixture at a time into round balls. (The size of the potato balls will depend on the size of the bread.)
    • Place the filling in the center of the bread and mold the bread to completely cover the potatoes all around, giving a round shape. Repeat to make all the rolls. Before frying.
    • Heat about 1 inch of oil in a frying pan on medium high heat moderately. To check if the oil is ready, put one drop of batter in oil. The batter should come up but not change color right away.
    • Dip the potato balls into the batter one at a time, making sure the potato balls are completely covered with batter. Then, slowly drop them into the frying pan.
    • Turn them occasionally. Fry the pakoras until all sides are golden-brown.
    • Aloo bread pakoras will take about four minutes to cook.
    • Cut them in half before serving. Serve them with mint chutney.
    Keyword bread pakora
    Tried this recipe?Let us know how it was!

    Bread Potato Pakora: A Delicious Snack for Any Occasion 

    Bread potato pakora is a popular vegan Indian snack made by coating bread slices with a spiced potato mixture and then deep-frying them until crispy and golden brown. It’s a versatile dish that can be enjoyed as a tea-time snack or as an appetizer for parties and gatherings. In this recipe, we’ll explore how to make delicious bread potato pakoras at home.

    How to Make Potato Bread Pakora 

    To make potato bread pakora, start by preparing the potato stuffing. Boil potatoes until they are soft, then mash them and mix them with spices such as turmeric, cumin, coriander, and salt. Next, take slices of bread and spread a layer of the potato mixture between two slices to form sandwiches. Cut the sandwiches into triangles or rectangles. Prepare a batter using gram flour (besan), water, salt, and spices such as chili powder and ajwain. Dip the potato-stuffed bread sandwiches into the batter, ensuring they are fully coated. Deep fry the pakoras until they are golden brown and crispy. Serve hot with chutney or ketchup.

    Potato Stuffed Bread Pakora Recipe: Tips for Success 

    • Use fresh bread: Fresh bread works best for making bread potato pakoras as it holds its shape better during frying.
    • Adjust the spices: Feel free to adjust the spices in the potato mixture and batter according to your taste preferences. You can make it spicier by adding more chili powder or milder by reducing the amount of spices.
    • Ensure even frying: Make sure the oil is hot enough before frying the pakoras to ensure they cook evenly and become crispy.
    • Serve immediately: Bread potato pakoras are best enjoyed hot and crispy, so serve them immediately after frying for the best taste and texture.

    Variations of Bread Potato Pakora 

    • Cheese-filled: For an indulgent twist, you can add a slice of cheese along with the potato mixture between the bread slices before frying.
    • Vegetable-packed: Add finely chopped vegetables such as bell peppers, or spinach to the potato mixture for added flavor and nutrition.
    • Sauce-dipped: Serve the pakoras with a tangy tamarind chutney or mint yogurt sauce for a burst of flavor.

    How to Make Potato Bread Pakora: Serving Suggestions 

    Bread potato pakoras can be served as a standalone snack with green chutney, tamarind chutney, or ketchup. They also pair well with a hot cup of tea or coffee, making them perfect for afternoon gatherings or rainy-day munching. Additionally, you can serve them alongside other Indian snacks such as samosas, pakoras, or chaat for a complete spread.

    Benefits of Bread Potato Pakora 

    • Quick and easy: Bread potato pakoras can be made in a relatively short amount of time, making them perfect for when you need a quick snack or appetizer.
    • Kid-friendly: Children tend to love the crispy texture and flavorful filling of bread potato pakoras, making them a great way to sneak in some veggies.
    • Customizable: You can customize the spices and fillings in bread potato pakoras to suit your taste preferences or dietary restrictions.

    FAQs about Bread Potato Pakora 

    Q: Can I make bread potato pakoras ahead of time?

    A: While bread potato pakoras are best enjoyed fresh, you can prepare the potato stuffing and batter ahead of time and assemble and fry the pakoras just before serving.

    Q: Can I bake bread potato pakoras instead of frying them?

    A: While traditionally bread potato pakoras are deep-fried for a crispy texture, you can try baking them in the oven for a healthier alternative. Simply brush them with oil and bake at a high temperature until they are golden brown and crispy.

    Q: Can I freeze bread potato pakoras?

    A: While bread potato pakoras are best enjoyed fresh, you can freeze them after frying. Allow them to cool completely, then place them in an airtight container or freezer bag and freeze for up to one month. To reheat, simply bake them in a preheated oven until heated through.

    If you’re interested in exploring more recipes similar to aloo bread pakora, be sure to check out Manjula’s Kitchen for a wide range of Indian snacks, appetizers, and main courses. From samosas to chaat to curries, you’ll find delicious and authentic Indian recipes to try at home.

    Explore more recipes on Manjula’s Kitchen: Vegetable Samosas, Paneer Tikka, Crispy Spinach Pakoras, Mango Lassi, Masala Chai, Gulab Jamun, Kheer (Rice Pudding)

  • Mysore Bonda

    Mysore Bonda

    Mysore Bonda

    Mysore bondas

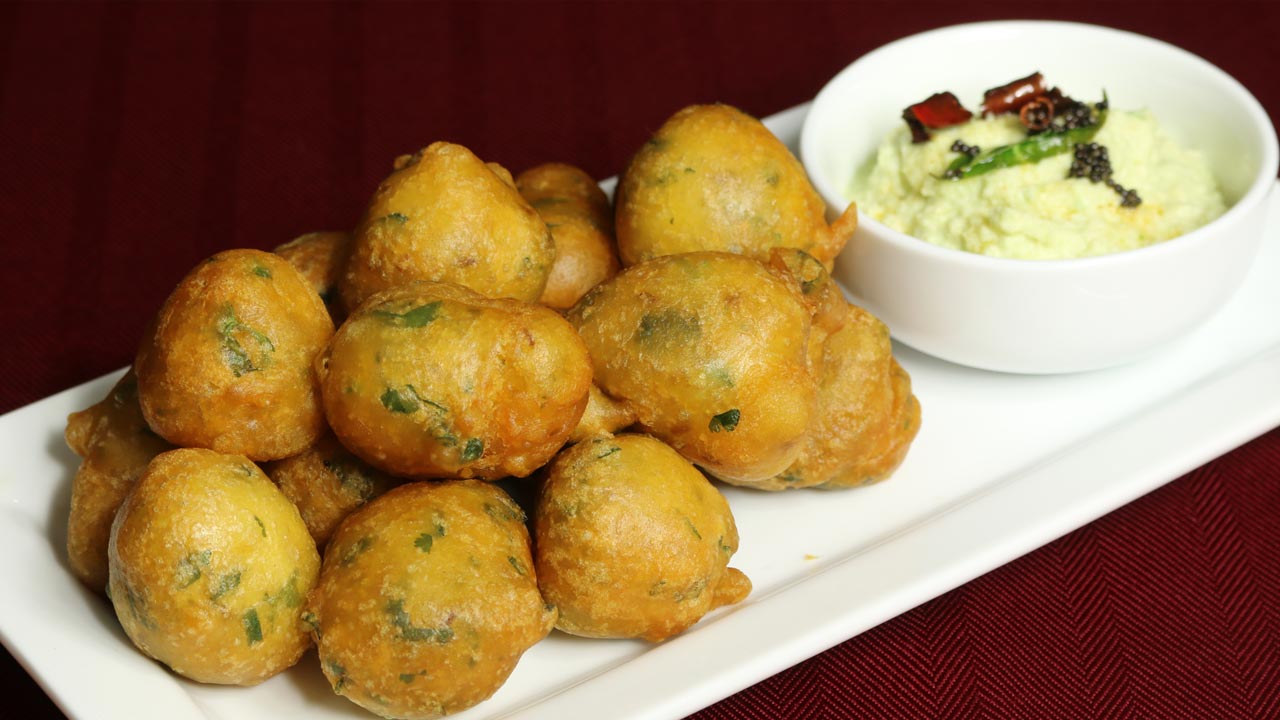
    Mysore bondas are south indian fried dumplings dish made with flour, yogurt and spices. They are crispy outside and fluffy inside. They make a delightful treat for any party or snack for tea time. Serve them with coconut chutney.
    No ratings yet
    Prep Time 10 minutes
    Cook Time 10 minutes
    Total Time 20 minutes
    Course Appetizer
    Cuisine Indian
    Servings 4 people

    Ingredients
      

    • 1 cup all purpose flour maida, plain flour
    • 1/4 cup rice flour
    • 1 tsp salt 1
    • 1/2 tsp baking soda
    • 1/2 tsp cumin seeds jeera
    • 1/2 cup yogurt, dahai sour curd works best
    • 3/3 cup water
    • 1 tsp finely chopped ginger
    • 1 tbsp finely chopped green chilies
    • 2 tbsp finely chopped cilantro hara dhania

    Oil to fry

    Instructions
     

    • To make batter, mix all the dry ingredients together, all-purpose flour, rice flour, salt, baking soda, and cumin seeds. Add yogurt mix it well add the water to make thick batter. Add remaining ingredients ginger, green chili, and cilantro. Set aside for about 15-20 minutes. Batter will be light and fluffy.
    • Heat the oil on medium heat. The frying pan should have about 1 inch of oil. To check if the oil is ready, put little batter in oil. The batter should sizzle and come up but not change color right away. If oil is very hot bondas will not cook through and will not be crispy.
    • Place about 2 tablespoon of batter into the oil with your fingers. Fry bondas in small batches. Fry them until golden-brown all around. This should take about 3-4 minutes.
    • Mysore bond a should be crispy from outside and should be soft inside.

    Notes

    Serve them with coconut Chutney.
    You will also enjoy Rava Idli another quick South Indian dish.
    Tried this recipe?Let us know how it was!

    Exploring the Delights of Mysore Bonda: A Flavorful South Indian Treat 

    Originating from the vibrant culinary landscape of South India, Mysore bonda is a delectable snack cherished for its crispy exterior and soft, fluffy interior. This beloved dish is a favorite among locals and has gained popularity worldwide for its irresistible taste and unique texture. Traditionally served as a tea-time snack or as part of a festive spread, Mysore bonda captivates food enthusiasts with its distinct flavors and comforting appeal.

    Directions: 

    To embark on the delightful journey of preparing Mysore bonda, follow these simple steps:

    • Gathering Ingredients: Start by assembling the necessary ingredients. You’ll need urad dal (black gram lentils), rice flour, finely chopped green chilies, chopped cilantro (coriander leaves), ginger paste, salt, and asafoetida (hing).
    • Preparing Batter: Begin by soaking urad dal in water for a few hours. Once soaked, drain the water and grind the urad dal into a smooth paste using minimal water. Transfer the paste into a mixing bowl and add rice flour, chopped green chilies, cilantro, ginger paste, salt, and a pinch of asafoetida. Mix the ingredients thoroughly to form a thick batter.
    • Frying Bonda: Heat oil in a deep frying pan or kadhai over medium heat. Once the oil is hot, take small portions of the batter and gently drop them into the oil using your fingers or a spoon. Fry the bondas until they turn golden brown and crispy on the outside, ensuring they are evenly cooked.
    • Draining Excess Oil: Once fried to perfection, remove the bondas from the oil using a slotted spoon and place them on a paper towel-lined plate to drain excess oil.
    • Serve Hot: Your crispy and fluffy Mysore bondas are now ready to be served. Enjoy them hot with coconut chutney or a tangy tomato sauce for a delightful culinary experience.

    Tips: 

    • For best results, ensure the consistency of the batter is thick enough to hold its shape when dropped into the hot oil.
    • Adding a pinch of baking soda to the batter can enhance the fluffiness of the bondas.
    • Use freshly ground urad dal for optimal taste and texture.

    Variations: 

    • Spice it up by adding grated carrots to the batter for extra flavor and crunch.
    • Experiment with different spices such as cumin seeds or curry leaves to customize the taste according to your preference.
    • For a healthier twist, try air-frying the bondas instead of deep-frying them.

    Suggestions: 

    • Serve Mysore bonda as a delightful appetizer or snack during gatherings or festive occasions.
    • Pair it with a piping hot cup of masala chai or filter coffee for an authentic South Indian culinary experience.
    • Garnish with freshly grated coconut or chopped cilantro for added visual appeal.

    FAQs: 

    Q: Can I use store-bought rice flour instead of grinding rice at home?

    A: Yes, you can use store-bought rice flour as a convenient alternative to grinding rice at home. However, freshly ground rice flour may yield better results in terms of texture and flavor.

    Q: Can I make the batter in advance and fry the bondas later?

    A: While it’s best to fry the bondas immediately after preparing the batter to retain their crispiness, you can refrigerate the batter for a few hours before frying. Just ensure to bring the batter to room temperature before frying.

    Q: Can I freeze leftover bondas for later consumption?

    A: Yes, you can freeze leftover bondas in an airtight container for up to a month. When ready to enjoy, simply reheat them in a preheated oven until heated through.

    Explore more appetizer recipes on Manjula’s Kitchen: Vegetable Samosas, Paneer Tikka, Crispy Spinach Pakoras, Mango Lassi, Masala Chai, Gulab Jamun, Kheer (Rice Pudding)

  • Homemade Pizza

    Homemade Pizza

    Homemade Pizza

    Home Made Pizza

    Pizza – who can name someone that does not enjoy pizza? Now has become a universal snack loved by all! There are so many variations of pizza. There are a number of recipes for pizza dough, sauce, and toppings. I like to make all my pizzas from scratch. There's nothing better than biting into that first slice of fresh, hot, homemade pizza. Its a great appetizer to be tried by all.
    5 from 1 vote
    Prep Time 30 minutes
    Cook Time 40 minutes
    Total Time 1 hour 10 minutes
    Course Main Course
    Cuisine Italian
    Servings 4 people

    Ingredients
      

    Dough

    • 2-1/2 cups all-purpose flour plain flour, maida
    • 1/2 tsp sugar
    • 1/2 tsp salt
    • 1-1/2 tbsp dry yeast
    • 3 tbsp olive oil preferred
    • 1 cup lukewarm water, use as needed
    • 2 tbsp all-purpose flour for rolling

    Sauce

    • 3 cups crushed tomatoes
    • 1 tsp Italian herbs
    • 1 tsp salt
    • 2 tsp sugar
    • 1/8 tsp black pepper
    • 1/4 tsp chili flake
    • 2 tsp corn starch

    For Topping

    • 2 cups shredded mozzarella cheese
    • 1 cup sliced bell pepper in small pieces capsicum, Shimla mirch
    • 1 cup sliced mushrooms

    Instructions
     

    Dough

    • Add the yeast to lukewarm water and set it aside for about 5 minutes, mix it well making sure yeast has dissolved.
    • Combine flour, sugar, salt and oil and mix. I am using food processor with dough blade to make dough. Note: for pizza dough should be knead well, you can use standing mixer with a dough attachment, or make the dough by hand.
    • Add yeast water run the food processor for 4-5 minutes, stopping every minute for few seconds. Make sure dough is very soft but not sticky if needed add more water or if it is too sticky add little more flour. When dough is ready add 1 tablespoon of oil and run the food processor for about half a minute more.
    • Take out the dough over floured surface and knead the dough until smooth and elastic will take about 3-4 minutes.
    • Grease large bowl with oil, and oil the dough all around lightly, cover the bowl. Set aside the dough in a warm area, for about two hours, dough should be double in size.
    • Knead the dough again over lightly floured surface and divide the dough into 2 equal parts. And let them rest for 3-4 minutes, before rolling. 

    Making Sauce

    • Add oil into a pan over medium high heat. Add Italian herbs, black pepper, and chili flakes stir for few seconds add tomatoes, salt and sugar. Cook until tomatoes have become mushy and most of the water from tomatoes has evaporated. Mix the corn starch with 2 tablespoons of water and add to the tomatoes. Reduce the heat to low stir the sauce for few minutes until sauce becomes the consistency of soft batter. If tomatoes are too sour use little more sugar. Set aside.

    Preparing the Pizza

    • Preheat the oven at 425 degree F (225 Celsius). Grease the pizza pan, I am using 14 inch pan. 
    • Lightly flour roll into a 13 inch circle. Transferred to greased 12-in. pizza pan; build up edges slightly. Lightly greased the rolled dough, this helps making the pizza crisp.
    • Spoon a few tablespoons of sauce into the center of the pizza and use the back of a spoon to spread it out to within one inch of edges. Spread your toppings bell pepper, mushrooms, sprinkle the cheese.
    • Bake for 15 to 18 minutes depend on the oven, until the golden brown. Slice and serve.

    Notes

    Notes
    When you make pizza and crust comes out soggy every time, did not cook well and you don’t know what you are doing wrong!  For that bake the pizza before adding any topping or sauce at 375° for about 10 minutes or until lightly browned. Spread sauce and topping bake again for about 10 minutes or until pizza is done.
    Also check the recipe for pasta  Butternut squash Pasta, Creamy Spinach Pasta, stove top pizza  
    Keyword Home Made Sauce, Kid Friendly, Vegetable Pizza
    Tried this recipe?Let us know how it was!

  • Cauliflower with Yogurt Gravy

    Cauliflower with Yogurt Gravy

    Cauliflower with Yogurt Gravy

    Cauliflower with Yogurt Gravy

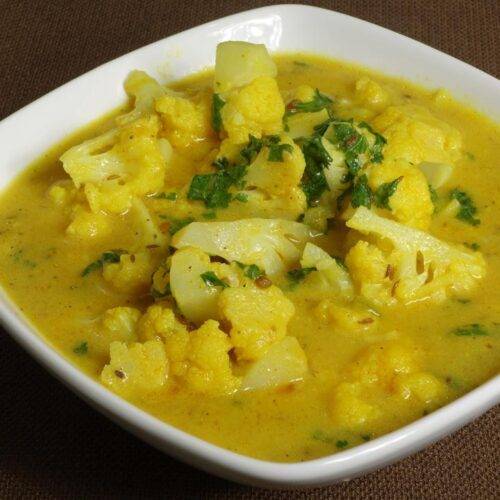
    Cauliflower in spiced yogurt gravy makes a very flavorful side dish. This dish is simply delicious and worth trying. You can serve this with any bread or rice.
    5 from 1 vote
    Course curry
    Cuisine Indian
    Servings 4 people

    Ingredients
      

    • 3 cup cauliflower cut into small florets (phool gobi)
    • 3 tbsp oil
    • 1/2 tbsp cumin seeds (jeera)
    • 1/4 tbsp fenugreek seeds (methi dana)
    • 1/4 tbsp mustard seeds (rai)
    • 1/8 tbsp asafetida (hing)
    • 2 tbsp besan, available in Indian grocery stores
    • 1/4 tbsp turmeric (haldi)
    • 1/4 tbsp red chili powder
    • 1 tbsp ginger thinly sliced (adrak)
    • 1 green chili finely chopped
    • 1/2 cup yogurt (curd, dahi)
    • 1 tbsp salt
    • 1/2 tbsp sugar
    • Approx. 1 cup water
    • 2 tbsp cilantro chopped (hara dhania)
    • 1/4 tbsp garam masala, available in Indian grocery stores

    Instructions
     

    • Heat the oil in a saucepan over medium high heat. Test the heat by adding one cumin seed to the oil. If the cumin seed cracks right away, the oil is ready.
    • Add cumin, fenugreek, mustard seeds, and asafetida. When the seeds crack, lower the heat to low.
    • Add the besan, stir fry for about one minute until besan becomes light golden brown and becomes lightly aromatic.
    • Add ginger, green chili, turmeric, red chili powder, stir fry for about one minute and add yogurt mix it well and cook for two minutes stirring continuously.
    • Add water and salt bring it to boil, add cauliflower cook 15-18 minutes, stirring occasionally. Cauliflower should be tender and the gravy should be thick. Adjust the thickness of the gravy to taste.
    • Turn off the heat, add cilantro and garam masala and cover the pan for a minute.
    • Cauliflower with yogurt gravy is ready. Serve with any bread or plain rice.
    Tried this recipe?Let us know how it was!