Category: Quick & Easy

Easy Indian Recipes: Quick and Delicious Vegetarian Dishes

In today’s fast-paced world, we often find ourselves seeking meals that are quick to prepare but still bursting with flavor. Indian cuisine, known for its rich and aromatic spices, offers a plethora of options that are both easy to make and incredibly satisfying. Let’s explore some easy Indian recipes vegetarian, perfect for any occasion, ensuring that you can enjoy delicious easy Indian recipes without spending hours in the kitchen.

Paneer Bhurji

Paneer Bhurji is a delightful scramble made with crumbled paneer (Indian cottage cheese) and a mix of vegetables and spices. This dish is a staple in many Indian households and is a fantastic example of easy Indian recipes. It comes together quickly, making it ideal for a weeknight dinner or a hearty breakfast. Serve it with a side of warm roti or toast for a complete meal.

Vegetable Pulao

For a one-pot wonder, Vegetable Pulao is a go-to choice. This dish features rice cooked with a medley of vegetables and fragrant spices. It’s a shining star among easy Indian food recipes due to its simplicity and the minimal effort required. Pair it with a cooling cucumber raita from the Raita Recipes category for a refreshing touch.

Aloo Jeera

Aloo Jeera, or cumin-spiced potatoes, is a quick and flavorful dish that exemplifies Indian food recipes easy. The potatoes are sautéed with cumin seeds and a handful of spices, resulting in a dish that’s both comforting and satisfying. This recipe is perfect for those times when you need something delicious without a lot of fuss.

Enhancing Your Quick and Easy Menu

To elevate your menu, why not include some delectable options from other categories? Indian Breads like chapati or naan can be quickly prepared and make a perfect accompaniment to any meal. For those with a sweet tooth, Indian Desserts Recipes such as a speedy coconut burfi or a delightful mango lassi can provide a sweet finish to your meal. Incorporating dishes from the Healthy Recipes section, such as a simple and nutritious palak dal or a crisp salad from the Soups and Salads Recipe category, can add a healthy balance to your table.

More Easy Indian Recipes

Chana Masala

Chana Masala is a popular dish featuring chickpeas cooked in a spiced tomato gravy. This dish is not only delicious but also quick to prepare, making it a favorite in the realm of easy Indian recipes vegetarian. Serve it with basmati rice or naan for a complete meal.

Moong Dal Khichdi

For a comforting and nourishing option, Moong Dal Khichdi is a must-try. This simple dish made from rice and yellow moong dal (split yellow lentils) is seasoned with basic spices and is incredibly easy to make. It’s perfect for those days when you want something light yet satisfying.

Sweet and Simple Endings

Sheera

Sheera is a traditional Indian dessert made with semolina, ghee, and sugar. It’s a quick and easy dessert that fits perfectly into the category of easy Indian food recipes. The best part? It takes just a few minutes to prepare, making it a great option for last-minute sweet cravings.

Coconut Ladoo

Another sweet treat that’s both simple and delightful is Coconut Ladoo. Made with grated coconut and condensed milk, these sweet balls are a favorite among easy Indian recipes vegetarian. They’re perfect for festivals or just as a quick dessert to satisfy your sweet tooth.

Frequently Asked Questions (FAQs)

Q: What are some popular easy Indian recipes vegetarian? 

A: Some popular easy Indian recipes vegetarian include Paneer Bhurji, Vegetable Pulao, Aloo Jeera, Chana Masala, Moong Dal Khichdi, Sheera, and Coconut Ladoo. These dishes are quick to prepare and full of flavor.

Q: How can I make traditional Indian food recipes easy? 

A: To make traditional Indian food recipes easy, look for recipes that require minimal ingredients and cooking time. Dishes like Paneer Bhurji, Aloo Jeera, and Moong Dal Khichdi are great examples of easy and quick Indian recipes.

Q: What are some easy Indian food recipes for beginners? 

A: Some easy Indian food recipes for beginners include Vegetable Pulao, Chana Masala, and Coconut Ladoo. These recipes are straightforward and don’t require advanced cooking skills, making them perfect for those new to Indian cooking.

Q: Can I prepare easy Indian recipes in advance? 

A: Yes, many easy Indian recipes can be prepared in advance. Dishes like Vegetable Pulao and Chana Masala can be made ahead of time and stored in the refrigerator. Simply reheat before serving.

Q: What are some quick Indian desserts? 

A: Some quick Indian desserts recipes include Sheera and Coconut Ladoo. These desserts are easy to make and require minimal preparation time, making them perfect for when you need a sweet treat in a hurry.

Conclusion

Easy Indian recipes vegetarian offer a world of flavors and aromas without the lengthy preparation time. 

Whether you’re looking for easy Indian recipes, easy Indian food recipes, or specific Indian food recipes easy, these dishes bring convenience and deliciousness to your table. 

So, gather your ingredients, try out these recipes, and enjoy the rich and diverse world of Indian cuisine. Happy cooking and happy eating!

By incorporating these dishes into your menu, you’ll be able to enjoy a wide variety of delicious and nutritious foods. Whether you’re looking for quick snacks, main courses, or desserts, there’s an easy Indian recipe to suit every taste. 

Don’t forget to check out Manjula’s Kitchen for more inspiration and culinary delights. Happy cooking and happy eating!

  • Missa Paratha

    Missa Paratha

    Missa Paratha (Kala Chana Paratha Roti)

    Missa paratha is a traditional North Indian bread. At our house, this recipe was a staple. Adding spices to the dough makes these parathas very enjoyable. Missa Paratha is often mistaken by besan ka paratha. Missa atta (flour) is made with whole gram with the skin on and besan is made with split gram without skin. This makes a very noticeable difference in the flavor and texture of the paratha. This bread is healthy and a better substitute for people who are diabetic. I decided to use whole chana instead of buying the flour, which is not readily available. This also gives a better taste. You can also try spices of your choice. These parathas pair well with gravy-based dishes like Mixed Dal and Aloo Tamatar. Finish this great meal with Salted Mint Lassi, which is a good complement. I also enjoy these parathas with a simple cup of hot chai. This recipe will make 6 parathas.
    No ratings yet
    Prep Time 15 minutes
    Cook Time 15 minutes
    Course Bread
    Cuisine Indian
    Servings 6 parathas

    Ingredients
      

    • ½ cup black gram flour Kala chana
    • cup whole wheat flour roti ka atta, use as needed
    • ½ inch ginger chopped
    • 1 green chili chopped adjust to taste
    • ½ tsp salt
    • tsp asafetida hing
    • ½ tsp cumin seeds jeera
    • 3 tbsp oil for cooking

    Instructions
     

    • Soak chana for about 4 hours. Grind the chana with ginger and green chili to the paste using water as little possible. I used about 1/2 cup of water.
    • Mix all the ingredients for paratha together, whole wheat flour, cumin seeds, salt, and asafetida.
    • Make the dough mixing everything together if needed add more flour, knead the dough. Oil your both palm and roll the dough between your palms.
    • Dived the dough into 6 equal parts, oil your palm and roll them between your palms, to make them round petties.
    • Roll dough ball into a 3” circle. Spread about 2 drops of oil and pull the edges of the dough to wrap. Repeat to make all six balls.
    • Roll the patty in dry whole-wheat flour. Press it a little and start rolling on a clean surface to about 6 inches in diameter.
    • Place the Paratha over the skillet. When you see the color change and the paratha will puff in different places. Turn the paratha over.
    • The paratha should have golden-brown spots. Wait a few seconds and put about 1 teaspoon of oil and spread with a spatula.
    • Flip it again and lightly press it with a spatula. Flip again and press with the spatula making sure the paratha is golden-brown on both sides.
    • Repeat same process for the remaining.
    Tried this recipe?Let us know how it was!

    How To Make Missa Parantha Recipe – Manjula’s Kitchen

    Missa paratha is a traditional flatbread from North India. It’s made with wheat flour, spices, and leftover yellow dal tadka. Missa paratha is often confused with besan ka paratha, but the two are different. Missa atta (flour) is made from whole gram with the skin on, while besan is made from split gram without skin. Preparing Missa Paratha is a delightful process that involves a few simple steps. Let’s break it down in detail:

    Step 1: Soaking the Chana

    To begin, soak the chana (chickpeas) for about 4 hours. This soaking step is important as it softens the chana, making it easier to turn into a paste later on. Patience is key here, as giving the chana enough time to soak will make the entire process smoother. So, just let them soak and you’re on your way to making a fantastic dish!

    Step 2: Grinding the Chana Paste

    Once your chickpeas have soaked, grind them up with ginger and green chili. The key is to make a smooth paste, and try to use as little water as you can – about half a cup should do the trick. Grinding it all together will give your dish a tasty and smooth texture.

    Step 3: Mixing Missa Parantha Ingredients

    Alright, let’s get into making the delicious Missa Paratha. First, gather the simple ingredients: whole wheat flour, cumin seeds, salt, and a dash of asafetida. Now, mix them all up to create the foundation for your tasty Missa Paratha.

    Step 4: Creating the Dough

    Combine the mixed ingredients to make the dough. If necessary, add more flour to achieve the right consistency. Knead the dough thoroughly to ensure a uniform texture. To prevent sticking, oil your palms before rolling the dough between them.

    Step 5: Dividing and Shaping Dough

    Now, take the dough you’ve prepared and split it into 6 equal parts. To make things easier, put a bit of oil on your palms – it helps! With your oiled hands, roll each part between your palms, shaping them into round patties. This simple step ensures that all your portions are the same size, making the next part, where you roll them out, much simpler. So, oil up your hands, divide the dough, and roll those parts into neat, round patties – it’s the key to uniform and manageable dough balls!

    Step 6: Rolling the Paratha

    To shape each dough ball into a peda, start by rolling it into a circle about 3 inches in diameter. For an extra burst of flavor and a delightful texture, gently spread about 2 drops of oil onto the dough. Now, carefully pull the edges of the dough towards the center, wrapping it neatly to form a round peda. Repeat this process for all six dough balls, ensuring each one gets the same delicious treatment. This simple yet crucial step adds a lovely touch to your pedas, making them even more irresistible. Enjoy the process of crafting these delightful treats!

    Step 7: Coating in Flour and Rolling Further

    Roll each patty in dry whole-wheat flour. Press it lightly and start rolling on a clean surface until it reaches approximately 6 inches in diameter. This step adds a thin layer and enhances the texture of your Missa Paratha.

    Step 8: Cooking on Skillet

    Now, it’s time to cook. Place the paratha on a hot skillet. Watch for a change in color and puffiness in different places. When you observe these signs, it’s time to flip the paratha over. The aim is to achieve golden-brown spots on both sides.

    Step 9: Adding Oil and Pressing

    Once flipped, wait a few seconds, then add about 1 teaspoon of oil. Spread it evenly with a spatula. Flip it again and lightly press it with the spatula. The goal here is to ensure that the Missa Paratha is golden-brown on both sides. This process adds flavor and a delightful crispiness to your Missa Paratha.

    Step 10: Repeat the Process

    Keep the momentum going by repeating the same process for the rest of your dough balls. This step is crucial for maintaining a consistent flavor and texture in all your Missa Parathas. Just follow the same easy steps you did for the first batch – roll out the dough, add the delicious filling, and cook them up to perfection. This ensures that each parantha on your plate is as tasty and delightful as the last one, giving you a uniform and satisfying dining experience. So, keep at it, and soon you’ll have a batch of wonderfully consistent Missa Paranthas ready to be enjoyed!

    In conclusion, making Missa Paratha involves a series of straightforward yet crucial steps, from soaking and grinding the chana to crafting the perfect dough and achieving that golden-brown finish on the skillet. It’s a process that rewards attention to detail and patience, resulting in a delicious and satisfying Indian flat bread. Enjoy your homemade Missa Parathas!

    You might also like: Punjabi Aloo Paratha, Sooji Ka Halwa, Salted Mint Lassi, Mixed Dal

  • Banaras Tamatar Ki Chaat

    Banaras Tamatar Ki Chaat

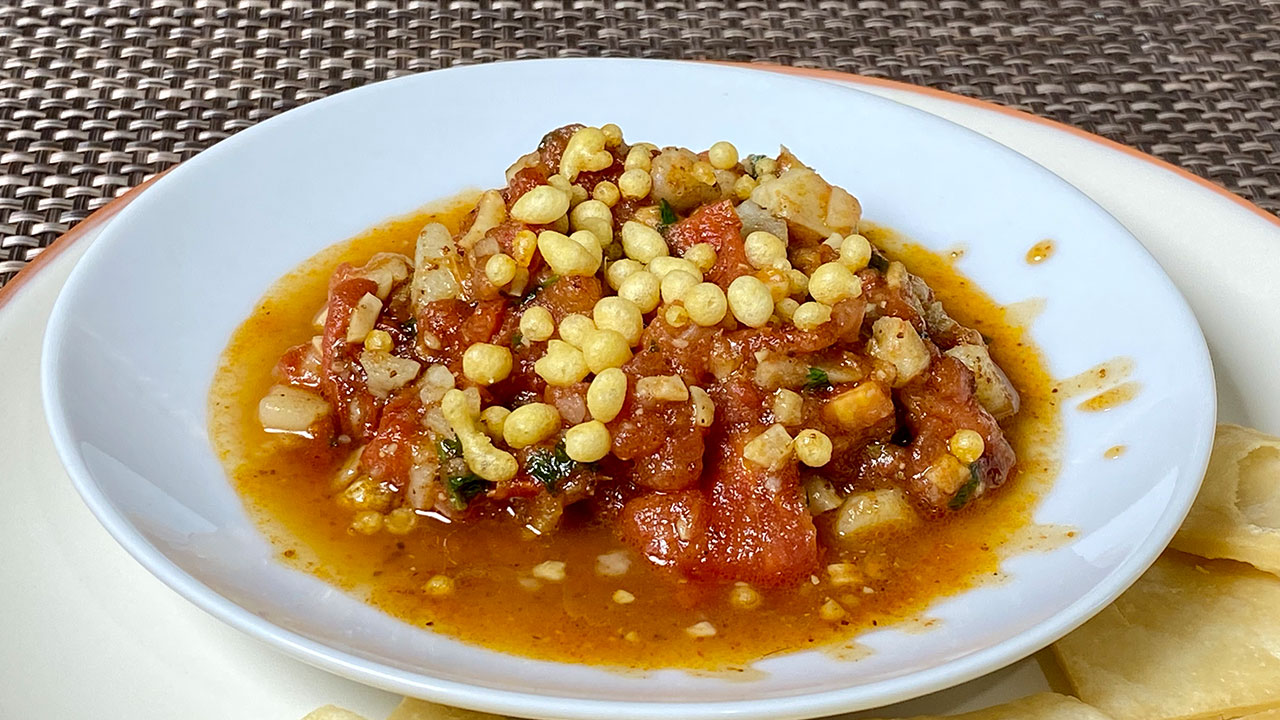
    A bowl of Banaras Tamatar Ki Chaat garnished with fresh coriander and sev

    Banaras Tamatar ki Chaat

    Tamatar ki Chaat is a popular street chaat from Banaras. This vegan and gluten free tomato chaat is a unique dish that bursts with flavor. It is made with a delectable combination of tomatoes, potatoes, nuts, spices and drizzled with a spicy sugar syrup. I ate this chaat almost a decade ago while visiting Banaras and can remember the unique flavor till today! The unforgettable flavors of this chaat made me want to see if I could recreate it! After several tries, I feel like I came pretty close to making this dish how I remember it. I served it at a recent lunch with friends and was overwhelmed at the positive response. My friends raved about this chaat and insisted I do the video recipe for it as soon as possible. Make sure to try. Tamatar ki Chaat and tell me what you think!
    4.50 from 4 votes
    Prep Time 10 minutes
    Cook Time 15 minutes
    Total Time 25 minutes
    Course Chaat
    Cuisine Indian
    Servings 4 people

    Equipment

    Circulon Acclaim Hard Anodized Nonstick Stir Fry Wok Pan, 12 Inch, Black
    Rani Garam Masala Indian 11-Spice Blend

    Ingredients
      

    • 3 cup tomatoes chopped into small pieces
    • 1 cup potatoes boiled and roughly mashed
    • 3 Tbsp oil
    • 2 Tbsp cashew crushed
    • 1 Tbsp ginger chopped adrak
    • 1 Tbsp green chili finely chopped
    • ¼ tsp black pepper powder kaali mirch
    • ½ tsp red chili powder
    • ½ tsp roasted cumin seeds powder
    • 1 tsp salt
    • 1 tsp black salt
    • 1 tsp garam masala
    • 1 Tbsp sugar
    • ¼ cup cilantro chopped
    • 1 tsp lemon juice

    Spicy Sugar syrup

    • ½ cup water
    • ¼ cup sugar
    • ¼ tsp roasted cumin powder
    • ¼ tsp chili powder
    • ¼ tsp salt
    • ¼ tsp black salt

    For Garnishing

    • ¼ cup boondi

    Instructions
     

    Spicy Syrup

    • In a saucepan boil all the syrup ingredients water, sugar, salt, black salt, chili powder, lemon juice and cumin powder over medium heat. Mix well and boil for about 5 minutes or until syrup is sticky. Set aside, (we will use this later for garnishing)

    For making tamatar ki chaat

    • In a frying pan heat the oil over low medium heat. Add cashew powder, ginger, green chili, and red chili powder stir fry for about 30 seconds.
    • Next add tomato, salt, black salt, black pepper, cumin powder and stir for 2 minutes, add ½ cup of water and bring it to boil, boil over medium heat about for 3 minutes or until tomatoes soften slightly.
    • Now add potato mix gently cover the pan and let it cook for about 3 minutes until tomatoes are soft but not mushy, and oil starts to separate. Notes: Make sure do not mash tomatoes and potatoes completely, as we need to enjoy the bite of tomatoes and potatoes.
    • Add cilantro garam masala, lemon juice and sugar. mix well.
    • Tomato chaat is ready. Banarsi tamatar chaat tastes the best when sweetness and tanginess is well balanced. Taste and adjust salt sugar and lemon juice. Very aromatic
    • For servingtamatar chaat: in an individual serving bowl take about ¼ cup of tamatar ki chaat, top with about 2 tablespoons of syrup and boondi. Chaat without chutney, I am using spicy syrup instead of chutney.

    Notes

    • Make sure do not mash tomatoes and potatoes completely, as we need to enjoy the bite of tomato and potatoes
    • Banaras tamatar chaat tastes the best when sweetness and tanginess is well balanced.
    If you enjoy spicy snacks, you should also try sweet potato chaat,
    Tried this recipe?Let us know how it was!


    How to make Banarasi Tamatar Chaat Recipe – Manjula’s Kitchen


    Banarasi Tamatar Chaat is a flavorful and spicy vegan tomato-based chaat (savory snack) that originates from Banaras or Varanasi, a city in the northern part of India. It is a popular gluten free street food known for its distinctive taste and the unique combination of sweet, tangy, and spicy flavors. To prepare Banarasi Tamatar Chaat, follow this tamatar chaat recipe:

    Spicy Syrup:

    To create the syrup for our dish, start by gathering your ingredients. In a saucepan, combine water, sugar, salt, black salt, chili powder, lemon juice, and cumin powder. These elements will come together to form a flavorful and balanced syrup. Once all the ingredients are in the saucepan, place it over medium heat. The goal here is to allow the mixture to cook and meld, developing a harmonious blend of sweet, salty, spicy, and tangy flavors. Cooking it over medium heat ensures a gradual and even infusion of these elements. 

    As the saucepan warms up, keep a close eye on the mixture. Stir occasionally to help the sugar dissolve and to ensure that all the ingredients are well incorporated. The heat will play a crucial role in transforming these individual components into a cohesive syrup that will elevate the overall taste of our dish. Stir the ingredients well to ensure they are thoroughly mixed. Allow the mixture to come to a boil and then let it simmer for about 5 minutes. Keep a close eye on it to make sure the syrup reaches a sticky consistency. 

    Once the syrup achieves the desired stickiness, remove the saucepan from the heat. This syrup will be set aside and used later for garnishing. It adds a flavorful touch to our dish. Now that the syrup is ready, you can move on to the next steps of your recipe.

    Tamatar Ki Chaat:

    Let’s explore further as we create the delectable Banaras Tamatar Chaat, a delightful dish featuring the vibrant combination of tomatoes and aromatic spices. Follow these detailed steps to bring this tantalizing Tamatar ki Chaat to life.

    1. Heating the Oil:

    Begin by heating oil in a frying pan over low to medium heat. Allow it to warm up, setting the stage for the rich flavors to unfold.

    2. Adding Aromatic Ingredients:

    Once the oil reaches the right temperature, introduce cashew powder, ginger, green chili, and red chili powder. Stir-fry this aromatic mix for about 30 seconds, letting the spices infuse the oil with their essence.

    3. Incorporating Tomatoes and Spices:

    Add tomatoes to the pan, along with salt, black salt, black pepper, and cumin powder. Stir this flavorful combination for a duration of 2 minutes, allowing the spices to mingle with the tomatoes.

    4. Introducing Water and Simmering:

    Pour in half a cup of water to the pan. Bring it to a gentle boil and let it simmer over medium heat for 3 minutes or until the tomatoes slightly soften. This simmering process enhances the infusion of flavors.

    5. Adding Potatoes:

    Gently fold in the potatoes, ensuring they are coated with the aromatic tomato-spice mixture. Cover the pan and let it cook for approximately 3 minutes. Aim for the tomatoes to be soft but not mushy, and observe the oil starting to separate, a sign of the dish’s richness.

    6. Preserving Texture:

    As you stir, be mindful not to mash the tomatoes and potatoes completely. Preserving their texture is key to the appeal of Banarasi Tamatar Chaat.

    7. Final Touch:

    Elevate the flavors with a final touch. Add cilantro for freshness, garam masala for warmth, lemon juice for a zesty kick, and a hint of sugar to balance the savory notes. Mix everything thoroughly, allowing the ingredients to harmonize.

    8. Adjusting Sweetness and Tanginess:

    Before presenting your Banarasi Tamatar ki Chaat, take a moment to taste and adjust. Fine-tune the sweetness, tanginess, and salt levels to achieve a well-balanced and harmonious flavor profile.

    The Banaras Tamatar Chaat recipe is a symphony of textures and flavors. The careful combination of spices, the gentle simmering, and the final touch of freshness and warmth create a dish that captures the essence of Banaras (Varanasi), known for its rich culinary heritage. As you savor each bite of this Tamatar Chaat, you’ll experience the unique and delightful taste that defines this iconic recipe. Enjoy the journey of creating and relishing the Banarasi Tamatar ki Chaat in your own kitchen!

    If you enjoy spicy snacks, you should also try Sweet potato chaat, Khasta Kachori Besan, Crispy Vegetable Pakoras, Dahi Puri Chaat & Bread Dahi Vada

  • Moong Dal Halwa

    Moong Dal Halwa

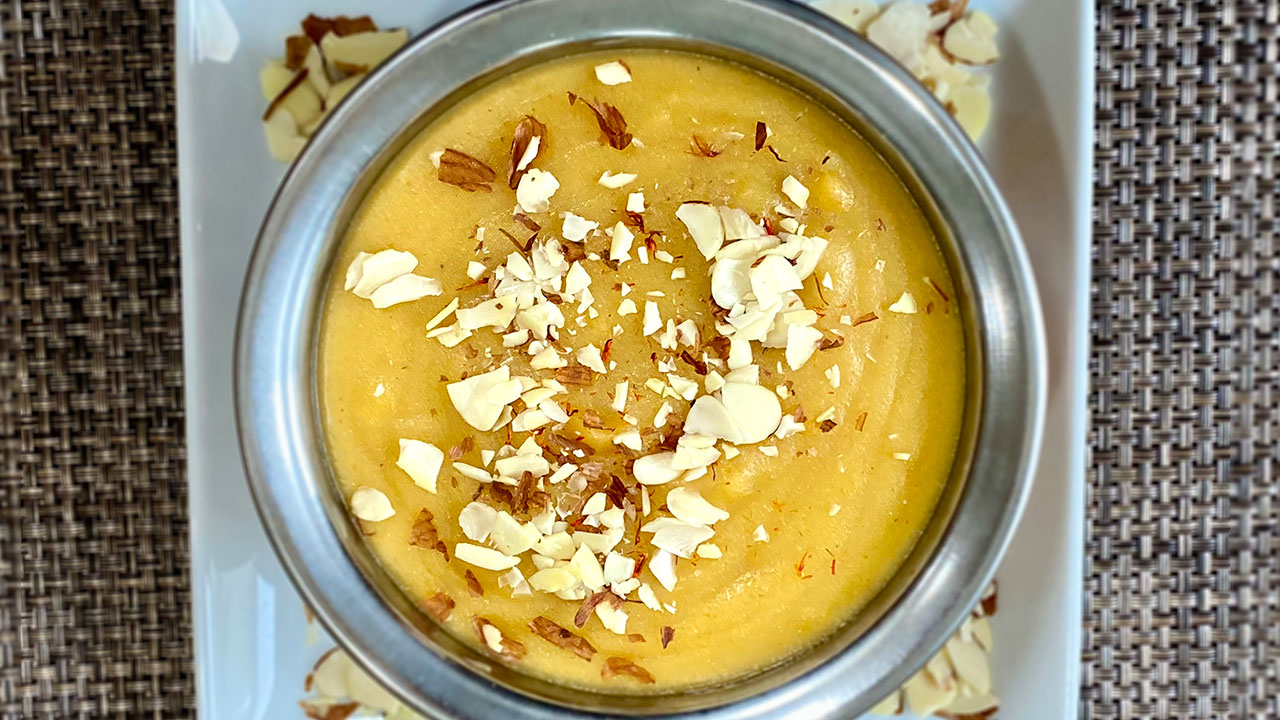
    A bowl of rich and creamy Moong Dal Halwa garnished with chopped nuts

    Moong Dal Halwa (vegan)

    Moong Dal Halwa is a delicious and festive sweet from North India. It is a rich, creamy pudding-like dessert. I like Moong Dal Halwa, but it is a long process and for me stirring the halwa was becoming difficult. While trying to make the process easy I also decided to make it vegan. I was happily surprised by the result. This is a must to try the recipe. This recipe will serve 4.
    5 from 1 vote
    Prep Time 5 minutes
    Cook Time 15 minutes
    Total Time 20 minutes
    Course Dessert
    Cuisine Indian
    Servings 4 people

    Ingredients
      

    • ½ cup split yellow Moong dal washed
    • ¼ cup grapeseed oil is my preferred oil
    • ½ cup sugar
    • 1/8 tsp cardamom powder
    • few strands saffron optional
    • 2 ½ cups water

    For Garnishing

    • 2 tsp sliced almonds

    Instructions
     

    • Clean the moong dal rubbing with a moist towel.
    • Boil water and sugar in a pan over medium heat, for about 2 minutes. Remove from heat. Add cardamom powder and saffron set aside.
    • In a heavy bottom frying pan, roast moong dal over medium-low heat. Keep stir-frying till it’s light brown in color and becomes aromatic. Make sure to cook on low heat otherwise dal will not be toasted inside. This will take about 8 minutes. Remove from heat and let it cool to room temperature.
    • Once dal comes to room temperature, grind it to a powder lightly grainy.
    • In a heavy bottom frying pan, add oil and roasted moong dal powder, mix it well, and again roast over medium low heat for about 3 minutes. Dal will become dark in brown. Notes: After adding the syrup color will become a little lighter.
    • Add syrup to the dal, a little at a time. The syrup will splatter as you are adding syrup, keep stirring and mix it well, cook for 2-3 minutes. Halwa should be the texture of soft sticky dough.
    • Serve the halwa warm.

    Notes

    If you are not vegan and want to use clarified butter (ghee), replace the oil with 1/3 cup of ghee rest of the recipe remains the same.
    I have tried many different oils and vegan butter, but I prefer grape seed oil. It has become a preferred oil to make any vegan dessert.
    For making the halwa, traditional way is a long process and requires lots of work from the hands. For me, stirring the halwa was becoming difficult. You must soak dal for a few hours and grind it to a smooth paste. Then, cook over low heat with ghee, stirring continuously for about 40 minutes. The whole process not including soaking dal takes about one hour.
    If you enjoy Indian sweets and you are on the dairy-free diet you should also try:
    Tried this recipe?Let us know how it was!

    Indulge in the Richness of Vegan Moong Dal Halwa

    Moong Dal Halwa is a classic Indian dessert known for its rich flavour and indulgent texture. This vegan version of Moong Dal Halwa is a perfect way to enjoy the traditional dessert while adhering to a plant-based diet. In this article, we’ll explore the essence of this delightful vegan moong dal halwa recipe, its origins, health benefits, and tips for making it at home.

    The Essence of Vegan Moong Dal Halwa

    The vegan moong dal halwa is made with split yellow moong dal (lentils), grape seed oil or other instead of ghee and a blend of aromatic spices. This dessert is known for its creamy texture and rich taste, making it a perfect treat for festive occasions or any time you crave something sweet and indulgent.

    Origins and Cultural Significance

    Moong Dal Halwa has been a staple in Indian households for centuries, often prepared during festivals and special celebrations. This dessert is particularly popular in North India, where it is enjoyed during winter months to provide warmth and nourishment. The vegan version retains all the traditional flavours and textures while offering a plant-based alternative.

    Tips for the Perfect Vegan Moong Dal Halwa

    Soak the Lentils: Soaking the moong dal overnight or for at least a few hours helps in reducing the cooking time and achieving a smooth texture for the halwa.

     Use High-Quality Ingredients: Using fresh and high-quality ingredients like organic coconut milk, pure saffron, and freshly ground cardamom will enhance the flavour of the vegan moong dal halwa recipe.

    Patience is Key: Cooking moong dal halwa requires patience as it needs to be cooked on low heat with constant stirring to prevent sticking and ensure even cooking.

    Health Benefits of Moong Dal Halwa

    Moong dal is a powerhouse of nutrients, rich in protein, fibre, and essential vitamins. This makes moong dal halwa not just delicious but also nutritious. The use of coconut or almond milk adds healthy fats and a creamy texture without any dairy. For more health-focused recipes, check out Millet Soup (Bajra Raab) and Sweet Potato Chaat.

    Variations to Try

    While the classic vegan moong dal halwa is delightful on its own, you can experiment with various ingredients to create interesting variations. Adding nuts like almonds, cashews, or pistachios can add a delightful crunch to the halwa. You can also flavor the halwa with different essences like rose or kewra for a unique twist. For more creative ideas, explore Vegetable Biryani and Spicy Indian Flour Chips.

    Pairing and Serving Suggestions

    This vegan moong dal halwa is best enjoyed warm, garnished with chopped nuts and a sprinkle of saffron strands. It pairs wonderfully with a cup of masala chai or as a sweet ending to a festive meal. You can also serve it alongside other Indian sweets like Dodha Burfi (Punjabi Milk Fudge) or Sweet and Sour Guava Curry for a delightful dessert spread.

    Frequently Asked Questions

    Q: Can I make this halwa ahead of time?

    A: Yes, the vegan moong dal halwa can be made ahead of time and stored in the refrigerator for up to a week. Reheat it on low heat before serving, adding a splash of coconut milk if needed.

    Q: Is this halwa suitable for freezing?

    A: Absolutely. This halwa freezes well. Simply cool it completely before transferring it to a freezer-safe container. It can be frozen for up to two months. Thaw in the refrigerator overnight before reheating.

    Q: How can I adjust the sweetness of the halwa?

    A: You can adjust the sweetness of the halwa by adding more or less sugar according to your taste. You can also use natural sweeteners like jaggery or maple syrup as alternatives.

    Conclusion

    The vegan moong dal halwa recipe is a fantastic way to enjoy a traditional Indian dessert with a plant-based twist. Whether you’re a seasoned cook or a beginner, this indulgent dessert is sure to impress. With its rich flavours and creamy texture, this dish is perfect for any celebration or a special treat. For more exciting recipes and variations, explore other delightful dishes like Masala Bell Pepper Curry, Vegetable Biryani, and Spicy Indian Flour Chips. Enjoy the journey of flavors and happy cooking!

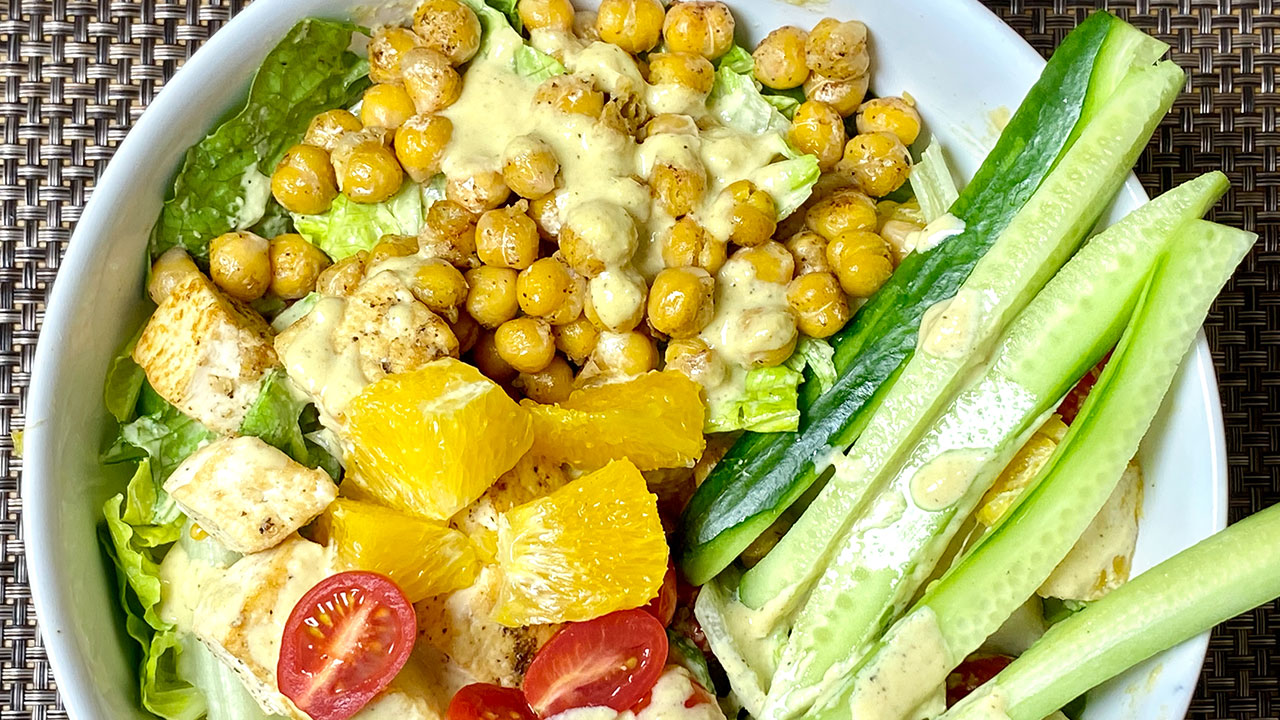
  • Healthy Chickpea And Tofu Salad

    Healthy Chickpea And Tofu Salad

    A bowl of Healthy Chickpea and Tofu Salad with fresh vegetables and herbs

    Healthy Chickpea And Tofu Salad

    Chickpea and tofu salad is a new favorite in our family. It is both heart healthy and delicious. It's packed with plant protein and fiber and is also a great option for those who are vegan and gluten free. These days everyone in my family is eating clean and will usually ask me to make a salad bowl. This colorful and delicious salad has become part of my salad recipes. There’s nothing like a fresh salad. Salads are of course healthy and contrary to popular belief they can be quite filling and satisfying! This particular salad is a combination of greens, cucumber, tomatoes, and some fruit which gives it a fresh taste. Add in some chickpeas and tofu with my special homemade dressing and you have a great meal! It’s unbelievably tasty and nutritious too! I love eating leftovers all week long. This super delicious salad is full of flavor and textures and is really easy to prepare.
    This recipe will serve 4.
    Prep time 20 minutes.
    Assembly time is 5 minutes.
    4.34 from 3 votes
    Prep Time 20 minutes
    Cook Time 5 minutes
    Course Salad
    Cuisine Fusion
    Servings 0

    Equipment

    Blendtec Classic Blender
    butane stove
    All-Clad Fry Pan

    Ingredients
      

    For salad dressing

    • ¼ cup fresh lemon juice
    • ¼ cup roasted sesame seeds
    • 2 Tbsp nutritional yeast
    • ¼ cup olive oil
    • ¼ tsp salt
    • ¼ tsp black pepper
    • 2 tsp sugar
    • 1 Tbsp ginger finely shredded
    • 2 Tbsp fresh orange juice

    Tofu

    • 6 oz firm tofu
    • ¼ tsp salt
    • ¼ tsp black pepper
    • 1 Tbsp ginger finely shredded
    • 2 tsp lemon juice

    Chickpeas

    • 15 oz can of chickpea
    • 1 Tbsp oil
    • ¼ tsp salt
    • ¼ tsp black pepper
    • 1 tsp lemon juice
    • 1 tsp ginger juice

    Other Salad Ingredients

    • 1 cup romaine lettuce roughly chopped
    • ½ cup spinach leaves roughly chopped
    • ¼ cup cucumber cut into bite size, I am using Asian cucumber
    • ¼ cup pear cut into bite size pieces
    • ½ orange peeled and cut into bite size pieces
    • 8 cherry tomato cut into half
    • 1 Asian cucumber thinly sliced long ways

    Instructions
     

    For Dressing:

    • blend all the salad dressing ingredients together, lemon juice, roasted sesame seeds, nutritional yeast, olive oil, salt, black pepper, sugar, ginger, orange juice. Dressing should be pourable consistency. Keep aside.
    • Tofu: drained the water and pat dry the tofu, cut the tofu in about ½ inch cubes. Grill the tofu over medium heat. lightly oil the pan and spread the tofu pieces, grill the tofu from both sides until they are light brown. It will take about 3 minutes.
    • Drizzle, lemon juice over tofu, salt and black pepper turn them lightly. Turn of the heat and take them out in a bowl.

    Prepare chickpeas:

    • drain the water and wash the chickpea. Sauté the chickpeas over medium heat, add oil, oil should be moderately hot add chickpeas, drizzle salt, black pepper, lemon juice and ginger. Stir them together for about 2 minutes. Chickpeas will have a nice flavor.

    Assembling the salad:

    • use the bowl you will serve the salad, spread lettuce, spinach leaves (remove the stems from spinach), add cucumber, pair cut, orange and tomatoes.
    • Next drizzle about 2 tablespoons of dressing and toss them together. Add about 1/3 cup of chickpeas and 1/3 cup of grilled tofu on one side I am also putting few slices of cucumber, to dress it up.
    • Now again drizzle about 2 tablespoons of dressing. salad is ready to serve.
    • For this recipe use the chickpea, tofu, vegetables, and fruits quantity of your choice.

    Notes

    you can make plenty of salad dressing in advance and refrigerate it in a jar, you can save this dressing for up to a week. You can use this dressing in any salad, it tastes grate. Prepare the tofu and chickpeas also in advance and refrigerate, they will be good for 3-4 days. Add the greens and fruits of your choice.
    You will also enjoy: Millet Soup, Mango Salsa, Potato soup, Masala idli
    Tried this recipe?Let us know how it was!
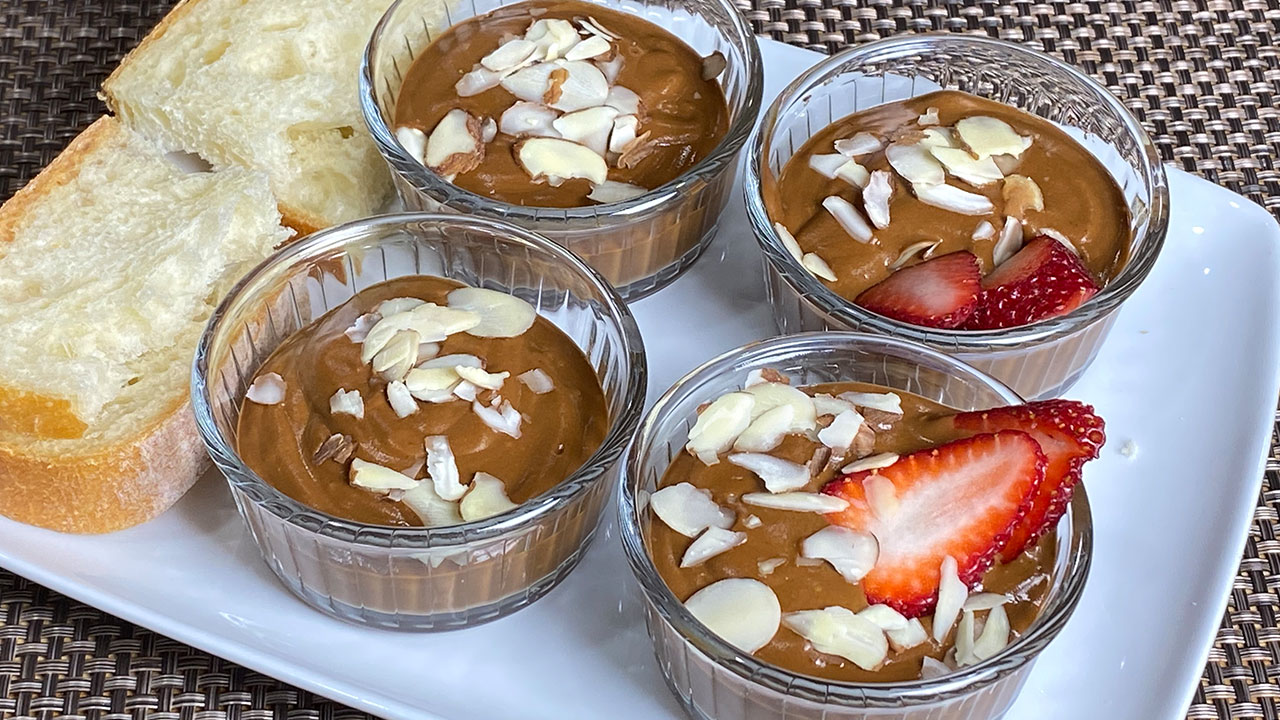
  • Chocolate Pudding

    Chocolate Pudding

    A bowl of creamy Chocolate Pudding garnished with chocolate shavings

    Chocolate Pudding

    Chocolate Pudding is a simple and delightful dessert. My son is on a vegan diet and one day he mentioned he was craving a dessert like a chocolate pudding or mousse. I think he was giving me a not-so-subtle hint that he wanted me to experiment with this! I decided to give a try and he was very happy with the results! Soon after that this became a favorite dessert with others in my family. It's funny because my family's favorites keep changing! This is a super simple and easy recipe to make. I can prepare this dessert on demand and with limited notice for my grandchildren, who love to request dishes last minute! This rich chocolatey dessert is vegan and gluten-free. Hope you enjoy!
    This recipe will serve 4
    5 from 2 votes
    Prep Time 5 minutes
    Cook Time 10 minutes
    Total Time 15 minutes
    Course Dessert
    Cuisine American
    Servings 4 people

    Ingredients
      

    • 1 ½ cup sweet potato peeled and sliced
    • ½ cup coconut milk full fat, chilled
    • 4 Tbsp cacao powder
    • 4 Tbsp sugar
    • 2 tsp vanilla extract
    • ¼ tsp cinnamon powder

    Instructions
     

    • Steam the sweet potato until soft.
    • Drain the water and wash with cold water, and pat dry them.
    • Place sweet potato, cacao, sugar, coconut milk, vanilla and cinnamon into blender and blend until smooth.
    • Take out the Chocolate Pudding into a covered bowl.
    • Refrigerate for at least an hour before serving.

    Notes

    Serving Suggestions
    When it is fully blended, scoop the Pudding into the individual serving bowls and refrigerate for an hour. Remove the Pudding from the refrigerator after it has chilled. Serve the Pudding with your choice of topping. I like to garnish with sliced almonds. You may top with fresh fruit, or seeds. Also, chocolate pudding tastes great as a dip or spread.
    Suggested Recipes
    Tried this recipe?Let us know how it was!
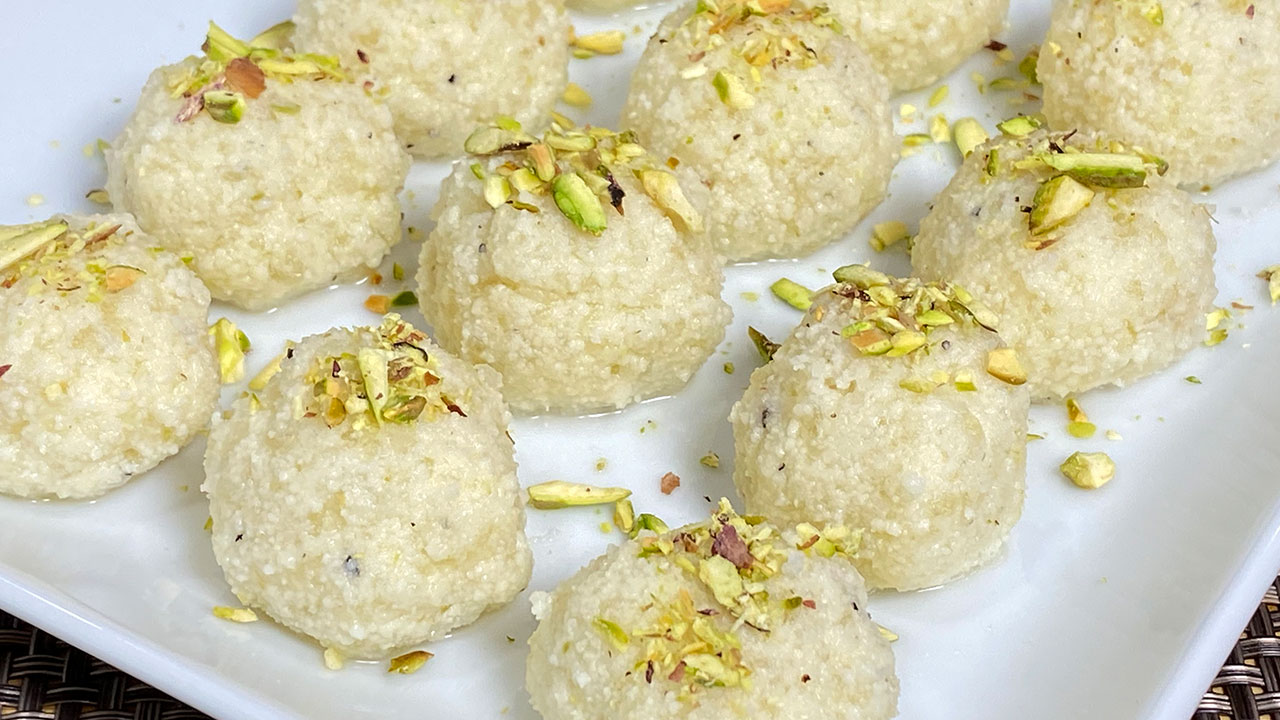
  • Paneer Petha Ka Ladoo

    Paneer Petha Ka Ladoo

    Paneer Pethe Ka Ladoo garnished with chopped nuts

    Paneer Pethe Ke Ladoo & Petha Sandesh Dessert

    Many sweets are made using paneer, which is freshly made homemade Indian cheese. Paneer Pethe Ka Ladoo is delicious and easy to make. This recipe was suggested by my friend Usha, who lives in Jaipur. I must say I really enjoy paneer-based sweets, which include Rasgullas, Ras Malai, Sandesh and many more! I decided I would give a paneer-based dessert a try, Paneer Petha Ladoo. Paneer desserts are considered very classy and for a sophisticated palate. They also are typically very refreshing, delicious, and easy to make. Another reason I like to make paneer sweets is because it is very difficult to mess up the recipe! You can start with one recipe for a paneer dessert and then if it doesn't turn out right, it is very easy to fix and come up with a new recipe! Another favorite dessert of mine is Petha, which is a famous sweet from Agra (India). Petha is made from white pumpkin and sugar.
    These ingredients together are simply delicious. Enjoy!
    Recipe will make about 12 Ladoo.
    4.50 from 2 votes
    Prep Time 20 minutes
    Cook Time 5 minutes
    Total Time 25 minutes
    Course Dessert
    Cuisine Indian
    Servings 12 ladoos

    Ingredients
      

    • 1 cup Paneer homemade
    • 1 cup Petha shredded, sweet
    • ¼ tsp Green Cardamom powder
    • 1 Tbsp Pistachios sliced, for garnishing

    Instructions
     

    • Drin the whey from paneer well and knead the paneer until the paneer is almost rolls into smooth soft dough.
    • In a flat frying pan add paneer, petha and cardamom mix it. Turn the heat to low and cook the paneer mixture stirring and pressing continuously until paneer starts coming together as soft dough. This should take about 4-5 minutes.
    • Turn off the heat and keep mixing the paneer like you are making dough. This is most important step to this dish; you are just cooking paneer enough to take out the rawness. If you over cook the paneer it will become crumbly.
    • Turn off the heat and transfer the mixture to the plate, let the mix sit for about 5 minutes, then divide into 12 equal parts or make the size of ladoo you prefer. Roll them between you palm and shape them in round balls. Garnish with pistachios.

    Notes

    I am using homemade paneer, you can refer to my video how to make the paneer which I have done earlier. I am also using dry petha sweet which is available in Indian grocery store, you can also use canned Petha sweet. If you are using canned petha, drain the syrup, and lightly pat dry.
    Tried this recipe?Let us know how it was!


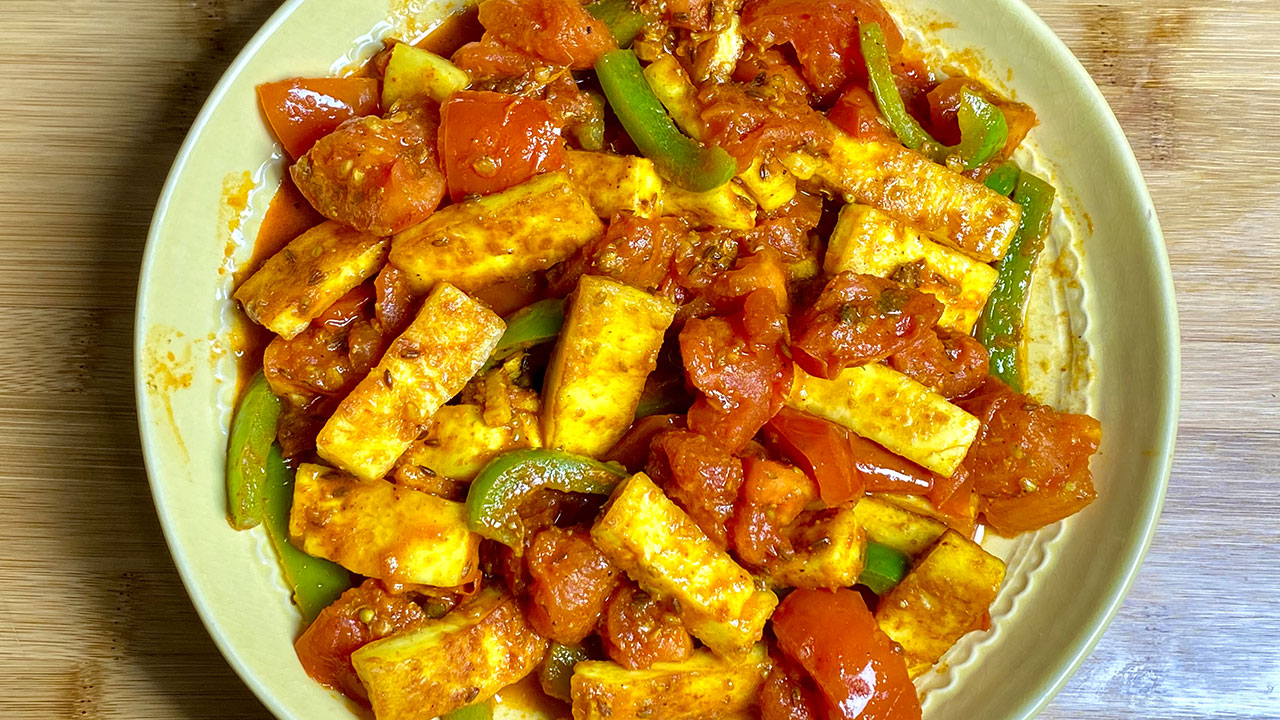
  • Paneer Tomato Curry

    Paneer Tomato Curry

    A bowl of vibrant Paneer Tomato Curry with bell peppers and fresh tomatoes

    Paneer Tomato Curry

    Paneer tomato curry is a delicious and sophisticated side dish. My husband, who enjoys paneer dishes in every form, asked me to make a paneer dish, which is different than what I have made before. It should not be creamy. So, I decided not to add cream or nuts. Also, as per Alex’s request, I did not add spinach. After trying to make a new recipe, I landed on Paneer Tomato Curry. Alex really enjoyed this. I knew this was a hit with him because he cleaned up the entire plate. You all know he is my videographer, so this was the next recipe he wanted me to make.I have done many paneer recipes. They all are starting to look the same. In this recipe the paneer is first grilled and then simmered in tomatoes. This is an amazingly simple and quick recipe and is very satisfying. Hope you give this recipe a try and enjoy!
    Recipe will serve 4.
    5 from 4 votes
    Prep Time 10 minutes
    Cook Time 15 minutes
    Course Side Dish
    Cuisine Indian
    Servings 4 people

    Ingredients
      

    • 3 cups tomatoes cut into large pieces, I used 4medium tomatoes.
    • 6 oz paneer cut into about 1/4 inch thick and 1-1/2 inch long
    • ¼ bell pepper cut into thin slices.
    • 2 Tbsp oil divided.
    • 1 tsp cumin seeds jeera
    • tsp asafetida hing
    • 2 Tbsp thinly sliced ginger
    • 2 tsp coriander powder
    • ¼ tsp turmeric haldi
    • ½ tsp red chili powder
    • 1 tsp sugar
    • 1 tsp salt
    • ½ tsp garam masala

    Instructions
     

    • Heat one tablespoon oil over low medium heat in a flat saucepan, spread the paneer pieces and grill them for one side till they are golden brown. Take them out from the pan and set aside.
    • In the same pan add the remaining oil. Wait until oil is moderately hot add cumin seeds as the cumin seeds crack add asafetida and sliced ginger, stir fry them for about 30 seconds.
    • Add bell pepper and stir fry them for about half a minute add coriander powder, turmeric and red chili powder and stir.
    • Next add tomatoes, salt, and sugar, cook them stirring for about 2-3 minutes tomatoes should be just tender add paneer and cook for about 5 minutes stirring occasionally. Paneer should be covered with spices and tomatoes should be still not mushy, you should be able to see tomato pieces. Turn of the heat sprinkle the garam masala and stir.
    • Paneer with Tomato is delicious and super simple this goes well with plain rice, roti, paratha, puri or naan.

    Notes

    Paneer with Tomato is delicious and super simple this goes well with plain rice, roti, paratha, puri or naan.
    Tried this recipe?Let us know how it was!

    How to make Tomato Paneer Curry Recipe By Manjula’s Kitchen

    Paneer tomato curry, also known as tomato paneer curry, is a delightful and aromatic dish that captures the essence of Indian cuisine. This paneer based gluten free veg gravy dish combines the rich and creamy texture of paneer (Indian cottage cheese) with the tanginess of tomatoes and a blend of aromatic spices. In this detailed exploration, we will take you through each step of the paneer tomato recipe, highlighting the significance of each element to create a dish that tantalizes the taste buds.

    Step 1: Heating the Oil and Grilling the Paneer

    The first step in making tomato paneer curry is heating one tablespoon of oil in a flat saucepan over low-medium heat. This is a crucial step as it sets the foundation for the flavor development in the dish. The low-medium heat allows the oil to gradually heat up, preventing it from smoking and ensuring that the paneer pieces cook evenly.

    Once the oil is heated, the paneer pieces are spread in the pan and grilled on one side until they achieve a golden brown color. Grilling the paneer serves multiple purposes. It imparts a subtle smokiness to the paneer, enhancing its flavor profile. The golden brown color also adds visual appeal to the dish. After grilling, the paneer is taken out from the pan and set aside, ready to be reintroduced later in the cooking process.

    Step 2: Adding Cumin Seeds, Asafetida, and Sliced Ginger

    In the same pan that was used for grilling the paneer, the remaining oil is added. It is essential to use the same pan to retain the flavors that have infused into it during the initial step. Waiting until the oil is moderately hot, cumin seeds are introduced. The crackling of cumin seeds in hot oil releases their aromatic oils, infusing the entire dish with a warm and earthy essence.

    Asafetida, a pungent spices with a unique flavor, is added along with sliced ginger. Asafetida contributes a distinct umami note to the dish, enhancing the overall taste. Ginger, known for its subtle spiciness and freshness, complements the other ingredients, creating a harmonious balance of flavors. Stir-frying these elements for about 30 seconds allows their flavors to meld and infuse into the oil.

    Step 3: Stir-Frying Bell Pepper with Spices

    Next in the process is the addition of bell pepper to the pan. Stir-frying the bell pepper for about half a minute ensures that it retains its crispness and vibrant color. The bell pepper not only adds a crunchy texture but also contributes a slightly sweet and fruity undertone to the dish. At this stage, the ground spices – coriander powder, turmeric, and red chili powder – are introduced.

    Coriander powder provides a warm and citrusy flavor, turmeric adds a golden hue and earthy notes, while red chili powder imparts the desired level of spiciness. Stir-frying the bell pepper with these spices allows them to coat the vegetables evenly, creating a flavorful base for the curry.

    Step 4: Adding Tomatoes, Salt, and Sugar

    The introduction of tomatoes is a crucial step in paneer tomato curry, as it forms the base of the gravy. Tomatoes bring a tangy and slightly sweet taste to the dish. Adding salt at this stage not only enhances the natural flavors of the tomatoes but also helps in their cooking process by drawing out moisture.

    A touch of sugar is included to balance the acidity of the tomatoes, creating a harmonious blend of sweet and tangy notes. Cooking the tomatoes, stirring for about 2-3 minutes, ensures that they are just tender but not mushy. This careful monitoring of the tomatoes’ texture is essential for achieving the desired consistency in the final dish.

    Step 5: Cooking Paneer in Tomato Gravy

    Once the tomatoes reach the desired tenderness, the grilled paneer is reintroduced to the pan. Cooking the paneer in the tomato gravy for about 5 minutes allows it to absorb the flavors of the spices and the tanginess of the tomatoes. Stirring occasionally ensures that the paneer is evenly coated with the aromatic mixture, creating a cohesive and well-balanced dish.

    During this stage, it is crucial to maintain a balance between cooking the paneer thoroughly and preserving its distinct texture. The goal is to have paneer covered with spices while retaining visible tomato pieces in the curry.

    Step 6: Final Touch – Sprinkling Garam Masala

    As a finishing touch, the heat is turned off, and a sprinkle of garam masala is added to the tomato paneer curry. Garam masala, a blend of warm spices like cinnamon, cardamom, and cloves, contributes a final layer of complexity and depth to the dish. Adding garam masala at the end preserves its volatile flavors, ensuring that they are not overpowered by the other spices during the cooking process.

    Stirring the garam masala into the curry distributes its aromatic compounds evenly, elevating the overall fragrance of the dish. This final step enhances the complexity of flavors, making the paneer and tomato curry a symphony of tastes and aromas.

    Conclusion:

    In the art of crafting paneer in tomato gravy, each step plays a pivotal role in building layers of flavor and texture. From grilling the paneer for a smoky undertone to carefully stir-frying spices for a well-balanced taste, every action contributes to the overall success of the dish. The interplay of ingredients like cumin seeds, asafetida, ginger, bell pepper, and a medley of ground spices creates a curry that is not just a meal but a culinary experience.

    This detailed exploration of the tomato paneer recipe highlights the importance of technique, timing, and ingredient selection in Indian cuisine. The result is a dish that showcases the versatility of paneer and the vibrancy of tomatoes, bringing together the best of both worlds in a savory and satisfying curry. 

    Whether you call it paneer tomato curry, tomato paneer curry, paneer tomato recipe, paneer and tomato curry, paneer in tomato gravy, or tomato paneer recipe, this flavorful creation is sure to become a staple in your culinary repertoire.

    Note: 

    Paneer with Tomato is delicious and super simple this goes well with plain rice, roti, paratha, puri or naan.

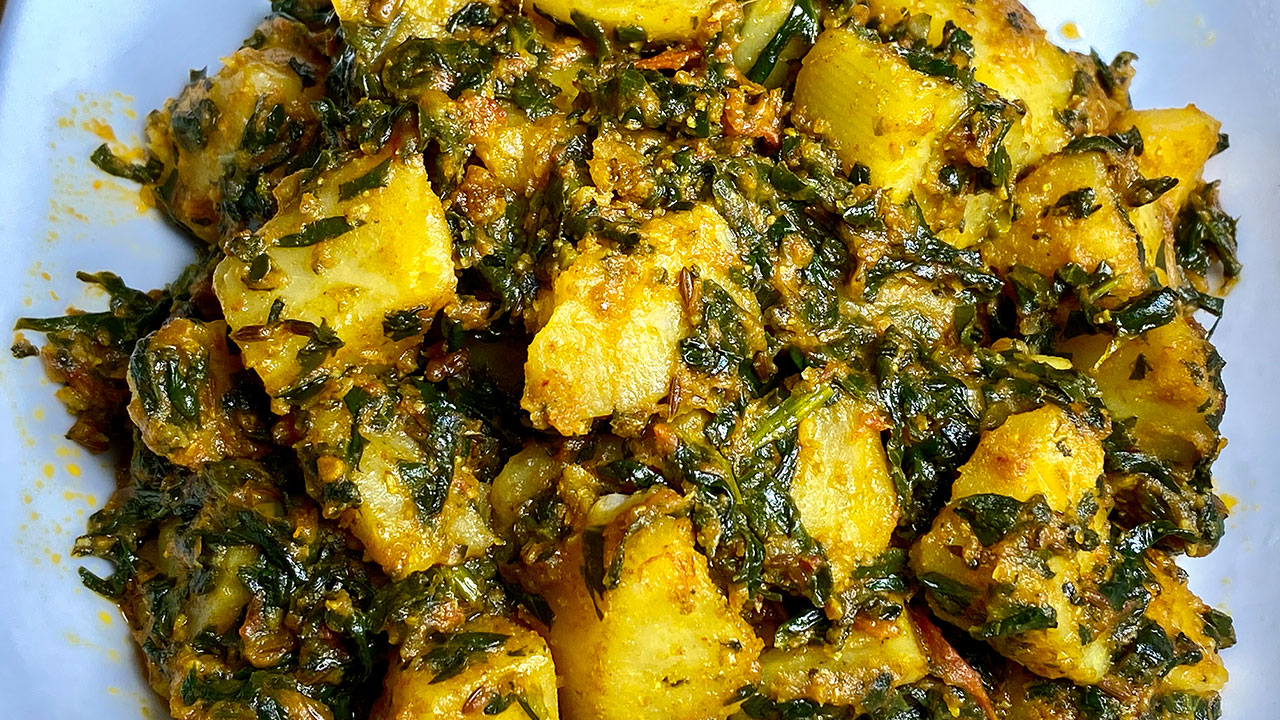
  • Aloo Palak

    Aloo Palak

    A dish of Aloo Palak, featuring potatoes and spinach cooked with spices

    Aloo Palak (Spinach with Potatoes)

    Aloo Palak is a versatile side dish that is a great complement to any meal. Aloo (potatoes) and Palak (spinach) are two vegetables I always have in my kitchen. Potatoes we all know are used in so many ways and have endless recipes. I also use spinach in many dishes. I thought I had done this recipe a long time ago, but today I made this dish for my family after some time and they enjoyed it very much and asked me if I have done this video recipe. I was looking on my website and realized I have not done this recipe yet. This is a common recipe, but this is my version of Aloo Palak. Adding fenugreek seeds and besan (gram flour) kicks off the flavor to the dish. For me and Alex, this is a comfort dish. This recipe is also vegan and gluten free. I serve this as a side dish, or I enjoy rolling it in a Roti or Paratha to make a to-go lunch. Alex especially enjoys making grilled cheese sandwiches filled with leftover Aloo Palak.
    I have done many recipes for spinach:
    Palak Paneer, Saag, Spinach Crisps, Chole Palak, Palak Puri
    This recipe will serve 4.
    4.75 from 8 votes
    Prep Time 10 minutes
    Cook Time 20 minutes
    Total Time 30 minutes
    Course Main Course
    Cuisine Indian
    Servings 4 people

    Ingredients
      

    • 2 cup potatoes cut into small pieces I used 2 medium size potatoes
    • 4 cup spinach finely chopped, approx. 8oz
    • ½ cup tomato finely chopped
    • 4 Tbsp oil
    • 1 tsp cumin seed jeera
    • ¼ tsp fenugreek seeds methi optional
    • 1 Tbsp besan gram flour
    • 1 Tbsp coriander powder dhania
    • ½ tsp red chili powder adjust to taste
    • ¼ tsp turmeric haldi
    • 1 tsp salt
    • ½ tsp mango powder amchoor

    Instructions
     

    • Heat the oil in a saucepan. The oil should be moderately hot. Add the cumin seeds as they crack add besan, and fenugreek seeds. Stir for about one minute, besan will become aromatic and will be light golden brown.
    • Next add tomato, coriander, red chili powder, and turmeric.
    • Stir-fry spice mix until spice mix starts leaving the oil. It should take about 2 minutes.
    • Add potatoes, spinach, and 1/2 cup of water, cover the pan. Let it cook over medium heat. The potatoes should be very tender but not mushy and should be covered with spinach.

    Notes

    Do stir in between besan can stick to the bottom of the pan. I did stir once in between. If needed, add a little more water.
    Aloo Palak should not be very dry, it should be moist. Add mango powder and stir, turn off the heat. Aloo Palak is ready.
    Tried this recipe?Let us know how it was!
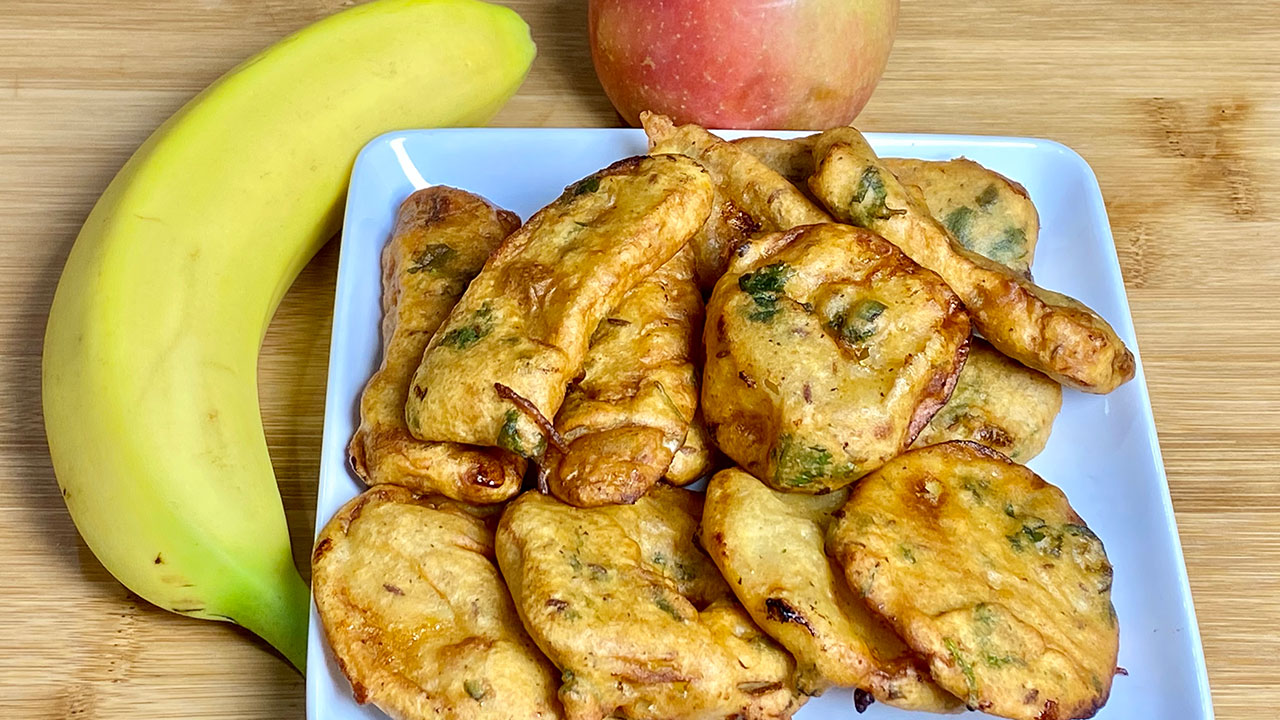
  • Apple Banana Pakora

    Apple Banana Pakora

    A plate of crispy Apple Banana Pakoras

    Apple Banana Pakora

    Apple and Banana Pakoras! Pakoras are an all-time favorite snack amongst everyone. Pakoras are made in so many ways using a variety of vegetables and lentils. Apple and Banana Pakoras were suggested by my friend Rajni from India. It sounds different because I never tried these pakoras. I decided to give it a try. I know she enjoys sweet and spicy combinations of flavors. These pakoras are crispy from the outside and soft from the inside. These Pakoras are also vegan and gluten-free. Give it a try and share your experience. Hope you will enjoy it. This recipe will serve 4.
    5 from 2 votes
    Prep Time 5 minutes
    Cook Time 15 minutes
    Total Time 20 minutes
    Course Appetizer
    Cuisine Indian
    Servings 4 people

    Ingredients
      

    • 6 Apple slices cut into rounds ¼ inch thick
    • 6 banana slices, cut into the long way banana should not be very ripe
    • ½ cup gram flour besan
    • 2 Tbsp rice flour
    • 1 Tbsp corn starch also can use arrow root powder
    • ½ tsp salt adjust to taste
    • ½ tsp cumin seeds jeera
    • ¼ tsp black pepper
    • ½ tsp mango powder amchoor
    • 1 Tbsp sugar
    • 2 Tbsp cilantro finely chopped, hara dhania
    • 1 Tbsp green chili finely chopped

    Instructions
     

    • I am using firm apples. I have sliced the apples in rounds about 1/4 inch thick. Use firm bananas that are slightly less ripe. Do not use fully ripe bananas. I am using 1banana. I sliced the banana in 6 pieces the long way
    • To make the batter, add all the dry ingredients together besan, rice flour, cornstarch, salt, cumin seeds, black pepper, mango powder, and sugar. Mix all the ingredients well.
    • Add the water slowly to make a smooth batter. Consistency of pancake mix. I used about 1/2 cup of water. Now add the green chilies and cilantro, mix it well.
    • Heat the oil in a frying pan on medium-high heat. The frying pan should have about 1 inch of oil. To check if the oil is ready, put one drop of batter in the oil. The batter should come up but not change color right away.
    • Dip the apples and bananas slices into the batter one at a time, making sure it is covered by the batter completely. Then, slowly drop in the slices into the frying pan.
    • Fry the pakoras in small batches, not overlapping. The pakoras will take about 3-4 minutes to cook.
    • Turn them occasionally. Fry the pakoras until both sides are golden brown. If the oil is too hot, the pakoras will brown too fast and not get crispy.
    • The crispy, delicious pakoras are now ready to serve.

    Notes

    They taste delicious with tamarind sweet and sour chutney. I already have this chutney recipe on my blog.
    You would also like to see the recipes for Apple Jalebi, Apple Bread Rolls, Aloo Puri, Tomato soup.
    Tried this recipe?Let us know how it was!
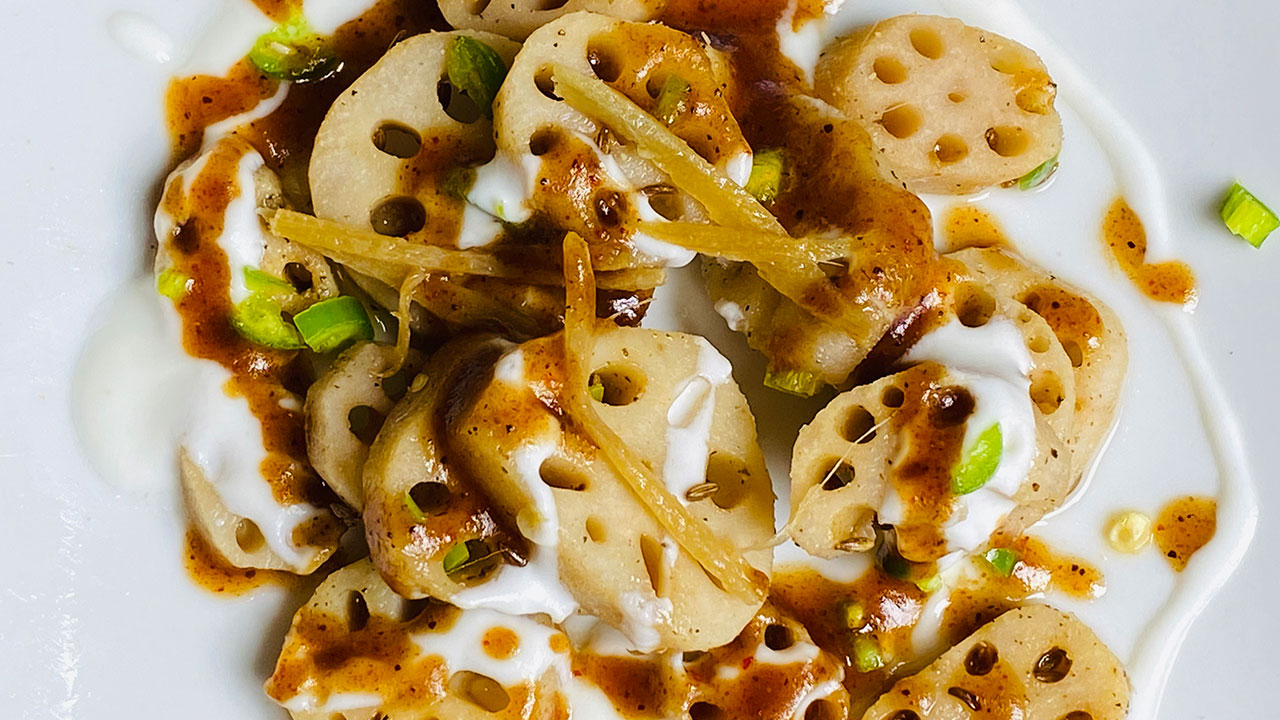
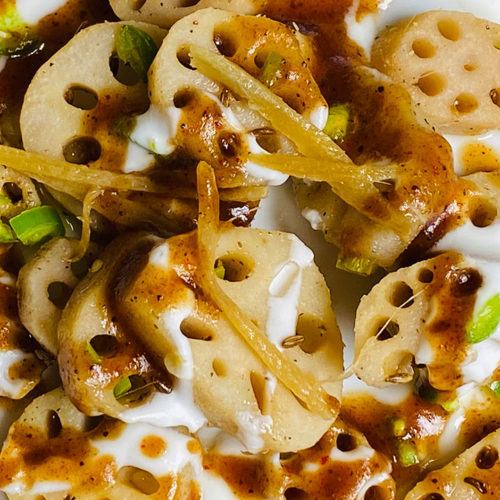
  • Kamal Kakdi Ki Chaat

    Kamal Kakdi Ki Chaat

    A plate of Kamal Kakdi Ki Chaat

    Kamal Kakdi Ki Chaat

    Kamal Kakdi Chaat is a truly unique and tasty dish. I wanted to make something new and delicious but also healthy and easy to make. kamal kakdi, is an edible lotus root that has a crunchy texture and slightly sweet taste. After doing some research, I was surprised at how much nutrients kamal kakdi has. I was excited to try out a spicy chat recipe using it. An added plus is that this recipe requires no frying and is a nice healthy savory snack. My family really enjoyed this new dish! Hope you give this recipe a try and enjoy!
    This recipe will serve 6.
    5 from 1 vote
    Prep Time 5 minutes
    Cook Time 5 minutes
    Total Time 10 minutes
    Course Chaat
    Cuisine Indian
    Servings 6 people

    Ingredients
      

    • 2 cup sliced lotus stem I am using frozen, Kamal Kakdi
    • 1 Tbsp oil
    • 1 Tbsp ginger thinly sliced, adrak
    • ½ tsp cumin seeds jeera
    • ½ tsp salt
    • ¼ tsp black pepper kali mirch
    • 1 tsp green chili finely chopped, Hari mirch
    • ½ tsp lemon juice

    Also Need for Serving

    • ½ cup whipped yogurt for serving
    • 2 Tbsp tamarind chutney please add the link check the recipe

    Instructions
     

    • pressure cook the Kamal Kakdi in an instant pot for five minutes in two cups of water. I also drained the water. Kamal Kakdi should be tender. Notes: you can also, use the pressure cooker and cook at the same time, or you can also cook in a pot for 20 minutes.
    • Drain the water and pat dry.
    • In a frying pan heat the oil over low medium heat. Add the oil, oil should be just warm add sliced ginger. Stir fry for about 2 minutes and take it out in a bowl. I will use this ginger later for garnishing. Note: I feel adding ginger later it gives a nice kick to chaat.
    • Use the same pan and it already has some left-over oil. Oil should be moderately hot, add cumin seeds. As cumin seeds crack add kamal kakdi, stir and sprinkle salt and black pepper.
    • Stir fry for one minute add about 1 teaspoon of chopped green chiles and lemon juice stir fry for about 2 minutes, turn off the heat. Kamal Kakdi is ready to be served.
    • Plating the chaat, drizzle yogurt over kamal kakdi also drizzle tamarind chutney. And finish it off with some green chilies and roasted ginger.

    Notes

    Serving suggestions: You can also serve this kamal kakdi as is as a masla kamal kakdi, sprinkle little chaat masala.
    You will also enjoy the recipes for, Bread Pudding With Chocolate Sauce, Sabudana (Tapioca) Bhel, Dahi Puri Chaat
    Tried this recipe?Let us know how it was!
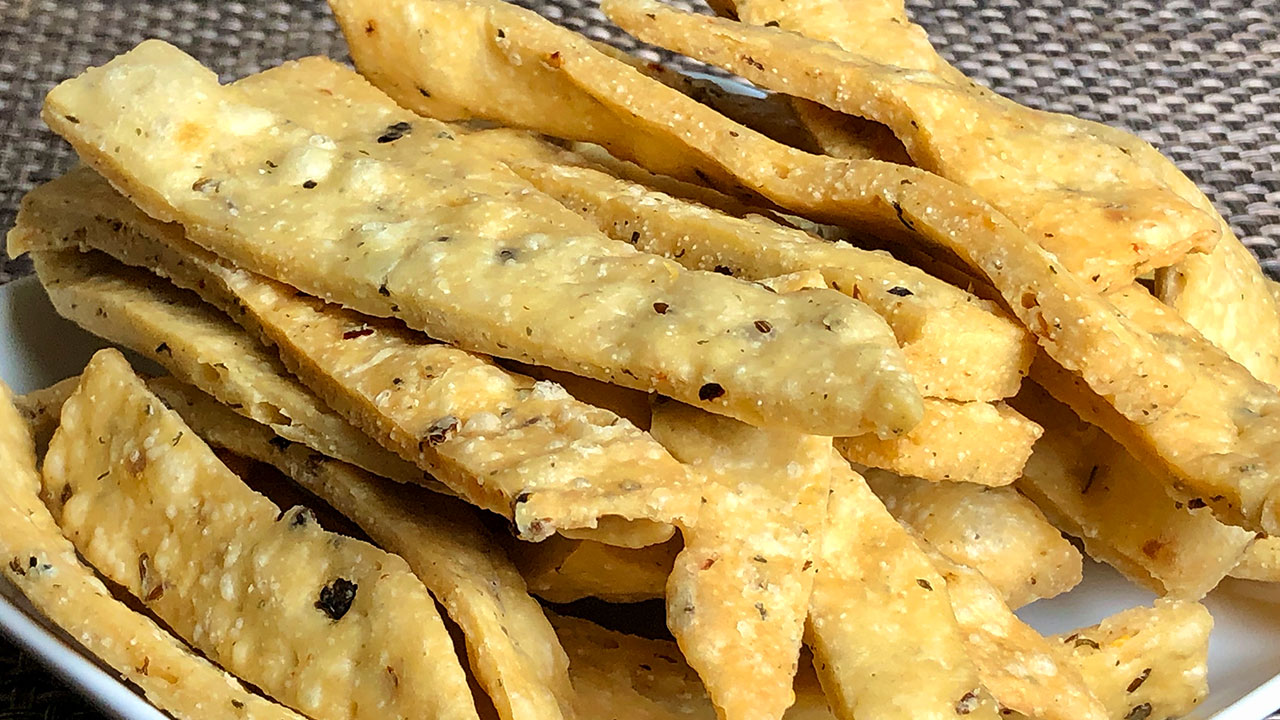
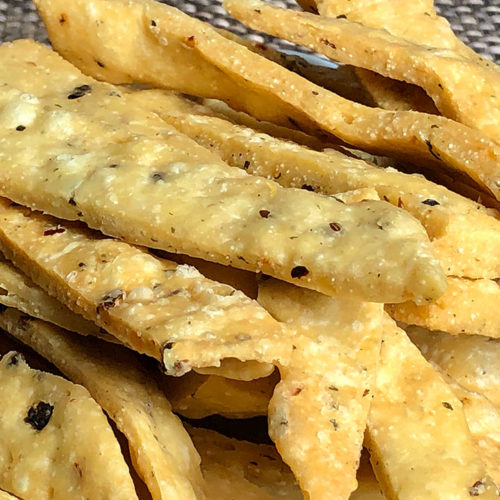
  • Spicy Namak Para

    Spicy Namak Para

    A plate of crispy Namak Para (savory fried snacks)

    Spicy Namak Para (Masala Paras)

    Spicy Namak Para is a crispy and savory snack that's perfect for the holiday season. Not only is this a popular snack, but it is also easy to make. This particular recipe is a twist on traditional Namak Paras with added spices to make it even more flavorful. You can always experiment with different variations by adding your choice of flavors! Spicy Namak Para taste especially delicious with a hot cup of chai. They also make for a simple but special homemade gift. It's also an easy road trip snack when traveling with your family! Hope you enjoy this recipe! This recipe is good for 10 people.
    3.34 from 3 votes
    Course Appetizer
    Cuisine Indian
    Servings 10 people

    Ingredients
      

    • 2 cup All Purpose Flour Maida
    • ¼ cup fine semolina sooji
    • 1 tsp salt
    • 1 tsp black pepper crushed, kali mirch
    • 1 tsp chili flakes lal mirch
    • 1 tsp cumin seeds jeera
    • 1 Tbsp dried fenugreek leaves Kasuri Methi
    • 4 Tbsp oil
    • ¾ cup chilled water approx

    Instructions
     

    • In a bowl mix all the dry ingredients well, all-purpose flour, sooji, salt, black pepper, red pepper, cumin seeds, and methi. Next add the oil mix it well.
    • Add the chilled water slowly, mixing with your fingers as you pour. Do not knead the dough. The dough should be soft. Cover the dough and let it sit for at least fifteen minutes.
    • Knead the dough and divide into two equal parts. Take each part of the dough and make a flat ball shape. Roll them into about 10-inch circles, it should not be very thin.
    • Prick them with a fork all over the rolled dough, on both sides. This helps paras not to puff while frying.
    • Cut each of the rolled dough into about 1/2-inch-wide and 3-inch-long pieces. Note: you can cut them in your desire shape.
    • Heat the oil in a frying pan on medium heat.
    • The frying pan should have at least 1-1/2 inch of oil. To check if the oil is ready, put a small piece of dough in the oil. The dough should make the oil sizzle and come up slowly.
    • Make sure to place just enough paras so you can turn them over easily when frying. Fry the paras until both sides are light golden brown. This should take about 8 minutes.
    • After Spicy Namak Paras come to room temperature they should become crisp.

    Notes

    Experimenting and making the recipes to your taste is the best part of cooking.
    Try different variations by adding your choice of flavors.
    Tried this recipe?Let us know how it was!
  • Instant Badam Burfi

    Instant Badam Burfi

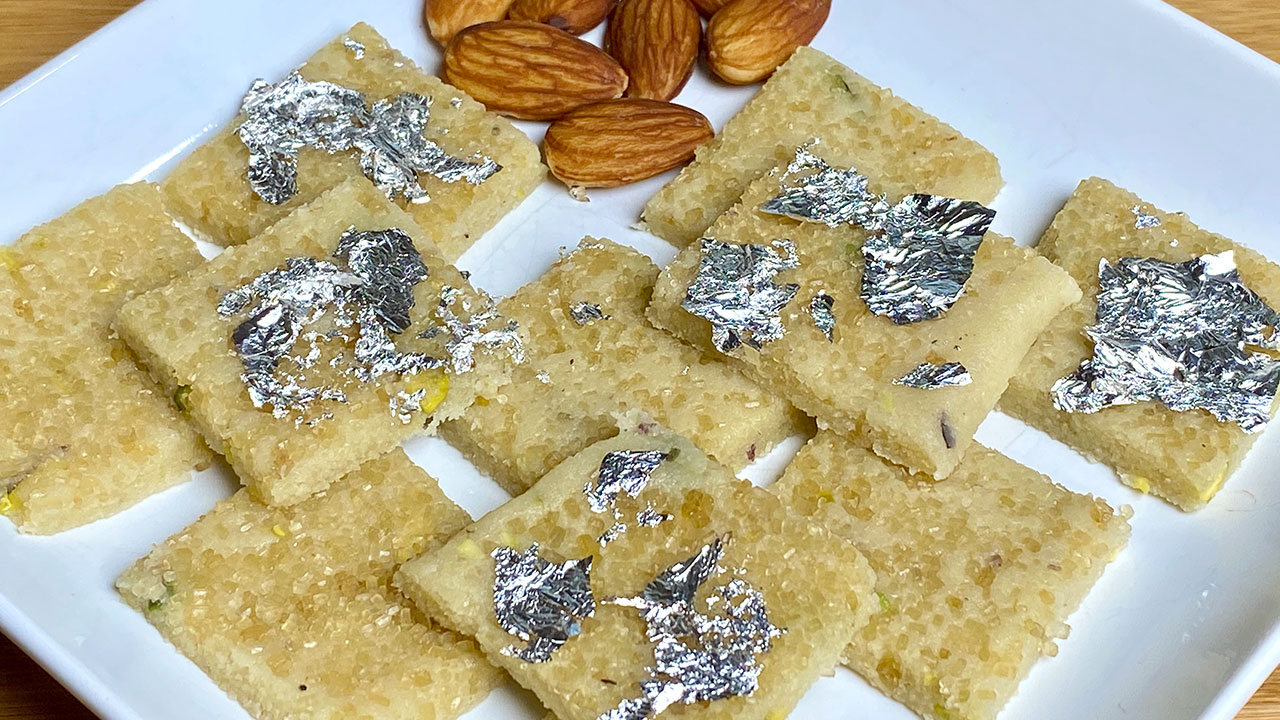
    A plate of Instant Badam Burfi garnished with edible silver foil and almonds

    Instant Badam Burfi

    Instant Badam Burfi, or Almond Candy is a quick and easy recipe that will satisfy the entire family! The best part of this recipe is that involves absolutely no cooking. This is the time of the year when we are all busy celebrating the holidays.
    Of course, this year will look a little different, but we can always make the best of this situation.
    Since we are all busy with work and family responsibilities, I wanted to make a quick and easy dessert that is both delicious and sweet. Badam Burfi is just that.
    All you need is less than 10 minutes to make this delicious Burfi. After trying this recipe a few times, I was surprisingly satisfied with the way it turned out! I wish I had thought of this recipe before. During the holidays, homemade sweets make the best holiday gift for family and friends. The main ingredients are almond flour and condensed milk. Enjoy!
    5 from 1 vote
    Course Dessert
    Cuisine Indian
    Servings 0

    Ingredients
      

    • 1 cup almond flour badam
    • 3 Tbsp condense milk sweetened
    • tsp cardamom powder
    • 1 Tbsp grainy sugar
    • 1 Tbsp sliced pistachios pista

    Instructions
     

    • In a bowl mix almond flour pistachios and cardamom powder. Add condensed milk mix it with a spoon then lightly oil your finger and make it smooth like dough.
    • I am using Ziplock to roll the Burfi. Cut the Ziplock bag in two, put the almond dough in the center of one piece and cover it with another piece.
    • With your palm press it to make a Pattie then roll it into quarter-inch thick. Note: try to keep in rectangle shape because we are going to cut them in the square.
    • Remove the top wrap and spread evenly sugar and cover it again and lightly roll t again. Note: this will make sugar stick to burfi.
    • Cut them into your preferred size. Wait for about fifteen minutes and then remove it. Almond burfi is ready.

    Notes

    Adding grainy sugar gives nice texture to burfi and add little needed sweetness.
    Tried this recipe?Let us know how it was!
  • Mexican Refried Beans and Salsa

    Mexican Refried Beans and Salsa

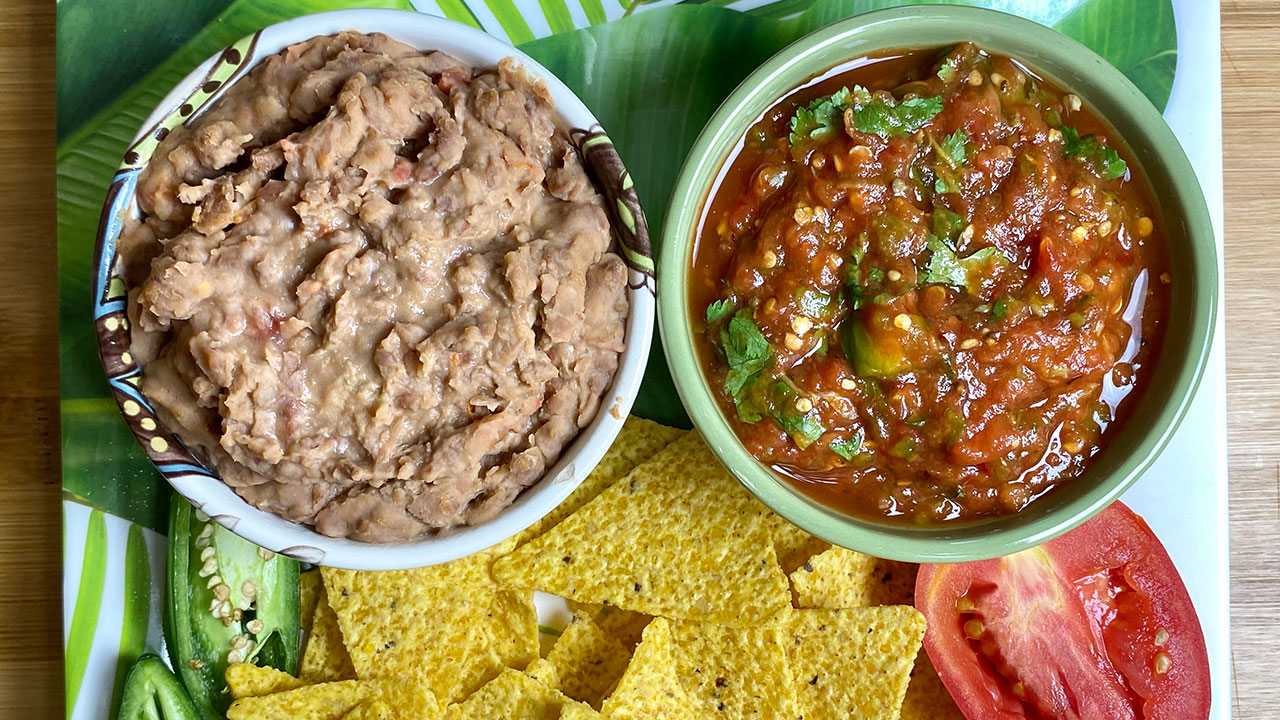
    A plate of Mexican Refried Beans and Salsa served with tortilla chips and fresh vegetables

    Mexican Refried Beans and Salsa

    My ultimate favorite cuisine is of course Indian. But I must say that Mexican and Italian cuisines are close seconds! Overall, I enjoy trying new cuisines with a variety of flavors. After coming to the United States, Mexican cuisine was the first new cuisine I tried. As you already know, I have a story behind every dish.
    It was many years ago and we had just come to the United States. Some good friends of ours decided to take us to a small mom and pop Mexican restaurant. They were sure we would enjoy the food. I was a little hesitant and when the server came to take our order, I immediately began to tell her all of my limitations for food, such as no onions, garlic, and of course vegetarian. She smiled at me and proudly let me know she was the owner of the restaurant. She reassured me that I had come to the right restaurant and advised that all the food at her restaurant was made fresh that very day. She personally brought out our food which included refried beans, soft tortillas, salsa, enchiladas, and salad. I tried the food and immediately fell in love. Mexican cuisine had become another favorite cuisine, and this restaurant became our go-to place for dinner. Both dishes are also vegan and gluten free.
    I typically keep beans and salsa in my refrigerator or freezer. Both items freeze well. Also, you can come up with so many dishes using them. These are some of my favorite dishes to serve using refried beans and salsa: beans and corn chips, tostadas, burritos, and enchiladas. I hope you will enjoy these dishes!
    This recipe will serve 4.
    No ratings yet
    Servings 0

    Ingredients
      

    Refried Beans

    • 1 cup pinto beans
    • 3 Tbsp oil
    • ½ cup tomatoes finely chopped
    • 1 tsp ginger shredded
    • 1 tsp salt
    • 2 cup of water

    Salsa

    • 5 Roma tomatoes
    • 3 Jalapeno pepper
    • 6 red whole red chili
    • 1 tsp salt
    • ¼ cup cilantro finely chopped

    Instructions
     

    How to prepare Beans

    • soak the beans for at least 6 hours in six cups of water. Drain the water boiled the beans in 3 cups of water instant pot or pressure cooker for 40 minutes. Drain most of the water and save, this will be used slowly as needed.
    • In a saucepan moderately heat the oil over medium-high heat. Add beans keep steering and keep mashing the beans. Cook for about 5 minutes. Add tomatoes, ginger and salt keep mashing, and cook for another five minutes. Add water we have saved from beans slowly as needed. As beans cool off will become thick. I used most of the water, we saved from beans. Beans should be the inconsistency of thick batter.

    How to prepare Salsa

    • dry roast the red chilies over medium heat, till they are darker in color. Remove from the pan and set aside.
    • Preheat the oven at 350-degree F. Half the tomatoes and jalapeno peppers long way. Spread them over the baking sheet, Put the tomatoes and jalapeno face down, and bake for 10 minutes.
    • Take out from the oven and remove the skin from tomatoes and jalapenos.
    • First in a food processor crush red chilies, then add tomatoes, jalapeno, and salt roughly blend them together, take it out in a bowl and add cilantro. Salsa is ready and keeps aside.
    • Beans and salsa make a good side dish for any Mexican cuisine.
    • Enjoy!
    Tried this recipe?Let us know how it was!
  • Ras Malai Cake

    Ras Malai Cake

    A plate of Ras Malai Cake garnished with sliced almonds and pistachios

    Ras Malai Cake

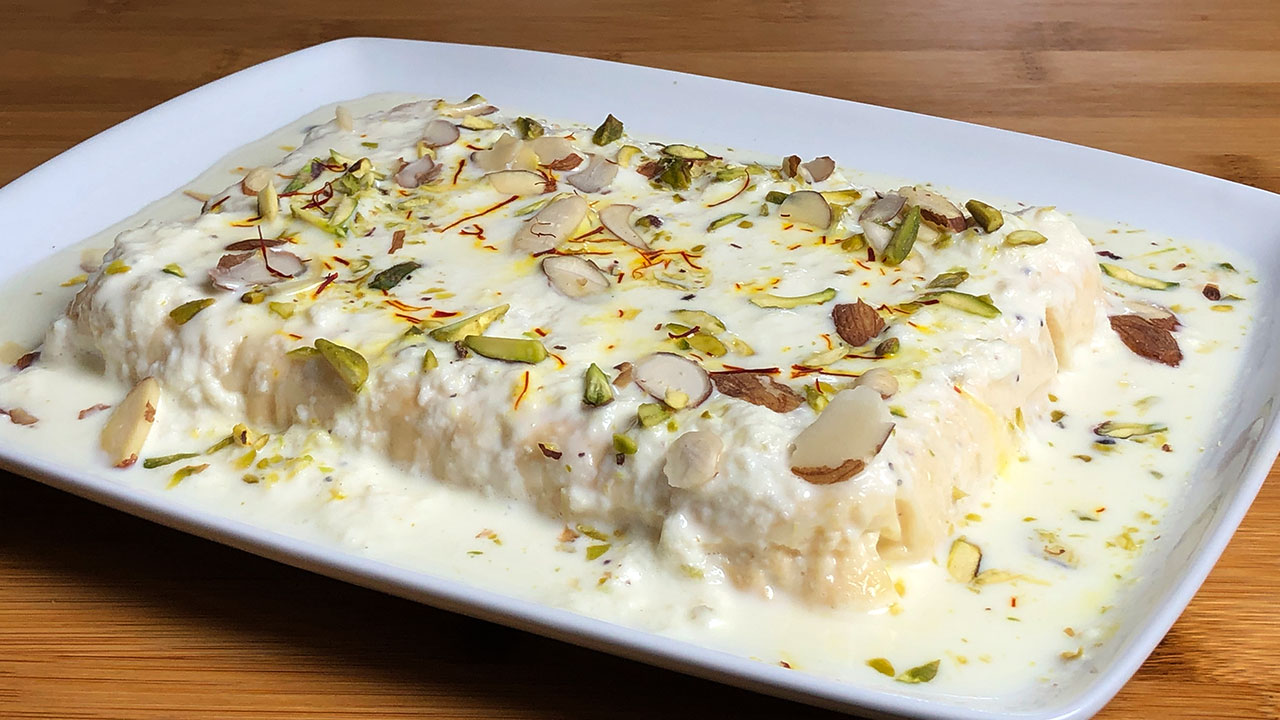
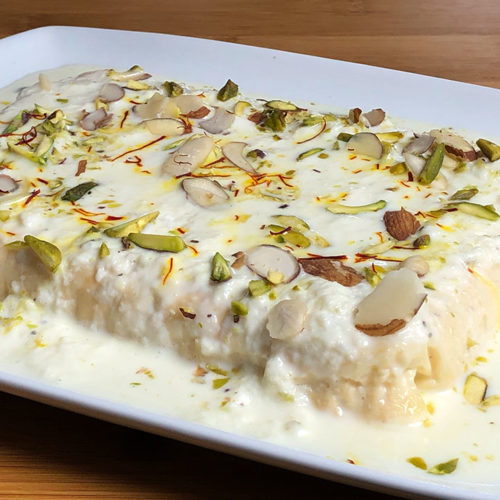
    Ras Malai Cake is a twist on a very popular Bengali dessert "Ras Malai". Ras Malai is made with homemade cheese known as “paneer” or “chana”. It consists of soft paneer balls immersed in chilled creamy milk. Ras Malai has been always my favorite dessert for as long as I can remember. Back when I came to the U.S. many years ago, Indian cooking was a challenge as there were very few Indian ingredients available. Indian groceries weren't as plentiful back then. To top that off, I was also a new cook. I remember my friends and I would always experiment with different recipes for Indian food using whatever ingredients we could find. We knew we had to make do with what we had by being creative and learning to cook using the ingredients were available. One thing we discovered is using ricotta cheese as a substitute for paneer as it was the closest in consistency to paneer. We started using ricotta cheese to make many milk-based Indian desserts. It was then that I learned how to make Ras Malai. While it certainly was not the same as the "real thing", it was super simple to make and very tasty! Most importantly, I got to enjoy a little taste of home with my favorite Indian dessert! I have done one more recipe using Ricotta cheese Microwave Milk Cake. Enjoy!
    This recipe will serve 6.
    4.50 from 2 votes
    Prep Time 5 minutes
    Cook Time 40 minutes
    Course Dessert
    Cuisine Indian
    Servings 6 people

    Ingredients
      

    • 15 oz Ricotta Cheese whole milk
    • 2 Tbsp sugar
    • ¼ tsp cardamom powder

    Milk for Rasmalai

    • 2 cups whole milk
    • 1 ½ tbsp sugar
    • tsp crushed cardamom

    Garnishing

    • 1 tbsp sliced almonds
    • 1 tbsp sliced Pistachios
    • few strands of saffron

    Instructions
     

    • I am also using a 5×7 Pyrex pan for baking the cake, line the pan with parchment paper.
    • Mix the ricotta, sugar, cardamom, and saffron together well. Transfer the ricotta cheese mixture into a round Pyrex bowl. It should be around 1/2″ thickness. Bake it at 300 degrees F for 35 minutes.
    • After 10 minutes cover the cake with aluminum foil, which will prevent the cake browning from the top. Let it cool off to room temperature.
    • While baking the cake, prepared the milk. Boil the milk in a frying pan on medium heat until the milk reduces to about 1 cup (Make sure wet the frying pan before putting the milk to prevent milk not to burn). Stir the milk occasionally. Set aside.
    • Take the ricotta cake out into the serving plate, pour the milk over and garnish with almonds and pistachios. Keep it in the fridge for at least one hour, serve chill.
    Tried this recipe?Let us know how it was!
  • Red Lentil Dal (Instant Pot Recipe)

    Red Lentil Dal (Instant Pot Recipe)

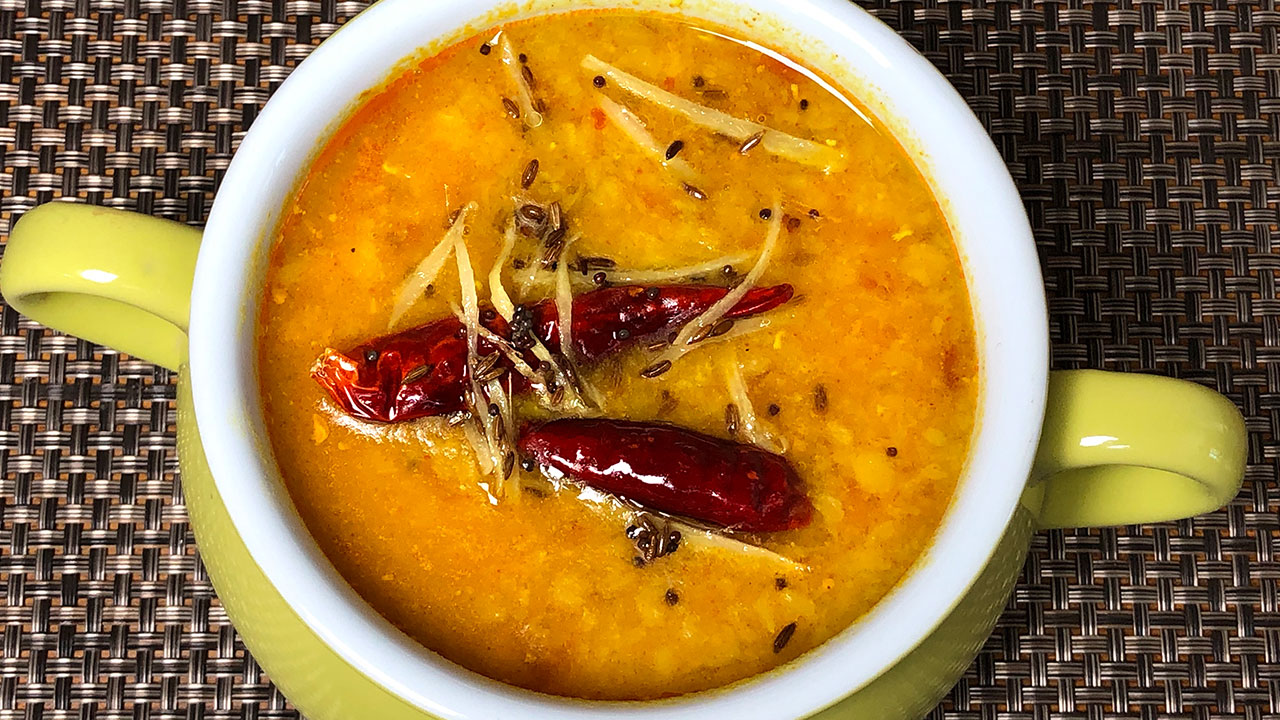
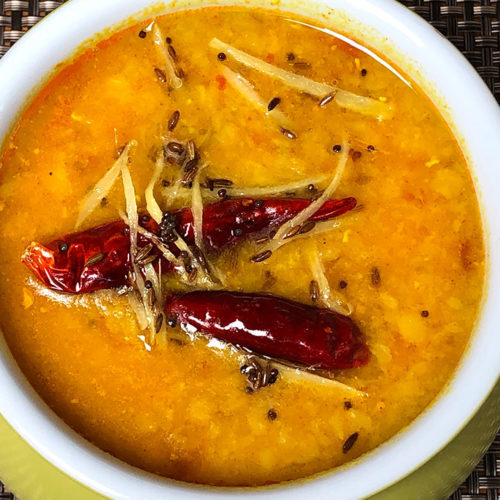
    A bowl of Red Lentil Dal garnished with red chilies

    Red Lentil Dal – Instant Pot

    Red Lentil Dal is a washed and split Masoor Dal. It is a rich, healthy lentil packed with protein and serves as a great side dish for a meal. You can also serve this as a comforting lentil soup. This is an easy dish to make.
    I am in my seventies and surprisingly I had never cooked or tasted this lentil. About a month back we had dinner with our friend, where she served this red lentil for dinner. We loved it. I asked her how she cooked this dal. It tasted so good! After finding out which lentil she had used, I was genuinely surprised. I questioned myself: why haven’t I been cooking it? I see this red lentil in an Indian grocery store all the time but never thought I should try it. My friend, like me, was surprised when she found out that this was my first time trying this dal. She suggested this lentil for Alex (my husband) and explained that it will be good for him since it is easy to digest.
    After that dinner, I have made this dal many times. It is an easy, simple recipe and it tastes delicious. I serve this dal with roti, rice, and one dry vegetable (e.g. aloo methi). I thought I should share this recipe because now this dal has become a staple dish for us.
    Recently I have been using an instant pot instead of a pressure-cooker. It takes the same time as the pressure cooker, but the advantage is that you don’t have to watch over it when it starts steaming or when it is time to turn off. You can take care of other things in the meantime.
    This recipe will serve 3.
    4.15 from 14 votes
    Prep Time 5 minutes
    Cook Time 10 minutes
    Course Soup
    Cuisine Indian
    Servings 0

    Ingredients
      

    • ½ cup red lentils
    • 1 Tbsp oil
    • ½ tsp cumin seeds
    • ½ tsp mustard seeds
    • tsp asafetida
    • 2 dry red chilies
    • 1 Tbsp thinly sliced ginger
    • ½ cup chopped tomato
    • ¼ tsp turmeric
    • ¼ tsp red chili powder
    • 1 tsp salt
    • 2 cup water

    Instructions
     

    • Wash lentils changing water few times.
    • I am using instant pot to make dal. Use the instant pot on sauté mode and add oil. After oil is moderately hot add cumin seeds, and mustard seeds, after the seeds crack, add asafetida, whole red chili and ginger stir for about a minute. Now take out the ginger and red chilies from oil and keep aside. We will use this later for garnishing.
    • Next add tomatoes, turmeric, red chili powder and salt. Cook and stir until tomatoes are soft.
    • Add dal and water, stir, and close the instant pot. Change the instant pot setting to pressure cooker mode. Cook for 14 minutes.
    • Dal is done it should be soft. If needed add more water, dal should not be very thick. Dal will thicken as it sits. Make it more liquid than you want it to be.
    • Take dal out in serving bowl and garnish with ginger and red chilies.
    • Serve hot.
    Keyword Dal Fry, Diabetic, Gravy, Hare Krishna, Healthy, High Protein, Homemade, Jain Food, Low Cholesterol, Low Fat, No Garlic, No Onion, Roti, Sattvic Food, Split Lentil, Split Masoor, Swami Narayan Food, Temple Food, Vaishnava Food
    Tried this recipe?Let us know how it was!

    Instant Pot Red Lentil Dal: A Quick and Flavorful Meal

    Red Lentil Dal is a nutritious and flavorful dish made from red lentils, which are rich in protein, fibre, and essential nutrients. It is suitable for individuals with diabetes, as it has a low glycemic index and helps regulate blood sugar levels. Additionally, it is gluten-free, making it suitable for those with gluten intolerance or celiac disease.
    This dish can be easily prepared in an Instant Pot, allowing for quick and convenient cooking. It is low in fat, making it a healthy option for those looking to reduce their fat intake. As a vegan dish, it does not contain any animal products, making it suitable for those following a plant-based diet.

    The dish is typically prepared by cooking red lentils with a variety of vegetables, such as tomatoes, and spinach, in a flavorful curry or gravy made from spices like cumin, coriander, turmeric, and ginger. The result is a hearty and satisfying meal that is both delicious and nutritious.

    Instant Pot Red Lentil Dal, also known as Masoor Dal, is a popular Indian lentil dish known for its simplicity, flavor, and quick preparation. This Instant Pot Red Lentil Dal recipe offers a convenient way to enjoy the rich flavors of lentils infused with aromatic spices in a fraction of the time. Perfect for busy weeknights or whenever you’re craving a hearty and nutritious meal, this dish is sure to become a staple in your recipe repertoire.
    Step 1: Preparation of Lentils

    Begin by rinsing the red lentils (masoor dal) under cold water until the water runs clear. This step helps remove any impurities and starch from the lentils, ensuring they cook evenly and maintain their shape. Once rinsed, drain the lentils and set them aside while you prepare the other ingredients.

    Step 2: Sautéing Aromatics

    To infuse the dal with flavor, heat oil or ghee in the Instant Pot using the “Sauté” function. Add aromatics such as cumin seeds, mustard seeds, and dried red chilies to the hot oil, allowing them to sizzle and release their fragrance. Then, add ginger, sautéing until they turn golden brown and aromatic.
    Step 3: Adding Spices

    Next, it’s time to add a medley of spices to the Instant Pot to create a robust flavor base for the dal. Incorporate ground turmeric, ground coriander, ground cumin, and red chili powder, stirring well to coat the aromatics. Toasting the spices in oil helps enhance their flavors and aromas, elevating the taste of the dal.

    Step 4: Cooking Lentils in Instant Pot

    Once the spices are well-incorporated, add the rinsed red lentils to the Instant Pot, stirring to coat them with the aromatic spice mixture. Pour in water or vegetable broth, ensuring that the lentils are fully submerged. Close the lid of the Instant Pot and set it to “Pressure Cook” mode, cooking the dal for the specified time until the lentils are tender and cooked through.

    Step 5: Natural Pressure Release

    After the cooking cycle is complete, allow the Instant Pot to naturally release pressure for a few minutes before carefully opening the lid. This gradual release of pressure helps prevent the dal from splattering and ensures that the lentils are fully cooked and tender. Once the pressure has been released, gently stir the dal to combine the flavors.

    Step 6: Adjusting Consistency and Seasoning

    At this stage, you can adjust the consistency of the dal by adding more water or broth if desired. Taste the dal and adjust the seasoning by adding salt and freshly ground black pepper according to your preferences. For added freshness, squeeze in a splash of lemon juice or garnish with chopped cilantro leaves before serving.

    Step 7: Serving and Enjoying

    Serve the Instant Pot Red Lentil Dal hot, garnished with additional cilantro leaves for a pop of color and freshness. This versatile dish pairs well with steamed rice, naan bread, or roti, making it a satisfying and wholesome meal option for any occasion.

    Tips for Perfect Instant Pot Red Lentil Dal

    Rinse Lentils Thoroughly: Be sure to rinse the red lentils thoroughly under cold water before cooking to remove any dirt or debris.

    Control Spice Level: Adjust the amount of red chili powder and dried red chilies according to your spice tolerance. For a milder dal, reduce the amount of chili powder or omit the dried red chilies altogether.

    Experiment with Spices: Feel free to customize the spice blend to suit your taste preferences. Additions such as garam masala, cinnamon, or cloves can add depth and complexity to the flavor profile of the dal.

    Variations of Instant Pot Red Lentil Dal

    Coconut Red Lentil Dal: Incorporate coconut milk or coconut cream into the dal for a creamy and indulgent variation with a hint of sweetness.

    Spinach Red Lentil Dal: Add fresh spinach leaves to the dal during the cooking process for an extra dose of greens and nutrition.

    Tadka Tempering: Elevate the flavor of the dal by adding a tadka (tempering) of ghee, cumin seeds, and dried red chilies to the finished dish before serving.

    Benefits of Instant Pot Red Lentil Dal

    High in Protein: Red lentils are a rich source of plant-based protein, making this dal an excellent option for vegetarians and vegans.

    Rich in Fiber: Lentils are also high in dietary fiber, which helps promote digestive health and keeps you feeling full and satisfied.

    Quick and Convenient: Cooking dal in the Instant Pot drastically reduces the cooking time compared to traditional stovetop methods, making it a convenient option for busy lifestyles.

    Frequently Asked Questions (FAQs)

    Can I use other types of lentils for this recipe?

    Yes, you can substitute other varieties of lentils such as green lentils or brown lentils for the red lentils in this recipe, although the cooking time may vary.

    Can I make this recipe on the stovetop instead of using an Instant Pot?

    Absolutely! Simply follow the same steps using a large pot or saucepan on the stovetop, adjusting the cooking time as needed until the lentils are tender.

    Can I freeze leftover dal for later?

    Yes, you can freeze leftover dal in airtight containers for up to 3 months. Thaw it in the refrigerator overnight before reheating and serving.

    Explore more delightful Indian recipes on Manjula’s Kitchen, such as Chana Masala for another culinary adventure.