Tag: Low Carb Vegetarian Recipes

Low Carb Vegetarian Recipes: Delicious and Nutritious Indian Options
Introduction
Exploring low carb vegetarian recipes can open up a world of flavorful and healthy dishes, especially within the rich culinary tradition of Indian cuisine. This guide provides a variety of delicious options, focusing on incorporating low-carb ingredients while maintaining the vibrant flavors of vegetarian Indian recipes.
Benefits of Low Carb Vegetarian Diet
Weight Management: Low carb diets are effective for weight management by reducing calorie intake and promoting fat loss.

Blood Sugar Control: They help in managing blood sugar levels, making them suitable for diabetics.

Nutrient-Rich: Emphasis on vegetables and legumes ensures high nutrient intake, which is essential for overall health.
Popular Low Carb Vegetarian Recipes
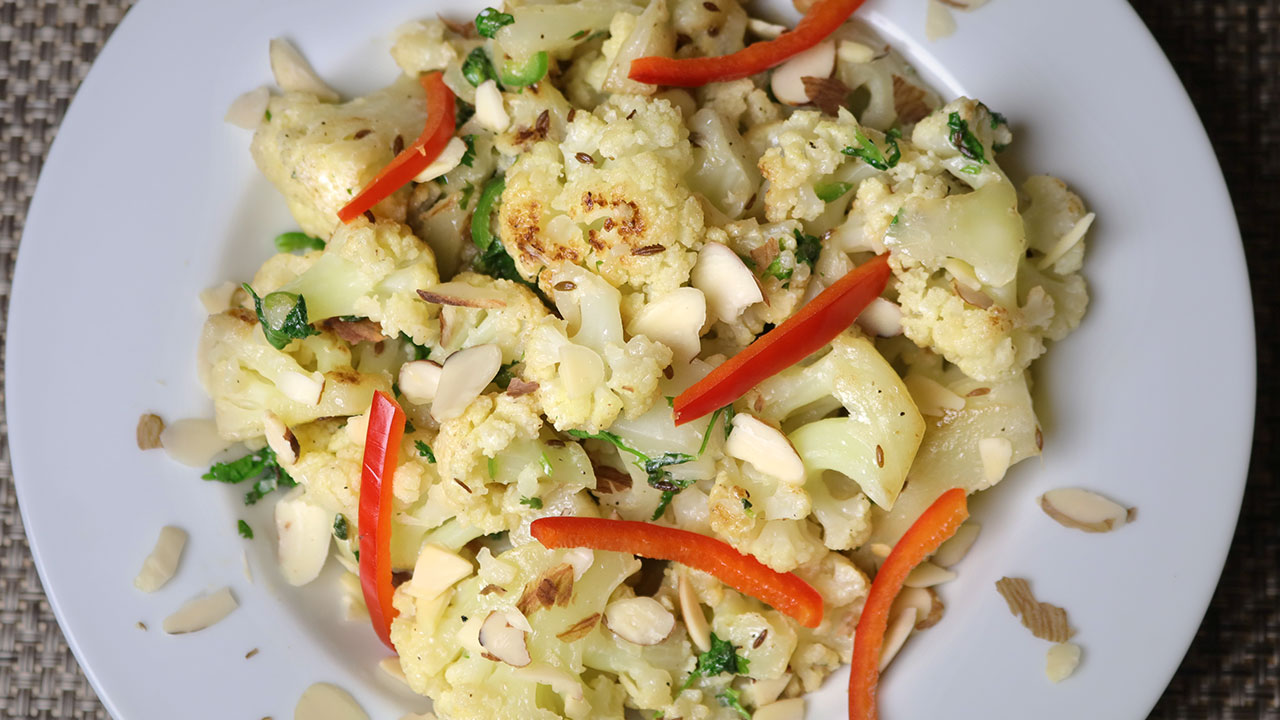
1. Cauliflower Rice Pulao
A great substitute for traditional rice, cauliflower rice is low in carbs and high in nutrients. Prepared with spices, peas, and carrots, this dish is a staple among vegetarian low carb recipes.
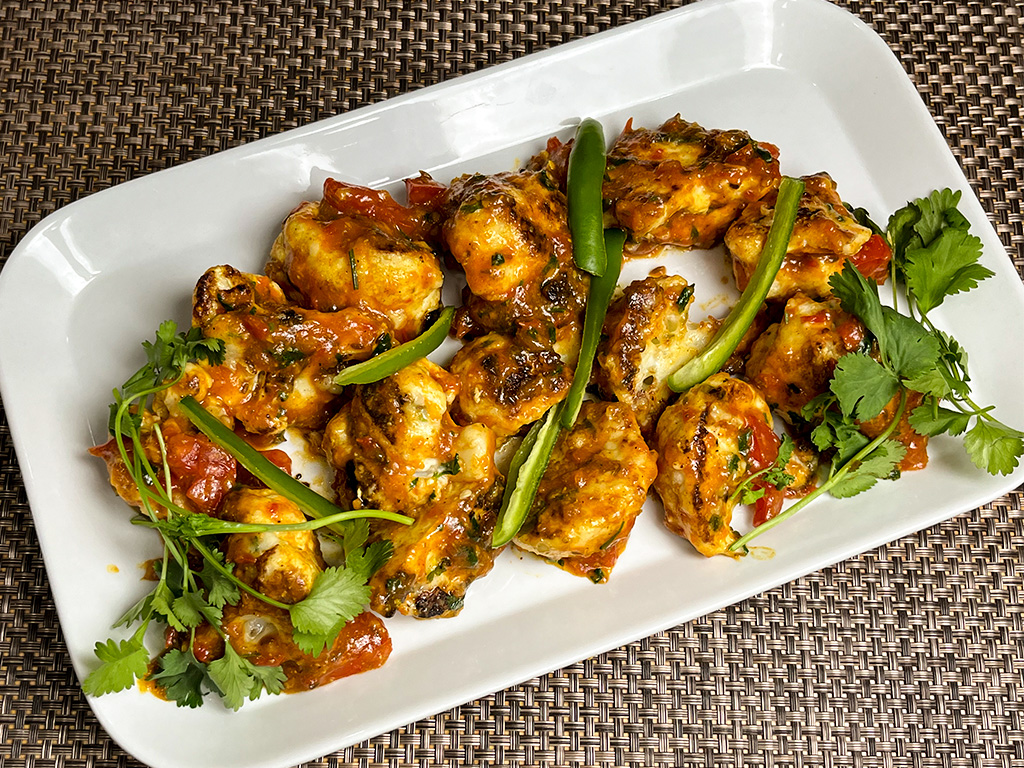
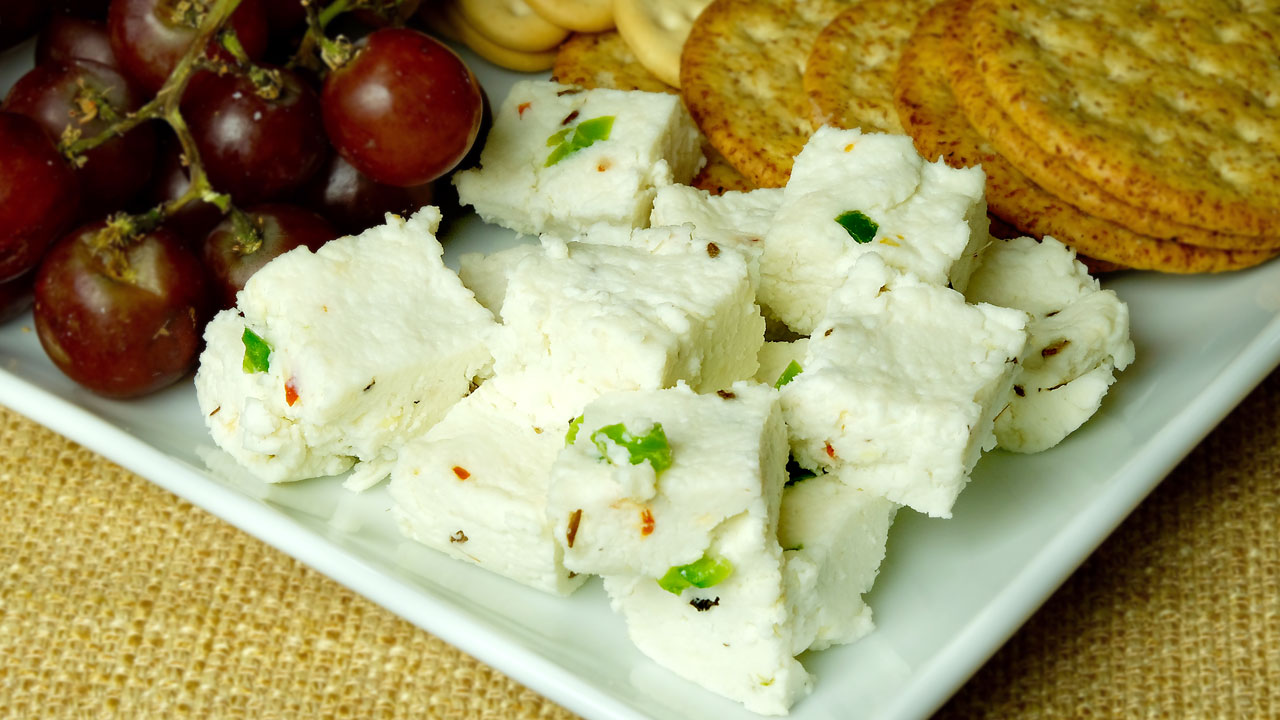
2. Paneer Tikka
Paneer tikka is a type of Indian cottage cheese, is marinated in spices and grilled. This easy low carb vegetarian recipe is both delicious and high in protein. It’s a great dish that is popular in paneer recipes
3. Zucchini Sabzi
Zucchini, cooked with tomatoes and Indian spices, makes for a light and nutritious dish. This vegetarian recipe low carb is perfect for a quick and healthy meal.
4. Spinach and Mushroom Stir Fry
A simple yet flavorful stir-fry combining spinach and mushrooms, seasoned with spices. This dish is a go-to for healthy low carb vegetarian recipes. Spinach and Mushroom Stir Fry is part of easy indian recipes 
More Low Carb Vegetarian Recipes
5. Baingan Bharta (Roasted Eggplant Mash)
Roasted eggplant mixed with tomatoes, and spices creates a smoky and delicious dish. Baingan bharta is a low carb vegetarian recipe is a classic Indian dish that is both satisfying and healthy.
6. Chana Salad (Chickpea Salad)
Chickpeas tossed with cucumbers, tomatoes, and a squeeze of lemon juice make for a refreshing and nutritious salad. This dish fits well into vegetarian low carb recipes.
7. Methi Thepla (Fenugreek Flatbread)
Methi thepla is made with fenugreek leaves and low carb flours, Methi Thepla is a nutritious flatbread that pairs well with various Indian dishes.
Exploring Diverse Low Carb Vegetarian Dishes
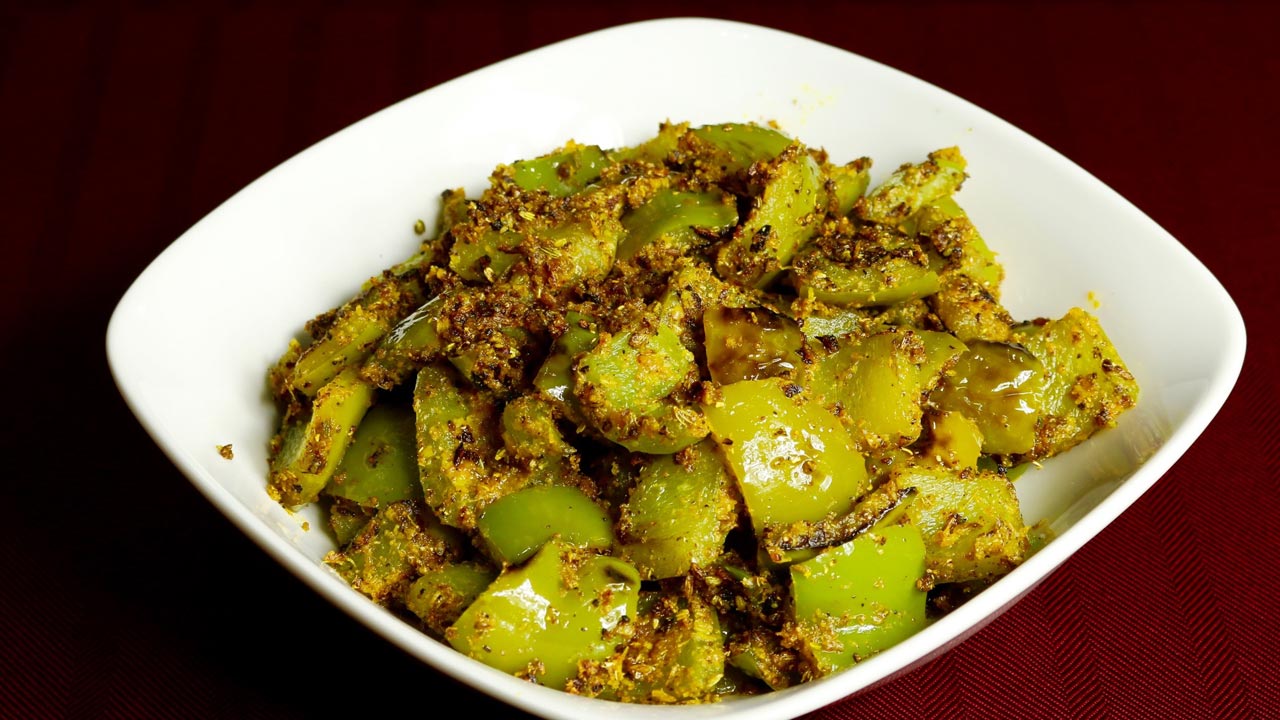
8. Okra Fry (Bhindi Fry)
Okra cooked with spices and a touch of lemon juice is a simple yet flavorful dish. This easy low carb vegetarian recipe is perfect as a side or a main dish.
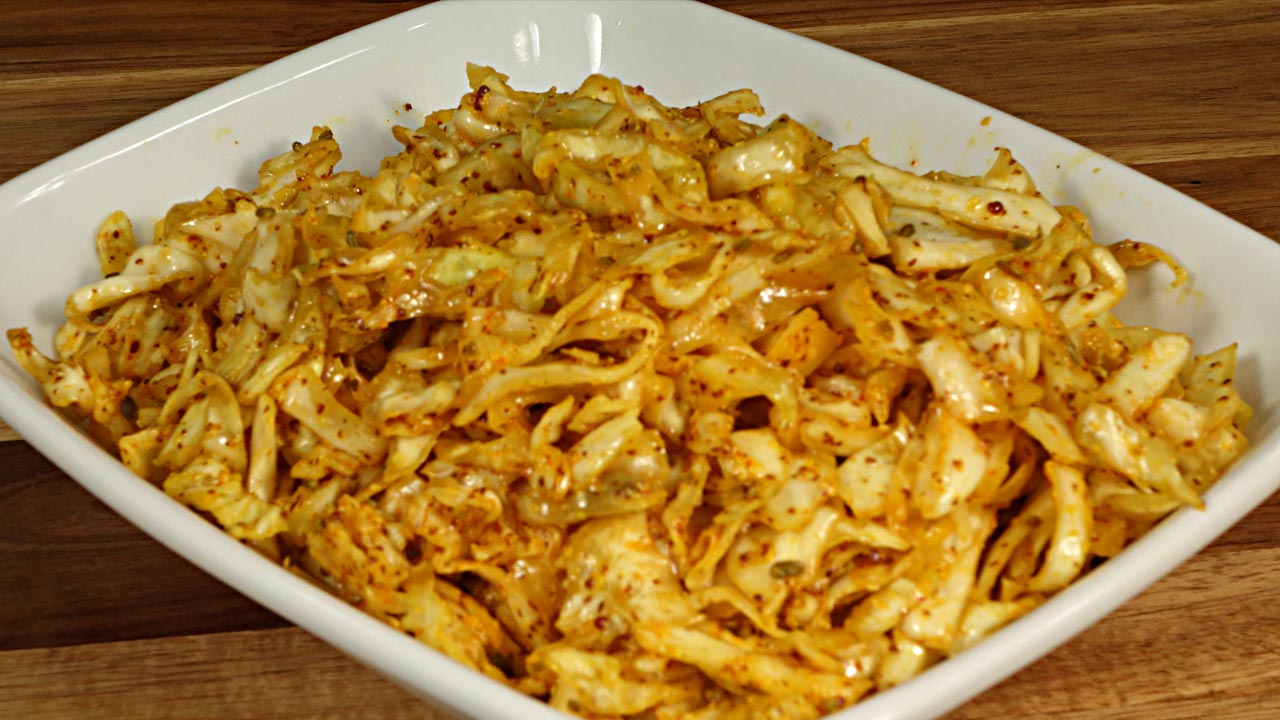
9. Cabbage Stir Fry
Cabbage, stir-fried with mustard seeds, curry leaves, and spices, makes for a crunchy and delicious dish. It’s an excellent option for those looking for vegetarian recipes with low carb.
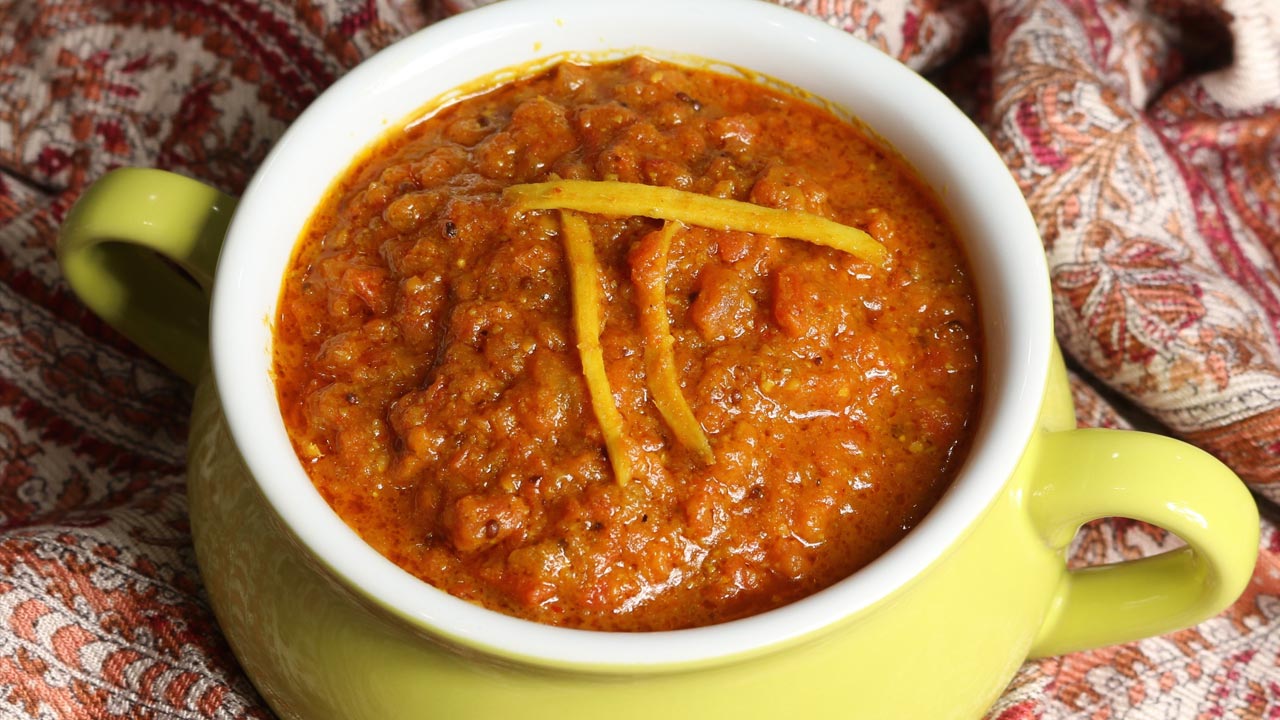
10. Tofu Curry
Tofu cooked in a rich tomato-based sauce with spices creates a hearty and satisfying dish. This healthy low carb vegetarian recipe is perfect for dinner.
Tips for Maintaining a Low Carb Vegetarian Diet
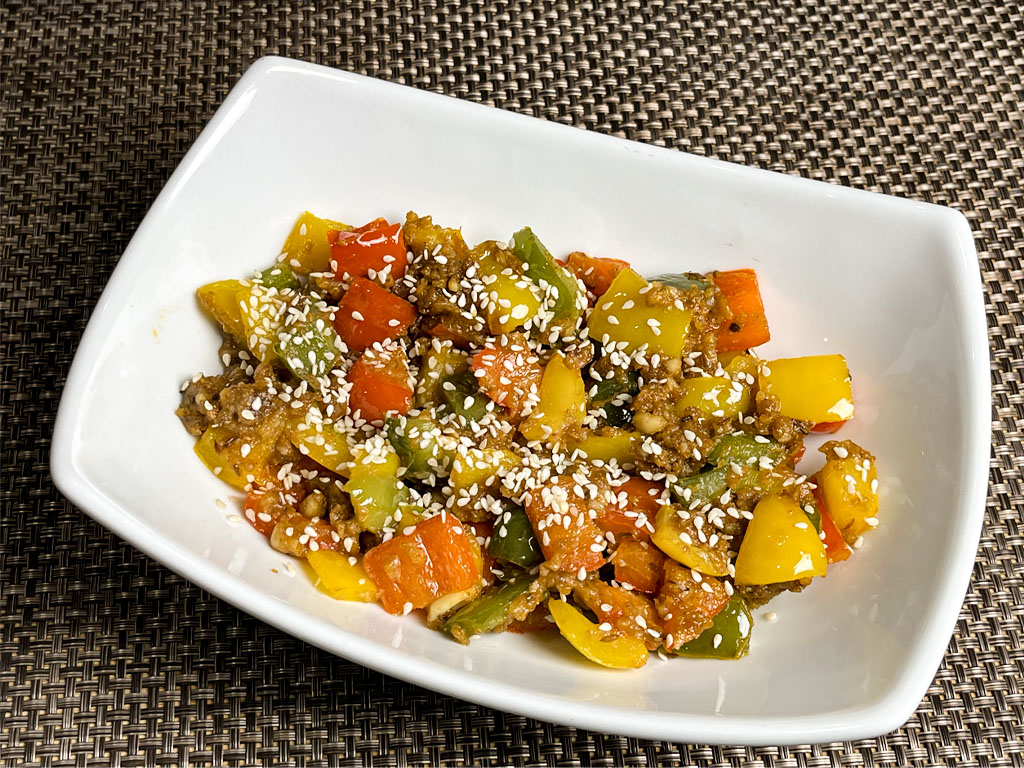
Focus on Vegetables: Use a variety of low carb vegetables like cauliflower, zucchini, spinach, and bell peppers.

Include High Protein Foods: Incorporate paneer, tofu, and legumes to ensure adequate protein intake.

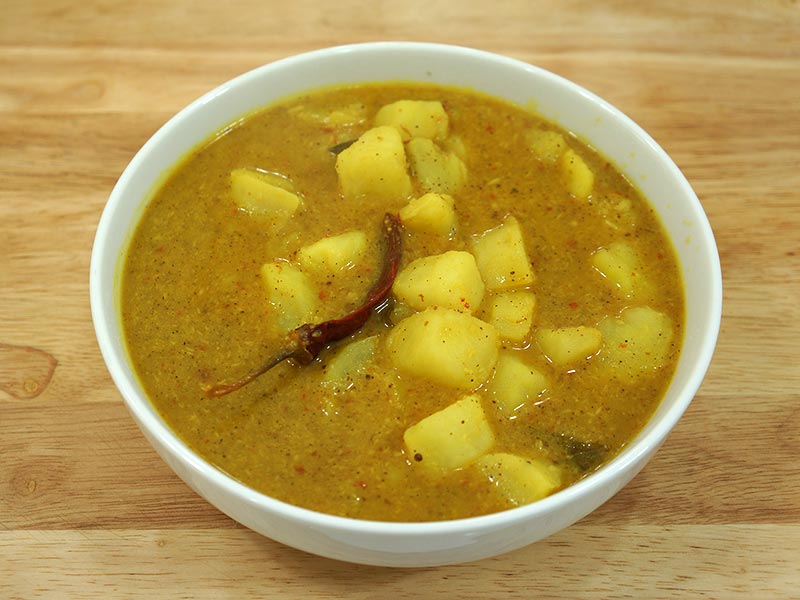
Avoid Starchy Vegetables: Limit the use of potatoes, corn, and peas as they are higher in carbs.
Frequently Asked Questions (FAQs)
What vegetarian foods are low-carb?
Vegetarian foods that are low in carbs include leafy greens, cauliflower, zucchini, bell peppers, eggplant, and mushrooms. These foods are nutrient-dense and perfect for a low carb diet.
More Unique Low Carb Vegetarian Recipes
11. Coconut Curry with Mixed Vegetables
A creamy curry made with coconut milk and a variety of low carb vegetables like bell peppers, zucchini, and spinach. This dish is both rich in flavor and low in carbs.
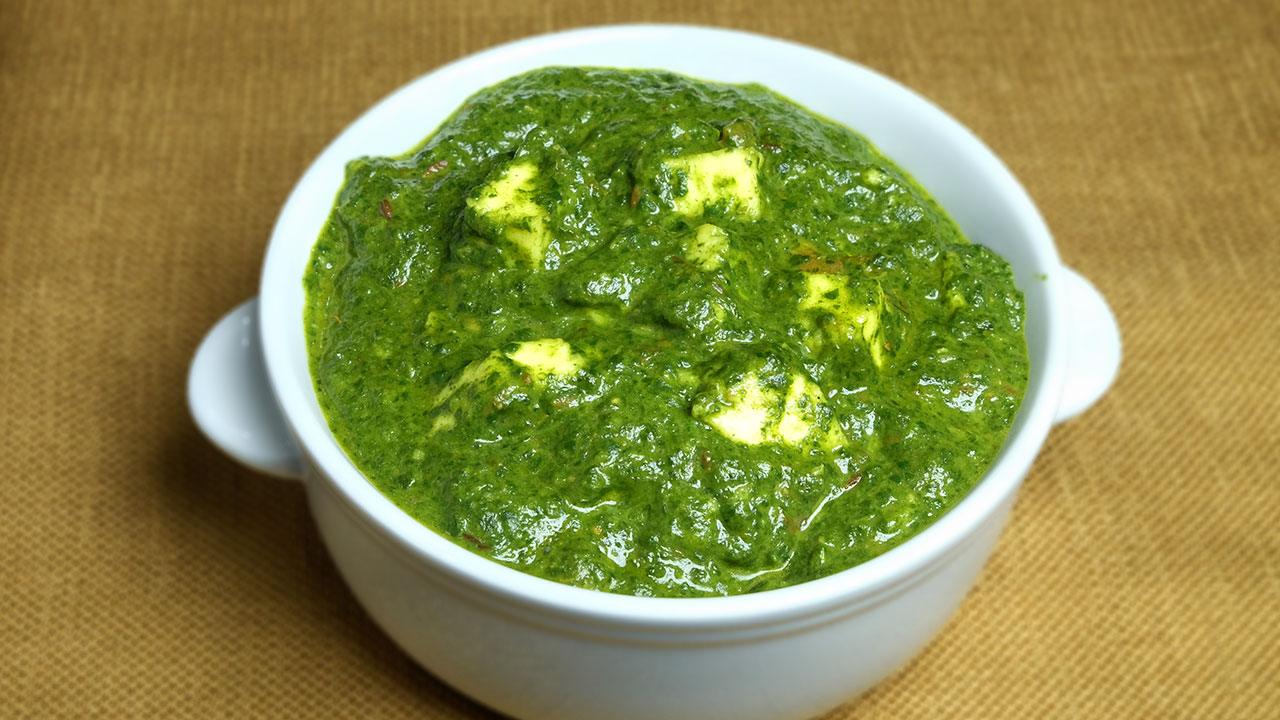
12. Palak Paneer (Spinach with Cottage Cheese)
Palak paneer is a classic Indian dish where spinach is pureed and cooked with paneer and spices. This dish is not only delicious but also fits well into easy low carb vegetarian recipes.
13. Cauliflower and Peas Curry (Gobi Matar)
Cauliflower and peas cooked in a tomato-based sauce with spices create a comforting and nutritious dish. Gobi matar is an excellent addition to any low carb vegetarian meal plan.
Creative Ways to Enjoy Low Carb Vegetarian Foods
Smoothies: Blend low carb vegetables like spinach with unsweetened almond milk and a touch of fruit for a nutritious smoothie.

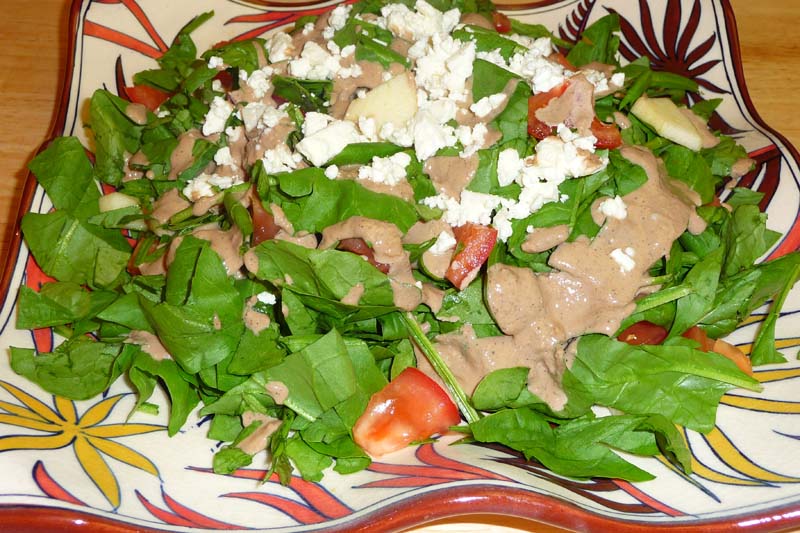
Salads: Create hearty salads with a base of leafy greens and add in various low carb vegetables, nuts, and seeds for added nutrition.

Soups: Make soups using low carb vegetables and spices for a warming and filling meal.
Incorporating Low Carb Vegetarian Foods into Traditional Indian Meals
14. Tandoori Tofu
Tofu marinated in yogurt and spices, then grilled, creates a flavorful and high protein dish. This fits perfectly into a low carb vegetarian diet.
15. Lentil and Vegetable Stew (Dal)
Lentil dal is a mix of lentils and low carb vegetables cooked with spices makes for a hearty and nutritious stew. This dish is both filling and healthy.
16. Beetroot and Carrot Salad
Grated beetroot and carrots mixed with yogurt and spices create a colorful and nutritious salad. This dish is a great way to enjoy a variety of vegetables while keeping carb intake low.
Conclusion
Exploring low carb vegetarian recipes within the rich tapestry of Indian cuisine can be both exciting and rewarding. From classic dishes like Baingan Bharta to innovative recipes like Tandoori Tofu, there are countless ways to enjoy delicious and nutritious meals while maintaining a low carb diet. 

By focusing on nutrient-dense vegetables, high protein foods, and avoiding starchy ingredients, you can create a variety of tasty and healthy dishes. 

Whether you are looking to manage your weight, control blood sugar, or simply enjoy flavorful vegetarian food, these low carb vegetarian recipes are sure to satisfy your culinary cravings. For more vegetarian recipes that cater to healthy eating habits, visit Manjula’s Kitchen.

  • Roasted Cauliflower with Tomato Gravy

    Roasted Cauliflower with Tomato Gravy

    A plate of golden brown roasted cauliflower florets

    Roasted Cauliflower with Tangy Tomato Gravy

    This is simply a delightful indian appetizer or side dish. Cauliflower florets are tossed with yogurt and spices, then shallow-fried. The crispy cauliflower has the perfect bite bursting with flavors, covered in tangy tomato gravy. It makes a mouthwatering appetizer.
    You can also serve them without tomato gravy, you can choose how spicy you want to make these roasted cauliflower florets. There are so many ways to enjoy this tangy cauliflower dish; they're all delicious!
    One of my favorite recipe published at Manjula's Kitchen, it can be enjoyed on its own with just a drizzle of oil and with your favorite spices. Some of my favorite dishes with cauliflower, Aloo Gobhi (potato with cauliflower), Pakoras, Paratha, and rice pulav with cauliflower, Gobhi Manchurian.
    4.30 from 10 votes
    Prep Time 10 minutes
    Cook Time 20 minutes
    Course Appetizer
    Cuisine Indian
    Servings 4

    Ingredients
      

    For the Roasted Cauliflower:

    • 1 medium cauliflower cut into florets (phool Gobhi), about 18 florates
    • 1 cup yogurt
    • 2 tbsp corn starch
    • 1 tsp cumin seeds (jeera)
    • 2 tbsp finely chopped cilantro (dhania)
    • 1 tsp finely chopped green chilies optional
    • 2 tsp finely shredded ginger
    • ½ tsp salt
    • 3 tbsp oil for shallow frying

    For the Tomato Gravy:

    • 2 tbsp oil
    • 1 tsp cumin seeds (jeera)
    • 2 tsp ginger finely shredded
    • 1 cup tomatoes pureed, I used 3 medium size tomatoes
    • ¼ tsp turmeric powder
    • ½ tsp red chili powder (adjust to taste)
    • 2 tsp coriander powder
    • 1 tsp garam masala
    • 1 tsp salt
    • 1 tsp sugar
    • 2 tbsp coriander leaves, finely chopped
    • ¼ cup chopped tomatoes

    For Garnishing:

    • 2 green chilies, slit for garnishing

    Instructions
     

    • In a large bowl: Mix the yogurt, corn starch, cumin seeds, cilantro, and green chilies until well combined.
    • Add the cauliflower florets to the yogurt mixture and toss well to coat each floret evenly.
    • Shallow Fry the Cauliflower: Heat oil in a skillet over medium heat, adding just enough to cover the pan.
    • Add the cauliflower florets in batches and shallow fry them until they are golden brown and crispy on all sides.
    • Remove and drain on paper towels to remove excess oil.
    • Tomato Gravy: Mix the corn starch with 1/4 cup of water in a small bowl and set aside.
    • Heat oil in a pan over medium heat.
    • Add cumin seeds until they crack. Add tomato puree and ginger, stirring for a few seconds.
    • Add red chili powder, coriander powder, turmeric, and sauté for another 2-3 minutes until the tomatoes release oil on the sides.
    • Add the corn starch paste and cook until the gravy reaches a pourable consistency, adding water if needed.
    • Add chopped tomatoes, sugar, garam masala, and cilantro, stir well, and turn off the heat.
    • Serve the crispy cauliflower with the tangy tomato gravy and garnish with slit green chilies.
    • Enjoy! Roasted cauliflower with tangy tomato sauce.

    Notes

    For serving: Arrange the cauliflowers on serving plates and pour the tomato sauce and garnish with cilantro and green chilies. serve hot as an appetizer or side dish.
    Enjoy your Roasted Cauliflower with Tangy Tomato Gravy!
    Choosing Cauliflower: look for cauliflower with firm and white and firmly attached green leaves. You can store uncut cauliflower in the refrigerator for up to five days
    How to Cut & Prepare Cauliflower: To separate the cauliflower florets from the core, halve and then quarter the head. This exposes the core, making it easy to cut out the florets. 
    Health Benefits of Cauliflower: Cauliflower is full of dietary fiber, vitamin C, and folic acid. Cauliflower is great for digestion and iron absorption as well. It’s a total vegetable all-star and helps round out a healthy meal!
    Keyword cauliflower appetizer, tomato gravy
    Tried this recipe?Let us know how it was!

    How to Make Roasted Cauliflower in Tangy Tomato Gravy: A Healthy and Flavorful Curry Recipe

    Roasted Cauliflower with Tangy Tomato Gravy is a flavorful and nutritious dish that combines the earthy taste of roasted cauliflower with a tangy, spiced tomato gravy. This cauliflower tomato curry is perfect for those looking to enjoy a healthy delicious meal, this simple indian vegetarian recipe is easy to prepare and packed with flavor. Whether served with plain indian rice or flatbread, this dish is sure to become a favorite in your household.

    The Essence of Roasted Cauliflower with Tangy Tomato Gravy

    The essence of this dish lies in its balance of flavors and textures. The cauliflower is roasted to perfection, bringing out its natural sweetness and adding a delightful crunch can  be served with Indian main course recipes. The tangy tomato gravy is made with ripe tomatoes and a blend of aromatic spices, creating a rich and flavorful sauce that complements the roasted cauliflower beautifully.

    Origin and Popularity

    Cauliflower is a versatile vegetable used in various cuisines around the world. Roasting cauliflower enhances its flavor and texture, making it a popular method of preparation. This roasted cauliflower recipe with tangy tomato gravy draws inspiration from Indian cuisine, where tomato-based gravies are commonly used to create rich, flavorful dishes.

    Why You’ll Love This Recipe

    • Flavorful and Nutritious: Combines the goodness of roasted cauliflower with a tangy, spiced tomato gravy.
    • Easy to Make: Simple ingredients and straightforward steps make this recipe accessible to everyone.
    • Versatile: Can be served with rice, flatbread, or as a standalone dish.
    • Perfect for Any Occasion: Ideal for everyday meals or special gatherings.

    How to Make Roasted Cauliflower with Tangy Tomato Gravy

    To make this delightful roasted cauliflower with tangy tomato gravy, start by mixing yogurt, corn starch, cumin seeds, cilantro, and green chilies in a large bowl. Coat cauliflower florets in this mixture. Heat oil in a skillet over medium heat and shallow fry the florets until golden brown and crispy. Drain excess oil using paper towels.

    For the tomato gravy, mix corn starch with 1/4 cup water. Heat oil in a pan, add cumin seeds, and once they crackle, add tomato puree and ginger. Stir in red chili powder, coriander powder, turmeric, and sauté for 2-3 minutes until the tomatoes release oil. Add the corn starch paste and cook until the gravy is of pourable consistency, adding water if needed. Stir in chopped tomatoes, sugar, garam masala, and cilantro, then turn off the heat.

    Serve the crispy cauliflower florets with the tangy tomato gravy, garnished with slit green chilies. This dish is very good indian appetizer or can be served hot as an side dish, garnished with cilantro and green chilies.

    When choosing cauliflower, look for firm, white heads with firmly attached green leaves. Store uncut cauliflower in the refrigerator for up to five days. Cauliflower is rich in dietary fiber, vitamin C, and folic acid, promoting digestion and iron absorption, making it a nutritious addition to any meal. Enjoy!

    Variations of Cauliflower Dishes

    Exploring Manjula’s Kitchen reveals a treasure trove of other delicious cauliflower recipes that you might enjoy. Here are some related dishes that you might find interesting:

    1. Aloo Gobi: A classic Indian dish made with potatoes and cauliflower cooked with spices.
    2. Baked Cauliflower: Cauliflower Spinach Bake is a healthy indian recipe which is nutrition-rich side dish that is easy and quick to make.
    3. Cauliflower Manchurian: An Indo-Chinese dish featuring crispy cauliflower florets in a tangy sauce.
    4. Cauliflower Crust Pizza: This is a yummy and healthy cauliflower crusted pizza, made with fresh ingredients and also egg-less. Pizza sauce and Indian cheese was made from scratch using fresh ingredients. Its a nice appetizer..
    5. Gobi Paratha: A stuffed flatbread or gobi paratha with a spicy cauliflower filling.

    Serving Suggestions

    Roasted cauliflower with tangy tomato gravy can be enjoyed in various ways:

    • With Rice: Serve it with steamed basmati rice or jeera rice for a complete meal.
    • With Flatbread: Pair it with naan, roti, or paratha for a satisfying lunch or dinner.
    • As a Side Dish: Serve it alongside other Indian vegetarian recipes for a flavorful spread.
    • On Its Own: Enjoy it as a standalone dish for a light and healthy meal.

    Tips and Tricks

    To perfect your roasted cauliflower with tangy tomato gravy recipe, consider these helpful tips:

    • Roast Evenly: Ensure the cauliflower florets are evenly coated with oil and spread out on the baking sheet for even roasting.
    • Use Fresh Tomatoes: Fresh, ripe tomatoes provide the best flavor for the gravy.
    • Adjust Spices: Tailor the amount of spices to suit your taste preference.
    • Simmer Slowly: Let the gravy simmer slowly to develop a rich and deep flavor.

    FAQs

    Can I Use Frozen Cauliflower?

    Yes, you can use frozen cauliflower. Thaw it and pat it dry before roasting to prevent excess moisture.

    How Long Does This Dish Last?

    Store any leftovers in an airtight container in the refrigerator for up to 3 days. Reheat before serving.

    Is This Recipe Vegan?

    Yes, this recipe is naturally vegan and gluten-free.

    Can I Add Other Vegetables?

    Absolutely, you can add other vegetables like bell peppers, peas, or carrots to the dish.

    What If I Don’t Have Fresh Tomatoes?

    You can use canned tomatoes or tomato puree as a substitute for fresh tomatoes.

  • Sweet & Sour Bell Pepper

    Sweet & Sour Bell Pepper

    Sweet & Sour Bell Pepper

    Sweet and Sour Bell Pepper

    Sweet and sour bell pepper is colorful, sweet, sour, and nutty—all the flavors blend into one delicious taste. It tastes great when served as a side dish with paratha, roti or rice.
    I make this quite often upon request of my family because it can be used for making sandwiches or rolled up in any Indian flatbread or tortillas. For making sandwiches, add cheese to make a complete meal. This recipe is also versatile, keeping everything the same, you can change the bell pepper with potatoes or any squash.
    5 from 1 vote
    Prep Time 10 minutes
    Cook Time 20 minutes
    Servings 2 people

    Ingredients
      

    • 3 cups bite-cubed bell pepper, I am using green, yellow, and red bell peppers to make it colorful.
    • 1/4 cup peanuts coarsely powder
    • 2 tbsp besan
    • 2 tbsp oil
    • 1/2 tsp cumin seeds (jeera)
    • 2 tsp coriander powder (dhania)
    • 1 tsp salt
    • ¼ tsp red chili powder
    • 1 tsp mango powder (amchoor)
    • 2 tsp lemon juice
    • 3 tbsp brown sugar or jaggery
    • 2 tsp sesame seeds

    Instructions
     

    • Cut the bell peppers into bite-size cubes and remove all the seeds.
    • Heat the oil in a saucepan. Test the heat by adding one cumin seed to the oil. If the cumin seed cracks right away, the oil is ready. Add the cumin seeds. After the cumin seeds crack, add peanuts, besan, and 1 teaspoon of sesame seeds. Stir for about half a minute until the besan (gram flour) is golden-brown.
    • Reduce the heat to medium-low, add the bell peppers and stir. Add coriander powder, red chili powder, and salt, then stir. Add about ¼ cup of water and cover the pan. Cook over low-medium heat for 6 to 8 minutes. Open and stir to check if the bell peppers are tender but still have some crispness to it.
    • Add the mango powder and brown sugar. Stir and taste to adjust salt and lemon juice according to your taste.
    • Turn the heat to low and cook for about 2 minutes, stirring gently.
    • Before serving, garnish with the saved sesame seeds. Enjoy
    Tried this recipe?Let us know how it was!

    Easy Bell Pepper Recipe: How to make Sweet & Sour Bell Pepper 

    Bell peppers are versatile vegetables that add vibrant color and flavor to dishes. While commonly used in savory recipes, they also shine in sweet and sour preparations. 

    Sweet and sour bell peppers offer a delightful appetizer with an added combination of tangy sweetness, making them a favorite among food enthusiasts. 

    Tips for Easy Bell Pepper Recipe:

    Selecting Bell Peppers: For bell pepper recipes, Choose bell peppers that are firm, glossy, and free from wrinkles or blemishes. Look for peppers with vibrant colors, such as red, yellow, or orange, as they tend to be sweeter than green bell peppers.

    Preparing Bell Peppers: Wash the bell peppers thoroughly under running water and pat them dry with a paper towel. Remove the stem, seeds, and white membrane from the inside of the peppers before slicing them into uniform strips or cubes.

    Balancing Sweetness and Sourness: Achieving the perfect balance of sweetness and sourness is key to a delicious sweet and sour bell pepper dish. Adjust the amount of brown sugar or jaggery and lemon juice according to your taste preferences, keeping in mind that the sweetness should complement the tanginess without overpowering it.

    Cooking Techniques: Sweet and sour bell peppers can be cooked using various methods, including stir-frying, sautéing, or roasting. Stir-frying is a quick and convenient method that retains the peppers’ crisp texture, while roasting enhances their natural sweetness and adds depth of flavor.

    Suggestions for Spicy Bell Pepper Recipe:

    Side Dish: Sweet and sour bell peppers make a flavorful side dish that pairs well with a variety of main courses, such as grilled tofu. Serve them alongside steamed rice or noodles for a complete meal.

    Topping: Use sweet and sour bell peppers as a topping for pizza, sandwiches, or burgers to add a burst of flavor and color. They can also be layered onto wraps or quesadillas for a tasty twist.

    Dip or Relish: Turn sweet and sour bell peppers into a dip or relish by blending them with herbs, spices, and a touch of olive oil. Serve it with crunchy crackers, tortilla chips, or crusty bread for a delicious appetizer or snack.

    Variations to Sweet & Sour Bell Pepper:

    Spicy Kick: Add diced jalapeños or red chili flakes to the sweet and sour bell pepper mixture for a spicy kick. The heat from the peppers will complement the sweet and tangy flavors, creating a delicious contrast.

    Herb Infusion: Enhance the flavor of sweet and sour bell peppers by infusing them with fresh herbs such as basil, thyme, or cilantro. Simply add the herbs to the cooking process or sprinkle them over the dish before serving for a burst of freshness.

    Protein Addition: Incorporate tofu into the sweet and sour bell pepper dish to make it more hearty and satisfying. Cook the protein separately and then combine it with the peppers during the final stages of cooking.

    Frequently Asked Questions (FAQs):

    Q: How long can I store leftover sweet and sour bell peppers?

    A: Leftover sweet and sour bell peppers can be stored in an airtight container in the refrigerator for up to 3-4 days. Reheat them gently on the stovetop or in the microwave before serving.

    Q: Can I make sweet and sour bell peppers ahead of time?

    A: Yes, you can prepare sweet and sour bell peppers ahead of time and reheat them when ready to serve. However, keep in mind that the texture may slightly change upon reheating.

    Q: Is this dish vegan/vegetarian-friendly?

    A: Of course this dish is absolutely vegan/vegetarian-friendly for it doesn’t incorporate any non veg ingredients.

    Q: How spicy is this dish?

    A: Sweet and Sour Bell Pepper is typically not spicy, but you can adjust the heat level by adding chili flakes or fresh chili peppers if desired.

    Q: Can I make this dish ahead of time?

    Yes, you can make the sauce ahead of time and store it in the refrigerator for up to a week. When ready to serve, simply reheat the sauce and stir in freshly cooked bell peppers.

    Q: What can I serve with Sweet and Sour Bell Pepper?

    This dish pairs well with steamed rice or noodles. You can also serve it alongside other Asian-inspired dishes like stir-fried vegetables or tofu.

    Q: How long will leftovers last?

    Leftovers can be stored in an airtight container in the refrigerator for up to 3-4 days. Reheat gently on the stove or in the microwave before serving.

    Q: Can I freeze Sweet and Sour Bell Pepper?

    While you can freeze this dish, the texture of the bell peppers may change slightly upon thawing. It’s best enjoyed fresh, but if you do freeze it, store it in an airtight container for up to 2-3 months.

    Q: How can I make this dish gluten-free?

    Use tamari or a gluten-free soy sauce instead of regular soy sauce, and ensure all other ingredients are gluten-free as well.

  • Potato Curry Recipe

    Potato Curry Recipe

    Potato with Coconut Gravy

    Potato in Coconut Gravy

    This is a beautiful looking dish! Mouthwatering, heat from red chilies and sweet and sourness from tamarind make this dish exotic. This is a great dish for me and our family when we want a change from our regular tomato or yoghurt based gravy.
    5 from 1 vote
    Course gravy
    Cuisine Indian
    Servings 2

    Ingredients
      

    • 4 boiled 4 potatoes medium size, boiled peeled and cut into 1/3” cubes that will make about 3 cups of cubed potatoes
    • 2 tbsp oil
    • 1/2 tbsp mustard seeds (rai)
    • 2 whole dried red chilies
    • 1/4 tbsp turmeric (haldi)
    • 8-10 curry leaves
    • 1 tbsp salt adjust to taste
    • 3 whole dried red chilies
    • 1/4  cup grated coconut
    • Approx. 2 tbsp tamarind pulp(imli)
    • 1/2 tbsp mustard seeds (rai)
    • 1 tbsp coriander (dhania)

    Instructions
     

    • Soak tamarind in about ¼ cup of hot water, mix it well and squeeze out the pulp, recipe needs about 2 tablespoons of pulp. Set aside.
    • For gravy dry roast chilies, mustard seeds and coriander over medium heat for about 1 minute.
    • First grind the dry ingredient red chili, mustard seeds, and coriander, into coarse powder. Add coconut, tamarind pulp and ¼ cup water to make it into a paste. While blending use water as needed to make paste. If you prefer mild take the seeds out of red chili before blending. Set aside.
    • Heat the oil in a sauce pan add mustard seeds red chilies, and curry leaves, as seeds crack add potatoes, salt and turmeric. Stir for about 1-2 minutes.
    • Add coconut paste and mix it well; add about 1-1/2 cups of water.
    • After potatoes come to boil let it cook covered for 4-5 minutes over medium heat.
    • Note: The dish absorbs water while sitting. Add more water as needed to keep the gravy consistency of your liking. Let it cook on low heat for few more minutes.
    • Potato with Coconut Gravy is ready to serve.

    Notes

    Serving Suggestions
    Potato with Coconut goes well Plain Paratha or Puri.
    Tried this recipe?Let us know how it was!

    Potato Curry in Coconut Milk | Potato Coconut Curry Recipe | Potato in Coconut Gravy

    How to Make Potato in Coconut Gravy: A Step-by-Step Guide to a Tasty Dish

    Potato Curry in Coconut Milk, also known as Potato in Coconut Gravy, is a delectable Indian dish that beautifully combines the rich creaminess of coconut milk with the heartiness of potatoes. This recipe is a staple in many households, known for its aromatic flavors and creamy texture. Whether you are a seasoned cook or a beginner, this recipe will guide you through creating a dish that is both comforting and flavorful.

    The Essence of Potato Curry in Coconut Milk

    This dish is a perfect example of how simple ingredients can come together to create something extraordinary. The star of the recipe is, of course, the humble potato, which absorbs the flavors of the spices and the coconut milk beautifully. The creamy coconut milk not only adds a rich texture but also a subtle sweetness that balances the heat from the spices.

    Origin and Popularity

    The origin of Potato Curry in Coconut Milk can be traced back to South Indian cuisine, where coconut milk is a common ingredient in many dishes. Over time, this dish has gained popularity across different regions due to its unique taste and ease of preparation. It is now enjoyed by people all over the world who appreciate the blend of spices and the creamy consistency.

    Why You’ll Love This Recipe

    • Simple Ingredients: This recipe uses everyday ingredients that are easily available.
    • Flavorful: The combination of spices and coconut milk creates a burst of flavors.
    • Vegan and Gluten-Free: It’s a great option for those with dietary restrictions.
    • Versatile: Can be served with rice, roti, or naan.

    Variations of the Recipe

    Exploring Manjula’s Kitchen reveals a treasure trove of other delicious variations that you can try. Here are some related recipes that you might enjoy:

    1. Butter Paneer: This classic dish features paneer cubes in a rich and creamy tomato gravy, infused with aromatic spices like coriander and turmeric.
    2. Paneer Tikka Masala: Marinated paneer pieces are pan-fried and then cooked in a luxurious tomato-based gravy, offering a smoky flavor with a hint of sweetness.
    3. Paneer Methi: A creamy dish made with paneer and dried fenugreek leaves (kasoori methi), providing a unique slightly bitter taste that complements the creamy base.
    4. Paneer Tomato Curry: A simple yet delicious curry made with fresh tomatoes and aromatic spices, with chunks of paneer absorbing all the delicious flavors.
    5. Palak Paneer: A nutritious green curry made with fresh spinach and spices, providing a rich source of iron and vitamins.

    Serving Suggestions

    Potato Curry in Coconut Milk is incredibly versatile and can be enjoyed in various ways:

    • With Rice: Serve it over a bed of steamed basmati rice to soak up the creamy gravy.
    • With Naan or Roti: Use the bread to scoop up the curry for a satisfying meal.
    • As a Side Dish: Pair it with other Indian dishes like dal and vegetable curry for a complete meal.

    Tips and Tricks

    To enhance your Potato Curry in Coconut Milk, consider the following tips:

    • Use Fresh Coconut Milk: If possible, use fresh coconut milk for a more authentic flavor.
    • Adjust the Spices: Tailor the heat level to your preference by adjusting the amount of chili powder and green chilies.
    • Garnish: Garnish with fresh coriander leaves for a burst of freshness and color.

    FAQs

    Is Potato Curry in Coconut Milk Vegan? 

    Yes, this recipe is vegan as it uses plant-based coconut milk.

    Can I Make It Ahead of Time? 

    Yes, you can prepare the curry in advance and store it in the refrigerator. Reheat gently on the stovetop before serving.

    What Can I Serve with This Curry? 

    This curry pairs well with rice, naan, or roti. It can also be served alongside other Indian dishes for a complete meal.

    How Spicy is This Curry?

     The spice level can be adjusted to your taste. The coconut milk helps balance the heat, making it a mild to moderately spicy dish.

  • Spinach Salad

    Spinach Salad

    Spinach Salad

    Spinach Salad

    This is a delicious quick & easy and refreshing spinach and tomato salad. Adding walnuts and ginger dressing provides a creamy and tangy flavor.
    5 from 1 vote
    Course Salad
    Cuisine Indian
    Servings 4 people

    Ingredients
      

    • About 4 cup chopped spinach
    • 2 tomatoes
    • 1 apple
    • 1/4 cup  feta cheese (optional)
    • 1/4 cup  walnuts
    • 2 tbsp olive oil
    • 2 tbsp balsamic vinegar
    • 1 tbsp lemon juice
    • 1 tbsp ginger juice
    • 1 tbsp salt
    • 1 tbsp sugar
    • 1/2 tbsp black pepper
    • About 2 tbsp water adjust as needed

    Instructions
     

    • Wash the spinach and pat dry and chop them coarsely. Keep aside.
    • Cut the tomatoes in halves and remove the seeds, cut them in about half inch pieces.
    • Next peel and cut the apples in small pieces.
    • In a salad bowl toss the spinach, tomatoes and apples together. Keep aside.

    Notes

    Dressing:
    1. Shred about 1 inch piece of ginger on fine side of shredder. Squeeze the shredded ginger between your fingers to make ginger juice.
    2. Next blend all the dressing ingredients together. Add the water as needed otherwise dressing will be too thick.
    3. Pour the dressing over salad, and sprinkle with feta cheese. Enjoy!
     
    Suggested Variations:
    1. Tomatoes can be replaced with strawberries.
    2. Walnuts can be replaced with roasted peanuts
    Keyword Healthy Salad
    Tried this recipe?Let us know how it was!
  • Cabbage Pizza

    Cabbage Pizza

    Cabbage Pizza

    Cabbage Pizza

    Cabbage Pizza is a nice twist to traditional pizza with touch of Indian spices as a fusion. Makes 2 medium pizzas. Pizzas are generally a favorite snack of all and is a nice appetizer
    5 from 1 vote
    Course Main Course
    Cuisine Fusion, Indian
    Servings 2 Medium Pizza

    Ingredients
      

    for the Dough:

    • 2 ¾ cup All Purpose flour Plain flour or Maida
    • 1 cup lukewarm water
    • 1 Tbsp dry active yeast
    • 3 Tbsp olive oil
    • 1 tsp salt
    • ½ tsp sugar

    for the White Sauce:

    • 2 Tbsp olive oil
    • 2 ½ Tbsp All Purpose flour Plain flour or Maida
    • ¾ cup milk
    • 1 tsp salt
    • ½ tsp black pepper

    for Cabbage Topping:

    • 3 cup sliced cabbage
    • ½ thinly sliced red bell pepper
    • 2 Tbsp chopped cilantro Green coriander
    • 2 chopped green chilies

    Instructions
     

    Making the Dough:

    • Dissolve yeast in lukewarm water and let it sit for about 20 minutes or until the yeast becomes frothy.
    • Add sugar, salt and oil to the flour and mix well.
    • Add the yeast water and make into a dough. The dough should be soft and a little sticky. Add more water if needed.
    • Cover the dough and let it sit for about four hours. The dough should be double in volume.
    • Knead the dough well using a little dry flour.

    Making White Sauce:

    • Heat the oil in a small heavy saucepan over low-medium heat.
    • Add the flour and cook until the flour changes into a light brown color.
    • Slowly add the milk, stirring constantly. Continue cooking slowly until it is smooth and thick. Add the salt and black pepper.
    • Making Cabbage Topping:
    • Mix the cabbage, bell pepper, cilantro, and green chilies with the white sauce.

    Making the Pizza:

    • Pre-heat the oven to 500 degrees, placing a pizza stone inside for about 30 minutes so the pizza stone will be hot.
    • Divide the dough in to two equal parts and roll into two 8 inch diameter pizzas.
    • Place over greased cookie sheets. Put about a half teaspoon of olive oil over the pizza. Evenly spread the cabbage mixture onto the pizza.
    • Slide the cookie sheet on the pizza stone and let it cook for about five minutes.
    • To make a crispy pizza crust, remove the pizza from the cookie sheet and place over the pizza stone.
    • Let it cook for about 7 minutes, or until the edges are golden-brown.
    Keyword Cabbage, Cheeseless, Flour, Fusion, Maida, Pizza
    Tried this recipe?Let us know how it was!
  • Tamarind Chutney

    Tamarind Chutney

    Homemade Tamarind Chutney served in a bowl

    Tamarind Chutney, Tamarind Sauce

    This exotic sweet and sour chutney is a zesty condiment. This chutney can be called the ketchup of the east and goes best with all kinds of indian snacks, be it pakoras to other snack munchies.
    5 from 3 votes
    Prep Time 5 minutes
    Cook Time 20 minutes
    Total Time 25 minutes
    Course Side Dish
    Cuisine Indian
    Servings 20 people

    Ingredients
      

    • 1/2 lm tamarind seeded imle
    • 2-1/2 cup sugar
    • 2 cups boiling water
    • 1-1/2 tbsp roasted ground cumin seeds
    • 1 tbsp salt
    • 1 tsp black salt
    • 1 tsp red chili powder
    • 1 tsp ground black pepper
    • 1/2 tsp ginger powder

    Instructions
     

    • Break the tamarind into small pieces and soak in boiling water for one hour.
    • Mash it into a pulp and strain, pressing the tamarind into the strainer to remove all the pulp. Add sugar to the pulp. Mix well. Add the remaining ingredients. Mix and taste. Add more sugar, salt or pepper as needed.

    Notes

    Notes
    Chutney can be refrigerated for two to three months.
    Serving Suggestions
    Tamarind chutney is delicious with samosas, pakoras, drizzled over dahi vadas,  or any kind of chat.
    It is also delicious as a dipping sauce for French fries and as a spread over crackers.
    Try drizzling over rice to add a unique flavor to plain rice.
    Variations
    To use as a dip, thicker chutney is ideal. To use as a topping, add water to make the chutney thinner.
    Add water and ice cubes to serve as a cool spicy drink.
    Add equal parts yogurt and chutney to make a dipping sauce.
    Keyword Hot And Spicy, Popular Condiment, Sweet And Sour Sauce
    Tried this recipe?Let us know how it was!

    Tamarind Chutney Recipe: 

    Tamarind Chutney, also known as Imli Chutney, is a sweet and tangy condiment widely used in Indian cuisine. This versatile chutney adds a burst of flavor to a variety of dishes, from savory snacks to appetizers to main courses. 

    Why Tamarind Chutney is so popular:

    • Rich Flavor Profile: Tamarind Chutney is prized for its unique combination of sweet, tangy, and slightly sour flavors. The tartness of tamarind is balanced with sweetness from jaggery or sugar, creating a harmonious blend of tastes that enhances the overall flavor of any dish.
    • Versatile Usage: Tamarind Chutney is incredibly versatile and can be used in various ways. It’s commonly served as a dipping sauce for snacks like samosas be it or pakoras like Spinach Potato Pakora, Cabbage Pakora or Palak Pakora, and Chaat. Its tangy-sweet flavor adds depth and complexity to both savory and sweet dishes.
    • Digestive Properties: Tamarind is known for its digestive properties and is often used in traditional medicine to aid digestion and relieve gastrointestinal issues. Tamarind Chutney, with its natural acidity, can help stimulate digestion and alleviate discomfort after a heavy meal.
    • Easy to Prepare: Making Tamarind Chutney at home is simple and requires only a few basic ingredients. With minimal effort, you can whip up a batch of this flavorful condiment to elevate your favorite dishes and impress your guests.

    Variations of Chutney:

    • Hari Cilantro Chutney: Hari chutney is a blend of fresh cilantro (green coriander) and variety of spices. Hari chutney is a “must” with pakoras, samosas, chaats, and many popular Indian snacks.
    • Date And Raisin Chutney: Date and Raisin chutney! This exotic sweet and sour chutney is mildly spiced, this will complement any meal. This recipe is quick and easy to make.
    • Methi Chutney: Methi Chutney is a popular North Indian condiment. Methi Chutney is packed with flavors, sourness from mango, sweetness from raisins; some bitterness from fenugreek, mixed with spices it has a very unique taste. 
    • Tomato Chutney: Tomato Chutney with freshly grated ginger for a warming and aromatic flavor. It adds a spicy and pungent kick to the chutney, making it ideal for pairing with rich and hearty dishes like kebabs and curries.

    Tips for Making Perfect Tamarind Chutney:

    • Soak Tamarind Properly: Start by soaking tamarind pulp in warm water to soften it before extracting the pulp. This helps to release the natural flavors and acids from the tamarind, resulting in a more flavorful chutney.
    • Adjust Sweetness and Tanginess: Taste the Tamarind Chutney as you go and adjust the sweetness and tanginess according to your preference. Add more jaggery or sugar for a sweeter chutney, or increase the amount of tamarind pulp for a tangier flavor.
    • Strain for Smooth Texture: For a smooth and silky texture, strain the Tamarind Chutney after cooking to remove any fibrous or gritty particles. This ensures a velvety consistency and enhances the overall eating experience.
    • Store Properly: Store Tamarind Chutney in an airtight container in the refrigerator for up to a month. It can also be frozen for longer storage. Allow it to thaw before using and adjust the consistency with a little water if needed.

    FAQs about Tamarind Chutney:

    Is Tamarind Chutney gluten-free? 

    Yes, Tamarind Chutney is naturally gluten-free as it’s made with tamarind pulp, sugar or jaggery, and spices, which are all gluten-free ingredients. It’s safe for individuals with gluten intolerance or celiac disease to consume.

    Can I make Tamarind Chutney without sugar?

    Yes, you can make Tamarind Chutney without sugar by using alternatives like jaggery, honey, or maple syrup. Adjust the amount of sweetener according to your taste preferences and dietary restrictions.

    How long does Tamarind Chutney last? 

    Tamarind Chutney can be stored in the refrigerator for up to a month in an airtight container. If properly stored, it can last even longer. However, always check for signs of spoilage before consuming.

    What can I serve with Tamarind Chutney? 

    Tamarind Chutney pairs well with a variety of dishes, including samosas, pakoras, chaat, grilled meats, and rice dishes. It adds a tangy-sweet flavor and enhances the overall taste of the dish.

    In conclusion, Tamarind Chutney is a delightful and versatile condiment that adds a burst of flavor to a wide range of dishes. Whether enjoyed as a dipping sauce for snacks or as a condiment for main courses, its tangy-sweet taste and aromatic spices are sure to tantalize your taste buds and elevate your dining experience. So why not try making a batch of homemade Tamarind Chutney and discover the joy of this beloved Indian condiment?

    Stay tuned for our next exploration into the world of culinary delights!

  • Hari Chutney

    Hari Chutney


    Hari Cilantro Chutney

    Hari Cilantro Chutney

    Hari chutney is a blend of fresh cilantro (green coriander) and variety of spices. Hari chutney is a “must” with pakoras, samosas, chaats, and many popular Indian snacks. Like ketchup and other popular condiments, hari chutney can be used in a variety of different ways!
    5 from 1 vote
    5 10 minutes
    Course Side Dish
    Cuisine Indian
    Servings 6 people

    Ingredients
      

    • 1 large bunch of cilantro. will be about cups
    • 3 green chilies chopped about 2 tbsp
    • 3 tbsp lemon juice
    • 1/2 inch ginger
    • 1-1/2 tsp salt
    • 1 tsp cumin seeds jeera
    • 1 tsp oil
    • 1 tsp sugar
    • 1/8 tsp asafetida hing

    Instructions
     

    • Blend all ingredients, except the cilantro, into a paste. Add cilantro, a little at a time, and blend until smooth. Add water as needed.
    • Taste and adjust salt, green chilies, or lemon juice as desired.

    Notes

    Tips:
    Using a little oil and sugar keeps the color fresh.
    While cleaning cilantro (hara dhania) chop off just the thick stems.
    You can make hari chutney in large quantity in advance and freeze it in ice cube trays. Store the frozen cubes in a zip-lock plastic bag. When ready to serve, defrost as many cubes of hari chutney as needed.  If you freeze the hari chutney soon after preparing, the chutney will not lose its bright green color and freshness.
    Variations:
    Mix mint leaves (without stems) with cilantro half and half.
    Serving Suggestions:
    To make a delicious dip for vegetables, chips, or crackers, mix one part chutney and three parts yogurt.  
    To make a sandwich spread, mix 1 part chutney and 2 parts cream cheese.
    Tried this recipe?Let us know how it was!

  • Apple Banana Pakora

    Apple Banana Pakora

    A plate of crispy Apple Banana Pakoras

    Apple Banana Pakora

    Apple and Banana Pakoras! Pakoras are an all-time favorite snack amongst everyone. Pakoras are made in so many ways using a variety of vegetables and lentils. Apple and Banana Pakoras were suggested by my friend Rajni from India. It sounds different because I never tried these pakoras. I decided to give it a try. I know she enjoys sweet and spicy combinations of flavors. These pakoras are crispy from the outside and soft from the inside. These Pakoras are also vegan and gluten-free. Give it a try and share your experience. Hope you will enjoy it. This recipe will serve 4.
    5 from 2 votes
    Prep Time 5 minutes
    Cook Time 15 minutes
    Total Time 20 minutes
    Course Appetizer
    Cuisine Indian
    Servings 4 people

    Ingredients
      

    • 6 Apple slices cut into rounds ¼ inch thick
    • 6 banana slices, cut into the long way banana should not be very ripe
    • ½ cup gram flour besan
    • 2 Tbsp rice flour
    • 1 Tbsp corn starch also can use arrow root powder
    • ½ tsp salt adjust to taste
    • ½ tsp cumin seeds jeera
    • ¼ tsp black pepper
    • ½ tsp mango powder amchoor
    • 1 Tbsp sugar
    • 2 Tbsp cilantro finely chopped, hara dhania
    • 1 Tbsp green chili finely chopped

    Instructions
     

    • I am using firm apples. I have sliced the apples in rounds about 1/4 inch thick. Use firm bananas that are slightly less ripe. Do not use fully ripe bananas. I am using 1banana. I sliced the banana in 6 pieces the long way
    • To make the batter, add all the dry ingredients together besan, rice flour, cornstarch, salt, cumin seeds, black pepper, mango powder, and sugar. Mix all the ingredients well.
    • Add the water slowly to make a smooth batter. Consistency of pancake mix. I used about 1/2 cup of water. Now add the green chilies and cilantro, mix it well.
    • Heat the oil in a frying pan on medium-high heat. The frying pan should have about 1 inch of oil. To check if the oil is ready, put one drop of batter in the oil. The batter should come up but not change color right away.
    • Dip the apples and bananas slices into the batter one at a time, making sure it is covered by the batter completely. Then, slowly drop in the slices into the frying pan.
    • Fry the pakoras in small batches, not overlapping. The pakoras will take about 3-4 minutes to cook.
    • Turn them occasionally. Fry the pakoras until both sides are golden brown. If the oil is too hot, the pakoras will brown too fast and not get crispy.
    • The crispy, delicious pakoras are now ready to serve.

    Notes

    They taste delicious with tamarind sweet and sour chutney. I already have this chutney recipe on my blog.
    You would also like to see the recipes for Apple Jalebi, Apple Bread Rolls, Aloo Puri, Tomato soup.
    Tried this recipe?Let us know how it was!
  • Mexican Refried Beans and Salsa

    Mexican Refried Beans and Salsa

    A plate of Mexican Refried Beans and Salsa served with tortilla chips and fresh vegetables

    Mexican Refried Beans and Salsa

    My ultimate favorite cuisine is of course Indian. But I must say that Mexican and Italian cuisines are close seconds! Overall, I enjoy trying new cuisines with a variety of flavors. After coming to the United States, Mexican cuisine was the first new cuisine I tried. As you already know, I have a story behind every dish.
    It was many years ago and we had just come to the United States. Some good friends of ours decided to take us to a small mom and pop Mexican restaurant. They were sure we would enjoy the food. I was a little hesitant and when the server came to take our order, I immediately began to tell her all of my limitations for food, such as no onions, garlic, and of course vegetarian. She smiled at me and proudly let me know she was the owner of the restaurant. She reassured me that I had come to the right restaurant and advised that all the food at her restaurant was made fresh that very day. She personally brought out our food which included refried beans, soft tortillas, salsa, enchiladas, and salad. I tried the food and immediately fell in love. Mexican cuisine had become another favorite cuisine, and this restaurant became our go-to place for dinner. Both dishes are also vegan and gluten free.
    I typically keep beans and salsa in my refrigerator or freezer. Both items freeze well. Also, you can come up with so many dishes using them. These are some of my favorite dishes to serve using refried beans and salsa: beans and corn chips, tostadas, burritos, and enchiladas. I hope you will enjoy these dishes!
    This recipe will serve 4.
    No ratings yet
    Servings 0

    Ingredients
      

    Refried Beans

    • 1 cup pinto beans
    • 3 Tbsp oil
    • ½ cup tomatoes finely chopped
    • 1 tsp ginger shredded
    • 1 tsp salt
    • 2 cup of water

    Salsa

    • 5 Roma tomatoes
    • 3 Jalapeno pepper
    • 6 red whole red chili
    • 1 tsp salt
    • ¼ cup cilantro finely chopped

    Instructions
     

    How to prepare Beans

    • soak the beans for at least 6 hours in six cups of water. Drain the water boiled the beans in 3 cups of water instant pot or pressure cooker for 40 minutes. Drain most of the water and save, this will be used slowly as needed.
    • In a saucepan moderately heat the oil over medium-high heat. Add beans keep steering and keep mashing the beans. Cook for about 5 minutes. Add tomatoes, ginger and salt keep mashing, and cook for another five minutes. Add water we have saved from beans slowly as needed. As beans cool off will become thick. I used most of the water, we saved from beans. Beans should be the inconsistency of thick batter.

    How to prepare Salsa

    • dry roast the red chilies over medium heat, till they are darker in color. Remove from the pan and set aside.
    • Preheat the oven at 350-degree F. Half the tomatoes and jalapeno peppers long way. Spread them over the baking sheet, Put the tomatoes and jalapeno face down, and bake for 10 minutes.
    • Take out from the oven and remove the skin from tomatoes and jalapenos.
    • First in a food processor crush red chilies, then add tomatoes, jalapeno, and salt roughly blend them together, take it out in a bowl and add cilantro. Salsa is ready and keeps aside.
    • Beans and salsa make a good side dish for any Mexican cuisine.
    • Enjoy!
    Tried this recipe?Let us know how it was!
  • Sauteed Cauliflower

    Sauteed Cauliflower

    A plate of sautéed cauliflower garnished with sliced almonds and red pepper strips.

    Sautéed Cauliflower

    Sautéed cauliflower is a simple and delicious side dish. This is my favorite way to serve cauliflower because its simple, quick, and delicious.
    5 from 6 votes
    Course Side Dish
    Cuisine Indian
    Servings 3 people

    Ingredients
      

    • 4 cup Cauliflower cut into florets
    • 1 ½ Tbsp Oil
    • ½ tsp Cumin seeds
    • 3 Tbsp Yogurt
    • 1 tsp Salt
    • tsp Black pepper
    • ½ tsp Sugar
    • 1 tsp Ginger juice
    • 1 Tbsp Green chili finely chopped
    • 1 Tbsp Cilantro finely chopped

    For Garnishing

    • 1 Tbsp sliced almonds
    • few thin slices red bell pepper

    Instructions
     

    • In a bowl mix the yogurt, salt, black pepper, sugar, ginger juice (shred the ginger using fine shredded and squirgreen chili, and cilantro, mix it well and keep aside.
    • Boil cauliflower in a large pot, boil them until cauliflower crisp and tender; drain well.
    • In a large skillet over medium heat, heat the oil. When oil is moderately hot add cumin seeds after seeds crack add cauliflowers Sauté’ the cauliflower and cook a few minutes, stirring, until it becomes lightly golden brown in color.
    • Turn off the heat and add the yogurt mix and mix it well. Add the spice mix just before serving.
    • Sprinkle with almonds and sliced red bell pepper
    Keyword Bhoona Phool Gobhi, Gluten Free, Healthy, Homemade, No Onion Garlic, Phool Gobhi, Quick And Easy, Sattvik Food, Side Dish, Vegetarian
    Tried this recipe?Let us know how it was!
  • Custard Toast Bites

    Custard Toast Bites

    Slices of toasted bread topped with custard and garnished with sliced pistachios, served with extra custard and a bowl of pistachios on the side.

    Custard Toast Bites

    Custard Toast Bites is custard flavored with saffron and cardamom and served over toasted bread. This recipe is definitely un-traditional but nonetheless a delicious approach. This is super easy to make and you can call this Custard Bruschetta. Custard Toast Bites can be served as a dessert or tea time snack.
    No ratings yet
    Course Appetizer
    Servings 4 people

    Ingredients


    • 12 thin slices of French bread bruschetta or use the regular size bread and cut them to size you will like
    • 2 Tbsp melted butter
    • 1 ¼ cup milk
    • ¼ cup heavy cream
    • ¼ cup sugar
    • 1 ½ Tbsp corn starch
    • Pinch saffron
    • tsp cardamom powder
    • 1 Tbsp sliced almond for garnishing
    • 1 Tbsp sliced pistachios for garnishing

    Instructions
     

    • In a heavy bottom pan; stir in the milk, cream, cornstarch, sugar, cardamom powder and saffron. Make sure the corn flour has dissolved completely, no lumps.
    • Turn the heat to medium and bring the milk mixture to a boil, stirring continuously. Turn the heat to low. Keep stirring until the mixture thickens. It is important to keep stirring continuously to avoid burning and the lumps.
    • Milk mixture should be consistency of thick batter. This should take about 3-4 minutes. Remember as custard will cool of it will become thicker. Turn off the heat and sliced almonds mix it well. The custard is ready.
    • Lightly butter the bread from both sides and toast to make them crisp.

    Notes

    For Serving
    Spread custard generously over toasted bread and garnish with pistachios.
    Keyword Bruschetta, Custard, Dessert, Eggless, Homemade, Quick And Easy, Saffron Custard, Snack, Vegetarian
    Tried this recipe?Let us know how it was!
  • Masala Paneer

    Masala Paneer

    Masala Paneer

    Masala Paneer

    Need a simple healthy appetizer that is sure to be enjoyed by all? Try serving my "Masala Paneer Cubes" at your next get together! It is homemade paneer mixed with a variety of spices. Serve with crackers, or fruit plate. Masala paneer can be used for many different ways, like paneer pakoras, paneer paratha.
    No ratings yet
    Course Appetizer
    Cuisine Indian
    Servings 8 people

    Ingredients
      

    • 8 cup milk whole milk
    • 5 tbsp lemon juice
    • 1 tbsp salt
    • 10 black pepper crushed
    • 1/4 tbsp red chili flakes
    • 1 tbsp clarified butter, ghee
    • 1/2 tbsp cumin seeds, jeera
    • 1 tbsp ginger finely shredded, or paste
    • 1 tbsp green chili seeded and finely chopped
    • 1 tbsp lemon juice

    Instructions
     

    • Boil the milk in a heavy-bottomed pan over medium heat, first wet the pan to ensure the milk will not burn. Stir occasionally.
    • When the milk comes to a boil, add the lemon juice gradually and stir gently. The curd will start separating from the whey. Turn off the heat.
    • Once the milk fat has separated from the whey, drain the whey using a strainer lined with muslin cloth.
    • Wrap the curds in a muslin cloth, rinse under cold water, and squeeze well.
    • To test whether enough water has been removed from the paneer, rub a little piece of paneer on your palm with your fingers. After rubbing the paneer 15-20 seconds, you should be able to make a firm, smooth ball.
    • In a small frying pan heat the clarified butter (ghee) over medium heat. When ghee is moderately hot add cumin seeds as seeds crack add green chili and ginger, turn off the heat. Stir fry for few seconds and set aside.
    • In a mixing bowl mix the paneer with all the ingredients fried cumin mix, salt, black pepper, chili flakes, black pepper and lemon juice.
    • Mix it well, do not knead the paneer. Put the paneer in a flat bowl and press it to spread evenly. Cover it and refrigerate for at least two hours.

    Notes

    Notes
    For this recipe full fat milk works better otherwise paneer will be too dry.
    Do not knead the paneer that will make paneer little chew.
    Keyword Masala Paneer
    Tried this recipe?Let us know how it was!

    How To Make Paneer Masala At Home Recipe 

    Explore the perfect fusion of flavors with our delectable masala paneer appetizers and snacks. Satisfy your cravings for gluten-free delights featuring the rich essence of paneer. Indulge in these flavorful snacks that redefine the joy of snacking.

    Preparing Masala Paneer at Home: 

    Indulge in the culinary art of crafting masala paneer by following this easy step-by-step guide on how to make paneer masala at home. Begin the process by boiling milk in a heavy-bottomed pan over medium heat, ensuring the pan is wet to prevent burning. Stir occasionally as the milk comes to a boil. Gradually introduce lemon juice to curdle the milk, separating the curd from the whey. This initial step sets the foundation for a delightful paneer butter masala.

    Draining and Squeezing the Curds for Paneer Butter Masala:

    After successfully curdling the milk, the next crucial step in the paneer butter masala recipe involves draining the whey. Employ a strainer lined with muslin cloth to filter out excess liquid. Wrap the curds in the cloth, rinse under cold water, and squeeze thoroughly. Testing the paneer’s water content is key; a firm, smooth ball should form after rubbing it on your palm for 15-20 seconds. This meticulous process ensures the perfect texture for your homemade paneer butter masala.

    Flavor Infusion with Cumin Mix for Masala Paneer:

    Enhance the taste of your paneer butter masala by preparing a flavorful cumin mix. Heat clarified butter (ghee) in a small pan, adding cumin seeds until they crack. Introduce green chili and ginger, stir-frying for a few seconds. This aromatic blend serves as a crucial ingredient in the masala, imparting a distinct and savory touch to your how to make paneer butter masala adventure.

    Mixing and Chilling for the Best Paneer Butter Masala: 

    In a mixing bowl, combine the prepared paneer with the cumin mix, salt, black pepper, chili flakes, and lemon juice. It’s essential to achieve a thorough mix without kneading the paneer. Place the paneer in a flat bowl, press it evenly, and cover it. Allow it to refrigerate for a minimum of two hours. This cooling period not only solidifies the paneer but also intensifies the flavors for an extraordinary paneer butter masala recipe.

    Savoring the Delight of Homemade Paneer Butter Masala: 

    Once refrigerated, your homemade masala paneer is ready to elevate your culinary experience, especially when preparing the tantalizing paneer butter masala. Explore the rich flavors and follow a simple how to make paneer butter masala recipe to create a dish that delights your taste buds and showcases your culinary prowess. Relish the satisfaction of crafting a delectable paneer butter masala from scratch, bringing the authentic taste of Indian cuisine to your dining table.

    If you liked this recipe you should also try our: Corn Bruschetta, Baklava Rolls, Spicy Cashews, Bread Potato Rolls and Kalmi Vada

  • Masala Bell Pepper Recipe

    Masala Bell Pepper Recipe

    Masala Bell Pepper

    Masala Bell Pepper (Capsicum)

    Bell pepper is also known as capsicum or shimla mirch. Masala bell pepper with great blend of spices, makes a very enjoyable side dish. This can complement any meal. Masala bell pepper can be served with roti, paratha or puries. I enjoy this with side of dal fry and plain rice.
    5 from 1 vote
    Course vegan
    Cuisine Indian
    Servings 4 people

    Ingredients
      

    • 3 medium Green bell pepper seeded and cubed in 1/2” pieces this will make about 3 cup cubed bell pepper (capsicum, shimla mirch)
    • 2 tbsp oil
    • 1/2 tbsp cumin seeds (jeera)
    • 1/8 tbsp asafetida (hing)
    • 1-1/2 tbsp coconut powder (gola)
    • 1-1/2 tbsp sesame Seed powder (til)
    • 2 tbsp teaspoons coriander powder (dhania)
    • 2 tbsp fennel seeds powder (saunf)
    • 1/2 tbsp Red Chili Powder (lal mirch)
    • 1/4 tbsp Turmeric Powder (haldi)
    • 3/4 tbsp salt
    • 1 tbsp sugar
    • 1/2 tbsp mango powder (amchoor)
    • 1 tbsp Lemon Juice

    Instructions
     

    • In a small bowl mix most of the spices, coconut powder, sesame powder, coriander powder, fennel seeds powder, red chili, turmeric, salt, and sugar. Set aside.
    • In a wide frying pan heat the oil moderately over medium high heat, add cumin seeds as seeds crack add asafetida. Add bell pepper mix well lower the heat to low medium. Cover the pan and let it cook for about 3 minutes.
    • Sprinkle the spice mix. Mix it well coating all the bell pepper. Let it cook about 3-4 minutes covered, do stir in between. Cook the bell peppers until they are tender but still little crisp.
    • Turn off the heat, add the mango powder and lemon juice mix well.
    • Masala bell pepper is ready.
    Tried this recipe?Let us know how it was!


  • Tomato Chutney Recipe

    Tomato Chutney Recipe

    Tomato Chutney

    Tomato Chutney (Pickle)

    Tomato Chutney is tangy and spicy. I was inspired to make this particular tomato chutney from the south Indian cuisine. Chutneys and pickles are a common component of Indian meals. This unique blend of spices gives an amazing unforgettable flavor to chutney. It goes well with breads and rice or can be used as a spread for sandwiches. Tomato chutney is very easy to make and can be refrigerated for up to a month.
    5 from 1 vote
    Prep Time 10 minutes
    Cook Time 30 minutes
    Total Time 40 minutes
    Course Side Dish
    Cuisine Indian
    Servings 10 people

    Ingredients
      

    • 4 cups tomatoes cubed in small pieces
    • 3 tbsp tamarind paste
    • 1/4 cup oil
    • 1 tsp mustard seeds rai
    • 1 tsp asafetide hing
    • 1/4 tsp turmeric haldi
    • 2 tbsp sesame seeds til
    • 2 tbsp coriander seed
    • 1 tsp fenugreek seeds
    • 10 whole dry red chilies
    • 1/4 cup sliced ginger optional
    • 1 tsp salt
    • 2 tsp sugar

    Instructions
     

    • In a small frying pan dry roast red chilies, over low medium heat, stirring continuously to cook evenly till they are darker in color, this should take about 2 minutes. Remove from the frying pan.
    • In the same pan, dry roast sesame seeds, coriander seeds, and fenugreek seeds over low medium heat individually stirring continuously to cook evenly for about less than a minutes. Don’t over roast.
    • In a same pan add 2 teaspoons of oil when oil is moderately hot add ginger and stir-fry on low medium heat for about 3 minutes until ginger start catching the light brown color from the sides. Set aside.
    • After spices cool of grind them into the powder. Set aside.
    • In a blender crush the tomatoes do not make a paste. Set aside.
    • In a pan heat remaining oil over medium high heat, oil should be moderately hot add mustard seeds, after they crack add asafetida. Now add tomatoes, and tamarind paste. Stir and cook for about 10 minutes semi covered (after tomato comes to boil start splattering) or until oil start separating.
    • Add the roasted spice powder, ginger, turmeric, salt and sugar, reduce the heat to low medium and cook for about another 8 minutes or until chutney is thick and oil is separated.

    Notes

    I like to serve tomato chutney with rava dosa, vada or spread on sandwich.
    Tried this recipe?Let us know how it was!

  • Cabbage Pickle Recipe

    Cabbage Pickle Recipe

    Cabbage Pickle

    Cabbage Pickle (Bandh Gobhi Achar)

    Cabbage pickle is a spicy condiment with any meal. This is quick and easy to prepare. Traditionally Indian meals are not complete without pickles / relish.
    5 from 1 vote
    Course Pickle
    Cuisine Indian
    Servings 0

    Ingredients
      

    • 4 cup cabbage sliced, (patta gobhi, bandh gobhi)
    • 3 tbsp mustard seeds coarsely ground, (rai)
    • 1 tbsp fennel seeds coarsely ground (saunf)
    • 1/4 tbsp turmeric (haldi)
    • 1/2 tbsp chili powder adjust to taste
    • 1-1/2 tbsp salt
    • 1/8 tbsp asafetida (hing)
    • 1 tbsp mustard oil (sarso ka tale) this is my preference but you may use olive oil

    Instructions
     

    • Mix all the ingredients together with the cabbage and put in a glass jar. Set the jar in the sun for three to four hours.
    • Pickle can be refrigerated for about two weeks.

    Notes

    Serving Suggestions
    1. Cabbage pickle can also be used as a side dish.
    2. Use the pickle for sandwiches.
    Tried this recipe?Let us know how it was!