Category: Makar Sankranti Recipes

Makar Sankranti Recipes: Celebrating the Harvest Festival

Makar Sankranti is a vibrant harvest festival celebrated across India with great enthusiasm. This festival marks the transition of the Sun into the zodiac sign of Capricorn, symbolizing the end of winter and the beginning of longer days. 

Sankranti special food plays a significant role in the celebrations, with a variety of Makar Sankranti food items prepared to mark the occasion. Let’s explore some traditional Sankranti food items that you can prepare to enhance your festive experience.

Festive Sweets for Sankranti
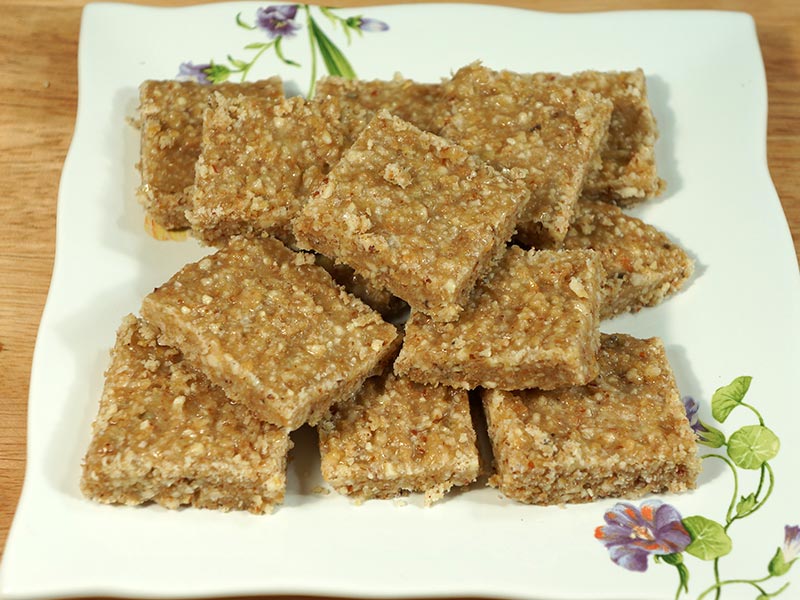
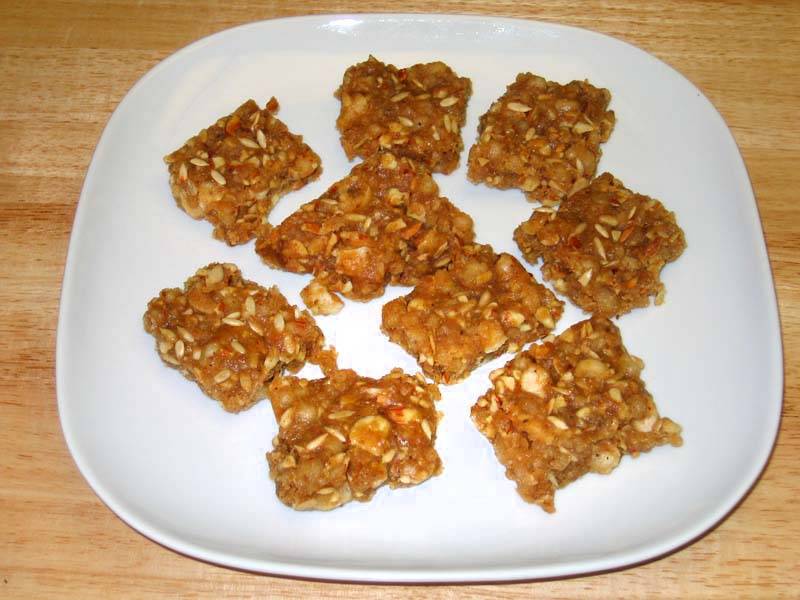
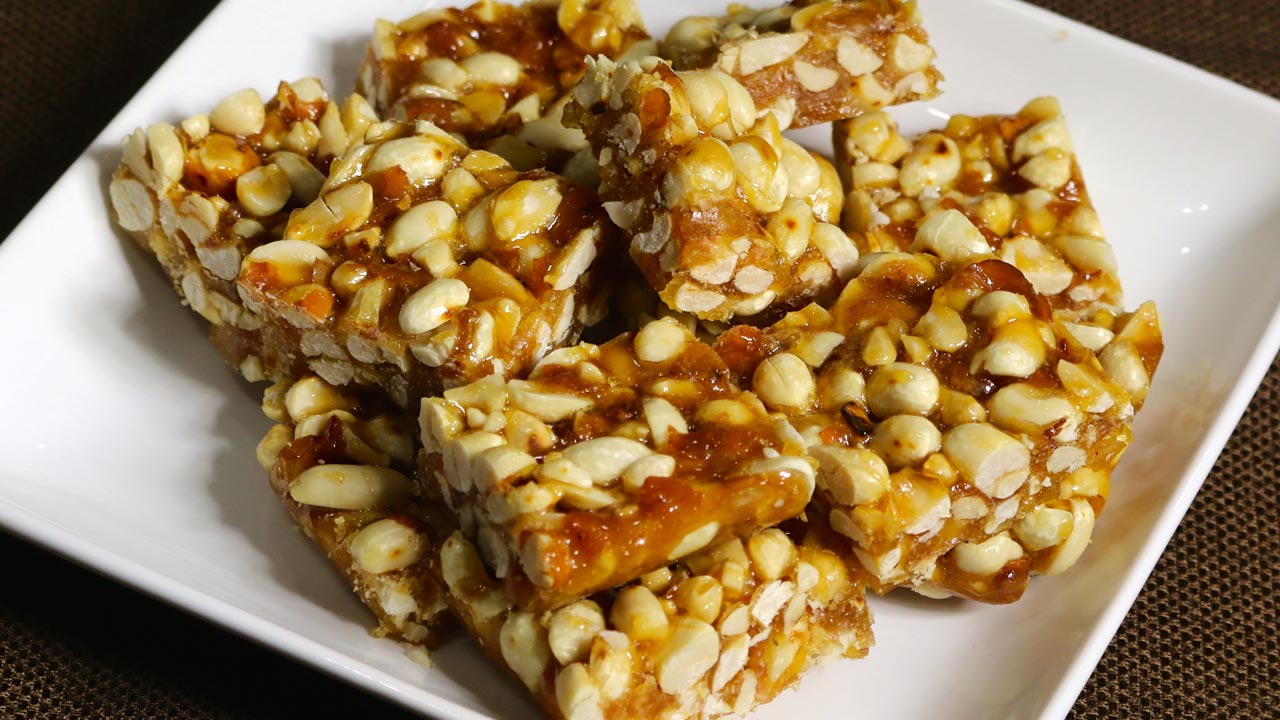
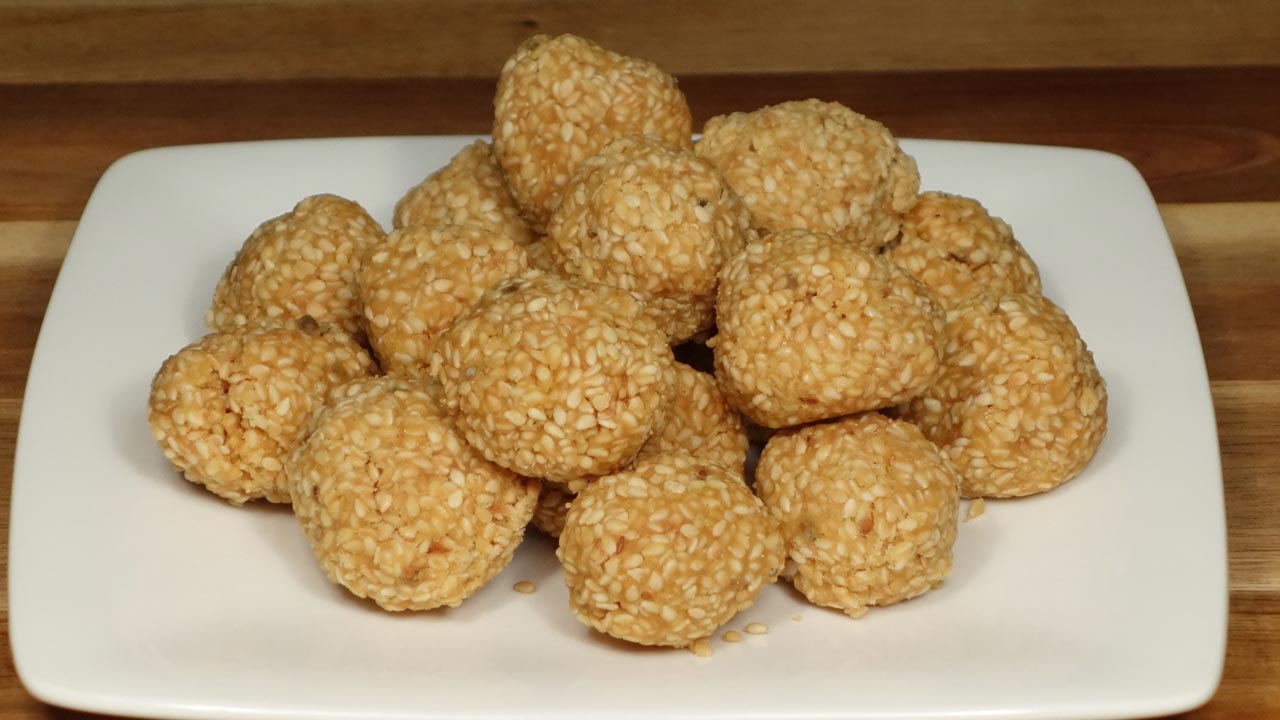
Tilgul Ladoo

Tilgul Ladoo is a quintessential Sankranti special food made from sesame seeds (til) and jaggery (gur). These laddoos are exchanged among friends and family as a symbol of goodwill. Including Tilgul Ladoo in your Makar Sankranti food menu is a must.
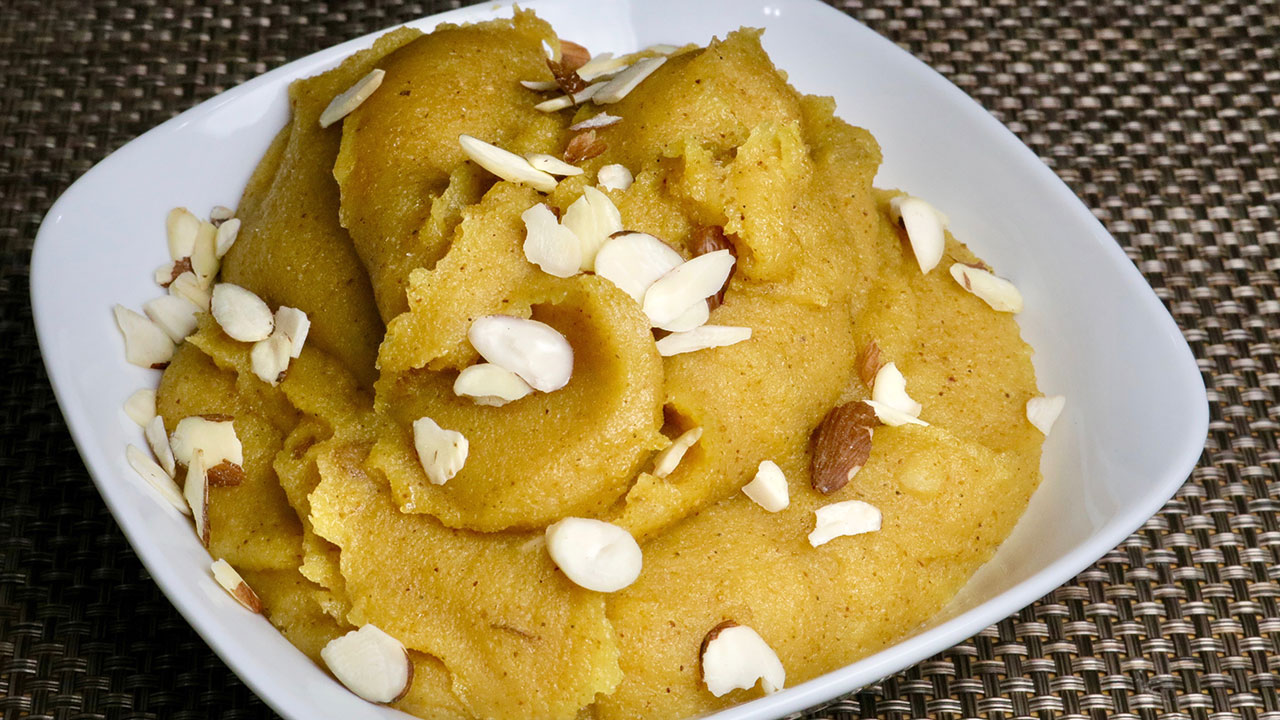
Puran Poli

Puran Poli is a sweet flatbread stuffed with a mixture of chana dal (split chickpeas) and jaggery. This dish is a staple in many Indian households during Makar Sankranti and is a perfect addition to your Sankranti food items. It is not only delicious but also nutritious.
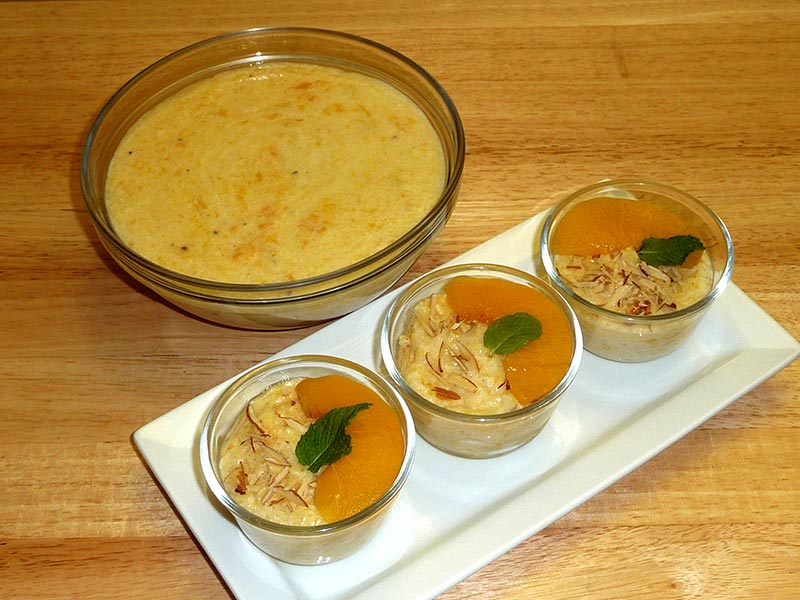
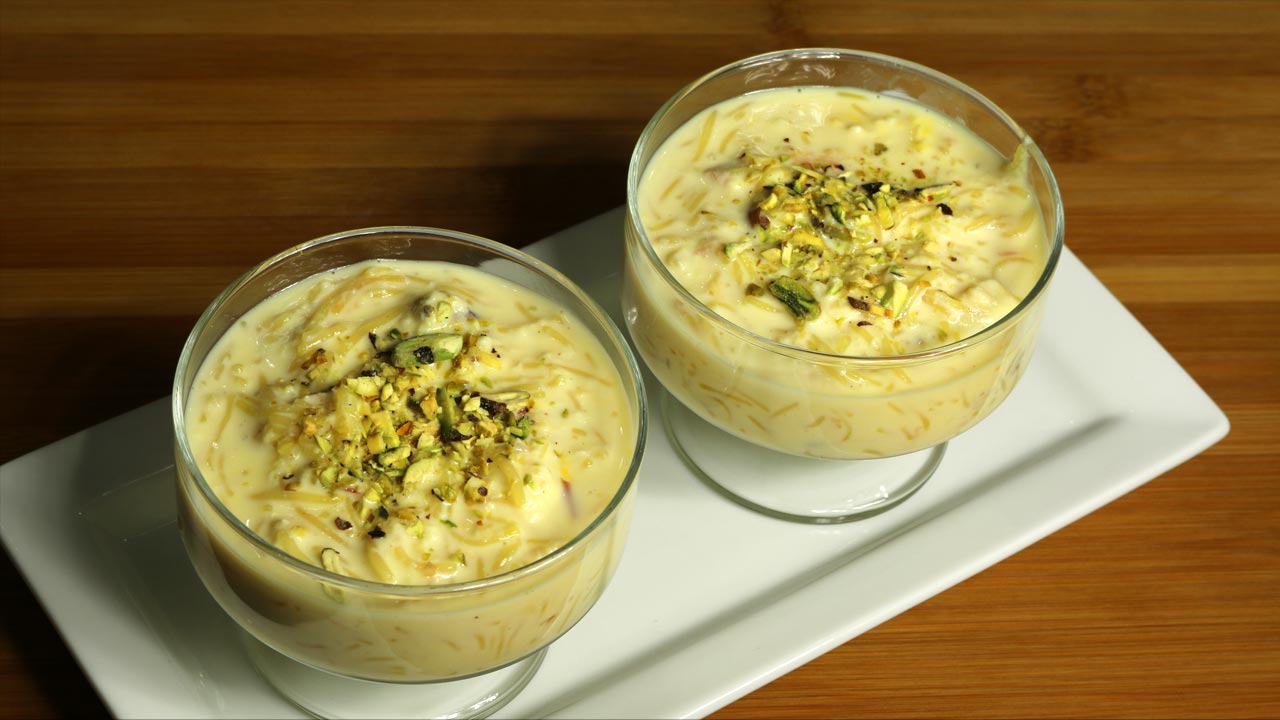
Sakkarai Pongal

Sakkarai Pongal is a sweet rice dish made with rice, jaggery, and ghee, often garnished with nuts and raisins. This dish is particularly part of South Indian recipes as a Makar Sankranti food. It is an integral part of the festival and is enjoyed by all.

Savory Delights for Sankranti

Undhiyu

Undhiyu is a mixed vegetable dish that is a specialty of Gujarat and a popular Sankranti special food. Made with a variety of winter vegetables, spices, and fenugreek dumplings (muthiyas), Undhiyu is a flavorful and wholesome addition to your Sankranti food menu.

Bajra Khichdi

Bajra Khichdi is a nutritious dish made with pearl millet (bajra), lentils, and spices. This dish is commonly prepared during Makar Sankranti in many parts of India. Including Bajra Khichdi in your Makar Sankranti food items ensures a healthy and satisfying meal.

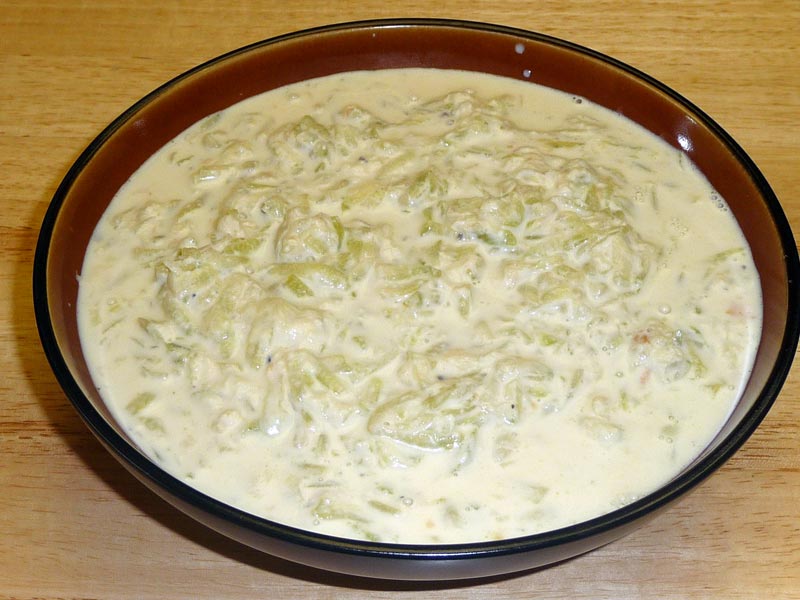
Makki Ki Roti and Sarson Ka Saag

Makki Ki Roti (cornmeal flatbread) and Sarson Ka Saag (mustard greens) is a classic combination enjoyed in Punjab during Makar Sankranti. This hearty meal is a favorite Sankranti food and is known for its rich flavors and nutritional benefits.

Enhancing Your Sankranti Feast

To make your Makar Sankranti feast even more delightful, consider adding related dishes that complement these Sankranti food items. Adding Indian snacks like samosas and pakoras can provide a variety of flavors and textures. For a sweet ending, explore Indian desserts recipes such as gulab jamun and jalebi. 

Incorporating healthy recipes like roasted nuts and fruit chaat can offer lighter options for your guests. Hosting a large gathering? The popular party recipe category is filled with dishes that are sure to impress your guests and make your celebration memorable. Including North Indian recipes like dal makhani or biryani can add a touch of authenticity to your meal.

Frequently Asked Questions (FAQs)

Q: What are some popular Sankranti special food items?

A: Some popular Sankranti special food items include Tilgul Ladoo, Puran Poli, Sakkarai Pongal, Undhiyu, Bajra Khichdi, and Makki Ki Roti with Sarson Ka Saag.

Q: How can I make traditional Makar Sankranti food at home? 

A: To make traditional Makar Sankranti food at home, try recipes like Tilgul Ladoo, Puran Poli, and Sakkarai Pongal. These recipes are simple to prepare and capture the essence of the festival.

Q: What are some Sankranti food ideas for a party? 

A: Some Sankranti food ideas for easy party foods include Undhiyu, Bajra Khichdi, Makki Ki Roti with Sarson Ka Saag, and Sakkarai Pongal. These dishes are flavorful and perfect for celebrations and gatherings.

Q: Can I prepare Sankranti food in advance? 

A: Yes, many Sankranti food items can be prepared in advance and stored. Sweets like Tilgul Ladoo and Puran Poli can be made ahead of time, while dishes like Undhiyu and Bajra Khichdi can be prepped and refrigerated.

Q: What are some healthy options for Sankranti food? 

A: Some healthy options for Sankranti food include roasted nuts, fruit chaat, and steamed dishes like Bajra Khichdi.

  • Shakar Para

    Shakar Para

    Shakkar Para

    Shakkar Paras are delightful, sweet snacks perfect for holidays and loved by kids. The addition of cinnamon not only enhances the flavor but also gives a cookie-like texture. They are ideal for all holidays and even for travel, as they have a long shelf life. Shakkar Paras have always been a staple in our pantry. The addition of cinnamon to this popular snack has made it even more appealing to kids. These sweet snacks are very enjoyable for all ages.
    This is an easy recipe to make because I always have the ingredients available. You just need 4 ingredients: all-purpose flour, sooji (semolina), sugar, and oil. I have flavored it this time with cinnamon, you can replace cinnamon with cardamom. They are so delicious you can not stop eating. This is also a vegan recipe.
    5 from 1 vote
    Course Appetizer
    Cuisine Indian
    Servings 6

    Ingredients
      

    • 2 cups all-purpose flour (maida)
    • 2 tbsp fine semolina flour (sooji)
    • 3 tbsp oil
    • 1/2 cup sugar
    • 1 pinch salt
    • 2 drops lemon juice
    • 1/2 tsp cinnamon powder
    • 1/3 cup chilled water (use as needed)

    Instructions
     

    • In a bowl, combine all dry ingredients: all-purpose flour, semolina, salt, sugar, and cinnamon powder, and mix them well.
    • Add oil and lemon juice to the dry mix. Gradually incorporate chilled water until the dough comes together. The dough should not be soft and do not knead the dough. Chilled water adds the crispness to Shakkar Paras.
    • Cover the dough and let it rest for at least fifteen minutes. Lightly knead the dough; it will soften due to the sugar.
    • Divide the dough into two parts and shape each into a flat ball.
    • Sprinkle a little all-purpose flour on the rolling surface. Roll each ball into about 9-inch circles with the thickness of salted crackers.
    • Prick the rolled dough with a fork on both sides to prevent puffing during frying.
    • Cut the rolled dough into 1/2-inch-wide and 3-inch-long pieces or your desired shape.
    • Heat oil in a frying pan. Test readiness by placing a small piece of dough; it should sizzle and rise slowly.
    • Fry the Shakkar Paras until both sides are light golden-brown (approximately 6-7 minutes).
    • Allow them to cool to room temperature for crispiness.
    • Store the Shakkar Paras in an airtight container; they can be kept for several weeks.

    Notes

    Using chilled water to make the dough makes it flakiness.
    Adding lemon juice prevents excessive oil absorption and adds crispness. Use only 2-3 drops of lemon juice.
    Enjoy these delicious, cinnamon-flavored Shakkar Paras as a delightful snack or treat for holidays and travel! They are crisp and flaky, and I know my grandkids love them. If you enjoy the recipe, share it with friends, and don’t forget to subscribe to my YouTube channel. I look forward to reading your comments. Enjoy!
    Keyword shakar para
    Tried this recipe?Let us know how it was!

    Introduction to Shakar Para

    Shakar Para, a crispy and mildly sweet Indian snack, is a cherished treat, especially during festive occasions like Diwali. This delightful snack, also known as shakkar para, is easy to prepare and is loved by both adults and children alike. The recipe’s simplicity and the perfect blend of sweetness make it a favorite across Indian households.

    Cultural and Traditional Importance

    In many parts of India, Shakar Para holds a special place during festive celebrations. It is traditionally prepared in large batches, ensuring that everyone has a generous share of this delicious snack. The crispiness of shakarpara symbolizes prosperity and happiness, making it a staple during joyous occasions. This snack is not just limited to festivals; it’s also enjoyed as a daily tea-time companion, adding a touch of sweetness to everyday life.

    Recipe Variations

    While Shakar Para is delightful in its original form, there are various other Indian snacks that can complement or substitute this recipe:

    • Namak Para: A savory twist to Shakar Para, made with a blend of spices and salt. This snack provides a perfect balance when served alongside the sweet shakkar para.
    • Besan Ki Burfi: A sweet treat that shares the same festive significance as Shakar Para. Its rich texture and flavor profile offer a delightful contrast to the crispy shakarpara.
    • Mathri: Another crispy snack that can be enjoyed with shakarpara. This flaky biscuit-like snack pairs well with the sweetness of Shakar Para, making it an ideal combination for snack platters.
    • Kaju Katli: A popular Indian sweet made from cashews, perfect for those who prefer a richer taste. Kaju Katli can be served alongside Shakar Para to create a diverse spread of traditional Indian sweets.

    Health Benefits and Dietary Considerations

    Although Shakar Para is a sweet snack, it’s a much healthier option compared to store-bought sweets, as it can be made at home with control over the ingredients used. The recipe is entirely vegetarian, making it suitable for those following a vegetarian diet. Additionally, by opting for whole wheat flour and using jaggery instead of refined sugar, one can make a slightly healthier version of shakarpara.

    Serving Suggestions

    Shakar Para can be served in numerous ways. Traditionally, it’s enjoyed on its own as a snack, but it can also be served alongside a cup of masala chai, enhancing the tea-time experience. For a more elaborate spread, Shakar Para can be served alongside other Indian snacks like Mathri or Namak Para. It can also be gifted in decorative jars during festivals, making it a thoughtful and delicious present.

    Conclusion

    Shakar Para is more than just a snack; it’s a symbol of festivity, joy, and the richness of Indian culinary traditions. Whether you’re celebrating a festival or just craving a sweet treat, shakarpara is the perfect recipe to add to your repertoire. Try this authentic shakarpara recipe from Manjula’s Kitchen and experience the simple yet profound pleasure that this sweet snack brings.

    Frequently Asked Questions (FAQs)

    What is the origin of Shakar Para?

    Shakar Para is believed to have originated in the northern regions of India, where it is commonly prepared during festivals like Diwali.

    Can Shakar Para be made healthier?

    Yes, by using whole wheat flour and jaggery instead of refined sugar, Shakar Para can be made slightly healthier.

    How long does Shakar Para last?

    When stored in an airtight container, Shakar Para can stay fresh for up to 2 weeks.

    Can Shakar Para be made vegan?

    Yes, Shakar Para can be made vegan by using vegetable oil instead of ghee.

    What are some variations of Shakar Para?

    Variations include Namak Para, Mathri, and Besan Ki Burfi, each offering a unique taste experience.

  • Flax Seed Burfi

    Flax Seed Burfi


    Flaxseed Burfi

    Flax Seed Burfi

    Flax Seed Burfi or you can call this health bar. Flax Seed is high in protein and good source of vegetarian omega 3. This Burfi is vegan, gluten free and tastes great.
    5 from 1 vote
    Course Snack
    Cuisine Indian

    Ingredients
      

    • 1/2 cup golden flax seed powder or meal
    • 1/2 cup coarsely ground walnut
    • 1/2 cup coarsely ground almonds
    • 1/2 cup coarsely ground cashews
    • 1 tbsp crushed cardamom about 8 cardamoms
    • 1 cup sugar
    • 1/4 cup water

    Instructions
     

    • Grease the 8 inch plate and set aside.
    • Dry roast flex seed, over medium heat for about 1 minute. Add walnut, almond and cashew powder. Dry roast for about 2 minutes stirring continuously. Do not over roast the nuts, nuts will become oily.
    • Turn off the heat. Add cardamom mix it well and take out in a bowl. Set aside.
    • In same sauce pan boil the sugar and water together over medium heat. After syrup come to boil lower the heat to medium and let it boil for 1-2 minutes. To check the syrup put a drop over dry surface and check with finger syrup should be just sticky. On candy thermometer it should show 205 degree Ferranti.
    • Turn off the heat. Add the nuts mixture to the syrup. Mix it well and quickly spread over the greased plate by pressing from all sides to keep 1/4 inches in thickness and the edges clean.
    • Cool for a few minutes and cut them in about 1-1/2 inch square shape
    • Keep them in closed container; Flex Seed Burfi has a long shelf life.
    Tried this recipe?Let us know how it was!

    Introduction

    Flax seed burfi is a nutritious and tasty Indian sweet that combines the health benefits of flax seeds with the delightful flavors of traditional burfi. This flaxseed healthy bar is perfect for those looking to enjoy a sweet treat while maintaining a healthy diet. In this article, we will explore the benefits, variations, and a simple flax seed burfi recipe to make at home.

    What is Flax Seed Burfi?

    Flax seed burfi, also known as flax seed barfi, is a healthy twist on the traditional Indian burfi. Made with flax seeds, jaggery, and nuts, this sweet treat is not only delicious but also packed with nutrients.

    Health Benefits of Flax Seed Burfi

    1. Rich in Omega-3 Fatty Acids: Flax seeds are a great source of omega-3 fatty acids, which are essential for heart health.
    2. High in Fiber: This flaxseed healthy bar provides a good amount of dietary fiber, aiding in digestion and weight management.
    3. Antioxidant Properties: Flax seeds are rich in antioxidants, helping to reduce inflammation and protect against chronic diseases.
    4. Energy Boosting: The combination of jaggery and nuts provides a natural energy boost, making flax seed burfi a perfect snack.

    Simple Flax Seed Burfi Recipe

    Ingredients:

    • Flax seeds
    • Jaggery
    • Ghee (clarified butter)
    • Mixed nuts (almonds, cashews, etc.)

    Method:

    1. Roast Flax Seeds: Dry roast the flax seeds until they are aromatic and slightly crispy.
    2. Prepare Jaggery Syrup: Melt jaggery in a pan with a little water to form a syrup.
    3. Mix and Cook: Combine the roasted flax seeds and chopped nuts with the jaggery syrup. Stir well.
    4. Set and Cut: Spread the mixture on a greased plate and let it cool. Cut into desired shapes once set.

    Variations of Flax Seed Burfi

    • Chocolate Flax Seed Burfi: Add cocoa powder or melted dark chocolate for a rich, chocolaty flavor.
    • Coconut Flax Seed Burfi: Mix in desiccated coconut for an extra layer of texture and flavor.

    Incorporating Flax Seed Burfi into Your Diet

    Flax seed burfi can be enjoyed as a snack or dessert. It’s a great way to add more nutrients to your diet without compromising on taste. Perfect for festive occasions, family gatherings, or as a healthy treat for kids.

    Tips for Making the Best Flax Seed Burfi

    • Use fresh and high-quality flax seeds for the best flavor.
    • Adjust the sweetness according to your preference.
    • Experiment with different nuts and add-ins to create your unique version.

    Storing Flax Seed Burfi

    Store flax seed burfi in an airtight container at room temperature for up to a week. For longer storage, keep it in the refrigerator.

    FAQs

    What is the best sweetener for flax seed burfi?

    Jaggery is traditionally used, but you can also use honey or coconut sugar as alternatives.

    Can I make flax seed burfi vegan?

    Yes, substitute ghee with coconut oil or any plant-based oil to make it vegan.

    Is flax seed burfi gluten-free?

    Yes, flax seed burfi is naturally gluten-free, making it suitable for those with gluten intolerance.

    Can I add other seeds to the burfi?

    Absolutely! Chia seeds, sunflower seeds, and pumpkin seeds can be added for extra nutrition.

    How long does flax seed burfi last?

    When stored properly, flax seed burfi can last up to a week at room temperature or longer in the refrigerator.

    Is flax seed burfi suitable for kids?

    Yes, flax seed burfi is a healthy snack for kids, providing essential nutrients and energy.

    Conclusion

    Flax seed burfi is a delightful and nutritious sweet that combines the health benefits of flax seeds with the rich flavors of traditional Indian desserts. Whether you’re looking for a healthy snack or a festive treat, this flaxseed healthy bar is sure to satisfy your cravings while boosting your nutrition. Try our simple flax seed burfi recipe at home and enjoy this delicious, guilt-free indulgence.

    Similar Recipes from Manjula’s Kitchen: Besan Ladoo, Coconut Burfi, Almond Burfi, Dates and Nuts Ladoo

  • Peach Phirni

    Peach Phirni

    Peach Phirni (Rice Pudding)

    Peach phirni is a delicious dessert which is a creamy eggless pudding. Traditionally phirni is made with rice, milk and sugar. Adding peach gives a wonderful creamy smooth texture.
    5 from 1 vote
    Course Dessert
    Cuisine Indian
    Servings 8 people

    Ingredients
      

    • 1/4 cup rice
    • 3 cup milk
    • 3/4  cup sugar
    • 1 15 oz can of unsweetened sliced peaches
    • 1/2 tbsp corn starch
    • 1/8 tbsp cardamom powder
    • 1 tbsp sliced almonds
    • Few slices of canned peaches
    • Few mint leaves

    Instructions
     

    • Wash rice and soaks it for fifteen minutes or more.
    • Drain the water and blend rice to a fine texture, adding just enough milk as needed to blend. Keep aside.
    • Drain the syrup from can peaches. Keep 4 slices of peach aside for garnish.
    • Puree the remaining peaches with corn starch. Keep aside.
    • Boil the milk on medium high heat and let it simmer until milk reduces to about 2 cups. After milk comes to boil it should take about 8 minutes.
    • Take about 1/4 cup of hot milk and mix it with rice paste.
    • Add rice solution to the boiling milk slowly and keep stirring continuously, making sure rice does not become in lumps and milk does not burn on the bottom of the pen.
    • Cook until milk has reduced to about half in volume and rice is cooked.
    • Next add the sugar and cardamom powder, cook for about 4 minutes on low medium heat. Turn off the heat.
    • just after turning off the heat add the peach puree gently with cooked rice.
    • Shift the phirni to the serving bowl and garnish with almond, and peach slices.
    • Let it sit in refrigerator for few hours. Serve chill

    Notes

    Variations
    There are so many delicious variations to this dish! Instead of peaches try making this dish using fresh mango, guava, passion fruit puree.
    Tried this recipe?Let us know how it was!
  • Lauki Kheer

    Lauki Kheer


    Lauki Kheer

    Laucki Kheer (Bottle Gourd Pudding)

    Lauki Kheer is a healthy and very refreshing dessert made with bottle gourd.
    No ratings yet
    Prep Time 10 minutes
    Cook Time 45 minutes
    Course Dessert
    Cuisine Indian
    Servings 6 people

    Ingredients
      

    • 1 medium size bottle gourd (loki, doodhi, ghyia)
    • 1 tbsp butter or ghee
    • 5 cup milk
    • 1/2 cup sugar
    • 1/2 tbsp coarsely ground cardamom powder

    Instructions
     

    • Lightly peel the bottle gourd leaving shades of light green.
    • Cut it half length wise and take out the seeds from center of the bottle gourd.
    • Shred the bottle gourd and squeeze-out the water. After squeezing the water, shredded bottle gourd should be about 3 cups.
    • Heat butter in frying pan on medium high heat as it melts add the shredded bottle gourd and stir-fry for about 4 minutes.
    • Turn off the heat and transfer the stir-fry bottle gourd in to the bowl.
    • Boil the milk in wide frying pan on medium high heat. Cook until the milk is reduced to about four cups. Stir often to ensure the milk does not burn in the bottom of the pan.
    • Add the stir-fry bottle gourd to the milk and cook for another 10 minutes until the milk is creamy again make sure you stir the kheer often to ensure the milk does not burn in the bottom of the pan.
    • Next reduce the heat to medium and add the sugar and cardamom powder. Cook for another about 2 minutes and turn off the heat.
    • kheer is ready this can be served warm, at room temperature or cold.

    Notes

    Serving Suggestion
    Lauki Kheer tastes the best when it is served very chilled just when it start forming ice crystal.
    Keyword Kheer, Laucki Kheer
    Tried this recipe?Let us know how it was!
  • Shakkar Para

    Shakkar Para

    Shakkar Para

    Shakkar Para

    Shakkar Para is a popular vegan sweet snack. They are deep-fried sugar crisps with coconut powder and hint of cardamom, which gives them an interesting flavor. This is one of those snacks you cannot stop munching. Shakkar paras’ main ingredients are plain flour, semolina, and sugar.
    Recipe will serves 4.
    No ratings yet
    Course Snack
    Cuisine Indian
    Servings 4 people

    Ingredients
      

    • 1 cup all purpose flour plain flour, maida
    • ¼ cup fine sooji semolina flour
    • 2 Tbsp oil
    • ½ cup water use water as a guide line

    For Syrup

    • ¾ cup sugar
    • ½ cup water
    • ½ tsp coarsely grounded cardamom
    • 3 Tbsp coconut powder

    Instructions
     

    • Mix flour, sooji, and oil in a bowl and make a stiff dough adding water slowly as needed. Knead it well. Dough also can be made using food processor.
    • Cover the dough and set aside for 15 minutes or more.
    • Divide dough in two equal parts.
    • Take each part of the dough and make a flat ball shape. Roll them into 8-inch circles and thickness of salted crackers.
    • Prick them with a fork all over the rolled dough, so the paras do not puff when frying.
    • Cut each of the rolled dough into about 1 inch square. Note: you can cut them in your desire shape.
    • Heat the oil in a frying pan on medium heat.
    • The frying pan should have at least 1 ½ inch of oil. To check if the oil is ready, just put a small piece of dough in the oil. The dough should make the oil sizzle and come up slowly.
    • Make sure to place just enough shakkar paras to cover top of the oil in frying pan. Fry the shakkar paras until both sides are a light golden-brown.
    • Let the shakkar paras comes to the room temperature and they should be crisp.

    Making Sugar Syrup

    • Put the water and sugar in a saucepan and bring to a boil on medium-high heat.
    • When the syrup comes to a boil, turn the heat down to medium and stir to dissolve the sugar.
    • Let it simmer until the syrup is about half thread consistency or 220 degrees F. on a candy thermometer. Close the heat.
    • Add coconut powder and cardamom to the syrup mix it well.
    • Put all the paras to the syrup and mix it quickly, making sure all the paras are coated with syrup.
    • Take them out on a greased tray, making sure that paras are not clumped together.
    • Allow them to cool.
    • Shakkar paras can be stored for several weeks in airtight container.
    Keyword Coconut, Meeta, Meetha, Shakkar Para, Sweet Para, Vegan
    Tried this recipe?Let us know how it was!
  • Whole Wheat Gaund Panjiri

    Whole Wheat Gaund Panjiri

    Whole Wheat Gaund Panjiri

    Whole Wheat Gaund Panjiri

    Gaund (or Gond) is a natural edible gum. Gaund provides heat to the body and is usually eaten in cold winter months. It is also given to the nursing mother to help with lactation and provide nutrients for the baby. The main ingredients for Whole Wheat Gaund Panjiri are whole wheat flour, nuts, Gaund, and sugar. Its a quick and easy recipe to make with simple ingredients
    Will make 20 pieces.
    No ratings yet
    Course Dessert
    Cuisine Indian
    Servings 20 pieces

    Ingredients
      

    • 1 cup whole wheat flour
    • cup clarified butter ghee
    • ½ cup gaund edible gum
    • ¼ cup melon seeds
    • ¾ cup coarsely ground almonds
    • ½ cup puffed lotus seed makhana
    • 1 teaspoon ajwain powder carom seed
    • 1 teaspoon dry ginger powder
    • 1 cup sugar plus 2 tablespoon
    • ½ cup water

    Instructions
     

    • Break Gaund (edible gum) coarsely. Keep aside.
    • Break the makhana (lotus seed) in about four pieces. Keep aside.
    • Wash the melon seeds with water. Before draining the water, discard the seeds that are floating on top.
    • Next in a frying pan, dry roast the melon seeds on medium heat. Note: Stir the mixture continuously. They will lightly splatter while roasting (like popcorn). Take out and keep aside. When all seeds almost stop splattering they are done. The seeds should not get brown in color to avoid overcooking.
    • In the same frying pan, add one tablespoon of ghee. When it melts, add the makhana and roast them on medium heat for 2 to 3 minutes until they become crunchy. Note: Stir the mixture continuously. The makhana should not become brown in color. Otherwise, they will be overcooked.
    • Transfer them with melon seeds.
    • Heat 2 tablespoons ghee in the same frying pan on medium heat. Add the Gaund and stir-fry them until they puff up like popcorn. Note: Stir the mixture continuously. This should take 2 to 3 minutes. Note: This will absorb all the butter. Take it out over paper towel.
    • Use the same frying pan and put the ghee and whole-wheat flour and roast the flour on medium heat until the flour becomes light golden brown
    • Add the ground almonds, ajwain and ginger powder to the roasted flour and roast for another 5 to 6 minutes until the flour becomes medium brown in color and you start to smell the aroma.
    • Note: Stir the mixture continuously with a spatula to prevent burning. Cooking on high heat will not allow the mixture to fully cook.
    • Add all the remaining ingredients: Gaund, melon seeds, and makhana. With flour mixture. Mix it well and roast for another minute.
    • Remove from the heat and keep the mixture aside.
    • Put the water and sugar in a saucepan and bring to a boil on medium-high heat. When the syrup comes to a boil, turn the heat down to medium and stir to dissolve the sugar. Let it simmer until the syrup is about half thread consistency or 220 degrees F. on a candy thermometer.
    • Mix the flour mixture with syrup and pour it over 8″ greased plate quickly before the mixture dries.
    • After the panjiri dries break the in pieces.
    • The panjiri can be stored in an airtight container for 2 to 3 weeks.

    Notes

    • If panjiri is not being made for the nursing mother you don’t have to add ajwain and ginger powder (The ajwain and ginger add a slightly bitter taste to panjiri).
    • If you want to make ladoos from the mixture, add 2 tablespoons of warm ghee and sugar without making the syrup and form them in ladoo shapes.
    • Gaund and melon seeds are available in Indian grocery stores.
    Keyword ajwain, Gaund, Ginger Powder, Giri, Gond, Lactation, Lotus seed, Makhana, Melon seed, Nursing Mother, Panjeere, Panjiri
    Tried this recipe?Let us know how it was!
  • Peda

    Peda


    Peda (Indian Sweet)

    Peda, Milk Fudge

    Pedas are an all-time favorite sweet snack. Pedas are like soft milk fudge. Pedas are grainy texture made with milk and sugar, flavored with cardamom. Peda can be served as a candy or as a dessert.
    5 from 3 votes
    Prep Time 5 minutes
    Cook Time 15 minutes
    Making Paneer 20 minutes
    Total Time 20 minutes
    Course Dessert
    Cuisine Indian
    Servings 10 people

    Ingredients
      

    • 4 cupa paneer home made
    • 1/3 cup milk powder
    • 1/2 cup sugar
    • 3 tbsp unsalted butter or ghee
    • 1/4 tsp cardamom powder ilachi

    For Garnishing

    • 1 tbsp sliced pistachios

    Instructions
     

    • Check the recipe for paneer and make the paneer with whole milk. For this recipe use 4 cups of milk.
    • Heat the frying pan on medium. Add butter and let it melt. Next add milk, milk powder, and paneer. Mix it well.
    • Cook mixture on medium heat stirring continuously until mixture starts leaving the sides of the frying pan and becomes like dough. This should take about 12 minutes. Now this is known as khoya.
    • Transfer the khoya into a bowl and let it cool off until khoya becomes just lukewarm.
    • Mix the sugar and cardamom powder into the khoya and knead it for about a minute until every thing blends together and become soft dough. Note: if you mix the sugar while khoya is hot that will make pedas soft.
    • Divide the mix into about 20 equal parts and roll them into round balls. Lightly press it down so it looks like small patty. Put few pieces of sliced pistachios on every peda.
    • Pedas should be served at room temperature.

    Notes

    Pedas can be kept for few days at room temperature and about a month refrigerated.
    Keyword Gluten Free, Offering To God, Parsad, Peda
    Tried this recipe?Let us know how it was!

    Indian Peda Sweet Recipes – Manjula’s Kitchen 

    Peda sweet, an exquisite Indian dessert, holds a special place in the hearts of many dessert enthusiasts. The good news is, crafting this delightful treat at home is easier than you might think, especially if you’ve got some whole milk in your kitchen. Now, let’s go step-by-step process on how to make these mouthwatering peda mithai.

    Prepare the Paneer: 

    Start by making paneer by adding lemon juice to half a cup of hot water. Boil milk on medium heat, stirring to prevent burning. When it boils, gradually add lemon juice, stirring gently. Turn off the heat when curds separate from whey. Drain using a cheesecloth-lined strainer, rinse with cold water, and squeeze out excess water. Press wrapped paneer under a heavy pan for 1 hour to remove excess water.

    Get Cooking

    Begin by heating a frying pan on medium heat. Once the pan is warm, add a small amount of butter and let it melt until it becomes a golden liquid. Following this, introduce the whole milk into the pan. Sprinkle in a moderate amount of milk powder and incorporate the paneer into the mixture. Thoroughly mix these ingredients together in the pan, ensuring an even distribution. This step helps in the creation of a cohesive and flavorful mixture that will later contribute to the overall texture and taste of the dish.

    Stir, Stir, Stir

    Cook the mixture over medium heat, and the key is to keep stirring consistently. Don’t take a break! Keep at it until you notice the mixture changing – it will start to pull away from the sides of the pan, transforming into a dough-like texture. This process usually takes about 12 minutes. When that happens, you’ve successfully created khoya, the essential foundation for making our delicious peda indian sweet.

    Cool Off

    Transfer the khoya mixture that you’ve made into a bowl. Let it cool down until it reaches a lukewarm temperature. It’s important not to use it while it’s still hot for the next step in the recipe. Allowing it to cool ensures that the khoya’s texture and consistency are just right for the following stages of the cooking process. This cooling step is crucial to achieve the desired results in your final dish.

    Sweet Blending

    Now comes the sweet part! Once the khoya is lukewarm, add in the sugar and cardamom powder. Give it a good mix and start kneading for about a minute until everything blends into a soft dough. A little tip: if you mix the sugar while the khoya is still hot, your Peda indian sweet could turn out a bit too soft. So, let the khoya cool a bit before adding the sweetness!

    Shape It Up

    After preparing the khoya mix, divide it into roughly 20 equal portions. Take each portion and shape it into a round ball. Once you have your little balls, gently press them down to create a small, flat patty shape. If you want to enhance the appearance, consider placing a few slices of pistachios on top of each pera sweet. This simple step adds a touch of elegance to your homemade peda sweet, making them not only delicious but also visually appealing.

    Serve at Room Temperature

    Your pera sweet are almost ready to be savored! To enhance their delicious taste, allow them to sit at room temperature. This simple step allows the flavors to fully develop, resulting in a more rich and satisfying indulgence. When you’re ready to treat yourself, serve up these delightful indian sweet pedas. You’ll likely find that they disappear swiftly, a testament to their irresistible appeal.

    Storage Notes:

    Amongst all the indian sweet recipes the Indian sweet peda is one of the most versatile sweets that can last for a few days at room temperature. If you want to savor the sweetness for a more extended period, refrigerate them for about a month.

    In summary, making pera sweets at home is a rewarding and surprisingly simple process. From preparing the paneer to shaping the pera indian sweet, every step contributes to the rich flavor and texture of this delightful treat. So, gather your ingredients, follow these easy steps, and indulge in the joy of homemade peda mithai. Enjoy the sweetness!

    To experiment more with indian sweet recipes you can try Modak, Pineapple Sandesh & Moong Dal Ladoo

  • Sweet Paratha

    Sweet Paratha

    Sweet Paratha

    Sweet Paratha

    Sweet Paratha is whole wheat flat bread. This Paratha is filled with a delicious combination of nuts, cinnamon and sugar. It makes a great and easy breakfast or a snack with cup of tea or coffee!
    No ratings yet
    Course Bread
    Cuisine Indian
    Servings 4 Paratha

    Ingredients
      

    Dough

    • 1 cup whole wheat flour
    • 1/4 teaspoon salt
    • 1 tablespoon oil
    • Approx. 1/3 cup lukewarm water

    Filling

    • 1/3 cup almonds coarsely grind
    • 1/3 cup walnuts coarsely grind
    • 2 tablespoon coconut powder
    • 1 teaspoon cinnamon powder
    • 1/3 cup sugar

    Also need

    • 1/4 cup whole wheat flour for rolling the Paratha
    • Approx. 1-1/2 tablespoons oil for cooking the Paratha

    Instructions
     

    • In a bowl mix the flour, salt, and oil. Add about 1/3 cup of water to make dough add remaining water as needed to make smooth and pliable dough. Knead the dough on a lightly greased surface. Cover the dough and keep it aside for at least 15 minutes.
    • For the filling mix the almonds, walnuts coconut, cinnamon, and sugar, set aside.
    • Knead the dough again and divide into 4 equal parts.
    • Roll the dough into 3-inch diameter circles. Place about 3 tablespoons filling mix in the center. Seal by pulling the edges of the rolled dough together to make a ball. Proceed to make all four balls.
    • Let them settle for 3 to 4 minutes before rolling.
    • Heat the skillet on medium high. Note: An iron skillet works best. To check if the skillet is hot enough, sprinkle a couple of drops of water on it. When the water sizzles right away, the skillet is ready.
    • First lightly roll the filled ball in dry whole-wheat flour.
    • Lightly press the ball on the sealed side and keep it on the topside when rolling. Roll the ball lightly into about 7-inch circles. Whenever the dough sticks to the rolling pin or rolling surface, lightly sprinkle dry whole-wheat flour on both sides of the semi-rolled Paratha.
    • Place the Paratha over the skillet. After a few seconds you will see the Paratha change color and puff in different places.
    • 10. At this point flip the Paratha over. You should see some golden-brown spots on the topside. After a few seconds, spread about 1 teaspoon of oil on the Paratha. Again, flip the Paratha and lightly press the puffed areas with a spatula.
    • Flip again and press with the spatula making sure the Paratha is golden-brown on both sides.
    • Sweet Paratha can be served hot or at room temperature. Paratha can be kept at room temperature for about week.
    Keyword parantha
    Tried this recipe?Let us know how it was!

    Sweet Paratha: A Delectable Indian Dessert

    Sweet Paratha is a delightful and indulgent Indian dessert that combines the savoury goodness of paratha with the sweetness of sugar, jaggery, or other sweet fillings. 

    This versatile dish can be enjoyed as a treat on its own or paired with a dollop of yogurt, a drizzle of honey, or a sprinkle of powdered sugar. 

    Sweet Paratha is loved for its crispy exterior, soft interior, and irresistible sweetness, making it a favorite among both children and adults. 

    Benefits of Sweet Paratha:

    • Energy Boost: Sweet Paratha is a rich source of carbohydrates, which provide a quick and sustained source of energy. Whether enjoyed as a breakfast dish or a midday snack, Sweet Paratha can help fuel your body and keep you feeling energized throughout the day.
    • Comfort Food: The warm and comforting flavors of Sweet Paratha make it the perfect indulgence for chilly mornings or cozy evenings. The combination of sweet fillings and savory dough creates a satisfying and heartwarming dish that’s sure to lift your spirits and tantalize your taste buds.
    • Customizable: Sweet Paratha is incredibly versatile and can be customized to suit individual taste preferences. From traditional fillings like sugar and jaggery to more exotic options like chocolate, fruit compote, or nut butter, the possibilities for creating unique and delicious Sweet Paratha variations are endless.

    Variations of Paratha:

    • Paneer Paratha: Paneer Paratha is whole-wheat flat bread filled with mildly spiced paneer Indian Cheese). This is a good breakfast option. Paneer paratha can be served by itself or enjoyed with any gravy-based dish.
    • Pizza Paratha : Pizza has become a universal food enjoyed by all. Pizza paratha is perfect for the times when you want to enjoy homemade pizza.
    • Masala Paratha: This paratha is a combination of whole wheat flour and besan with a mix of delicious spices. Masala Paratha is a great breakfast treat and also a great lunch box option.
    • Matar Ka Paratha: Matar Ka Paratha is stuffed paratha with spicy green peas and is a delicacy. Matar Ka Paratha can be part of any main meal, making it a special treat.

    Tips for Making Perfect Sweet Paratha:

    • Knead the Dough Well: Properly kneaded dough is the key to soft and pliable parathas. Ensure that the dough is smooth, elastic, and free of lumps to achieve the perfect texture in your Sweet Paratha.
    • Roll Out Evenly: Roll out the dough into thin, even circles to ensure that the Sweet Parathas cook evenly and develop a crispy exterior. Use a rolling pin and a dusting of flour to prevent sticking and achieve uniform thickness.
    • Seal the Edges: Seal the edges of the rolled-out dough tightly to prevent the filling from spilling out during cooking. Press the edges firmly together and pinch them closed to create a secure seal.

    FAQs about Sweet Paratha:

    Can I make Sweet Paratha ahead of time?

    Yes, you can prepare the dough and filling for Sweet Paratha in advance and store them separately in the refrigerator. When ready to cook, simply assemble the parathas and cook them fresh for the best taste and texture.

    Is Sweet Paratha suitable for vegetarians?

    Yes, Sweet Paratha is vegetarian-friendly as it does not contain any meat, poultry, or fish. However, be mindful of the ingredients used in the filling, especially if using commercial products like chocolate spread that may contain animal-derived ingredients.

    Can I make Sweet Paratha without sugar?

    Yes, you can adjust the sweetness of Sweet Paratha according to your taste preferences or dietary restrictions. Substitute sugar with natural sweeteners like honey, maple syrup, or date syrup, or omit the sweet filling altogether for a less sweet version of the dish.

    Sweet Paratha is a delectable and versatile dessert that offers a perfect balance of sweetness and indulgence. Whether enjoyed on its own or paired with your favorite accompaniments, Sweet Paratha is sure to delight your taste buds and satisfy your cravings for something sweet. 

    With its simple preparation, customizable fillings, and irresistible flavor, Sweet Paratha is a must-try dish for anyone looking to explore the rich and diverse world of Indian cuisine.

  • Gur Para (Punjabi Sweet Snack)

    Gur Para (Punjabi Sweet Snack)

    A plate of crispy Gur Para, a traditional Indian sweet snack made with jaggery and flour.

    Gur Para, Punjabi Sweet Snack

    Gur Para is a traditional Punjabi treat. This is made in preparation for festivals such as Holi, Makarshakrantri, and Diwali. Gur Para makes for a great homemade gift because of its long shelf life. It can be stored for up to 2 months in an airtight container. This is a super simple recipe that only requires a few ingredients.  
    5 from 1 vote
    Prep Time 10 minutes
    Cook Time 30 minutes
    Total Time 40 minutes
    Course Snack
    Cuisine Indian
    Servings 6 people

    Ingredients


    For Dough

    • 1 cup all-purpose flour plain flour, maida
    • 2 Tbsp sooji fine samolina
    • 2 Tbsp oil
    • 1/3 cup water, use as needed

    For Syrup

    • 3/4 cup gur jaggery
    • 1 tsp oil
    • 1/4 cup water

    Instructions
     

    Making Para

    • Mix flour, sooji, and oil, and mix it well to get consistency of breadcrumb. Add water as needed to make firm but smooth dough. Cover with damp cloth and set aside at least for ten minutes.
    • Knead the dough for another minute and divide in two equal parts.
    • Take each part of the dough and make a flat ball shape. Roll them into 8-inch circles and thickness of salted crackers.
    • Cut each of the rolled dough into about half inch wide and 2 inch long pieces. Note: you can cut them in your desire shape.
    • Heat the oil in a frying pan on medium heat. The frying pan should have about 1 inch of oil. To check if the oil is ready, put little piece of dough in the oil. The dough should make the oil sizzle and come up slowly.
    • Fry the paras until both sides are light golden-brown. Let them cool off to room temperature before coating them.

    Making Sugar Syrup

    • Put the water and gur in a frying-pan and bring to a boil on medium heat. Keep stirring till gur is dissolve, syrup should be about 1 thread, to check the right consistency of syrup drop the syrup in cold water and you should be able to roll into ball. Close the heat.
    • Put all the paras to the syrup and mix it well, making sure all the paras are coated with syrup. Keep stirring every few minutes and keep separating them. After they are just warm, take them out on a greased plate, making sure that paras are not clumped together.
    • Allow them to cool. Gur paras can be stored for several weeks in airtight container.

    Notes

    Notes: If Syrup consistency is not right paras will be sticky, if paras are little sticky let them dry for longer.
    You will also like to see these recipes they are good for gifting and easy to make Moong dal Ladoo, Apple Coconut Burfi, Besan Save
    Tried this recipe?Let us know how it was!

  • Besan Ka Halwa

    Besan Ka Halwa

    Besan Ka Halwa

    Besan Ka Halwa

    Besan Ka Halwa is a traditional Indian dessert and made using different flour, lentils, nuts and vegetables. Besan Ka Halwa is one of my favorite Halwas. This is delicious and also quick and easy to make. When you roast the besan, the house is full of sweet aroma. Besan Ka Halwa is also gluten free.
    3.89 from 9 votes
    Prep Time 5 minutes
    Cook Time 12 minutes
    Total Time 17 minutes
    Course Dessert
    Cuisine Indian
    Servings 4 people

    Ingredients
      

    • 1 cup coarse besan ladoo ka besan, gram flour
    • 1/2 cup clarified butter ghee
    • 1 cup sugar
    • 1/4 tsp cardamom powder ilachi
    • 2-1/2 cup water
    • 2 Tbsp almonds sliced

    Instructions
     

    • Boil the water with sugar, and cardamom powder in a sauce pan over low medium heat. Bring to a boil and Set aside.
    • Melt the clarified butter in a frying pan on low medium heat. Add besan and roast to golden brown color; stirring constantly this will take about 5 to 8 minutes. Besan will be golden brown in color and will have a light sweet aroma.
    • Add the syrup slowly, as you add the syrup to besan water will splatter.
    • Turn down the heat to low and let it cook for about 2-3 minutes.
    • Besan will absorb the water, as the Halwa cools so keep Halwa a little softer then you like.
    • Garnish with cashews.

    Notes

    Serving suggestion
    Serve hot for best taste. If you like, garnish with shaved pistachio, almonds or shredded coconut.
    Variations
    Instead of water add 1 cup of milk and 1/2 cup of water and keep Halwa a little thicker. Pour the Halwa on a greased plate, keep it about 1/2 inch thick. Garnish with shaved almonds or pistachio or shredded coconut, and let it cool for about a half an hour. Cut the Halwa in square or diamond shapes like burfi.
    Tried this recipe?Let us know how it was!

    Besan ka Halwa is a classic Indian dessert made from besan (gram flour), ghee (clarified butter), sugar, and aromatic spices. This sweet treat is loved for its rich flavor, creamy texture, and irresistible aroma. 

    Whether served warm or at room temperature, Besan ka Halwa is a delightful dessert that’s perfect for celebrating special occasions such as a party recipe or even festive occasions such as diwali, holi, ganesh chaturthi or janmashtami or simply made to satisfy one’s sweet tooth. 

    Variations of Halwa:

    Although Besan ka Halwa can be considered to be one of the most savoury and fulfilling desserts amongst all halwas, here we have a list of some halwas that can be savoured and enjoyed all along with friends and family. 

    1. Gajar ka Halwa: Gajar Ka Halwa is a classical Indian dessert, this is also known as gajraula. Gajar ka Halwa is a delicious and popular sweet made with few ingredients, carrots, milk, sugar and flavoured with cardamom.
    2. Atta Ka Halwa: Atta ka Halwa, is a delicious sweet dessert. This is easy to make and with few ingredients. Atta ka halwa is made with whole wheat flour, sugar, and clarified butter, flavoured with cardamom.
    3. Sooji ka Halwa: Sooji Halwa is a very popular sweet dish all over India and is made on religious occasions, as prasad.
    4. Sweet Potato Halwa: Sweet Potato Halwa, an eggless pudding, stands out as one of the simplest Halwa recipes to prepare. Infused with the delicate and distinctive flavors of cardamom and cinnamon, it serves as a deliciously warm dessert ideal for chilly winter evenings.

    Tips for Making Perfect Besan ka Halwa:

    Use Good Quality Gram Flour: Use fresh and high-quality gram flour (besan) to make Besan ka Halwa for the best flavor and texture. Fresh besan has a nutty aroma and a smooth texture, which enhances the taste of the halwa.

    Roast the Gram Flour Well: Roast the gram flour in ghee until it turns golden brown and fragrant. Properly roasting the gram flour is crucial for developing the rich and nutty flavor of the halwa.

    Control the Sweetness: Adjust the amount of sugar according to your taste preferences. Some people prefer Besan ka Halwa to be sweeter, while others prefer it less sweet. Start with a smaller amount of sugar and add more if needed.

    Garnish with Nuts and Saffron: Garnish Besan ka Halwa with chopped nuts such as almonds, pistachios, and cashews, as well as a few strands of saffron for a luxurious touch. The nuts add crunch and texture, while saffron adds color and aroma to the halwa.

    FAQs about Besan ka Halwa:

    Can I make Besan ka Halwa ahead of time? 

    Yes, Besan ka Halwa can be made ahead of time and stored in an airtight container in the refrigerator for up to 3-4 days. Reheat the halwa gently on the stovetop or in the microwave before serving.

    Can I freeze Besan ka Halwa? 

    While Besan ka Halwa can be frozen, its texture may change slightly upon thawing. If freezing, allow the halwa to cool completely before transferring it to a freezer-safe container. Thaw the halwa in the refrigerator overnight before reheating.

    Is Besan ka Halwa vegan-friendly? 

    Traditional Besan ka Halwa is made with ghee (clarified butter), which is not vegan. However, you can make a vegan version of Besan ka Halwa by using plant-based ghee or oil instead of dairy ghee.

    Is Besan ka Halwa gluten-free? 

    Yes, Besan ka Halwa is gluten-free as it is made from gram flour, which is naturally gluten-free. However, be cautious of cross-contamination if you have a severe gluten allergy or celiac disease.

    Besan ka Halwa is a luxurious and aromatic dessert that’s perfect for indulging in on special occasions or as a sweet treat for your loved ones. 

    With its rich flavor, creamy texture, and endless variations, Besan ka Halwa is sure to become a favorite in your dessert repertoire. Whether enjoyed warm or at room temperature, this halwa is guaranteed to satisfy your sweet cravings and leave you feeling content and happy.

    Besan ka Halwa goes best even at marriage and big events hence its often served as people’s favorite choice of sweet dessert after every celebration and is a great hit among family gatherings and unions.

  • Atta Ka Halwa (Wheat Flour Halwa)

    Atta Ka Halwa (Wheat Flour Halwa)

    Atta ka Halwa (Wheat Flour Dessert)

    Atta Ka Halwa (Wheat Flour Halwa)

    Atta ka Halwa, is a delicious sweet dessert. This is easy to make and with few ingredients. Atta ka halwa is made with whole wheat flour, sugar, and clarified butter, flavored with cardamom. I love the sweet aroma and flavor of cardamom, for me cardamom is must to have any sweet I make.
    No ratings yet
    Course Dessert
    Cuisine Indian
    Servings 4 people

    Ingredients
      

    • 1/2 cup whole wheat flour
    • 1/3 cup ghee, clarified butter
    • 1/2 cup sugar
    • 2 cups water
    • 10-12 raisins
    • 1/4 teaspoon cardamom coarsely ground
    • 2 tablespoons sliced almonds
    • 1 tablespoon pistachios sliced for garnishing

    Instructions
     

    • Boil the water and sugar in a pan over medium high heat. Bring the syrup to full boil and mix it well making sure sugar is dissolved, and turn off the heat. Set aside.
    • In a frying pan over low medium heat, add the clarified butter after butter is melted add whole wheat flour. Keep stirring and roast the flour, till it turns light brown and have nice sweet aroma. Flour should be roasted well, after adding the syrup four will be lighter in shade. Halwa should be nice and light brown in color. This should take about 7-8 minutes.
    • Add the syrup slowly to minimize splattering. Keep stirring continuously, making sure there is no lumps. Add raisins, half the almonds and cardamom, and cook till it becomes consistency of thick batter. Keep the halwa softer than your desired consistency, as it will thicken over time. This should take about 5-6 minutes.
    • Garnish with almonds, and pistachios. Serve warm.
    Tried this recipe?Let us know how it was!

  • Dal Puri (Indian Fried Bread)

    Dal Puri (Indian Fried Bread)

    Dal Puri

    Dal Puri (Indian Fried Bread)

    Dal Puri (fried puffed bread), which consist of puris filled with mildly spiced moong dal. This delicacy is delicious and very festive. Dal Puri is an excellent option with any meal as it is sure to be a crowd-pleaser. Serve these incredible dal puris with spicy squash, or potato curry with yogurt gravy.
    No ratings yet
    Course Bread
    Cuisine Indian
    Servings 4 people

    Ingredients
      

    For Dough

    • 1-1/2 cups all-purpose flour – plain flour – maida
    • 1-1/2 tablespoons oil
    • 1/4 teaspoon salt
    • About 1/2 cup water

    For Filling

    • 1/2 cup moong dal
    • 1 tablespoon ginger chopped
    • 1 green chili chopped
    • 1/2 teaspoon salt
    • 1 teaspoon fennel seeds powder- saunf
    • 1/2 teaspoon cumin seeds – jeera
    • 1/2 teaspoon mango powder – amchoor
    • 1/8 teaspoon asafetida – hing
    • 2 teaspoons oil
    • Also need oil to fry

    Instructions
     

    For Dough

    • In a bowl mix the flour, salt and oil together. Add the water slowly, mixing with your fingers as you pour. Dough should be firm and smooth. I used about half cup of water. Knead the dough lightly. Cover the dough and let it sit for at least fifteen minutes.

    For Filling

    • Wash and soak dal for at least four hours. Drain the water and blend dal, with ginger, and green chili to smooth paste. While blending dal just use enough water needed to blend. I used about 3 tablespoons of water.
    • After dal is blended to smooth paste add all the ingredients fennel seeds, cumin seeds, asafetida, and mango powder except oil, blend for few seconds making all the ingredients mix well.
    • Heat the oil in a nonstick frying pan over low medium heat, add dal paste and keep stirring until it becomes consistency of soft dough. This should take about 2 minutes.
    • Remove from heat and let it cool just enough that you can knead it to make a soft dough.

    Making the Dal Puri

    • Take the dough and knead it for a minutes. Divide the dough in 18 equal parts.
    • Take the filling and divide into 18 parts, filling should be little smaller then dough ball. You may have some filling left over.
    • Take one part of the dough and with your fingers flatten the edges and make into 3-inch circle. Leaving center little thicker then edges.
    • Mold the dough into a cup and place 1 part of filling in the center. Pull the edges of the dough to wrap the dal filling. Proceed to make all the balls.
    • Let the filled ball sit for three to four minutes before rolling.
    • Lightly Oil the rolling pin and rolling surface. Roll the balls gently into 6” circles.
    • You can roll two or three puris before start frying, but do not roll all the puris at once or they will begin to dry out and fail to puff.
    • Heat the oil in frying pan over medium heat frying pan should have about one inch of oil. To check if oil is ready put a little piece of dough in the oil. Dough should sizzle, and come up slowly.
    • Fry one puri at a time. Place the puri in the frying pan and press with a skimmer. The puri should puff up. Turn puri over and cook until light golden brown on both sides. Take the puri out and place them on paper towels to absorb the excess oil. Repeat the process for remaining piries.
    Tried this recipe?Let us know how it was!

  • Coconut Almond Burfi

    Coconut Almond Burfi

    Coconut Almond Burfi

    Coconut Almond Burfi

    Coconut almond burfi is a classic dessert and simply delicious. Coconut almond burfi is super easy to make with few ingredients.  This is also vegan and gluten-free.
    No ratings yet
    Course Dessert
    Cuisine Indian
    Servings 6 people

    Ingredients
      

    • 2 cups coconut freshly grated, I am using frozen shredded coconut
    • 1-3/4 cups sugar
    • 1/2 cup blanched almond powder
    • 1/4 teaspoon cardamom powder

    Instructions
     

    • In a non-stick frying pan add coconut and sugar, cook over low medium heat, stir continuously till sugar is melted and mixture starts to bubble.
    • Add the almond powder and cardamom, keep stirring continuously, scraping the sides and bottom of the pan, until mixture start coming together and becomes consistency of soft dough. This should take about 6-7 minutes. Turn of the heat.
    • Pour the mixture into greased plate while burfi mixture is still hot spread it evenly about 3/4 inch thick in a square shape. Press the mixture with spatula to make it firm.
    • While burfi is still warm cut them in about one inch square.
    • Allow the burfi to cool for about an hour to dry and hold its shape. Now you can remove the burfi from the plate.
    • Burfi can be stored for 2 weeks in air tight container.

    Notes

    Notes: To blanch almonds, drop almonds in boiling water and keep aside. Drain and rinse under cold water after 5 minutes. Press the almonds one by one and squeeze the skin lightly to pop
    Tried this recipe?Let us know how it was!

  • Peanut Chikki (Peanut Brittle)

    Peanut Chikki (Peanut Brittle)

    Peanut Chikki

    Peanut Chikki (Peanut Brittle)

    Peanut chikki or peanut brittle is a delicious homemade sweet snack. This recipe is super simple and easy with very few ingredients, peanuts, sugar and touch of ginger and salt. Ginger adds a very nice tanginess to the chikki.
    No ratings yet
    Prep Time 5 minutes
    Cook Time 19 minutes
    Course Dessert
    Cuisine Indian
    Servings 12 peanut chikkies

    Ingredients
      

    • 1 cup peanuts shelled unsalted raw
    • 1 cup sugar
    • 2 teaspoons of clarified butter or ghee
    • 1/4 teaspoon salt
    • 2 teaspoons ginger juice

    Instructions
     

    • Grease about 5×7 plate and set aside.
    • Dry roast the peanuts on medium heat stirring continuously for about 6 to 7 minutes until golden brown. Remove from pan, wait till they cool off rub between your palms and remove most of the skin. Lightly crush the peanuts.
    • In a heavy bottom sauce pan, over medium high heat melt the butter, then add sugar, ginger, and salt.
    • Keep stirring the sugar continuously till sugar start melting and changing the color to light brown. Turn off the heat as soon it comes to golden brown in color. Note: when sugar starts melting it changes the color very quickly and it can easily burn.
    • Add peanuts stir quickly. Pour over the greased plate and spread evenly.
    • Cool for a few minutes chikki should be warm, cut them in about 1-1/2 inch square.
    • Store them in air tight container

    Notes

     Note: To make the ginger juice grate the ginger using fine shredder and then press it between your fingers to yield the juice.
    Tried this recipe?Let us know how it was!

  • Seviyan (Vermicelli) Kheer Dessert

    Seviyan (Vermicelli) Kheer Dessert

    Seviyan (Vermicelli) Kheer

    Seviyan (Vermicelli) Kheer Dessert

    Seviyan or vermicelli kheer, is a traditional popular dessert. Seviyans are thin long strings that looks very much like spaghetti however process if different. Seviyan is a delicious and an easy recipe to make. Basic seviyan is made with milk, seviyan and sugar, and then flavored with cardamom. Garnish with sliced almonds and pistachios and you have a delicious dish!
    5 from 1 vote
    Prep Time 5 minutes
    Cook Time 39 minutes
    Course Dessert
    Cuisine Indian
    Servings 6 people

    Ingredients
      

    • 1/2 cup sevia roasted and broken (vermicelli) available Indian grocery stores
    • 7 cups milk
    • 1/2 cup sugar
    • 1/8 teaspoon cardamom powder (ilachi)
    • Pinch nutmeg (jaiphel)
    • About 10-12 saffron strings
    • 2 tablespoons sliced or crushed almonds
    • 1 tablespoons sliced or crushed pistachios for garnishing

    Instructions
     

    • Use a nonstick or heavy bottom frying pan to make a seviyan kheer. Add the seviyan and roast them for about two minutes on medium low heat.
    • Add the milk and increase the heat to medium high. After milk comes to boil reduce the heat to medium. Let the milk boil for about 30 minutes, until the milk is creamy and reduced to almost half. Stir often to ensure the milk does not burn in the bottom of the pan, and also keep scraping the sides of the frying pan.
    • Add the sugar, saffron, cardamom, nutmeg, and almonds. Let the seviyan kheer simmer over low heat for about 5 minutes.
    • Turn off the heat.
    • As seviyan kheer cools it will become thicker in texture.
    • Garnish with pistachios. Seviyan can be served chilled or warm.
    Tried this recipe?Let us know how it was!