Tag: Miscellaneous

Manjula’s Kitchen Presents: Simple Indian Vegetarian Recipes for Dinner
Indian cuisine is known for its vibrant flavors, rich textures, and diverse dishes that can satisfy any palate. Whether you’re looking for something quick to whip up on a busy weeknight or a special meal to enjoy with family, Manjula’s Kitchen offers a variety of simple Indian vegetarian recipes for dinner. These easy-to-follow recipes feature classic Indian ingredients and flavors, perfect for anyone who loves hearty, wholesome meals.

Here are some delicious vegetarian dinner ideas you can explore from Manjula’s Kitchen:
1. Palak Paneer

Description: Palak Paneer is a comforting dish made with fresh spinach puree and cubes of paneer (Indian cottage cheese). It’s creamy, flavorful, and rich in iron and protein, making it a healthy choice for dinner. Serve it with warm chapati or naan for a balanced meal.

2. Chana Masala

Description: Chana Masala is a classic North Indian dish made with chickpeas cooked in a spicy tomato-based gravy. It’s packed with flavor and protein, making it a wholesome dinner option. Pair it with basmati rice or puri for a delicious, satisfying meal.

3. Aloo Gobi

Description: This simple and popular dish combines potatoes and cauliflower, cooked with aromatic spices like turmeric, cumin, and coriander. Aloo Gobi is a dry curry that is perfect for serving with rice or Indian flatbreads like chapati or paratha.

4. Vegetable Pulao

Description: Vegetable Pulao is a fragrant and easy-to-make rice dish cooked with mixed vegetables and spices. It’s a one-pot meal that’s light yet filling, making it an ideal dinner option for busy nights.

5. Dal Tadka

Description: Dal Tadka is a staple in Indian households, made with yellow lentils cooked with onions, tomatoes, and spices, then tempered with cumin seeds, garlic, and red chili. It’s a simple yet flavorful dish that pairs wonderfully with steamed rice or chapati.

6. Paneer Butter Masala

Description: Paneer Butter Masala is a rich and creamy dish made with paneer cubes cooked in a tomato and cashew-based gravy, flavored with butter and spices. This dish is indulgent and perfect for a special dinner, especially when served with naan or jeera rice.

7. Baingan Bharta

Description: Baingan Bharta is a smoky, mashed eggplant dish cooked with tomatoes, onions, and spices. This simple yet flavorful dish is a perfect vegetarian option for dinner, especially when paired with chapati or paratha.

8. Kadhi Pakora

Description: Kadhi Pakora is a traditional dish made with gram flour-based dumplings (pakoras) in a yogurt-based gravy, flavored with spices like turmeric, cumin, and mustard seeds. Serve it with rice for a comforting, homestyle dinner.

9. Vegetable Korma

Description: Vegetable Korma is a mildly spiced, creamy curry made with mixed vegetables simmered in a cashew or coconut-based gravy. It’s perfect for a dinner party or a cozy family meal when served with soft rotis or naan.

10. Stuffed Parathas

Description: Stuffed Parathas are whole wheat flatbreads filled with spiced vegetables or paneer. They make for a hearty and satisfying dinner, especially when served with a side of yogurt and pickles.

  • Raj Kachori

    Raj Kachori

    Raj Kachori Chat

    Raj Kachori

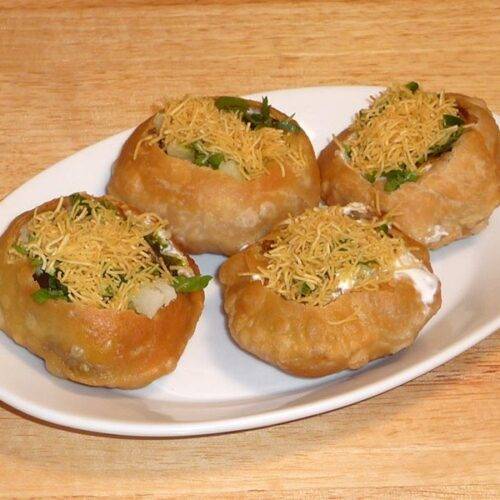
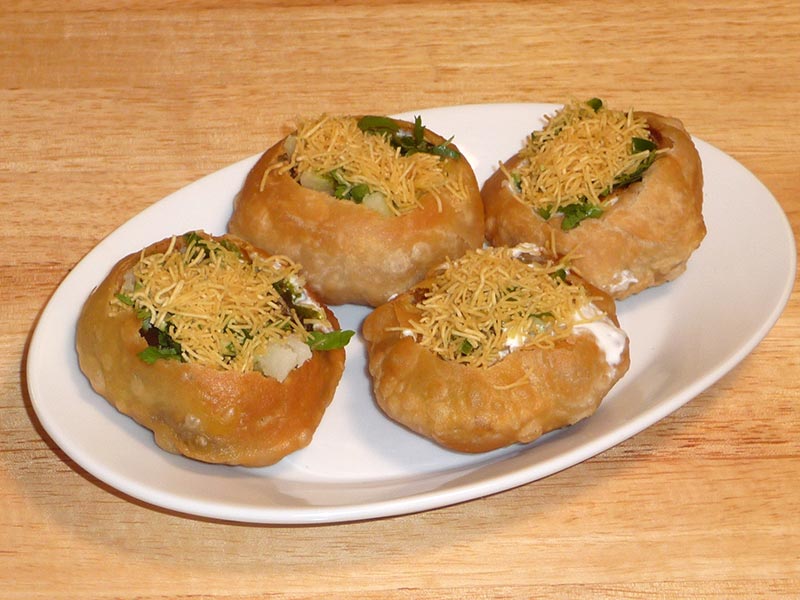
    Raj Kachori is a spicy chaat bowl filled with delicious condiments. It has refreshing flavors and makes for a unique food experience. Guests will have fun filling their own Kachories according to their taste palette. Served as a snack or appetizer, Raj Kachories make a beautiful presentation and are thoroughly enjoyed by just about everyone.
    5 from 1 vote
    Prep Time 15 minutes
    Cook Time 30 minutes
    Total Time 45 minutes
    Course Appetizer
    Cuisine Indian
    Servings 6 people

    Ingredients
      

    Kachori Dough

    • 1 cup all-purpose flour plain flour, maida
    • 1 tbsp oil
    • 1/2 tsp salt
    • 1/2 cup approx. lukewarm water

    Kachori Filling

    • 1/3 cup besan gram flour
    • 1/8 tsp asafetide hing
    • 1/2 tsp salt
    • 1/2 tsp chili flakes
    • 1/2 tsp mango powder amchoor
    • 1 tbsp oil

    Condiments to be served With Kachories

    • 1 cup moong sprouts
    • 1 cup boiled and peeled potato cut into small pieces
    • 1 cup whipped yogurt dahi, curd
    • 1/4 cup hari cilantro chutney
    • 1/4 cup tamarind chutney
    • 2 tbsp cilantri finely chopped hara dhania
    • 2 green chilies finely chopped
    • 1/4 cup fine save available in Indian grocery store optional

    Instructions
     

    Making Dough

    • In a mixing bowl add all-purpose flour, salt, and oil; add water slowly while mixing and kneading to make firm, yet pliable dough. Cover and set the dough aside for at least 10 minutes.

    Filling

    • Mix Kachori filling ingredients together, i.e. gram flour, asafetida, salt, chili flakes, mango powder and oil. Set it aside.

    Making Kachori

    • Knead dough for a minute and divide into 12 equal parts.
    • Roll dough ball into a 2-inch diameter circle and place 1 teaspoon of filling in the center. Seal by pulling the edges together to make a ball. Prepare all 12 kachoris and let sit for 3 to 4 minutes.
    • Place a filled kachori with the seam side up, onto a clean surface. Using a rolling pin roll into a circle, approximately 3 inches in diameter.
    • Heat approx. 1 ½ inches of oil in a frying pan over medium heat. To check if the oil is ready, put a little piece of dough into the oil and it should immediately rise to the surface without having changed its color.
    • Slowly drop kachoris into the frying pan making sure they don’t overlap with one another. As kachoris puff up, slowly turn them over and fry them on all sides. Turn kachoris 3-4 times until they are golden brown in color, which will take about 7KacKachorishories should be crisp. If the kachoris are fried over high heat they will be too soft.

    Notes

    Prepare Moong Sprouts
    Add ¼ teaspoon of salt and 2-3 tablespoons of water to the moong sprouts. Cover and cook over medium heat for 3-4 minutes till sprouts are tender. Set aside.
    Serving Kachories
    Gently make an inch sized hole in the center of the kachori.
    Fill with 1 tablespoon of sprouts, 1 tablespoon of potatoes, 2 tablespoons of yogurt and a drizzle with both of the 2 chutneys.
    As an option, add a little cilantro, green chili and 1 tablespoon of fine Sev. These add a little more texture and flavor to the Kachori.
    Tip:
    These Raj Kachories can be prepared in advance and stored up to 2 weeks in an air tight container, making it more convenient to serve. It is even easier if you have the Hari Cilantro and Tamarind chutneys previously stored.
    Keyword Appetizer, Party Food, Street Food, Tea Time Snack
    Tried this recipe?Let us know how it was!

    How To Make Raj Kachori Recipe – Manjula’s Kitchen 

    Raj Kachori Indian appetizer, a popular Indian snack, is a delightful combination of crispy shells filled with flavorful ingredients. Follow this step-by-step guide to create your own Raj Kachori at home, offering a burst of textures and tastes in every bite.

    Making the Dough: 

    Begin by preparing the dough for the kachori. In a mixing bowl, combine all-purpose flour (maida), salt, and oil. Gradually add water while kneading to achieve a firm and pliable consistency. Cover the dough and set it aside for at least 10 minutes to allow it to rest and develop the right texture.

    Preparing the Filling: 

    The filling is a crucial component that adds a distinct taste to Raj Kachori. Mix gram flour, asafetida, salt, chili flakes, mango powder, and oil in a bowl. This flavorful mixture will be the heart of your kachori, providing a savory and aromatic essence.

    Shaping and Filling the Kachori: 

    After the dough has rested, knead it briefly and divide it into 12 equal parts. Roll each portion into a 2-inch diameter circle. Spoon 1 teaspoon of the prepared filling into the center of each circle and seal the edges to form a ball. Let these filled kachories sit for a few minutes. Roll each ball into a 3-inch diameter circle, ensuring an even distribution of the filling.

    Frying the Kachoris: 

    Heat about 1 ½ inches of oil in a frying pan over medium heat. To check if the oil is ready, drop a small piece of dough into it; it should rise immediately without changing its color. Carefully place the filled kachoris in the pan, ensuring they do not overlap. As the kachoris puff up, turn them over slowly, frying on all sides until they achieve a golden-brown color. This process should take approximately 7 minutes, and it’s crucial to maintain medium heat to ensure the kachoris turn out crispy rather than overly soft.

    Preparing Moong Sprouts: 

    For an additional layer of flavor and nutrition, cook moong sprouts with a pinch of salt and a few tablespoons of water over medium heat for 3-4 minutes until they become tender. Set aside these sprouts as they will be used as a topping for your kachori.

    Serving the Kachoris: 

    Once the kachoris are cooked to perfection, it’s time to assemble and serve them. Gently create a small hole in the center of each kachori. Fill the hole with a tablespoon of each of the moong sprouts, mashed potatoes, and yogurt. Drizzle the kachoris with both hari cilantro and tamarind chutneys for a burst of tangy and spicy flavors. For those seeking an extra layer of texture and flavor, consider adding fresh cilantro, green chilies, and a tablespoon of fine Sev as optional toppings.

    Tips for Storage: 

    For convenience, Raj Kachoris can be prepared in advance and stored in an airtight container for up to two weeks. This makes it easy to serve these delightful treats whenever the craving strikes. With this simple yet comprehensive recipe on how to make raj Kachori, create authentic Raj Kachori in your kitchen. Enjoy the delectable experience of this iconic Indian street food without the need to visit a chaat vendor.

  • Oat Dosa (Spicy Pancake)

    Oat Dosa (Spicy Pancake)

    Instant Oat Dosa

    (Spicy Pancake)

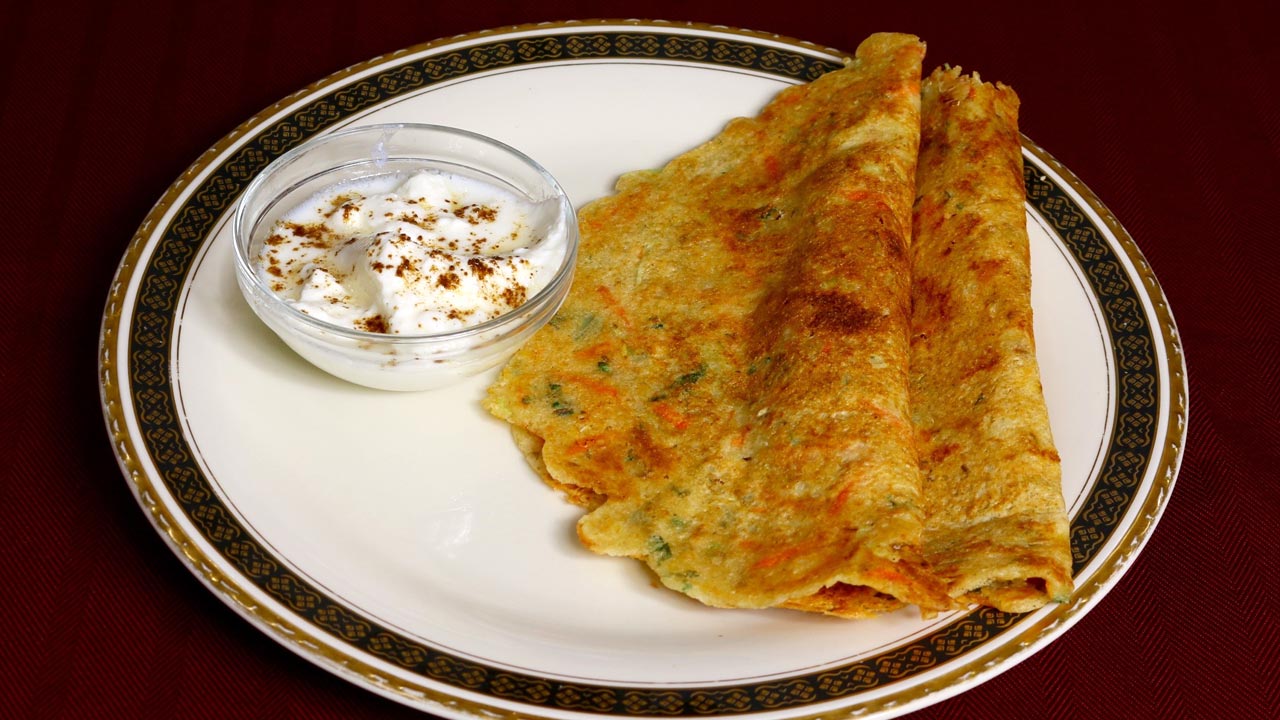
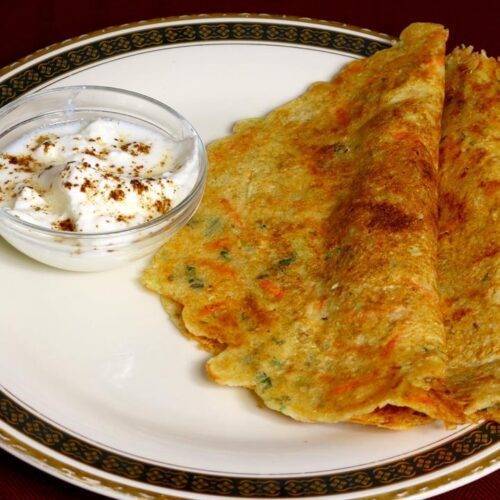
    Instant Oat dosa is an easy recipe that is perfect for busy families. Sometimes you want to make something that is easy and hassle-free and of course healthy.  Oat dosas are instant dosas and make a great breakfast or anytime snack. This gluten-free dish is made with oats, rice flour, yogurt, and a few spices. I am also adding cabbage and carrots for texture.  This will be a staple in my house.
    No ratings yet
    Course Bread
    Cuisine Indian
    Servings 2 people

    Ingredients
      

    • 1 cup quick oats
    • 1/2 cup rice flour
    • 1/2 cup yogurt whipped
    • 1/8 teaspoon asafetida
    • 1/2 teaspoon cumin seeds
    • 1 green chili finely chopped
    • 2 tablespoons cilantro finely chopped
    • 1 teaspoon ginger finely shredded
    • 1/3 cup cabbage shredded
    • 1/3 cup carrot shredded
    • 1/2 teaspoon salt
    • 1 cup water
    • 1-1/2 teaspoon ENO
    • 1-1/2 tablespoons oil

    Instructions
     

    • Grind oats to make fine powder. Add all the dry ingredients except ENO rice flour, asafetida, salt, and cumin seeds and mix it well. Notes: ENO is added just before making dosa.
    • Add yogurt mix, add water as needed to make batter consistency of dosa or pancake mix. Set aside for about fifteen minutes.
    • Add green chilies, cilantro, cabbage, and carrots mix it well.
    • Place a non-stick skillet over medium-high heat. Grease the skillet lightly. Test by sprinkling a few drops of water on it. The water should sizzle right away.
    • In a small bowl take about ½ cup of batter and add ¼ teaspoon of ENO mix it well batter will become a little frothy.
    • Pour the batter mixture into the skillet and spread evenly with the back of a spoon, about seven inches in diameter.
    • When the batter begins to dry, gently spread one teaspoon of oil over it. Wait about 30 seconds, then flip the dosa using a flat spatula.
    • Press the dosa lightly with the spatula all around to ensure even cooking, turning two to three times. The dosa should be golden brown on both sides.
    • Repeat for the remaining dosas.
    • Serve oat dosa with your choice of chutney, I like it with tomato chutney.
    Tried this recipe?Let us know how it was!

    Oats Dosa Recipe: Crispy and Healthy Dosas with a Nutritious Oats Twist 

    Dosa is a popular south Indian delicacy that looks like a crepe. It’s like a crisp and thin pancake made of rice and urad dal batter. Traditionally Dosa is served with sambar, aloo masala, and coconut chutney. It is an Indian crepe made usually through rice batter, but here we have experimented and made many alternative dosa such as Oat Dosa, Besan Dosa, Rava Dosa, Sorghand um Dosa. This preparation uses oats dosa and is a bread-based breakfast recipe that is vegan. The preparation entails skillfully combining pan techniques and manual dexterity to achieve the perfect bread cooked on non-stick skillets.

    1. Grind Oats to Make Fine Powder: Elevating Texture with Oats Dosa 

    Start the oats dosa preparation by grinding oats into a fine powder. This step not only enhances the nutritional profile but also contributes to the unique texture of the dosa. The combination of finely ground oats with other dry ingredients, excluding ENO, rice flour, asafetida, salt, and cumin seeds, ensure a harmonious blend of flavors. It’s essential to note that ENO is introduced just before making the dosa, adding a special touch to the preparation.

    1. Create the Dosa Batter: Blending Nutrients and Flavors with Oats 

    Building on the groundwork laid in the first step, proceed to create the dosa batter. Integrate yogurt into the dry mixture, adjusting the consistency with water to achieve a batter reminiscent of dosa or pancake mix. Allowing the batter to rest for fifteen minutes is a crucial step in enhancing the overall flavor profile. This brief resting period ensures that the oats absorb the flavors, resulting in a more palatable and delicious end product.

    1. Enhance with Vegetables: Burst of Colors and Nutrients in Oats Dosa 

    Take your oats dosa to the next level by introducing a medley of vegetables. Finely chopped green chilies, cilantro, cabbage, and carrots bring not only vibrant colors but also a variety of nutrients to the dosa. This step adds a delightful crunch and freshness, transforming the oats dosa into a visually appealing and nutrition-packed dish that is as wholesome as it is flavorful.

    1. Heat the Skillet: Perfecting the Cooking Surface for Oats Dosas 

    Achieving the ideal dosa requires a properly heated skillet. Place a non-stick skillet over medium-high heat and lightly grease it. To test readiness, sprinkle a few drops of water on the skillet – the water should sizzle right away. This ensures that the dosa cooks evenly and attains the desired crispiness while preventing sticking to the surface.

    1. Prepare the Frothy Batter: Enhancing Texture for Irresistible Oats Dosas 

    Before pouring the batter onto the skillet, take a small portion (about ½ cup) and introduce ¼ teaspoon of ENO. Mixing this well creates a frothy consistency in the batter, adding a light and airy texture to the dosa. This step is crucial for achieving the perfect balance between softness and crispiness in each bite.

    1. Spread the Batter: Crafting Perfectly Shaped Oats Dosas 

    Once the skillet is ready, pour the batter onto it, spreading it evenly with the back of a spoon to form a dosa of about seven inches in diameter. This step requires a bit of finesse to ensure an even thickness throughout the dosa, contributing to the overall enjoyable texture.

    1. Flip and Oil: Locking in Flavor with Precision 

    As the batter begins to dry, delicately spread one teaspoon of oil over the dosa. Waiting for about 30 seconds before flipping with a flat spatula ensures that the dosa achieves a golden brown hue on both sides. This careful process locks in the flavors and adds a subtle yet essential touch of crispiness.

    1. Ensure Even Cooking: Perfecting the Golden Brown Finish 

    To guarantee even cooking, lightly press the dosa with the spatula all around, turning it two to three times. This step is vital in achieving the desired golden brown color, indicating that the dosa is cooked to perfection. The interplay of textures, from the soft interior to the crispy edges, creates a delightful culinary experience.

    1. Repeat for More Dosas: Scaling Up the Oats Dosa Feast 

    The joy of oats dosa doesn’t end with just one. Repeat the cooking process for the remaining batter, creating a batch of these tasty dosas. This step allows you to share the wholesome goodness and unique flavors with family and friends, turning the dosa-making experience into a communal celebration of culinary delight.

    1. Serve with Chutney: Pairing Oats Dosa with Flavorful Companions 

    Finally, elevate your oats dosa experience by serving it with your choice of chutney. The versatility of oats dosa makes it a perfect companion for various chutney options. Whether you prefer the tanginess of tomato chutney or the spiciness of coconut chutney, the pairing enhances the overall dining experience, making each bite a harmonious blend of flavors. Enjoy this nutritious twist on a classic dish, savoring the delicious combination of oats dosa and flavorful chutneys.