Tag: Gluten Free Bread

Gluten-Free Bread: Delicious and Nutritious Indian Variants
In recent years, the demand for gluten free bread has surged, particularly among those with gluten intolerance, celiac disease, or those who simply prefer a gluten-free diet for its potential health benefits. Indian cuisine offers a range of delectable and nutritious options that fit perfectly into this dietary preference.
What is Gluten-Free Bread?
Gluten free bread is bread made without the use of gluten, a protein found in wheat, barley, and rye. Instead, it utilizes alternative flours such as rice flour, almond flour, or chickpea flour, which are naturally gluten-free.
Benefits of Gluten-Free Bread
Digestive Health: Reduces symptoms of gluten intolerance, including bloating and abdominal pain.

Nutrient-Rich: Often made with nutrient-dense ingredients like seeds and nuts.

Versatile: Can be adapted to various cuisines, including Indian, to create delicious and healthy meals.
Popular Gluten-Free Bread Recipes
Let’s explore some easy Indian recipes that are bread based and serve as a great alternative to gluten free diet followers. 
1. Besan Chilla (Chickpea Flour Pancake)
A savory pancake made from chickpea flour, besan chilla is a staple traditional Indian food in many Indian households. It’s a great example of a gluten free bread recipe that’s easy to make and delicious.
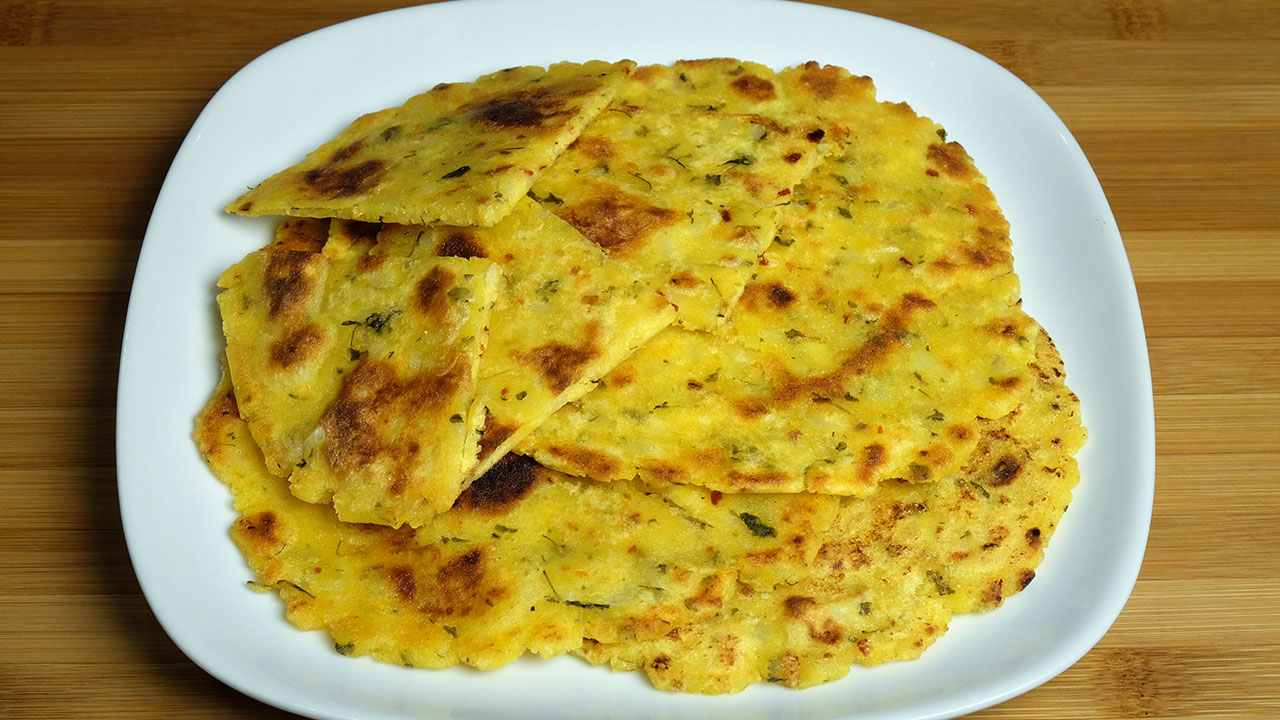
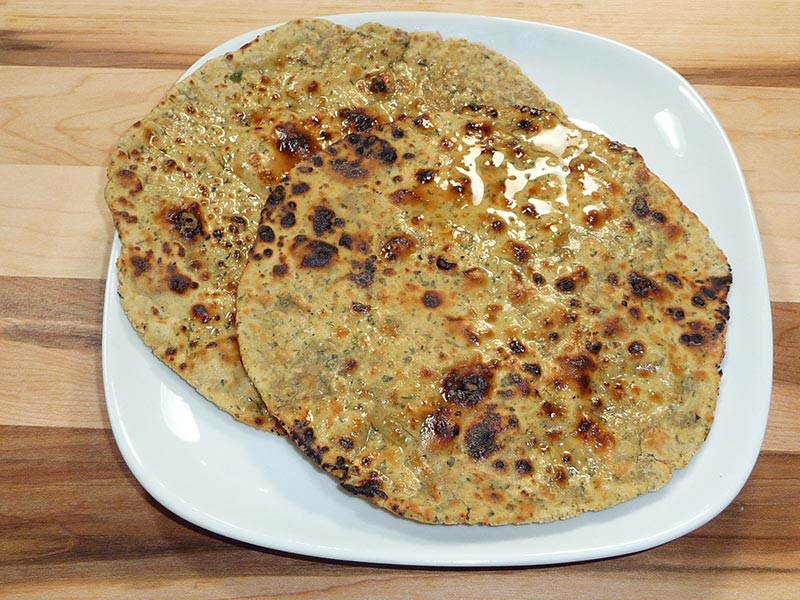
2. Ragi Roti (Finger Millet Bread)
Ragi, or finger millet, is a highly nutritious grain that makes for excellent gluten-free bread. Ragi roti is rich in calcium and fiber, making it one of the best gluten free bread options.
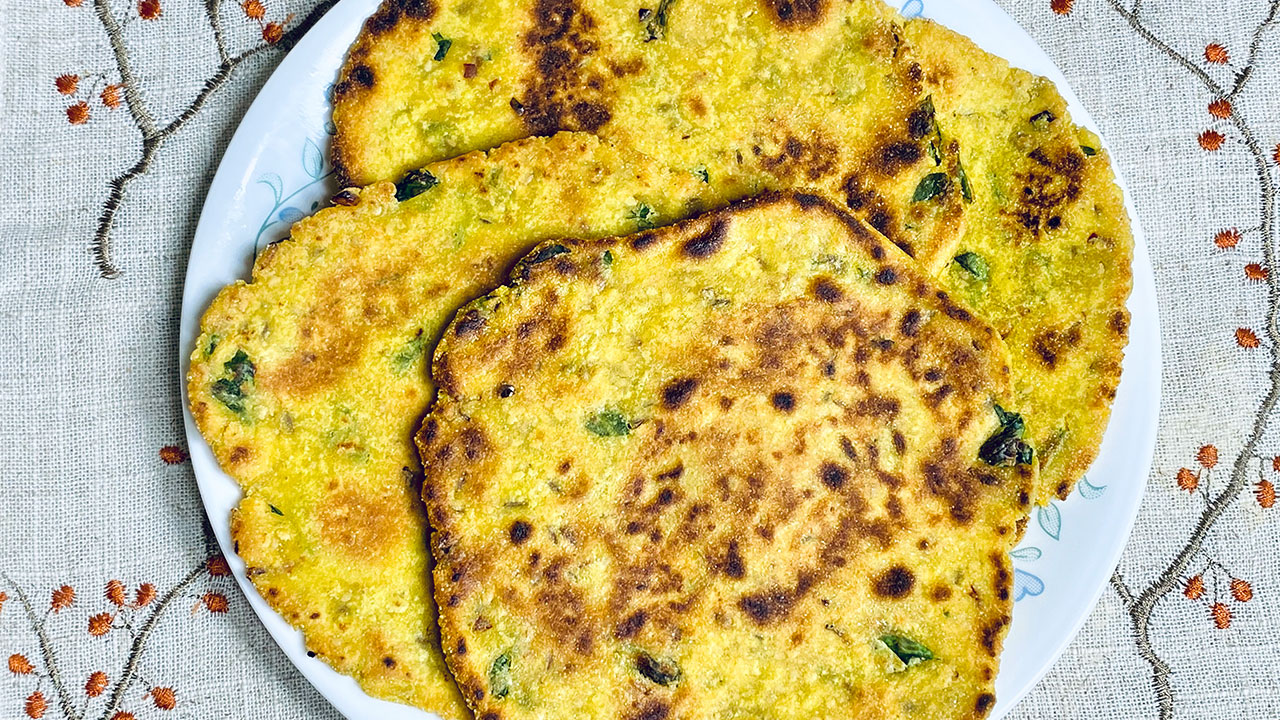
3. Jowar Bhakri (Sorghum Flatbread)
Jowar or sorghum flour is another excellent gluten-free option. Jowar bhakri is a traditional Indian flatbread that’s both nutritious and satisfying.
More Gluten-Free Bread Recipes
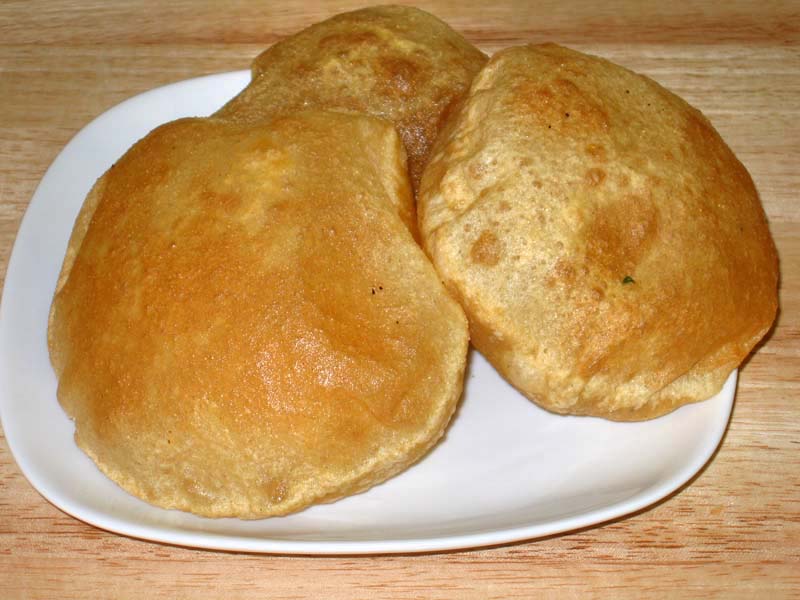
4. Bajra Roti (Pearl Millet Bread)
Bajra, or pearl millet, is a versatile grain used to make gluten-free bread. Bajra roti is not only gluten-free but also rich in iron and magnesium. It’s a great dish coming from the north indian recipes
5. Thalipeeth (Multi-Grain Flatbread)
Thalipeeth is a multi-grain flatbread made with a mix of gluten-free flours such as rice flour, gram flour, and millet flour. It’s a wholesome and filling option for those seeking the best gluten free bread recipe.
Exploring Diverse Gluten-Free Bread Options
6. Amaranth Paratha
Amaranth flour, known for its high protein content, is used to make amaranth paratha. This gluten free bread variant is perfect for a nutritious meal.
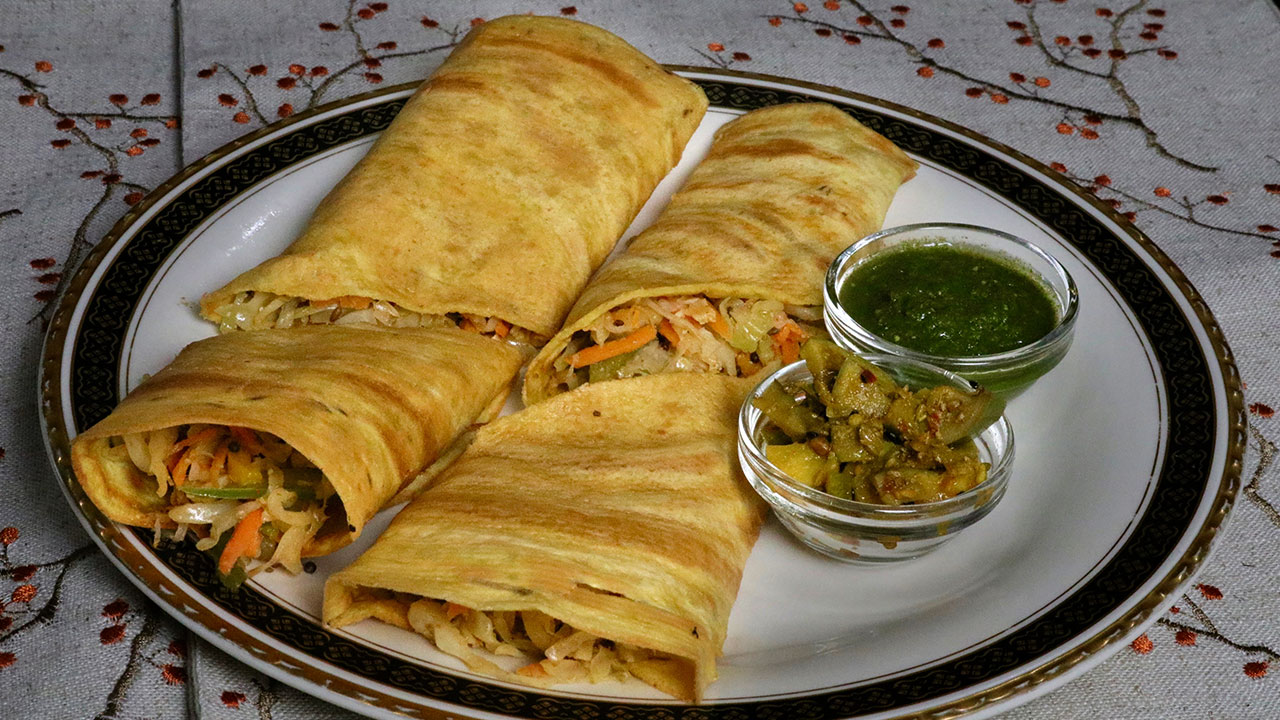
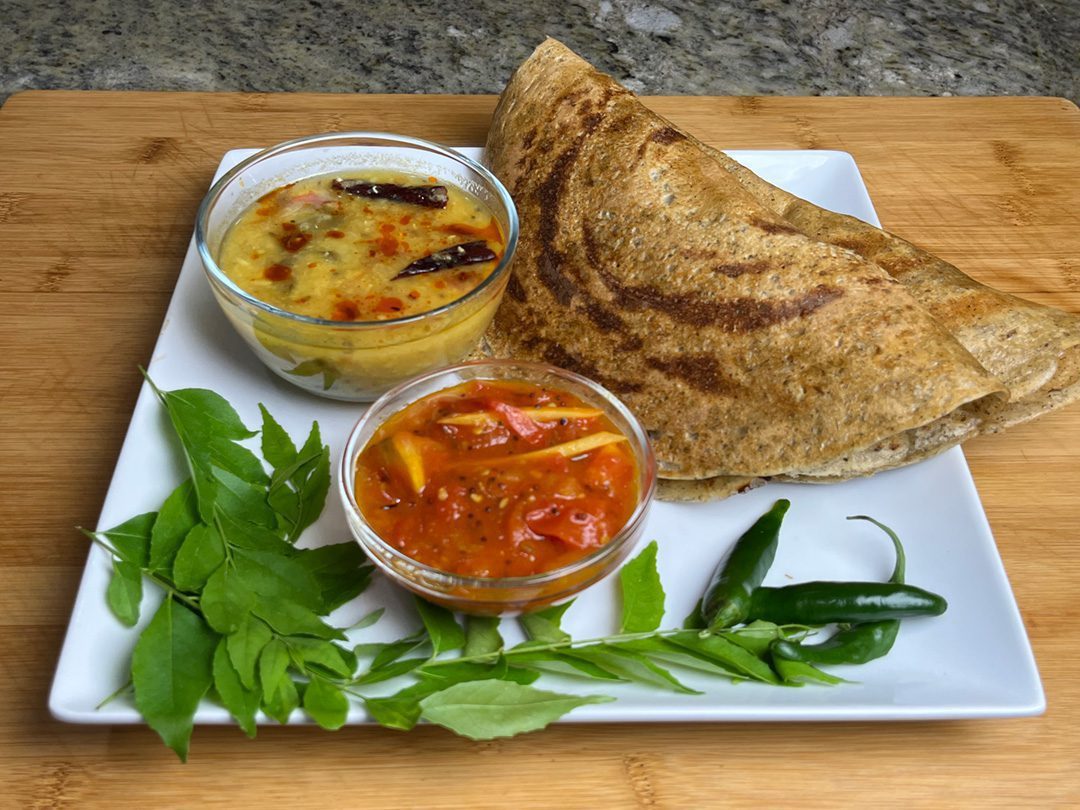
7. Quinoa Dosa
Quinoa, a complete protein, is used to make a gluten-free version of the traditional Indian dosa. Quinoa dosa is both healthy and delicious, making it an excellent addition to your gluten-free diet.
Tips for Making Gluten-Free Bread
Use Binding Agents: Ingredients like xanthan gum or psyllium husk help bind the dough, giving it a texture similar to traditional bread.

Experiment with Flours: Combining different gluten-free flours can enhance the texture and flavor of your bread.

Stay Hydrated: Gluten-free dough often requires more liquid, so adjust the water content accordingly.
More Unique Gluten-Free Bread Recipes
8. Rice Flour Uttapam
Rice flour is used to make uttapam, a type of thick pancake topped with vegetables. It’s a tasty and gluten-free alternative to traditional wheat-based pancakes.
9. Coconut Flour Naan
Coconut flour adds a unique flavor and texture to naan, a popular Indian bread. This gluten free bread recipe is perfect for those looking to add a tropical twist to their meal.
10. Almond Flour Chapati
Almond flour chapati is a low-carb, high-protein alternative to traditional wheat chapati. It’s perfect for those following a gluten-free and low-carb diet.
Creative Ways to Enjoy Gluten-Free Bread
Sandwiches: Use gluten-free bread to make delicious and nutritious sandwiches filled with your favorite ingredients.

Toppings: Top your gluten-free bread with avocado, hummus, or grilled vegetables for a tasty and healthy recipes.

Dips: Pair gluten-free bread with dips like guacamole, salsa, or tzatziki for a flavorful and satisfying treat.
Incorporating Gluten-Free Bread into Traditional Indian Meals
11. Buckwheat Dosa
Buckwheat flour is used to make a gluten-free version of dosa. This dish is rich in antioxidants and perfect for a healthy breakfast.
12. Lentil and Rice Idli
Idli, a popular dish from the south indian recipes, can be made gluten-free by using a mix of lentils and rice. These steamed cakes are light, fluffy, and nutritious.
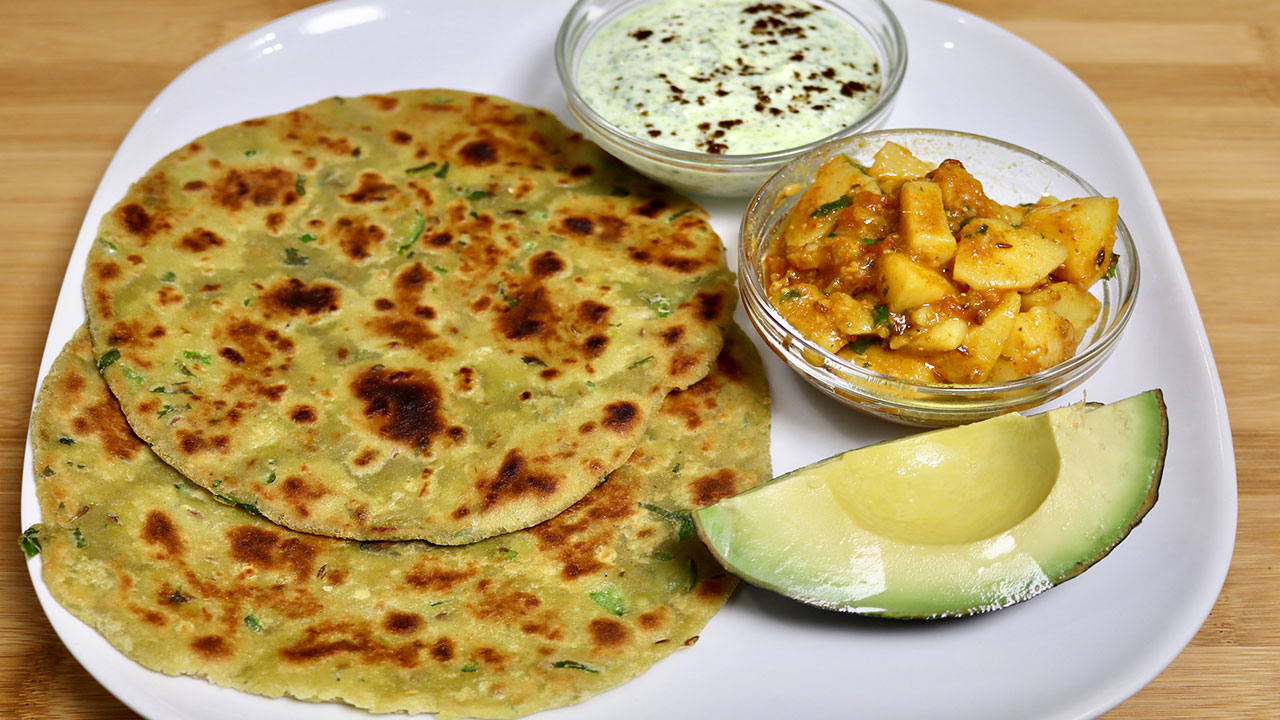
13. Sattu Paratha (Roasted Gram Flour Flatbread)
Sattu, or roasted gram flour, is used to make a gluten-free version of paratha. This dish is rich in protein and fiber, making it a healthy choice.
Conclusion
Exploring gluten free bread within the rich tapestry of Indian cuisine can be both exciting and rewarding. From classic dishes like Ragi Roti to innovative recipes like Quinoa Dosa, there are countless ways to enjoy delicious and nutritious meals while maintaining a gluten-free diet. 

By focusing on alternative flours and nutritious ingredients, you can create a variety of tasty and healthy dishes. Whether you are looking to manage gluten intolerance, explore new flavors, or simply enjoy wholesome food, these gluten free bread recipes are sure to satisfy your culinary cravings. 

For more gluten-free recipes that cater to healthy eating habits, visit Manjula’s Kitchen.

  • Mixed Dal Dosa

    Mixed Dal Dosa

    Mixed Dal Dosa

    Mixed Dal Dosa is a simple and nutritious flatbread that doesn’t require fermentation. This high-protein dosa is made from a blend of various lentils (dal), which are soaked and ground into a smooth paste. A few spices enhance the flavors, and the dosa is cooked on a hot skillet until it’s crispy and golden. These dosas are not only high in protein but also vegan and gluten-free, making them a healthy choice for everyone.
    These protein-rich mixed dal dosas are incredibly versatile. They’re perfect for a healthy breakfast, but they can also be enjoyed at any meal—lunch, dinner, or even as a snack. Serve them with your favorite chutney, a comforting soup, or your choice of vegetable dish to complete the meal.
    5 from 1 vote
    Prep Time 15 minutes
    Cook Time 20 minutes
    Servings 6 Dosa

    Ingredients
      

    • ¼ cup moong dal
    • ¼ cup washed moong dal
    • ¼ cup washed urad dal
    • ¼ cup red lentil
    • 1 green chili chopped optional
    • ¼ piece ginger chopped
    • ½ tsp cumin seeds (jeera)
    • ¼ tsp black pepper 
    • tsp asafetida (hing)
    • ½ tsp salt (adjust to taste)
    • 4 tbsp oil

    Instructions
     

    • In a bowl mix all the dal, wash them changing water 2-3 times. Soak dal in four cups of water for 6-8 hours.
    • Drain the water. Blend the lentils (dal) with green chili and ginger, adding water slowly as needed to make a smooth batter. Note: The less water, the smoother the batter.
    • Mix the salt and cumin seeds into the batter. Add water as needed. The total water added will be about ½ cup, just enough to achieve the consistency of pancake batter.
    • Place a non-stick skillet over medium-high heat. Test by sprinkling a few drops of water on it. The water should sizzle right away.
    • Pour about ½ cup of the batter mixture into the skillet and spread evenly with the back of a spoon. Starting from the center, spiral outward until evenly spread, about seven inches in diameter.
    • When the batter begins to dry, gently spread one teaspoon of oil over it. Wait about 30 seconds, then flip the dosa using a flat spatula.
    • Press the dosa lightly with the spatula all around to ensure even cooking, turning them two to three times. Dosa should be crisp and golden brown on both sides.
    • Repeat for the remaining dosas.

    Notes

    Notes: If you are on a gluten-free diet, be aware that asafetida (hing) in powder form is often not gluten-free. In that case, you may want to avoid using asafetida.
    Serving suggestion
    Serve dosas with any chutney, such as tomato chutney, peanut chutney or cilantro chutney, or chutney of your choice.
    You can also serve them with samber (a south Indian style dal) or your choice of soup.
    For a creative twist, you can use these dosas to make delicious wraps, commonly known as frankies or kathi rolls. Simply wrap some vegetables or salad inside the dosa for a wholesome and satisfying meal on the go. 
    You can even make these dosas in advance, then reheat them over a skillet to restore their crispness.
    For a creative twist, you can use these dosas to make delicious wraps. Make the dosas slightly thicker so they stay soft; these wraps are commonly known as frankies or kathi rolls. Simply wrap some vegetables or salad inside the dosa for a wholesome and satisfying meal on the go.
    Tried this recipe?Let us know how it was!

    Introduction to Mixed Dal Dosa

    Mixed Dal Dosa is a wholesome, protein-rich flatbread that’s not only easy to make but also doesn’t require the traditional fermentation process. Made from a blend of various lentils, this dosa is packed with plant-based protein, making it a great meal option for anyone looking to boost their protein intake. Lentils like moong dal, urad dal, and red lentils are soaked, ground into a smooth batter, and spiced to create a savory and crispy dosa. The best part? This dosa is both vegan and gluten-free, catering to various dietary preferences while still delivering great taste and texture.

    Cultural and Traditional Importance

    Dosas are a staple in South Indian cuisine, traditionally made from fermented rice and lentil batter. However, the Mixed Dal Dosa offers a quicker alternative without the need for fermentation, making it an ideal choice for those who are short on time. Lentils are a common ingredient in Indian cooking, celebrated for their versatility and nutritional value. By using a variety of dals, this dosa provides a range of nutrients, especially plant-based proteins, making it a go-to dish for breakfast, lunch, dinner, or even as a snack.

    The beauty of Mixed Dal Dosa lies in its simplicity and adaptability. It’s a great way to incorporate different types of lentils into your diet, each contributing its unique flavor and health benefits. Traditionally served with chutneys and sambar, this dosa has found a place in modern kitchens due to its quick preparation and nutritious profile.

    Recipe Variations from Manjula’s Kitchen

    While Mixed Dal Dosa is delicious and nutritious on its own, there are several other similar dosa and pancake recipes available on Manjula’s Kitchen that you can explore for variety:

    • Moong Dal Dosa: Another high-protein dosa made primarily from moong dal, offering a lighter alternative.
    • Besan Chilla: A savory pancake made with gram flour (besan), perfect for a quick, protein-packed breakfast.
    • Rava Dosa: A crisp and delicate dosa made with semolina, for those who prefer a thin and crunchy dosa.
    • Oat Dosa: Similar to Mixed Dal Dosa, Instant Oat dosa is an easy recipe that is perfect for busy families.

    Health Benefits and Dietary Considerations

    The Mixed Dal Dosa is packed with nutrients, especially protein, making it a great option for those following a vegetarian or vegan diet. Lentils are an excellent source of protein, fiber, vitamins, and minerals, contributing to overall digestive health and maintaining energy levels throughout the day. By using a variety of dals, you’re also ensuring that you get a broader range of nutrients in every dosa.

    Additionally, this recipe is gluten-free, making it suitable for those with gluten sensitivities or anyone on a gluten-free diet. If you’re strictly gluten-free, it’s important to note that asafetida (hing) often contains gluten, so be sure to use a gluten-free version or skip it altogether.

    Serving Suggestions

    Mixed Dal Dosa can be served with a variety of chutneys to complement its savory flavors. Here are a few chutney options from Manjula’s Kitchen that pair well with the dosa:

    • Tomato Chutney: A tangy and slightly sweet chutney that adds a fresh burst of flavor.
    • Cilantro Chutney: A classic chutney with refreshing cilantro and a hint of spice.
    • Peanut Chutney: A creamy and nutty chutney that pairs wonderfully with the crispy dosa.

    For a complete meal, serve Mixed Dal Dosa with Sambar or a comforting soup. Another creative twist is to use the dosa as a wrap, filling it with vegetables, paneer, or salad to create a delicious and nutritious frankie or kathi roll. The dosas can also be prepared in advance and reheated on a skillet, making them an excellent option for meal prep.

    Conclusion

    Mixed Dal Dosa is a simple yet highly nutritious meal that can be enjoyed at any time of the day. Its high protein content, along with being vegan and gluten-free, makes it a versatile option for a variety of dietary needs. Whether you’re serving it with chutney for breakfast or transforming it into a wrap for lunch, this high protein dosa will quickly become a favorite in your household. Explore the other dosa recipes on Manjula’s Kitchen to discover even more delicious ways to enjoy Indian flatbreads.

    Frequently Asked Questions (FAQs)

    What makes Mixed Dal Dosa high in protein?

    The use of multiple lentils like moong dal, urad dal, and red lentils makes Mixed Dal Dosa rich in plant-based protein, making it an excellent option for those seeking a high-protein meal.

    Can I make the dosa ahead of time?

    Yes, you can make the dosas in advance and reheat them on a skillet to restore their crispness. They also work well as wraps for on-the-go meals.

    What are some serving options for Mixed Dal Dosa?

    Serve Mixed Dal Dosa with chutneys like tomato chutney, cilantro chutney, or peanut chutney. You can also pair it with sambar or use it as a wrap filled with vegetables or paneer.

    Is Mixed Dal Dosa gluten-free?

    Yes, this dosa is naturally gluten-free. However, be cautious with asafetida (hing) as it may contain gluten unless specifically labeled gluten-free.

    Can I adjust the spiciness of the dosa?

    Absolutely! You can adjust the spice level by adding or omitting green chili and black pepper based on your preference.

  • Vegetable Cheela Rolls

    Vegetable Cheela Rolls

    Vegetable Cheela Rolls recipe by Manjula

    Vegetable Cheela Rolls

    Vegetable Cheela Rolls is a healthy and delicious any-time meal. Cheela Rolls is a treat for people who are vegan and gluten free. Cheela is like a besan dosa, and can be used as a wrap and this cheela wrap with vegetables makes a wholesome meal. Cheela Rolls can be used as a snack and also for good a lunch box meal.
    4.41 from 5 votes
    Prep Time 10 minutes
    Cook Time 20 minutes
    Total Time 30 minutes
    Course Appetizer, Snack
    Cuisine Indian
    Servings 2 people

    Ingredients
      

    For Cheela

    • 1 cup besan Gram flour
    • 2 Tbsp rice flour
    • 1 tsp salt
    • 1/2 tsp cumin seeds jeera
    • 3/4 cup water to make batter
    • 4 tsp oil

    For Filling

    • 3 cup cabbage thinly sliced
    • 1/2 cup carrots shredded
    • 1/2 cup bell pepper thinly sliced
    • 2 tsp oil Canola or vegetable oil
    • 1/2 tsp cumin seeds jeera
    • 1/2 tsp mustard seeds rai
    • 2 tsp coriander powder dhania
    • 1/4 tsp chili powder
    • 1/2 tsp salt
    • 1/2 tsp sugar
    • 1 tsp lemon juice

    Instructions
     

    • Mix all the dry ingredients together, besan, rice flour, cumin seeds, and salt. Add the water slowly to make a smooth batter, consistency of Dosa batter. Set aside.
    • To make the filling: Heat the oil in frying pan over medium high heat. Oil should be moderately hot, add cumin seeds and mustard seeds, as the seeds crack. Add cabbage, carrots, and bell pepper. Stir-fry for about one minutes add all the other ingredients, coriander powder, chili powder, salt, sugar and lemon juice. Stir- fry for about three to four minutes, vegetables should be still crisp. Turn off the heat.
    • To make the Cheele: Use a heavy skillet and place on medium-high heat. Test by sprinkling a few drops of water on it. Water should sizzle right away.
    • Pour about 1/4 cup of the batter into the skillet and spread evenly with a back of spoon. Starting from the center, spiral the batter outward evenly to form a circle.
    • When batter starts to dry, gently spread one teaspoon of oil over it. Wait about 30 seconds; flip the cheela using a flat spatula.
    • Press the cheela lightly all around with the spatula to make cheela cook evenly. Turn the cheela and in the center of the cheele put about ½ cup of stir-fry diagonally and roll it.
    • Vegetable Cheela Roll is ready to serve. I like to serve this with Mango Pickle or Cilantro Chutney.
    • Enjoy!

    Notes

    In the ingredients, we need about 4 cups total of sliced vegetable (this includes the cabbage, bell pepper, and carrots)
    Suggestions
    Use or preferred vegetables and also works good with any leftover vegetables.
    Tried this recipe?Let us know how it was!

    A Comprehensive Guide to Besan Cheela Recipe with Vegetables

    Welcome to Manjula’s Kitchen, your ultimate destination for authentic Indian recipes and culinary inspiration. Today, we embark on a flavorful journey to explore the delightful world of Vegetable Cheela Rolls, a versatile and nutritious dish that is perfect for any meal of the day. Made with besan (gram flour) and a colorful assortment of vegetables, these cheelas are not only delicious but also packed with vitamins, minerals, and fibre. 

    Join us as we unravel the secrets to creating the perfect Besan Cheela Recipe with Vegetables, along with tips, variations, benefits, and answers to frequently asked questions. Vegetable cheela is a delectable gluten-free and vegan snack, perfect for appetizers or as a bread alternative, offering a flavorful option for those seeking tasty and wholesome options.

    Preparing the Batter for Vegetable Cheela 

    • Begin by preparing the batter for the besan Vegetable Cheela, the foundation of this delectable dish. In a mixing bowl, combine besan (gram flour) with water to create a smooth and lump-free batter. Add finely chopped vegetables such as carrots, bell peppers, spinach, and green chilies to the batter, along with spices like turmeric powder, cumin powder, and salt. Mix well to ensure that the vegetables are evenly distributed throughout the batter, imparting their vibrant colors and flavors.

    Cooking the Vegetable Cheela 

    • Once the batter is ready, it’s time to cook the Vegetable Cheela to perfection. Heat a non-stick skillet or tawa over medium heat and lightly grease it with oil or ghee. Pour a ladleful of the batter onto the skillet and spread it evenly in a circular motion to form a thin layer. Cook the cheela for a few minutes until the edges start to crisp up and bubbles appear on the surface. Flip the cheela using a spatula and cook the other side until golden brown and crisp. Repeat the process with the remaining batter, adjusting the heat as needed to ensure even cooking.

    Assembling the Vegetable Cheela Rolls 

    • Once all the cheelas are cooked, it’s time to assemble the besan Vegetable Cheela Rolls, adding an extra layer of flavor and texture. Place a cooked cheela on a clean surface and spread a generous layer of mint chutney or yogurt sauce over it. Add a filling of thinly sliced cucumber, tomatoes and fresh coriander leaves on one side of the cheela. Roll the cheela tightly into a cylindrical shape, securing the filling inside. Repeat the process with the remaining cheelas to create a batch of delicious besan Vegetable Cheela Rolls.
    • Tips for Perfect Vegetable Cheela Rolls Every Time 

    • Use a non-stick skillet or tawa to cook the cheelas to prevent sticking and ensure easy flipping.
    • Add a pinch of baking soda to the batter to make the cheelas light and fluffy.
    • Experiment with different vegetables and spices to customize the flavor of your cheelas according to your taste preferences.
    • Serve the besan Vegetable Cheela Rolls hot with a side of green chutney or ketchup for dipping.

    Variations of Besan Cheela Recipe with Vegetables 

    • Paneer Cheela: Add crumbled paneer (Indian cottage cheese) to the vegetable filling for added protein and richness.
    • Masala Cheela: Sprinkle chaat masala or garam masala over the cooked cheelas for an extra burst of flavor.
    • Cheese Cheela: Grate some cheese over the filling before rolling the cheelas for a gooey and indulgent twist.

    Health Benefits of Vegetable Cheela Rolls: 

    Vegetable Cheela Rolls are not only delicious but also nutritious, offering a range of health benefits:

    • Besan (gram flour) is rich in protein, fiber, and essential nutrients, making it a healthy alternative to refined flour.
    • Vegetables add vitamins, minerals, and antioxidants to the dish, promoting overall health and well-being.
    • Cheelas are low in calories and high in satiety, making them a filling and satisfying option for weight management.

    Frequently Asked Questions (FAQs) About Vegetable Cheela Rolls 

    Q: Can I make the batter for Vegetable Cheela in advance?

    A: Yes, you can prepare the batter in advance and store it in the refrigerator for up to 24 hours. Just give it a quick stir before cooking the cheelas.

    Q: Can I freeze Vegetable Cheela Rolls for later use?

    A: While it’s best to enjoy besan Vegetable Cheela Rolls fresh, you can freeze them for up to 1 month. Wrap them individually in plastic wrap or foil and store them in an airtight container. Thaw and reheat in a skillet or microwave before serving.

    Q: What other fillings can I use for Vegetable Cheela Rolls?

    A: You can get creative with the fillings for Vegetable Cheela Rolls. Try adding cooked beans, grated cheese, or leftover cooked vegetables for added flavor and variety.

    Congratulations! You have now mastered the art of making besan Vegetable Cheela Rolls, a wholesome and delicious dish that is sure to impress your family and friends. Whether enjoyed as a snack, appetizer, or light meal, these flavorful rolls are a testament to the rich culinary heritage of India. Explore more recipes and culinary inspirations on Manjula’s Kitchen and continue your culinary adventures with confidence and creativity.

    If you liked the recipe here are some other recipes that you may like too 

    Vegetable Cheela: A savory Indian pancake made with mixed vegetables and chickpea flour.

    Palak (Spinach) Paneer: A classic North Indian dish made with spinach and paneer cheese cooked in a creamy tomato-based sauce.

    Shahi Pulao (Vegetable Pulao): A flavorful rice dish made with spiced basmati rice and vegetables.

    Gobi (Cauliflower) Manchurian: Crispy cauliflower florets tossed in a tangy and spicy Indo-Chinese sauce.

    Aloo (Potato) Paratha: Whole wheat flatbread stuffed with spiced mashed potatoes and cooked on a griddle.

    Mango Lassi: A refreshing yogurt-based drink flavored with ripe mangoes and a hint of cardamom.

    Besan Ladoo: Traditional Indian sweet made with roasted chickpea flour, ghee, and sugar.

  • Makki Ki Roti

    Makki Ki Roti

    Makki Ki Roti

    Makki Ki Roti – Paratha

    Makki Ki Roti is a popular Punjabi bread made with corn flour and served with Sarson Ka Saag. Maki ki roti is also a Gluten Free flat bread.
    No ratings yet
    Course Bread
    Cuisine Indian
    Servings 3 people

    Ingredients
      

    • 2 cup Makki ka atta, corn flour
    • 1 cup potato, boiled peeled and grated
    • 1 tbsp salt
    • 1 tbsp chili flakes
    • 2 tbsp dry fenugreek leaves, kasuri methi
    • 1/8 tbsp asafetida, hing
    • ¾ cup warm water
    • 3 tbsp of ghee or clarified butter for cooking rotis

    We also need a plastic sheet about 8” x 12” to roll the rotis I am using a zip lock bag.

    Instructions
     

    • Combine all the dry ingredients in a bowl, corn flour, salt chili flakes, fenugreek leaves, and asafetida mix it well. Add potato to the mixture and mix. This will become very crumbly. Add water as needed to make the firm dough. Knead the dough for a minute. For Makki ki roti make the dough when ready to make roti.
    • Note: Makki ki roti is little hard to roll, that is the reason I decided to use potatoes. Potatoes help to bind the dough.
    • Divide the dough into 6 equal parts. Make them in smooth balls.
    • Take one ball press it between the plastic sheet plastic sheet help rolling the roti, roll the roti into about 6-inch circle. Note: maybe the edges will not be as clean as other rotis.
    • Heat the skillet over medium heat. Skillet should not be very hot. Otherwise rotis will not cook through.
    • Place the roti in the skillet. As it cooks, the dough will change color and have a dryer look. Turn the roti over using a spatula. You should see golden-brown spots on the semi-cooked side.
    • After a few seconds, spread 1 teaspoon ghee onto the roti using a spatula. Turn the roti over. Using your spatula, lightly press the entire surface of the roti to help it cook all the way through. Put the ghee on both sides of the roti while cooking. Grill the roti from both sides making sure it is golden-brown on both sides.  Remove from heat.
    • Repeat with the remaining dough, until they are all done.

    Notes

    Serve them hot. Makki ki roti is traditionally served with sarson ka saag or dal makhani. If you are vegan use the oil for cooking the rotis.
    Keyword Roti
    Tried this recipe?Let us know how it was!
  • Methi Bajra Paratha (Millet Gluten Free and Vegan Bread)

    Methi Bajra Paratha (Millet Gluten Free and Vegan Bread)

    A plate of Methi Bajra Paratha, golden and crispy, garnished with fresh fenugreek leaves

    Methi Bajra Paratha

    Parathas always have been a family-favorite treat. Lately I have been trying to make gluten-free breads. A combination of bajra and besan with methi parathas taste delicious. These spicy Methi Bajra Parathas have a biscuit texture, which makes it very enjoyable. They also pair well with gravy-based dishes like Mixed Dal, Aloo Tamatar or you can serve with plain yogurt. You can enjoy these as a proper meal, or even as a great on-the-go lunch! I also enjoy these parathas with just hot cup of chai.
    This recipe will serve 2, and make 4 Parathas.
    5 from 1 vote
    Prep Time 10 minutes
    Cook Time 10 minutes
    Total Time 20 minutes
    Course Breakfast
    Cuisine Indian
    Servings 2 people

    Ingredients
      

    • ½ cup millet flour bajra atta
    • ½ cup besan
    • ½ tsp cumin seeds jeera
    • ½ tsp salt
    • 1 tsp chili flakes
    • ¼ tsp turmeric haldi
    • tsp asafetida hing
    • 1 Tbsp sesame seeds til
    • 1 Tbsp oil
    • ¼ cup fenugreek leaves option is using dry leaves
    • ½ cup hot water use as needed

    Also Need

    • 4 tsp oil to cook the parathas

    Instructions
     

    • Mix all the ingredients for paratha together, millet flour, besan. Cumin, salt, chili flakes, turmeric, asafetida, sesame seeds, oil, and fenugreek leaves. Notes: if you don’t have fresh fenugreek leaves use dry methi known as Kasuri Methi.
    • Make the dough using hot water, you will need about 1/2 cup of water. Dough should be firm and pliable. Notes: dough should be prepare just before making paratha.
    • Dived the dough into 4 equal parts, oil your palm and roll them between your palms, to make them round petites.
    • Heat the skillet on medium high heat. To test, sprinkle a couple of drops of water on the skillet. The water should sizzle right away.
    • Roll the paratha in about 6” circle, roll them between two pieces of plastic that makes the rolling easy, I am using zip log bag.
    • Place the methi bajra paratha over the skillet. When start to change color, flip it over. You will notice some golden-brown spots.
    • After a few seconds, spread one teaspoon of oil on the aratha. Flip it again and lightly press the with a spatula. Flip again and press with the spatula making sure the paratha is golden-brown on both sides.
    • Repeat same process for the remaining.
    Tried this recipe?Let us know how it was!
  • Avocado Paratha

    Avocado Paratha

    Avocado Paratha served with potato curry, yogurt sauce, and avocado slice on a white plate

    Avocado Paratha

    Avocado Paratha, these days I'm spending a lot of time at home, so I decided to experiment in the kitchen. I had one extra avocado left after making some guacamole dip. Avocados seem to be very popular these days most often served as "Avocado Toast". I decided to put an Indian twist and use the extra avocado in delicious flavorful parathas. It actually turned out great and I enjoyed, but I think it needed a few tweaks. I added some extra spices and it turned out even better.
    Avocados have many health benefits, including being a "healthy" fat and they taste great! I like to serve Avocado Parathas as a snack with tea. It can also be served with any gravy-based dish; however, I think its complemented perfectly with "Aloo Tamatar" or "Spinach Raita". This is also a satisfying lunch box meal.
    This recipe will serve 3.
    4.67 from 6 votes
    Prep Time 10 minutes
    Cook Time 15 minutes
    Total Time 25 minutes
    Course Breakfast
    Cuisine Indian
    Servings 3 people

    Ingredients
      

    • 1 large ripe avocado
    • 1 ¼ cup whole wheat flour use as needed
    • ½ tsp salt
    • ½ tsp cumin seeds jeera
    • tsp asafoetida hing
    • 1 Tbsp green chili finely chopped
    • 1 Tbsp cilantro finely chopped
    • 1 tsp ginger finely shredded
    • ½ tsp lemon juice

    Also, need

    • ¼ cup whole wheat flour for rolling the paratha
    • 3 Tbsp oil for cooking the parathas

    Instructions
     

    • Slice avocado in half, remove the pit and skins and scoop them into a mixing bowl. Then use a fork to gently mash, (avocado should be ripe). Add green chili, salt, asafetida, cumin seeds, lemon juice, cilantro and salt, mash all the ingredients together (Lemon juice is added to prevent oxidizing of the Avocados)
    • Add the whole wheat flour gradually, how much flour you will need depends on the avocado, knead all the ingredients together and make a smooth but firm dough. Do not add any water. Grease your palm and roll the dough between your palms basically you are kneading the dough between you palms. Let the dough sit for 10 minutes before making the parathas.
    • Divide the dough into 6 equal parts and roll them into smooth balls. Flatten them with the palm of your hand and roll them in dry flour. Roll the paratha into about 6-inch diameter. Note: if paratha is sticking while rolling sprinkle little more flour this will help rolling.
    • Heat the flat skillet over medium heat. Note: heavy skillet works best. To check if the skillet is ready, put few drops of water on it. If the water sizzles right away, the skillet is ready.
    • Place the Paratha over the skillet. When you see the color change and the paratha will puff in different places. Turn the paratha over.
    • Paratha should have golden-brown spots. Wait a few seconds and put about 1 teaspoon of oil and spread with a spatula. Flip the paratha and put again half teaspoon of oil. Lightly press the paratha with a spatula.
    • Flip again and press with a spatula making sure the paratha is golden-brown on both sides. Repeat for the remaining parathas.
    • Parathas are best served hot and crispy.

    Notes

    Serve them as a snack with cup of chai, or with a meal I like to serve with Aloo Tamatar and Spinach Raita.
    Keyword Avocado Pancake, Avocado Roti, Bread, Chapati, delicious, Easy Cooking, Guacamole Bread, Healthy, Homemade, Jain Food, Lunch Box, Main Meal, Onion Garlic Free Cooking, Roti, Side Dish, Swaminarayan, Teatime Snack, Unleavened Bread, Vegan, Vegetarian, Veshno Cooking, Video Recipe
    Tried this recipe?Let us know how it was!
  • Besan Ki Roti

    Besan Ki Roti

    Besan Roti

    Besan Ki Roti

    Besan Roti is very flavorful and healthy flat bread, high in protein and gluten free. Besan roti can be served with dal and leafy green vegetables like spinach or with yogurt.
    5 from 1 vote
    Course Bread
    Cuisine Indian
    Servings 6 people

    Ingredients
      

    Ingredients:

    • 2 cups besan gram flour (available in Indian grocery stores)
    • 2 tablespoons oil
    • 2 tablespoons yogurt (dahi)
    • 1/2 teaspoon salt
    • 1/2 teaspoon chili flakes
    • 1-1/2  tablespoon dry fenugreek leaves (kasoori mathi)
    • Pinch of asafetida (hing)
    • Approx. ¼ cup of water use as needed
    • ¼ cup rice flour for rolling the roti
    • Approx. 2 tablespoons butter or ghee (clarified butter)

    Instructions
     

    Method

    • Combine all the dry ingredients in a bowl mix it well. Add oil and yogurt to the mixture and mix. This will become very crumbly. Oil the palm to make the dough as it will be very sticky. Add water as needed to make the firm dough.
    • Keep the dough aside and cover with damp cloth. Let the dough rest for at least ten minutes or more.
    • Divide the dough in 6 equal parts. Make them in smooth balls.
    • Take one ball press it in rice flour from both sides and roll into about 6-inch circle. If the dough sticks to the rolling pin or rolling surface, lightly dust the roti with rice flour.
    • Heat the skillet over medium high heat. Note: Heavy skillet works best.
    • Place the rolled roti on skillet. In few seconds roti will start changing color, turn roti over, both sides of roti will have few light brown spots.
    • Next place the roti on open burner using tong. The top part of roti should be down. Note: if you have gas stove you can put roti directly over high flames but if you have electric stove use cake cooling rack or similar over the burner so roti does not touch burner coil directly.
    • Grill the roti from both sides using tong until roti has golden brown spots both sides. Bottom part of roti should be up for serving brush the roti with ghee or butter.
    • Keep Besan Roti’s in a covered container or wrap them in aluminum foil. (Besan Roti becomes dry when they come to room temperature)
    Tried this recipe?Let us know how it was!

  • Puri, Indian Puffed Flat Bread

    Puri, Indian Puffed Flat Bread

    Puri (Flat Bread) Recipe by Manjula

    Puri, Indian Puffed Flat Bread

    Puri is whole wheat fried bread, made on special occasions. Especially popular with children. It goes well with mutter paneer and other thick gravy recipes.
    4 from 4 votes
    Prep Time 5 minutes
    Cook Time 15 minutes
    Total Time 20 minutes
    Course Main Course
    Cuisine Indian
    Servings 2 people

    Ingredients
      

    • 1 cup whole wheat flour
    • 1/2 tsp salt
    • 1 tsp oil
    • 1/3 cup water, use as needed

    Instructions
     

    • Mix whole-wheat flour and salt. Add water as needed to make firm dough. Oil your palm and knead the dough until it is pliable. Cover the dough with a damp cloth and set it aside to rest at least ten minutes.
    • Divide the dough in eight equal parts. Form these into smooth balls, rolling the dough between your greased plams.
    • Roll the dough balls into seven inch circles. If the dough sticks to the rolling pin or rolling surface, put a drop of oil on the rolling pin and on the rolling surface. Roll four or five puris before you start frying. Do not roll all the puris at once, as they will dry out and fail to puff.
    • Heat at least one inch of oil in a frying pan over medium high heat. When the oil is moderately hot, a small piece of dough dropped into the oil will float immediately to the top.
    • Place one puri at a time in the frying pan and press it with a skimmer. The puris should puff up right away. Turn the puris over. Puri should be light creamy brown on both sides. Take the puris out and place them on paper towels to absorb the excess oil.
    • Serve puri hot or store in covered container after they cool to room temperature.

    Notes

    Tips: 
    Do not roll the puris on a floured surface. If it seems that you need to flour the surface that is an indication that the dough is too moist. In this case, put a drop of oil on the surface and on the rolling pin.
    If the oil is not hot enough, the puris will not puff and will be greasy.
    Variations:
    Add your choice of spices or one or more dry herbs to the flour when making dough. Red pepper flakes, asafetida, dry mint leaves, dry fenugreek leaves, or any other dry herb can be used.
    Tried this recipe?Let us know how it was!