Urad Dal Tadka
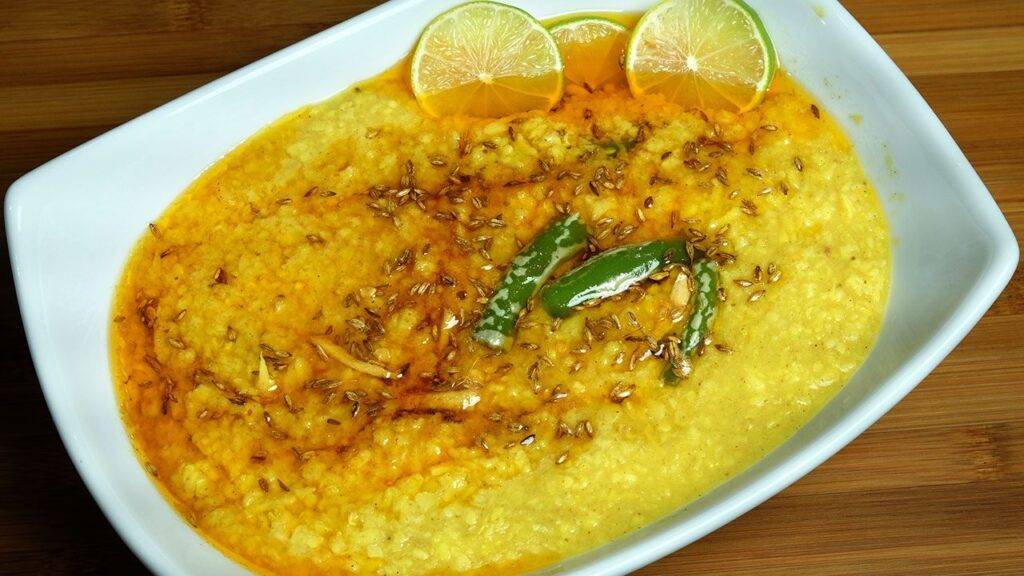
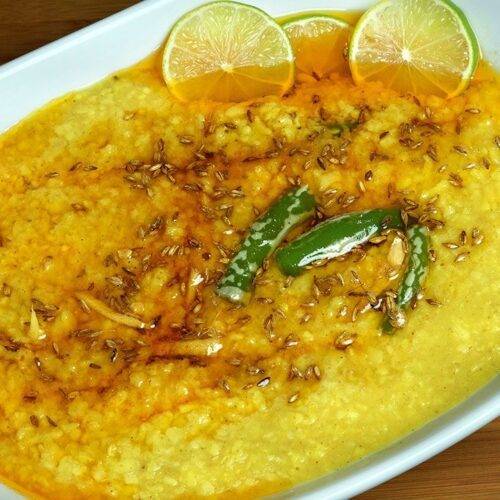
Tadka Urad Dal
Ingredients
- 1 cup urad dal washed
- 1 tsp salt
- 1/4 tsp turmeric
- 1 Tbsp ginger finely chopped
- 2 cups water
- 1/4 tsp garam masala
- 1/2 tsp mango powder amchoor
Seasoning
- 3 Tbsp ghee clarified butter
- 1/2 tsp cumin seeds jeera
- 1/8 tsp asafetida hing
- 1 green chili sliced
- 1 Tbsp ginger thinly sliced
- 1/2 tsp red pepper adjust to taste
- 4 pieces lemon for garnishing
Instructions
- Wash and soak urad dal for at least 20 minutes. Dal will be double in volume after soaking. Drain the water.
- Put dal with 2 cups water into a pressure cooker and add salt, turmeric, and ginger. Close the cover and cook on medium high heat.
- When the pressure cooker starts to steam, turn the heat down to low and cook for five minutes.
- Turn off the heat and wait until all the steam has escaped before opening the pressure cooker. Dal should be soft. If needed add more water, dal should be not very mushy you should be able to see the grains. You should be able to scoop the dal with roti. Dal will thicken as it sits after cooking. So leave it more liquid than you want it to be.
- Add garam masala, and mango powder mix it well.
Seasoning
- Heat ghee in a small saucepan. Test the heat by adding one cumin seed to the ghee; if it cracks immediately, the oil is ready. Add the cumin seeds. When they begin to crack, add the asafetida, ginger, and green chilies. Stir for a few seconds. Add red chili powder and 1 tablespoon of water to prevent the spices from burning. Pour spiced chaunk over hot dal, before serving.
Notes
Urad Dal Tadka: A Tempting Tempered Lentil Dish
Urad Dal Tadka, also known as Urad Dal Ka Tadka or Black Urad Dal Tadka, is a flavorful and comforting lentil dish that hails from North India. This urad dal tadka recipe features split black gram lentils cooked to perfection and tempered with aromatic spices, creating a dish that’s gluten free, healthy, hearty and satisfying. Whether served with steamed rice, roti, or naan bread, urad dal tadka is sure to delight your taste buds and leave you craving more of its irresistible flavors.
To commence the preparation, it is imperative to first ensure that all the vegetables are meticulously dried, a step crucial in achieving the desired texture and consistency in the final dish. This entails patting dry each vegetable, thereby mitigating excess moisture which could potentially alter the outcome of the recipe.
Once the vegetables are suitably dried, the next step entails assembling all the ingredients within a food processor. This multifunctional kitchen appliance serves as the cornerstone in amalgamating the disparate elements into a cohesive mixture. However, it is imperative to exercise caution during this stage, as over-processing the ingredients can lead to an undesired homogeneity akin to a paste. The objective here is to achieve a harmonious blend wherein the individual components remain discernible, imparting both visual appeal and varied texture to the final product.
Upon achieving the desired consistency, the mixture is then transferred from the confines of the food processor. At this juncture, it should embody the texture of a chunky yet pliable dough, indicative of a successful amalgamation of ingredients. This textured amalgam serves as the canvas upon which the ensuing steps of the recipe unfold.
With the mixture at hand, the next course of action involves portioning it into individual servings. This is accomplished by dividing the mixture into 16 equal portions, each to be fashioned into flat patties approximately half an inch in thickness. This meticulous shaping process not only ensures uniformity in size but also facilitates even cooking, thereby contributing to the overall gustatory experience.
As the patties take shape, attention shifts towards the culinary medium responsible for their transformation—hot oil. In a frying pan preheated to medium-high heat, a liberal amount of oil is introduced, its shimmering surface a harbinger of the culinary alchemy about to unfold. With utmost care, the patties are then gently lowered into the oil, ensuring that they are evenly spaced and devoid of any overlap. This deliberate approach not only prevents overcrowding but also promotes uniformity in cooking, allowing each cutlet to attain a golden brown hue, indicative of its culinary readiness.
Throughout the frying process, periodic rotation of the cutlets ensures uniformity in color and texture, with a total cooking time averaging between 5 to 6 minutes. Once the desired golden hue is achieved, the cutlets are carefully removed from the frying pan, their journey culminating on a bed of absorbent paper towels. This final step serves the dual purpose of draining any residual oil while preserving the inherent crispiness of the cutlets.
In culmination, the fruition of this culinary endeavor is best savored when the cutlets are served piping hot, their delectable aroma tantalizing the senses. Paired with the refreshing zest of cilantro chutney, each bite is a symphony of flavors and textures—a testament to the meticulous preparation and artistry inherent in this timeless recipe.
Tips for Perfect Urad Dal Tadka
- Soak Urad Dal: Soaking the urad dal before cooking helps reduce the cooking time and ensures that the lentils cook evenly and become tender.
- Control Spice Level: Adjust the amount of dried red chilies and red chili powder according to your spice tolerance. For a milder dal, reduce the amount of spice used or remove the seeds from the dried red chilies.
- Enhance Flavor with Ghee: For an extra layer of richness and flavor, consider using ghee (clarified butter) instead of oil for tempering the spices. Ghee adds a distinctive nutty flavor and aroma to the dish.
Variations of Urad Dal Tadka
- Urad Chana Dal Tadka: Combine black urad dal with chana dal (split chickpeas) for a nutritious and flavorful variation of the dish. The combination of lentils adds texture and depth to the dal tadka.
- Creamy Urad Dal Tadka: For a creamy texture, blend a portion of the cooked urad dal before adding it back to the tempering mixture. This creates a velvety sauce that coats the lentils, resulting in a luxurious and indulgent dal tadka.
Benefits of Urad Dal Tadka
- Rich in Protein: Urad dal is a excellent source of plant-based protein, essential for muscle repair and growth.
- High in Fiber: Urad dal is also high in dietary fiber, promoting digestive health and keeping you feeling full and satisfied.
- Packed with Nutrients: Urad dal is rich in essential nutrients such as iron, magnesium, and potassium, supporting overall health and well-being.
Frequently Asked Questions (FAQs)
Can I make urad dal tadka without soaking the lentils?
- While soaking the lentils helps reduce the cooking time, you can still cook urad dal tadka without soaking, although it may take longer for the lentils to become tender.
Can I make urad dal tadka ahead of time?
- Yes, urad dal tadka tastes even better when allowed to sit for a few hours or overnight, allowing the flavors to meld together. Reheat it gently before serving.
Is urad dal tadka vegan-friendly?
- Yes, urad dal tadka is inherently vegan as it contains no animal products. It’s a perfect option for those following a vegan or plant-based diet.
Explore more delicious Indian recipes on Manjula’s Kitchen
If you’re looking to explore more Indian recipes, appetizers, beverages, and desserts, be sure to check out the following links on Manjula’s Kitchen. Here are some links to recipes on Manjula’s Kitchen official website: Vegetable Pakoras, Kaju Katli (Cashew Burfi), Baingan Bharta (Roasted Eggplant), Matar (Green Peas) Paneer, Besan Ladoo.
33 Responses
Leave a Reply
You must be logged in to post a comment.


This is my staple recipe loved it . Never thought I will like urid dal. Now I love it. Making it again today. Easy tasty recipes.thanks manjula
Really easy to follow and delicious! Reminded me of home ❤
this was so tasty! I used to use the same ingrediends but in different order and pot, and oh dear what a difference your recipe makes! so tasty, I will add the spices in the order you said from now on. Thank you!
thanks, I appreciate
This was so delicious, just like my grandmother used to make. Thank you for sharing your family recipe. Now I know how to make it, I will enjoy it very much. Blessings to you and your family. Trisha
Trisha, Thank you
Hi Manjula, I love your website. Regarding urad dal you are adding two cups water to one cup of dal and then cook in the pressure cooker for 5 minutes . In my cooking I had to add 4cups and cook for more than 8 minutes in the pressure cooker. Are there different varieties of washed urad or differences in pressure cookers. My cooker is presto.
Thanks, and keep up with inspiring recipes.
Devki, I don’t know why this dal I make all the time with the same measurement I also use presto cooker
Excellent recipe to enhance it can try 2 things Urad dhuli dal ( yellow Punjabi )
We do 2 things in our house growing up
1) add 2 oz Channa dal
2) add soaked daal to dry pressure cooker
For few minutes stir till most daal grains have been rotated thru dry heat
It helps the final consistency
Also urad spoils very quickly in refrigerator be careful. You are better off undercooking a portion and freezing instead then take out to defrost and add tadka. Try it !
Very nice recipe. Thank you so much! Hare Krishna
I didn’t want to stop eating this! So delicious. Could you recommend a vegetable dish that would pair well with it?
This is the best dal I have ever eaten! I’ve been making it regularly since I discovered your YouTube channel about a year ago. Thank you for this delicious recipe.
Claudetta, thanks
Urad dal tadka was finger licking good
Vikas, Thank you
Thank you for your lovely recipes Manjula. Could you please advise how long I can leave cooked Dahl for in the fridge. I work in the week so make as many dishes as I can at the weekend to eat during the week. Do you have any advice?
should be good for few days it depends on the dish.
This recipe is delicious! Thanks for sharing. I made it in my instant pot pressure cooker. I have had some urad dal in my cupboard for ages and wasn’t quite sure what to do with this type of lentil.
I made Tadka Urad Dal for dinner last night. It was so good, I couldn’t wait for dinner time today so I could eat what was leftover. Thank you Manjula for the videos of your recipes. It really helps when I am making a new dish to see how it should be done.
Namaste! Thank you and your father for a delicious recipe. The lemon is a perfect garnish. The dish is scrumptious!
Sadhu, Thank you
Wonderful change of pace to add variety to daily life! 🙂 Very unusual and delicious; home-style and comforting. 🙂 Thanks so much!
Khadijah, Thank you
Hello Manjula, I have a Vinod pressure cooker, and I only cooked the urad dal for 1 whistle, which was about 12 minutes. The dal was not as soft as you showed. Do you know how many whistles it should take? Thank you and I learn so much from your videos.
Nancy, I have never used that particular pressure cooker, next time try 2 whistle.
We always prepare yellow Dal with same process, we will try with Urad now
What a wonderful gift for everyone. I love watching you cook so much I bought the book! Thank you for everything.
Angela, Thank you
Nice recipe Manjula ji, can we make with other dal variety the same way?
Shiny, yes
Manjula ji,
Did you use whole urad dal or split urda dal? Is it ok to use split urad dal with skin?
Thank you.
Sanjana
Love your recipes, but not everyone has a pressure cooker (like me!). Perhaps you could give the cooking times for non-pressure cooker cooks! Thanks.
Ellen, will take about 30 minutes of cooking use larger pot, because when you are cooking any lentils, dal will foam when it comes to boil in beginning, also will need more water.