Tag: Low Calorie Bread

Exploring Low Calorie Bread Options in Indian Cuisine
Maintaining a healthy diet while enjoying your favorite foods can be challenging, especially when it comes to bread. Bread is a staple in many diets, but it can often be high in calories. 

However, Indian cuisine offers a variety of low calorie bread options that are not only delicious but also nutritious. Let’s explore Indian vegetarian recipes and understand their benefits.
Understanding Low Calorie Bread
Low calorie bread refers to bread that provides fewer calories per serving compared to regular bread. These breads are often made with whole grains, fiber-rich ingredients, and minimal added fats and sugars. 

They are ideal for those looking to manage their weight or maintain a healthy diet. Indian bread recipe are fairly low key and manage to be easy, fast, healthy and versatile. 
Popular Low Calorie Bread Options
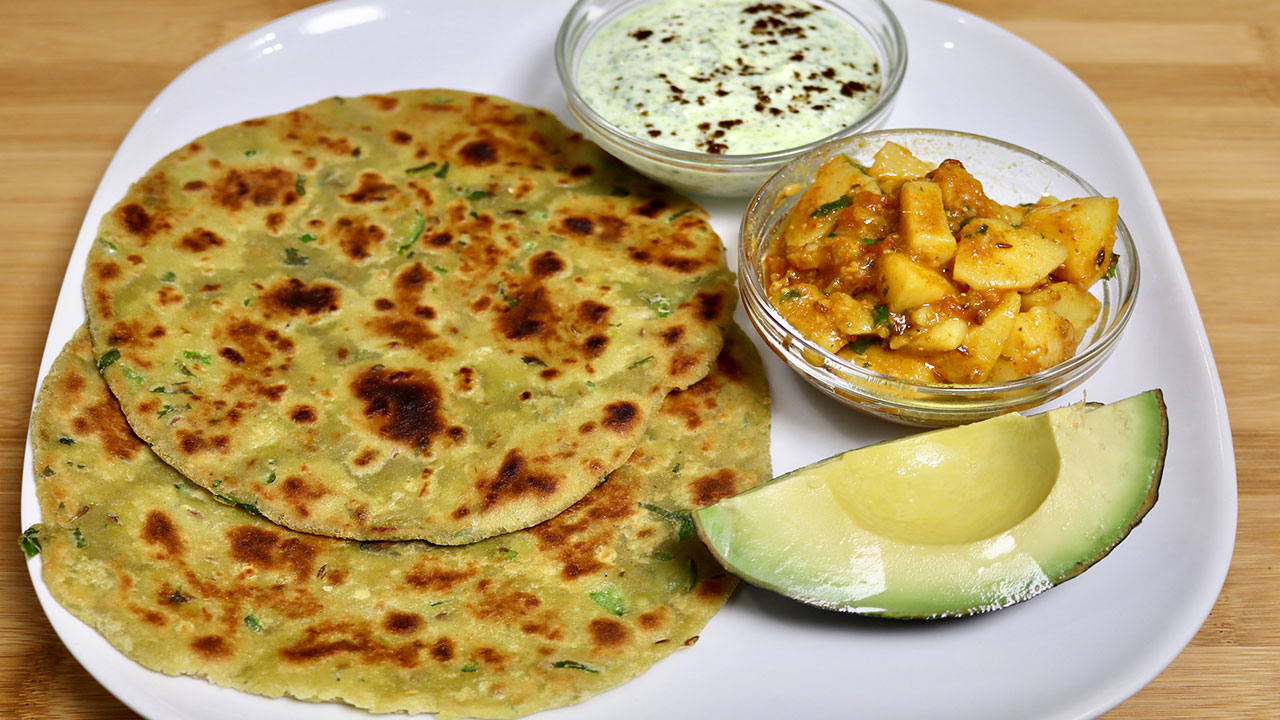
1. Chapati (Roti)
Chapati, also known as roti, is a traditional Indian flatbread made from whole wheat flour. It is a staple in many Indian households and is known for its simplicity and low calorie content. One chapati typically contains around 70-80 calories, making it a great low calorie bread option.
2. Multigrain Roti
Multigrain roti is an enhanced version of the traditional chapati, made with a mix of whole wheat flour, oats, millet, and other whole grains. This healthy low calorie bread is packed with fiber and nutrients, providing a fuller, more satisfying meal with fewer calories. To refer to the list of grains you can check out our website. 
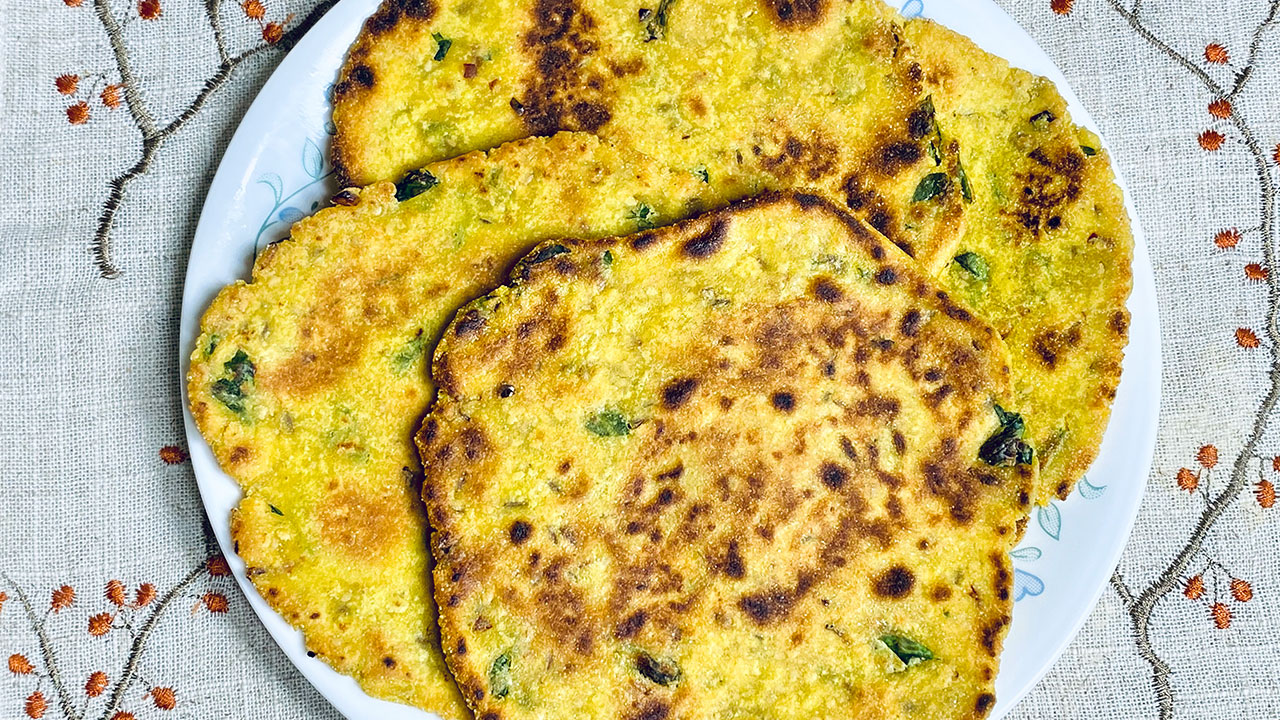
3. Jowar Bhakri
Jowar bhakri is a type of flatbread made from sorghum flour. Sorghum is a whole grain that is high in fiber and protein while being low in calories. Jowar bhakri is a popular choice in many parts of India, especially among those looking for gluten free Indian recipes and low calorie bread options.
4. Bajra Roti
Bajra roti, made from pearl millet flour, is another nutritious and low-calorie bread option. Pearl millet is rich in fiber, protein, and essential minerals, making bajra roti a healthy addition to any meal. One bajra roti contains about 97 calories, making it a low-calorie bread choice.
5. Ragi Roti
Ragi, or finger millet, is a highly nutritious grain that is often used to make roti. Ragi roti is rich in calcium, fiber, and iron, and is lower in calories compared to many other types of bread. This makes it an excellent healthy low calorie bread option.
Benefits of Low Calorie Bread
Choosing low calorie bread options offers several benefits:

Weight Management: Consuming bread with fewer calories helps in managing weight effectively.
Nutrient-Rich: Many low calorie breads are made from whole grains and are rich in fiber, vitamins, and minerals.
Digestive Health: High fiber content in these breads aids in digestion and helps maintain a healthy gut.

Low Calorie Bread Recipes
Here are some simple low calorie bread recipes you can try at home:
Chapati (Roti) Recipe
Ingredients: Whole wheat flour, water, salt (optional) 

Method: Mix the flour and water to form a dough, roll out small balls into flat discs, and cook on a hot griddle until both sides are golden brown.
Multigrain Roti Recipe
Ingredients: Whole wheat flour, oats flour, millet flour, water, salt (optional) 

Method: Combine the flours with water to form a dough, roll out small balls, and cook on a griddle until golden brown on both sides.
FAQs
What is low calorie bread? 

Low calorie bread is bread that contains fewer calories per serving compared to traditional bread, often made with whole grains and minimal added fats and sugars.

Are there healthy low calorie bread options in Indian cuisine? 

Yes, Indian cuisine offers several healthy low calorie bread options such as chapati, multigrain roti, jowar bhakri, bajra roti, and ragi roti.

What is the best low calorie bread? 

The best low calorie bread varies depending on personal preferences and dietary needs. However, chapati and multigrain roti are popular choices due to their low calorie content and high nutritional value.
Conclusion
Incorporating low calorie bread options into your diet is a great way to enjoy bread without consuming excess calories. 

Indian cuisine offers a variety of nutritious and delicious low calorie breads that can be easily made at home. 

From chapati to ragi roti, these breads are not only healthy but also satisfy your taste buds. Try these low-calorie bread recipes and enjoy a wholesome meal without compromising on your health goals. Explore more recipes on Manjula’s Kitchen and discover the joy of cooking nutritious and delicious food.

  • Missa Paratha

    Missa Paratha

    Missa Paratha (Kala Chana Paratha Roti)

    Missa paratha is a traditional North Indian bread. At our house, this recipe was a staple. Adding spices to the dough makes these parathas very enjoyable. Missa Paratha is often mistaken by besan ka paratha. Missa atta (flour) is made with whole gram with the skin on and besan is made with split gram without skin. This makes a very noticeable difference in the flavor and texture of the paratha. This bread is healthy and a better substitute for people who are diabetic. I decided to use whole chana instead of buying the flour, which is not readily available. This also gives a better taste. You can also try spices of your choice. These parathas pair well with gravy-based dishes like Mixed Dal and Aloo Tamatar. Finish this great meal with Salted Mint Lassi, which is a good complement. I also enjoy these parathas with a simple cup of hot chai. This recipe will make 6 parathas.
    No ratings yet
    Prep Time 15 minutes
    Cook Time 15 minutes
    Course Bread
    Cuisine Indian
    Servings 6 parathas

    Ingredients
      

    • ½ cup black gram flour Kala chana
    • cup whole wheat flour roti ka atta, use as needed
    • ½ inch ginger chopped
    • 1 green chili chopped adjust to taste
    • ½ tsp salt
    • tsp asafetida hing
    • ½ tsp cumin seeds jeera
    • 3 tbsp oil for cooking

    Instructions
     

    • Soak chana for about 4 hours. Grind the chana with ginger and green chili to the paste using water as little possible. I used about 1/2 cup of water.
    • Mix all the ingredients for paratha together, whole wheat flour, cumin seeds, salt, and asafetida.
    • Make the dough mixing everything together if needed add more flour, knead the dough. Oil your both palm and roll the dough between your palms.
    • Dived the dough into 6 equal parts, oil your palm and roll them between your palms, to make them round petties.
    • Roll dough ball into a 3” circle. Spread about 2 drops of oil and pull the edges of the dough to wrap. Repeat to make all six balls.
    • Roll the patty in dry whole-wheat flour. Press it a little and start rolling on a clean surface to about 6 inches in diameter.
    • Place the Paratha over the skillet. When you see the color change and the paratha will puff in different places. Turn the paratha over.
    • The paratha should have golden-brown spots. Wait a few seconds and put about 1 teaspoon of oil and spread with a spatula.
    • Flip it again and lightly press it with a spatula. Flip again and press with the spatula making sure the paratha is golden-brown on both sides.
    • Repeat same process for the remaining.
    Tried this recipe?Let us know how it was!

    How To Make Missa Parantha Recipe – Manjula’s Kitchen

    Missa paratha is a traditional flatbread from North India. It’s made with wheat flour, spices, and leftover yellow dal tadka. Missa paratha is often confused with besan ka paratha, but the two are different. Missa atta (flour) is made from whole gram with the skin on, while besan is made from split gram without skin. Preparing Missa Paratha is a delightful process that involves a few simple steps. Let’s break it down in detail:

    Step 1: Soaking the Chana

    To begin, soak the chana (chickpeas) for about 4 hours. This soaking step is important as it softens the chana, making it easier to turn into a paste later on. Patience is key here, as giving the chana enough time to soak will make the entire process smoother. So, just let them soak and you’re on your way to making a fantastic dish!

    Step 2: Grinding the Chana Paste

    Once your chickpeas have soaked, grind them up with ginger and green chili. The key is to make a smooth paste, and try to use as little water as you can – about half a cup should do the trick. Grinding it all together will give your dish a tasty and smooth texture.

    Step 3: Mixing Missa Parantha Ingredients

    Alright, let’s get into making the delicious Missa Paratha. First, gather the simple ingredients: whole wheat flour, cumin seeds, salt, and a dash of asafetida. Now, mix them all up to create the foundation for your tasty Missa Paratha.

    Step 4: Creating the Dough

    Combine the mixed ingredients to make the dough. If necessary, add more flour to achieve the right consistency. Knead the dough thoroughly to ensure a uniform texture. To prevent sticking, oil your palms before rolling the dough between them.

    Step 5: Dividing and Shaping Dough

    Now, take the dough you’ve prepared and split it into 6 equal parts. To make things easier, put a bit of oil on your palms – it helps! With your oiled hands, roll each part between your palms, shaping them into round patties. This simple step ensures that all your portions are the same size, making the next part, where you roll them out, much simpler. So, oil up your hands, divide the dough, and roll those parts into neat, round patties – it’s the key to uniform and manageable dough balls!

    Step 6: Rolling the Paratha

    To shape each dough ball into a peda, start by rolling it into a circle about 3 inches in diameter. For an extra burst of flavor and a delightful texture, gently spread about 2 drops of oil onto the dough. Now, carefully pull the edges of the dough towards the center, wrapping it neatly to form a round peda. Repeat this process for all six dough balls, ensuring each one gets the same delicious treatment. This simple yet crucial step adds a lovely touch to your pedas, making them even more irresistible. Enjoy the process of crafting these delightful treats!

    Step 7: Coating in Flour and Rolling Further

    Roll each patty in dry whole-wheat flour. Press it lightly and start rolling on a clean surface until it reaches approximately 6 inches in diameter. This step adds a thin layer and enhances the texture of your Missa Paratha.

    Step 8: Cooking on Skillet

    Now, it’s time to cook. Place the paratha on a hot skillet. Watch for a change in color and puffiness in different places. When you observe these signs, it’s time to flip the paratha over. The aim is to achieve golden-brown spots on both sides.

    Step 9: Adding Oil and Pressing

    Once flipped, wait a few seconds, then add about 1 teaspoon of oil. Spread it evenly with a spatula. Flip it again and lightly press it with the spatula. The goal here is to ensure that the Missa Paratha is golden-brown on both sides. This process adds flavor and a delightful crispiness to your Missa Paratha.

    Step 10: Repeat the Process

    Keep the momentum going by repeating the same process for the rest of your dough balls. This step is crucial for maintaining a consistent flavor and texture in all your Missa Parathas. Just follow the same easy steps you did for the first batch – roll out the dough, add the delicious filling, and cook them up to perfection. This ensures that each parantha on your plate is as tasty and delightful as the last one, giving you a uniform and satisfying dining experience. So, keep at it, and soon you’ll have a batch of wonderfully consistent Missa Paranthas ready to be enjoyed!

    In conclusion, making Missa Paratha involves a series of straightforward yet crucial steps, from soaking and grinding the chana to crafting the perfect dough and achieving that golden-brown finish on the skillet. It’s a process that rewards attention to detail and patience, resulting in a delicious and satisfying Indian flat bread. Enjoy your homemade Missa Parathas!

    You might also like: Punjabi Aloo Paratha, Sooji Ka Halwa, Salted Mint Lassi, Mixed Dal

  • Dal Fry (Dal Tadka) Recipe

    Dal Fry (Dal Tadka) Recipe

    Dal Fry (Dal Tadka)

    Dal Fry (Dal Tadka)

    Dal Fry is a popular Indian lentil recipe. This recipe uses Toor dal, which is also known as Arhar or Toovar dal. The dal is seasoned with variety of spices and it tastes delicious. This is something you often find served at Indian restaurants and is a part of the main course as part of the servings.
    5 from 2 votes
    Prep Time 10 minutes
    Cook Time 15 minutes
    Course dal
    Cuisine Indian

    Ingredients
      

    • 1 cup toor dal, arahar dal
    • 2-1/2 cup water
    • 1 tbsp salt
    • 1/4 tbsp turmeric

    Seasoning  

    • 3 tbsp clarified butter or ghee
    • 1 cup tomatoes chopped I used 3 medium size tomatoes
    • 1/2 tbsp cumin seeds (jeera)
    • 1/2 tbsp mustard seeds (rai)
    • 1/8 tbsp asafetida (hing)
    • 2 whole dry red chili
    • 2 bay leaf
    • 1 tbsp green chili finely chopped adjust to taste
    • 2 tbsp ginger finely shredded
    • 2 tbsp cilantro finely chopped (hara dhania)
    • 1/2 tbsp red pepper adjust to taste
    • 1/2 tbsp salt
    • 1 tbsp sugar
    • 1/2 tbsp mango powder (amchoor)
    • 1/4 tbsp garam masala

    Instructions
     

    • Wash and soak toor dal in approx. 3 cups of water, for at least one hours. Dal will be double in volume after soaking. Drain the water.
    • Put dal with 2-1/2 cups water into a pressure cooker and add salt, turmeric, Cook on medium high heat.
    • When the pressure cooker starts to steam, turn the heat down to medium and cook for five minutes.
    • Turn off the heat and wait until all the steam has escaped before opening the pressure cooker. Dal should be soft. If needed add more water, dal should be consistency of thick soup.

    Seasoning

    • Heat the ghee in a saucepan. Test the heat by adding one cumin seed to the oil; if it cracks right away, ghee is ready. Add cumin seeds, and mustard seeds, asafetida, whole red chili. After the seeds crack, add bay leaves, green chili, ginger and chili powder. Stir for a few seconds.
    • Add tomatoes, salt and sugar stir and cook until tomatoes are tender and mushy.
    • Add cilantro, mango powder, and garam masala cook for about one minute.
    • Pour the seasoning over  dal mix it well and cook for another minute.
    • Dal fry is ready, serve this as a main dish with Indian flat bread or I prefer with plain rice.
    Tried this recipe?Let us know how it was!

    How to make Dal Tadka Punjabi Style: A Flavorful Punjabi Delight

    Dal Tadka, also known as Dal Fry or Tadka Dal, is a gluten free north indian dish known for its rich flavors and aromatic tempering. This dal tadka recipe offers a tantalizing blend of lentils cooked to perfection and tempered with aromatic spices, making it a favorite comfort food across the country. Whether served with rice or roti, dal tadka never fails to satisfy the taste buds with its hearty and wholesome goodness.

    Step 1: Cooking the Lentils

    To begin, thoroughly wash and rinse the lentils of your choice, such as toor dal (split pigeon peas) or masoor dal (red lentils). In a pressure cooker or large pot, add the washed lentils along with water, turmeric powder, and salt. Cook the lentils until they are soft and mushy, ensuring they are well-cooked to achieve the desired creamy consistency for the dal.

    Step 2: Preparing the Tadka

    While the lentils are cooking, prepare the tadka (tempering) for the dal. In a separate pan, heat ghee or oil over medium heat. Add mustard seeds, cumin seeds, and dried red chilies to the hot ghee, allowing them to sizzle and release their aromatic flavors.

    Step 3: Adding Aromatics and Spices

    Add minced ginger and green chilies to the pan, stirring to combine with the tadka. Next, add ground spices such as cumin powder, coriander powder, and red chili powder, stirring well to toast the spices and enhance their flavors. Adjust the amount of spices according to your taste preferences, keeping in mind the desired level of heat and spice.

    Step 4: Combining Lentils and Tadka

    Once the lentils are cooked and the tadka is prepared, carefully pour the tadka over the cooked lentils, ensuring it covers the surface evenly. Stir the dal tadka gently to combine the lentils with the aromatic tadka, allowing the flavors to meld together. Let the dal tadka simmer for a few minutes to allow the flavors to infuse, adjusting the consistency with additional water if needed.

    Step 5: Garnishing and Serving

    Before serving, garnish the dal tadka with freshly chopped cilantro leaves for a burst of freshness and color. You can also drizzle a spoonful of lemon juice over the dal tadka to add a tangy kick to the dish. Serve the dal tadka hot with steamed rice, roti, or naan bread for a satisfying and wholesome meal.

    Tips for Perfect Dal Tadka

    Lentil Consistency: Ensure that the lentils are cooked until soft and mushy for the perfect creamy texture of the dal tadka.

    Tempering Technique: Take care not to burn the spices while tempering. The tadka should be aromatic and flavorful without any burnt taste.

    Adjusting Spice Level: Customize the spice level of the dal tadka according to your taste preferences by adjusting the amount of green chilies and red chili powder used in the tadka.

    Variations of Dal Tadka

    Restaurant-Style Dal Tadka: Recreate the flavors of your favorite restaurant-style dal tadka by adding a touch of cream or butter to the dish for extra richness.

    Healthy Dal Tadka: For a healthier version of dal tadka, use minimal oil or ghee for tempering and add a variety of vegetables such as spinach, tomatoes, or carrots to the lentils for added nutrition.

    Protein-Packed Dal Tadka: Boost the protein content of the dal tadka by adding cooked chickpeas or kidney beans along with the lentils for an extra protein boost.

    Benefits of Dal Tadka

    Rich in Protein: Lentils are a excellent source of plant-based protein, essential for muscle repair and growth.

    High in Fiber: Dal tadka is rich in dietary fiber, promoting digestive health and keeping you feeling full and satisfied.

    Nutrient-Dense: Packed with essential vitamins and minerals, dal tadka provides a nourishing and balanced meal option for vegetarians and non-vegetarians alike.

    Frequently Asked Questions (FAQs)

    Can I use different types of lentils for dal tadka?

    Yes, you can use a variety of lentils such as moong dal, masoor dal, or chana dal to make dal tadka according to your preference.

    Can I make dal tadka ahead of time?

    Yes, dal tadka tastes even better when allowed to sit for a few hours or overnight, allowing the flavors to meld together. Reheat it gently before serving.

    Is dal tadka gluten-free?

    Yes, dal tadka is inherently gluten-free as it contains no wheat or gluten-containing ingredients.

    Explore more delightful Rajasthani recipes on Manjula’s Kitchen, such as Gatte Ki Sabji for another culinary adventure.Explore more appetiser recipes on Manjula’s Kitchen: Vegetable Samosas, Paneer Tikka, Crispy Spinach Pakoras, Mango Lassi, Masala Chai, Gulab Jamun, Kheer (Rice Pudding)

  • Methi Bajra Paratha (Millet Gluten Free and Vegan Bread)

    Methi Bajra Paratha (Millet Gluten Free and Vegan Bread)

    A plate of Methi Bajra Paratha, golden and crispy, garnished with fresh fenugreek leaves

    Methi Bajra Paratha

    Parathas always have been a family-favorite treat. Lately I have been trying to make gluten-free breads. A combination of bajra and besan with methi parathas taste delicious. These spicy Methi Bajra Parathas have a biscuit texture, which makes it very enjoyable. They also pair well with gravy-based dishes like Mixed Dal, Aloo Tamatar or you can serve with plain yogurt. You can enjoy these as a proper meal, or even as a great on-the-go lunch! I also enjoy these parathas with just hot cup of chai.
    This recipe will serve 2, and make 4 Parathas.
    5 from 1 vote
    Prep Time 10 minutes
    Cook Time 10 minutes
    Total Time 20 minutes
    Course Breakfast
    Cuisine Indian
    Servings 2 people

    Ingredients
      

    • ½ cup millet flour bajra atta
    • ½ cup besan
    • ½ tsp cumin seeds jeera
    • ½ tsp salt
    • 1 tsp chili flakes
    • ¼ tsp turmeric haldi
    • tsp asafetida hing
    • 1 Tbsp sesame seeds til
    • 1 Tbsp oil
    • ¼ cup fenugreek leaves option is using dry leaves
    • ½ cup hot water use as needed

    Also Need

    • 4 tsp oil to cook the parathas

    Instructions
     

    • Mix all the ingredients for paratha together, millet flour, besan. Cumin, salt, chili flakes, turmeric, asafetida, sesame seeds, oil, and fenugreek leaves. Notes: if you don’t have fresh fenugreek leaves use dry methi known as Kasuri Methi.
    • Make the dough using hot water, you will need about 1/2 cup of water. Dough should be firm and pliable. Notes: dough should be prepare just before making paratha.
    • Dived the dough into 4 equal parts, oil your palm and roll them between your palms, to make them round petites.
    • Heat the skillet on medium high heat. To test, sprinkle a couple of drops of water on the skillet. The water should sizzle right away.
    • Roll the paratha in about 6” circle, roll them between two pieces of plastic that makes the rolling easy, I am using zip log bag.
    • Place the methi bajra paratha over the skillet. When start to change color, flip it over. You will notice some golden-brown spots.
    • After a few seconds, spread one teaspoon of oil on the aratha. Flip it again and lightly press the with a spatula. Flip again and press with the spatula making sure the paratha is golden-brown on both sides.
    • Repeat same process for the remaining.
    Tried this recipe?Let us know how it was!
  • Rava Uttapam (Instant Sooji Uttapam)

    Rava Uttapam (Instant Sooji Uttapam)

    Rava Uttapam served with green chutney on a white plate

    Rava Uttapam (Instant Sooji Uttapam)

    I have been wanting to do a video it should be easy and more versatile, ingredients maybe you have in your pantry. Utttapam a South Indian popular dish. Traditionally Uttapam is made with rice and lentil batter, which can be a long process, soaking, grinding then fermenting the batter. Rava Uttappam, on the other hand is instant and easy to make, with a variety of vegetables of your choice. It tastes delicious also can be served for breakfast, as a snack or for dinner. Rava Uttapam will be enjoyed by all ages.
    Uttapam is like a thick Dosa or Spicy pancake topped with vegetables. If you are serving this as a traditional Uttapam serve this with sambar and coconut chutney. But Rava Uttapam can be served with any chutney or condiment. Many times, I prefer this as a light dinner and enjoy with sprinkling samber powder, giving a traditional touch. The other reason I wanted to do this recipe as I said before I wanted to do the recipe more versatile you can use this batter for making Idli, because Rava Idli can be used for making so many recipes.
    I have many related recipes on my website like Masala Idli, Idli Manchurian.
    This recipe will serve 4.
    5 from 1 vote
    Prep Time 20 minutes
    Cook Time 10 minutes
    Course Breakfast, Snack
    Cuisine Indian
    Servings 4 people

    Ingredients
      

    • 1 cup sooji coarse, semolina
    • ½ cup yogurt curd, dahai
    • ½ cup cabbage finely chopped
    • 1 cup bell pepper finely chopped (capsicum, shimala mirch)
    • 1 cup tomatoes finely chopped, remove the seeds
    • 1 Tbsp cilantro finely chopped
    • 1 Tbsp green chili finely chopped
    • 2 tsp ginger shredded, adrak
    • 1 tsp salt
    • 1 tsp ENO fruit salt

    For Seasoning

    • 1 Tbsp oil
    • ¼ tsp cumin seeds jeera
    • ¼ tsp mustard seeds rai

    Also need

    • 2 Tbsp oil to cooking

    Instructions
     

    • In a bowl mix sooji, salt, green chili, ginger, cilantro, cabbage, yogurt, and add water as needed batter should be little thicker than dosa batter.
    • In a small bowl heat the oil over medium heat, oil should be moderately hot, add cumin seeds and mustard seeds as seeds crack add to the batter, mix it well. Let the batter set aside for at least 15 minutes.
    • Add Eno Fruit Salt to the batter just before you are ready to make Uttapam and mix well. The mixture will begin light and foaming.
    • Heat the skillet over medium heat and lightly grease the skillet. Pour about 2 large spoons of batter and spread consistency should be of thick then dosa. Sprinkle about 2 tablespoons of bell pepper and tomatoes press it lightly into the batter.
    • Pour about 1 teaspoon of oil around uttapam and cover it and let it cook for about 2 minutes and turn them over, uttapam should be golden brown from bottom making crisper, and top should be cooked well but not brown. Uttapam should be cooked over low medium heat.
    • Uttapam is ready to serve. I like to sprinkle lightly samber powder to add extra flavor.

    Notes

    Serving suggestions
    • You can serve the Rava Uttapam with sambar, coconut chutney or your choice of condiment.
    Additional Notes
    • Adding tomatoes and bell pepper gives a traditional look to Uttapam.
    • I add green chilies and cilantro in the batter to keep the colors better.
    • You can choose your choice of vegetables like shredded carrots, finely chopped green beans, corn, finely chopped spinach (these are the veggies I have tried).
    • Do not cook on high heat, uttapam will not cook through.
    • If I am making Uttapam to serve as a starter I make the uttapam in small sizes, otherwise make it in about 7-inch diameter. What size you want to make it is your choice.
    Keyword Appetizers, Bhartia Khana, Bread Uttapam, Coconut Chutney, Halwa, Healthy, Homemade, Idli, Jain Food, Mandir Food, No Garlic, No Onion, Quick And Easy, Rava Dosa, Samber, Savory Pancake, Sheera, Snack, South Indian Cuisine, Swami Narayan, Vegetarian, Video Recipe
    Tried this recipe?Let us know how it was!

    Introduction to Rava Uttapam Recipe

    Rava Uttapam is a delightful quick & easy south indian bread that makes for a wholesome breakfast or a light meal. Made from semolina (rava or sooji), this dish is not only delicious but also easy to prepare. In this rava uttapam recipe, we’ll walk through the steps to create this flavorful snack. Whether you’re a beginner or a seasoned cook, how to make rava uttapam will become a breeze with this simple yet detailed recipe.

    Ingredients Preparation for Rava Uttapam

    Before we dive into the cooking process, it’s essential to gather and prepare all the necessary ingredients. For this recipe for rava uttapam, you’ll need semolina, yogurt, water, salt, asafoetida (hing), ginger, green chilies, cilantro, and vegetables like bell peppers, tomatoes.

    Tips for Ingredients Preparation:

    • Ensure the semolina is fresh for the best texture.
    • Use thick yogurt for better consistency.
    • Chop vegetables finely for even distribution.

    Making the Batter for Rava Uttapam

    To start making rava uttapam batter, take a mixing bowl and add semolina and yogurt. Gradually pour water and whisk the mixture to form a smooth batter. The batter should have a pouring consistency, neither too thick nor too thin. Add salt, asafoetida, finely chopped ginger, green chilies, and cilantro to enhance the flavor.

    Tips for Making the Batter:

    • Let the batter rest for at least 10-15 minutes to allow semolina to absorb moisture.
    • Adjust water quantity as needed to achieve the desired consistency.

    Variations for Rava Uttapam Batter:

    • For a healthier option, you can add grated carrots, spinach, or grated zucchini to the batter.
    • Experiment with spices like cumin seeds or mustard seeds for added flavor.

    Cooking Rava Uttapam on the Griddle

    Heat a non-stick skillet or griddle on medium heat and lightly grease it with oil. Once the griddle is hot, pour a ladleful of batter onto it and spread it evenly to form a small circle. Sprinkle chopped vegetables like bell peppers, tomatoes, on top of the uttapam.

    Tips for Cooking Rava Uttapam:

    • Cook on low to medium heat to ensure even cooking without burning.
    • Cover the uttapam with a lid to cook the top layer thoroughly.
    • Drizzle oil around the edges to make them crispier.

    Variations in Toppings for Rava Uttapam:

    • You can customize the toppings according to your preference. Try adding grated cheese or paneer for a richer taste.
    • For a spicy kick, sprinkle some red chili flakes or chaat masala on top.

    Serving and Presentation of Rava Uttapam

    Once the rava uttapam is cooked to perfection and turns golden brown on both sides, transfer it to a plate. Serve hot with coconut chutney, tomato chutney, or sambar for a complete South Indian breakfast experience.

    Benefits of Rava Uttapam:

    • Rava Uttapam is a nutritious breakfast option as it is made from semolina, which is rich in carbohydrates and protein.
    • It’s light on the stomach and easy to digest, making it suitable for all age groups.
    • The addition of vegetables makes it a wholesome meal, providing essential vitamins and minerals.

    FAQs (Frequently Asked Questions) about Rava Uttapam:

            Explore more appetizer recipes on Manjula’s Kitchen: Vegetable Samosas, Paneer Tikka, Crispy Spinach PakorasMango Lassi, Masala Chai, Gulab Jamun, Kheer (Rice Pudding)

          • Avocado Paratha

            Avocado Paratha

            Avocado Paratha served with potato curry, yogurt sauce, and avocado slice on a white plate

            Avocado Paratha

            Avocado Paratha, these days I'm spending a lot of time at home, so I decided to experiment in the kitchen. I had one extra avocado left after making some guacamole dip. Avocados seem to be very popular these days most often served as "Avocado Toast". I decided to put an Indian twist and use the extra avocado in delicious flavorful parathas. It actually turned out great and I enjoyed, but I think it needed a few tweaks. I added some extra spices and it turned out even better.
            Avocados have many health benefits, including being a "healthy" fat and they taste great! I like to serve Avocado Parathas as a snack with tea. It can also be served with any gravy-based dish; however, I think its complemented perfectly with "Aloo Tamatar" or "Spinach Raita". This is also a satisfying lunch box meal.
            This recipe will serve 3.
            4.67 from 6 votes
            Prep Time 10 minutes
            Cook Time 15 minutes
            Total Time 25 minutes
            Course Breakfast
            Cuisine Indian
            Servings 3 people

            Ingredients
              

            • 1 large ripe avocado
            • 1 ¼ cup whole wheat flour use as needed
            • ½ tsp salt
            • ½ tsp cumin seeds jeera
            • tsp asafoetida hing
            • 1 Tbsp green chili finely chopped
            • 1 Tbsp cilantro finely chopped
            • 1 tsp ginger finely shredded
            • ½ tsp lemon juice

            Also, need

            • ¼ cup whole wheat flour for rolling the paratha
            • 3 Tbsp oil for cooking the parathas

            Instructions
             

            • Slice avocado in half, remove the pit and skins and scoop them into a mixing bowl. Then use a fork to gently mash, (avocado should be ripe). Add green chili, salt, asafetida, cumin seeds, lemon juice, cilantro and salt, mash all the ingredients together (Lemon juice is added to prevent oxidizing of the Avocados)
            • Add the whole wheat flour gradually, how much flour you will need depends on the avocado, knead all the ingredients together and make a smooth but firm dough. Do not add any water. Grease your palm and roll the dough between your palms basically you are kneading the dough between you palms. Let the dough sit for 10 minutes before making the parathas.
            • Divide the dough into 6 equal parts and roll them into smooth balls. Flatten them with the palm of your hand and roll them in dry flour. Roll the paratha into about 6-inch diameter. Note: if paratha is sticking while rolling sprinkle little more flour this will help rolling.
            • Heat the flat skillet over medium heat. Note: heavy skillet works best. To check if the skillet is ready, put few drops of water on it. If the water sizzles right away, the skillet is ready.
            • Place the Paratha over the skillet. When you see the color change and the paratha will puff in different places. Turn the paratha over.
            • Paratha should have golden-brown spots. Wait a few seconds and put about 1 teaspoon of oil and spread with a spatula. Flip the paratha and put again half teaspoon of oil. Lightly press the paratha with a spatula.
            • Flip again and press with a spatula making sure the paratha is golden-brown on both sides. Repeat for the remaining parathas.
            • Parathas are best served hot and crispy.

            Notes

            Serve them as a snack with cup of chai, or with a meal I like to serve with Aloo Tamatar and Spinach Raita.
            Keyword Avocado Pancake, Avocado Roti, Bread, Chapati, delicious, Easy Cooking, Guacamole Bread, Healthy, Homemade, Jain Food, Lunch Box, Main Meal, Onion Garlic Free Cooking, Roti, Side Dish, Swaminarayan, Teatime Snack, Unleavened Bread, Vegan, Vegetarian, Veshno Cooking, Video Recipe
            Tried this recipe?Let us know how it was!
          • Vegetable Kathi Roll

            Vegetable Kathi Roll

            Four vegetable kathi rolls filled with fresh veggies, served with a side of dipping sauce.

            Vegetable Kathi roll

            Vegetable Kathi Rolls are a popular Mumbai street food. Vegetable Kathi rolls are the perfect meal for any time. These are also a great vegan treat. This recipe is super easy to put together and it makes for the perfect lunchbox or tiffin meal. Also, this is my version of Spring Roll.
            4.25 from 4 votes
            Prep Time 15 minutes
            Cook Time 15 minutes
            Course Appetizer
            Cuisine Indian
            Servings 2 people

            Ingredients
              

            For Kathi roll

            • 2 uncooked tortilla
            • 2 tsp oil to cook the tortillas
            • About 20 spinach leaves cut into 2-3 pieces
            • ½ cup red bell pepper thinly sliced and remove the seeds
            • 1 cup cabbage thinly sliced
            • ¼ cup carrots shredded
            • ½ cup cucumber thinly sliced
            • 2 Tbsp cilantro leaves finely chopped

            Peanut Sauce

            • ¼ cup peanut butter
            • 2 Tbsp soy sauce
            • 1 Tbsp ginger juice
            • 1 Tbsp sugar
            • 2 Tbsp lime juice
            • 1 Tbsp sesame oil optional
            • 3 whole red chilies

            Instructions
             

            Sauce

            • Remove the seeds from red chili and soak in 2 tablespoons of hot water for few minutes. Blend all the ingredients together except peanut butter, soy sauce, ginger juice, sugar, lime juice, and sesame oil. After spices are blended to paste add peanut butter and blend enough to mix t well. Note: don’t over blend peanut butter will leave the oil.
            • Check if the salt is needed, soy sauce is quite salty.

            Kathi Roll

            • Heat the skillet over medium high, lightly oil the skillet, place the tortilla over skillet for about half a minute, it will change in the color lightly and puff different places. Flip the tortilla over, and lightly brush the oil, flip it again and lightly brush the tortilla. tortilla should have light golden color on both sides.
            • Remove the tortilla from the skillet, make both tortilla same way. And set it aside. You can cook the tortillas in advance.

            Assembling the Frankie

            • Take one tortilla and put it over a flat surface. Spread about 2 tablespoons of peanut sauce over tortilla, leaving 1/2 inch around. Center of the tortilla spread the vegetables moderately, spinach, carrot, bell pepper, cucumber, cabbage, and cilantro. Roll them tightly like burrito.
            • Use extra peanut sauce as a dip.

            Notes

            Suggestions
            Instead of tortilla you may use left over Roti, Paratha. Serve Peanut Sauce as a dipping sauce with vegetable salad, French fries or with variety of bread.
            You may also enjoy Idli Manchurian, Veggie Hash Browns
            Keyword Appetizer, Healthy, Homemade, Jain Food, Lunch Box, No Garlic, No Onion, Picnic Food, Sattvik Food, Snack, Spring Roll, Street Food, Vegan, Vegetable Roll, Vegetarian
            Tried this recipe?Let us know how it was!

            Guide to How to make Vegetable Kathi Rolls

            Welcome to our comprehensive recipe for vegetable kathi roll. Whether you’re a seasoned cook or a beginner in the kitchen, this recipe promises to deliver a delicious and satisfying appetizer. Kathi Rolls, a popular street food in India, are versatile and customizable, making them perfect for any occasion. 

            Paired with our homemade peanut sauce, they are sure to impress your family and friends. In this guide, we’ll walk you through each step of the process, providing clear instructions, helpful tips, and suggestions for variations. Let’s get started!

            Step-by-Step Instructions: Preparing the Sauce

            To start, let’s prepare the flavorful peanut sauce that will elevate your Kathi Rolls to the next level.

            • Begin by removing the seeds from the red chili and soaking them in two tablespoons of hot water for a few minutes. This step helps to soften the chili and enhance its flavor.
            • Once the chili is soaked, blend all the ingredients together in a blender, excluding the peanut butter, soy sauce, ginger juice, sugar, lime juice, and sesame oil. This will create a fragrant and spicy paste.
            • After blending the spices into a paste, add the peanut butter to the mixture. Be careful not to overblend, as this can cause the peanut butter to release its oil.
            • Taste the sauce and adjust the salt if necessary. Remember that soy sauce is quite salty, so proceed with caution.

            Cooking the Kathi Rolls

            Now that the sauce is ready, let’s move on to assembling the Kathi Rolls.

            • Heat a skillet over medium-high heat and lightly oil the surface. This will prevent the tortillas from sticking.
            • Once the skillet is hot, place a tortilla on it for about half a minute. You’ll notice the tortilla changing color slightly and puffing up in different places.
            • Flip the tortilla over and lightly brush it with oil. Repeat this process, flipping the tortilla again and brushing it with oil until it achieves a light golden color on both sides.
            • Remove the tortilla from the skillet and repeat the process with the remaining tortillas. You can cook the tortillas in advance and set them aside for later use.

            Assembling the Kathi Rolls

            Now it’s time to assemble the Kathi Rolls with our delicious peanut sauce.

            • Take one tortilla and lay it flat on a clean surface. Spread approximately two tablespoons of peanut sauce evenly over the tortilla, leaving about half an inch of space around the edges.
            • In the center of the tortilla, layer the vegetables generously. You can use a combination of spinach, carrots, bell peppers, cucumbers, cabbage, and cilantro for a colorful and nutritious filling.
            • Once the vegetables are in place, carefully roll the tortilla tightly like a burrito, ensuring that the filling is secure inside.
            • Repeat this process with the remaining tortillas until all the Kathi Rolls are assembled and ready to serve.

            Serving Suggestions

            Here are some suggestions for serving your Kathi Rolls with Peanut Sauce:

            • Serve the rolls with extra peanut sauce on the side for dipping.
            • Instead of tortillas, you can use leftover Roti or Paratha for a more traditional twist.
            • Pair the rolls with a side of vegetable salad, French fries, or a variety of bread for a complete meal.

            Notes and Tips

            • Be mindful not to overblend the peanut butter when preparing the sauce, as it can release its oil and affect the texture.
            • Adjust the salt level in the sauce according to your preference, keeping in mind the saltiness of the soy sauce.
            • You can customize the filling of the Kathi Rolls according to your taste preferences. Try addingpaneer, or tofu for added protein.
            • If you’re preparing the rolls in advance, store them in an airtight container in the refrigerator and reheat them in the oven or microwave before serving for best results.

            Frequently Asked Questions (FAQ)

            Q: Can I make the peanut sauce ahead of time?

            A: Yes, you can prepare the peanut sauce in advance and store it in the refrigerator for up to a week. Just make sure to stir it well before using.

            Q: Can I make the Kathi Rolls with gluten-free tortillas?

            A: Absolutely! You can use gluten-free tortillas or even lettuce wraps as a substitute for traditional tortillas.

            Q: Can I freeze the assembled Kathi Rolls?

            A: While it’s possible to freeze the assembled rolls, the texture of the vegetables may change upon thawing. It’s best to assemble the rolls just before serving for the freshest taste.

            Benefits of Kathi Rolls with Peanut Sauce

            • Kathi Rolls are a convenient and portable meal option, perfect for on-the-go lunches or picnics.
            • The peanut sauce adds a rich and creamy texture to the rolls while providing a good source of protein and healthy fats.
            • With a variety of vegetables in the filling, Kathi Rolls are a nutritious option that can help you meet your daily intake of vitamins and minerals.
            • By making your own Kathi Rolls at home, you can control the ingredients and customize them to suit your dietary preferences and restrictions.

            We hope this guide has inspired you to try making Kathi Rolls with Peanut Sauce at home. Enjoy experimenting with different fillings and variations to create your own delicious twist on this classic street food!
            Explore more appetizer recipes on Manjula’s Kitchen: Vegetable Samosas, Paneer Tikka, Crispy Spinach Pakoras, Mango Lassi, Masala Chai, Gulab Jamun, Kheer (Rice Pudding)