Tag: Vegetarian Meals

Quick & Easy Vegetarian Meals Recipes
Seeking vegetarian meals that are both delicious and easy to prepare is a common desire for many. With the wealth of resources available today, platforms like Manjula’s Kitchen make it incredibly convenient to discover a variety of vegetarian recipes that cater to different tastes and dietary needs.
Manjula’s Kitchen: A Hub for Vegetarian Meals Delights
Manjula’s Kitchen is a treasure trove for anyone looking to explore vegetarian cuisine. The platform offers an extensive collection of recipes that are perfect for all occasions. Here’s a detailed look at what you can find on each platform associated with Manjula’s Kitchen:
YouTube Channel
Manjula’s Kitchen on YouTube has a massive following with over 1 million subscribers and more than 500 videos. These videos range from traditional Indian dishes to modern vegetarian meals. 

The channel has garnered millions of views, with some popular videos like the Tawa naan reaching over 1 million views. The step-by-step video tutorials make it easy for beginners to follow along and create authentic Indian dishes at home.
Facebook Page
The Facebook page for Manjula’s Kitchen is another popular platform where you can find a plethora of indian vegetarian recipes. With over 200,000 followers, the page is regularly updated with new recipes, cooking tips, and engaging content. It also serves as a community hub where followers can share their cooking experiences and ask for advice.
Website
The official website of Manjula’s Kitchen is a comprehensive resource with hundreds of vegetarian recipes categorized under various sections like breakfast, lunch, dinner, snacks, and desserts

Each recipe is detailed with ingredients, cooking instructions, and nutritional information. The website also features a blog where Manjula shares her cooking journey, tips, and tricks.
Pinterest
Manjula’s Kitchen on Pinterest is a visual delight for those who love to browse through food photos. The page has over 50,000 followers and features pins of beautiful food photography, linking back to the detailed recipes on the website. It’s a great place to find inspiration for vegetarian meals and plan your meals visually.
TikTok
Although relatively new, the TikTok presence of Manjula’s Kitchen is growing rapidly. With short, engaging videos that showcase quick recipes and cooking hacks, it’s perfect for those who prefer bite-sized content. The TikTok account has already amassed thousands of followers and millions of views.
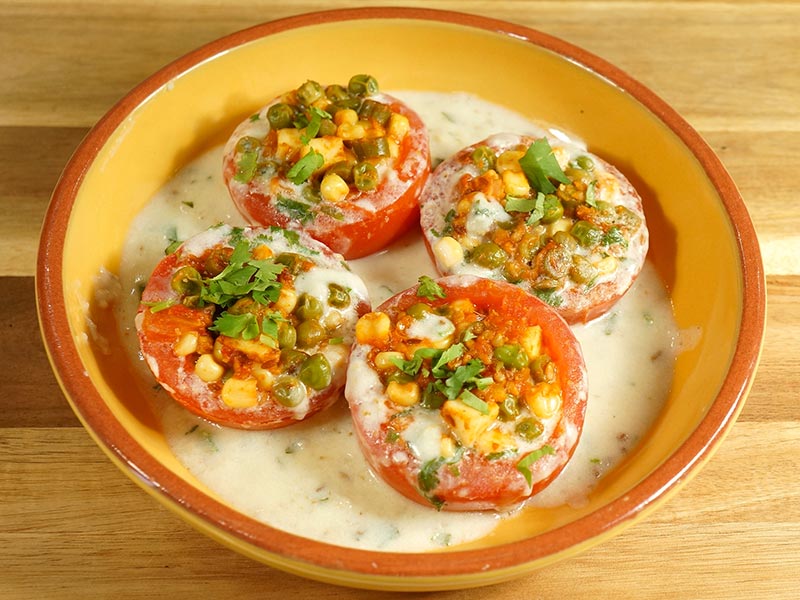
Popular Vegetarian Meals from Manjula’s Kitchen

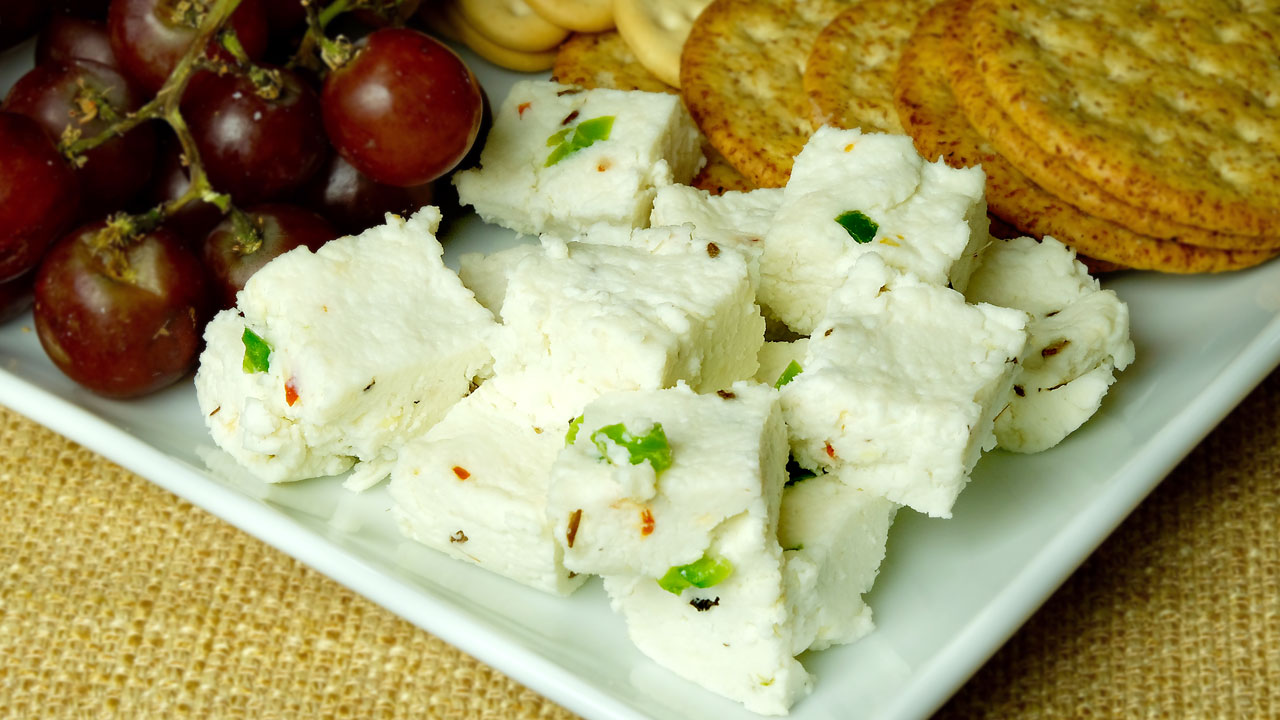
Paneer Butter Masala: A rich and creamy dish made with paneer (Indian cottage cheese) and a blend of spices. It’s a favorite among vegetarians and pairs well with naan or rice. A great delicacy coming from paneer recipes
Chole Bhature: This classic dish comes from North Indian recipes consisting of spicy chickpeas (chole) served with deep-fried bread (bhature). It’s a hearty and satisfying meal that’s perfect for brunch or dinner.
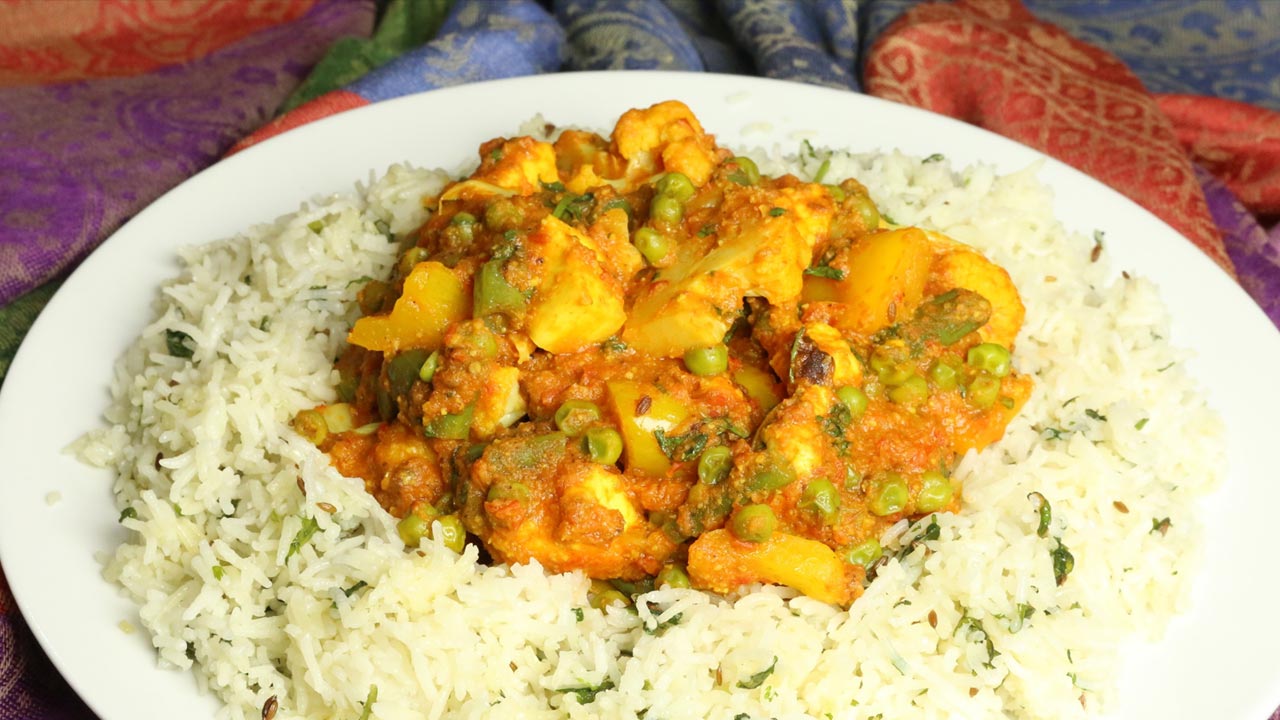
Vegetable Biryani: A fragrant rice dish cooked with a variety of vegetables and aromatic spices. It’s a complete meal in itself and can be enjoyed with raita (yogurt sauce). A special rice recipe that is great to taste and amazing to feast. 
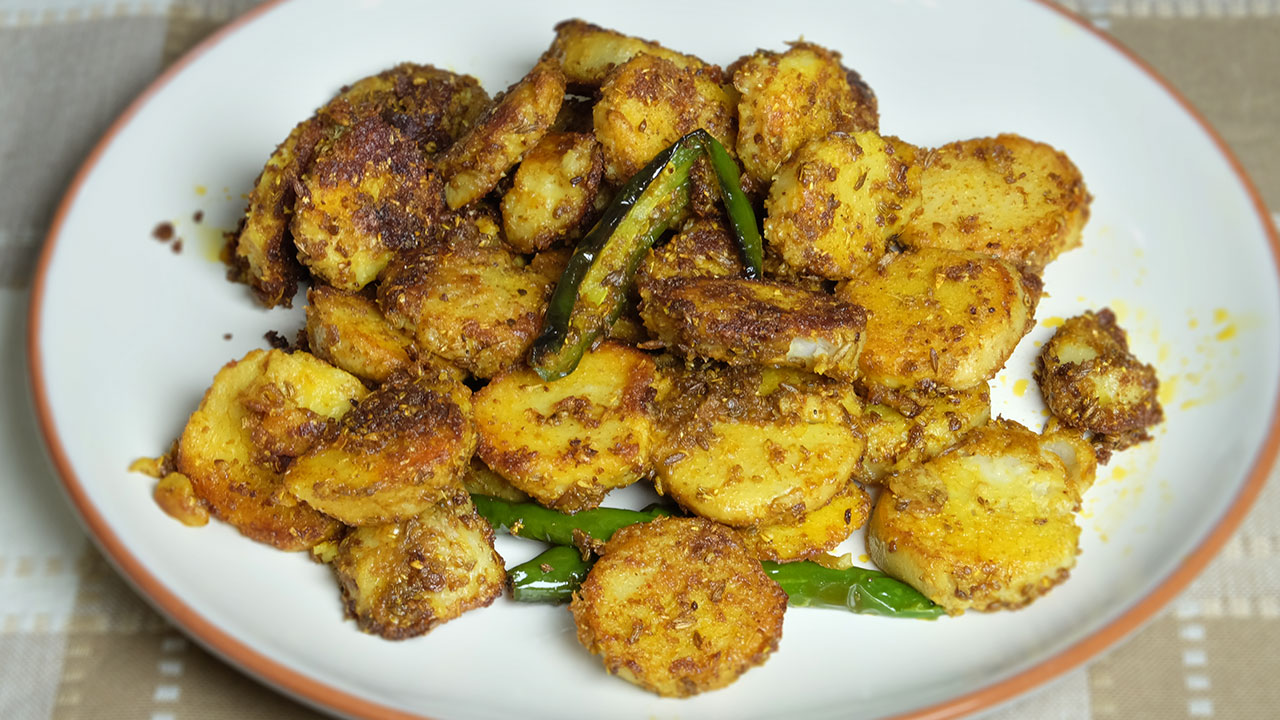
Aloo Gobi: A simple yet flavorful dish made with potatoes (aloo) and cauliflower (gobi). It’s a staple in many Indian households and can be served with roti or rice.
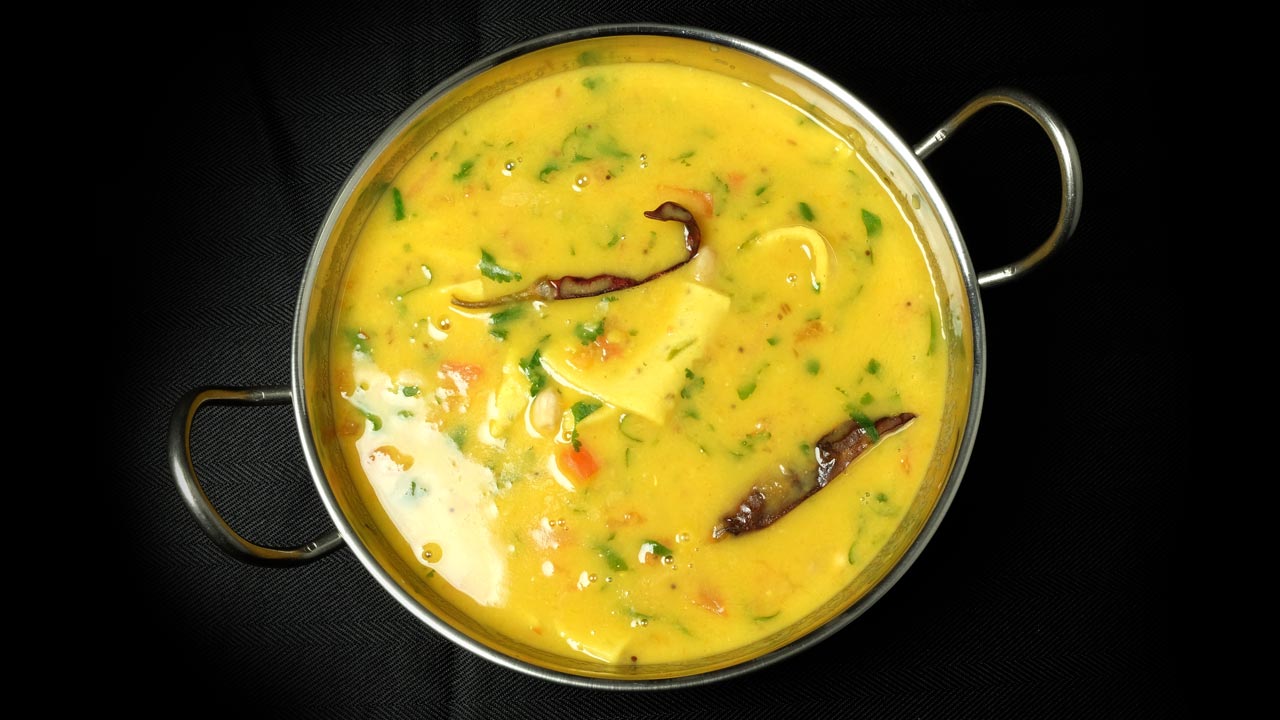
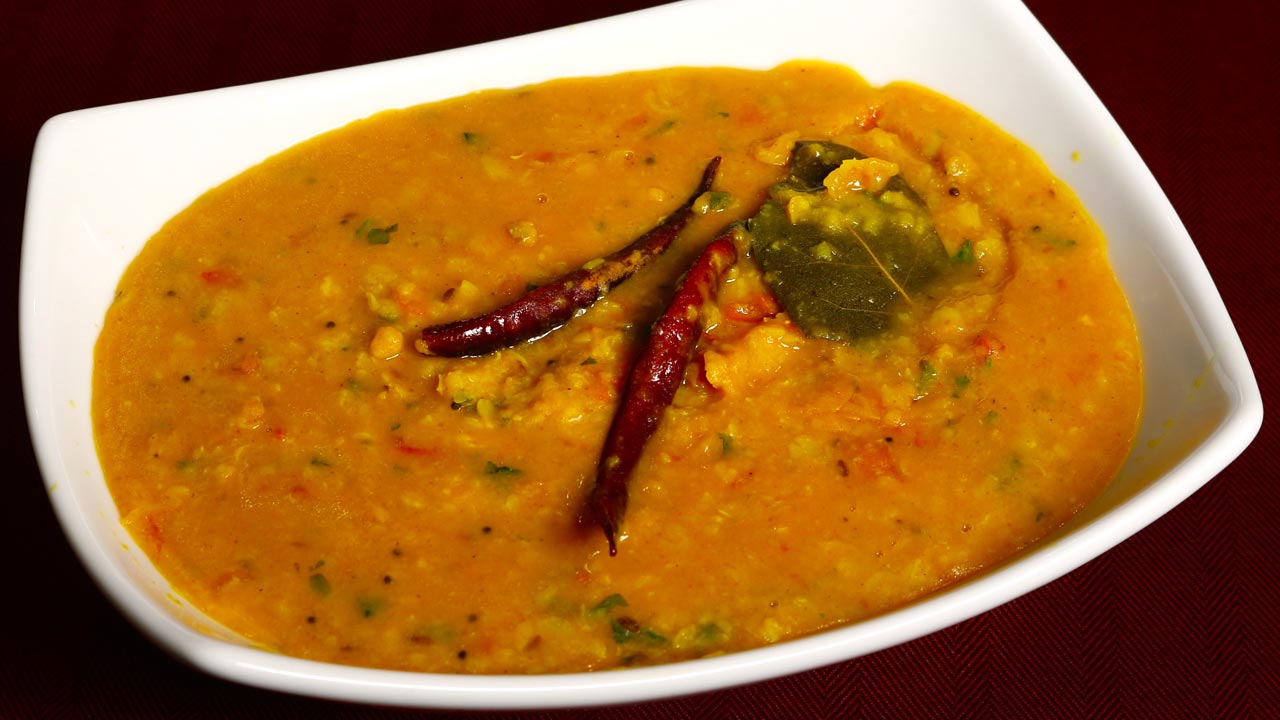
Dal Tadka: A comforting indian dal lentil dish tempered with spices. It’s a protein-rich meal that pairs well with steamed rice or roti.

Quick and Easy Vegetarian Meals
For those looking for quick easy vegetarian meals, Manjula’s Kitchen offers several options that can be prepared in under 30 minutes:

Vegetable Stir-Fry: A mix of colorful vegetables stir-fried with soy sauce and spices. It’s a healthy and quick meal that can be served over rice or noodles.
Chickpea Salad: A refreshing salad made with chickpeas, vegetables, and a tangy dressing. It’s perfect for a light lunch or a side dish.
Spinach Paratha: Whole wheat flatbreads stuffed with spiced spinach. They are nutritious and can be served with yogurt or pickle.
Mango Smoothie: A delicious and healthy smoothie made with fresh mangoes, yogurt, and a touch of honey. It’s a great breakfast option or a refreshing snack.

Engaging with the Community
Engaging with the community on platforms like YouTube, Facebook, and TikTok is a great way to discover new recipes and get cooking tips. The comments section often has valuable insights and variations of recipes shared by other users. Manjula herself is very responsive and often answers questions from her followers.
Conclusion
Manjula’s Kitchen is an excellent resource for anyone looking to explore the world of vegetarian cooking. Whether you’re a seasoned cook or a beginner, you’ll find a wealth of recipes and cooking tips that will make your culinary journey enjoyable. So, dive into the delicious world of vegetarian meals with Manjula’s Kitchen and discover the joy of cooking wholesome, flavorful dishes.

For more recipes and cooking tips, visit Manjula’s Kitchen, subscribe to her YouTube Channel, follow her on Facebook, Pinterest, and TikTok.

  • Vegetable Cheela Rolls

    Vegetable Cheela Rolls

    Vegetable Cheela Rolls recipe by Manjula

    Vegetable Cheela Rolls

    Vegetable Cheela Rolls is a healthy and delicious any-time meal. Cheela Rolls is a treat for people who are vegan and gluten free. Cheela is like a besan dosa, and can be used as a wrap and this cheela wrap with vegetables makes a wholesome meal. Cheela Rolls can be used as a snack and also for good a lunch box meal.
    4.41 from 5 votes
    Prep Time 10 minutes
    Cook Time 20 minutes
    Total Time 30 minutes
    Course Appetizer, Snack
    Cuisine Indian
    Servings 2 people

    Ingredients
      

    For Cheela

    • 1 cup besan Gram flour
    • 2 Tbsp rice flour
    • 1 tsp salt
    • 1/2 tsp cumin seeds jeera
    • 3/4 cup water to make batter
    • 4 tsp oil

    For Filling

    • 3 cup cabbage thinly sliced
    • 1/2 cup carrots shredded
    • 1/2 cup bell pepper thinly sliced
    • 2 tsp oil Canola or vegetable oil
    • 1/2 tsp cumin seeds jeera
    • 1/2 tsp mustard seeds rai
    • 2 tsp coriander powder dhania
    • 1/4 tsp chili powder
    • 1/2 tsp salt
    • 1/2 tsp sugar
    • 1 tsp lemon juice

    Instructions
     

    • Mix all the dry ingredients together, besan, rice flour, cumin seeds, and salt. Add the water slowly to make a smooth batter, consistency of Dosa batter. Set aside.
    • To make the filling: Heat the oil in frying pan over medium high heat. Oil should be moderately hot, add cumin seeds and mustard seeds, as the seeds crack. Add cabbage, carrots, and bell pepper. Stir-fry for about one minutes add all the other ingredients, coriander powder, chili powder, salt, sugar and lemon juice. Stir- fry for about three to four minutes, vegetables should be still crisp. Turn off the heat.
    • To make the Cheele: Use a heavy skillet and place on medium-high heat. Test by sprinkling a few drops of water on it. Water should sizzle right away.
    • Pour about 1/4 cup of the batter into the skillet and spread evenly with a back of spoon. Starting from the center, spiral the batter outward evenly to form a circle.
    • When batter starts to dry, gently spread one teaspoon of oil over it. Wait about 30 seconds; flip the cheela using a flat spatula.
    • Press the cheela lightly all around with the spatula to make cheela cook evenly. Turn the cheela and in the center of the cheele put about ½ cup of stir-fry diagonally and roll it.
    • Vegetable Cheela Roll is ready to serve. I like to serve this with Mango Pickle or Cilantro Chutney.
    • Enjoy!

    Notes

    In the ingredients, we need about 4 cups total of sliced vegetable (this includes the cabbage, bell pepper, and carrots)
    Suggestions
    Use or preferred vegetables and also works good with any leftover vegetables.
    Tried this recipe?Let us know how it was!

    A Comprehensive Guide to Besan Cheela Recipe with Vegetables

    Welcome to Manjula’s Kitchen, your ultimate destination for authentic Indian recipes and culinary inspiration. Today, we embark on a flavorful journey to explore the delightful world of Vegetable Cheela Rolls, a versatile and nutritious dish that is perfect for any meal of the day. Made with besan (gram flour) and a colorful assortment of vegetables, these cheelas are not only delicious but also packed with vitamins, minerals, and fibre. 

    Join us as we unravel the secrets to creating the perfect Besan Cheela Recipe with Vegetables, along with tips, variations, benefits, and answers to frequently asked questions. Vegetable cheela is a delectable gluten-free and vegan snack, perfect for appetizers or as a bread alternative, offering a flavorful option for those seeking tasty and wholesome options.

    Preparing the Batter for Vegetable Cheela 

    • Begin by preparing the batter for the besan Vegetable Cheela, the foundation of this delectable dish. In a mixing bowl, combine besan (gram flour) with water to create a smooth and lump-free batter. Add finely chopped vegetables such as carrots, bell peppers, spinach, and green chilies to the batter, along with spices like turmeric powder, cumin powder, and salt. Mix well to ensure that the vegetables are evenly distributed throughout the batter, imparting their vibrant colors and flavors.

    Cooking the Vegetable Cheela 

    • Once the batter is ready, it’s time to cook the Vegetable Cheela to perfection. Heat a non-stick skillet or tawa over medium heat and lightly grease it with oil or ghee. Pour a ladleful of the batter onto the skillet and spread it evenly in a circular motion to form a thin layer. Cook the cheela for a few minutes until the edges start to crisp up and bubbles appear on the surface. Flip the cheela using a spatula and cook the other side until golden brown and crisp. Repeat the process with the remaining batter, adjusting the heat as needed to ensure even cooking.

    Assembling the Vegetable Cheela Rolls 

    • Once all the cheelas are cooked, it’s time to assemble the besan Vegetable Cheela Rolls, adding an extra layer of flavor and texture. Place a cooked cheela on a clean surface and spread a generous layer of mint chutney or yogurt sauce over it. Add a filling of thinly sliced cucumber, tomatoes and fresh coriander leaves on one side of the cheela. Roll the cheela tightly into a cylindrical shape, securing the filling inside. Repeat the process with the remaining cheelas to create a batch of delicious besan Vegetable Cheela Rolls.
    • Tips for Perfect Vegetable Cheela Rolls Every Time 

    • Use a non-stick skillet or tawa to cook the cheelas to prevent sticking and ensure easy flipping.
    • Add a pinch of baking soda to the batter to make the cheelas light and fluffy.
    • Experiment with different vegetables and spices to customize the flavor of your cheelas according to your taste preferences.
    • Serve the besan Vegetable Cheela Rolls hot with a side of green chutney or ketchup for dipping.

    Variations of Besan Cheela Recipe with Vegetables 

    • Paneer Cheela: Add crumbled paneer (Indian cottage cheese) to the vegetable filling for added protein and richness.
    • Masala Cheela: Sprinkle chaat masala or garam masala over the cooked cheelas for an extra burst of flavor.
    • Cheese Cheela: Grate some cheese over the filling before rolling the cheelas for a gooey and indulgent twist.

    Health Benefits of Vegetable Cheela Rolls: 

    Vegetable Cheela Rolls are not only delicious but also nutritious, offering a range of health benefits:

    • Besan (gram flour) is rich in protein, fiber, and essential nutrients, making it a healthy alternative to refined flour.
    • Vegetables add vitamins, minerals, and antioxidants to the dish, promoting overall health and well-being.
    • Cheelas are low in calories and high in satiety, making them a filling and satisfying option for weight management.

    Frequently Asked Questions (FAQs) About Vegetable Cheela Rolls 

    Q: Can I make the batter for Vegetable Cheela in advance?

    A: Yes, you can prepare the batter in advance and store it in the refrigerator for up to 24 hours. Just give it a quick stir before cooking the cheelas.

    Q: Can I freeze Vegetable Cheela Rolls for later use?

    A: While it’s best to enjoy besan Vegetable Cheela Rolls fresh, you can freeze them for up to 1 month. Wrap them individually in plastic wrap or foil and store them in an airtight container. Thaw and reheat in a skillet or microwave before serving.

    Q: What other fillings can I use for Vegetable Cheela Rolls?

    A: You can get creative with the fillings for Vegetable Cheela Rolls. Try adding cooked beans, grated cheese, or leftover cooked vegetables for added flavor and variety.

    Congratulations! You have now mastered the art of making besan Vegetable Cheela Rolls, a wholesome and delicious dish that is sure to impress your family and friends. Whether enjoyed as a snack, appetizer, or light meal, these flavorful rolls are a testament to the rich culinary heritage of India. Explore more recipes and culinary inspirations on Manjula’s Kitchen and continue your culinary adventures with confidence and creativity.

    If you liked the recipe here are some other recipes that you may like too 

    Vegetable Cheela: A savory Indian pancake made with mixed vegetables and chickpea flour.

    Palak (Spinach) Paneer: A classic North Indian dish made with spinach and paneer cheese cooked in a creamy tomato-based sauce.

    Shahi Pulao (Vegetable Pulao): A flavorful rice dish made with spiced basmati rice and vegetables.

    Gobi (Cauliflower) Manchurian: Crispy cauliflower florets tossed in a tangy and spicy Indo-Chinese sauce.

    Aloo (Potato) Paratha: Whole wheat flatbread stuffed with spiced mashed potatoes and cooked on a griddle.

    Mango Lassi: A refreshing yogurt-based drink flavored with ripe mangoes and a hint of cardamom.

    Besan Ladoo: Traditional Indian sweet made with roasted chickpea flour, ghee, and sugar.

  • Litti Chokha

    Litti Chokha

    Litti Chokha

    Litti Chokha (Bihari Sattu Litti)

    Litti Chokha is an appetizer from the state of Bihar made with stuffed whole wheat dough balls with roasted chana dal and spices inside. These stuffed balls are known as Litties are usually roasted over charcoal but can also be baked. Litties are served with Chokha. Chokha is a dip prepared with mashing potato, tomato or eggplant with spices, but at my home it was always served with Dal Tadka.
    This recipe will make 8 litties.
    5 from 2 votes
    Prep Time 10 minutes
    Cook Time 30 minutes
    Total Time 40 minutes
    Course Main Course
    Cuisine Indian
    Servings 4 people

    Ingredients
      

    Dough

    • 1 cup whole wheat flour chapatti atta
    • 2 Tbsp ghee clarified butter
    • 1/2 tsp salt
    • cup About 1/3 lukewarm water

    Filling

    • 3/4 cup sattu flour of roasted chana dal, available in Indian grocery stores
    • 1/2 tsp salt adjust to taste
    • 1/8 tsp asafetida hing
    • 1/8 tsp turmeric haldi
    • 1/2 tsp red chili powder
    • 1 tsp mango powder amchoor
    • 1 tsp grated ginger
    • 1 Tbsp green chili finely chopped, adjust to taste
    • 1 tsp ghee clarified butter
    • 1/4 cup water approximately

    Potato, and Tomato Chokha

    • 1 cup medium size potato boiled peeled and roughly mashed
    • 2 medium size tomato roasted peeled and mashed, I have roasted them over the skillet
    • 1 tsp salt
    • Spices we will use half and half to make both Potato and Tomato Chokha
    • 1/4 tsp black pepper
    • 1 tsp lemon juice just for Potato Chokha
    • 2 tsp grated ginger
    • 2 Tbsp finely chopped green chilies
    • 2 Tbsp finely chopped cilantro
    • 2 Tbsp olive oil or mustard oil I prefer olive oil
    • 2 Tbsp ghee or clarified butter for serving the Litties.

    Instructions
     

    For Tomato Chokha

    • To prepare the Tomato Chokha add the spices to mashed tomatoes about 1/2 tsp salt, pinch of black pepper, 1/2 tsp ginger, 1 Tbsp green chili. 1 Tbsp cilantro and 1 Tbsp of oil mix it together. Tomato Chokha is ready set aside.

    For Potato Chokha

    • Add all the remaining spices with mashed potatoes, salt, pinch of black pepper, lemon juice, ginger, cilantro and oil, mix it well. Potato Chokha is ready, set aside.

    To Make Dough

    • Mix the flour, salt and ghee. Add water slowly to make dough. Dough should be firm but do not knead the dough. Cover the dough and let it sit for at least fifteen minutes.

    Filling

    • Mix all the ingredients together except water, sattu, salt, asafetida, turmeric, red chili powder, mango powder, ginger, green chili, and ghee, now add little water to make firm dough, dough will be little crumbly.

    Making Litti

    • Pre-heat the oven at 400 degree Fahrenheit. I am using a toaster oven or you can also use oven.
    • Divide the dough into 8 equal parts and roll them into balls. They will not be very smooth dough ball. Also, divide the filling in 8 parts filling should be little smaller then dough balls.
    • Roll the dough balls into 3-inch circle. Place one part of the filling in the center of each rolled dough, and pull the edges of the dough to wrap the filling. Proceed to make all 8 balls. Grease your palms and roll the filled balls gently between your palms.
    • Arrange the litties over greased baking sheet about one inch apart and place in toaster oven, for 10-12 minutes, turn them over and bake again for 10-12 minutes. Litties should be golden brown all around.

    Serving

    • need about 2 Tbsp ghee or clarified butter for serving the Litties.

    Notes

    I like to eat these Litties with Dal Tadka and Potato or Tomato Chokha.
    Tried this recipe?Let us know how it was!

    Litti Chokha Recipe: How to make Litti Chokha

    Litti Chokha is a traditional and an iconic appetiser and a bread format of dish from the state of Bihar in India. It consists of stuffed whole wheat dough balls (litti) served with spicy mashed vegetable mixture or chokha. This rustic and flavorful dish is a staple in Bihari cuisine and is enjoyed as a hearty meal or snack

    Litti Chokha: A traditional Bihari food

    High in Fiber: Litti Chokha is made primarily from whole wheat flour, which is rich in dietary fiber. Fiber aids in digestion, promotes gut health, and helps regulate blood sugar levels. Consuming fiber-rich foods like Litti Chokha can contribute to overall health and well-being.

    Vitamins and Minerals: Litti Chokha is often served with chokha, a spicy mashed vegetable mixture made from ingredients such as roasted eggplant, tomatoes, and potatoes. These vegetables are rich in vitamins, minerals, and antioxidants, which support immune function and promote overall health.

    Satiating and Flavorful: Litti Chokha is a satisfying and flavorful dish that combines the earthy taste of roasted wheat dough with the spicy and tangy flavors of chokha. The contrast in textures and flavors creates a delightful eating experience that is both comforting and nourishing.

    Variations of Litti Chokha:

    • Mattar Ke Kachori: Mattar Kachori is a delicious, fried puff pastry filled with spicy green peas. This mouthwatering snack also can be served as part of any main meal.
    • Pizza Paratha: Pizza has become a universal food enjoyed by all. Pizza paratha is perfect for the times when you want to enjoy homemade pizza. This is also a quick and easy recipe.
    • Dal Bati: Dal bati is a popular Rajasthani delicacy. Dal is simply soup of mixed lentils, cooked with spices. Bati is a baked, whole wheat bread roll and the combination is known as dal bati.
    • Khasta Kachori: Khasta kachori is a delicious, spicy, fried puffed pastry. Khasta Kachori is filled with spicy moong dal mixture and then deep fried. Kachori is flakey from outside and hollow inside. Kachori should be fried on low heat so it can cook through to have a nice crunch.

    Tips for Making Perfect Litti Chokha:

    Knead the Dough Well: For soft and fluffy litti, knead the dough thoroughly until it becomes smooth and elastic. Properly kneaded dough ensures that the litti hold their shape and cook evenly without becoming too dense or chewy.

    Roast Litti Over Charcoal: Traditional litti are cooked over a charcoal or wood fire, which imparts a smoky flavor and crispy texture to the outer crust. If using an oven, you can achieve a similar effect by placing the litti directly on a grill rack or using a barbecue grill.

    Use Fresh Ingredients: Use fresh and high-quality ingredients, especially for the chokha, to enhance the flavor and nutritional value of the dish. Choose ripe, firm vegetables and aromatic spices for the best results.

    Serve with Ghee: Litti Chokha is traditionally served with a generous drizzle of melted ghee (clarified butter) on top. The rich and buttery flavor of ghee complements the earthy taste of litti and adds a touch of indulgence to the dish.

    FAQs about Litti Chokha:

    Can I make Litti Chokha without sattu? 

    While sattu is the traditional filling for litti, you can substitute it with other ingredients such as besan (gram flour), crushed roasted peanuts, or mashed lentils. Experiment with different fillings to create unique variations of Litti Chokha.

    Is Litti Chokha gluten-free? 

    Litti Chokha is not gluten-free as it is made from whole wheat flour, which contains gluten. However, you can explore gluten-free alternatives for the dough, such as using a combination of gluten-free flours like rice flour, chickpea flour, and tapioca flour.

    Can I make Litti Chokha spicy? 

    Yes, you can adjust the level of spiciness in Litti Chokha according to your taste preferences by adding more or fewer green chilies or red chili powder to the chokha mixture. You can also serve Litti Chokha with a side of spicy pickle or chutney for extra heat.

    Can I make Litti Chokha ahead of time? 

    Yes, you can prepare the dough and filling for litti in advance and assemble them just before cooking. Store the prepared dough and filling separately in the refrigerator until ready to use. Leftover chokha can be stored in an airtight container in the refrigerator for up to 2-3 days.

    Litti Chokha is a delicious and wholesome dish that captures the essence of traditional Bihari cuisine. With its rich flavors, nourishing ingredients, and endless variations, Litti Chokha is sure to become a favorite among food enthusiasts. 

  • Masala Arbi

    Masala Arbi

    Masala Arbi

    Masala Arbi – Sautéed Taro Root

    Arbi is also known as Taro root. Masala Arbi with a great blend of spices makes a very enjoyable side dish. This can complement any meal. Masala Arbi can be served with paratha
    or roti.
    4.43 from 7 votes
    Prep Time 5 minutes
    Cook Time 15 minutes
    Total Time 20 minutes
    Course Side Dish
    Cuisine Indian
    Servings 4 People

    Ingredients
      

    • 7-8 medium sized taro root boiled, arbi
    • 3 Tbsp oil
    • 1/2 tsp carom seeds ajwain
    • 1/4 tsp cumin seeds jeera
    • 1/8 tsp asafetida hing
    • 1 Tbsp coriander powder dhania
    • 1/4 tsp turmeric haldi
    • 1/2 tsp red chilli powder
    • 2 green chilies sliced
    • 1 tsp salt
    • 1/2 tsp mango powder amchoor

    Instructions
     

    • Wash arbi before boiling and do not over boil the arbi as they become very slimy. I prefer to boil arbi in a pot so that it is easy to check if they are cooked. Arbi should be firm, and knife should go through effortless.
    • Peel the skin and slice them into about 1/8” thick rounds. Set aside.
    • In a small bowl mix turmeric, coriander powder, and red chili powder with 1/4 cup of water to make a paste. Set aside.
    • Heat the oil in wide pan over medium heat, oil should be moderately hot, (when you add the cumin seed to oil it should crack right away).
    • Add carom seeds, and cumin seeds as cumin seeds crack add asafetida,
    • Stir and add spice paste stir for about 30 seconds till oil start separating from oil.
    • Add green chili stir for few seconds.
    • Add arbi spreading over the pan, sprinkle the salt, and mango powder gently fold the arbi with spice mix, all the arbies should be coated well with spices. Making sure arbies are not sticking to each other.
    • Sautée them over medium heat till they are lightly brown both sides. Turning them occasionally gently. This should take about 8-10 minutes.
    Tried this recipe?Let us know how it was!
  • Urad Dal Tadka

    Urad Dal Tadka

    Urad Dal Tadka

    Tadka Urad Dal

    Tadka Urad Dal was a favored lentil dish in my family while I was growing up. Dal is a staple dish in Indian meals and, for most Indian vegetarians, a frequent source of protein. This delicious, nourishing dish can accompany any number of different meals be it lunch or dinner.
    4.37 from 19 votes
    Prep Time 10 minutes
    Cook Time 15 minutes
    Total Time 45 minutes
    Course Main Course
    Cuisine Indian
    Servings 4 people

    Ingredients
      

    • 1 cup urad dal washed
    • 1 tsp salt
    • 1/4 tsp turmeric
    • 1 Tbsp ginger finely chopped
    • 2 cups water
    • 1/4 tsp garam masala
    • 1/2 tsp mango powder amchoor

    Seasoning

    • 3 Tbsp ghee clarified butter
    • 1/2 tsp cumin seeds jeera
    • 1/8 tsp asafetida hing
    • 1 green chili sliced
    • 1 Tbsp ginger thinly sliced
    • 1/2 tsp red pepper adjust to taste
    • 4 pieces lemon for garnishing

    Instructions
     

    • Wash and soak urad dal for at least 20 minutes. Dal will be double in volume after soaking. Drain the water.
    • Put dal with 2 cups water into a pressure cooker and add salt, turmeric, and ginger. Close the cover and cook on medium high heat.
    • When the pressure cooker starts to steam, turn the heat down to low and cook for five minutes.
    • Turn off the heat and wait until all the steam has escaped before opening the pressure cooker. Dal should be soft. If needed add more water, dal should be not very mushy you should be able to see the grains. You should be able to scoop the dal with roti. Dal will thicken as it sits after cooking. So leave it more liquid than you want it to be.
    • Add garam masala, and mango powder mix it well.

    Seasoning

    • Heat ghee in a small saucepan. Test the heat by adding one cumin seed to the ghee; if it cracks immediately, the oil is ready. Add the cumin seeds. When they begin to crack, add the asafetida, ginger, and green chilies. Stir for a few seconds. Add red chili powder and 1 tablespoon of water to prevent the spices from burning. Pour spiced chaunk over hot dal, before serving.

    Notes

    Tadka urad dal is ready serve with roti or paratha, or with plain rice.
    Tried this recipe?Let us know how it was!

    Urad Dal Tadka: A Tempting Tempered Lentil Dish

    Urad Dal Tadka, also known as Urad Dal Ka Tadka or Black Urad Dal Tadka, is a flavorful and comforting lentil dish that hails from North India. This urad dal tadka recipe features split black gram lentils cooked to perfection and tempered with aromatic spices, creating a dish that’s gluten free, healthy, hearty and satisfying. Whether served with steamed rice, roti, or naan bread, urad dal tadka is sure to delight your taste buds and leave you craving more of its irresistible flavors.

    To commence the preparation, it is imperative to first ensure that all the vegetables are meticulously dried, a step crucial in achieving the desired texture and consistency in the final dish. This entails patting dry each vegetable, thereby mitigating excess moisture which could potentially alter the outcome of the recipe.

    Once the vegetables are suitably dried, the next step entails assembling all the ingredients within a food processor. This multifunctional kitchen appliance serves as the cornerstone in amalgamating the disparate elements into a cohesive mixture. However, it is imperative to exercise caution during this stage, as over-processing the ingredients can lead to an undesired homogeneity akin to a paste. The objective here is to achieve a harmonious blend wherein the individual components remain discernible, imparting both visual appeal and varied texture to the final product.

    Upon achieving the desired consistency, the mixture is then transferred from the confines of the food processor. At this juncture, it should embody the texture of a chunky yet pliable dough, indicative of a successful amalgamation of ingredients. This textured amalgam serves as the canvas upon which the ensuing steps of the recipe unfold.

    With the mixture at hand, the next course of action involves portioning it into individual servings. This is accomplished by dividing the mixture into 16 equal portions, each to be fashioned into flat patties approximately half an inch in thickness. This meticulous shaping process not only ensures uniformity in size but also facilitates even cooking, thereby contributing to the overall gustatory experience.

    As the patties take shape, attention shifts towards the culinary medium responsible for their transformation—hot oil. In a frying pan preheated to medium-high heat, a liberal amount of oil is introduced, its shimmering surface a harbinger of the culinary alchemy about to unfold. With utmost care, the patties are then gently lowered into the oil, ensuring that they are evenly spaced and devoid of any overlap. This deliberate approach not only prevents overcrowding but also promotes uniformity in cooking, allowing each cutlet to attain a golden brown hue, indicative of its culinary readiness.

    Throughout the frying process, periodic rotation of the cutlets ensures uniformity in color and texture, with a total cooking time averaging between 5 to 6 minutes. Once the desired golden hue is achieved, the cutlets are carefully removed from the frying pan, their journey culminating on a bed of absorbent paper towels. This final step serves the dual purpose of draining any residual oil while preserving the inherent crispiness of the cutlets.

    In culmination, the fruition of this culinary endeavor is best savored when the cutlets are served piping hot, their delectable aroma tantalizing the senses. Paired with the refreshing zest of cilantro chutney, each bite is a symphony of flavors and textures—a testament to the meticulous preparation and artistry inherent in this timeless recipe.

    Tips for Perfect Urad Dal Tadka

    • Soak Urad Dal: Soaking the urad dal before cooking helps reduce the cooking time and ensures that the lentils cook evenly and become tender.
    • Control Spice Level: Adjust the amount of dried red chilies and red chili powder according to your spice tolerance. For a milder dal, reduce the amount of spice used or remove the seeds from the dried red chilies.
    • Enhance Flavor with Ghee: For an extra layer of richness and flavor, consider using ghee (clarified butter) instead of oil for tempering the spices. Ghee adds a distinctive nutty flavor and aroma to the dish.

    Variations of Urad Dal Tadka

    • Urad Chana Dal Tadka: Combine black urad dal with chana dal (split chickpeas) for a nutritious and flavorful variation of the dish. The combination of lentils adds texture and depth to the dal tadka.
    • Creamy Urad Dal Tadka: For a creamy texture, blend a portion of the cooked urad dal before adding it back to the tempering mixture. This creates a velvety sauce that coats the lentils, resulting in a luxurious and indulgent dal tadka.

    Benefits of Urad Dal Tadka

    • Rich in Protein: Urad dal is a excellent source of plant-based protein, essential for muscle repair and growth.
    • High in Fiber: Urad dal is also high in dietary fiber, promoting digestive health and keeping you feeling full and satisfied.
    • Packed with Nutrients: Urad dal is rich in essential nutrients such as iron, magnesium, and potassium, supporting overall health and well-being.

    Frequently Asked Questions (FAQs)

    Can I make urad dal tadka without soaking the lentils?

    • While soaking the lentils helps reduce the cooking time, you can still cook urad dal tadka without soaking, although it may take longer for the lentils to become tender.

    Can I make urad dal tadka ahead of time?

    • Yes, urad dal tadka tastes even better when allowed to sit for a few hours or overnight, allowing the flavors to meld together. Reheat it gently before serving.

    Is urad dal tadka vegan-friendly?

    • Yes, urad dal tadka is inherently vegan as it contains no animal products. It’s a perfect option for those following a vegan or plant-based diet.

    Explore more delicious Indian recipes on Manjula’s Kitchen 

    If you’re looking to explore more Indian recipes, appetizers, beverages, and desserts, be sure to check out the following links on Manjula’s Kitchen. Here are some links to recipes on Manjula’s Kitchen official website: Vegetable Pakoras, Kaju Katli (Cashew Burfi), Baingan Bharta (Roasted Eggplant), Matar (Green Peas) Paneer, Besan Ladoo.


  • Papad Ki Subji

    Papad Ki Subji

    Papad ki Subji

    Papad Ki Subji (Rajasthani Dish)

    Papad ki sabzi this is a traditional Rajasthani dish. Papad ki subji is delicious and flavorful. Papad ki sabji has a distinct flavor and easy to make.  Serve this hot with roti, paratha or plain rice.
    No ratings yet
    Prep Time 5 minutes
    Cook Time 22 minutes
    Course curry
    Cuisine Indian
    Servings 3 people

    Ingredients
      

    • 4 plain papad I am using plain urad dal 8” diameter- Papadam
    • 2 tbsp oil
    • 1 tbsp cumin seeds – jeera
    • 1/8 tbsp asafetida – hing
    • 2 whole red chili dried
    • 2 cup of plain yogurt, sour yogurt works better – curd, dahi
    • 2 tbsp finely shredded ginger
    • 1 tbsp red chili powder – lal mirch
    • 1/2 tbsp turmeric – haldi
    • 2 tbsp coriander powder – dhania
    • 1/2 tbsp fenugreek seeds – mathi dana
    • 1 tbsp salt
    • 2 tbsp finely chopped cilantro – hara dhania

    Instructions
     

    • Wash and soak fenugreek seeds for about 5 minutes, and change the water 3-4 times, this will reduce the bitterness from the fenugreek seeds. Drain the water and set aside.
    • Break the papad in small pieces. Set aside.
    • In a bowl beat the yogurt until it is smooth. Add ginger, chili powder, turmeric, coriander powder, and fenugreek seeds and mix it well.
    • Heat the oil in a sauce pan over medium heat, oil should be moderately hot. Add cumin seeds as seeds crack add asafetida and whole red chilies, lower the heat.
    • Add yogurt mix and cook over low heat stir continuously. Let it boil for 2-3 minutes. Add about 1 cup of water and cook for 3-4 minutes after gravy comes to boil.
    • Add salt and papad mix it and let it cook for 3-4 minutes. Turn off the heat add cilantro. Papad ki sabji is ready to serve.
    Keyword curry, Subji
    Tried this recipe?Let us know how it was!

  • Vegetarian Enchiladas

    Vegetarian Enchiladas

    Vegetarian Enchiladas

    Vegetarian Enchiladas (Mexican Cuisine)

    Vegetarian enchilada is a popular Mexican appetizer with my family. This mix of veggies with homemade enchilada sauce is such a tasty treat. This is my fusion twist to the classic Mexican dish, which is very delicious and exotic.
    4 from 16 votes
    Prep Time 10 minutes
    Cook Time 25 minutes
    Total Time 35 minutes
    Course Main Course
    Cuisine Fusion
    Servings 3 people

    Ingredients
      

    • 6 corn tortillas (I am using white corn tortilla)

    Enchilada Sauce

    • 1 can 15 oz can crushed tomatoes
    • 3 tbsp oil
    • 3 tbsp all-purpose flour
    • 1-1/2 tsp red chili powder
    • 1 tsp dried oregano
    • 1 tsp cumin seed powder jeera
    • 1 tsp sugar
    • 1 tsp salt
    • 1/4 tsp black pepper
    • 1 cup water

    For filling

    • 1 tbsp oil
    • 3 cups spinach chopped
    • 1/2 cup corn, I am using frozen corn
    • 1/2 cup mushroom chopped
    • 1/3 cup sharp cheddar cheese shredded
    • 1/2 cup mozzarella cheese shredded

    For Topping

    • 1/2 cup sharp cheddar cheese shredded
    • 1/2 cup mozzarella cheese shredded
    • 1 jalapeno chopped, adjust to taste

    Instructions
     

    For Enchilada Sauce:

    • Blend the tomatoes, make a smooth puree. Heat the sauce pan over medium heat. Add the oil and all-purpose flour, stir for one minute until flour is light golden brown. Add tomato puree, oregano, salt, sugar, black pepper, red chili powder, and cumin. Mix it well making sure there is no lumps. Add 1 cup of water and boil over medium heat about 2-3 minutes, sauce should be pouring consistency. Set aside.

    Filling

    • Heat the oil in a sauce pan over medium heat, add the vegetables. Corn, mushrooms and spinach. Cook stirring until moisture has evaporated but mix should be still moist. Remove from heat add about 1/4 cup of enchilada sauce, mix it well. When vegetable mix comes to room temperature add the cheese and mix it well. Set aside.

    Making Enchilada:

      I am using microwave.

      • Mix both cheese and set aside. Heat the skillet over medium heat and grease the skillet generously. Toast the tortillas about one minute from both sides.
      • Top each tortilla with about 1/4 cup of filling; roll up tightly and arrange, two rolled tortilla seam side down, in microwaveable plates. I prefer to make enchiladas in microwave it is fast and it is easy to personalize how much filling, how much cheese and also mild or hot. Sprinkle enchiladas with about 3 tablespoons of sauce and sprinkle the cheese.
      • Microwave for about one and half minutes, cheese should be melted and little bubbly.

      Notes

      Serving Suggestion
      For best taste serve enchiladas hot with side of lettuce and chopped tomatoes.
      Also see the recipes for Butternut squash Pasta, Mexican Rice, Gobi (cauliflower) Manchurian, 
      Tried this recipe?Let us know how it was!

      How to make Vegetarian Enchiladas:

      Ah, vegetarian enchiladas, a dish close to my heart and a staple in many kitchens around the world. These cheesy, saucy parcels of goodness are a celebration of all things veggie, wrapped snugly in a warm tortilla blanket and baked to perfection. Whether you’re a seasoned cook or a novice in the kitchen, vegetarian enchiladas are a surefire crowd-pleaser that will leave everyone coming back for seconds. These appetizers are sure to entice you into its rich delight

      Tips for Making Perfect Vegetarian Enchiladas:

      1. Choose the Right Tortillas: When it comes to vegetarian enchiladas, the type of tortillas you use can make all the difference. Opt for soft, pliable tortillas that are sturdy enough to hold the filling without falling apart during baking. Corn or flour tortillas both work beautifully, so use whichever you prefer or have on hand.
      2. Prep Your Fillings: The beauty of vegetarian enchiladas lies in their versatility. Get creative with your fillings by incorporating a variety of vegetables, beans, and cheeses. Sautéed bell peppers, mushrooms, and spinach are all excellent options, while black beans or refried beans add protein and heartiness to the mix. Don’t forget the cheese—whether it’s gooey melted cheddar, creamy Monterey Jack, or tangy feta, cheese adds that irresistible indulgence to every bite.
      3. Don’t Skimp on the Sauce: The key to delicious vegetarian enchiladas is a flavorful sauce that coats every inch of the tortillas. Whether you opt for a homemade enchilada sauce or a store-bought variety, make sure it’s rich, robust, and packed with spices. Pour a generous amount of sauce over the assembled enchiladas before baking, and reserve some extra for drizzling over the top when serving.
      4. Get Creative with Toppings: The fun doesn’t stop with the filling and sauce—toppings are where you can really let your creativity shine. Fresh cilantro, diced tomatoes, sliced avocado, and a dollop of sour cream or Greek yogurt are all classic choices that add freshness and tanginess to each bite. For an extra kick of flavor, try sprinkling some crumbled cotija cheese or pickled jalapeños on top before serving.

      Suggestions for Serving Vegetarian Enchiladas:

      1. Serve with Sides: Vegetarian enchiladas are delicious on their own, but they’re even better when served alongside some tasty sides. A crisp green salad dressed with a zesty lime vinaigrette or a bowl of Mexican rice and beans make perfect accompaniments that round out the meal.
      2. Make it a Meal: Turn vegetarian enchiladas into a full-fledged feast by adding some complementary dishes to the table. Fresh salsa and guacamole with crunchy tortilla chips make for fantastic appetizers, while a pitcher of homemade margaritas or agua fresca adds a festive touch to any gathering.

      Benefits of Enjoying Vegetarian Enchiladas:

      1. Nutritious and Flavorful: Vegetarian enchiladas are packed with nutritious ingredients like vegetables, beans, and cheese, making them a wholesome and satisfying meal option for vegetarians and omnivores alike.
      2. Customizable and Versatile: One of the greatest things about vegetarian enchiladas is their adaptability. You can easily customize the filling to suit your taste preferences or dietary restrictions, making them a versatile option for any occasion.
      3. Family-Friendly Fare: Whether you’re cooking for a crowd or just feeding your family, vegetarian enchiladas are a hit with kids and adults alike. With their cheesy goodness and irresistible flavors, they’re sure to please even the pickiest of eaters.

      Variations of Vegetarian Enchiladas:

      While the classic vegetarian enchilada recipe is a timeless favorite, there are endless variations and adaptations to explore. Here are a few ideas to get you started:

      1. Vegan Enchiladas: For a dairy-free option, simply omit the cheese or use a plant-based cheese alternative. You can also swap out the sour cream for a vegan-friendly alternative like coconut yogurt or cashew cream.
      2. Enchiladas Verdes: Green enchiladas are made with a tangy and spicy green salsa made from tomatillos, green chilies, and cilantro. Fill your tortillas with your favorite vegetables and beans, then smother them in green salsa for a delicious twist on the classic recipe.
      3. Double Corn TortillasIf you love corn, you will love double corn tortillas. These tortillas are not only healthy for you, but also delicious. The great is that you can add additional items for the filling.

      4. Mexican Bhel: To make this dish unique and interesting I am using all classic Mexican ingredients – such as tortilla chips, salsa, Mexican cheese and more! Mexican Bhel Puri can be served as a snack or light lunch for your next get together.

      FAQs (Frequently Asked Questions) about Vegetarian Enchiladas:

      Q: Can I make vegetarian enchiladas ahead of time?

      A: Yes, you can assemble the enchiladas ahead of time and refrigerate them until you’re ready to bake. Just be sure to cover them tightly with foil or plastic wrap to prevent them from drying out. When you’re ready to serve, simply pop them in the oven and bake until heated through.

      Q: Can I freeze vegetarian enchiladas for later?

      A: Absolutely! Vegetarian enchiladas freeze beautifully, making them an excellent option for meal prep. Once they’re baked and cooled, wrap them tightly in foil or plastic wrap and store them in the freezer for up to three months. To reheat, simply thaw them in the refrigerator overnight and bake them in the oven until heated through.

      Q: Are vegetarian enchiladas spicy?

      A: The level of spiciness in vegetarian enchiladas can vary depending on the type of salsa or enchilada sauce you use. If you prefer a milder flavor, opt for a mild salsa or sauce, and adjust the amount of chili powder or jalapeños accordingly. Conversely, if you love heat, feel free to amp up the spice factor to suit your taste buds.

      In conclusion, vegetarian enchiladas are a delicious and satisfying meal option that’s perfect for any party occasion. With their customizable fillings, flavorful sauces, and endless topping options, they’re a versatile dish that’s sure to please everyone at the table. So, gather your ingredients, roll up your sleeves, and get ready to indulge in a fiesta of flavor with these easy vegetarian enchiladas

    • Masala Paneer

      Masala Paneer

      Masala Paneer

      Masala Paneer

      Need a simple healthy appetizer that is sure to be enjoyed by all? Try serving my "Masala Paneer Cubes" at your next get together! It is homemade paneer mixed with a variety of spices. Serve with crackers, or fruit plate. Masala paneer can be used for many different ways, like paneer pakoras, paneer paratha.
      No ratings yet
      Course Appetizer
      Cuisine Indian
      Servings 8 people

      Ingredients
        

      • 8 cup milk whole milk
      • 5 tbsp lemon juice
      • 1 tbsp salt
      • 10 black pepper crushed
      • 1/4 tbsp red chili flakes
      • 1 tbsp clarified butter, ghee
      • 1/2 tbsp cumin seeds, jeera
      • 1 tbsp ginger finely shredded, or paste
      • 1 tbsp green chili seeded and finely chopped
      • 1 tbsp lemon juice

      Instructions
       

      • Boil the milk in a heavy-bottomed pan over medium heat, first wet the pan to ensure the milk will not burn. Stir occasionally.
      • When the milk comes to a boil, add the lemon juice gradually and stir gently. The curd will start separating from the whey. Turn off the heat.
      • Once the milk fat has separated from the whey, drain the whey using a strainer lined with muslin cloth.
      • Wrap the curds in a muslin cloth, rinse under cold water, and squeeze well.
      • To test whether enough water has been removed from the paneer, rub a little piece of paneer on your palm with your fingers. After rubbing the paneer 15-20 seconds, you should be able to make a firm, smooth ball.
      • In a small frying pan heat the clarified butter (ghee) over medium heat. When ghee is moderately hot add cumin seeds as seeds crack add green chili and ginger, turn off the heat. Stir fry for few seconds and set aside.
      • In a mixing bowl mix the paneer with all the ingredients fried cumin mix, salt, black pepper, chili flakes, black pepper and lemon juice.
      • Mix it well, do not knead the paneer. Put the paneer in a flat bowl and press it to spread evenly. Cover it and refrigerate for at least two hours.

      Notes

      Notes
      For this recipe full fat milk works better otherwise paneer will be too dry.
      Do not knead the paneer that will make paneer little chew.
      Keyword Masala Paneer
      Tried this recipe?Let us know how it was!

      How To Make Paneer Masala At Home Recipe 

      Explore the perfect fusion of flavors with our delectable masala paneer appetizers and snacks. Satisfy your cravings for gluten-free delights featuring the rich essence of paneer. Indulge in these flavorful snacks that redefine the joy of snacking.

      Preparing Masala Paneer at Home: 

      Indulge in the culinary art of crafting masala paneer by following this easy step-by-step guide on how to make paneer masala at home. Begin the process by boiling milk in a heavy-bottomed pan over medium heat, ensuring the pan is wet to prevent burning. Stir occasionally as the milk comes to a boil. Gradually introduce lemon juice to curdle the milk, separating the curd from the whey. This initial step sets the foundation for a delightful paneer butter masala.

      Draining and Squeezing the Curds for Paneer Butter Masala:

      After successfully curdling the milk, the next crucial step in the paneer butter masala recipe involves draining the whey. Employ a strainer lined with muslin cloth to filter out excess liquid. Wrap the curds in the cloth, rinse under cold water, and squeeze thoroughly. Testing the paneer’s water content is key; a firm, smooth ball should form after rubbing it on your palm for 15-20 seconds. This meticulous process ensures the perfect texture for your homemade paneer butter masala.

      Flavor Infusion with Cumin Mix for Masala Paneer:

      Enhance the taste of your paneer butter masala by preparing a flavorful cumin mix. Heat clarified butter (ghee) in a small pan, adding cumin seeds until they crack. Introduce green chili and ginger, stir-frying for a few seconds. This aromatic blend serves as a crucial ingredient in the masala, imparting a distinct and savory touch to your how to make paneer butter masala adventure.

      Mixing and Chilling for the Best Paneer Butter Masala: 

      In a mixing bowl, combine the prepared paneer with the cumin mix, salt, black pepper, chili flakes, and lemon juice. It’s essential to achieve a thorough mix without kneading the paneer. Place the paneer in a flat bowl, press it evenly, and cover it. Allow it to refrigerate for a minimum of two hours. This cooling period not only solidifies the paneer but also intensifies the flavors for an extraordinary paneer butter masala recipe.

      Savoring the Delight of Homemade Paneer Butter Masala: 

      Once refrigerated, your homemade masala paneer is ready to elevate your culinary experience, especially when preparing the tantalizing paneer butter masala. Explore the rich flavors and follow a simple how to make paneer butter masala recipe to create a dish that delights your taste buds and showcases your culinary prowess. Relish the satisfaction of crafting a delectable paneer butter masala from scratch, bringing the authentic taste of Indian cuisine to your dining table.

      If you liked this recipe you should also try our: Corn Bruschetta, Baklava Rolls, Spicy Cashews, Bread Potato Rolls and Kalmi Vada

    • Dal Dhokli (Gujarati One Dish Meal)

      Dal Dhokli (Gujarati One Dish Meal)

      Dal Dhokli

      Dal Dhokli (Gujarati One Dish Meal)

      Dal Dhokli is a traditional Gujarati dish. This recipe consists of spicy whole wheat uncooked roti pieces simmered into dal and cooked to perfection. Dal dhokli has a mild sweet and spicy flavor.  Dal dhokli also makes a delightful one pot one dish meal.
      5 from 2 votes
      Prep Time 15 minutes
      Cook Time 25 minutes
      Course dal
      Cuisine Indian
      Servings 2 people

      Ingredients
        

      For dal

      • 1/2 cup Toor dal (Pigeon peas)
      • 1 tbsp salt
      • 1/4 tbsp turmeric (haldi)
      • 2 tbsp peanuts
      • 1/2 tbsp Red chili powder
      • 1/2 cup tomato chopped
      • 1 tbsp ginger paste
      • 1 tbsp Jaggery, gur
      • 3 cup of water

      For Seasoning (Tadka)

      • 2 tbsp oil
      • 1/4 tbsp mustard seeds (rai)
      • 1/4 tbsp cumin seeds (jeera)
      • 1/8 tbsp asafetida (hing)
      • 2 whole red chilies

      For garnishing

      • 2 tbsp cilantro finely chopped

      For Dhokli 

      • 1/2 cup whole wheat flour (Chapati atta)
      • 1 tbsp besan (gram flour)
      • 1/4 tbsp Turmeric (haldi)
      • 1 tbsp finely chopped green chili
      • 1/8 tbsp asafetida (hing)
      • 1/8 tbsp Carom seed (Ajwain)
      • 1/2 tbsp Salt
      • 1 tbsp Oil
      • 1/4 cup water

      Instructions
       

      For the dhoklis

      • Combine all the ingredients in a bowl, whole wheat flour, besan, turmeric, green chili, asafetida, carom seeds, salt, and oil and mix it well. Add the water as needed to make firm dough, this should take about ¼ cup of water.
      • Divide the dough into 2 equal parts and roll out each portion into about 7 inch in diameter. If needed use little whole wheat flour for dusting the rolling surface that will help in rolling.
      • Cut each roti into about 1-1/2 inch squares and set aside.

      For the dal

      • Clean, wash and drain the dal. In pressure cooker add dal, salt, turmeric, and 3 cups of water. Cook over medium high heat.
      • When the pressure cooker starts to steam, lower the heat to medium and cook seven minutes.
      • Turn off the heat and allow the steam to escape before opening the lid.
      • Combine the cooked dal and 1 cup of hot water, whip the dal so it becomes creamy texture, you can use the hand blender to mix dal. Dal will be consistency of thick batter. Add about 3-4 cups of boiling water. Dal should be very liquidey, consistency of runny batter.
      • Add peanuts, chili powder, tomatoes, ginger, and jiggery to dal, mix well and cook on a medium flame for 2-3 minutes, stirring occasionally.
      • Prepare the seasoning, heat the oil in a small pan, when oil is moderately hot add the cumin seeds and mustard seeds, asafetida, and red chilies and allow them to crack.
      • Add this tempering to the dal, mix well, add dhokli and cook on a low medium heat for about 15 minutes, stirring occasionally.
      • Add cilantro and cook for another 2 minutes on low medium heat.

      Notes

      Serving suggestions
      Serve with plain rice, drizzle some ghee and lemon juice on top right before serving dal dhokli.  Dal dhokli should be served hot.
      You will also enjoy other one dish meal like, masala khichdi, Vegetable rice, and Quinoa vegetable pilaf
      Keyword Dal, Dal Dhokli
      Tried this recipe?Let us know how it was!

      How To Make Traditional Gujarati Dal Dhokli Recipe: A Comforting Gujarati Delicacy

      Dal Dokli is a traditional Gujarati vegan gluten free dish that combines the richness of dal (lentils) with the heartiness of dhokli (wheat flour dumplings). This Dal Dhokli recipe is a beloved comfort vegan food in Gujarati households, cherished for its wholesome flavors and nourishing qualities. With its perfect blend of spices and textures, Dal Dhokli offers a delightful culinary experience that’s both satisfying and comforting.

      Step 1: Preparing traditional Gujarati dal dhokli recipe

      To start, prepare the dough for the dhokli by combining wheat flour, besan (gram flour), turmeric powder, red chili powder, ajwain (carom seeds), salt, and oil in a mixing bowl. Gradually add water and knead the ingredients into a smooth and pliable dough. Allow the dough to rest for a few minutes to ensure it’s well-hydrated and easy to work with.

      Step 2: Rolling and Cutting Dhokli

      Divide the rested dough into small portions and roll them out into thin, flat discs resembling chapatis. Use a knife or a pizza cutter to cut the rolled-out dough into small diamond or square-shaped pieces, known as dhokli. Ensure that the dhokli are uniform in size to ensure even cooking and a consistent texture.

      Step 3: Cooking Dhokli in Dal

      In a large pot or pressure cooker, prepare the dal base by cooking soaked tur dal (pigeon peas) with water, turmeric powder, salt, and a pinch of asafoetida until soft and mushy. Once the dal is cooked, add the prepared dhokli to the pot, gently stirring to ensure they’re submerged in the dal. Allow the dhokli to cook in the dal until they’re tender and cooked through.

      Step 4: Tempering and Flavoring the Dal Dokli

      In a separate pan, heat ghee or oil and add mustard seeds, cumin seeds, cloves, cinnamon, dried red chilies, and curry leaves. Allow the spices to sizzle and release their aromas. Sauté the aromatics until they’re golden brown and fragrant, enhancing the flavor of the tempering.

      Step 5: Incorporating the Tempering into the Dal

      Once the tempering is ready, pour it over the cooked dal dokli, stirring gently to combine. The tempering adds layers of flavor and aroma to the dal, elevating its taste profile and making it even more delicious. Allow the dal dhokli to simmer for a few more minutes, allowing the flavors to meld together.

      Step 6: Garnishing and Serving

      Before serving, garnish the dal dokli with freshly chopped cilantro leaves and a sprinkle of garam masala for added flavor and aroma. Serve the piping hot dal dhokli with a dollop of ghee on top, alongside steamed rice or roti for a wholesome and satisfying meal that’s sure to delight your taste buds.

      Tips for Perfect Dal Dhokli

      Consistency of Dhokli Dough: Ensure that the dough for the dhokli is neither too soft nor too firm. It should be smooth, pliable, and easy to roll out into thin discs.

      Even Cooking of Dhokli: Cut the dhokli into uniform-sized pieces to ensure they cook evenly and have a consistent texture throughout.

      Balancing Flavors: Adjust the amount of spices and seasoning in the dal according to your taste preferences. You can increase or decrease the spice level to suit your palate.

      Tempering Technique: Take care not to burn the spices while tempering. The tempering should be aromatic and flavorful without any burnt taste.

      Variations of Dal Dhokli

      Mixed Dal Dhokli: Use a combination of different lentils such as moong dal, masoor dal, and chana dal to add variety and depth of flavor to the dish.

      Vegetable Dal Dokli: Enhance the nutritional value of the dish by adding diced vegetables such as carrots, potatoes, and peas along with the dal dhokli.

      Spicy Dal Dhokli: Increase the heat level of the dish by adding green chilies or red chili powder to the tempering for an extra kick of spice.

      Benefits of Dal Dokli

      Rich in Protein: The combination of lentils and wheat flour in dal dhokli provides a good amount of protein, essential for muscle repair and growth.

      High in Fiber: The presence of lentils and whole wheat flour in dal dhokli makes it rich in dietary fiber, promoting digestive health and aiding in weight management.

      Balanced Meal: Dal dhokli is a complete meal in itself, providing a balanced combination of carbohydrates, protein, and fats along with essential vitamins and minerals.

      Frequently Asked Questions (FAQs)

      Can I use store-bought dhokli instead of making it from scratch?

      Yes, you can use store-bought dhokli as a time-saving alternative. However, homemade dhokli has a fresher flavor and texture.

      Can I make dal dhokli ahead of time?

      Yes, dal dhokli tastes even better when allowed to sit for a few hours or overnight, allowing the flavors to meld together. Reheat it gently before serving.

      Is dal dhokli gluten-free?

      No, dal dhokli contains wheat flour, so it’s not suitable for those following a gluten-free diet.

      Explore more delightful Gujarati recipes on Manjula’s Kitchen, such as Gujarati Kadhi for another culinary adventure.
      If you’re looking to explore more Indian recipes, appetizers, beverages, and desserts, be sure to check out the following links on Manjula’s Kitchen. Here are some links to recipes on Manjula’s Kitchen official website: Vegetable Pakoras, Kaju Katli (Cashew Burfi), Baingan Bharta (Roasted Eggplant), Matar (Green Peas) Paneer, Besan Ladoo.

    • Shahi Pulao Recipe

      Shahi Pulao Recipe

      Hyderabadi Biryani

      Shahi Pulao (Vegetable Pulao)

      Shahi Pulao or Vegetable Pulao is an exotic rice dish made for parties that combines spicy and aromatic vegetables served over rice. Rich with flavor, this is an extraordinary dish. You may also call this Biryani. This dish is made in two parts. First I prepare the rice with cumin seeds and cilantro. Then the vegetables are cooked separately with tomatoes, cashews, beans, green peas, cauliflower, and paneer. Top these vegetables over the rice and you have a mouth-watering dish!
      No ratings yet
      Course rice
      Cuisine Indian
      Servings 4 people

      Ingredients
        

      For rice

      • 1 cup rice preferred basmati rice available in Indian grocery stores
      • 2 tbsp clarified butter or ghee
      • 1/2 tbsp cumin seeds (jeera)
      • About 1 inch piece cinnamon stick (dal chini)
      • 1/2 tbsp salt
      • About 1/4 cup cilantro finely chopped (hara dhania)
      • 2 cup water

      For vegetables

      • About 3 cup mix vegetables I am using cauliflower cut into small floret, green beans cut into small pieces, bell pepper cut into cubes, and frozen green peas,
      • 1/2 cup paneer cut into about 1/2 inch cubes
      • 4 cup tomatoes chopped
      • 1 green chili cut into pieces
      • About 2 tbsp ginger cut into small pieces
      • 3 tbsp oil
      • 1 tbsp cumin seeds (jeera)
      • 1/8 tbsp asafetida (hing)
      • 2 tbsp coriander powder (dhania)
      • 1/2 tbsp turmeric
      • 1/2 tbsp red chili powder
      • 1-1/2 tbsp salt
      • 1 tbsp sugar
      • 1/4 cup cashew powder
      • 1/4 cup cilantro chopped
      • 1/4 tbsp garam masala

      Instructions
       

      Rice:

      • Wash rice gently changing water several times until the water appears clear.
      • For fluffier rice, the rice should be soaked for at least 15 minutes prior to cooking.
      • Heat the oil in a saucepan. Oil is the right temperature when one cumin seed dropped into the oil cracks immediately.
      • Add the cumin seeds. When they crack, add the cinnamon stick and stir for a few seconds. Add the rice, cilantro, and salt. Stir-fry one minute.
      • Add the water and bring to a boil, turn the heat to low. Cover the pan, and Cook 15 minutes, or until the rice is tender and the water has evaporated. Turn off the heat and fluff the rice with a fork.

      Vegetables

      • Blend tomatoes, green chilies and ginger to make a puree. If you prefer mild take the seeds out of green chili before blending.
      • Heat the oil in a saucepan. Over medium high heat oil should be moderately hot, add the cumin seeds, and asafetida, as seeds crack add tomato puree, coriander, turmeric, sugar and salt.
      • Lower the heat to medium, stir the spice paste occasionally when it start thickening add cashew powder and cook until paste become the thick and start leaving the oil from side.
      • Add all the vegetables and 1/4 cup of water, mix it well. Cover the pan and let it cook for about 5-6 minutes over medium heat stir few times in between. Add paneer mix and cover the pan, cook for another 3-4 minutes. Vegetables should be tender not mushy.
      • Turn off the heat add garam masala and cilantro, stir and cover the pan for few minutes before serving.
      • Serve the vegetable over hot rice.
      Keyword pulao
      Tried this recipe?Let us know how it was!

      Savour the Essence of Shahi Pulao: Mixed Vegetable Pulao or Biryani Pulav 

      Shahi pulao is a fragrant and rich rice dish from Indian cuisine. “Shahi” translates to “royal,” indicating the dish’s royal and luxurious nature. It is typically made with basmati rice cooked with a blend of aromatic spices, such as cardamom, cloves, and cinnamon, along with saffron for a distinctive golden color and aroma.

      Rice Preparation: Creating the Perfect Base for Pulav

      Washing and Soaking Rice to Enhance Texture 

      Kickstart your culinary journey of biryani pulav or mixed vegetable pulao by ensuring the rice is immaculately clean and primed for cooking. Begin by delicately washing the rice, changing the water multiple times until it achieves crystal clarity. For an impeccable fluffiness characteristic of pulav Indian dishes, soak the rice grains for a minimum of 15 minutes before cooking, allowing them to absorb moisture and expand, ready to absorb the delightful flavors of your shahi  pulao recipe.

      1. Tempering Oil with Aromatic Spices 

      In a saucepan, elevate the essence of your pulav by heating the oil to the perfect temperature. Gauge the oil’s readiness by dropping a cumin seed – it should crackle instantaneously upon contact, signalling the ideal heat level for infusing flavors. Once the oil reaches the desired temperature, introduce cumin seeds and a cinnamon stick, allowing them to crackle and permeate the oil with their delightful aroma, setting the stage for a tantalizing pulav experience.

      1. Incorporating Rice and Seasonings for Flavorful Base 

      After the spices have crackled to perfection, introduce the washed and soaked rice into the saucepan, along with freshly chopped cilantro and a dash of salt. Stir-fry the rice for about a minute, ensuring each grain is enveloped in the aromatic oil and spices, laying the foundation for a flavorful shahi pulao base that will elevate your biryani pulav or mixed vegetable pulao to new heights of deliciousness.

      1. Cooking Rice to Perfection for Pulav Indian Delight 

      Pour water into the saucepan, ensuring the rice is fully immersed, and bring it to a gentle boil. Once the water reaches a steady boil, reduce the heat to low and cover the pan, allowing the rice to simmer gently for approximately 15 minutes or until it reaches the desired tenderness and the water has evaporated. This slow and meticulous cooking process ensures that each grain of rice is cooked to perfection, ready to absorb the rich flavors of the accompanying vegetables in your mix vegetable pulao recipe.

      1. Fluffing Rice to Achieve Light Texture

      Once the rice has achieved the ideal level of tenderness, turn off the heat and delicately fluff the grains with a fork. This crucial step helps to separate the rice and prevent it from clumping together, ensuring a light and fluffy texture that is characteristic of a delectable pulav Indian masterpiece like biryani pulav or mixed vegetable pulao.

      Vegetable Preparation: Infusing Flavor into Mixed Vegetable Pulao 

      1. Creating a Flavorful Tomato Puree 

      Begin the vegetable preparation for your mix vegetable pulao by blending fresh tomatoes, green chilies, and ginger into a smooth puree. For a milder flavor, remove the seeds from the green chilies before blending, adjusting the spice level to your preference.

      1. Tempering the Oil with Aromatic Spices 

      In a separate saucepan, heat oil over medium-high heat until moderately hot. Add cumin seeds and a pinch of asafetida, allowing them to crackle and release their flavors into the oil.

      1. Cooking the Spices and Creating the Base 

      Once the cumin seeds crackle, add the freshly prepared tomato puree to the saucepan, along with ground coriander, turmeric powder, a hint of sugar, and salt to taste. Stir the spice paste occasionally until it thickens and the oil starts to separate from the sides of the pan.

      1. Adding Vegetables and Cooking Until Tender 

      Incorporate a variety of vegetables into the spice paste, along with a quarter cup of water, ensuring they are evenly coated with the flavorful mixture. Cover the saucepan and allow the vegetables to cook over medium heat for about 5-6 minutes, stirring occasionally to prevent sticking. Add paneer mix and cook for another 3-4 minutes until the vegetables are tender yet firm.

      1. Flavoring the Vegetable Mixture and Allowing to Rest 

      Once the vegetables are cooked to perfection, turn off the heat and sprinkle garam masala and freshly chopped cilantro over the mixture. Stir gently to incorporate the spices, then cover the pan and let the flavors meld together for a few minutes before serving atop the hot, fluffy rice.  

      This meticulous step-by-step approach ensures that each component of your biryani pulav or mixed vegetable pulao is prepared with care and attention, resulting in a flavorful and aromatic dish that will delight your senses. If you loved this mix vegetable pulao recipe then you must also check out other variants of Rice: Vegetable Biryani, Masala Khichdi, Chhole Biryani, Quinoa Vegetable Pilaf and Lemon Rice.

    • Masala Bell Pepper Recipe

      Masala Bell Pepper Recipe

      Masala Bell Pepper

      Masala Bell Pepper (Capsicum)

      Bell pepper is also known as capsicum or shimla mirch. Masala bell pepper with great blend of spices, makes a very enjoyable side dish. This can complement any meal. Masala bell pepper can be served with roti, paratha or puries. I enjoy this with side of dal fry and plain rice.
      3.50 from 2 votes
      Course vegan
      Cuisine Indian
      Servings 4 people

      Ingredients
        

      • 3 medium Green bell pepper seeded and cubed in 1/2” pieces this will make about 3 cup cubed bell pepper (capsicum, shimla mirch)
      • 2 tbsp oil
      • 1/2 tbsp cumin seeds (jeera)
      • 1/8 tbsp asafetida (hing)
      • 1-1/2 tbsp coconut powder (gola)
      • 1-1/2 tbsp sesame Seed powder (til)
      • 2 tbsp teaspoons coriander powder (dhania)
      • 2 tbsp fennel seeds powder (saunf)
      • 1/2 tbsp Red Chili Powder (lal mirch)
      • 1/4 tbsp Turmeric Powder (haldi)
      • 3/4 tbsp salt
      • 1 tbsp sugar
      • 1/2 tbsp mango powder (amchoor)
      • 1 tbsp Lemon Juice

      Instructions
       

      • In a small bowl mix most of the spices, coconut powder, sesame powder, coriander powder, fennel seeds powder, red chili, turmeric, salt, and sugar. Set aside.
      • In a wide frying pan heat the oil moderately over medium high heat, add cumin seeds as seeds crack add asafetida. Add bell pepper mix well lower the heat to low medium. Cover the pan and let it cook for about 3 minutes.
      • Sprinkle the spice mix. Mix it well coating all the bell pepper. Let it cook about 3-4 minutes covered, do stir in between. Cook the bell peppers until they are tender but still little crisp.
      • Turn off the heat, add the mango powder and lemon juice mix well.
      • Masala bell pepper is ready.
      Tried this recipe?Let us know how it was!


    • Mysore Bonda

      Mysore Bonda

      Mysore Bonda

      Mysore bondas

      Mysore bondas are south indian fried dumplings dish made with flour, yogurt and spices. They are crispy outside and fluffy inside. They make a delightful treat for any party or snack for tea time. Serve them with coconut chutney.
      No ratings yet
      Prep Time 10 minutes
      Cook Time 10 minutes
      Total Time 20 minutes
      Course Appetizer
      Cuisine Indian
      Servings 4 people

      Ingredients
        

      • 1 cup all purpose flour maida, plain flour
      • 1/4 cup rice flour
      • 1 tsp salt 1
      • 1/2 tsp baking soda
      • 1/2 tsp cumin seeds jeera
      • 1/2 cup yogurt, dahai sour curd works best
      • 3/3 cup water
      • 1 tsp finely chopped ginger
      • 1 tbsp finely chopped green chilies
      • 2 tbsp finely chopped cilantro hara dhania

      Oil to fry

      Instructions
       

      • To make batter, mix all the dry ingredients together, all-purpose flour, rice flour, salt, baking soda, and cumin seeds. Add yogurt mix it well add the water to make thick batter. Add remaining ingredients ginger, green chili, and cilantro. Set aside for about 15-20 minutes. Batter will be light and fluffy.
      • Heat the oil on medium heat. The frying pan should have about 1 inch of oil. To check if the oil is ready, put little batter in oil. The batter should sizzle and come up but not change color right away. If oil is very hot bondas will not cook through and will not be crispy.
      • Place about 2 tablespoon of batter into the oil with your fingers. Fry bondas in small batches. Fry them until golden-brown all around. This should take about 3-4 minutes.
      • Mysore bond a should be crispy from outside and should be soft inside.

      Notes

      Serve them with coconut Chutney.
      You will also enjoy Rava Idli another quick South Indian dish.
      Tried this recipe?Let us know how it was!

      Exploring the Delights of Mysore Bonda: A Flavorful South Indian Treat 

      Originating from the vibrant culinary landscape of South India, Mysore bonda is a delectable snack cherished for its crispy exterior and soft, fluffy interior. This beloved dish is a favorite among locals and has gained popularity worldwide for its irresistible taste and unique texture. Traditionally served as a tea-time snack or as part of a festive spread, Mysore bonda captivates food enthusiasts with its distinct flavors and comforting appeal.

      Directions: 

      To embark on the delightful journey of preparing Mysore bonda, follow these simple steps:

      • Gathering Ingredients: Start by assembling the necessary ingredients. You’ll need urad dal (black gram lentils), rice flour, finely chopped green chilies, chopped cilantro (coriander leaves), ginger paste, salt, and asafoetida (hing).
      • Preparing Batter: Begin by soaking urad dal in water for a few hours. Once soaked, drain the water and grind the urad dal into a smooth paste using minimal water. Transfer the paste into a mixing bowl and add rice flour, chopped green chilies, cilantro, ginger paste, salt, and a pinch of asafoetida. Mix the ingredients thoroughly to form a thick batter.
      • Frying Bonda: Heat oil in a deep frying pan or kadhai over medium heat. Once the oil is hot, take small portions of the batter and gently drop them into the oil using your fingers or a spoon. Fry the bondas until they turn golden brown and crispy on the outside, ensuring they are evenly cooked.
      • Draining Excess Oil: Once fried to perfection, remove the bondas from the oil using a slotted spoon and place them on a paper towel-lined plate to drain excess oil.
      • Serve Hot: Your crispy and fluffy Mysore bondas are now ready to be served. Enjoy them hot with coconut chutney or a tangy tomato sauce for a delightful culinary experience.

      Tips: 

      • For best results, ensure the consistency of the batter is thick enough to hold its shape when dropped into the hot oil.
      • Adding a pinch of baking soda to the batter can enhance the fluffiness of the bondas.
      • Use freshly ground urad dal for optimal taste and texture.

      Variations: 

      • Spice it up by adding grated carrots to the batter for extra flavor and crunch.
      • Experiment with different spices such as cumin seeds or curry leaves to customize the taste according to your preference.
      • For a healthier twist, try air-frying the bondas instead of deep-frying them.

      Suggestions: 

      • Serve Mysore bonda as a delightful appetizer or snack during gatherings or festive occasions.
      • Pair it with a piping hot cup of masala chai or filter coffee for an authentic South Indian culinary experience.
      • Garnish with freshly grated coconut or chopped cilantro for added visual appeal.

      FAQs: 

      Q: Can I use store-bought rice flour instead of grinding rice at home?

      A: Yes, you can use store-bought rice flour as a convenient alternative to grinding rice at home. However, freshly ground rice flour may yield better results in terms of texture and flavor.

      Q: Can I make the batter in advance and fry the bondas later?

      A: While it’s best to fry the bondas immediately after preparing the batter to retain their crispiness, you can refrigerate the batter for a few hours before frying. Just ensure to bring the batter to room temperature before frying.

      Q: Can I freeze leftover bondas for later consumption?

      A: Yes, you can freeze leftover bondas in an airtight container for up to a month. When ready to enjoy, simply reheat them in a preheated oven until heated through.

      Explore more appetizer recipes on Manjula’s Kitchen: Vegetable Samosas, Paneer Tikka, Crispy Spinach Pakoras, Mango Lassi, Masala Chai, Gulab Jamun, Kheer (Rice Pudding)

    • Dal Fry (Dal Tadka) Recipe

      Dal Fry (Dal Tadka) Recipe

      Dal Fry (Dal Tadka)

      Dal Fry (Dal Tadka)

      Dal Fry is a popular Indian lentil recipe. This recipe uses Toor dal, which is also known as Arhar or Toovar dal. The dal is seasoned with variety of spices and it tastes delicious. This is something you often find served at Indian restaurants and is a part of the main course as part of the servings.
      5 from 2 votes
      Prep Time 10 minutes
      Cook Time 15 minutes
      Course dal
      Cuisine Indian

      Ingredients
        

      • 1 cup toor dal, arahar dal
      • 2-1/2 cup water
      • 1 tbsp salt
      • 1/4 tbsp turmeric

      Seasoning  

      • 3 tbsp clarified butter or ghee
      • 1 cup tomatoes chopped I used 3 medium size tomatoes
      • 1/2 tbsp cumin seeds (jeera)
      • 1/2 tbsp mustard seeds (rai)
      • 1/8 tbsp asafetida (hing)
      • 2 whole dry red chili
      • 2 bay leaf
      • 1 tbsp green chili finely chopped adjust to taste
      • 2 tbsp ginger finely shredded
      • 2 tbsp cilantro finely chopped (hara dhania)
      • 1/2 tbsp red pepper adjust to taste
      • 1/2 tbsp salt
      • 1 tbsp sugar
      • 1/2 tbsp mango powder (amchoor)
      • 1/4 tbsp garam masala

      Instructions
       

      • Wash and soak toor dal in approx. 3 cups of water, for at least one hours. Dal will be double in volume after soaking. Drain the water.
      • Put dal with 2-1/2 cups water into a pressure cooker and add salt, turmeric, Cook on medium high heat.
      • When the pressure cooker starts to steam, turn the heat down to medium and cook for five minutes.
      • Turn off the heat and wait until all the steam has escaped before opening the pressure cooker. Dal should be soft. If needed add more water, dal should be consistency of thick soup.

      Seasoning

      • Heat the ghee in a saucepan. Test the heat by adding one cumin seed to the oil; if it cracks right away, ghee is ready. Add cumin seeds, and mustard seeds, asafetida, whole red chili. After the seeds crack, add bay leaves, green chili, ginger and chili powder. Stir for a few seconds.
      • Add tomatoes, salt and sugar stir and cook until tomatoes are tender and mushy.
      • Add cilantro, mango powder, and garam masala cook for about one minute.
      • Pour the seasoning over  dal mix it well and cook for another minute.
      • Dal fry is ready, serve this as a main dish with Indian flat bread or I prefer with plain rice.
      Tried this recipe?Let us know how it was!

      How to make Dal Tadka Punjabi Style: A Flavorful Punjabi Delight

      Dal Tadka, also known as Dal Fry or Tadka Dal, is a gluten free north indian dish known for its rich flavors and aromatic tempering. This dal tadka recipe offers a tantalizing blend of lentils cooked to perfection and tempered with aromatic spices, making it a favorite comfort food across the country. Whether served with rice or roti, dal tadka never fails to satisfy the taste buds with its hearty and wholesome goodness.

      Step 1: Cooking the Lentils

      To begin, thoroughly wash and rinse the lentils of your choice, such as toor dal (split pigeon peas) or masoor dal (red lentils). In a pressure cooker or large pot, add the washed lentils along with water, turmeric powder, and salt. Cook the lentils until they are soft and mushy, ensuring they are well-cooked to achieve the desired creamy consistency for the dal.

      Step 2: Preparing the Tadka

      While the lentils are cooking, prepare the tadka (tempering) for the dal. In a separate pan, heat ghee or oil over medium heat. Add mustard seeds, cumin seeds, and dried red chilies to the hot ghee, allowing them to sizzle and release their aromatic flavors.

      Step 3: Adding Aromatics and Spices

      Add minced ginger and green chilies to the pan, stirring to combine with the tadka. Next, add ground spices such as cumin powder, coriander powder, and red chili powder, stirring well to toast the spices and enhance their flavors. Adjust the amount of spices according to your taste preferences, keeping in mind the desired level of heat and spice.

      Step 4: Combining Lentils and Tadka

      Once the lentils are cooked and the tadka is prepared, carefully pour the tadka over the cooked lentils, ensuring it covers the surface evenly. Stir the dal tadka gently to combine the lentils with the aromatic tadka, allowing the flavors to meld together. Let the dal tadka simmer for a few minutes to allow the flavors to infuse, adjusting the consistency with additional water if needed.

      Step 5: Garnishing and Serving

      Before serving, garnish the dal tadka with freshly chopped cilantro leaves for a burst of freshness and color. You can also drizzle a spoonful of lemon juice over the dal tadka to add a tangy kick to the dish. Serve the dal tadka hot with steamed rice, roti, or naan bread for a satisfying and wholesome meal.

      Tips for Perfect Dal Tadka

      Lentil Consistency: Ensure that the lentils are cooked until soft and mushy for the perfect creamy texture of the dal tadka.

      Tempering Technique: Take care not to burn the spices while tempering. The tadka should be aromatic and flavorful without any burnt taste.

      Adjusting Spice Level: Customize the spice level of the dal tadka according to your taste preferences by adjusting the amount of green chilies and red chili powder used in the tadka.

      Variations of Dal Tadka

      Restaurant-Style Dal Tadka: Recreate the flavors of your favorite restaurant-style dal tadka by adding a touch of cream or butter to the dish for extra richness.

      Healthy Dal Tadka: For a healthier version of dal tadka, use minimal oil or ghee for tempering and add a variety of vegetables such as spinach, tomatoes, or carrots to the lentils for added nutrition.

      Protein-Packed Dal Tadka: Boost the protein content of the dal tadka by adding cooked chickpeas or kidney beans along with the lentils for an extra protein boost.

      Benefits of Dal Tadka

      Rich in Protein: Lentils are a excellent source of plant-based protein, essential for muscle repair and growth.

      High in Fiber: Dal tadka is rich in dietary fiber, promoting digestive health and keeping you feeling full and satisfied.

      Nutrient-Dense: Packed with essential vitamins and minerals, dal tadka provides a nourishing and balanced meal option for vegetarians and non-vegetarians alike.

      Frequently Asked Questions (FAQs)

      Can I use different types of lentils for dal tadka?

      Yes, you can use a variety of lentils such as moong dal, masoor dal, or chana dal to make dal tadka according to your preference.

      Can I make dal tadka ahead of time?

      Yes, dal tadka tastes even better when allowed to sit for a few hours or overnight, allowing the flavors to meld together. Reheat it gently before serving.

      Is dal tadka gluten-free?

      Yes, dal tadka is inherently gluten-free as it contains no wheat or gluten-containing ingredients.

      Explore more delightful Rajasthani recipes on Manjula’s Kitchen, such as Gatte Ki Sabji for another culinary adventure.Explore more appetiser recipes on Manjula’s Kitchen: Vegetable Samosas, Paneer Tikka, Crispy Spinach Pakoras, Mango Lassi, Masala Chai, Gulab Jamun, Kheer (Rice Pudding)

    • Mint Chutney Recipe

      Mint Chutney Recipe

      Mint Chutney

      Mint Chutney – Indian Condiment

      Mint chutney is a delicious condiment, blend of mint and cilantro combined with spices. Most Indian snacks are incomplete without chutney. Chutney also tastes great with a main meal. Try using mint chutney as a spread for your sandwiches – it tastes great!
      5 from 1 vote
      Prep Time 15 minutes
      Cook Time 10 minutes
      Course Chutney
      Cuisine Indian
      Servings 6 people

      Ingredients
        

      • 1 cup packed mint (podina) leaves all the stems removed
      • 1 cup packed Cilantro (hara dhania)roughly chopped
      • 2 tbsp green chilies chopped (adjust to taste)
      • 2 tbsp lemon juice (adjust to taste)
      • 1/2  inch ginger chopped
      • 1 tbsp salt (adjust to taste)
      • 2 tbsp sugar
      • Pinch of asafetida (hing)
      • Approx. 3 tbsp water use as needed

      Instructions
       

      • Blend all ingredients, except the mint and cilantro, into a paste. Add mint and cilantro, a little at a time, and blend until smooth. Add water as needed.
      • Taste and adjust salt, green chilies, or lemon juice as desire.
      • Taste great with samosa, vegetable pakoras….

      Notes

      Suggestions
      You can make mint chutney in large quantity in advance and freeze it in ice cube trays. Store the frozen cubes in a zip-lock plastic bag. When ready to serve, defrost as many cubes of mint chutney as needed 
      Tried this recipe?Let us know how it was!

    • Homemade Pizza

      Homemade Pizza

      Homemade Pizza

      Home Made Pizza

      Pizza – who can name someone that does not enjoy pizza? Now has become a universal snack loved by all! There are so many variations of pizza. There are a number of recipes for pizza dough, sauce, and toppings. I like to make all my pizzas from scratch. There's nothing better than biting into that first slice of fresh, hot, homemade pizza. Its a great appetizer to be tried by all.
      5 from 1 vote
      Prep Time 30 minutes
      Cook Time 40 minutes
      Total Time 1 hour 10 minutes
      Course Main Course
      Cuisine Italian
      Servings 4 people

      Ingredients
        

      Dough

      • 2-1/2 cups all-purpose flour plain flour, maida
      • 1/2 tsp sugar
      • 1/2 tsp salt
      • 1-1/2 tbsp dry yeast
      • 3 tbsp olive oil preferred
      • 1 cup lukewarm water, use as needed
      • 2 tbsp all-purpose flour for rolling

      Sauce

      • 3 cups crushed tomatoes
      • 1 tsp Italian herbs
      • 1 tsp salt
      • 2 tsp sugar
      • 1/8 tsp black pepper
      • 1/4 tsp chili flake
      • 2 tsp corn starch

      For Topping

      • 2 cups shredded mozzarella cheese
      • 1 cup sliced bell pepper in small pieces capsicum, Shimla mirch
      • 1 cup sliced mushrooms

      Instructions
       

      Dough

      • Add the yeast to lukewarm water and set it aside for about 5 minutes, mix it well making sure yeast has dissolved.
      • Combine flour, sugar, salt and oil and mix. I am using food processor with dough blade to make dough. Note: for pizza dough should be knead well, you can use standing mixer with a dough attachment, or make the dough by hand.
      • Add yeast water run the food processor for 4-5 minutes, stopping every minute for few seconds. Make sure dough is very soft but not sticky if needed add more water or if it is too sticky add little more flour. When dough is ready add 1 tablespoon of oil and run the food processor for about half a minute more.
      • Take out the dough over floured surface and knead the dough until smooth and elastic will take about 3-4 minutes.
      • Grease large bowl with oil, and oil the dough all around lightly, cover the bowl. Set aside the dough in a warm area, for about two hours, dough should be double in size.
      • Knead the dough again over lightly floured surface and divide the dough into 2 equal parts. And let them rest for 3-4 minutes, before rolling. 

      Making Sauce

      • Add oil into a pan over medium high heat. Add Italian herbs, black pepper, and chili flakes stir for few seconds add tomatoes, salt and sugar. Cook until tomatoes have become mushy and most of the water from tomatoes has evaporated. Mix the corn starch with 2 tablespoons of water and add to the tomatoes. Reduce the heat to low stir the sauce for few minutes until sauce becomes the consistency of soft batter. If tomatoes are too sour use little more sugar. Set aside.

      Preparing the Pizza

      • Preheat the oven at 425 degree F (225 Celsius). Grease the pizza pan, I am using 14 inch pan. 
      • Lightly flour roll into a 13 inch circle. Transferred to greased 12-in. pizza pan; build up edges slightly. Lightly greased the rolled dough, this helps making the pizza crisp.
      • Spoon a few tablespoons of sauce into the center of the pizza and use the back of a spoon to spread it out to within one inch of edges. Spread your toppings bell pepper, mushrooms, sprinkle the cheese.
      • Bake for 15 to 18 minutes depend on the oven, until the golden brown. Slice and serve.

      Notes

      Notes
      When you make pizza and crust comes out soggy every time, did not cook well and you don’t know what you are doing wrong!  For that bake the pizza before adding any topping or sauce at 375° for about 10 minutes or until lightly browned. Spread sauce and topping bake again for about 10 minutes or until pizza is done.
      Also check the recipe for pasta  Butternut squash Pasta, Creamy Spinach Pasta, stove top pizza  
      Keyword Home Made Sauce, Kid Friendly, Vegetable Pizza
      Tried this recipe?Let us know how it was!

    • Cabbage Pickle Recipe

      Cabbage Pickle Recipe

      Cabbage Pickle

      Cabbage Pickle (Bandh Gobhi Achar)

      Cabbage pickle is a spicy condiment with any meal. This is quick and easy to prepare. Traditionally Indian meals are not complete without pickles / relish.
      5 from 1 vote
      Course Pickle
      Cuisine Indian

      Ingredients
        

      • 4 cup cabbage sliced, (patta gobhi, bandh gobhi)
      • 3 tbsp mustard seeds coarsely ground, (rai)
      • 1 tbsp fennel seeds coarsely ground (saunf)
      • 1/4 tbsp turmeric (haldi)
      • 1/2 tbsp chili powder adjust to taste
      • 1-1/2 tbsp salt
      • 1/8 tbsp asafetida (hing)
      • 1 tbsp mustard oil (sarso ka tale) this is my preference but you may use olive oil

      Instructions
       

      • Mix all the ingredients together with the cabbage and put in a glass jar. Set the jar in the sun for three to four hours.
      • Pickle can be refrigerated for about two weeks.

      Notes

      Serving Suggestions
      1. Cabbage pickle can also be used as a side dish.
      2. Use the pickle for sandwiches.
      Tried this recipe?Let us know how it was!