Category: Kid-Friendly

Kid-Friendly Vegetarian Recipes: Delicious Indian Food for Kids

Finding recipes that are both nutritious and appealing to kids can be challenging. Indian cuisine offers a variety of vegetarian recipes for kids that are both delicious and easy to prepare. Whether you’re looking for vegetarian kid-friendly recipes, Indian food for kids, or specific Indian recipes for kids, Manjula’s Kitchen provides an extensive collection of dishes to suit every palate. Let’s explore some fantastic recipes that will make mealtimes enjoyable for your little ones.

Classic Vegetarian Recipes for Kids

Aloo Paratha

Aloo Paratha is a popular Indian flatbread stuffed with spiced mashed potatoes. This dish is a classic example of vegetarian recipes for kids that are both hearty and satisfying. Serve it with yogurt and a bit of butter for a complete meal. The soft texture and mild spices make it appealing to children.

Paneer Butter Masala

Paneer Butter Masala is a rich and creamy curry made with paneer (Indian cottage cheese) cooked in a tomato and cream sauce. This dish is a favorite among vegetarian kid-friendly recipes. Serve it with naan or jeera rice to make it a meal your kids will love.

Easy Indian Food for Kids

Vegetable Pulao

Vegetable Pulao is a fragrant and flavorful rice dish cooked with a variety of vegetables and mild spices. This dish is perfect for kids who enjoy rice. It’s a nutritious and delicious option in the category of vegan Indian food for kids. The colorful vegetables make it visually appealing as well.

Chole (Chickpea Curry)

Chole is a mild chickpea curry that is both tasty and nutritious. This dish is ideal for those looking for easy indian vegetarian recipes for kids. Serve it with rice or roti for a wholesome meal. The soft texture of chickpeas makes it easy for kids to eat and enjoy.

Healthy Vegetarian Kid-Friendly Recipes

Moong Dal Khichdi

Moong Dal Khichdi is a simple and healthy dish made with rice and split yellow lentils. It’s one of the best vegetarian kid-friendly recipes as it is easy to digest and packed with nutrients. This dish can be served with a dollop of ghee and a side of yogurt.

Palak Paneer

Palak Paneer is a nutritious dish made with spinach and paneer. It’s a great way to introduce leafy greens to your child’s diet. This dish is a fantastic example of vegetarian Indian recipes for kids that are both healthy and delicious. Serve it with chapati or rice.

Quick and Simple Indian Recipes for Kids

Besan Chilla

Besan Chilla, or chickpea flour pancake, is a quick and easy option that fits well within vegetarian recipes for kids. Made with chickpea flour and a variety of vegetables, this dish is a nutritious choice. It can be enjoyed with a side of green chutney and is perfect for breakfast or a snack.

Masala Dosa

Masala Dosa is a thin, crispy crepe made from fermented rice and urad dal batter, filled with a spiced potato mixture. This dish is a favorite in Indian food for kids. The crispy exterior and soft filling make it a hit with children. Serve it with coconut chutney and sambar.

Snacks and Appetizers for Kids

Samosas

Samosas are crispy pastries filled with spiced potatoes and peas. This snack is a favorite among vegetarian Indian recipes for kids and is perfect for lunchboxes or as an after-school snack. Serve them with tamarind or mint chutney for added flavor.

Pakoras

Pakoras are deep-fried fritters made with vegetables like spinach, potatoes, and cauliflower. This snack is a popular item in the vegetarian kid-friendly recipes category and is perfect for tea-time or as an appetizer. Serve pakoras with a side of green chutney.

Sweet Indian Recipes for Kids

Gulab Jamun

Gulab Jamun are soft, deep-fried balls made from khoya (dried milk) soaked in a sweet syrup flavored with cardamom and rose water. This dessert is a staple in traditional Indian food for kids and is often enjoyed during festivals and special occasions. The melt-in-your-mouth texture and sweet flavor make it a favorite among many.

Kheer

Kheer is a creamy rice pudding flavored with cardamom and garnished with nuts and raisins. This dessert is a classic in north indian vegetarian recipes for kids and is easy to prepare. Kheer is a perfect ending to any meal and is often enjoyed during celebrations.

Elevating Your Kid-Friendly Menu

To elevate your kid-friendly menu, consider adding dishes from various categories that enhance these vegetarian recipes for kids. Including Indian snacks like samosas and pakoras can introduce a variety of flavors and textures.

For a sweet finish, explore Indian desserts such as gulab jamun and kheer. Offering nutritious recipes like moong dal khichdi and palak paneer can provide lighter meal options.

Planning a kids’ party? The popular party recipe category offers numerous dishes that are sure to delight your young guests and make your celebration unforgettable. Incorporating North Indian recipes like aloo paratha or paneer butter masala can bring an authentic touch to your meal.

Frequently Asked Questions (FAQs)

Q: What are some popular vegetarian recipes for kids? 

A: Some popular vegetarian recipes for kids include Aloo Paratha, Paneer Butter Masala, Vegetable Pulao, Chole, Moong Dal Khichdi, Palak Paneer, Besan Chilla, Masala Dosa, Samosas, Pakoras, Gulab Jamun, and Kheer. These dishes are flavorful, nutritious, and perfect for children.

Q: How can I make traditional Indian food suitable for kids? 

A: To make traditional Indian food suitable for kids, try recipes like Aloo Paratha, Paneer Butter Masala, and Moong Dal Khichdi. These recipes are mild in spices and easy to eat, making them perfect for children.

Q: What are some easy Indian recipes for kids? 

A: Some easy Indian recipes for kids include Besan Chilla, Masala Dosa, Vegetable Pulao, and Samosas. These dishes are quick to prepare and provide the necessary nutrients for growing children.

Q: Can I prepare Indian recipes for kids in advance? 

A: Yes, many Indian recipes for kids can be prepared in advance and stored. Dishes like Vegetable Pulao and Chole can be made ahead of time and refrigerated, while snacks like Samosas and Pakoras can be prepped and frozen.

Q: What are some healthy vegetarian kid-friendly recipes? 

A: Some healthy vegetarian kid-friendly recipes include Moong Dal Khichdi, Palak Paneer, Besan Chilla, and Vegetable Pulao. These dishes are nutritious, mild in flavor, and perfect for maintaining a healthy diet for kids.

Conclusion

Vegetarian recipes for kids are a celebration of diverse flavors and nutritious ingredients. Whether you’re looking for vegetarian kid-friendly recipes, Indian food for kids, or specific Indian recipes for kids, these dishes will bring variety and flavor to your meals. So, gather your ingredients, try out these recipes, and enjoy the rich and diverse world of Indian food for children. Happy cooking and happy eating!

By incorporating these dishes into your menu, you’ll be able to enjoy a wide variety of delicious and nutritious foods that your kids will love. Whether you’re looking for snacks, main courses, or desserts, there’s a vegetarian recipe for kids to suit every taste. Don’t forget to check out Manjula’s Kitchen for more inspiration and culinary delights. Happy cooking and happy eating!

  • Yogurt Sandwich

    Yogurt Sandwich

    Yogurt Sandwich

    Yogurt Sandwich

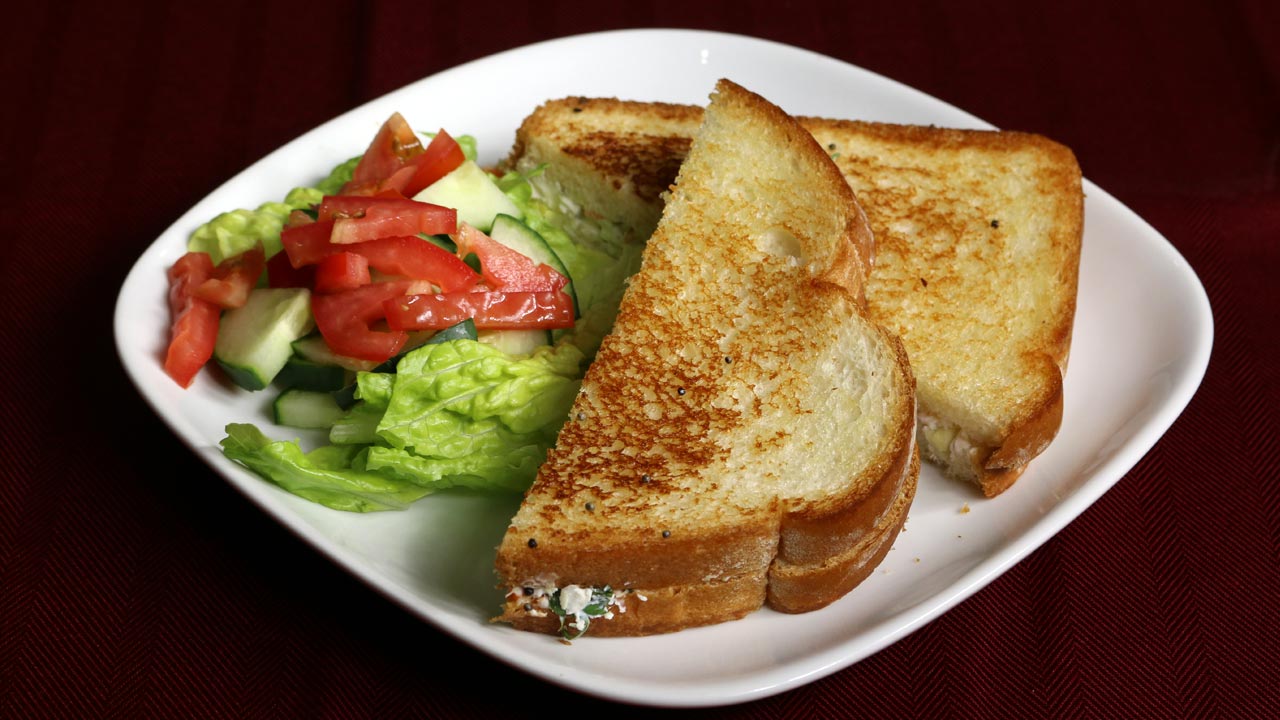
    Yogurt Sandwich is a light, healthy and refreshing sandwich, made with flavorful yogurt, cabbage and carrot. These are great for lunch box. 
    No ratings yet
    Course sandwiches
    Cuisine Indian
    Servings 2 sandwiches

    Ingredients
      

    • 4 slices of firm bread

    For Filling

    • 1 cup plain yogurt
    • 1/4 cup shredded cabbage (pata gobhi or band gobhi)
    • 1/4 cup shredded carrots (gajar)
    • 1/4 teaspoon salt
    • 1/8 teaspoon black pepper
    • 1 teaspoon finely chopped ginger
    • 2 tablespoons finely chopped cilantro (hara dhania)
    • 1/2 teaspoon minced green chili, optional

    Also need

    • 1/8 teaspoon mustard seeds (rai), for seasoning
    • About 2 tablespoons soft butter

    Instructions
     

    • Put the yogurt in a strainer lined with muslin or cheese cloth. Gently squeeze excess water from the yogurt.  Make sure not to squeeze out the yogurt, and leave it at least 4 hours or more. Before removing the yogurt from muslin cloth squeeze one more time.
    • The yogurt will become thick in consistency, this is known hung yogurt, and this should make about half cup.
    • Add all the ingredients for filling with yogurt and mix it well.
    • Spread the mix over two slices of bread and cover them with other slice.
    • Heat the skillet over medium heat; grease the skillet with about half teaspoon of butter.
    • Sprinkle the skillet with mustard seeds as seeds crack place the sandwich over, brush the butter on top of the slice. Grill the sandwich from both sides until they are golden brown. This should take about one minute each side.
    • Sandwiches are ready; serve them with side of salad
    • Yogurt sandwiches taste great even at room temperature, and great for lunch box. 
    Tried this recipe?Let us know how it was!
  • Watermelon Cooler – Lemonade

    Watermelon Cooler – Lemonade

    Watermelon Cooler (Lemonade)

    Watermelon Cooler – Lemonade

    Watermelon cooler is a refreshing summertime drink. Made with cubed watermelon, ginger ale, lemon juice and a few spices, it is sure to please. 
    No ratings yet
    Course Beverages
    Cuisine Indian
    Servings 2 people

    Ingredients
      

    • 2 cups watermelon cut in small pieces
    • 1-1/2 tablespoons lemon juice
    • 2 teaspoons ginger juice
    • 2 tablespoons sugar
    • 1/2 teaspoon black salt
    • Pinch of black pepper powder
    • Approx. 3/4 cup ginger ale
    • About 1 cup ice cubes

    Instructions
     

    • In a blender place watermelon, lemon juice, ginger juice, sugar, pepper and salt together and blend until it is smooth.  Add ice and blend it again until ice is crushed.
    • Pore the drink in a glass filling the glass up to 3/4 and add ginger ale, serve immediately.
    Tried this recipe?Let us know how it was!
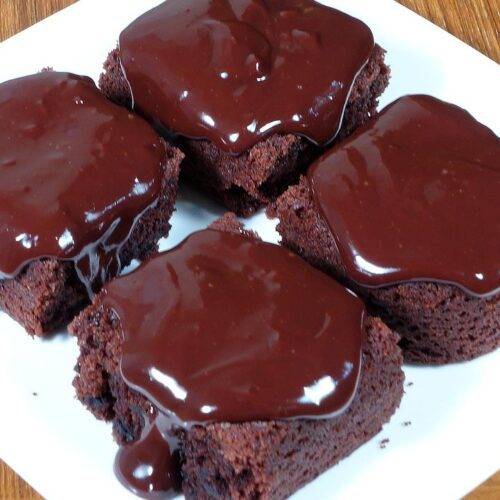
  • Eggless Chocolate Cake

    Eggless Chocolate Cake

    Eggless Chocolate Cake

    Eggless Chocolate Cake

    This is a great recipe of delicious dessert, moist and eggless cake to satisfy your chocolate cravings and sweet tooth. Adults and kids alike will be delighted with this yummy cake. A cake that is like a sweet snack in every bite and is kids favorite for having chocolate in it.
    No ratings yet
    Course Dessert
    Cuisine Indian
    Servings 16 pieces

    Ingredients
      

    • 1-1/2 cup all purpose flour (plain flour, maida)
    • 2 tablespoons corn starch, or arrowroot
    • 1/4 cup coco powder
    • 1/2 teaspoon baking soda
    • 1/2 teaspoon baking powder
    • 1/4 teaspoon salt
    • 1 cup silky tofu ( soft tofu will also work)
    • 1/2 cup unsalted butter at room temperature
    • 1 cup sugar
    • 1 tablespoon vanilla essence
    • 1 tablespoon vinegar, I am using rice vinegar
    • Approx. 1/3 cup milk

    For Chocolate Ganache

    • 1/2 cup chocolate chips, semi-sweet
    • 1/3 cup heavy cream
    • 1 teaspoon vanilla essence

    Instructions
     

    For Ganache

    • Place chocolate in a bowl and add the vanilla essence. Bring the heavy cream to boil and turn off the heat. Pour the cream over chocolate and stir until chocolate completely dissolve and become glossy. As ganache cool it will become thick.

    For Cake

    • Preheat the oven at 350 degree F
    • Grease 8×8 inches cake pan. Set aside.
    • All the dry ingredients except sugar, sift together flour, corn starch, coco powder, baking soda, baking powder, and salt, three times to make sure all the ingredients are well mixed. Set aside.
    • With the electric mixer on low speed mix the butter, sugar, vinegar and vanilla until it is smooth this should take about two minutes. Add the tofu to butter mixture and mix on low speed for about two minutes. This will have a curdle kind of texture.
    • Slowly add the dry mix, mix with spatula all the ingredients should be mixed well. Add milk as needed, batter should be of thick consistency but pourable.
    • Pour the mixture into a greased baking pan evenly. Place the pan on middle oven rack and bake it for 35 minutes or until knife inserted in centre comes out clean.
    • Allow cake to cool for about 15 minutes in pan and then run a butter knife around the edges of cake. Place a wire cooling rack over top of pan. Use both hands to hold the rack in place while flipping the cake over onto the rack. Set the rack down and gently tap on the bottom of pan until the cake is released. Cool completely before slicing the cake.
    • Pour the ganache over the cake or individual cake pieces.
    Tried this recipe?Let us know how it was!

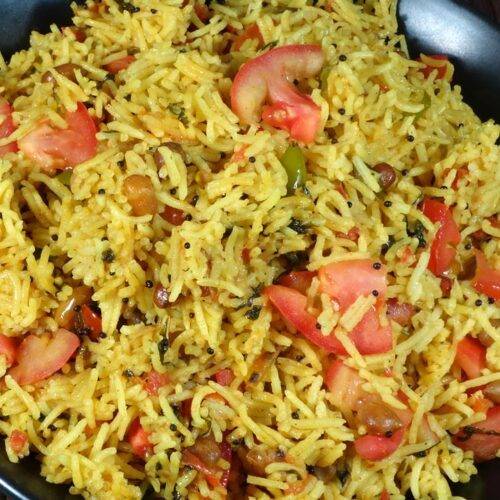
  • Tomato Rice (Pulao)

    Tomato Rice (Pulao)

    Tomato Rice (Pulao)

    Tomato Rice (Pulao)

    Tomato rice or pulao has a South Indian flair as I have used sambar powder in this recipe. Samber powder is a spice mix used in many South Indian dishes. It has a spicy and tangy flavor. This flavor combined with tomato and rice taste great! This dish will also make a nice lunch box meal.
    5 from 1 vote
    Course rice
    Cuisine Indian
    Servings 3 people

    Ingredients
      

    • 1 cup rice
    • 3 tomatoes chopped, will make 1-1/2 cup chopped tomatoes
    • 3 tablespoons oil
    • 1/4 cup raw shelled peanuts
    • 1 teaspoon mustard seeds
    • 1 green chili chopped
    • 1/4 teaspoon turmeric
    • 3 teaspoons samber powder, available in Indian grocery store
    • 1-1/2 teaspoo n salt 
    • 1/4 cup cilantro (hara dhania) chopped
    • 2 cups of water

    Instructions
     

    • Wash and soak the rice in about 3 cups of water for at least 15 minutes. Drain the water and set aside.
    • Heat the oil in a saucepan over medium heat. When moderately hot, add mustard seeds.
    • When the seeds cracks add peanuts and stir fry for one minute until peanuts are lightly golden brown.
    • Add about 1 cup chopped tomatoes, green chili, turmeric, sambar powder, salt and cilantro, cook until tomatoes are tender. This should take about 2 minutes.
    • Add rice and 2 cups of water mix and bring it to boil, lower the heat to low and cover the pen. Let it cook for about 18-20 minutes. Cook until rice is soft and water has evaporated.
    • Stir the rice gently and add the remaining tomatoes stir gently, cover the pan and let it cook for 2 more minutes.
    • Serve rice by it self or with yogurt.
    Tried this recipe?Let us know how it was!

    Delicious Tomato Pulao Recipe: How to Make Tomato Pulao 

    Tomato pulao is a gluten free, flavorful, kid friendly and aromatic rice dish originating from Indian cuisine. It is made by cooking rice with a mixture of tomatoes, spices, and other ingredients. Typically, the dish begins by tempering mustard seeds and peanuts in hot oil, followed by adding chopped tomatoes, green chilies, turmeric, sambar powder, salt, and cilantro.

    1. Soaking Rice for Flavorful Tomato Rice Dish 

    Embark on the journey of making tomato pulao by ensuring that the rice is clean and ready for cooking. Begin by thoroughly washing the rice to remove any impurities, ensuring a clean and pristine base for your dish. Once washed, soak the rice in about 3 cups of water for at least 15 minutes. This crucial step helps to soften the rice grains, allowing them to cook evenly and absorb the rich flavors of the tomato pulao recipe. After soaking, drain the water and set the rice aside, eagerly awaiting its transformation into a delicious and aromatic dish of tomato pulao rice.

    1. Tempering Oil and Stir-Frying: Enhancing Flavor in Tomato Pulao Rice

    In a saucepan heated over medium heat, initiate the flavor infusion process by adding oil and mustard seeds. Allow the oil to heat up to a moderate temperature, then add the mustard seeds and let them crackle, releasing their aromatic essence. Once the mustard seeds crackle, introduce peanuts to the pan and stir-fry for about a minute until they turn lightly golden brown. This step adds a delightful crunch and nutty flavor to the tomato pulao, elevating its overall taste and texture to new heights.

    1. Cooking Tomato Mixture: Infusing Flavors into Tomato Pulao Recipe 

    The heart of any tomato pulao recipe lies in its flavorful base. To create this base, add chopped tomatoes, green chili, turmeric, sambar powder, salt, and cilantro to the saucepan. Allow the mixture to cook until the tomatoes are tender, typically taking about 2 minutes. These flavorful ingredients work in harmony to infuse the rice with a burst of deliciousness, setting the stage for a mouthwatering tomato pulao experience that will tantalize your taste buds and leave you craving for more.

    1. Simmering Rice: Perfecting Tomato Rice Pulao 

    Once the tomato mixture has cooked to perfection, it’s time to introduce the star ingredient – the soaked and drained rice. Add the rice to the saucepan along with 2 cups of water, ensuring that everything is mixed well to distribute the flavors evenly. Bring the mixture to a gentle boil, then reduce the heat to low, cover the pan, and let the rice simmer for about 18-20 minutes, or until it becomes soft and the water has evaporated. After cooking, gently stir the rice and add the remaining tomatoes, incorporating them into the dish with care. Cover the pan once again and let it cook for an additional 2 minutes to ensure that all the flavors meld together perfectly, creating a harmonious symphony of taste and aroma.

    1. Serving Tomato Rice Pulao: Enjoying the Flavorful Rice Dish 

    With the tomato pulao cooked to perfection, it’s time to indulge in its flavorful goodness. Serve the dish by itself as a main course or pair it with yogurt for a satisfying and wholesome meal that will leave you feeling nourished and satisfied. Whether enjoyed as a standalone dish or as a side, tomato pulao is sure to impress with its vibrant flavors, aromatic spices, and irresistible appeal. So gather your loved ones, sit back, and savor every mouthful of this delightful and comforting tomato rice pulao.

    If you loved how to make tomato pulao recipe then you must also check out other variants of Rice: Vegetable Biryani, Masala Khichdi, Chhole Biryani, Quinoa Vegetable Pilaf and Lemon Rice.

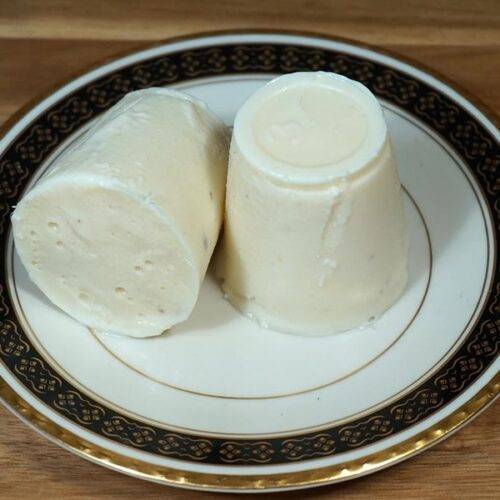
  • Kulfi (Indian Eggless Ice Cream)

    Kulfi (Indian Eggless Ice Cream)

    Kulfi Ice Cream

    Kulfi (Indian Eggless Ice Cream)

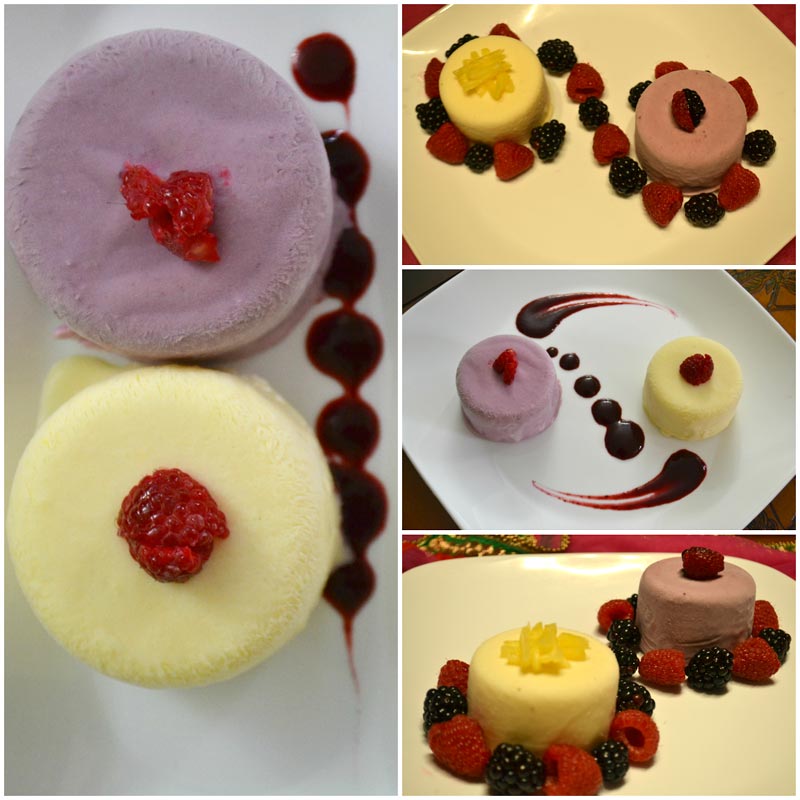
    Kulfi is an eggless Indian ice cream. This is a simple and delicious dessert made with milk and sugar. Kulfi is very popular with street vendors, especially in summer. This is an easy recipe to make and Kulfi is an absolute treat for both young and old.
    5 from 2 votes
    Course Dessert
    Cuisine Indian

    Ingredients
      

    • 4 cup milk
    • 3/4 cup heavy cream
    • 3/4 cup sugar
    • 2 teaspoons corn starch
    • 1/2 teaspoon agar-agar (sea weed works as a vegetarian gelatin)
    • 1/4  teaspoon cardamoms crushed

    Instructions
     

    • In a heavy bottom pan over medium high heat boil the milk, heavy cream, and sugar together.
    • After milk comes to boil lower the heat to medium and let it boil for about 35 minutes, stir the milk occasionally and clean the sides preventing milk not to make a ring on sides. Because of cream, milk does not burn in bottom of the pan.
    • In a small bowl mix corn starch, agar-agar, and cardamom with 2 spoons of water really well making sure there are no lumps,
    • Add to the boiling milk mix it well, boil for about 3 minutes. Turn off the heat and mix the milk for about a minute.
    • Let it cool and pour into the molds, use Kulfi molds, Popsicle molds or small cups. I am using 3 oz plastic cups.
    • Freeze for about 5 hours, before Kulfi is ready to serve.

    Notes

    Suggestions
    You can flavor Kulfi with saffron or vanilla and add the nuts of your choice.
    Tried this recipe?Let us know how it was!

  • Grilled Corn off the Cob (Bhutta/Makai)

    Grilled Corn off the Cob (Bhutta/Makai)

    Grilled Corn off the Cob

    Grilled Corn off the Cob (Bhutta/Makai)

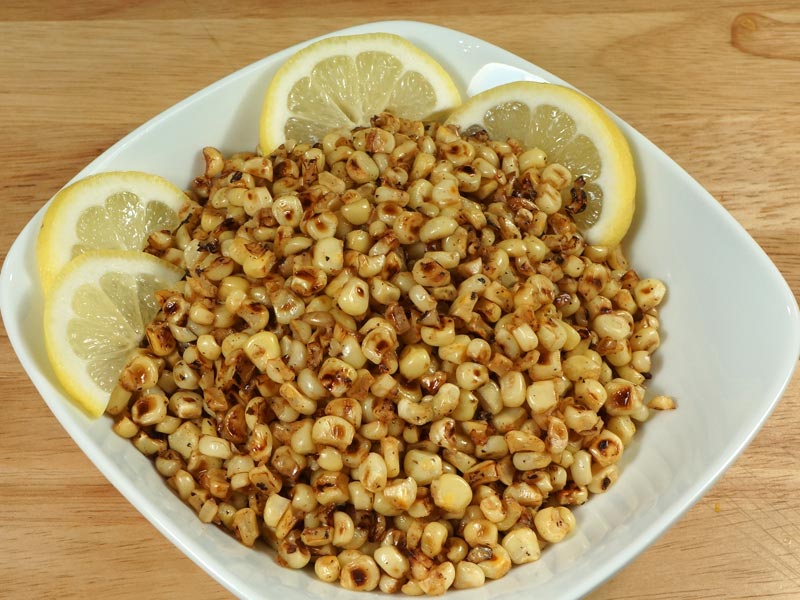
    My favorite way to have corn is grilled. However, sometimes grilling corn takes a lot of time, with the set up and preparation. This is a quick & easy and no mess and a yet a healthy recipe. This is a delicious simple twist on the traditional grilled corn on the cob.
    No ratings yet
    Course Appetizer
    Cuisine Indian
    Servings 4 people

    Ingredients
      

    • 4 ears corn, husked and silky thread remove
    • 1 teaspoon oil
    • 1/2 teaspoon salt
    • 1/8 teaspoon black pepper
    • 1 teaspoon fresh lemon juice
    • 1 teaspoon finely grated ginger

    Instructions
     

    • Remove the kernels from corn, it is easy to do, tear the husk off, and then run the knife downwards to remove the kernels.
    • Coat the flat bottom heavy frying pan with oil and heat over medium high heat, put the corn kernels and stir fry for 4-5 minutes stirring continuously.
    • While stir frying kernels will be getting some light and some dark brown color, some of the kernels will pop like you are grilling.
    • When the kernels are similar in color turn off the heat, and add salt, black pepper, lemon juice, and ginger mix it well.
    • You will be amazed by the taste. They match the taste of corn grilled over charcoal, without even preparing the grill.
    Tried this recipe?Let us know how it was!

    Grill Corn off the Cob: A Flavorful Delight 

    Grilled corn off the cob makes for a delightful appetizer, perfect for summer gatherings, that’s gluten-free, vegan, and kid-friendly, offering a wholesome snack option for everyone to enjoy. Grilling corn off the cob is a fantastic way to elevate this classic vegetable, imparting a delightful smoky flavor while maintaining its natural sweetness. 

    Grilling corn off the cob not only adds depth to the taste but also brings a visually appealing charred texture to the dish. If you’re wondering how to grill corn off the cob, fear not! It’s simpler than you think. Let’s dive into the process and explore the nuances of this delectable preparation.

    To prepare this delectable dish, begin by removing the kernels from the corn. This can be easily accomplished by first tearing away the husk to reveal the golden kernels nestled within. With a steady hand, guide a sharp knife downwards along the cob, separating the kernels from their base. This process ensures that each kernel is freed from its attachment, ready to impart its sweet, crisp flavor to the dish.

    Next, prepare a flat-bottomed heavy frying pan by coating it with oil. This step is essential for achieving a golden, caramelized exterior on the corn kernels. The oil acts as a medium for heat transfer, ensuring even cooking and preventing the kernels from sticking to the pan. Once the pan is adequately coated, heat it over medium-high heat, allowing the oil to reach its optimal temperature.

    Once the pan is heated, carefully add the freshly removed corn kernels. The sizzle of the kernels hitting the hot surface is a testament to the imminent transformation they are about to undergo. With a spatula or wooden spoon in hand, stir-fry the kernels for 4-5 minutes, ensuring continuous movement to prevent uneven cooking and to coax out their natural sweetness.

    As the kernels dance in the heat, they will gradually take on a medley of colors, ranging from light golden to deep brown. Some kernels may even burst open, reminiscent of the crackling sound of grilling over an open flame. This visual and auditory symphony is a sign that the kernels are nearing perfection, their flavors intensifying with each passing moment.

    When the kernels have achieved a uniform color and are tinged with a hint of caramelization, it is time to remove them from the heat. With the pan still sizzling, add a dash of salt, a sprinkle of black pepper, a squeeze of fresh lemon juice, and a hint of ginger. These carefully selected seasonings complement the natural sweetness of the corn, elevating its flavor profile to new heights.

    Give the ingredients a gentle stir, allowing the flavors to meld together and coat each kernel with their tantalizing essence. The aroma that wafts from the pan is a testament to the culinary magic that has taken place, promising a taste experience that transcends expectation.

    As you take your first bite, you will be greeted with a burst of flavor that rivals the charred perfection of corn grilled over charcoal. The sweetness of the kernels is enhanced by the savory notes of salt and pepper, while the brightness of lemon juice adds a refreshing tang. The subtle warmth of ginger lingers on the palate, leaving a tantalizing finish that beckons for another bite.

    Tips for Success 

    • Maintain medium-high heat: Consistency in heat is key to achieving perfectly grilled corn off the cob. Avoid fluctuations in temperature for optimal results.
    • Rotate the corn: Turning the corn regularly ensures even cooking and prevents any single side from burning.
    • Experiment with seasonings: Don’t be afraid to get creative with seasonings and toppings to elevate the flavor profile of your grilled corn off the cob.

    Variations to Explore 

    • Spicy Chipotle Corn: Brush grilled corn with chipotle-infused butter for a smoky and spicy kick.
    • Herb-Infused Corn: Toss grilled corn with chopped fresh herbs such as cilantro, parsley, and chives for a burst of freshness.
    • Sweet and Savory Corn: Drizzle grilled corn with honey and sprinkle with crispy bits of fried bell peppers for a delightful combination of sweet and savory flavors.

    Benefits of Grilling Corn off the Cob 

    Grilling corn off the cob offers numerous benefits beyond its enticing flavor. By removing the kernels from the cob, you create a versatile ingredient that can be incorporated into various dishes with ease. Additionally, grilling imparts a smoky essence to the corn, enhancing its natural sweetness and elevating its overall taste profile. Furthermore, corn off the cob on the grill is a visually appealing dish that adds a pop of color to any table spread, making it a favorite among both chefs and diners alike.

    FAQs (Frequently Asked Questions) 

    Q: Can I grill corn off the cob ahead of time?

    A: Absolutely! Grilled corn off the cob can be prepared in advance and reheated just before serving. Simply store the grilled kernels in an airtight container in the refrigerator for up to two days. When ready to serve, reheat the corn in a skillet over medium heat until warmed through.

    Q: Can I freeze grilled corn off the cob?

    A: Yes, you can freeze grilled corn off the cob for future use. Allow the grilled kernels to cool completely, then transfer them to a freezer-safe bag or container. Label the container with the date and store it in the freezer for up to three months. To use, simply thaw the corn in the refrigerator overnight before reheating.

    Q: Can I grill corn off the cob indoors?

    A: While grilling corn off the cob is traditionally done outdoors on a grill, you can also achieve similar results indoors using a grill pan or a cast-iron skillet. Simply heat the grill pan or skillet over medium-high heat and follow the same grilling process as you would on an outdoor grill.

    Q: Can I use frozen corn instead of fresh for grilling?

    A: While fresh corn is preferred for grilling, you can certainly use frozen corn kernels as a convenient alternative. Thaw the frozen corn before grilling and pat it dry to remove excess moisture. Keep in mind that frozen corn may require slightly longer cooking time than fresh corn to achieve that perfect char.

    Explore More Recipes 

    Looking to expand your culinary repertoire? Explore more mouthwatering recipes on Manjula’s Kitchen:

    With these delectable recipes at your fingertips, you’re sure to impress family and friends with your culinary prowess. Happy cooking!

  • Vegan Jello (Gelatin Free Jello)

    Vegan Jello (Gelatin Free Jello)

    Vegan Jello (gelatin free)

    Vegan Jello (Gelatin Free Jello)

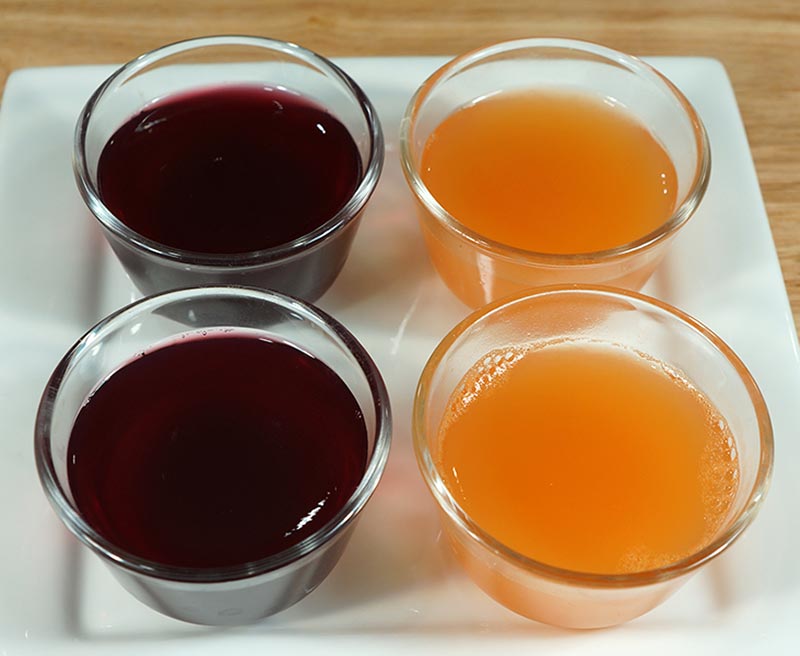
    This is a great vegan recipe for Jello! Jello is a simple easy snack that most kids love. Instead of adding gelatin, I am using Agar-Agar. It is an excellent vegetarian alternative for gelatin. It's a good snack for kids and adults alike.
    No ratings yet
    Course Beverages
    Cuisine Indian
    Servings 4 people

    Ingredients
      

    • 1 cup grape juice
    • 1 cup water
    • 1/4 cup sugar
    • 1/2 teaspoon agar-agar powder (available in Indian and Asian stores)

    Instructions
     

    • Dissolve the agar-agar in water, in saucepan combine juice, sugar, and water with agar-agar.
    • Bring it to boil over medium heat. Stir occasionally making sure agar-agar is mixed well. Let it boil for about 2 minutes.
    • Remove from the heat pour into individual cups or molds, or in a small glass tray. Refrigerate for about 3-4 hours.
    • Jello is ready to serve.

    Notes

    Notes
    1. Pour the juice in the dish while it is hot as Jello will start getting set as it cools.
    2. I have experimented many times to give the right texture to the Jello and this combination comes out just right. Adding more agar-agar or not adding water with the juice will make jello very firm.
    3. Store bought orange juice did not work well for this recipe, but fresh orange juice works great.
    Tried this recipe?Let us know how it was!

  • Shahi Toast (Eggless Bread Pudding)

    Shahi Toast (Eggless Bread Pudding)

    Shahi Toast (Bread Pudding)

    Shahi Toast (Eggless Bread Pudding)

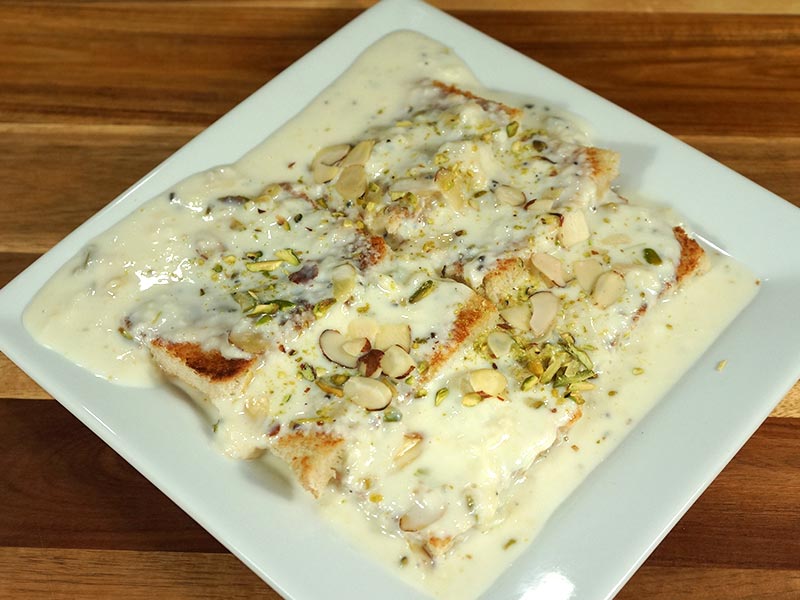
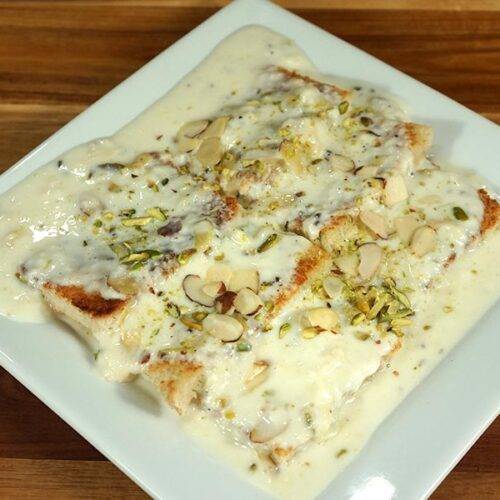
    Shahi Toast is rich bread pudding. Toasted bread covered with creamy milk known as Malai its a rich and royal form of dessert. This is delicious quick and easy recipe to make.
    5 from 1 vote
    Prep Time 5 minutes
    Cook Time 25 minutes
    Total Time 30 minutes
    Course Breakfast
    Cuisine Indian
    Servings 2 people

    Ingredients
      

    • 3 slices white bread firm
    • 1-1/2 tbsp unsalted butter
    • 2 cups milk
    • 2 tbsp sugar
    • 4 Green Cardamoms – shelled and the seeds crushed1 tbsp
    • 1 tbsp sliced almonds
    • 1 tbsp sliced pistachios

    Instructions
     

    • Remove the crust from all sides of bread and butter the bread slices from both sides generously. Cut the slices in two.
    • Toast the bread from both sides on the skillet over medium heat until bread is toasted on both sides golden brown and crispy. Set aside.
    • In a heavy bottom pan boil milk over medium high heat until the milk reduces to about 1cup. After milk comes to boil this should take about 20 minutes. Wet the pan and have few spoons of water before putting the milk in pan, this will reduce the chances of milk to burn. Make sure frequently stir the milk and scrapes the sides.
    • Add sugar cardamom powder, half the almonds and half the pistachios. Boil for about 3 more minutes, stirring occasionally. Turn off the heat.
    • Assembling Shahi Toast: In serving plate arrange the bread slices; pour the milk over bread covering all sides. Notes: you may prepare the toast and milk in advance but assemble just before serving otherwise toast will become very soft.
    • Next garnish with remaining nuts.

    Notes

    Suggestion:
    Shahi Toast can be served for breakfast or as a dessert. Any way you serve it will taste fabulous.
    Tried this recipe?Let us know how it was!