Category: Low Calorie Recipes

Low Calorie Indian Food: Delicious and Nutritious Recipes

Maintaining a healthy diet doesn’t mean you have to compromise on taste, especially with the variety of low calorie foods available in Indian cuisine. Whether you’re looking for low calorie recipes, low calorie Indian food, or traditional low calorie Indian food recipes, this guide offers a selection of delicious and nutritious dishes. Let’s explore some fantastic low calorie food Indian style that you can incorporate into your diet.

Breakfast Recipes

Oats Idli

Oats Idli is a nutritious and light breakfast option. Made with oats and vegetables, this dish is perfect for those looking for low calorie foods. It is also a great example of low calorie Indian food recipes that are both nutritious and delicious.

Vegetable Poha

Vegetable Poha is a light and flavorful dish made from flattened rice, seasoned with turmeric, mustard seeds, and curry leaves. This dish is a staple in many Indian households and is a fantastic low calorie food Indian for Indian breakfast ideas. It’s easy to make and highly customizable.

Low Calorie Lunch Recipes

Moong Dal Soup

Moong Dal Soup is a nutritious and filling soup made with split yellow lentils and a blend of spices. This dish is an excellent choice for low calorie recipes, offering a substantial amount of protein and fiber. It’s a perfect example of low calorie Indian food that is hearty and satisfying.

Cabbage Stir Fry

Cabbage Stir Fry is a simple yet flavorful dish made with shredded cabbage, peas, and a mix of spices. This dish is a staple in low calorie Indian food recipes and pairs well with whole wheat roti or brown rice. It’s a delicious way to enjoy low calorie foods.

Low Calorie Dinner Recipes

Tandoori Cauliflower

Tandoori Cauliflower is a nutritious dish made with cauliflower florets marinated in yogurt and spices, then roasted to perfection. This dish fits perfectly within low calorie Indian food. It can be paired with a side salad for a complete meal, making it one of the best low calorie recipes for dinner.

Palak Tofu

Palak Tofu is a nutritious dish made with spinach and tofu. Rich in iron and protein, this dish fits perfectly within low calorie Indian food recipes. It can be paired with whole wheat roti or brown rice for a balanced meal.

Low Calorie Snack Recipes

Sprout Salad

Sprout Salad is a refreshing and nutritious snack that fits well within low calorie foods. Made with sprouted legumes, fresh vegetables, and a tangy dressing, this salad is a perfect example of low calorie Indian food that is healthy and delicious.

Roasted Chickpeas

Roasted Chickpeas are a crunchy and satisfying snack that fits well within low calorie recipes. High in protein and fiber, this snack helps manage hunger and maintain energy levels. It’s also a great addition to a salad or enjoyed on its own.

Low Calorie Dessert Recipes

Fruit Salad

Fruit Salad is a nutritious and refreshing dessert made with a mix of fresh fruits, spices, and lime juice. This dessert is a delightful example of low calorie Indian food recipes that can be enjoyed as a dessert or a snack. It’s perfect for those looking for a sweet treat that is also healthy.

Carrot Halwa

Carrot Halwa, made with grated carrots, milk, and a sugar substitute, is a delightful dessert that can be enjoyed by those looking for low calorie foods. This traditional Indian sweet is modified to reduce sugar content while retaining its delicious taste.

Enhancing Your Low-Calorie Menu

To make your low-calorie menu even more delightful, consider adding dishes from related categories that complement these low calorie foods. Adding healthy Indian snacks like roasted chickpeas and sprout salad can provide a variety of flavors and textures. 

For a sweet ending, explore Indian desserts such as fruit salad and carrot halwa, made with low-calorie ingredients. Incorporating healthy recipes like moong dal soup and cabbage stir fry can offer lighter options for your meals. 

Hosting a large gathering? The popular party recipe category is filled with dishes that are sure to impress your guests and make your celebration memorable. Including North Indian recipes like palak tofu or tandoori cauliflower can add a touch of authenticity to your meal.

Frequently Asked Questions (FAQs)

Q: What are some popular low calorie foods? 

A: Some popular low calorie foods include Oats Idli, Vegetable Poha, Moong Dal Soup, Cabbage Stir Fry, Tandoori Cauliflower, Palak Tofu, Sprout Salad, Roasted Chickpeas, Fruit Salad, and Carrot Halwa.

Q: How can I make traditional Indian food low in calories? 

A: To make traditional Indian food low in calories, try recipes like Oats Idli, Vegetable Poha, and Tandoori Cauliflower. These recipes are modified to include more vegetables and whole grains while retaining their authentic flavors.

Q: What are some low calorie recipes for a party? 

A: Some low calorie recipes for a party include Tandoori Cauliflower, Sprout Salad, Roasted Chickpeas, and Fruit Salad. These dishes are flavorful and perfect for gatherings while being mindful of calorie content.

Q: Can I prepare low calorie Indian food in advance? 

A: Yes, many low calorie Indian food recipes can be prepared in advance and stored. Snacks like Roasted Chickpeas and Sprout Salad can be made ahead of time, while dishes like Moong Dal Soup and Cabbage Stir Fry can be prepared and refrigerated.

Q: What are some healthy options for low calorie Indian food? 

A: Some healthy options for low calorie Indian food include Quinoa Salad, Vegetable Stir Fry, Oats Idli, and Moong Dal Cheela. These dishes are high in fiber and protein, helping to maintain energy levels effectively.

Conclusion

Low calorie foods are a celebration of healthy and flavorful meals. Whether you’re looking for low calorie recipes or low calorie Indian food, these dishes will bring variety and nutrition to your meals. So, gather your ingredients, try out these recipes, and create delicious meals that are mindful of your health needs. Don’t forget to explore related categories for more delightful recipes from Manjula’s Kitchen!

By incorporating these dishes into your diet, you’ll be able to enjoy a wide variety of delicious and nutritious foods. Whether you’re looking for breakfast, snacks, main courses, or desserts, there’s a low calorie Indian food recipe to suit every taste. Happy cooking and healthy eating!

  • Contest October 2011

    Appetizers are a great way to share with friends and family during the holidays. Since Diwali festival is coming at the end of the month, I thought it will be nice to make the contest about an appetizer.  The rules for October are the following:

    • You may create any kind of appetizer
    • It must be vegetarian and also egg-less

    In general I will only consider recipes that I feel are complete in regards to ingredients, measurement, and instruction. From there I am looking for creativity and a recipe that my viewers would enjoy to prepare on their own. I will be judging on overall recipe and presentation also.

    Be sure to check out Manjula’s appetizer recipes for inspiration. Good Luck!

    Below is my checklist:

    • Be Creative!
    • Ingredients should be listed with measurements.
    • Method must be explained clearly, so it’s easy to follow.
    • Please include your name along with the recipe.
    • Search the web for ideas. There are many resources available.
    • Please send me a detailed recipe to contest@manjulaskitchen.com
    • You must also send original picture(s) of the recipe – do not simply grab a photo from the web. Otherwise your recipe will not be considered for entry.
    • The deadline is October 29th.
    • The winner will be featured on the homepage with the new recipe and a link to their website (if available).

    1st Prize: $100 gift certificate from Amazon.com
    2nd Prize: $25 gift certificate from Amazon.com

    **Anyone can join this contest**

  • Contest 2011 September Winners

    Contest 2011 September Winners

    Thank you to everyone who took part in September’s Content. Here are the winners for 1st and 2nd place:

    1st Place: Nibedita Das (Paneer Curry Pasta Salad)

    2nd Place: Dipti Joshi (Colorful Veggie Wrap)

    Thank you to everyone else that participated:

    • Poonam Jadhav
    • Sreedevi.R
    • Sushma
    • Rupal Patel
    • Payal Choudhary
    • sugandha kortikar
    • Meena Panchal
    • Hem Srivastava
    • Mike
    • Divya Kudua
    • Anu Soni
    • Deepali Bohra
    • Shweta Pahadiya
    • Sumedha Bailur
    • Madhu
    • Shilpa Jadhav
    • Kaveri Venkatesh
    • Deepti Rao
    • Sadaf Afshan
    • Nayana
    • Kavya Dwivedi
    • Amina Khaleel
    • Anitha Regunath
    • Neeraja Parthasarathy
    • Kushbu Majithiya
    • Priya Suresh
    • Khyati
    • Silky Kapoor
    • Hari Chandana
    • Noopur Srivastava
    • Charu Goswami
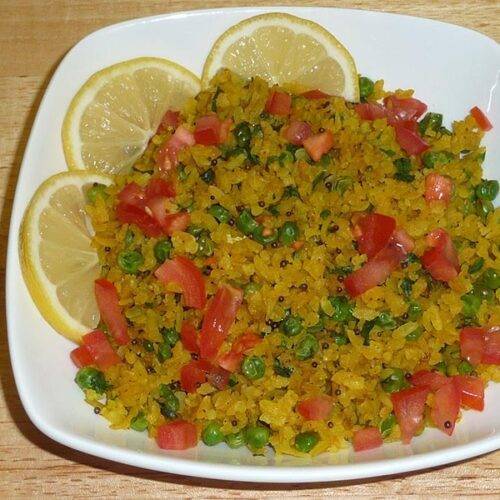
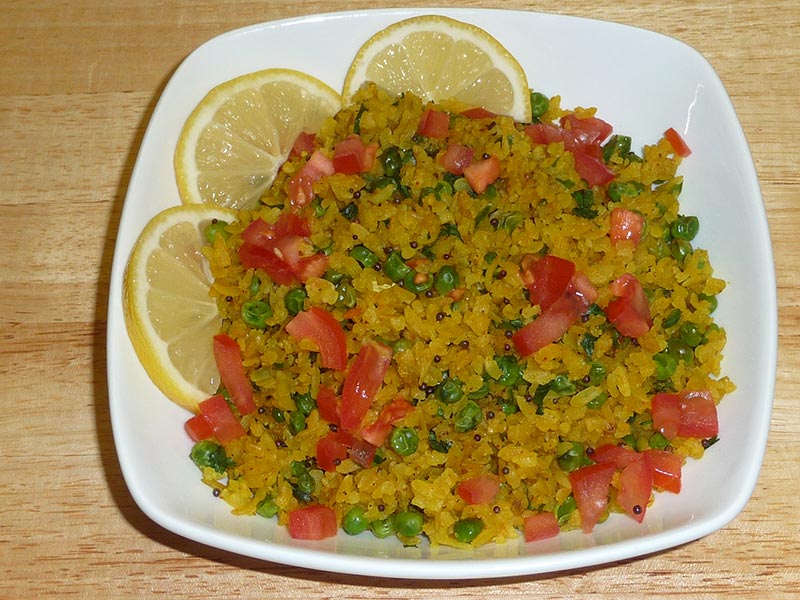
  • Poha (Flattened Rice)

    Poha (Flattened Rice)

    Poha, Chudwey

    Poha (Flattens Rice)

    This dish is a favorite for breakfast or as a light snack in different parts of India. Being raised in Bihar, my mother was very fond of Chudwey. She would often prepare this dish as a special snack for guests to be served with tea. I have grown up loving this recipe and thought I would share it with all of you. This is a quick and easy recipe to make and very delicious.
    5 from 1 vote
    Prep Time 5 minutes
    Cook Time 10 minutes
    Total Time 15 minutes
    Course Breakfast
    Cuisine Indian
    Servings 4 people

    Ingredients
      

    • 2 cups thick poha, poha is available in different thickness
    • 1 cup green peas, I am using frozen
    • 2 tbsp oil
    • 1 tsp mustard seeds rai
    • 3 cardamoms ilachai
    • 1/2 tsp turmeric haldi
    • 1/4 tsp red chili powder
    • 1 green Chile finely chopped
    • 1 tsp ginger finely chopped
    • 1 tsp salt
    • 1 tsp sugar
    • 1 tsp lemon juice
    • 2 tbsp cilantro finely chopped hara dhania1
    • 2 lemon slice for garnishing
    • 1/4 cup chopped tomatoes for garnishing

    Instructions
     

    • Gently wash poha in a colander and let it sit/drain for approx. 10 minutes.
    • Sprinkle turmeric, chili powder and salt and toss with a fork.
    • Wash and drain green peas and set aside.
    • Heat oil in a frying pan over medium high heat. When oil is moderately hot add mustard seeds and wait till seeds crack. Add cardamom, ginger and green chili and stir for a few seconds. Then add green peas and cook until they are tender.
    • Add poha and stir-fry for 3 to 4 minutes, mixing gently. (If the poha looks too dry, add a few tablespoons of water and continue cooking).
    • Remove from heat and add lemon juice, sugar and cilantro. Mix and cover for few minutes.

    Notes

    Serve hot with a side of Hari Cilantro Chutney.
    Tips:  Poha comes in different thickness sizes, but you must use the “thick” poha for this recipe, or else it will become too mushy.
    Varying brands of Poha may absorb water differently. Therefore use your judgment while cooking, to add a few tablespoons of water, if it feels too dry.
    I am using frozen baby green peas, but you can use fresh or frozen of any style green peas. Just make sure that they are fully cooked before you add the poha.
    Tried this recipe?Let us know how it was!
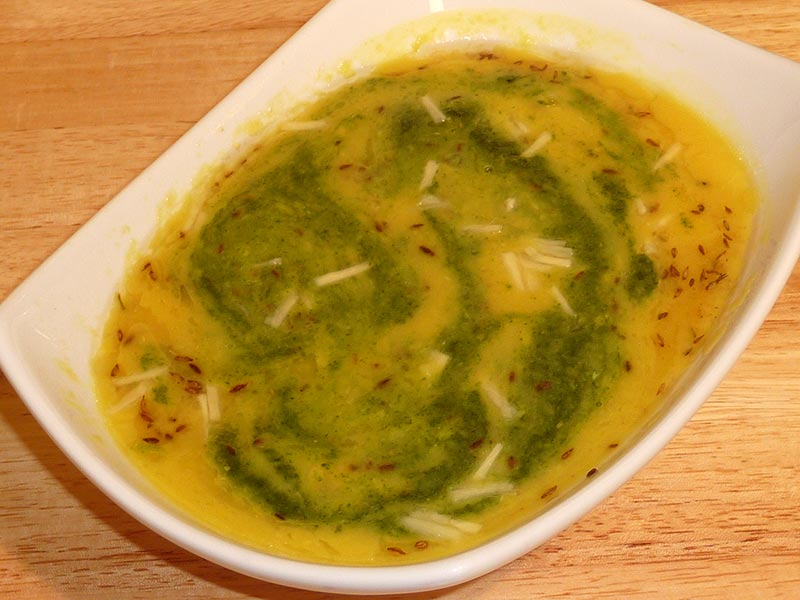
  • Moong Dal Soup

    Moong Dal Soup

    Moong Dal Soup

    Moong Dal Soup

    This healthful vegan soup is high in protein. Made with split Moong dal and flavored with hari cilantro chutney, moong dal soup is flavorful yet simple and easy to make.
    No ratings yet
    Course dal, Soup
    Cuisine Indian
    Servings 4 people

    Ingredients
      

    For the Soup

    • 1 cup split yellow Moong dal, washed (available in Indian grocery stores)
    • 1 teaspoon salt
    • 1/4  teaspoon turmeric (haldi)
    • 3 cups water
    • Approximately 1/4 cup of Hari Cilantro Chutney

    For the Seasoning

    • 1 tablespoon oil
    • 1/2 teaspoon cumin seeds (jeera)
    • Pinch of asafetida (hing)

    For the Garnish (optional)

    • 1 tablespoon ginger, finely sliced
    • 1/8 teaspoon salt, adjust to taste
    • 1 teaspoon lemon juice

    Instructions
     

    Method

    • Wash the dal several times, until the water becomes almost clear.
    • In a medium pot combine the moong dal, turmeric, salt, and water. Cook over medium-high heat until it starts to boil. Remove the frothy foam that accumulates on the surface as the dal cooks.
    • Lower the heat to medium and cook for 15 to 20 minutes, until completely cooked and a little mushy. Stir occasionally and add more water if needed. Turn off the heat.
    • Puree the dal using a hand blender or regular blender. If needed, adjust the thickness of the dal by adding more boiled water. Mix well. The dal will thicken as it cools.
    • Add hari cilantro chutney to suit your taste.  The chutney gives the soup a fresh green appearance and a tangy flavor.

    Seasoning

    • Heat the oil in a small saucepan. Add cumin seeds and wait until the seeds crack. Add asafetida and turn off the heat.
    • Pour the mixture over the cooked soup.

    Garnish (optional)

    • Combine the ginger, salt and lemon juice. Marinate for at least a half hour.
    • Garnish with a few slices of marinated ginger.
    • Marinated ginger can be refrigerated for up to a week.

    Notes

    Time-saving Tip:
    To save time you may use a pressure cooker, as follows.
    1. In a pressure cooker add Moong dal, turmeric, salt, and water.  Close the cooker.
    2. Cook over medium-high heat until it starts to steam.  Lower the heat to medium and cook for 5 more minutes.
    3. Turn off the heat and let the steam escape before you open the pressure cooker.
    4. Puree the dal using a hand blender or regular blender. If needed, adjust the dal to your desired consistency by adding more boiled water.  Mix well.
    5. Add “Hari Cilantro Chutney” according to your taste.  The chutney will give a fresh green look to the soup and have a tangy flavor.
    Tried this recipe?Let us know how it was!

    How to make Yellow Moong al Soup with Vegetables

    Moong dal soup is a nutritious dish made from split mung beans, also known as moong dal. It is suitable for individuals with diabetes as it has a low glycemic index, meaning it doesn’t cause a rapid spike in blood sugar levels. Additionally, it is gluten-free, making it safe for those with gluten sensitivities or celiac disease.

    The soup is high in protein due to the lentils, making it a filling and satisfying meal option. It is also low in fat, which can be beneficial for those looking to manage their weight or reduce their fat intake.

    Moong dal soup is often prepared as a vegan dish, as it typically does not contain any animal products. It can be served as a standalone soup or paired with salads for a wholesome and nutritious meal. Overall, it’s a healthy option that aligns with various dietary preferences and requirements.

    Moong dal soup is a comforting and nutritious dish that is popular in Indian cuisine. Made from split mung beans, this soup is not only delicious but also packed with protein, fibre, and essential nutrients. In this easy moong dal soup recipe, we’ll guide you through the process of making a flavorful and hearty soup that is perfect for any occasion.

    Easy Moong Dal Soup: A Cozy and Flavorful Treat
    This recipe guides you through making a delicious and comforting moong dal soup, perfect for a quick and nourishing meal. Moong dal, also known as split mung beans, cooks quickly and offers a satisfying protein punch. Let’s get started!

    Prep Work (15 minutes): Clean the Dal: Rinse the moong dal thoroughly under cold running water to remove any dust or debris. Soaking the dal for 30 minutes to 1 hour is optional, but it helps them cook faster and become more tender.

    Flavor Builders: While the dal soaks (or if you choose to skip soaking), chop up some fresh ginger for that warming aroma. You can also add diced tomatoes and green chilies for a touch of sweetness and heat, depending on your preference.

    Cooking the Soup (30-40 minutes): Sautéing the Aromatics: Heat oil or ghee in a pot over medium heat. Once hot, add the chopped ginger and cook for a few minutes until fragrant. This fragrant base will form the foundation of your soup’s flavor.

    Spice Up Your Life: Now comes the magic! Add ground cumin, coriander, turmeric, and a pinch of asafoetida (if using) to the pot with the ginger. Stir everything well to coat the aromatics in the spices. Let them sizzle for a bit, releasing their wonderful aromas. Feel free to adjust the spice quantities based on your taste preference.

    Simmering the Dal: Add the soaked (or unsoaked) moong dal to the pot and stir to combine it with the flavorful spice mixture. Next, pour in enough water or vegetable broth to cover the dal completely. Bring the mixture to a boil, then reduce heat and simmer gently. Let it simmer until the dal is tender and cooked through.

    Creamy Option (optional, 5-10 minutes): Smooth Operator (Optional): If you prefer a creamy soup, let it cool slightly. Then, use an immersion blender or a regular blender (in batches) to achieve a smooth and velvety texture. Blend until you reach your desired consistency.

    Final Touches (5 minutes): Season to Perfection: Now’s the time to adjust the taste! Add salt and a squeeze of lemon juice (optional) to balance the flavors. You can also add more spices if needed.

    Fresh Finish: Garnish your soup with freshly chopped cilantro leaves for a pop of color and a refreshing touch.

    Serving Up Warmth (enjoy!):

    Ladle and Enjoy: Ladle the hot soup into serving bowls and garnish with additional cilantro, if desired. Pair your comforting bowl of moong dal soup with crusty bread, naan, or rice for a complete and satisfying meal. Enjoy this nourishing and delicious soup anytime you need a warm hug in a bowl!

    Tips for Making the Perfect Moong Dal Soup:

    • Soaking the moong dal helps reduce cooking time and improves texture.
    • Experiment with different spices and seasonings to customize the flavor of the soup to your liking.
    • For added richness, you can stir in a spoonful of coconut milk or cream towards the end of cooking.
    • If you prefer a chunkier soup, you can skip blending and leave some of the dal intact.

    Variations of Moong Dal Soup:

    • Vegetable Moong Dal Soup: Add diced carrots, peas, and spinach for a hearty and nutritious twist.
    • Spicy Moong Dal Soup: Increase the amount of green chilies or add red chili powder for extra heat.
    • Coconut Moong Dal Soup: Stir in coconut milk for a creamy and indulgent flavor.

    Benefits of Including Moong Dal Soup in Your Diet:

    • High in Protein: Moong dal is an excellent source of plant-based protein, making it ideal for vegetarians and vegans.
    • Rich in Fiber: The fiber content in moong dal aids digestion and helps maintain a healthy gut.
    • Low in Fat: Moong dal soup is low in fat and cholesterol, making it a heart-healthy option for all.

    Frequently Asked Questions (FAQs) about Moong Dal Soup:

    Q: Can I use other lentils instead of moong dal?

    A: Yes, you can substitute other lentils such as masoor dal or red lentils for moong dal in this recipe.

    Q: Can I make moong dal soup in advance?

    A: Yes, you can make the soup ahead of time and store it in the refrigerator for up to 3 days. Reheat gently on the stovetop or in the microwave before serving.

    Q: Is moong dal soup gluten-free?

    A: Yes, moong dal soup is naturally gluten-free, making it suitable for those with gluten intolerance or celiac disease.

    For more delicious Indian soup recipes, visit Manjula’s Kitchen. Explore a variety of vegetarian soups, appetizers, main courses, and desserts to delight your taste buds and impress your family and friends.

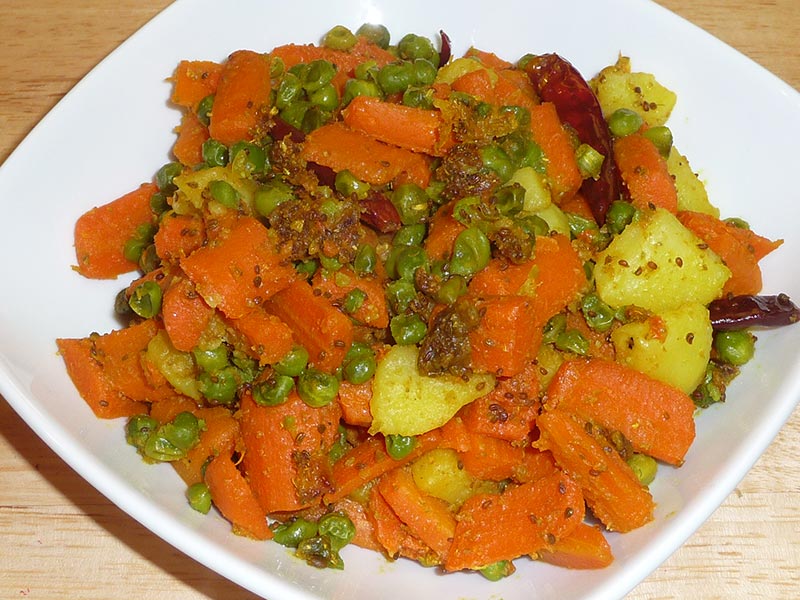
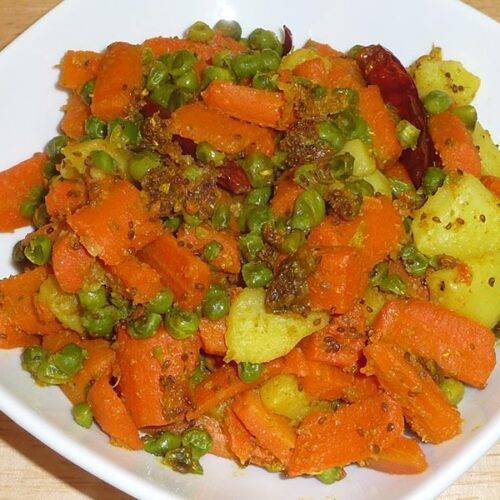
  • Gajar Matar (Carrots With Green Peas)

    Gajar Matar (Carrots With Green Peas)

    Gajar Matar

    Gajar Matar (Carrots With Green Peas)

    Gajar Matar is a healthy and quick & easy recipe to make. This mildly spiced, colorful dish can compliment just about any meal.
    No ratings yet
    Course Dessert
    Cuisine Indian
    Servings 4 people

    Ingredients
      

    Ingredients

    • 2 cups carrots diced in about 1/2 inch pieces
    • 1 cup potato cubed in about ½ inch pieces
    • 1 cup green peas
    • 2 tablespoons oil
    • 1 teaspoon carom seeds (ajwain)
    • 4 whole red chilies
    • 1 tablespoon coriander powder (dhania)
    • 1/2  teaspoon turmeric (haldi)
    • 1 teaspoon salt
    • 1 teaspoon lemon juice

    Instructions
     

    Method

    • Heat the oil in a saucepan, on medium heat.Add carom seeds.   The oil should NOT be very hot as the carom seeds will burn and lose their flavor.
    • Add whole red chilies and turmeric and stir for a few seconds.
    • Add carrots, potatoes, green peas,  coriander powder, and salt.  Mix well.
    • Cover the pan and let it cook on medium heat for 10 minutes until the vegetables are tender. Stir occasionally. Turn off the heat when done.
    • Add the lemon juice and stir.
    • Serve hot.
    Tried this recipe?Let us know how it was!
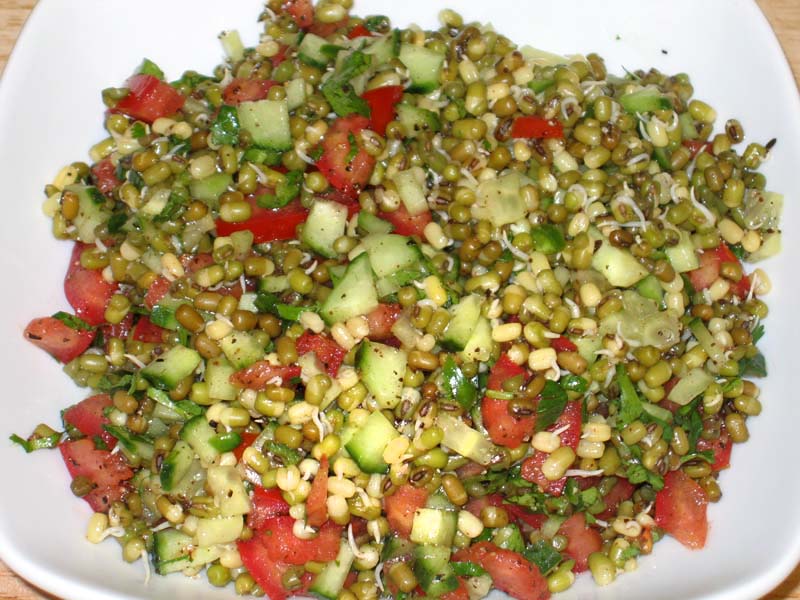
  • Sprouted Moong Salad

    Sprouted Moong Salad


    Sprouted Moong Salad

    Sprouted Moong Salad

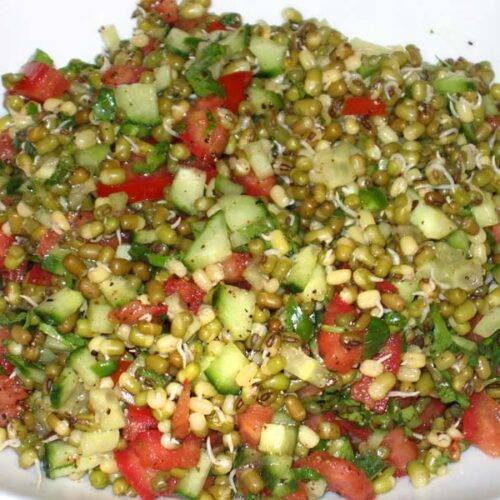
    Sprout lentil (dal) salad is a colorful, refreshing, nourishing dish, a good source of protein and calcium. This salad can be served as a light lunch. This is an easy recipe to prepare.
    5 from 2 votes
    Prep Time 10 minutes
    Cook Time 10 minutes
    Total Time 20 minutes
    Course Salad
    Cuisine Indian
    Servings 4 people

    Ingredients
      

    • 1-1/2 cup sprouted moong
    • 1 cup tomatoes chopped
    • 1 cup cucumber chopped
    • 1 orange separated into slices
    • 1 tbsp cilantro chopped hara dhania)
    • 1 seeded green chili chopped optional

    For Dressing

    • 1/2 tsp black pepper
    • 1 tso salt
    • 1 tsp ground roasted cumin seed jeera
    • 1 tbsp lemon juice
    • 1 tbsp yogurt optional for vegan
    • 1 tbsp ginger juice
    • 1 tsp sugar
    • 1 tbsp olive oil

    Instructions
     

    • Mix all the salad dressing ingredients together. Set aside.
    • Cook the sprouts with salt and ¼ cup water in a saucepan. Bring it to a boil and cook two minutes. Cover the pan for three to four minutes. Drain off any liquid.
    • Let the sprouts cool to room temperature and add the dressing.
    • In a serving dish arrange tomatoes, cucumber, and oranges. Top with the spiced sprouts.
    • Garnish with cilantro and green chili.

    Notes

    How to make sprouts
    Soak the whole moong ten to twelve hours in four parts water. (Soaking will double the volume of the moong).
    Line a colander from the moong and loosely wrap the beans in the muslin cloth.  Store the soaked beans in a warm dark place for a day or two (a closed, unheated oven, for example, or on the countertop covered with a heavy cloth) until sprouted.
    Suggestions
    Sprouts can be refrigerated for four to five days.
    Sprouts salad makes a good lunch to take to the office or school.
    Keyword Gluten Free, Healthy Salad, Low Carb Vegetarian Salad, Low Fat, Vegan
    Tried this recipe?Let us know how it was!
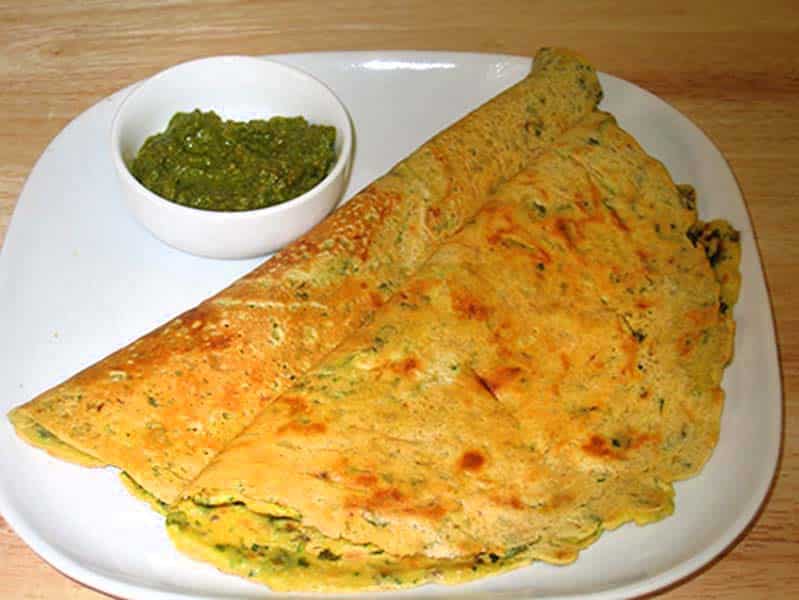
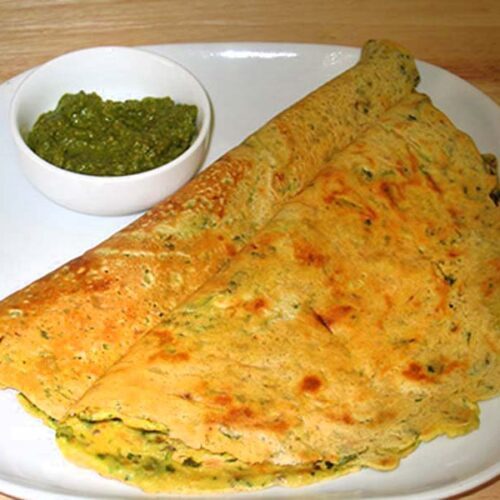
  • Besan Puda – Cheela (Gram Flour Dosa)

    Besan Puda – Cheela (Gram Flour Dosa)

    Besan Puda Dosa

    Besan Puda – Cheela – Gram Flour Cheela

    Basen Ka Puda is a tasty low fat, quick & easy, vegan dish for breakfast or a light lunch. This recipe is quick to prepare and can be served many different ways. In my house this is a favorite dish for breakfast, folded with cheese.
    4.20 from 5 votes
    Prep Time 10 minutes
    Cook Time 15 minutes
    Total Time 25 minutes
    Course Breakfast
    Cuisine Indian
    Servings 3 people

    Ingredients
      

    • 1 cup besan gram flour
    • 1/4 cup rice flour chawal ka atta
    • 1 tsp salt
    • 3/4 cup water, use as needed
    • 1/2 tsp cumin seeds jeera
    • 1 tsp green chili finely chopped
    • 1 cup zucchini shredded
    • 1 tabs cilantro finely chopped hara dhania
    • 6 tbsp oil for cooking use as needed

    Instructions
     

    • Shred the zucchini with the skin and keep aside.
    • Mix all the dry ingredients together: besan, rice flour, cumin seeds, and salt. Add the water slowly to make a smooth batter, the consistency of pancake batter or Dosa batter. Add the green chilies, cilantro, and zucchini. Mix well.
    • Use a non-stick skillet and place on medium-high heat. Test by sprinkling a few drops of water on it. Water should sizzle right away. Pour about 1/2 cup of the batter into the skillet and spread evenly with a back of spoon. Starting from the center, spiral the batter outward evenly to form a circle about 7″ in diameter.
    • When batter starts to dry, gently spread one teaspoon of oil over it. Wait about 30 seconds; flip the puda using a flat spatula.
    • Press the puda lightly all around with the spatula to make the puda cook evenly. Turn the puda three to four time, until crisp and brown on both sides.
    • Repeat for the remaining pudas.

    Notes

    Tips:
    Spread the batter quickly, or it will begin to dry and will be difficult to spread.
    Serving Suggestions:
    You can serve the puda with yogurt, hari chutney, spicy pickles.
    Pudas can also be served as quesadillas. Fold the pudda with shredded cheddar cheese, sliced tomatoes, or roasted vegetables.
    Variations
    Zucchini can be replaced with finely chopped spinach, shredded potatoes, or  finely shredded cabbage.
    If you make the puda without vegetables, do not use rice flour. This will cause the pudas to be very dry.
    Cilantro can be replaced with ground coriander powder.
    Keyword Besan Cheela, Healthy Breakfast, Quick And Easy
    Tried this recipe?Let us know how it was!

    How to Make Besan Cheela: Crafting a Delightful Indian Pancake

    Besan Cheela is a quick & easy bread based breakfast recipe ideal for those on a gluten free and looking for low fat vegan alternative.  Besan cheela, also known as chilla or besan chilla, is a savory Indian pancake that’s not only delicious but also packed with nutrients. Made primarily from gram flour (besan), this versatile dish can be customized with various ingredients to suit individual tastes. From shredded vegetables to aromatic spices, each component contributes to the overall flavor and texture of the cheela. Let’s delve deeper into the art of crafting the perfect besan cheela, step by step.

    Step 1: Shredding Zucchini for Besan Cheela

    The journey to creating the perfect besan cheela begins with the humble zucchini. Its vibrant green hue and delicate flavor make it an ideal addition to this traditional recipe. Start by carefully shredding the zucchini, ensuring to retain its nutritious skin. This step not only adds a delightful texture to the besan cheela but also enhances its nutritional value. Once the zucchini is finely shredded, set it aside, eagerly awaiting its incorporation into the besan cheela batter.

    Step 2: Preparing Dry Ingredients for Besan Chilla

    The foundation of a perfect besan chilla lies in the precise combination of dry ingredients. In a mixing bowl, amalgamate besan, rice flour, cumin seeds, and salt, creating the essential base for the besan cheela batter. Gradually introduce water, achieving a smooth consistency akin to that of pancake or dosa batter. The inclusion of finely chopped green chilies, fresh cilantro, and the shredded zucchini further enriches the mixture, imparting a burst of flavors and a harmonious medley of textures.

    Step 3: Heating the Skillet for Making Besan Cheela

    An indispensable element in the besan cheela-making process is a well-heated skillet. Place a non-stick skillet over medium-high heat and confirm its readiness by performing the quintessential water droplet test – the sizzle upon contact indicates the skillet’s optimum temperature for crafting the perfect besan chilla.

    Step 4: Pouring and Spreading Batter for Besan Chilla

    With the skillet primed and ready, it’s time to pour approximately 1/2 cup of the besan cheela batter onto its surface. Using the back of a spoon, adeptly spread the batter evenly, starting from the center and spiraling outward. This technique ensures the formation of a well-rounded besan chilla, approximately 7 inches in diameter, ready to be adorned with flavorful toppings.

    Step 5: Cooking the Besan Cheela to Perfection

    As the besan cheela begins to set on the heated skillet, delicately spread a teaspoon of oil over its surface. After a brief interval of about 30 seconds, gracefully flip the cheela using a flat spatula. Applying gentle pressure with the spatula ensures uniform cooking, and this process is repeated three to four times until the besan chilla attains a crisp, golden-brown exterior on both sides, tantalizing the senses with its aroma and visual appeal.

    Step 6: Repeating the Process for Besan Cheela

    The besan cheela-making process is a delightful rhythm that beckons for subsequent rounds. Repeat the aforementioned steps for the remaining batter, creating a succession of besan chillas, each promising a savory and gratifying experience. Whether enjoyed as a snack or a light meal, besan chillas stand as a testament to their versatility and irresistible charm.

    In conclusion, mastering the art of making besan cheela is not only a culinary feat but also a journey of exploration and creativity. With each step carefully executed and each ingredient thoughtfully incorporated, you can create a dish that delights the palate and nourishes the body. So, gather your ingredients, heat up your skillet, and embark on the flavorful adventure of making besan chillas – a dish that’s sure to become a favorite in your kitchen repertoire.