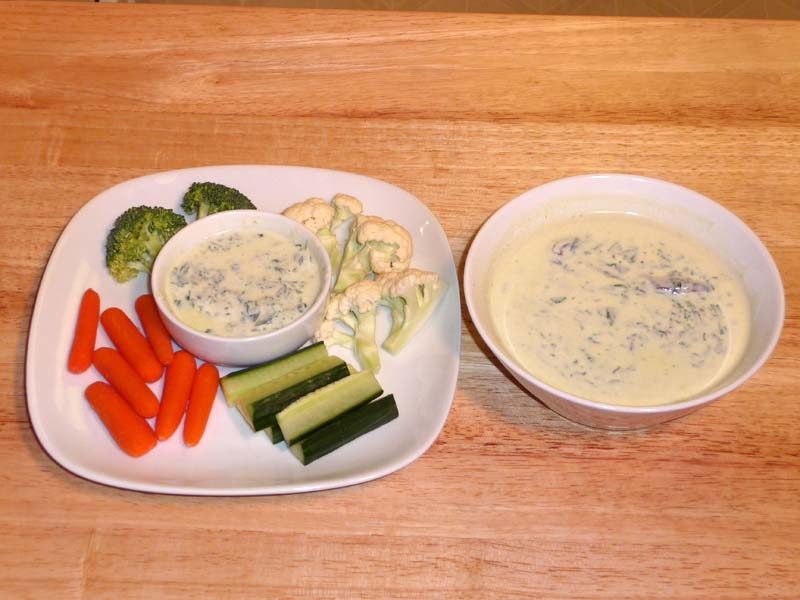
Category: Appetizers

Indian Vegetarian Appetizers: A Delightful Start to Any Meal

When it comes to starting a meal on a high note, Indian vegetarian appetizers offer a delightful and diverse range of options. These veg appetizers Indian style are not only delicious but also reflect the rich culinary heritage of India. From spicy and tangy to savory and crispy, there’s something for everyone to enjoy. Let’s dive into some of the most popular Indian veg appetizers that you can easily prepare at home.

Popular Vegetarian Appetizers

Samosa

The samosa is perhaps the most iconic Indian vegetarian appetizer. These deep-fried pastries are filled with a spiced mixture of potatoes and peas, offering a perfect blend of flavors and textures. Whether served with chutneys or as part of a larger meal, samosas are a favorite among all age groups. This veg appetizer Indian is also a great popular party recipe for any occasion. Additionally, samosas can be included in lunch box suggestions for a delightful midday meal. For those who love the tangy and spicy flavors, explore easy chat recipes that can add a delightful zing to your meal.

Pakora

Pakoras are another beloved veg appetizer Indian. These are fritters made by dipping vegetables like potatoes, or spinach in a seasoned gram flour batter and deep-frying them until golden brown. The crispiness and savory taste make pakoras a perfect snack for rainy days or festive occasions. Pakora is a vegetarian recipe that can also be enjoyed as part of a healthy Indian recipe collection if baked instead of fried. Furthermore, pakoras can be a highlight in indian street food recipes, capturing the essence of Indian street food culture. For those looking for quick and easy bites, these pakoras can also be included in the Indian snacks category.

Aloo Tikki

Aloo Tikki is a popular street food that also doubles as a great appetizer. These are patties made from boiled potatoes, spices, and herbs, shallow-fried to perfection. Often served with chutneys and yogurt, aloo tikki can be a hit at any gathering. It’s also a versatile dish that fits well in lunch box suggestions. For a twist, you can explore fusion recipes, combining aloo tikki with other cuisines to create unique flavors. For instance, making aloo tikki burgers or spring rolls can surprise your guests with innovative dishes. Aloo tikki can also be part of your healthy Indian snacks collection by altering the cooking method.

Paneer Tikka

For those who love paneer, Paneer Tikka is the ultimate Indian vegetarian appetizer. Cubes of paneer are marinated in a mixture of yogurt and spices, then grilled or baked until they acquire a smoky flavor. This appetizer is not only delicious but also packed with protein, making it an excellent choice for a high protein diet. Paneer Tikka also fits well in indian food recipes, as it’s perfect for grilling during outdoor gatherings. If you enjoy experimenting with flavors, trying fusion paneer tikka tacos can be an exciting culinary adventure. Including paneer tikka in your popular party recipe list is sure to impress guests.

Dhokla

Hailing from the western state of Gujarat, Dhokla is a steamed cake made from fermented rice and chickpea batter. Light and fluffy, this best Indian appetizer is typically garnished with mustard seeds, curry leaves, and grated coconut, offering a unique taste experience. It’s also a fantastic option for those looking for gluten-free recipes. Additionally, dhokla can be considered one of the healthy recipes due to its steamed preparation method and nutritious ingredients. It also works well as a snack, providing a quick and satisfying bite. Dhokla is a versatile dish that can be enjoyed in various forms, such as adding it to a lunch box or serving it at a party.

Enhance Your Appetizer Experience

To enhance your appetizer experience, it’s beneficial to explore related categories that complement these delightful flavors of Indian appetizers vegetarian. For example, chaat recipes can bring tangy and spicy elements to your meal, while Indian snacks provide quick and easy options that are perfect for any time of the day. If you enjoy experimenting with flavors, the fusion category offers innovative recipes that blend Indian flavors with other cuisines. Embrace the vibrant taste of India’s street food culture with street food recipes, and opt for lighter versions of your favorite appetizers with healthy recipes

For those with dietary restrictions, gluten-free options like dhokla are both delicious and nutritious. Including high protein appetizers like paneer tikka in your meal plan can help you meet your nutritional needs while enjoying tasty food. Many Indian appetizers, such as samosas and aloo tikki, are great additions to lunch boxes, ensuring a satisfying meal on the go. Hosting a party? The popular party recipe category is filled with crowd-pleasing appetizers that are sure to impress your guests. During the warmer months, grilled appetizers from the summer recipes category are a hit, while during the colder months, warming appetizers from the winter recipes category provide comfort and satisfaction.

Conclusion

Indian vegetarian appetizers are more than just starters; they are a celebration of flavors and culinary traditions. Whether you’re hosting a party or simply want to enjoy a tasty snack, these veg appetizers Indian style will never disappoint. So, gather your ingredients and try out these Indian appetizers today. And don’t forget to find vegetarian recipes related categories for more delightful recipes from Manjula’s Kitchen!

By incorporating these appetizers into your culinary repertoire, you’ll be able to enjoy a wide variety of delicious and nutritious dishes. Whether you’re looking for a quick snack, a healthy option, or a popular party recipe, there’s an Indian appetizer vegetarian to suit every occasion. Happy cooking!

Frequently Asked Questions (FAQs)

Q: What are some popular Indian vegetarian appetizers?

A: Some popular Indian vegetarian appetizers include Samosas, Pakoras, Aloo Tikki, Paneer Tikka, and Dhokla.

Q: What are the benefits of including Indian appetizers in my meal plan?

A: Including Indian appetizers vegetarian in your meal plan adds variety, flavor, and nutritional benefits. These appetizers are often rich in spices and ingredients that offer numerous health benefits.

Q: Can these appetizers be made healthier?

A: Yes, many Indian veg appetizers can be made healthier by baking instead of frying, using less oil, and incorporating more vegetables. For example, you can bake pakoras or use low-fat paneer for paneer tikka.

Q: Are there any gluten-free Indian appetizers?

A: Yes, there are several gluten-free Indian appetizers, such as Dhokla and some versions of pakoras made with gram flour. These options are great for those with gluten sensitivities.

Q: How can I incorporate these appetizers into a party menu?

A: These veg appetizers Indian style are perfect for any party menu. Serve them with a variety of chutneys and dips, include some Indian snacks, and finish with a selection of Indian desserts for a complete festive spread.

  • Spinach Raita

    Spinach Raita

    Spinach raita is a refreshing yogurt-based dish made with spiced spinach and yogurt. By adjusting its thickness, you can also serve spinach raita as a sandwich spread or as a dip for fresh veggies. Spinach raita tastes delicious any way you serve it.

    Ingredients:

    • 2 cups chopped spinach, stems removed
    • 1 teaspoon oil
    • 1/2  teaspoon cumin seeds (jeera)
    • Pinch of asafetida (hing)
    • 2 whole red chili
    • 1/2  teaspoon black pepper
    • 1/2 teaspoon salt (adjust to taste)
    • 1 1/2  cup yogurt

    Method:

    1. Heat the oil in a saucepan on medium high heat. Test the heat by adding one cumin seed to the oil; if seed cracks right away, oil is ready.

    2. Add the asafetida and cumin seeds. After the cumin seeds crack, add red chilies stir-fry for few seconds.

    3. Add spinach, salt, and black pepper and stir-fry, pressing the spinach down to allow most of the water to evaporate but still leaving the spinach moist.

    4. After the spinach cools off, mix it well into the yogurt.

    5. Add milk to the raita about half a cup adjust to the desire consistency.

    6. For best result serve chill.

    Tips:

    Frozen chopped spinach can be used instead of fresh spinach.

    Variations:

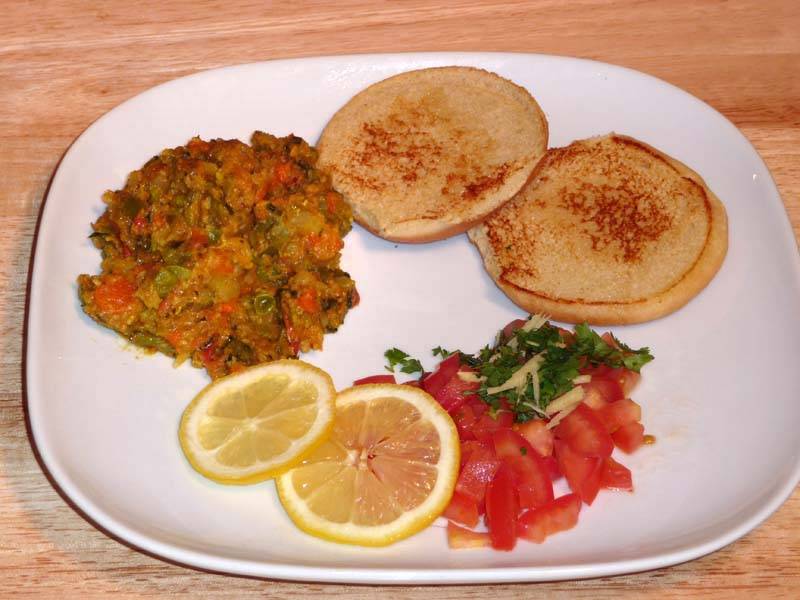
    1. Spinach raita also can be served as a spread with bread or crackers keep the consistency thick do not need to add any milk.
    2. To serve as a dip add about ¼ cup of milk but keep thicker then raita.

    Serving suggestion:

    Serve over plain rice or as a side dish with any meal.

    Raita
    Indian

    How to Make Palak Raita – Manjula’s Kitchen 

    What is Raita: Raita is an accompaniment for any Indian meal and can be created in the form of Vegetable Raita, Spinach Raita, Boondi ka Raita, Cucumber Raita & Lauki ka Raita. Here we are focussing on making palak ka raita or spinach raita, it’s a simple quick & easy, gluten free, kid friendly and nutritious yogurt-based recipe featuring palak or spinach and a selection of Indian spice powders. 

    1. Heating Oil and Infusing Flavours: Initiating Palak Raita Preparation 

    Begin the palatable journey of creating Palak Raita by heating oil in a saucepan over medium-high heat. A simple test, featuring the crackling of a cumin seed, confirms the readiness of the oil for the culinary symphony about to unfold. With the aromatic base established, infuse the oil with the distinctive essence of asafetida and cumin seeds. As the cumin seeds crackle, introduce red chilies, stirring the mix for a tantalizing burst of flavour that sets the stage for the vibrant palak raita.

    1. Sautéing Spinach with Seasonings: Crafting the Palak Raita Base

    Add the star ingredient, spinach, to the fragrant mix, along with a dash of salt and black pepper. Engage in a thorough stir-fry, applying gentle pressure to the spinach, coaxing it to release its moisture. The objective is to strike a balance, allowing most of the water to evaporate while retaining the spinach’s inherent moisture. This meticulous step forms the foundation of the palak raita, infusing it with the earthy essence of spinach.

    1. Blending Spinach with Yogurt and Milk: Achieving Palak Raita Consistency 

    Once the sautéed spinach cools off, seamlessly integrate it into the waiting yogurt. This integration creates a symphony of textures and flavours, transforming the yogurt into the creamy canvas for the palak raita. To achieve the desired consistency, introduce milk gradually, adjusting until reaching the perfect balance. This harmonious blend of yogurt and milk ensures a palak raita that is not only flavorful but also luxuriously creamy.

    1. Chilling for Optimal Enjoyment: Perfecting the Palak Raita Experience 

    For optimal results, serve the palak raita chilled. This step enhances the overall sensory experience, allowing the flavours to meld and intensify. The coolness complements the earthy spinach and the tanginess of the yogurt, resulting in a refreshing and delightful palak raita that is sure to tantalize the taste buds.

    1. Tips and Variations: Enhancing the Palak Raita Recipe 

    Consider using frozen chopped spinach as a convenient alternative to fresh spinach. Additionally, palak raita transforms into a versatile spread when served with bread or crackers, maintaining a thick consistency without the need for additional milk. For a dip, add approximately ¼ cup of milk, ensuring a thicker texture than traditional raita. These variations allow palak raita to shine in diverse culinary roles, catering to a spectrum of taste preferences.

    1. Serving Suggestions: Palak Raita as a Versatile Accompaniment 

    Experience the versatility of Palak Raita by serving it over plain rice or as a side dish accompanying any meal. Its dynamic flavours and creamy texture make it a perfect accompaniment to a variety of dishes, contributing a touch of freshness and vibrancy to the overall dining experience.

  • Pav Bhaji

    Pav Bhaji

    Pav Bhaji is a favorite fast food dish in India. Pav is buns and bhaji is the mixed spicy vegetables. This is a very popular street food with roadside vendors.

    Ingredients:

    • 2 medium potatoes, peeled and diced
    • 1 cups chopped cauliflower
    • 1/2  cup chopped green beans
    • 1/2  cup peas
    • 1/2  cup chopped carrots
    • 3 tablespoons oil
    • 3 tablespoons butter
    • 2 green chilies chopped
    • 2 tablespoon finely sliced ginger
    • 3 medium chopped tomatoes
    • 1/2  teaspoon red chili
    • 1/2  teaspoon turmeric
    • 1 tablespoon fennel seed powder (saunf)
    • 2 teaspoon salt (adjust to taste)
    • 1 teaspoon garam masala
    • 1 tablespoon lemon juice (adjust to taste)
    • 1/4  cup chopped cilantro (hara dhania)
    • 6  bread buns

    for Garnish:

    • 1 medium chopped tomatoes 
    • Few pieces of thinly sliced lemon

    Method

    1. Boil all the vegetables potatoes, cauliflower, beans, peas, and beans in about 1 ½ cup of water. Don't add too much water, just enough to cook.

    2. After the vegetables are soft and tender, drain the excess water and mash them coarsely with a fork or potato masher.

    3. Heat the oil in a frying pan over medium heat.

    4. Add tomatoes, green chilies, cilantro, and ginger and sauté for 2-3 minutes until pasty.

    5. Next add the red chili powder, fennel seed and turmeric, mix it well.

    6. Add mashed vegetables.

    7. Using a spatula, simultaneously mash and stir all the vegetables for 5 minutes.Using a spatula, simultaneously mash and stir all the vegetables for 5 minutes.

    8. Add salt and two tablespoons of ghee, stir-fry for another minute.

    9. Add about ¼ cup of water or as needed, and let it cook for a minute.

    10. Turn off the heat.

    11. Add garam masala, and lemon juice, mix it well

    12. Toast the halves bun over a skillet using butter over medium heat until buns are golden brown from both sides.

    13. Serve toasted buns with bhaji (mixed vegetables), garnish with chopped tomatoes and sliced lemon.

    Variations:

    1. You can use almost any vegetables to make the bhaji, but keep the potato base. You can also try vegetables such as cabbage, bell pepper, and eggplant.
    2. If you don’t eat potatoes, use green bananas for the base.
    3. For vegan replace the butter with oil.
    sandwiches
    Indian

  • Asparagus With Ginger

    Asparagus Ginger Stir Fry: A Flavorful Delight

    Asparagus Ginger is a flavorful appetizer that caters to various dietary needs, including being suitable for those who are diabetic, gluten-free, and seeking low-cholesterol and low-fat options. Additionally, it’s a vegan dish featuring fresh asparagus delicately sautéed with aromatic ginger, highlighting the natural flavors of the vegetables without added fats. 

    In this recipe, we combine the vibrant flavors of asparagus and ginger to create a delightful stir-fry dish that is both nutritious and delicious. Asparagus, with its tender spears, brings a unique earthy flavor, while ginger adds a refreshing zing, making this dish a perfect addition to any meal.

    Step 1: Preparing the Ingredients

    To begin, gather all the necessary ingredients for this asparagus ginger recipe. You will need fresh asparagus, ginger, oil, salt, and pepper. Wash the asparagus thoroughly and trim off the tough ends. Peel and finely chop the ginger, ensuring you have enough to infuse the dish with its aromatic flavor.

    Step 2: Sautéing the Asparagus and Ginger

    In a skillet or wok, heat some oil over medium-high heat. Add the chopped ginger to the hot oil and sauté for a minute or two until it becomes fragrant. The aroma of the ginger asparagus combination will start to fill your kitchen, enticing your senses and preparing you for the delightful dish to come.

    Step 3: Adding the Asparagus

    Once the ginger is aromatic, add the trimmed asparagus spears to the skillet. Stir-fry the asparagus and ginger together, ensuring that the spears are coated evenly with the ginger-infused oil. Season with salt and pepper to taste, enhancing the natural flavors of the dish.

    Step 4: Cooking to Perfection

    Continue to stir-fry the asparagus ginger stir-fry over medium-high heat until the asparagus is tender yet still crisp, typically for about 5-7 minutes. Be mindful not to overcook the asparagus, as you want to preserve its vibrant green color and crisp texture, providing a satisfying crunch with every bite.

    Step 5: Serving and Enjoying

    Once the asparagus and ginger are cooked to perfection, transfer the stir-fry to a serving dish and garnish with some freshly chopped cilantro or sesame seeds for an added touch of flavor and visual appeal. Serve hot alongside your favorite main course or enjoy it as a standalone dish.

    Tips for Success

    • For an extra burst of flavor, you can add minced garlic along with the ginger.
    • Feel free to incorporate other vegetables such as bell peppers or snap peas for added color and variety.
    • Adjust the seasoning according to your taste preferences, adding more ginger for a stronger flavor or a dash of soy sauce for added depth.

    Variations to Explore

    • For a spicy kick, sprinkle some red pepper flakes or drizzle with chili oil before serving.
    • Experiment with different cooking methods such as grilling or roasting the asparagus for a change in texture and flavor.

    Benefits of Asparagus and Ginger

    Asparagus is a nutrient-dense vegetable rich in vitamins A, C, and K, as well as folate and fiber. It supports digestive health, aids in weight loss, and is packed with antioxidants that promote overall well-being. Ginger, on the other hand, is renowned for its anti-inflammatory and immune-boosting properties. It aids in digestion, relieves nausea, and may even help alleviate muscle pain and soreness.

    FAQs (Frequently Asked Questions)

    Q: Can I use frozen asparagus for this recipe?

    A: While fresh asparagus is preferable for its flavor and texture, you can certainly use frozen asparagus if that’s what you have on hand. Just be sure to thaw it thoroughly before cooking and adjust the cooking time accordingly.

    Q: How do I store leftover asparagus ginger stir-fry?

    A: Store any leftovers in an airtight container in the refrigerator for up to 2-3 days. Reheat gently in the microwave or on the stovetop until heated through before serving.

    Q: Can I make this dish ahead of time?

    A: While this dish is best enjoyed fresh, you can prepare the ingredients ahead of time and stir-fry them just before serving to retain the optimal texture and flavor.

    More Recipes to Explore (H2)

    If you enjoyed making these masala peanuts, why not try your hand at some other mouthwatering recipes from Manjula’s Kitchen?

    Explore these recipes and more for a culinary journey through the vibrant and diverse flavors of Indian cuisine.

  • Spicy Sweet Potatoes

    Sweet and Spicy Potatoes Recipe: A Flavorful Delight

    For Ganesh Chaturthi celebrations, serve up Spicy Sweet Potatoes as appetizers that cater to everyone’s dietary needs, being both gluten-free, low-fat, and vegan-friendly. Indulge in the tantalizing blend of flavors with this exquisite spicy sweet potato recipe. These sweet and spicy potatoes are a delightful treat for your taste buds, offering a perfect balance of heat and sweetness. Let’s delve into how to make these delectable spicy sweet potatoes that will surely become a favorite in your culinary repertoire.

    How to Make Spicy Sweet Potato: A Step-by-Step Guide

    Step 1: Preparing the Sweet Potatoes

    Begin by preheating your oven to 400°F (200°C). Wash and scrub sweet potatoes thoroughly under running water to remove any dirt or debris. Pat them dry with a clean kitchen towel.

    Step 2: Cutting and Seasoning

    Cut the sweet potatoes into uniform cubes or wedges, ensuring even cooking. In a large mixing bowl, toss the sweet potato pieces with olive oil, salt, black pepper, and your preferred spices. You can experiment with spices like cayenne pepper, paprika, chilli powder, or a blend of your favorite seasonings to achieve the desired level of heat and flavor.

    Step 3: Roasting the Sweet Potatoes

    Spread the seasoned sweet potato pieces in a single layer on a baking sheet lined with parchment paper. Place the baking sheet in the preheated oven and roast for 25-30 minutes, or until the sweet potatoes are tender and lightly browned, flipping halfway through the cooking time for even caramelization.

    Step 4: Adding the Sweet and Spicy Glaze

    While the sweet potatoes are roasting, prepare the sweet and spicy glaze. In a small saucepan, combine honey, sriracha sauce, and a dash of soy sauce or lime juice for a tangy twist. Heat the mixture over low heat, stirring continuously until well combined and slightly thickened.

    Step 5: Glazing the Roasted Sweet Potatoes

    Once the sweet potatoes are cooked to perfection, remove them from the oven and transfer them to a serving dish. Drizzle the prepared sweet and spicy glaze generously over the roasted sweet potatoes, ensuring each piece is coated evenly.

    Step 6: Serving Suggestions

    Garnish the spicy sweet potatoes with freshly chopped cilantro for a burst of freshness and color. Serve hot as a delightful side dish alongside your favorite main course or as a standalone snack for a flavorful indulgence.

    Variations to Enhance Your Sweet and Spicy Potatoes

    • Cheesy Twist: Sprinkle grated Parmesan or cheddar cheese over the roasted sweet potatoes before adding the sweet and spicy glaze for an irresistible cheesy flavor.
    • Herb Infusion: Experiment with fresh herbs like rosemary, thyme, or cilantro to add a fragrant herbal aroma to your spicy sweet potatoes.
    • Nutty Crunch: Toss in some toasted nuts such as pecans or almonds for a delightful crunch and added nutrition.

    Benefits of Spicy Sweet Potatoes

    • Nutrient-Rich: Sweet potatoes are packed with essential vitamins and minerals, including vitamin A, vitamin C, potassium, and fibre, making them a nutritious choice for a balanced diet.
    • Antioxidant Properties: The vibrant orange hue of sweet potatoes signifies their high antioxidant content, which helps combat oxidative stress and inflammation in the body.
    • Digestive Health: The fibre present in sweet potatoes promotes healthy digestion and may aid in regulating blood sugar levels, making them suitable for individuals with diabetes or those looking to manage their weight.

    FAQs (Frequently Asked Questions)

    Q: Can I adjust the spiciness level of the dish?

    A: Absolutely! Feel free to adjust the amount of sriracha sauce or chilli powder according to your preference for heat. You can also omit the spicy elements altogether if you prefer a milder flavor profile.

    Q: Can I make this recipe ahead of time?

    A: While these sweet and spicy potatoes are best enjoyed fresh out of the oven, you can prepare the roasted sweet potatoes in advance and reheat them in the oven before serving. However, it’s recommended to prepare the sweet and spicy glaze just before serving for optimal flavor.

    Q: Are there any alternative sweeteners I can use instead of honey?

    A: Yes, you can substitute honey with maple syrup, agave nectar, or brown sugar for a vegan-friendly option. Adjust the quantity according to your desired level of sweetness.

    Explore More Delectable Recipes

    For more mouthwatering recipes and culinary inspiration, explore the following links from Manjula’s Kitchen:

    Crispy Spinach Pakoras, Vegetable Biryani, Paneer Tikka Masala, Vegetable Pakoras Recipe, Baingan Bharta (Roasted Eggplant) Recipe & Matar (Green Peas) Paneer Recipe

    Dive into the world of authentic Indian cuisine and elevate your cooking skills with these delightful recipes.

  • Masala Peanuts

    Peanut Masala Recipe: A Spicy Delight

    Masala Peanuts are delightful appetizers perfect for holidays and festivals, offering a crunchy, gluten-free snack option that satisfies both vegan and non-vegan palates alike. Peanut masala recipe is a beloved snack across India, offering a delightful combination of crunchy peanuts and aromatic spices. This masala peanuts recipe is a favorite among snack enthusiasts for its bold flavors and addictive crunch. Whether you’re hosting a gathering or simply craving a savory treat, learning how to make masala peanuts recipe at home is both rewarding and satisfying.

    How to Make Masala Peanuts Recipe: Step-by-Step Guide

    Step 1: Prepare the Peanuts

    Start by selecting fresh, raw peanuts for the best results. Rinse them thoroughly under cold water to remove any dirt or debris. Then, pat them dry using a clean kitchen towel or paper towels.

    Step 2: Dry Roast the Peanuts

    Heat a non-stick pan over medium heat. Once the pan is hot, add the peanuts in a single layer. Dry roast them, stirring occasionally, until they turn golden brown and emit a nutty aroma. This process typically takes about 8 to 10 minutes. Keep a close eye on them to prevent burning.

    Step 3: Prepare the Spice Mixture

    While the peanuts are roasting, prepare the spice mixture. In a small bowl, combine masala peanuts recipe spices such as red chili powder, turmeric powder, cumin powder, chaat masala, and salt according to your taste preferences. Adjust the spice levels to suit your palate.

    Step 4: Coat the Peanuts with Spices

    Once the peanuts are roasted to perfection, transfer them to a large mixing bowl. While they are still warm, sprinkle the prepared spice mixture over the peanuts. Toss them gently to ensure that each peanut is evenly coated with the spices. Allow the peanuts to cool completely before serving.

    Step 5: Serve and Enjoy

    Your homemade masala peanuts are now ready to be enjoyed! Serve them as a standalone snack or pair them with your favorite beverages. Store any leftovers in an airtight container to maintain their freshness and crunchiness.

    Tips for Making Perfect Masala Peanuts

    • Experiment with different spice blends to customize the flavor according to your preferences. 
    • You can add ingredients like amchur powder for tanginess or garam masala for extra warmth.
    • For an extra layer of flavor, consider adding roasted garlic or curry leaves to the spice mixture.
    • Make sure to roast the peanuts evenly to achieve a uniform golden brown color and prevent any burnt spots.
    • Allow the peanuts to cool completely before storing them to maintain their crispiness.

    Variations of Masala Peanuts

    Sweet and Spicy: Add a touch of sweetness to your masala peanuts by incorporating a bit of powdered sugar or jaggery along with the spices.

    Herb Infused: Experiment with fresh herbs like cilantro, mint, or curry leaves to add a refreshing twist to your masala peanuts.

    Nutty Crunch: Enhance the texture of your masala peanuts by tossing them with a handful of toasted cashews, almonds, or pistachios.

    Benefits of Masala Peanuts

    Rich in Protein: Peanuts are an excellent source of plant-based protein, making masala peanuts a nutritious snack option.

    Good Source of Healthy Fats: Peanuts are high in monounsaturated fats, which are beneficial for heart health when consumed in moderation.

    Packed with Essential Nutrients: Peanuts are rich in essential nutrients like vitamins, minerals, and antioxidants, contributing to overall well-being.

    FAQs about Masala Peanuts

    Can I use pre-roasted peanuts for this recipe?

    While you can use pre-roasted peanuts, roasting them yourself allows you to control the level of crunchiness and ensures that they are freshly toasted.

    How long do homemade masala peanuts stay fresh?

    When stored in an airtight container at room temperature, homemade masala peanuts can stay fresh for up to two weeks. However, they are best enjoyed within the first few days to maintain their crispiness.

    Can I make masala peanuts without oil?

    Yes, you can skip the oil and dry roast the peanuts directly in a pan for a healthier alternative. However, using a small amount of oil helps the spices adhere to the peanuts more effectively.

    For more delightful Indian recipes, explore Manjula’s Kitchen, where you’ll find a treasure trove of culinary inspiration ranging from traditional dishes to modern twists on classic favorites. Be sure to check out recipes like Aloo Gobi, Palak Paneer, and Chana Masala for a taste of authentic Indian cuisine.

    If you enjoyed making these masala peanuts, why not try your hand at some other mouthwatering recipes from Manjula’s Kitchen? Vegetable Pakoras, Paneer Tikka, Aloo Gobi (Potato Cauliflower), Samosa, Mango Lassi

    Explore these recipes and more for a culinary journey through the vibrant and diverse flavors of Indian cuisine.

  • Papdi (papri) Chaat

    Recipe for Papdi Chat

    Papdi Chaat, a popular street food delicacy, combines crispy papdi with a tantalizing mix of appetizers and chaat elements, creating a flavorful explosion that delights the taste buds. Papdi chat is a delightful Indian street food snack that tantalizes the taste buds with its crispy papdis, tangy chutneys, yogurt, and assorted toppings. This papdi chat recipe promises to deliver an explosion of flavors in every bite, making it a perfect choice for parties, gatherings, or simply as a savory indulgence.

    How to Make Papdi Chat

    To create this mouthwatering delicacy, start by preparing the papdis, the essential base of the dish. Combine all-purpose flour, semolina, carom seeds, and salt in a mixing bowl. Knead the ingredients into a firm dough, adding water gradually. Roll out the dough thinly and cut it into small rounds. Prick the rounds with a fork and deep fry until golden brown and crispy. Drain excess oil and set aside.

    Next, prepare the tangy tamarind chutney by simmering tamarind pulp, dates, jaggery, and spices until thickened. Strain the mixture to remove any solids, resulting in a smooth, flavorful chutney. Similarly, whip up a refreshing mint chutney by blending mint leaves, coriander, green chilies, and yogurt into a smooth paste.

    Now, assemble the papdi chat by arranging the crispy papdis on a serving plate. Drizzle generous amounts of both chutneys over the papdis, followed by spoonfuls of beaten yogurt. Sprinkle chaat masala, roasted cumin powder, and red chili powder for an extra kick of flavor. Top it off with tomatoes, and fresh coriander leaves.

    Serve the papdi chat immediately, allowing everyone to enjoy the perfect blend of textures and tastes.

    Tips for Making Papdi Chat

    Crispy Papdis: Ensure the papdis are rolled out thinly and fried until crisp to achieve the perfect texture.

    Chutney Consistency: Adjust the consistency of the chutneys by adding water gradually while cooking to achieve the desired thickness.

    Topping Variation: Experiment with different toppings such as boiled potatoes, chickpeas, or sev to add more depth to the flavor profile.

    Spice Level: Adjust the amount of green chilies and red chili powder according to your preference for spice.

    Variations of Papdi Chat

    Dahi Papdi Chat: For a creamier variation, substitute beaten yogurt with thick, creamy yogurt or hung curd.

    Healthy Twist: Replace fried papdis with baked or air-fried versions for a healthier alternative.

    Fusion Flavors: Experiment with fusion flavors by incorporating ingredients like avocado, salsa, or shredded cheese for a unique twist on the traditional recipe.

    Benefits of Papdi Chat

    Rich in Flavors: Papdi chat combines a variety of flavors, textures, and spices, making it a truly indulgent treat for the taste buds.

    Nutrient-Rich Ingredients: Ingredients like yogurt, chickpeas, and fresh vegetables provide essential nutrients like protein, fiber, vitamins, and minerals.

    Cultural Experience: Enjoying papdi chat offers a cultural experience, allowing you to savor the vibrant street food culture of India.

    FAQs (Frequently Asked Questions)

    Q: Can I prepare the papdis ahead of time?

    A: Yes, you can prepare the papdis in advance and store them in an airtight container once cooled to maintain their crispiness.

    Q: Can I make the chutneys ahead of time?

    A: Absolutely, both tamarind and mint chutneys can be prepared in advance and stored in the refrigerator for several days.

    Q: Can I make papdi chat without yogurt?

    A: Yes, you can omit yogurt or use a dairy-free alternative like coconut yogurt for a vegan version of the dish.

    Papdi chat is a versatile and beloved snack that never fails to impress with its burst of flavors and textures. Whether enjoyed as an appetizer, a snack, or a light meal, this recipe promises to be a crowd-pleaser at any gathering or occasion. So, gather your ingredients and embark on a culinary journey to recreate this iconic Indian street food delight in your own kitchen!

    Other Recipes on Manjula’s Kitchen

    If you’re looking to explore more Indian recipes, appetizers, beverages, and desserts, be sure to check out the following links on Manjula’s Kitchen. Here are some links to recipes on Manjula’s Kitchen official website: Rasgulla, Gobi (Cauliflower) Manchurian, Aloo Tikki (Potato Patties), Malai Kofta, Palak (Spinach) Paneer

  • Dahi Vada

    Dahi Vada

    Dahi Vadas are lentil dumplings dipped in yogurt and topped with spicy savory tamarind chutney. These are great as a side dish for a formal dinner, appetizer or served as a chaat.

    For Vada

    • 3/4 cup washed Moong dal
    • 1/4 cup washed Urad dal

    For Garnish

    • 1-1/2 cupa yogurt (curd, dahi)
    • 1 tsp salt
    • 1/2 tsp red chili powder
    • 1/2 tsp roasted cumin seed powder (bhuna jeera)
    • 3 tbsp tamarind chutney
    1. Mix both dals and wash several times until the water appears clear. Soak dal in 4 cups of water for at least six hours. Drain the water. In a blender, blend the dal to very creamy texture. Use only as little water as needed to blend. Using too much water for blending will not give the desired creamy texture. 

    2. Whip the dal batter, stirring with a spoon in a circular motion two to three minutes, until batter is light and fluffy. Add a few spoonfuls of water as needed.
    3. Cover the bottom of a flat frying pan with ½-inch of oil and heat over medium high heat. Test the oil by dropping a little batter into it. When the oil sizzles, it is ready.
    4. Place one tablespoon of batter into the oil. The oil should not be deep enough to cover the batter; the vadas will be softer if they are shallow-fried. The vadas will begin to expand slowly, without changing color.
    5. Fry the vadas in small batches, until golden all around.
    6. After you have made all of the vadas, place them in lukewarm water and soak for about 20 minutes. Squeeze the vadas gently to remove the water, being careful not to break the vadas. Set aside.
    7. Whip the yogurt until smooth. Add a little milk as needed to make the consistency similar to pancake batter or lassi. Add about one teaspoon salt, to taste. 

    8. Soak vadas in the yogurt batter for at least half an hour, giving the vadas time to absorb the yogurt.
    9. Slowly pick up each vada and transfer to a serving dish. Pour a few more spoons yogurt over the Vadas.
    10. Just before serving, sprinkle some salt as needed, ground roasted cumin seeds, red chile powder, and finish off with a drizzle of tamarind chutney.

    Variations:

    Change the proportion of dals, or use only urad dal.

    As an alternative, you can add chopped green chilies and crushed coriander seeds to the dal batter just before frying.

    Instead of serving with tamarind chutney, you can sprinkle chopped cilantro over the dahi vadas.

    You can also make the vadas very small and serve as a Raita dish.

    If you are vegan, you can soak the vadas in tamarind chutney instead of yogurt and sprinkle some chopped cilantro or chopped mint leaves.

    Suggestions:

    You can make the dahi vadas in advance and freeze them before soaking in water. When ready to use, soak as many as needed in hot water for about half an hour, then change the water to room temperature and soak for another ten minutes. Now proceed according to the recipe.

    Appetizer
    Indian
    Dahi Pakora, Dahi Vada Chaat, Dal Dumpling

  • Bread Pakoras

    Bread Pakoras

    Spicy Bread Pakoras are great as an appetizer, finger food for any gathering, and a tasty compliment to your afternoon tea.

    • 4 slices white firm bread
    • 1 cup besan (gram flour)
    • 1 tbsp rice flour
    • 1 tsp salt
    • 1/8 tsp asafetida (hing)
    • 1 tsp cumin seeds (jeera)
    • 2 tbsp green finely chopped
    • 1/4 cup cilantro finely chopped (hara dhania)
    • 1/2 cup water little more or less use as needed
    1. Remove the crust from all sides of the bread. Slice the bread lengthwise into 3 equal parts.

    2. Mix all the dry ingredients together: Gram flour (besan), rice flour, asafetida, cumin seeds, and salt. Rice flour adds to the crispness. Add the water slowly to make a smooth batter. (Batter should be the consistency of pancake batter or dosa batter)

    3. Next, add the green chilies and cilantro. Mix well.
    4. Heat the oil in a frying pan on medium high heat. Frying pan should have at least 1 inch of oil. To check if the oil is ready, put one drop of batter in the oil. The batter should come up but not change color right away.

    5. Dip the bread slices in the batter one at a time and slowly drop into the frying pan. Fry the Pakoras in small batches. The pakoras will take about 4 to 5 minutes to cook.

    6. Turn them occasionally. Fry the Pakoras until both sides are golden-brown. Repeat this process. The crispy, delicious Bread Pakoras are ready to serve.

    Tips:

    If oil is too hot Pakoras will cook too fast and will not be crispy; if oil is not hot enough Pakoras will be greasy. You may have to adjust the heat as needed while cooking.

    Variations:

    Use 1/4 cup of chopped spinach or 2 tablespoons of chopped fenugreek leaves as a substitute for the chopped cilantro.

    Serving suggestions:

    The bread pakoras are best when dipped with a fresh cilantro chutney or 

    Pakoras taste best when they are served hot.

    Pakoras can be made one day in advance do not refrigerate. When ready to eat, place on a cookie sheet and heat in the preheated oven on 300 degrees.

    Appetizer
    Indian
    Crispy Pakora, Kid Friendly, Spicy Fritters, Tea Time Snack, Vegan

  • Samosa

    Part 1:

    Part 2:

    Samosa, Aloo Samosa, Street Food

    Samosa is probably the most popular Indian snack. Fried puffed pastry filled with spicy potatoes and green peas. No one can resist samosas, a mouthwatering snack. Samosas can be served any time and for any occasion. This recipe is for traditional north Indian Samosa.

    Dough

    • 1/2 cup all purpose flour (plain flour, maida)
    • 1/2 tbsp sooji (samolina)
    • 1/4 tsp salt
    • 1-1/2 tbsp oil (canola or vegetable)
    • 3 tbsp lukewarm water use as needed

    For the Filling:

    • 3 boiled potatoes, peeled and chopped into very small cubes
    • 1/2 tsp cumin seeds (jeera)
    • 1 tbsp chopped green chilies
    • 1 tsp coriander powder (dhania)
    • 1/4 tsp garam masala
    • 1 tsp mangopowder (amchoor)
    • 1 tsp salt
    • 2 tbsp oil (canola or vegetable)
    • 1/2 cup green peas (I am using frozen peas)

    Need oil to fry

    Making the Dough:

    1. Mix the flour, sooji, salt, oil and salt together to make a soft dough (add more water as needed). knead the dough for about 1 to 2 minutes to make the dough smooth and pliable. Set the dough aside and cover it with damp cloth. Let the dough sit for at least 15 minutes.

    Making the Filling:

    1. Heat the oil in a frying pan on medium high heat. Test the heat by adding one cumin seed to the oil; if it cracks right away oil is ready. Add cumin seeds as cumin seeds crack, add green chilies, coriander powder and stir for few seconds. Next add green peas and turn heat to medium and stir until tender. Add the potatoes and stir-fry for about 4 minutes. Stir in garam masala and amchur. Add more salt or amchur according to taste.

    2. Let the filling cool to room temperature.

    Making Samosa:

    1. Take 2 tablespoons of water and 1 tablespoon of all-purpose flour to make a paste and keep aside.

    2. Knead the dough for a minute. Divide the dough into 4 equal parts and make into balls. Roll each ball into 6-inch diameter circles and cut each circle in half.

    3. Spread the paste lightly all along the edge of one semicircle. Pick this semicircle up with both hands and fold it into a cone shape. Pinch the side of this cone so that it is completely sealed.
    4. Fill the cone with 3 tablespoons of filling. Press this filling down with your fingers. Now close the top of this cone into a triangle shape, pinching the top edge so that it is completely sealed. Continue filling the rest of the samosas.

    5. Heat about 1 inch of the oil in a frying pan on medium heat. To check if oil is hot enough place a small piece of dough in oil and dough should sizzle and come to the surface slowly.

    6. Place the samosas in the frying pan a few at a time. After samosas are floating on top of the oil turn them slowly. Fry the samosas until the samosas turn a light golden-brown color on all sides. If you use a high heat, the samosa crust will be too soft and not crispy.

    Tips:

    Boil the potatoes just until tender. Be careful not to poke the potatoes multiple times while they are cooking, as they will absorb the water. Drain immediately and keep aside until cool enough to touch.

    The dough has to be kneaded well; otherwise, the samosas will not come out as crisp.

    If the filled samosas sit for too long, they will dry. To avoid this, cover with a damp cloth.

    Suggestions:

    Samosa can be prepared ahead of time and can be freeze for a month.

    Before freezing fry them enough until samosa changes the color to very light gold brown.

    After samosas are on room temperature bag them in zip lock bags and freeze them.

    To use frozen samosas take out as many you need and fry them on medium heat.

    Appetizer
    Indian
    Aloo Samosa, Homemade Samosa, Punjabi Samosa

  • Aloo Gobi | Potato & Cauliflower

    Aloo Gobi – Potatoes With Cauliflower

    Aloo Gobi is a delicious main dish made with potatoes, cauliflower, and a great blend of spices. Aloo Gobi can be served with various breads, such as rotis, parathas, and puris.

    • 2 cups cauliflower, cut into small florets
    • 2 medium potatoes, cubed into bite sized pieces
    • 1/2 inch shredded ginger
    • 3 tsp coriander powder (dhania)
    • 1/4 tsp turmeric (haldi)
    • 1/4 tsp red chili powder
    • 3 tbsp water
    • 3 tbsp oil
    • 1/8 tsp asafetida (hing)
    • 1/2 tsp cumin seeds (jeera)
    • 2 green chilies, sliced in long pieces
    • 2 bay leaves
    • 1 tsp salt
    • 1 tsp mango powder (amchoor)
    • 2 tbsp chopped cilantro (hara dhania)

    1/4 cup water use as needed

    1. In a small bowl, mix the shredded ginger, coriander powder, cayenne pepper, turmeric, and 3 tablespoons of water to make a paste.

    2. Heat the oil in a pan. Test the heat by adding one cumin seed to the oil; if seed crack right away oil is ready. Add hing and cumin seeds to the oil after seeds crack add the bay leaves and green chilies and stir for a few seconds.
    3. Next, add the spice paste and stir for a minute until spices start leaving the oil.
    4. Add cauliflower, potatoes, 2 tablespoons of water and salt. Mix well. Cover the pan and let it cook on medium heat for about 15 to 20 minutes until the vegetables are tender. Make sure to stir gently every 3 to 4 minutes.
    5. Lastly, add the mango powder and fresh cilantro (green coriander). Mix everything and cover for a minute. Adjust the salt to your taste.

    Variations:

    Add some green peas and/or sliced red bell peppers. The red bell peppers should be added at the end of the recipe as they cook quickly.

    Tips:

    Making a paste with the spices will prevent the spices from burning.

    Serve with Paratha, Puri 

    Main Course
    Indian

Exit mobile version