Category: Spicy Indian Recipes

Best Spicy Indian Food Recipes: Delicious Vegetarian Dishes

Indian cuisine is renowned for its bold flavors and vibrant spices. For those who love a bit of heat, spicy Indian dishes offer a tantalizing culinary experience. Here, we explore some of the best spicy Indian food recipes that are not only vegetarian but also easy to prepare. Let’s dive into the world of spicy Indian food recipes that will ignite your taste buds and leave you craving for more.

Paneer Tikka

Paneer Tikka is a popular appetizer that is a perfect example of spicy Indian food recipes. Cubes of paneer (Indian cottage cheese) are marinated in a blend of yogurt and spices, including chili powder, garam masala, and turmeric. The marinated paneer is then grilled to perfection, creating a smoky, spicy flavor that is irresistible. Serve with mint chutney for an extra kick.

Spicy Vegetable Pulao

Spicy Vegetable Pulao is a fragrant rice dish that includes a medley of vegetables and a generous amount of spices. This dish is a staple in spicy Indian food recipes vegetarian, combining ingredients like green chilies, cumin, and coriander to create a dish that is both flavorful and satisfying. Pair it with a cooling cucumber raita from the Raita Recipes category to balance the heat.

Enhancing Your Spicy Indian Menu

To elevate your spicy Indian meal, consider adding some complementary dishes from other categories. Indian Snacks like spicy samosas or mirchi bajji (stuffed chili fritters) can add an exciting crunch to your meal. For dessert, indulge in Indian Desserts Recipes like gulab jamun or jalebi to provide a sweet contrast to the spice. Including Healthy Recipes like a spiced lentil soup or a tangy tamarind rasam can offer nutritious options that don’t skimp on flavor.

More Best Spicy Indian Food Recipes

Chana Madra

Chana Madra is a spicy chickpea curry that hails from the Himachal region of India. This dish features chickpeas cooked in a yogurt-based gravy, spiced with green chilies, garam masala, and cloves. It’s a fantastic addition to your collection of best spicy Indian food recipes. Serve with steamed basmati rice for a comforting meal.

Baingan Bharta

Baingan Bharta is a smoky, spicy eggplant dish that is a favorite in spicy Indian food recipes vegetarian. The eggplant is roasted until soft, then mashed and cooked with tomatoes, and a blend of spices including cumin, coriander, and chili powder. This dish pairs wonderfully with roti or naan.

Sweet and Spicy Endings

Spicy Mango Chutney

Spicy Mango Chutney is a versatile condiment that combines the sweetness of ripe mangoes with the heat of red chili powder and ginger. It’s a delicious accompaniment to any spicy meal and fits perfectly into the category of spicy Indian food recipes.

Masala Chai

For a warming, spicy beverage, Masala Chai is a perfect choice. This tea is brewed with black tea leaves and a mix of spices such as cardamom, cinnamon, ginger, and black pepper. It’s a soothing end to a spicy meal and a staple in many best spicy Indian food recipes collections.

Frequently Asked Questions (FAQs)

Q: What are some popular spicy Indian food recipes? 

A: Some popular spicy Indian food recipes include Paneer Tikka, Spicy Vegetable Pulao, Chana Madra, Baingan Bharta, Spicy Mango Chutney, and Masala Chai. These dishes are full of flavor and perfect for spice lovers.

Q: How can I make traditional Indian food recipes spicy? 

A: To make traditional Indian food recipes spicy, incorporate ingredients like green chilies, red chili powder, black pepper, and garam masala. Adjust the spice levels according to your taste preferences.

Q: What are some easy spicy Indian food recipes vegetarian? 

A: Some easy spicy Indian food recipes vegetarian include Spicy Vegetable Pulao, Baingan Bharta, and Masala Chai. These recipes are straightforward and don’t require advanced cooking skills, making them perfect for those new to spicy Indian cooking.

Q: Can I prepare spicy Indian food recipes in advance? 

A: Yes, many spicy Indian food recipes can be prepared in advance. Dishes like Paneer Tikka and Chana Madra can be marinated or cooked ahead of time and reheated before serving.

Q: What are some sweet dishes that pair well with spicy Indian food? 

A: Some sweet dishes that pair well with spicy Indian food include gulab jamun, jalebi, and Spicy Mango Chutney. These desserts provide a sweet contrast to the heat of the main dishes.

Conclusion

Spicy Indian food recipes offer a thrilling culinary adventure with their bold flavors and vibrant spices. Whether you’re looking for spicy Indian food recipes vegetarian, specific best spicy Indian food recipes, or just want to explore the fiery side of Indian cuisine, these dishes are sure to delight your taste buds. 

So, gather your ingredients, try out these recipes, and enjoy the rich and diverse world of spicy Indian cuisine. Happy cooking and happy eating!

By incorporating these dishes into your menu, you’ll be able to enjoy a wide variety of delicious and nutritious foods.

Whether you’re preparing snacks, main courses, or desserts, or find vegetarian recipes there’s a spicy Indian recipe to suit every taste. Don’t forget to check out Manjula’s Kitchen for more inspiration and culinary delights. Happy cooking and happy eating!

  • Sweet and Sour Potatoes

    Sweet and Sour Potatoes: A Flavorful Fusion | Manjula’s Kitchen

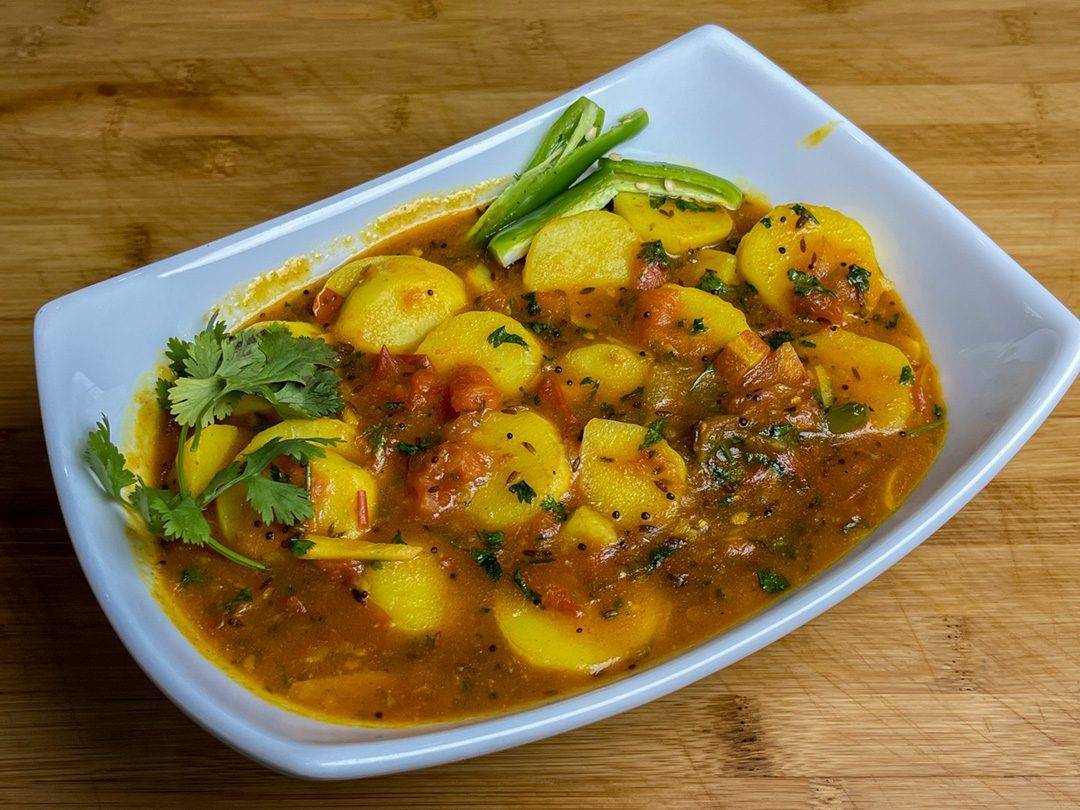
    If you’re looking to experience a delightful balance of sweet, spicy, and tangy flavors, the Sweet and Sour Potatoes recipe is just what you need. This dish, featuring tender potato slices cooked in a rich tomato-based gravy, offers an explosion of flavors in every bite. 

    The combination of sweet, sour, and spicy elements creates a unique taste profile that makes this dish stand out in the vast array of Indian cuisine. It’s a dish that not only satisfies the taste buds but also appeals to the senses with its vibrant colors and inviting aroma.

    Cultural and Traditional Importance 

    While Sweet and Sour Potatoes may not be a traditional dish deeply rooted in Indian festivals, it showcases the creativity and adaptability of Indian home cooking. The use of Ukrainian potatoes, known for their ability to hold shape while absorbing the flavorful gravy, highlights the influence of global ingredients in modern Indian cooking. 

    This dish perfectly embodies the fusion of traditional Indian spices with a global twist, making it a popular choice for those seeking something different yet familiar. Its unique flavor profile resonates with those who enjoy experimenting with food while staying true to the essence of Indian culinary traditions.

    In Indian households, the art of balancing flavors is a cherished skill, and Sweet and Sour Potatoes is a testament to that art. The sweet and tangy notes, combined with the warmth of spices, create a dish that is both comforting and exhilarating. It’s a dish that can easily become a staple in your home, whether you’re looking to impress guests with something new or simply wanting to enjoy a comforting meal with your family.

    Recipe Variations 

    Though Sweet and Sour Potatoes are unique, there are other recipes on Manjula’s Kitchen that share a similar balance of flavors and can complement this dish:

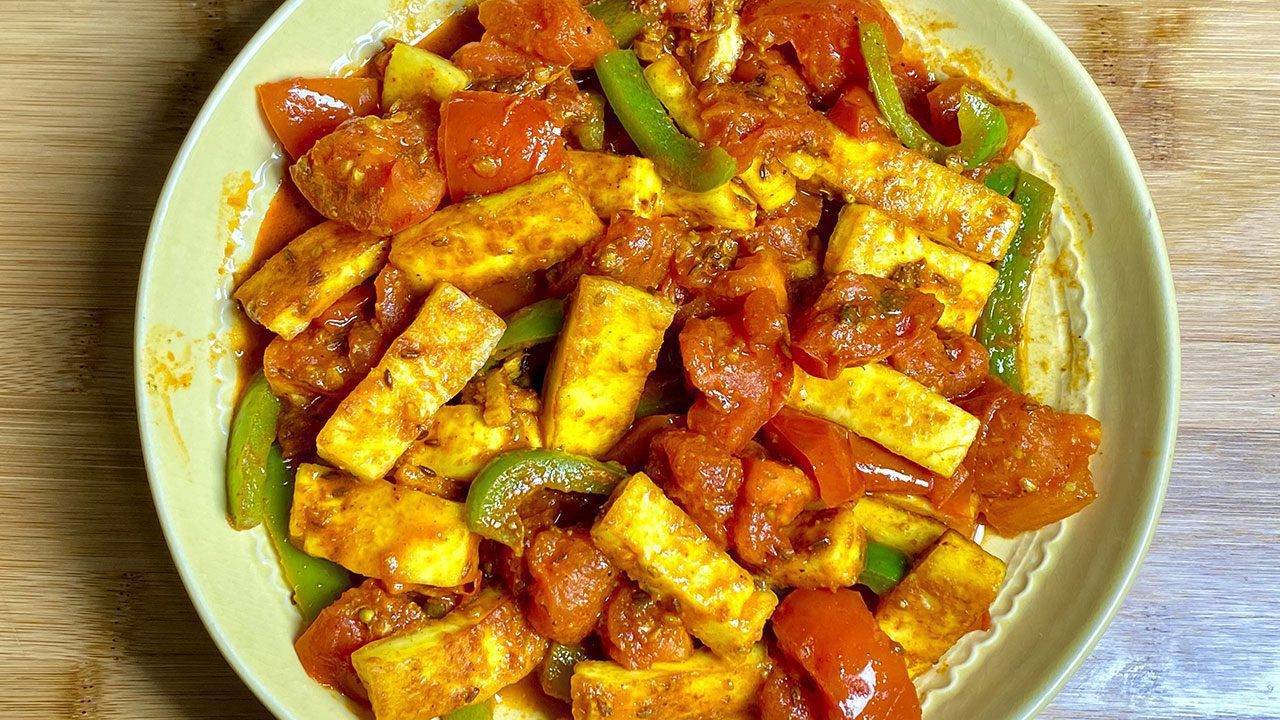
    Aloo Tamatar: A classic potato-tomato curry that offers a more traditional take on the combination of potatoes and tangy tomato gravy.

    Aloo Baingan: This dish adds eggplant to the mix, providing a different texture and taste, while still maintaining the tangy notes from the tomatoes.

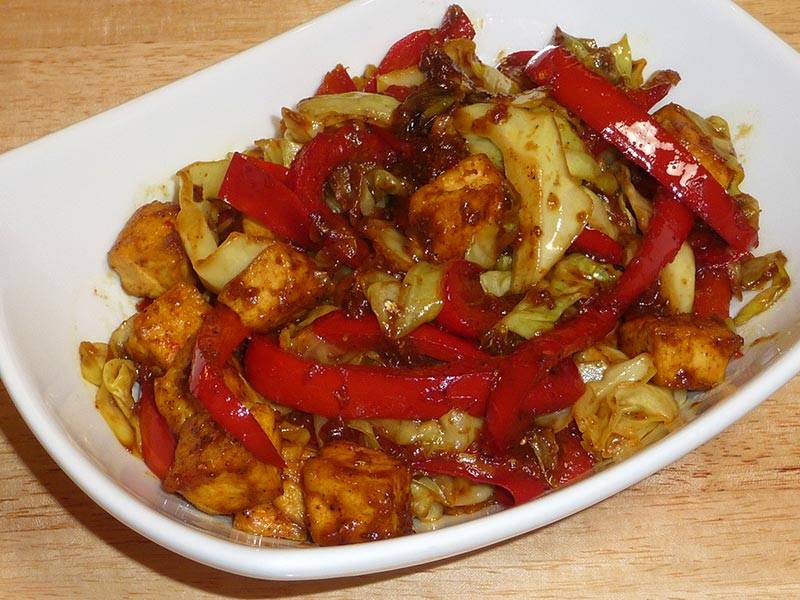
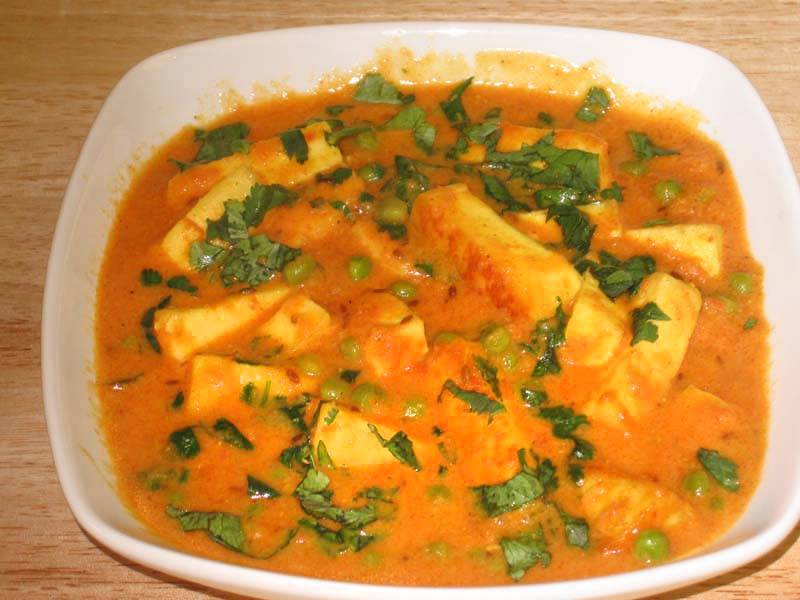
    Paneer in Tomato Gravy: For those who enjoy the richness of paneer, this recipe offers a creamy tomato-based gravy that pairs wonderfully with the tender potatoes.

    Aloo Chaat: A street food favorite, this dish provides a tangy and spicy flavor profile that complements the sweet and sour notes of the potatoes.

    Health Benefits and Dietary Considerations 

    The Sweet and Sour Potatoes dish is not only a treat for your taste buds but also caters to various dietary preferences. It is both vegan and gluten-free, making it accessible to those with specific dietary needs. The use of Ukrainian potatoes or baby potatoes adds a good source of dietary fiber, while the tomato gravy provides vitamins and antioxidants. 

    This dish is a great choice for anyone looking to enjoy a flavorful meal without compromising on health. Additionally, the absence of dairy makes it suitable for those who are lactose intolerant or following a plant-based diet.

    The incorporation of spices such as cumin, mustard seeds, and turmeric also adds to the health benefits of this dish. These spices are known for their digestive properties and anti-inflammatory effects, making the Sweet and Sour Potatoes not only delicious but also nourishing.

    Serving Suggestions 

    Sweet and Sour Potatoes can be enjoyed in a variety of ways. It is often served as a side dish with Indian breads like puri or paratha, but it can also be the star of the meal when served over a bed of steamed rice. For a complete meal, pair it with Jeera Rice or Rotis. The vibrant colors and bold flavors make it a perfect dish to serve at a dinner party, ensuring that it will be a crowd-pleaser.

    You can also serve Sweet and Sour Potatoes as part of a larger spread, featuring other complementary dishes such as Palak Paneer or Dal Tadka. The combination of these dishes creates a well-rounded and satisfying meal that showcases the diversity of Indian cuisine.

    Conclusion 

    The Sweet and Sour Potatoes recipe is a wonderful example of how different flavors can come together to create something truly special. Its balance of sweetness, spiciness, and tanginess makes it a dish that is both comforting and exciting, perfect for any occasion. 

    Whether you’re serving it as a main course or a side dish, this recipe is sure to impress. Don’t hesitate to give it a try and experience the delightful fusion of flavors that this dish has to offer. The next time you’re in the mood for something new and flavorful, remember that Sweet and Sour Potatoes are just a few simple steps away.

    Frequently Asked Questions (FAQs)

    Can I use regular potatoes instead of Ukrainian potatoes?

    Yes, regular potatoes can be used, but small baby potatoes are preferred as they hold their shape better in the gravy.

    Is this dish suitable for a gluten-free diet?

    Yes, Sweet and Sour Potatoes are naturally gluten-free, making them an excellent choice for those avoiding gluten.

    Can I adjust the level of sweetness in the dish?

    Absolutely, you can adjust the sugar according to your taste. Add it gradually until you reach your desired level of sweetness.

    What can I serve with Sweet and Sour Potatoes?

    This dish pairs well with Jeera Rice, puri, or paratha. For a more elaborate meal, consider serving it alongside other Indian favorites like Palak Paneer or Dal Tadka.

    How do I store leftovers?

    Store any leftovers in an airtight container in the refrigerator for up to 3 days. Reheat gently before serving to preserve the flavors and texture.

  • Sweet And Sour Tofu

    Sweet And Sour Tofu

    Tofu and vegetable cooked with the tamarind sauce makes a very unique flavorful dish. This Sweet and Sour Tofu dish is vegan-friendly and it is enjoyable for just about anyone's taste palette.

    • 1-1/2 oz of seedless tamarind, available in Indian and Asian grocery stores
    • 1 tbsp roasted cumin seeds powder (jeera)
    • 1 tbsp salt
    • ¼ tbsp turmeric (haldi)
    • ¼ tbsp black pepper
    • ¼ tbsp red chili powder
    • 1 tbsp finely shredded ginger
    • ¼ cup brown sugar
    1. Soak tamarind in 1/4 cup of warm water for 15 minutes. Squeeze the tamarind mixture well, then discard tamarind pieces leaving a nice thick pulp.

    2. Add the remaining sauce ingredients to the tamarind pulp mix well and set aside.

    3. Squeeze the Tofu gently keeping between your both palm.

    4. Cut tofu into ¾ inch thick slices then and pat dry between paper towels. Then cut slices into ¾ inch cubes.

    5. Remove seeds from bell pepper and slice 1/4 inch thick lengthwise.

    6. Heat oil in a wide pan over medium heat. Stir fry tofu pieces until golden brown in color, approximately 2-3 minutes. Remove from pan and place on a paper towel.

    7. In the remaining oil, first stir-fry bell pepper for a minute and add cabbage continue to stir fry for approx. 2 more minutes over medium heat. Vegetables should still be crunchy.

    8. Add tofu and tamarind sauce to the vegetables in the pan, stir well and let simmer over low heat for 4-5 minutes.

    9. Sweet and Sour Tofu tastes great served over plain rice.

    vegan
    Indian

  • Achari Paneer

    Achari Paneer

    Achari Paneer is flavorful, healthy and high in protein.  Paneer is an Indian cheese, also known as chenna.  Achari paneer is very versatile and can be served as an appetizer or as an accompaniment to a main course.

    • 14oz paneer cut in ½ inch cubes ((paneer you can find in Indian grocery store))
    • 1 tbsp salt
    • 1/8 tbsp turmeric (haldi)
    • 1/4 cup  yogurt (dahi)
    • 2 tbsp olive oil
    • 4 whole red chilies Sabut lal mirch)
    • Pinch of asafetida (hing)
    • 1/4 tbsp nigella (onion seeds or kalonji)
    • 1 tbsp coriander seeds (dhania)
    • 1/4  tbsp fenugreek seeds (mathi)
    • 1/2  tbsp black pepper
    • 1/2 tbsp fennel seeds (saunf)
    • 1 ½ cup baby spinach leaves (palak)
    1. Mix paneer, yogurt, turmeric and salt. Set aside.

    2. In a frying pan over medium heat, dry roast nigella, coriander seeds, fenugreek seeds, fennel seeds, and black pepper for 1-2 minutes. Seeds will become darker in color and give off a beautiful aroma.

    3. Crush the roasted seeds using a mortar or rolling pin.  Set aside.

    4. Add oil to the same pan, at low-medium heat.  Roast red chilies till they turn a darker color.  Remove from pan and break each one into 2-3 pieces.

    5. Increase to medium heat; add asafetida, followed by paneer mixture.   Stir fry for 3-4 minutes until most of the moisture has evaporated.  Do not overcook the paneer as it will become dry.The yogurt should coat the paneer nicely so it remains moist. Turn off the heat.

    6. Add all the dry spices and mix well.

    7. Serve warm achari paneer over a bed of spinach leaves.

    Tips

    Achari paneer can be made in advance and refrigerated up to a week.   However, it tastes best when served warm.

    Appetizer
    Indian
    Achari Paneer

    What is Achari Paneer ?

    Paneer Achari isn’t quite an appetizer or snack, but it can definitely be enjoyed in those settings! It’s a delicious vegetarian dish originating in North India. The star is paneer, a soft Indian cheese, cooked in a creamy, flavorful gravy.

    The “Achari” part comes from the pickling spices used in the recipe, giving it a tangy and slightly spicy kick. It’s often enjoyed with rice or naan, a type of leavened flatbread.

    While the exact origin is unknown, achari paneer tikka recipe is believed to have emerged in North India, particularly in the regions of Punjab and Delhi. Its popularity has spread throughout the country and even internationally, capturing hearts (and taste buds) with its delightful combination of textures and flavors.

    So, while not technically an appetizer, Achari Paneer is a crowd-pleasing dish that’s perfect for sharing with friends and family. Plus, it’s naturally gluten-free thanks to the paneer, making it a great option for those with dietary restrictions.

    How to make Achari Paneer ?

    To make achari paneer masala, first, mix paneer (Indian cheese), yogurt, turmeric, and salt together and set it aside. In a pan over medium heat, dry roast nigella, coriander seeds, fenugreek seeds, fennel seeds, and black pepper for 1-2 minutes until they darken and release a nice smell. Crush these roasted seeds using a mortar or rolling pin and keep them aside.

    In the same pan, add oil over low-medium heat and roast red chilies until they darken. Remove them from the pan and break each chili into 2-3 pieces. Increase the heat to medium, add asafetida, then pour in the paneer mixture. Stir-fry for 3-4 minutes until most of the moisture evaporates, being careful not to overcook the paneer.

    Now, turn off the heat and add the crushed spices, mixing everything well. The paneer needs to be nicely coated with the yogurt to keep it moist. Serve the warm achari paneer tikka over a bed of spinach leaves for a delicious and flavorful dish. Enjoy!

    Other Paneer Variants

    Diving into Manjula’s Kitchen, a treasure trove of Indian recipes, we can discover a delectable world of paneer dishes! Here are 5 enticing paneer variations that will tantalize your taste buds:

    Butter Paneer: This classic dish features paneer cubes deep-fried to a golden crisp. Manjula’s recipe guides you through creating a rich and creamy tomato gravy infused with aromatic spices like coriander, turmeric, and red chili powder. The addition of whipped yogurt adds a touch of tang, perfectly complementing the melt-in-your-mouth paneer.

    Paneer Tikka Masala: This vibrant dish takes inspiration from the tandoor oven. Here, marinated paneer pieces are pan-fried until slightly browned, then bathed in a luxurious gravy. The gravy boasts a symphony of flavors – the sweetness of tomatoes, the warmth of red chili powder, and a hint of smokiness. A touch of cornstarch lends a delightful silky texture, making it an ideal main course with rice or naan.

    Paneer Methi (Methi Malai Paneer): This comfort food features paneer simmered in a creamy and flavorful fenugreek sauce. Manjula’s recipe uses dried fenugreek leaves (kasoori methi) to impart a unique, slightly bitter taste that beautifully complements the creamy cashew and tomato base. The addition of milk further enhances the smooth texture, making it a perfect dip for roti or a comforting side dish.

    Paneer Tomato Curry: This vibrant curry showcases the beauty of simplicity. Fresh tomatoes are blended into a smooth puree, then cooked with aromatic spices like cumin and coriander. Chunks of paneer are added to the gravy, allowing them to soak up all the delicious flavors. Bell peppers add a touch of sweetness and crunch, making this a wholesome and satisfying meal.

    Palak Paneer: This vibrant green curry is a nutritional powerhouse. Fresh spinach forms the base of the gravy, providing a rich source of iron and vitamins. Manjula’s recipe guides you through incorporating spices like ginger, garlic, and garam masala, creating a flavorful and aromatic sauce. Paneer cubes nestled in this emerald green gravy make for a visually stunning and incredibly delicious dish.

    FAQs Frequently Asked Question for Achari Paneer

    Is Achari Paneer Spicy?

    Achari paneer can range from mild to spicy, depending on the recipe. The “achari masala” itself has a kick, but the level of heat can be adjusted by controlling the amount of red chili powder used.

    What Does Achari Paneer Taste Like?

    The dominant flavors are tangy and savory, thanks to the pickling spices. You’ll also experience hints of spice, creaminess (often from yogurt or cashews), and the mild flavor of paneer itself.

    Is Achari Paneer Vegetarian?

    Yes, achari paneer is traditionally a vegetarian dish. Paneer is made from milk and the masala typically uses vegetarian ingredients.

    Is Achari Paneer Vegan?

    Not always. Some recipes incorporate yogurt or cream in the gravy. You can find vegan versions that use plant-based yogurt alternatives or coconut milk for creaminess.

  • Green Chili Pickle

    Green Chili Pickle

    Green Chili Pickle is a delightful way to spice up any meal. Indian meals are generally served with a variety of condiments, of which pickles are the most common. This is a rather hot and spicy pickle, not for the timid palate by any means. But it goes very well with main course meal

    • 20 chilies green Serrano chili peppers (you may use different chilies)
    • 3 tbsp coriander (dhania)
    • 1-1/2 tbsp fennel seeds (saunf)
    • 1 tsp fenugreek seeds (mathi)
    • 1 tsp mustard seeds (rai)
    • 1/8 tsp asafetida (hing)
    • 3 tsp salt
    • 1 tsp mango powder (amchoor)
    • 1/2 tsp turmeric (haldi)
    • 1 tbsp vinegar
    • 2 tbcp oil, preferred mustard oil
    1. Wash and dry the chilies and cut a vertical lengthwise slit in each one.

    2. Combine coriander, fennel, and fenugreek seeds. Grind coarsely. Add salt, mango powder, and turmeric to the ground spices. Mix well.
    3. Heat oil until quite hot, and pour over the dry ingredient mixture. Mix well.
    4. Add vinegar and mix well, again.
    5. Stuff the spice mix into the green peppers and place in a glass jar.
    6. Let the jar sit two days at room temperature or one day in direct sunlight.Pickle is ready to serve.Chili Pickle will keep in the refrigerator up to one month.

    Variation 

    As an alternative to stuffing the chilies, you can slice them into 1/8“pieces and mix them in with the spice mixture.

    Tip

    For a milder pickle, remove the pepper seeds prior to stuffing with spices

    Side Dish
    Indian
    Condiment, Hot Spicy, Pickle

    Green Chilli Pickle Recipe | Hari Mirch ka Aachar By Manjula’s Kitchen 

    Green chili pickle is a popular condiment in many cuisines. It is known for its spicy and tangy flavor, adding a kick to various dishes. This pickle is made by preserving green chilies in a mixture of spices, oil, and vinegar, allowing the chilies to develop a unique taste profile over time. The process of how to make green chili pickles involves carefully selecting fresh, vibrant green chilies washing and drying them thoroughly before they are marinated in a blend of spices.

    Prepare the Green Chilies 

    Start by washing and drying the green chilies thoroughly. To begin the pickle-making process, cut a vertical lengthwise slit in each chili. This step allows the spices to penetrate the chilies, creating a harmonious blend of heat and flavor.

    Spice Blend Creation 

    Combine coriander, fennel, and fenugreek seeds in a grinder and coarsely grind them to release their aromatic essence. This spice blend forms the heart of our green chili pickle recipe. Add a generous amount of salt, mango powder, and turmeric to the ground spices. Mix the ingredients well, ensuring an even distribution of flavors.

    Infuse the Spices 

    In a culinary alchemy, heat oil until it reaches a sizzling hot temperature. Once hot, pour the oil over the dry spice mixture. This step is to infuse the spices with the richness of the heated oil. The resulting aroma is intoxicating, promising a sensory delight in every bite of the green chili achar.

    Incorporate the Vinegar 

    Add a tangy kick and introduce vinegar to the spice-infused mixture to enhance the pickle’s longevity. This step contributes to the chili pickle’s distinctive flavor profile. It acts as a natural preservative, allowing you to savor its taste for an extended period.

    Stuff and Jar 

    With your spice mix ready, it’s time to stuff the green peppers. Gently open the vertical slits and fill each chili with the aromatic blend. Place the stuffed chilies carefully in a glass jar, ensuring they snugly fit without excessive empty spaces. This step is for optimal preservation and flavor development.

    Let it Mature 

    Patience is the key to a truly exceptional green chili pickle. Allow the jar to sit for two days at room temperature or, for an added depth of flavor, let it bask in direct sunlight for one day. This period is crucial as it allows the spices to meld with the chilies, creating a symphony of taste that will tantalize your taste buds.

    Notes and Variations: 

    As you start your green chili pickle-making process, consider these helpful notes and variations to customize the recipe according to your preferences.

    Variation: 

    Instead of stuffing the chilies, experiment with slicing them into 1/8″ pieces and mixing them directly into the spice mixture. This variation offers your pickle a different texture and flavor profile, providing a unique twist to the traditional recipe.

    Tip: 

    If you prefer a milder pickle, take the extra step of removing the pepper seeds before stuffing them with the spice mix. This adjustment allows you to control the heat level, making the pickle more accessible to milder palates.

    With this comprehensive how-to-make green chili pickle recipe, you are now well equipped to create your green chili achar masterpiece. Whether you choose to stuff or slice your chilies, the result is a culinary delight that will add a punch of spice to your meals. Enjoy these homemade green chili pickles with khichdi, aloo paratha, veg pulav

  • Khasta Kachori

    Khasta Kachori

    Khasta kachori is a delicious, spicy, fried puffed pastry. Khasta Kachori is filled with spicy moong dal mixture and then deep fried. Kachori is flakey from outside and hollow inside. Kachori should be fried on low heat so it can cook through to have a nice crunch. Khasta kachori is one of the dish you can eat for any meal! Serve them for breakfast with potato curry with yogurt. kachori makes a mouthwatering appetizer and can be served with, Green Chutney, and tamarind chutney. How about serving for dinner with Aloo Dum. This is one of those recipe you make when you want to impress someone. Kachories can also be stored in air tight container for a week.

    Dough

    • 1 cup all purpose flour (maida, plain flour)
    • ¼ tsp salt
    • 2 Tbsp oil (canola, or vegetable)
    • ¼ cup cold water (more or less as needed)

    Filling

    • ¼ cup washed moong dal, yellow
    • 1 tsp fennel seeds coarsely ground (saunf)
    • 1 tsp red chilly flakes
    • ¼ tsp ginger powder (saunth)
    • ½ tsp mango powder (amchoor)
    • ⅛ tsp asafetida (hing)
    • ½ tsp salt
    • 2 Tbsp water

    Making Dough

    1. Mix the flour, salt and oil. Add the chilled water slowly, mixing with your fingers as you pour. Do not knead the dough. The dough should be soft. Cover the dough and let it sit for at least fifteen minutes.

    Filling

    1. Grind the moong dal dry, almost to a powder.

    2. Mix one tablespoon of oil to the ground dal in a frying pan and roast over medium heat for about two to three minutes or until dal changes color slightly. Stir continuously. Turn off the heat. Add all the spices mix well. Let the mixture cool off. Add two tablespoons of warm water and mix it well. Let it sit for ten minutes and cover with demp cloth.

    Making Kachories

    1. Take the dough and knead it for a minutes. Divide the dough in twelve equal parts.

    2. Take one part of the dough and with your fingers flatten the edges and make into 3-inch circle. Leaving center little thicker then edges. Mold the dough into a cup and place 1 teaspoon of filling in the center. Pull the edges of the dough to wrap the dal filling. Proceed to make all 12 balls.

    3. Let the filled ball sit for three to four minutes before rolling.
    4. Set the kachoris on a surface with the seams facing up. Using the base of your palm, slowly flatten them into about three inches in diameter.
    5. Heat the oil in frying pan over medium heat frying pan should have about one inch of oil. To check if oil is ready put a little piece of dough in the oil. Dough should sizzle, and come up very slow.
    6. Fry them on medium-low heat. After they start to puff, slowly turn them over. Fry until golden-brown on both sides. If the kachoris are fried on high heat, they will get soft and will not be crispy.
    7. Kachories can be stored for at least a week in an airtight container

    Additional Tips

    Don’t roll the kachoris with a rolling pin. Rolling pins can create small holes in the dough that let the oil seep into the kachoris, and they can also cause the kachoris to come out with one side thicker than the other.

    Variation

    Instead of using moong dal, you can use washed urad dal or chana dal. The rest of the recipe stays the same.

    Serving suggestions:

    Kachoris can be served plain, with Tamarind Chutneys, chola, or with Aloo Dum.  Serve them as a chat, pouring plain yogurt and chutney on top.

    Appetizer

    Khasta Kachori Recipe: How to make Khasta Kachori

    Khasta Kachori, a popular Indian street food delicacy, is a deep-fried pastry filled with a spicy and flavorful stuffing. This crispy and indulgent snack is loved for its rich taste and satisfying crunch, making it a favorite among food enthusiasts.

    Khasta Kachori Recipe: 

    Rich Flavor Profile: Khasta Kachori is bursting with a medley of spices and aromatics, creating a symphony of flavors with every bite. The combination of ingredients like lentils, spices, and herbs provides a unique and indulgent taste experience.

    Satiating Snack: Despite its small size, Khasta Kachori is incredibly filling and satiating, making it an ideal snack option to curb hunger pangs between meals or as a satisfying accompaniment to tea or coffee.

    Versatile: While traditionally served as a snack, Khasta Kachori can also be enjoyed as a part of a larger meal. It pairs well with various chutneys, sauces, and accompaniments, allowing for endless culinary creativity.

    Convenience: Khasta Kachori can be prepared in advance and stored for later consumption, making it a convenient snack option for busy days or entertaining guests.

    Variations of Kachori:

    1. Mattar Ke Kachori: Mattar Kachori is a delicious, fried puff pastry filled with spicy green peas. This mouthwatering snack also can be served as part of any main meal.
    2. Raj Kachori: Raj Kachori is a spicy chaat bowl filled with delicious condiments. It has refreshing flavors and makes for a unique food experience. Guests will have fun filling their own Kachoris according to their taste palette. Served as a snack or appetizer, Raj Kachories make a beautiful presentation and are thoroughly enjoyed by just about everyone.
    3. Mawa Kachori: Mawa Kachori is an exotic dessert. This is a delicacy from the state of Rajasthan. Rajasthan is known for its rich food and culture. Pastry filled with an aromatic mixture of Mawa and nuts makes a very festive dessert.
    4. Urad Dal Kachori: Dal kachori is a delicacy from north India. Dal kachori is a spicy puffed pastry. Traditionally kachoris are sold at a sweet and snack shop. These mouthwatering Dal kachoris can be served as a snack, chaat or part of main meal, making the meal exotic.

    Tips for Making Perfect Khasta Kachori

    Prepare the Dough with Care: The key to crispy and flaky Khasta Kachori lies in the dough preparation. Use a combination of all-purpose flour (maida) and semolina (sooji) to achieve the desired texture. Ensure that the dough is firm yet pliable to prevent it from becoming too soft during frying.

    Fry at the Right Temperature: Fry the kachoris in hot oil over medium-high heat to ensure that they cook evenly and develop a golden-brown crust. Avoid overcrowding the frying pan to maintain the oil temperature and prevent the kachoris from absorbing too much oil.

    Seal the Edges Properly: To prevent the filling from leaking out during frying, seal the edges of the kachoris tightly before frying. Press the edges together firmly and ensure that there are no gaps or openings.

    Serve Fresh and Hot: Khasta Kachori is best enjoyed fresh and hot, straight out of the frying pan. Serve it with your favorite chutneys, sauces, or accompaniments for a delightful snacking experience.

    FAQs about Khasta Kachori:

    Can I make Khasta Kachori ahead of time? 

    While Khasta Kachori is best enjoyed fresh, you can prepare the dough and filling in advance and assemble the kachoris just before frying to save time.

    Can I bake Khasta Kachori instead of frying? 

    While traditional Khasta Kachori is deep-fried for that signature crispy texture, you can try baking them for a healthier alternative. However, the texture and taste may differ slightly.

    What are the best accompaniments for Khasta Kachori? 

    Khasta Kachori pairs well with a variety of chutneys such as tamarind chutney, mint chutney, or coriander chutney. It also tastes delicious with a dollop of yogurt and a sprinkle of chaat masala.

    Is Khasta Kachori suitable for vegetarians? 

    Yes, Khasta Kachori is a vegetarian dish as it contains no meat or animal products. It’s a popular choice among vegetarians and vegans alike.

    Khasta Kachori is not just a snack; it’s a culinary delight that excites your taste buds with its crispy exterior and flavorful filling. Whether enjoyed as a street food treat or homemade snack, its rich taste and versatility make it a beloved favorite in Indian cuisine. 

  • Butter Paneer Masala

    Butter Paneer Masala

    Butter Paneer Masala is a rich entre made with Indian cheese and a creamy sauce. This dish is tasty when served over white rice or with Naan or Tandoori Roti.

    • 1/2 lb paneer cubed in byte size
    • 2 medium tomatoes
    • 1 green chili
    • 1/4 inch ginger
    • 1/2 cup green peas
    • 1/2 cup yogurt, whipped (curd, dahi)
    • 2 tbsp oil
    • 1/8 tsp asafetida (hing)
    • 1 tsp cumin seeds (jeera)
    • 1 tbsp coriander powder (dhania)
    • 1/2 tsp turmeric (haldi)
    • 1/2 tsp red chili powder
    • 2 bay leaves (tajpat)
    • 1 tsp salt
    • 1/2 tsp garam masala
    • 1 tsp corn starch
    • 1 tsp sugar, optional
    • 2 tbsp cilantro finely chopped (hara dhania)
    1. Deep-fry the paneer on low-medium heat until the paneer has a little golden- brown color. Set aside.

    2. Blend tomatoes, green chilly and ginger to make a puree.
    3. Heat the oil in a saucepan. Test the heat by adding one cumin seed to oil; if seed cracks right away oil is ready. Add hing and cumin seeds.
    4. After the cumin seeds crack, add the tomato puree, coriander powder, turmeric, red chili powder and bay leaves. Cook for about 4 minutes on medium heat. Tomato mixture will start to leave the oil and will reduce to about half in quantity.

    5. Add the whipped yogurt into the gravy. Stir occasionally for about 3 minutes on medium heat.
    6. To thicken the gravy, dissolve the cornstarch in 3 tablespoons of water and add to the gravy.
    7. Add the green peas and paneer. Let it cook for a few minutes until the peas are tender.
    8. Add the garam masala and cilantro. Add a little sugar if the gravy is sour.

    Variations

    You can substitute the yogurt with heavy cream for a richer flavor.

    1 tablespoon of fresh or dried methi leaves (Fenugreek leaves) can be added at the end.

    Add in the yogurt powder of 4 to 5 cashews to make it creamier.

    This gravy can be used in any combination of vegetables you desire.

    This recipe is only a method – feel free to be creative and experiment!

    Main Course
    Indian
    Kid Friendly, Paneer Dish, Party Food

    How to Make Butter Paneer at Home – Manjula’s Kitchen 

    Butter Paneer Masala, also known as Paneer Butter Masala, is a timeless Gluten vegetable curry-based North Indian dish celebrated for its rich, creamy texture and aromatic flavors. In this Butter Paneer Recipe, we will delve into the intricacies of crafting the perfect Butter Paneer Masala, exploring various recipes, techniques, and customizable options. Whether you are a seasoned chef or a novice in the kitchen, this recipe for butter paneer masala will empower you to master the art of creating this culinary masterpiece.

    Understanding Paneer Butter Masala: 

    Butter Paneer Masala is a vegetarian dish that centers around paneer, or Indian cottage cheese, immersed in a luscious tomato-based gravy enriched with butter and cream. The dish seamlessly blends spices, herbs, and dairy to create a harmonious symphony of flavors. Often enjoyed with naan or rice, Butter Paneer Masala is a favorite among Indian food enthusiasts worldwide.

    Recipe: How to Make Butter Masala Paneer: 

    Step 1: Deep-fry the Paneer

    To initiate the culinary journey, the paneer cubes are deep-fried to perfection. This step is crucial as it imparts a golden-brown color and a slight crispiness to the paneer, enhancing its overall texture.

    Step 2: Prepare Tomato Puree 

    The heart of the paneer masala recipe lies in the vibrant tomato puree. A blend of ripe tomatoes, green chilies, and ginger creates a smooth, flavorful base that serves as the canvas for the ensuing layers of spices and aromatics.

    Step 3: Tempering the Gravy 

    In a hot saucepan, a tempering process begins with the crackling of cumin seeds and the aromatic release of hing (asafoetida). The tomato puree, along with coriander powder, turmeric, red chili powder, and bay leaves, is added to create a robust foundation for the Paneer Butter Masala.

    Step 4: Introduce Yogurt 

    Whipped yogurt is then introduced into the gravy, imparting a creamy and tangy dimension to the dish. Stirring occasionally allows the yogurt to amalgamate seamlessly, contributing to the overall richness of the masala.

    Step 5: Thicken the Gravy 

    To achieve the desired consistency, a cornstarch-water mixture is incorporated into the gravy. This step ensures a velvety and well-coated texture, elevating the dining experience.

    Step 6: Add Paneer and Green Peas 

    The deep-fried paneer cubes, now infused with a golden hue, and vibrant green peas are added to the simmering gravy. This step allows the paneer to absorb the flavors of the aromatic sauce while the green peas contribute a sweet and crisp element.

    Step 7: Seasoning and Final Touches 

    The final touches involve sprinkling garam masala and fresh cilantro into the mixture, providing a burst of aromatic complexity. A hint of sugar may be added to balance the flavors if the gravy tends to lean towards the tangy side.

    Variations and Customizations: 

    Richness Enhancement: For an even more indulgent flavor, consider substituting yogurt with heavy cream. This variation introduces a luxurious creaminess that elevates the dish to a new level of decadence.

    Flavorful Twist with Methi Leaves: To add a unique and slightly bitter note, incorporate 1 tablespoon of fresh or dried methi leaves (fenugreek leaves) towards the end of the cooking process. This variation introduces a depth of flavor that complements the richness of the Butter Paneer Masala.

    Creamy Texture with Cashews: For those seeking an extra creamy consistency, include 1 tablespoon of yogurt powder or crushed cashews. This addition not only enhances the creaminess but also imparts a subtle nutty undertone to the dish.

    Versatility in Vegetable Combinations: The Butter Paneer Masala gravy is a versatile canvas that welcomes a variety of vegetables. Experiment with different combinations to suit your preferences and create a personalized version of this classic dish.

    In the end, you have learned how to make butter masala paneer which involves a meticulous balance of spices, textures, and flavors. This comprehensive how-to-make butter paneer guide has provided a detailed walkthrough of the paneer masala recipe, from deep-frying the paneer to infusing the gravy with aromatic spices. 

    Armed with this knowledge, you are now equipped to embark on this recipe for butter paneer masala in creating a perfect Butter Paneer Masala that is uniquely yours. So, don your apron, gather the ingredients, and let the aroma of this exquisite dish fill your kitchen.

    If you liked this recipe you must also try Kadai Paneer, Malai Kofta, Palak Paneer

  • Chole Masala

    Chola Chana Masala, Spicy Chickpeas

    Chole also known chickpea, garbanzo, and kable chana, Chana Masala is a cooked in a spicy tomato gravy. This is a very popular, served with Naan, Tandori Roti. 

    • 1 15oz can of chickpeas (kable chana, Garbanzo beans)
    • 3 tbsp oil
    • 1/8 tsp asafetida (hing)
    • 1 tsp cumin seeds (jeera)
    • 1 tbsp besan (gram flour)
    • 1 large tomato chopped
    • 1 tsp ginger paste
    • 1 tsp chopped green chili
    • 2 tsp coriander powder (dhania)
    • 1/2 tsp turmeric (heldi)
    • 1/2 tsp red chili powder
    • 1 tsp salt
    • 1/4 tsp garam masala
    • 1 tbsp chopped cilantro (hara dhania)

    Few slices of tomatoes for garnishing

    1. Drain chickpeas and wash well.

    2. Blend the tomatoes, green chilies and ginger to make a puree.
    3. Heat the oil in a saucepan. Test the heat by adding one cumin seed to the oil; if seed cracks right away, oil is ready. Add the asafetida and cumin seeds. When cumin seeds crack, add the gram flour and stir-fry for a minute.
    4. Add the tomato puree, coriander powder, turmeric, and red chili powder. Cook about four minutes on medium heat. The tomato mixture will separate from the oil and reduce to about half in quantity.
    5. Add chickpeas, salt, and one cup of water. Cook, covered, for seven to eight minutes on medium heat. Press the chickpeas with a spatula to soften. Add more water as needed to keep the gravy consistency to your liking, and let it cook on low heat a few more minutes.
    6. Add the garam masala and cilantro. Let it cook for another minute.
    7. Garnish with thin tomato slices.

    Chana Masala goes well with any Indian flat bread, like Naan, Paratha, Puri. and can also be served with Western bread or pita bread.

    Chana Masala is also a delectable treat over plain rice.

    This is a healthy, nutritious dish for vegan and gluten-free diets.

    Main Course
    Indian
    Chickpeas, Chole, Punjabi Cuisine, Spicy Garbanzo

    Chola Chana Masala Recipe: A Flavorful North Indian Delicacy

    Chana Masala, also known as Chola Chana Masala or simply Chola Masala, is a beloved North Indian delicacy famed for its robust flavors and comforting texture. This Chola Chana Masala recipe artfully combines tender chickpeas with an array of aromatic spices, ensuring a dish that’s both hearty and satisfying. Whether paired with fluffy rice, crispy puris, or warm naan bread, this chola masala recipe promises to delight your palate and leave you yearning for more. 

    Chana Masala is gluten-free, vegan making it suitable for individuals with dietary restrictions. Chola Chana Masala combines tender chickpeas (chola) with a variety of aromatic spices, creating a satisfying and nutritious meal. The dish is typically prepared by simmering cooked chickpeas in a flavorful gravy made from a blend of spices, tomatoes, and other aromatic ingredients. 

    Tips for Perfect Chola Chana Masala

    Consistency is Key: Adjust the quantity of water or cooking liquid added to the chickpeas to attain the desired consistency of the masala. For a thicker gravy, prolong the simmering duration to allow the sauce to reduce and thicken.

    Enhance Flavor with Whole Spices: For an enhanced depth of flavor, contemplate incorporating whole spices such as bay leaves, cinnamon sticks, and cardamom pods into the dish. These spices impart a subtle aroma and complexity to the masala.

    Customize Spice Level: Tailor the spice level of the Chana Chola Masala to align with your taste preferences by adjusting the quantities of red chili powder and green chilies utilized in chola masala recipe.

    Make Ahead for Enhanced Flavor: Similar to numerous Indian dishes, Chola Chana Masala attains an even richer flavor profile when allowed to rest for a few hours or overnight, permitting the flavors to mature and intensify.

    Variations of Chola Chana Masala

    Punjabi Chana Masala: This variant of Chana Chola Masala showcases a tangy and spicy tomato-based gravy infused with the flavors synonymous with Punjab.

    Kabuli Chana Masala: Kabuli Chana, also referred to as white chickpeas, can serve as a substitute for black chickpeas, offering a lighter-colored and milder-flavored rendition of the dish.

    Chola Chana Masala with Spinach: Elevate the nutritional quotient of the dish by incorporating fresh spinach leaves into the masala, thereby amplifying its health benefits and introducing vibrant hues.

    Health Benefits of Chola Chana Masala

    Rich in Protein: Chickpeas, the primary ingredient in Chana Chola Masala, serve as an excellent source of plant-based protein, vital for muscle repair and growth.

    High in Fiber: Chickpeas boast a high dietary fiber content, which facilitates digestive health and aids in weight management by inducing a sensation of fullness and satiety.

    Packed with Vitamins and Minerals: This dish abounds in essential vitamins and minerals, including iron, magnesium, and vitamin C, which collectively contribute to overall health and well-being.

    Frequently Asked Questions (FAQs)

    Can I use canned chickpeas instead of dried ones?

    Indeed, canned chickpeas can serve as a convenient time-saving alternative. However, it’s worth noting that dried chickpeas soaked overnight tend to yield superior texture and flavor.

    Can I prepare Chola Chana Masala in advance?

    Absolutely! This dish exhibits enhanced flavors upon reheating, as it allows the various spices and ingredients to meld together. Store it in an airtight container in the refrigerator for up to 3-4 days.

    Is Chana Chola Masala suitable for a vegan diet?

    Certainly! This dish is inherently vegan, devoid of any animal products, rendering it a perfect culinary choice for individuals adhering to a vegan or plant-based diet.

    For an exploration of additional delectable Indian recipes, peruse Manjula’s Kitchen, which offers delightful culinary adventures such as Punjabi Aloo Paratha.

    If you’re looking to explore more Indian recipes, appetizers, beverages, and desserts, be sure to check out the following links on Manjula’s Kitchen. Here are some links to recipes on Manjula’s Kitchen official website: Vegetable Pakoras, Kaju Katli (Cashew Burfi), Baingan Bharta (Roasted Eggplant), Matar (Green Peas) Paneer, Besan Ladoo.

  • Paneer Tomato Curry

    How to make Tomato Paneer Curry Recipe By Manjula’s Kitchen

    Paneer tomato curry, also known as tomato paneer curry, is a delightful and aromatic dish that captures the essence of Indian cuisine. This paneer based gluten free veg gravy dish combines the rich and creamy texture of paneer (Indian cottage cheese) with the tanginess of tomatoes and a blend of aromatic spices. In this detailed exploration, we will take you through each step of the paneer tomato recipe, highlighting the significance of each element to create a dish that tantalizes the taste buds.

    Step 1: Heating the Oil and Grilling the Paneer

    The first step in making tomato paneer curry is heating one tablespoon of oil in a flat saucepan over low-medium heat. This is a crucial step as it sets the foundation for the flavor development in the dish. The low-medium heat allows the oil to gradually heat up, preventing it from smoking and ensuring that the paneer pieces cook evenly.

    Once the oil is heated, the paneer pieces are spread in the pan and grilled on one side until they achieve a golden brown color. Grilling the paneer serves multiple purposes. It imparts a subtle smokiness to the paneer, enhancing its flavor profile. The golden brown color also adds visual appeal to the dish. After grilling, the paneer is taken out from the pan and set aside, ready to be reintroduced later in the cooking process.

    Step 2: Adding Cumin Seeds, Asafetida, and Sliced Ginger

    In the same pan that was used for grilling the paneer, the remaining oil is added. It is essential to use the same pan to retain the flavors that have infused into it during the initial step. Waiting until the oil is moderately hot, cumin seeds are introduced. The crackling of cumin seeds in hot oil releases their aromatic oils, infusing the entire dish with a warm and earthy essence.

    Asafetida, a pungent spices with a unique flavor, is added along with sliced ginger. Asafetida contributes a distinct umami note to the dish, enhancing the overall taste. Ginger, known for its subtle spiciness and freshness, complements the other ingredients, creating a harmonious balance of flavors. Stir-frying these elements for about 30 seconds allows their flavors to meld and infuse into the oil.

    Step 3: Stir-Frying Bell Pepper with Spices

    Next in the process is the addition of bell pepper to the pan. Stir-frying the bell pepper for about half a minute ensures that it retains its crispness and vibrant color. The bell pepper not only adds a crunchy texture but also contributes a slightly sweet and fruity undertone to the dish. At this stage, the ground spices – coriander powder, turmeric, and red chili powder – are introduced.

    Coriander powder provides a warm and citrusy flavor, turmeric adds a golden hue and earthy notes, while red chili powder imparts the desired level of spiciness. Stir-frying the bell pepper with these spices allows them to coat the vegetables evenly, creating a flavorful base for the curry.

    Step 4: Adding Tomatoes, Salt, and Sugar

    The introduction of tomatoes is a crucial step in paneer tomato curry, as it forms the base of the gravy. Tomatoes bring a tangy and slightly sweet taste to the dish. Adding salt at this stage not only enhances the natural flavors of the tomatoes but also helps in their cooking process by drawing out moisture.

    A touch of sugar is included to balance the acidity of the tomatoes, creating a harmonious blend of sweet and tangy notes. Cooking the tomatoes, stirring for about 2-3 minutes, ensures that they are just tender but not mushy. This careful monitoring of the tomatoes’ texture is essential for achieving the desired consistency in the final dish.

    Step 5: Cooking Paneer in Tomato Gravy

    Once the tomatoes reach the desired tenderness, the grilled paneer is reintroduced to the pan. Cooking the paneer in the tomato gravy for about 5 minutes allows it to absorb the flavors of the spices and the tanginess of the tomatoes. Stirring occasionally ensures that the paneer is evenly coated with the aromatic mixture, creating a cohesive and well-balanced dish.

    During this stage, it is crucial to maintain a balance between cooking the paneer thoroughly and preserving its distinct texture. The goal is to have paneer covered with spices while retaining visible tomato pieces in the curry.

    Step 6: Final Touch – Sprinkling Garam Masala

    As a finishing touch, the heat is turned off, and a sprinkle of garam masala is added to the tomato paneer curry. Garam masala, a blend of warm spices like cinnamon, cardamom, and cloves, contributes a final layer of complexity and depth to the dish. Adding garam masala at the end preserves its volatile flavors, ensuring that they are not overpowered by the other spices during the cooking process.

    Stirring the garam masala into the curry distributes its aromatic compounds evenly, elevating the overall fragrance of the dish. This final step enhances the complexity of flavors, making the paneer and tomato curry a symphony of tastes and aromas.

    Conclusion:

    In the art of crafting paneer in tomato gravy, each step plays a pivotal role in building layers of flavor and texture. From grilling the paneer for a smoky undertone to carefully stir-frying spices for a well-balanced taste, every action contributes to the overall success of the dish. The interplay of ingredients like cumin seeds, asafetida, ginger, bell pepper, and a medley of ground spices creates a curry that is not just a meal but a culinary experience.

    This detailed exploration of the tomato paneer recipe highlights the importance of technique, timing, and ingredient selection in Indian cuisine. The result is a dish that showcases the versatility of paneer and the vibrancy of tomatoes, bringing together the best of both worlds in a savory and satisfying curry. 

    Whether you call it paneer tomato curry, tomato paneer curry, paneer tomato recipe, paneer and tomato curry, paneer in tomato gravy, or tomato paneer recipe, this flavorful creation is sure to become a staple in your culinary repertoire.

    Note: 

    Paneer with Tomato is delicious and super simple this goes well with plain rice, roti, paratha, puri or naan.

  • Palak Kadhi

    Palak Kadhi Recipe: A Nutritious Spinach Delight

    Palak Kadhi, also known as Palak Ki Kadhi or Spinach Kadhi, is a comforting and nutritious Indian dish that combines the goodness of spinach with the tanginess of yogurt. Palak kadhi is a gluten-free and vegan dish made with lentils (usually split pigeon peas, or toor dal) and spinach (palak) cooked in a flavorful curry or gravy. It is a high-protein dish suitable for parties and gatherings. 

    The lentils provide a good source of protein, while the spinach adds vitamins and minerals. The curry/gravy is typically made with spices, yogurt (or a dairy-free alternative), and sometimes besan (chickpea flour) to thicken the sauce. Palak kadhi is a popular North Indian dish known for its creamy texture and delicious flavor.

    This palak kadhi recipe offers a delightful blend of flavors and textures, making it a perfect accompaniment to steamed rice or roti. With its vibrant green color and rich taste, palak kadhi is sure to become a favorite in your household, especially for those looking to incorporate more greens into their diet.

    Step 1: Blending Spinach

    Begin by thoroughly washing fresh spinach leaves and removing any tough stems. Then, blanch the spinach in boiling water for a few minutes until wilted. Drain the spinach and immediately transfer it to a bowl of ice water to halt the cooking process and preserve its vibrant green color. Once cooled, blend the spinach into a smooth puree using a blender or food processor, ensuring there are no lumps.

    Step 2: Preparing Yogurt Mixture

    In a mixing bowl, whisk together yogurt and besan (gram flour) until smooth and creamy. This yogurt mixture forms the base of the kadhi, providing a creamy texture and tangy flavor to the dish. Ensure that the besan is well-incorporated into the yogurt to prevent any lumps from forming during the cooking process.

    Step 3: Tempering Spices

    In a deep saucepan or kadhai, heat oil or ghee over medium heat. Add mustard seeds, cumin seeds, fenugreek seeds, and dried red chilies to the hot oil, allowing them to splutter and release their aromatic flavors. The tempering of spices adds depth and complexity to the palak kadhi, infusing it with layers of flavor.

    Step 4: Cooking Aromatics

    Next, add finely chopped ginger to the tempered spices, sautéing. The combination of these aromatic ingredients forms the flavorful base of the palak kadhi, enhancing its taste and aroma. Stir the mixture occasionally to prevent it from sticking to the bottom of the pan.

    Step 5: Adding Spinach Puree

    Once tcooked add the blended spinach puree to the pan, stirring well to combine with the aromatics. Allow the spinach to simmer gently in the pan, infusing the kadhi with its vibrant green color and earthy flavor. Cook the spinach mixture for a few minutes until it thickens slightly and the raw flavor of the spinach is cooked out.

    Step 6: Incorporating Yogurt Mixture

    Gradually pour the prepared yogurt-besan mixture into the pan, stirring continuously to prevent any lumps from forming. Ensure that the yogurt mixture is well-incorporated into the spinach base, creating a smooth and creamy consistency. Allow the kadhi to simmer gently on low heat, allowing the flavors to meld together and the yogurt to thicken.

    Step 7: Seasoning and Garnishing

    Season the palak kadhi with salt, turmeric powder, and red chili powder to taste, adjusting the seasoning according to your preferences. Garnish the kadhi with fresh cilantro leaves and a sprinkle of garam masala for added flavor and aroma. Serve the palak kadhi hot alongside steamed rice or roti for a wholesome and satisfying meal.

    Tips for Perfect Palak Kadhi

    • Consistency Control: Adjust the amount of water added to the kadhi to achieve the desired consistency. For a thicker kadhi, simmer it for longer to allow the yogurt mixture to reduce and thicken.
    • Balancing Flavors: Taste the palak kadhi as it cooks and adjust the seasoning accordingly. You can add a squeeze of lemon juice for a tangy kick or a pinch of sugar to balance the flavors.
    • Texture Enhancement: For added texture and flavor, consider adding fried pakoras or chickpea flour dumplings to the palak kadhi before serving. These additions not only enhance the dish but also make it more filling and satisfying.
    • Freshness Factor: Use fresh spinach and yogurt for the best results. Fresh ingredients impart a vibrant color and flavor to the kadhi, elevating its taste to another level.
    •  

    Variations of Palak Kadhi

    • Punjabi Palak Kadhi: This variation of palak kadhi features a thicker consistency and a richer flavor profile, achieved by simmering the kadhi for a longer duration.
    • Gujarati Palak Kadhi: Gujarati-style palak kadhi is typically sweeter and tangier than its Punjabi counterpart, thanks to the addition of jaggery and kokum.
    • Paneer Palak Kadhi: Add cubes of paneer (Indian cottage cheese) to the palak kadhi for a protein-rich variation that’s sure to please both vegetarians and non-vegetarians alike.

    Health Benefits of Palak Kadhi

    • Rich in Iron and Vitamins: Spinach is a nutritional powerhouse, rich in iron, vitamins, and antioxidants that support overall health and well-being.
    • Probiotic Benefits: Yogurt, a key ingredient in palak kadhi, is rich in probiotics that promote gut health and aid in digestion.
    • Low in Calories: Palak kadhi is a low-calorie dish, making it a healthy option for those looking to manage their weight without compromising on taste.
    •  

    Frequently Asked Questions (FAQs)

    Can I use frozen spinach instead of fresh?

    • Yes, you can use frozen spinach as a convenient alternative. Thaw the spinach before blending it into a puree for the kadhi.
    •  

    Can I make palak kadhi ahead of time?

    • Yes, palak kadhi tastes even better when allowed to sit for a few hours or overnight, allowing the flavors to meld together. Reheat it gently before serving.
    •  

    Is palak kadhi gluten-free?

    • Yes, palak kadhi is inherently gluten-free as it contains no wheat or gluten-containing ingredients.

    Explore more delectable Indian recipes on Manjula’s Kitchen, such as Paneer Tikka Masala for another delightful culinary adventure.

Exit mobile version