Category: Holi

Holi Food Recipes: A Festive Feast

Holi, the vibrant festival of colors, is celebrated with an array of delicious foods across India. Holi recipes encompass sweets, snacks, and beverages that are integral to the celebrations. Let’s delve into some popular Holi food recipes that you can prepare at home, highlighting various regional specialties and fitting them into different categories.

Gujiya

Gujiya is a sweet dumpling filled with khoya (dried milk), nuts, and dried fruits, deep-fried to a golden brown. This classic Holi food recipe is a must-have during the festival. It falls under the Indian desserts and North Indian recipes categories. Variations like Kesar Mawa Gujiya and Chocolate Cheese Gujiya are also popular. Including Gujiya in your Holi Indian kitchen menu ensures a festive touch.

Thandai

Thandai is a cooling beverage made with milk, nuts, and aromatic spices, perfect for the hot days of Holi. This Holi Indian kitchen menu item is often flavored with saffron and rose, making it a delightful drink. It fits well within the beverages and healthy recipes categories. Thandai is an essential part of Holi vegan kitchen offerings.

Dahi Bhalla

Dahi Bhalla (or Dahi Vada) is a savory dish made with lentil fritters soaked in yogurt and topped with chutneys and spices. This recipe for Holi is a favorite snack, fitting perfectly in Indian snacks and healthy recipes categories. It’s known for its light, tangy flavor and is an essential part of the Holi Indian food menu.

Malpua

Malpua is a traditional sweet pancake, often enjoyed with rabdi (sweetened condensed milk). This easy Holi recipe involves deep-frying the batter and soaking it in sugar syrup. Malpua is a delicious dessert that fits into Indian desserts and North Indian recipes categories. Adding Malpua to your Holi Indian food menu enhances the festive experience.

Puran Poli

Puran Poli is a sweet flatbread stuffed with a mixture of chana dal (split chickpeas) and jaggery, flavored with cardamom. This dish is a staple in many Indian households during festivals like Holi, making it a perfect addition to the Indian desserts and North Indian recipes categories.

Kanji

Kanji is a tangy and refreshing fermented drink made with black carrots, mustard seeds, and water. This beverage is a traditional Holi vegan kitchen item, fitting well in the beverages and healthy recipes categories. Known for its probiotic properties, Kanji is a unique and flavorful drink.

Shakarpara and Namakpara

Shakarpara and Namakpara are crispy, bite-sized snacks that are sweet and savory, respectively. These are easy to make and store well, making them perfect for Holi food recipes. They fall under Indian snacks and quick & easy categories.

Kachori

Kachori is a deep-fried pastry filled with spicy lentils or peas. Variants like Moong Dal Kachori and Matar Kachori are popular during Holi. This snack fits into Indian snacks and popular party recipe categories, adding a savory crunch to the festive spread.

Ras Malai

Ras Malai consists of soft paneer balls soaked in sweet, flavored milk. This Indian dessert is often flavored with cardamom and saffron, making it a rich and delightful treat. It’s a part of Indian desserts and North Indian recipes categories, perfect for ending the meal on a sweet note.

To elevate your Holi feast, consider exploring complementary categories to the food recipes. Introducing Indian snacks like samosas and pakoras can diversify the flavors and textures. For a delightful conclusion, try out Indian desserts such as gulab jamun and jalebi. 

Opting for healthier chaat recipe options like roasted nuts and fruit chaat can provide lighter alternatives for your attendees. If hosting a large group, the party recipe section offers impressive dishes to make your gathering unforgettable. Including North Indian recipes like dal makhani or biryani can bring an authentic touch to your meal.

Frequently Asked Questions (FAQs)

Q: What are some popular Holi food recipes?

A: Some popular Holi food recipes include Gujiya, Thandai, Dahi Bhalla, Malpua, Puran Poli, and Kanji.

Q: How can I make traditional Holi food at home? 

A: To make traditional Holi food at home, try recipes like Gujiya, Thandai, and Dahi Bhalla. These recipes are simple to prepare and capture the essence of the festival.

Q: What are some Holi special food ideas for a party? 

A: Some Holi party food ideas include Gujiya, Thandai, Puran Poli, and Kanji. These dishes are flavorful and perfect for celebrations and gatherings.

Q: Can I prepare Holi food in advance? 

A: Yes, many Holi food items can be prepared in advance and stored. Sweets like Gujiya and Puran Poli can be made ahead of time, while beverages like Thandai and Kanji can be prepared and refrigerated.

Q: What are some healthy options for Holi food? 

A: Some healthy options for Holi food include Kanji, fruit chaat, and steamed dishes like Dahi Bhalla.

  • Carrot Kheer

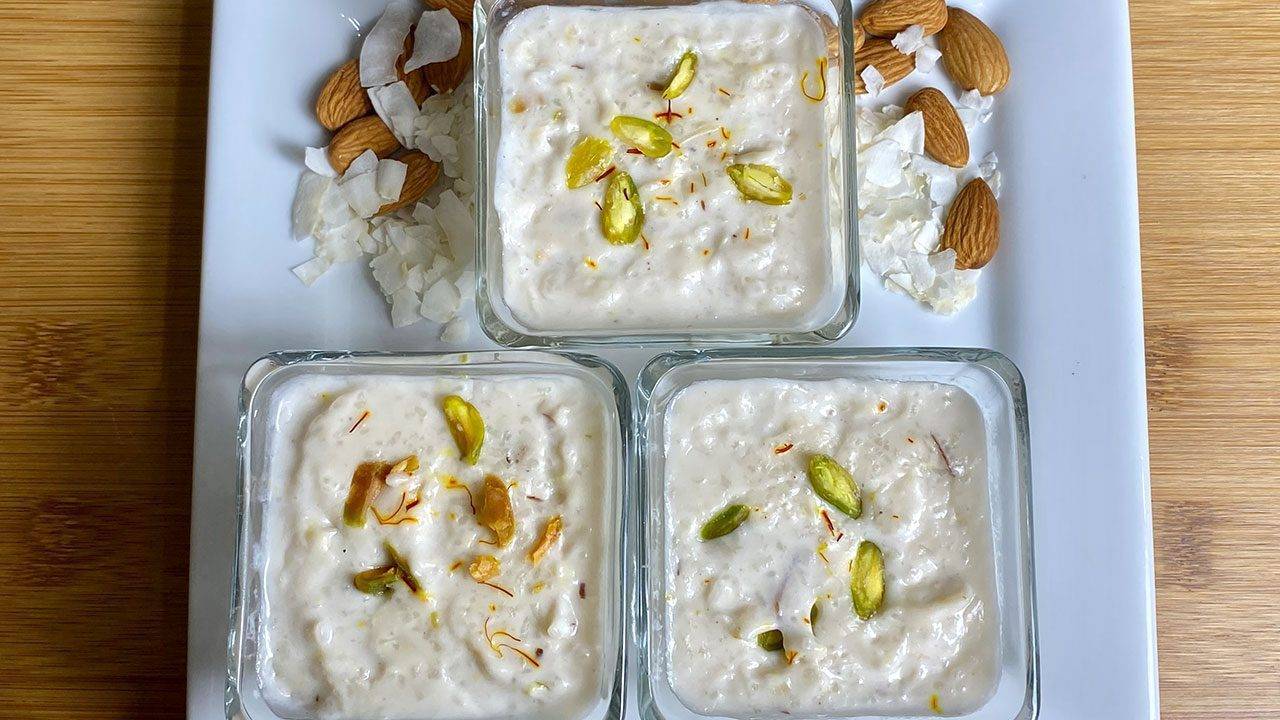
    Carrot Kheer (Carrot Paayasam): A Delicious Twist on a Timeless Indian Sweet | Manjula’s Kitchen

    Introduction to Carrot Kheer

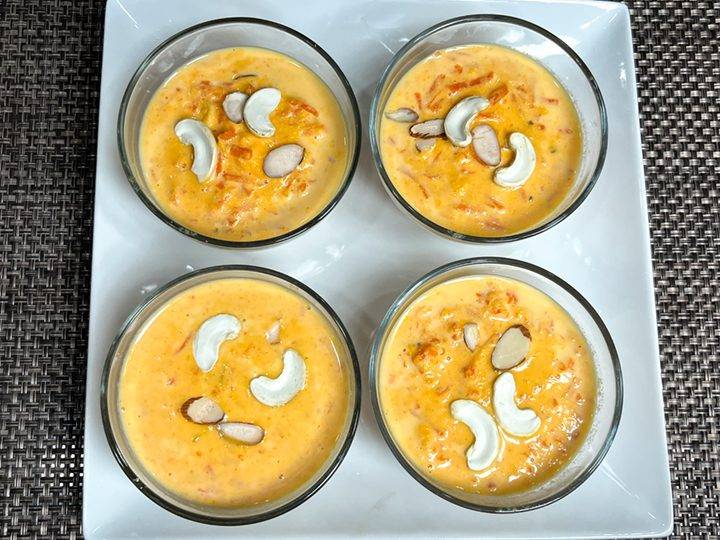
    Kheer is one of the most cherished and traditional sweets in Indian cuisine, with its creamy, sweet, and flavorful profile making it a favorite during festivals and special occasions. Carrot Kheer, also known as Carrot Payasam, offers a delightful twist to the traditional rice-based kheer, adding a unique layer of flavor and texture with shredded carrots. Over the years, kheer has seen many variations, and this version brings the earthy sweetness of carrots into the creamy goodness of milk and sugar. With just a few simple ingredients, this Carrot Kheer delivers a rich and flavorful dessert that’s perfect for any occasion.

    Cultural and Traditional Importance

    Kheer holds a special place in Indian households, especially during festivals such as Diwali, Holi, and Raksha Bandhan. It is often served as an offering to deities and enjoyed as a dessert after meals. While Rice Kheer is the most traditional form, Carrot Kheer adds a refreshing twist by incorporating a vegetable into the dessert, making it both nutritious and flavorful. The vibrant color of the carrots combined with the rich texture of milk creates an aesthetically pleasing and indulgent treat that is sure to impress your family and friends.

    Although Carrot Kheer may not be as well-known as its rice counterpart, it is quickly gaining popularity for its unique taste and simplicity. This version strikes the perfect balance of sweetness and creaminess, making it a must-try for those looking to experiment with traditional Indian sweets.

    Recipe Variations from Manjula’s Kitchen

    While Carrot Kheer is a delightful dessert on its own, you can explore other variations of kheer or similar milk-based sweets from Manjula’s Kitchen:

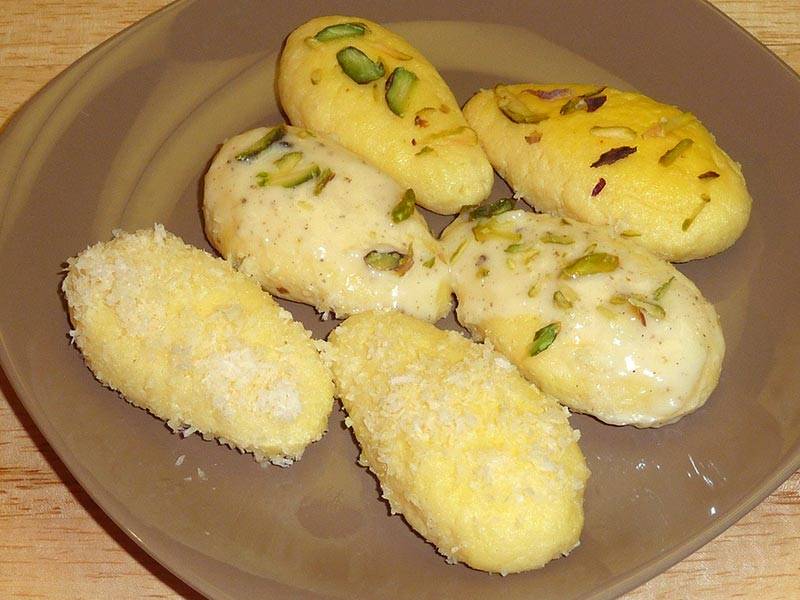
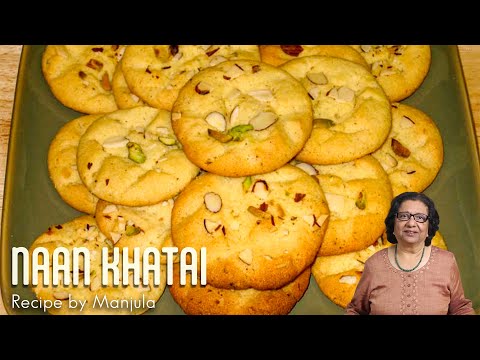
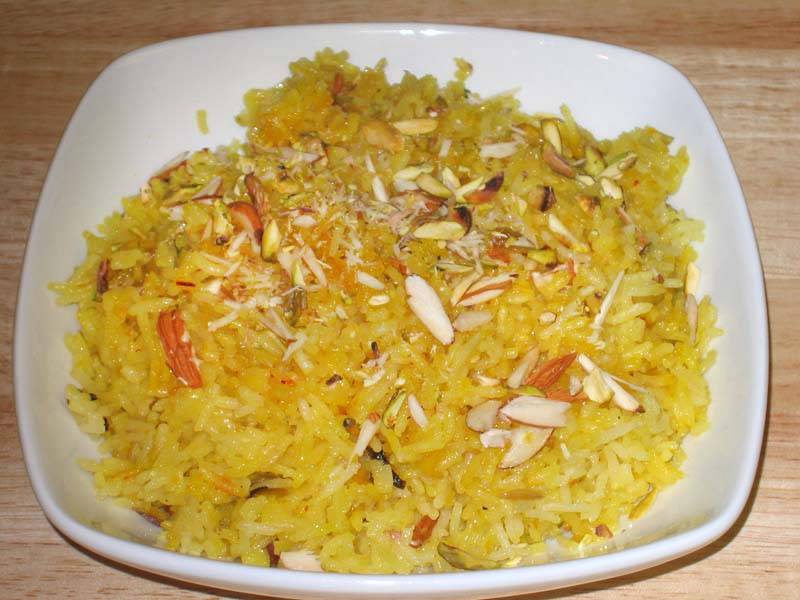
    • Rice Kheer: The classic, most traditional form of kheer made with rice, milk, and sugar.
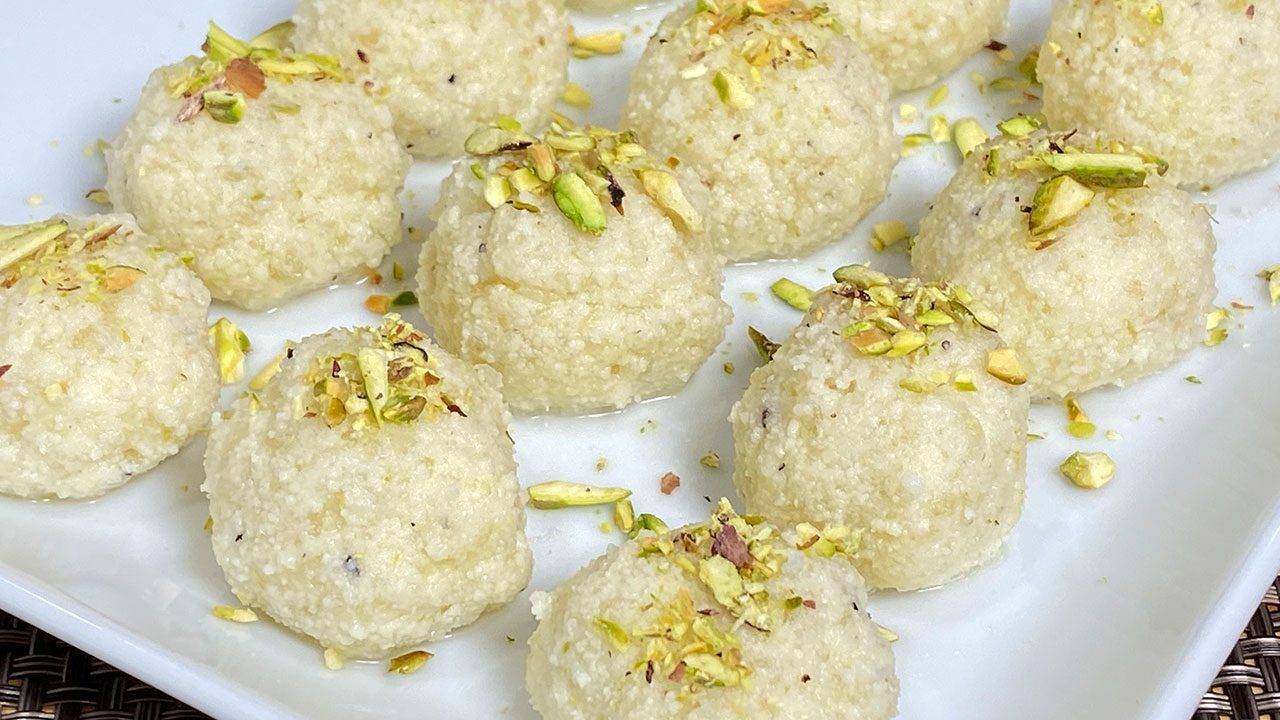
    • Sabudana Kheer: A delicious variation using tapioca pearls, commonly served during fasting periods.
    • Vermicelli Kheer (Seviyan Kheer): Made with thin vermicelli noodles, this version offers a unique texture to the traditional kheer.
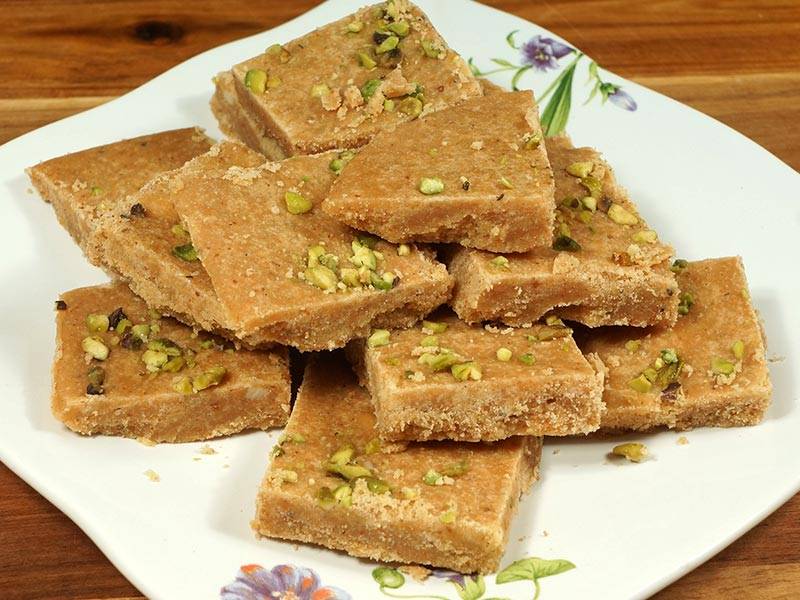
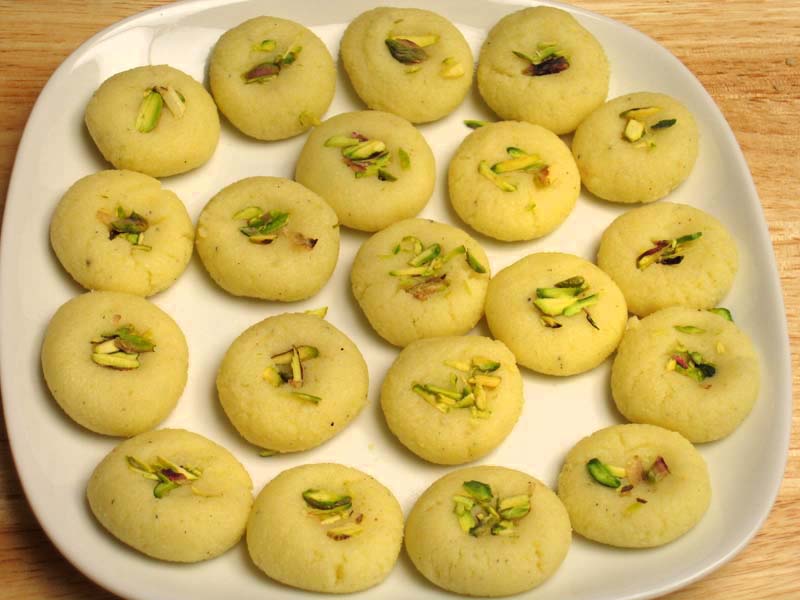
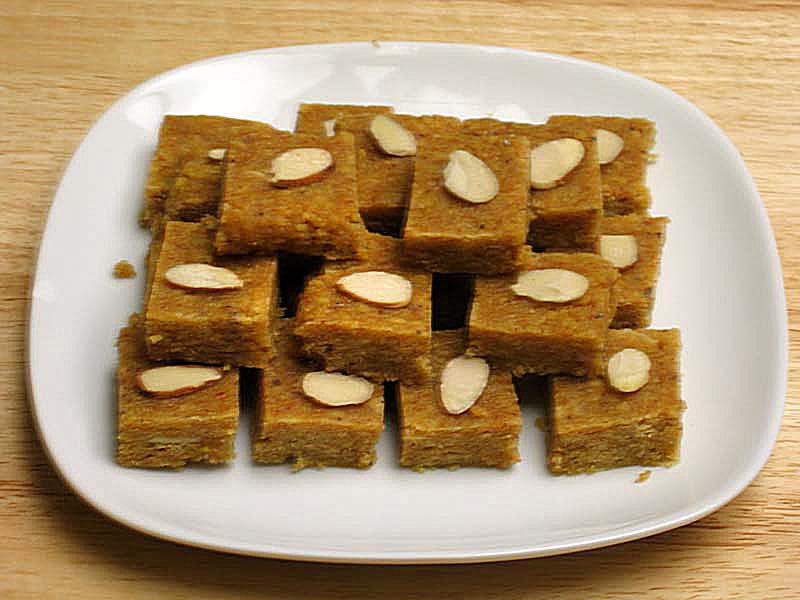
    • Badam Burfi (Almond Candy): Rich and creamy, this version uses almonds to create a decadent dessert that’s both healthy and delicious.

    Health Benefits and Dietary Considerations

    Carrot Kheer offers a nutritious alternative to traditional kheer, with the inclusion of carrots providing a good source of vitamins, fiber, and antioxidants. Carrots are rich in vitamin A, which promotes eye health and boosts immunity, making this kheer not only delicious but also beneficial for overall wellness. Additionally, milk provides calcium and protein, while the nuts add healthy fats, making this dessert a well-rounded treat.

    This kheer can be easily adjusted for various dietary preferences. For a vegan option, you can substitute dairy milk with almond or coconut milk. The natural sweetness of the carrots also allows for a reduction in added sugar if you prefer a lighter dessert.

    Serving Suggestions

    Carrot Kheer can be served warm or chilled, depending on your preference. Its vibrant color and rich flavor make it an attractive addition to any festive meal. For an even more indulgent experience, you can serve Carrot Kheer with a sprinkle of extra chopped nuts, such as almonds or pistachios, for added crunch and richness.

    If you want to serve Carrot Kheer as a pudding, cook it for a few more minutes to achieve a thicker, more pudding-like consistency. This version pairs wonderfully with Gulab Jamun or Rasgulla for a complete Indian dessert platter.

    Conclusion

    Carrot Kheer is a simple yet luxurious dessert that offers a modern twist on the traditional Indian sweet. With its creamy texture, vibrant color, and subtle sweetness, this dessert is sure to become a favorite at your dinner table. Whether you’re celebrating a festival or simply want to treat yourself to something special, this Carrot Kheer recipe is a must-try. Explore the other kheer variations on Manjula’s Kitchen to discover even more delicious ways to enjoy this timeless dessert.

    Frequently Asked Questions (FAQs)

    • What is the difference between Carrot Kheer and Rice Kheer?
      • Carrot Kheer uses shredded carrots as the main ingredient, while Rice Kheer is made with rice. Both versions are cooked in milk and flavored with sugar and cardamom, but Carrot Kheer offers a more vibrant color and slightly different texture.
    • Can I make Carrot Kheer vegan?
      • Yes, you can easily make Carrot Kheer vegan by using plant-based milk like almond or coconut milk instead of dairy milk.
    • What are some other variations of kheer I can try?
      • You can try Rice Kheer, Sabudana Kheer, Vermicelli Kheer, or Badam Kheer, each offering unique flavors and textures while still being deliciously creamy and satisfying.
    • How do I serve Carrot Kheer as a pudding?
      • To serve Carrot Kheer as a pudding, cook it for 2-3 extra minutes to achieve a thicker consistency, similar to a pudding. You can serve it warm or chilled
    • How long can I store Carrot Kheer?
      • Carrot Kheer can be stored in an airtight container in the refrigerator for up to 2-3 days. Reheat it gently before serving if you prefer it warm.

  • Shakar Para

    Shakkar Para

    Shakkar Paras are delightful, sweet snacks perfect for holidays and loved by kids. The addition of cinnamon not only enhances the flavor but also gives a cookie-like texture. They are ideal for all holidays and even for travel, as they have a long shelf life. Shakkar Paras have always been a staple in our pantry. The addition of cinnamon to this popular snack has made it even more appealing to kids. These sweet snacks are very enjoyable for all ages.

    This is an easy recipe to make because I always have the ingredients available. You just need 4 ingredients: all-purpose flour, sooji (semolina), sugar, and oil. I have flavored it this time with cinnamon, you can replace cinnamon with cardamom. They are so delicious you can not stop eating. This is also a vegan recipe.

    • 2 cups all-purpose flour (maida)
    • 2 tbsp fine semolina flour (sooji)
    • 3 tbsp oil
    • 1/2 cup sugar
    • 1 pinch salt
    • 2 drops lemon juice
    • 1/2 tsp cinnamon powder
    • 1/3 cup chilled water (use as needed)
    1. In a bowl, combine all dry ingredients: all-purpose flour, semolina, salt, sugar, and cinnamon powder, and mix them well.

    2. Add oil and lemon juice to the dry mix. Gradually incorporate chilled water until the dough comes together. The dough should not be soft and do not knead the dough. Chilled water adds the crispness to Shakkar Paras.

    3. Cover the dough and let it rest for at least fifteen minutes. Lightly knead the dough; it will soften due to the sugar.

    4. Divide the dough into two parts and shape each into a flat ball.

    5. Sprinkle a little all-purpose flour on the rolling surface. Roll each ball into about 9-inch circles with the thickness of salted crackers.

    6. Prick the rolled dough with a fork on both sides to prevent puffing during frying.

    7. Cut the rolled dough into 1/2-inch-wide and 3-inch-long pieces or your desired shape.

    8. Heat oil in a frying pan. Test readiness by placing a small piece of dough; it should sizzle and rise slowly.

    9. Fry the Shakkar Paras until both sides are light golden-brown (approximately 6-7 minutes).

    10. Allow them to cool to room temperature for crispiness.

    11. Store the Shakkar Paras in an airtight container; they can be kept for several weeks.

    Using chilled water to make the dough makes it flakiness.

    Adding lemon juice prevents excessive oil absorption and adds crispness. Use only 2-3 drops of lemon juice.

    Enjoy these delicious, cinnamon-flavored Shakkar Paras as a delightful snack or treat for holidays and travel! They are crisp and flaky, and I know my grandkids love them. If you enjoy the recipe, share it with friends, and don’t forget to subscribe to my YouTube channel. I look forward to reading your comments. Enjoy!

    Appetizer
    Indian
    shakar para

    Introduction to Shakar Para

    Shakar Para, a crispy and mildly sweet Indian snack, is a cherished treat, especially during festive occasions like Diwali. This delightful snack, also known as shakkar para, is easy to prepare and is loved by both adults and children alike. The recipe’s simplicity and the perfect blend of sweetness make it a favorite across Indian households.

    Cultural and Traditional Importance

    In many parts of India, Shakar Para holds a special place during festive celebrations. It is traditionally prepared in large batches, ensuring that everyone has a generous share of this delicious snack. The crispiness of shakarpara symbolizes prosperity and happiness, making it a staple during joyous occasions. This snack is not just limited to festivals; it’s also enjoyed as a daily tea-time companion, adding a touch of sweetness to everyday life.

    Recipe Variations

    While Shakar Para is delightful in its original form, there are various other Indian snacks that can complement or substitute this recipe:

    • Namak Para: A savory twist to Shakar Para, made with a blend of spices and salt. This snack provides a perfect balance when served alongside the sweet shakkar para.
    • Besan Ki Burfi: A sweet treat that shares the same festive significance as Shakar Para. Its rich texture and flavor profile offer a delightful contrast to the crispy shakarpara.
    • Mathri: Another crispy snack that can be enjoyed with shakarpara. This flaky biscuit-like snack pairs well with the sweetness of Shakar Para, making it an ideal combination for snack platters.
    • Kaju Katli: A popular Indian sweet made from cashews, perfect for those who prefer a richer taste. Kaju Katli can be served alongside Shakar Para to create a diverse spread of traditional Indian sweets.

    Health Benefits and Dietary Considerations

    Although Shakar Para is a sweet snack, it’s a much healthier option compared to store-bought sweets, as it can be made at home with control over the ingredients used. The recipe is entirely vegetarian, making it suitable for those following a vegetarian diet. Additionally, by opting for whole wheat flour and using jaggery instead of refined sugar, one can make a slightly healthier version of shakarpara.

    Serving Suggestions

    Shakar Para can be served in numerous ways. Traditionally, it’s enjoyed on its own as a snack, but it can also be served alongside a cup of masala chai, enhancing the tea-time experience. For a more elaborate spread, Shakar Para can be served alongside other Indian snacks like Mathri or Namak Para. It can also be gifted in decorative jars during festivals, making it a thoughtful and delicious present.

    Conclusion

    Shakar Para is more than just a snack; it’s a symbol of festivity, joy, and the richness of Indian culinary traditions. Whether you’re celebrating a festival or just craving a sweet treat, shakarpara is the perfect recipe to add to your repertoire. Try this authentic shakarpara recipe from Manjula’s Kitchen and experience the simple yet profound pleasure that this sweet snack brings.

    Frequently Asked Questions (FAQs)

    What is the origin of Shakar Para?

    Shakar Para is believed to have originated in the northern regions of India, where it is commonly prepared during festivals like Diwali.

    Can Shakar Para be made healthier?

    Yes, by using whole wheat flour and jaggery instead of refined sugar, Shakar Para can be made slightly healthier.

    How long does Shakar Para last?

    When stored in an airtight container, Shakar Para can stay fresh for up to 2 weeks.

    Can Shakar Para be made vegan?

    Yes, Shakar Para can be made vegan by using vegetable oil instead of ghee.

    What are some variations of Shakar Para?

    Variations include Namak Para, Mathri, and Besan Ki Burfi, each offering a unique taste experience.

  • Besan Ki Burfi

    Besan Ki Burfi (Gram Flour Fudge)

    Besan ki barfi is sweet like candy and has a fudge like consistency its a dessert which is savoured by all. Made with roasted Besan, butter and sugar, it is then flavored with cardamom and garnished with nuts. Besan Burfi can be served any time of the day. In an Indian household, Burfies are served as cookies or chocolate.

    • 1 cup besan (gram flour)
    • 2 tbsp sooji (samolina)
    • 1/4 cup almonds coarsely ground (badam)
    • 6 tbsp melted unsalted butter (ghee)
    • 1 cup sugar
    • 1/2 cup water
    • 8 cardamoms– shelled and seeds crushed
    • 1 tbsp pistachios crushed for garnishing
    1. Grease 8” flat plate and set aside.

    2. In a bowl mix besan and semolina, add about 3 tablespoons of butter mix it well by rubbing with fingers. Mix will become grainy; Let it sit for about 15 minutes.
    3. Put rest of the butter in frying pan over medium heat; add besan mix and roast for about 4-5 minutes stirring continuously basen will lightly change the color.
    4. Add almonds and roast stirring continuously until the color has change to deep golden brown and also start to smell of the roasted basen, this should take another 6-7 minutes. Turn off the heat. We add the almonds later otherwise almonds will be over roasted.
    5. In a saucepan, boil the sugar and water together over medium heat until syrup is little less then 1 thread or 205 degrees F on a candy thermometer. Mix the syrup with flour mixture mix well and pore over greased plate.
    6. Sprinkle the sliced pistachios evenly over the top to garnish.
    7. Let Burfi cool it takes about 1 hours and cut into 1” squares.

     Notes

    If syrup is not right consistency Burfi can become very soft or very dry, in any case it is easy to fix.

    Burfi is too soft: add little more almond powder or coconut powder. May be make them in ladoo a ball shape little smaller then golf ball and roll them in almond or coconut powder.

    Burfi is very dry: sprinkle hot water as needed about 2-3 tablespoons over Burfi and mix it.

    Besan Burfi also good for home made gift snack, some more suggestions Moog Dal Ladoo, Apple Coconut Burfi a perfect gift for vegan friend.

    Dessert
    Indian
    Candy, Dessert, Fudge, Gram Flour Burfi, Mohan Thal, Sweet

    Besan ki Burfi Recipe: How to make Besan ki Burfi

    Besan ki Burfi, also known as Gram Flour Fudge, is a popular Indian dessert that is loved for its rich flavor and melt-in-your-mouth texture. Made from gram flour (besan), ghee (clarified butter), sugar, and flavored with cardamom and nuts, this sweet treat is a favorite during festivals, celebrations like Diwali or Party. Besan ki Burfi is relatively easy to make and requires only a few ingredients, making it a beloved homemade sweet in Indian households. 

    Benefits of Besan ki Burfi:

    Simple Ingredients: Besan ki Burfi requires minimal ingredients that are commonly found in Indian kitchens, making it an accessible and budget-friendly dessert option. With just gram flour, ghee, sugar, and a few flavorings, you can whip up a batch of delicious Besan ki Burfi in no time.

    Customizable: While the basic recipe for Besan ki Burfi is simple and straightforward, it can be customized to suit individual taste preferences. You can adjust the sweetness, flavorings, and texture of the burfi by varying the amount of sugar, adding different spices or essences, or incorporating nuts and dried fruits.

    Other Variations of Barfi:

    • Til ki Barfi: It’s a burfi that incorporates sesame seeds or til and is a winter favourite for all
    • Carrot Barfi: Carrot Burfi or carrot fudge is a classic Indian dessert made with carrot and milk. This burfi is packed with all the goodness of carrots.
    • Badam Barfi: Badam (almond) Burfi is a healthy substitute for candy but is rich in flavor. Almond burfi can be served as dessert or snack.
    • Coconut Barfi: Coconut Burfi is made with coconut powder combined with a cardamom flavored sugar syrup. It’s a scrumptious dessert.

    Tips for Making Perfect Besan ki Burfi:

    1. Roast the Gram Flour Well: Properly roasting the gram flour is essential for achieving the right flavor and texture in Besan ki Burfi. Roast the gram flour on low heat, stirring continuously, until it turns golden brown and aromatic.
    2. Use Fresh Ingredients: Use fresh and high-quality ingredients, especially ghee and nuts, for the best results. Fresh ghee has a rich and buttery flavor that enhances the taste of the burfi, while fresh nuts add crunch and texture.
    3. Be Patient: Making Besan ki Burfi requires patience and attention to detail. Cook the burfi mixture over low heat, stirring continuously, until it thickens and starts to leave the sides of the pan. This ensures that the burfi sets properly and has the right consistency.
    4. Cut Carefully: Once the Besan ki Burfi is set and cooled, cut it into neat squares or diamond shapes using a sharp knife. Dip the knife in warm water between cuts to prevent sticking and ensure clean edges.

    FAQs:

    Q: Can I store besan ki burfi?

    A: Yes, you can store besan ki burfi in an airtight container at room temperature for up to a week. However, it’s best enjoyed fresh.

    Q: Can I make besan ki burfi vegan?

    A: Absolutely! You can substitute melted ghee with vegan butter or coconut oil to make it vegan-friendly.

    Q: How do I fix besan burfi if it turns out too soft or too dry?

    A: If the burfi is too soft, add a little more almond powder or coconut powder to thicken it. If it’s too dry, sprinkle some hot water over it and mix well to restore moisture.

    Q: Can I make besan burfi without sugar?

    A: While sugar is traditionally used to sweeten besan burfi, you can substitute it with jaggery or a sugar alternative like stevia for a healthier option.

    In conclusion, besan ki burfi is a delightful Indian sweet that’s relatively easy to make and offers a myriad of variations to suit different preferences. Whether you’re celebrating a festival or simply craving a sweet indulgence, this timeless treat is sure to impress with its irresistible taste and aromatic essence.

  • Flax Seed Burfi


    Flax Seed Burfi

    Flax Seed Burfi or you can call this health bar. Flax Seed is high in protein and good source of vegetarian omega 3. This Burfi is vegan, gluten free and tastes great.

    • 1/2 cup golden flax seed powder or meal
    • 1/2 cup coarsely ground walnut
    • 1/2 cup coarsely ground almonds
    • 1/2 cup coarsely ground cashews
    • 1 tbsp crushed cardamom about 8 cardamoms
    • 1 cup sugar
    • 1/4 cup water
    1. Grease the 8 inch plate and set aside.

    2. Dry roast flex seed, over medium heat for about 1 minute. Add walnut, almond and cashew powder. Dry roast for about 2 minutes stirring continuously. Do not over roast the nuts, nuts will become oily.

    3. Turn off the heat. Add cardamom mix it well and take out in a bowl. Set aside.

    4. In same sauce pan boil the sugar and water together over medium heat. After syrup come to boil lower the heat to medium and let it boil for 1-2 minutes. To check the syrup put a drop over dry surface and check with finger syrup should be just sticky. On candy thermometer it should show 205 degree Ferranti.

    5. Turn off the heat. Add the nuts mixture to the syrup. Mix it well and quickly spread over the greased plate by pressing from all sides to keep 1/4 inches in thickness and the edges clean.

    6. Cool for a few minutes and cut them in about 1-1/2 inch square shape

    7. Keep them in closed container; Flex Seed Burfi has a long shelf life.

    Snack
    Indian

    Introduction

    Flax seed burfi is a nutritious and tasty Indian sweet that combines the health benefits of flax seeds with the delightful flavors of traditional burfi. This flaxseed healthy bar is perfect for those looking to enjoy a sweet treat while maintaining a healthy diet. In this article, we will explore the benefits, variations, and a simple flax seed burfi recipe to make at home.

    What is Flax Seed Burfi?

    Flax seed burfi, also known as flax seed barfi, is a healthy twist on the traditional Indian burfi. Made with flax seeds, jaggery, and nuts, this sweet treat is not only delicious but also packed with nutrients.

    Health Benefits of Flax Seed Burfi

    1. Rich in Omega-3 Fatty Acids: Flax seeds are a great source of omega-3 fatty acids, which are essential for heart health.
    2. High in Fiber: This flaxseed healthy bar provides a good amount of dietary fiber, aiding in digestion and weight management.
    3. Antioxidant Properties: Flax seeds are rich in antioxidants, helping to reduce inflammation and protect against chronic diseases.
    4. Energy Boosting: The combination of jaggery and nuts provides a natural energy boost, making flax seed burfi a perfect snack.

    Simple Flax Seed Burfi Recipe

    Ingredients:

    • Flax seeds
    • Jaggery
    • Ghee (clarified butter)
    • Mixed nuts (almonds, cashews, etc.)

    Method:

    1. Roast Flax Seeds: Dry roast the flax seeds until they are aromatic and slightly crispy.
    2. Prepare Jaggery Syrup: Melt jaggery in a pan with a little water to form a syrup.
    3. Mix and Cook: Combine the roasted flax seeds and chopped nuts with the jaggery syrup. Stir well.
    4. Set and Cut: Spread the mixture on a greased plate and let it cool. Cut into desired shapes once set.

    Variations of Flax Seed Burfi

    • Chocolate Flax Seed Burfi: Add cocoa powder or melted dark chocolate for a rich, chocolaty flavor.
    • Coconut Flax Seed Burfi: Mix in desiccated coconut for an extra layer of texture and flavor.

    Incorporating Flax Seed Burfi into Your Diet

    Flax seed burfi can be enjoyed as a snack or dessert. It’s a great way to add more nutrients to your diet without compromising on taste. Perfect for festive occasions, family gatherings, or as a healthy treat for kids.

    Tips for Making the Best Flax Seed Burfi

    • Use fresh and high-quality flax seeds for the best flavor.
    • Adjust the sweetness according to your preference.
    • Experiment with different nuts and add-ins to create your unique version.

    Storing Flax Seed Burfi

    Store flax seed burfi in an airtight container at room temperature for up to a week. For longer storage, keep it in the refrigerator.

    FAQs

    What is the best sweetener for flax seed burfi?

    Jaggery is traditionally used, but you can also use honey or coconut sugar as alternatives.

    Can I make flax seed burfi vegan?

    Yes, substitute ghee with coconut oil or any plant-based oil to make it vegan.

    Is flax seed burfi gluten-free?

    Yes, flax seed burfi is naturally gluten-free, making it suitable for those with gluten intolerance.

    Can I add other seeds to the burfi?

    Absolutely! Chia seeds, sunflower seeds, and pumpkin seeds can be added for extra nutrition.

    How long does flax seed burfi last?

    When stored properly, flax seed burfi can last up to a week at room temperature or longer in the refrigerator.

    Is flax seed burfi suitable for kids?

    Yes, flax seed burfi is a healthy snack for kids, providing essential nutrients and energy.

    Conclusion

    Flax seed burfi is a delightful and nutritious sweet that combines the health benefits of flax seeds with the rich flavors of traditional Indian desserts. Whether you’re looking for a healthy snack or a festive treat, this flaxseed healthy bar is sure to satisfy your cravings while boosting your nutrition. Try our simple flax seed burfi recipe at home and enjoy this delicious, guilt-free indulgence.

    Similar Recipes from Manjula’s Kitchen: Besan Ladoo, Coconut Burfi, Almond Burfi, Dates and Nuts Ladoo

  • Chum Chum

    Chum Chum – Bengali Dessert

    Chum Chum is a popular Bengali (East Indian) sweet dessert that is made with Paneer, (home-made cheese). It is a versatile dish that can be served in many different variations. Here I will show you 3 different ways to serve Chum Chum, either with Pistachios, or with Coconuts or with Malai (cream).

    • 4 cups whole milk, paneer
    • 2 cups sugar
    • 5 cups water
    • 1/8 tsp cardamom powder

    Ingredients for different For Different Garnishing

    • 1 tbs pistachio
    • 1 tbs coconut powder
    • 2 tbsp cream
    1. Prepare paneer according to recipe “How to Make Paneer”. To test if sufficient water has been removed out of the paneer, take a little piece of paneer in your palm and rub with your fingers. You should be able to make a firm but smooth ball, after 15-20 seconds of rubbing.

    2. Place the drained paneer on a dry, clean surface and knead it for 3 to 4 minutes until it rolls into smooth soft dough. If the paneer is too crumbly, add a teaspoon of water.
    3. Divide the paneer dough into 8 equal parts and roll each one into a smooth oval shaped ball.
    4. For the syrup: In a wide saucepan, bring 5 cups of water to a boil. Add sugar and stir to dissolve completely. Use a large pan as the Chum Chums will double in volume while cooking in the syrup.
    5. Add the paneer balls to the syrup and bring it back to a boil. Then turn down the heat to medium and cover the pot. Cook for 10 minutes.
    6. Open the pot cover, turn the chum chums over and cook for another 15 minutes. Check to see if the chum chums appear firm but sponge-like (with little holes on the surface). Turn off the heat and let sit for 10 more minutes.

    7. Remove the chum chums from the syrup. Serve chill!

    8. Serving With Pistachios: Cover every Chum Chum with a few pieces of sliced pistachios

    9. Serving with Coconut Powder: Roll the chum chums in dry coconut

    10. Serving with Malai (cream): Boil the milk over medium heat until it reduces to ½ its volume. Stir the milk continuously so it doesn’t burn on the bottom of the pot. Add sugar, and cardamom powder. Stir for 2 minutes, and then turn off the heat. While milk is still warm pour 1 tablespoon over every Chum Chum and top with a few pieces of pistachios.

    Dessert
    Indian
    Bengali Dessert, Paneer Dessert

    How to make Chum Chum Recipe: Chum Chum Sweet

    Chum Chum is a popular Indian sweet delicacy that originates from the state of West Bengal. This soft and spongy dessert is made from paneer (Indian cottage cheese) and soaked in a sugar syrup flavored with saffron and cardamom. 

    Chum Chum is known for its delicate texture, subtle sweetness, and vibrant colors, making it a delightful treat for special occasions and celebrations. 

    Chum Chum are like a luxurious and bigger version of rasgulla although made with richer ingredients such as pistachio and other dry fruits along with garnishing done using cream. 

    Other Dessert Variations:

    1. Ras Malai: Rasmalai is a Bengali dessert consisting of soft paneer balls immersed in chilled creamy milk. Like Rasgullas, Rasmalai is also made with homemade cheese known as “paneer” or “chana”. Instead of being soaked in sugar syrup like Rasgullas, Rasmalai is soaked in sweet, flavored milk.
    1. Kala Jamun: Kala Jamun is a delicious dessert very similar to Gulab Jamun. Kala jamun is an exotic sweet dish served on special occasions. Kala Jamuns have a very unique texture as they are chewy outside and grainy inside.
    1. Bengali Rasgulla: Bengali Rasgullas are homemade paneer (Cottage cheese) sweet dish, round paneer balls soaked in sugar syrup. This is a delicacy from the state of Bengal, these are very light and delicious, you can never go wrong with Bangali Rasgulla.
    1. Jalebi: Jalebi is a warm, crispy, delicious treat. It can best be described as funnel cake. In many places jalebi is still served as a breakfast treat like pancakes. It is a treat to have jalebi and kachori for a hearty breakfast.

    Tips for Making Perfect Chum Chum:

    Use Fresh Paneer: Use fresh and homemade paneer for the best texture and flavor in your Chum Chum. Homemade paneer is softer and creamier than store-bought varieties and yields a more delicate and spongy dessert.

    Knead the Paneer Well: Knead the paneer dough thoroughly to ensure a smooth and uniform texture. Proper kneading helps to remove excess moisture from the paneer and creates a soft and pliable dough that’s easy to shape into rolls.

    Soak in Sugar Syrup: Allow the paneer rolls to soak in the sugar syrup for at least 4-6 hours or overnight for maximum flavor absorption. The longer the Chum Chum sits in the syrup, the softer and more flavorful it will become.

    Garnish Creatively: Get creative with your garnishes and decorations. Sprinkle chopped nuts, edible silver leaf (varak), or dried rose petals on top of your Chum Chum for an elegant and festive presentation.

    FAQs about Chum Chum:

    Can I make Chum Chum without paneer? 

    While paneer is the traditional main ingredient in Chum Chum, you can experiment with alternative fillings such as khoya (reduced milk solids) or ricotta cheese for a different texture and flavor profile.

    How long does Chum Chum stay fresh? 

    Chum Chum can be stored in the refrigerator for up to 3-4 days in an airtight container. However, it’s best enjoyed fresh within the first day or two for optimal taste and texture.

    Can I freeze Chum Chum? 

    While Chum Chum can be frozen, its texture may change slightly upon thawing. If freezing, wrap the Chum Chum tightly in plastic wrap or foil and store them in a freezer-safe container for up to 1-2 months. Thaw the Chum Chum in the refrigerator before serving.

    Is Chum Chum gluten-free? 

    Yes, Chum Chum is gluten-free as it does not contain any wheat or gluten-containing ingredients. However, be cautious of cross-contamination if you have a severe gluten allergy or celiac disease.

    How did Chum Chum got its name?

    The name chum chum comes from Bengal, where it originated as a sweet treat. The name mimics the sound “nom nom,” which is fitting because the sweet is soft and fluffy, and you might munch on it like that.

    Chum Chum is a delightful and versatile Indian dessert that’s perfect for celebrating special occasions or indulging in a sweet treat. With its soft and spongy texture, subtle sweetness, and endless variations, Chum Chum is sure to captivate your taste buds and leave you craving for more. 

    Whether enjoyed as a festive dessert or as a comforting indulgence, Chum Chum is a beloved sweet delicacy that’s cherished by people of all ages.

  • Peda


    Peda, Milk Fudge

    Pedas are an all-time favorite sweet snack. Pedas are like soft milk fudge. Pedas are grainy texture made with milk and sugar, flavored with cardamom. Peda can be served as a candy or as a dessert.

    • 4 cupa paneer (home made)
    • 1/3 cup milk powder
    • 1/2 cup sugar
    • 3 tbsp unsalted butter (or ghee)
    • 1/4 tsp cardamom powder (ilachi)

    For Garnishing

    • 1 tbsp sliced pistachios
    1. Check the recipe for paneer and make the paneer with whole milk. For this recipe use 4 cups of milk.

    2. Heat the frying pan on medium. Add butter and let it melt. Next add milk, milk powder, and paneer. Mix it well.

    3. Cook mixture on medium heat stirring continuously until mixture starts leaving the sides of the frying pan and becomes like dough. This should take about 12 minutes. Now this is known as khoya.
    4. Transfer the khoya into a bowl and let it cool off until khoya becomes just lukewarm.
    5. Mix the sugar and cardamom powder into the khoya and knead it for about a minute until every thing blends together and become soft dough. Note: if you mix the sugar while khoya is hot that will make pedas soft.
    6. Divide the mix into about 20 equal parts and roll them into round balls. Lightly press it down so it looks like small patty. Put few pieces of sliced pistachios on every peda.

    7. Pedas should be served at room temperature.

    Pedas can be kept for few days at room temperature and about a month refrigerated.

    Dessert
    Indian
    Gluten Free, Offering To God, Parsad, Peda

    Indian Peda Sweet Recipes – Manjula’s Kitchen 

    Peda sweet, an exquisite Indian dessert, holds a special place in the hearts of many dessert enthusiasts. The good news is, crafting this delightful treat at home is easier than you might think, especially if you’ve got some whole milk in your kitchen. Now, let’s go step-by-step process on how to make these mouthwatering peda mithai.

    Prepare the Paneer: 

    Start by making paneer by adding lemon juice to half a cup of hot water. Boil milk on medium heat, stirring to prevent burning. When it boils, gradually add lemon juice, stirring gently. Turn off the heat when curds separate from whey. Drain using a cheesecloth-lined strainer, rinse with cold water, and squeeze out excess water. Press wrapped paneer under a heavy pan for 1 hour to remove excess water.

    Get Cooking

    Begin by heating a frying pan on medium heat. Once the pan is warm, add a small amount of butter and let it melt until it becomes a golden liquid. Following this, introduce the whole milk into the pan. Sprinkle in a moderate amount of milk powder and incorporate the paneer into the mixture. Thoroughly mix these ingredients together in the pan, ensuring an even distribution. This step helps in the creation of a cohesive and flavorful mixture that will later contribute to the overall texture and taste of the dish.

    Stir, Stir, Stir

    Cook the mixture over medium heat, and the key is to keep stirring consistently. Don’t take a break! Keep at it until you notice the mixture changing – it will start to pull away from the sides of the pan, transforming into a dough-like texture. This process usually takes about 12 minutes. When that happens, you’ve successfully created khoya, the essential foundation for making our delicious peda indian sweet.

    Cool Off

    Transfer the khoya mixture that you’ve made into a bowl. Let it cool down until it reaches a lukewarm temperature. It’s important not to use it while it’s still hot for the next step in the recipe. Allowing it to cool ensures that the khoya’s texture and consistency are just right for the following stages of the cooking process. This cooling step is crucial to achieve the desired results in your final dish.

    Sweet Blending

    Now comes the sweet part! Once the khoya is lukewarm, add in the sugar and cardamom powder. Give it a good mix and start kneading for about a minute until everything blends into a soft dough. A little tip: if you mix the sugar while the khoya is still hot, your Peda indian sweet could turn out a bit too soft. So, let the khoya cool a bit before adding the sweetness!

    Shape It Up

    After preparing the khoya mix, divide it into roughly 20 equal portions. Take each portion and shape it into a round ball. Once you have your little balls, gently press them down to create a small, flat patty shape. If you want to enhance the appearance, consider placing a few slices of pistachios on top of each pera sweet. This simple step adds a touch of elegance to your homemade peda sweet, making them not only delicious but also visually appealing.

    Serve at Room Temperature

    Your pera sweet are almost ready to be savored! To enhance their delicious taste, allow them to sit at room temperature. This simple step allows the flavors to fully develop, resulting in a more rich and satisfying indulgence. When you’re ready to treat yourself, serve up these delightful indian sweet pedas. You’ll likely find that they disappear swiftly, a testament to their irresistible appeal.

    Storage Notes:

    Amongst all the indian sweet recipes the Indian sweet peda is one of the most versatile sweets that can last for a few days at room temperature. If you want to savor the sweetness for a more extended period, refrigerate them for about a month.

    In summary, making pera sweets at home is a rewarding and surprisingly simple process. From preparing the paneer to shaping the pera indian sweet, every step contributes to the rich flavor and texture of this delightful treat. So, gather your ingredients, follow these easy steps, and indulge in the joy of homemade peda mithai. Enjoy the sweetness!

    To experiment more with indian sweet recipes you can try Modak, Pineapple Sandesh & Moong Dal Ladoo

  • Mohan Thal

    Mohan Thal (Fudge)

    Mohan Thal is like a gram flour fudge with a touch of cardamom flavor and topped with sliced almonds. Mohan Thal can be served as a dessert or served with a cup of chai tea. This fudge looking candy is irresistible.

    • 2 cups besan (gram flour)
    • 6 tbsp unsalted butter (ghee)
    • 1 tbsp warm milk
    • 1/2 cup heavy cream
    • 1 cup milk powder
    • 1 tsp cardamom powder (ilachi)
    • 1-1/4 cup sugar
    • 1/2 cup water
    • 2 tbsp almonds sliced
    1. Melt the butter and mix with gram flour by rubbing between both palms. Texture will become like a lightly rough powder. Keep aside for at least fifteen minutes.

    2. Add the milk. Milk should be warm and rub the mixture again between your both palms.
    3. Next put the cream and milk powder in a frying pan and cook on medium heat. String continuously until mixture comes together and looks like soft dough. Remove from heat and keep aside.
    4. Mix the milk dough with gram flour mixture together and stir fry on medium heat until it becomes light brown in color and start giving off a sweet aroma. Tips: stir fry continuously making sure it stays powdery.
    5. Let it cool and add cardamom powder mix it well.
    6. In a saucepan, boil the sugar and water together on medium heat until syrup is 2 threads or 225 degrees F on a candy thermometer.
    7. Mix the syrup with flour mixture mix well and pour on a 8 inch greased plate. Do this quickly before syrup cools down.
    8. Mohanthal should be about ½ inch thick and shape it into a square shape on the plate. While it is still hot spread the sliced almonds evenly over the top to garnish.
    9. Cut the mohanthal into 1-inch square shapes while it is still warm. Serve at room temperature.

    Notes:   Mmohanthal can be kept for 2 weeks or refrigerate for a month. You May also like Gulab Jamuns, Badam Ki Burfi

    Dessert
    Indian

    Mohanthal Recipe: How to Make Mohanthal Fudge

    Mohan Thal, also known as Besan Barfi, is a traditional Indian dessert that hails from the state of Gujarat. This rich and decadent fudge is made from gram flour (besan), ghee (clarified butter), sugar, and flavored with cardamom and nuts. 

    Mohan Thal is loved for its melt-in-your-mouth texture, aromatic flavor, and irresistible sweetness, making it a favourite treat during festivals, such as Diwali, Ganesh Chaturthi, Holi or Makar Sankranti

    Why make Mohan Thal Burfi

    • Fun & Savoury: Mohan Thal is a fun and savoury dish that can be enjoyed by everyone and is revered for its sweetness that has a long lasting after taste even even after consuming it 2 hours before. 
    • Rich Flavor Profile: Mohan Thal is infused with the warm and aromatic flavors of cardamom, saffron, and nuts, giving it a rich and complex flavor profile. The combination of sweet, nutty, and spicy notes makes Mohan Thal a truly indulgent and satisfying dessert experience.
    • Easy to Make: Despite its luxurious taste and appearance, Mohan Thal is surprisingly easy to make at home with just a few simple ingredients. With a bit of patience and practice, you can recreate this traditional Indian sweet in your own kitchen and impress your family and friends.

    Other Variations of Burfi:

    • Til ki Burfi: It’s a burfi that incorporates sesame seeds or til and is a winter favourite for all
    • Carrot Burfi: Carrot Burfi or carrot fudge is a classic Indian dessert made with carrot and milk. This burfi is packed with all the goodness of carrots.
    • Badam Burfi: Badam (almond) Burfi is a healthy substitute for candy but is rich in flavor. Almond burfi can be served as dessert or snack.
    • Coconut Burfi: Coconut Burfi is made with coconut powder combined with a cardamom flavored sugar syrup. It’s a scrumptious dessert.

    Tips for Making Perfect Mohan Thal (Gram Flour Fudge):

    • Use Good Quality Ghee: Use high-quality ghee made from pure cow’s milk for the best flavor and texture in Mohan Thal. Ghee adds richness and depth to the fudge and enhances its overall taste and aroma.
    • Cook on Medium Heat: Cook the gram flour mixture on Medium heat to prevent it from burning while ensuring an even cooking. Stir the mixture constantly to prevent lumps from forming and to achieve a smooth and creamy texture.
    • Cut into Uniform Pieces: Once the gram flour mixture has set, cut it into uniform pieces using a sharp knife for a neat and professional presentation. Garnish each piece with a sliver of almond or pistachio for an elegant finishing touch.

    FAQs about Mohan Thal (Gram Flour Fudge):

    How long does Mohan Thal stay fresh? 

    Mohan Thal can be stored in an airtight container at room temperature for up to 1-2 weeks. For longer storage, refrigerate the fudge in the refrigerator for up to 3-4 weeks or freeze it for up to 2-3 months.

    Can I make MohanThal with nuts? 

    Yes, you can add nuts or substitute them with seeds such as melon seeds or pumpkin seeds if you have nut allergies or prefer a nut-free version of Mohan Thal.

    Can I reduce the amount of sugar in Mohan Thal? 

    Yes, you can reduce the amount of sugar in MohanThal to suit your taste preferences. However, keep in mind that sugar plays a crucial role in the texture and sweetness of the fudge, so adjust the sugar quantity accordingly.

    Mohan Thal (Gram Flour Fudge) is an elegant luxurious Indian sweet that’s perfect for celebrating special occasions or satisfying your sweet cravings. 

    With its rich flavor, melt-in-your-mouth texture, and endless variations, Mohan Thal is sure to become a favorite treat in your household. Whether enjoyed on its own or paired with a cup of chai, Mohan Thal is a timeless classic that’s cherished by sweet enthusiasts everywhere.

    Stay tuned for our next exploration into the world of culinary delights!

  • Nan Khatai

    Nan khatai

    Nan khatai is an egg-less light and crispy biscuit snack that's perfect to serve with tea or coffee.

    • 1/3 cup all purpose flour (plain flour or maida)
    • 1/3 cup fine sooji (samolina)
    • 1/8 tsp baking soda
    • 1/4 tsp cardamom coarsely ground (ilaichi)
    • 1/2 cup unsalted butter
    • 2/3 cup sugar
    • 1 tbsp almond sliced
    • 1 tbsp pistachio sliced
    1. Pre heat the oven to 375 degree.

    2. In a bowl, mix the all-purpose flour, gram flour, sooji, baking soda and cardamom powder and set aside.
    3. Let the butter come to the room temperature (butter should be soft not melted)
    4. Add butter and sugar in a mixing bowl and beat for two to three minutes until light and fluffy.
    5. Add the flour mix to butter and sugar mixture and knead them together to make smooth dough. Divide the dough into about 24 equal parts and make them into balls. Press each ball between your palms lightly; every piece should be about 3/4″ in thickness.

    6. With a sharp knife softly draw a tic-tac-toe design on the top and put few pieces of almonds and pistachios and press them into the dough gently.
    7. Put Nan khatai on a lightly greased cookie sheet and bake at 375 degrees for about 13 to 15 minutes or until Nan khatai are lightly gold brown.
    8. After they are lightly golden brown remove the cookie sheet from the oven. Let the Nan Khatais cool down for two to three minutes before taking them off the cookie sheet.

    Nan khatai make a great homemade gift for holidays. Your friends and relatives will love it.

    Serve them with hot cup of chai.

    Enjoy!

    Dessert
    Indian
    Biscuit, Cookies, Eggless, Kid Friendly, Tea Time Snack

  • Sweet Saffron Rice

    Savor the Aromatic Bliss: Sweet Saffron Rice – A Delightful Indian Treat

    Sweet saffron rice is a delectable, gluten free and aromatic dessert that originates from Indian cuisine. It features fragrant basmati rice cooked with saffron-infused syrup and a blend of spices, resulting in a rich and flavorful dessert or sweet treat. The saffron lends a vibrant golden hue and a distinct floral flavor to the dish, while the nuts and dried fruits add texture and depth. This delightful dessert is often served on special occasions, festivals, or as a comforting indulgence any time of the day.

    1. Nutty Roasting: Enhancing Flavor for Sweet Saffron Rice

    Begin your journey of crafting sweet saffron rice by imparting a rich nuttiness to the dish. In a pan over medium heat, dry roast the almonds, pistachios, and raisins until the raisins puff and the nuts undergo a slight color change. This step not only intensifies the flavors of the nuts but also adds a delightful crunch and texture to your saffron sweet rice, elevating its overall appeal.

    2. Indian Sweet Rice Recipe: Setting the Stage for Saffron Sweetness

    In a saucepan, combine rice, water, a cinnamon stick, and a pinch of salt over medium-high heat. As the ingredients come to a gentle boil, prepare the canvas for the infusion of saffron’s golden hue and aromatic essence into your Indian sweet rice recipe.

    3. Simmering Brilliance: Cooking the Rice to Perfection

    Once the rice mixture reaches a boil, reduce the heat to low and cover the saucepan. Allow the rice to simmer for approximately 15 minutes or until the water has evaporated, ensuring each grain is cooked to perfection. This crucial step lays the foundation for the sumptuous texture and delightful flavor profile of your saffron rice Indian delicacy.

    4. Saffron Infusion: Creating the Signature Sweetness

    While the rice undergoes its transformation, prepare the decadent saffron-infused syrup in a separate saucepan. Combine milk, butter, sugar, saffron strands, cloves, and cardamom over medium heat, stirring until the sugar dissolves and the aromatic spices release their essence. This fragrant mixture sets the stage for the indulgent sweetness that defines your kesar rice experience.

    5. Harmonious Fusion: Merging Nutty Goodness and Sweetness

    Once the rice and saffron syrup are ready, it’s time to bring together the elements of your sweet saffron rice. Gently fold the roasted nuts mixture and the fragrant saffron syrup into the cooked rice, using a spoon to ensure even distribution without mashing the grains. This harmonious fusion of flavors and textures creates a symphony of taste in every bite of your Indian sweet rice recipe.

    6. Final Simmer: Infusing Depth of Flavor

    Cover the saucepan once more and allow the saffron sweet rice to simmer over very low heat for an additional 3 to 4 minutes. This final step ensures that the flavors meld together seamlessly, infusing every grain of rice with the richness of saffron and the nutty crunch of almonds and pistachios.

    7. Culinary Crescendo: Serving Sweet Saffron Rice in All its Glory

    Turn off the heat and let the sweet saffron rice rest, covered, for a few more minutes before serving. This brief interlude allows the flavors to further develop, culminating in a dish that’s not just a treat for the taste buds but a celebration of the vibrant culinary heritage of India. Enjoy your saffron rice Indian delicacy or kesar rice as a delightful dessert or a comforting indulgence any time of the day.

    If you loved this indian sweet rice recipe then you must also check out other variants of Rice: Vegetable Biryani, Masala Khichdi, Chhole Biryani, Quinoa Vegetable Pilaf and Lemon Rice

Exit mobile version