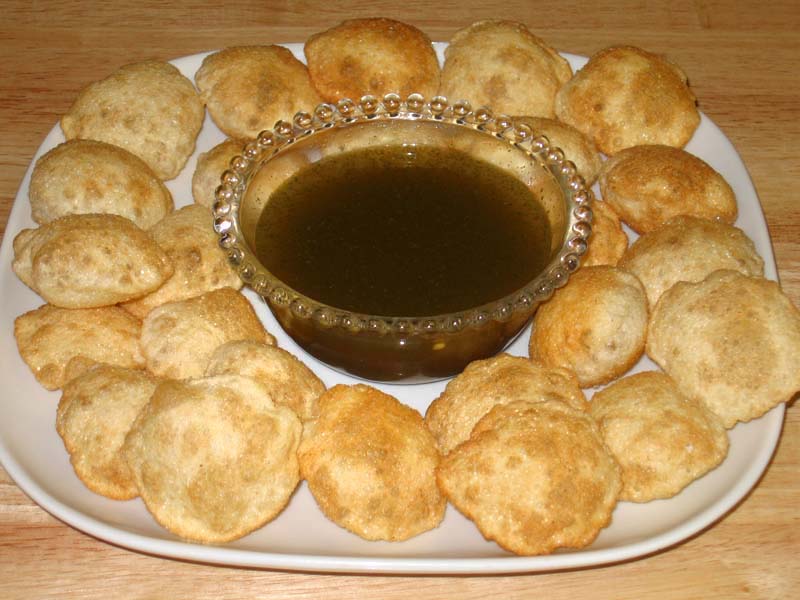
Pani Puri
Ingredients
Pani (Spicy Water):
- 1 cup mint leaves Pudina
- 2 to 4 green chilies adjust to taste
- 3 Tbsp tamarind paste Imli
- 3 Tbsp lemon juice
- 1 tsp black salt
- 1 tsp salt adjust to taste
- ¼ tsp ginger powder
- ⅛ tsp asafetida Hing
- 1 Tbsp roasted cumin seed powder
- 1 Tbsp sugar adjust to taste
- ½ tsp black pepper
- 4 cup water adjust to taste
Puris:
- ¼ cup All Purpose flour Maida or Plain Flour
- ¾ cup fine Sooji Semolina Flour
- ½ cup water as needed
Instructions
Pani (Spicy Water):
- Blend everything except the water together to make a fine paste. While blending, add water as needed to blend.
- Taste to adjust the green chilies as they can be mild or hot. Add more lemon juice, sugar, and salt as needed to your desired taste. Remember you will be adding more water to dilute so paste should be spicier. Strain the paste using water as needed.
- After straining mix the paste with remaining water or adjusting to the taste.
- The pani (water) will taste best if refrigerated for a day.
To make Puris:
- Mix the flour and sooji. Add water as needed to make firm dough. Knead the dough until it is pliable. Cover the dough with a damp cloth for about ten minutes.
- Damp two kitchen towels, spread one damp towel over a cookie sheet or plain surface, close to where you are going to fry the puris.
- Divide the dough into about 60 small balls. Keep them under a damp cloth.
- Start rolling each ball to about a 2-inch diameter circle. Place over a damp towel and cover with another damp towel. Do this for all 60 puris. TIP: Placing the puris between damp cloths helps the puris to puff evenly on all sides.
- Heat the oil on medium high heat. Oil should be about 1 1/2 inch high in frying pan. To test the oil, put a little piece of dough in the oil. The oil is ready if the dough comes up right away and does not change color.
- Start frying the puris, starting first with the puri you first rolled.
- Put one puri in the oil and press lightly. When it puffs turn over and put another puri in the oil. Keep adding six to eight puris at a time. Fry the puris until they are golden-brown all around by turning a few times. You may adjust the heat as needed while frying.
- Take the puris out and place over paper towel, so the excess oil is absorbed. TIP: When taking the puris out of the frying pan, make sure to tilt the skimmer so that the excess oil is drained before placing on the paper towel.
- Fry all the puris. They should be crisp and puff like a ball.
Notes
- Pani puris are served by making a small hole in each puri. Fill the puris with boiled and chopped potatoes, or boiled chickpeas.
- Finish by filling each puri with the spicy pani (water). Enjoy!
Pani Puri Recipe: The Ultimate Guide to Making Delicious Pani Puris
Introduction to Pani Puri
Pani Puri, also known as golgappa or phuchka, is a beloved Indian street food famous for its burst of flavors and crunchy texture. This pani puri recipe encapsulates the essence of Indian culinary tradition, offering a delightful mix of tangy, spicy, and sweet flavors. Perfect for gatherings, parties, or simply as a snack, making pani puri at home is a rewarding experience that brings friends and family together.
How to Make Pani Puri: Step-by-Step Guide
Preparing the Puris
To start this recipe for pani puri, you’ll need puris, which are hollow, crispy semolina or wheat spheres. You can either make them at home or purchase them from a store. If making at home, mix semolina or wheat flour with water and knead into a firm dough. Roll out small circles and deep fry until golden brown. Set aside to cool.
Preparing the Pani
The pani puri is incomplete without its signature spicy and tangy water. In a blender, combine mint leaves, coriander leaves, green chilies, ginger, tamarind pulp, black salt, roasted cumin powder, chaat masala, and salt. Blend until smooth. Strain the mixture and dilute it with water according to taste. Chill the pani in the refrigerator for at least an hour before serving.
Preparing the Filling
For the filling, boil potatoes until tender, then peel and mash them. Add boiled chickpeas, and a dash of chaat masala for extra flavor. Mix well and set aside.
Assembling the Pani Puris
Now comes the fun part! Take each puri and gently make a hole in the center, creating a cavity for the filling. Stuff the puris with the potato mixture and arrange them on a serving plate. Pour the chilled pani into each puri using a small spoon or a pani puri maker, ensuring they’re filled to the brim.
Garnishing and Serving
Garnish the pani puris with a drizzle of sweet tamarind chutney and a sprinkle of sev (crunchy chickpea flour noodles) for added texture. Serve immediately to enjoy the burst of flavors and textures in every bite.
Tips for Perfect Pani Puris
Fresh Ingredients: Use fresh mint, coriander, and tamarind for the pani to enhance the flavor.
Chilling Time: Allow the pani to chill for at least an hour to let the flavors meld together.
Crunchy Puris: Ensure the puris are crispy and hollow to hold the filling and pani without getting soggy.
Variations of Pani Puri
Ragda Pani Puri: Replace the potato filling with ragda (spicy chickpea curry) for a heartier version.
Fruit Pani Puri: Experiment with filling options like diced mango, pomegranate seeds, or grated pineapple for a fruity twist.
Sukha Puri: Skip the pani and serve the stuffed puris with sweet tamarind chutney and spicy mint chutney for a dry version.
Benefits of Pani Puri
Rich in Flavor: Pani puri offers a medley of flavors, from spicy and tangy to sweet and savory.
Customizable: You can adjust the spice level and filling according to your preference, making it suitable for all taste buds.
Social Experience: Making and enjoying pani puri with friends and family fosters bonding and creates lasting memories.
FAQs (Frequently Asked Questions)
Q: Can I make the puris ahead of time?
A: Yes, you can prepare the puris in advance and store them in an airtight container for up to a week.
Q: How spicy should the pani be?
A: The spice level of the pani can be adjusted according to your preference. Start with fewer green chilies and add more if desired.
Q: Can I make a healthier version of pani puri?
A: Yes, you can opt for baked puris and use less oil in the filling to make a healthier version of pani puri.
For more delightful Indian recipes, visit Manjula’s Kitchen and explore a world of culinary delights!
By following this comprehensive pani puri recipe, you’ll be able to recreate the magic of this iconic Indian street food in the comfort of your own kitchen. Whether it’s a special occasion or just a craving for something delicious, pani puri never fails to satisfy. So gather your ingredients, invite your loved ones, and embark on a flavorful journey with homemade pani puris!
Other Recipes on Manjula’s Kitchen
If you’re looking to explore more Indian recipes, appetizers, beverages, and desserts, be sure to check out the following links on Manjula’s Kitchen. Here are some links to recipes on Manjula’s Kitchen official website: Vegetable Pakoras Recipe
Kaju Katli (Cashew Burfi) Recipe, Baingan Bharta (Roasted Eggplant) Recipe, Matar (Green Peas) Paneer Recipe, Besan Ladoo Recipe
Leave a Reply
You must be logged in to post a comment.