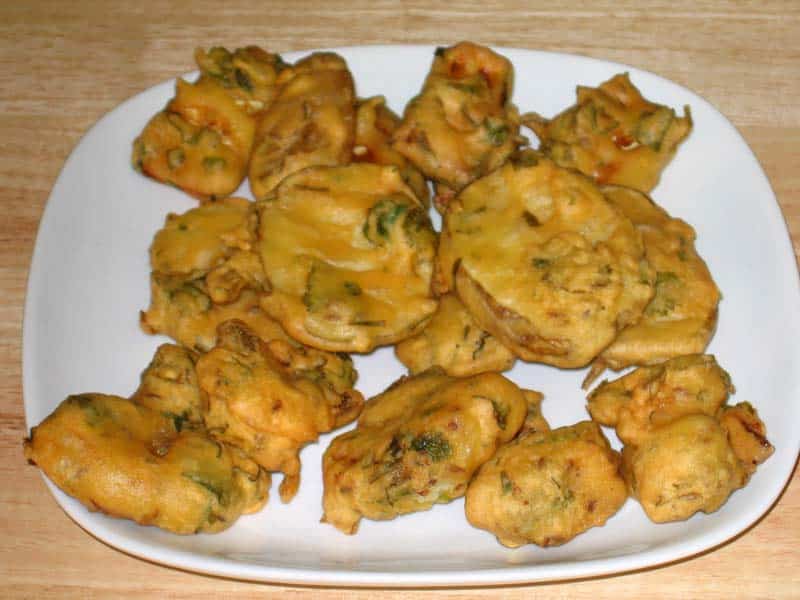
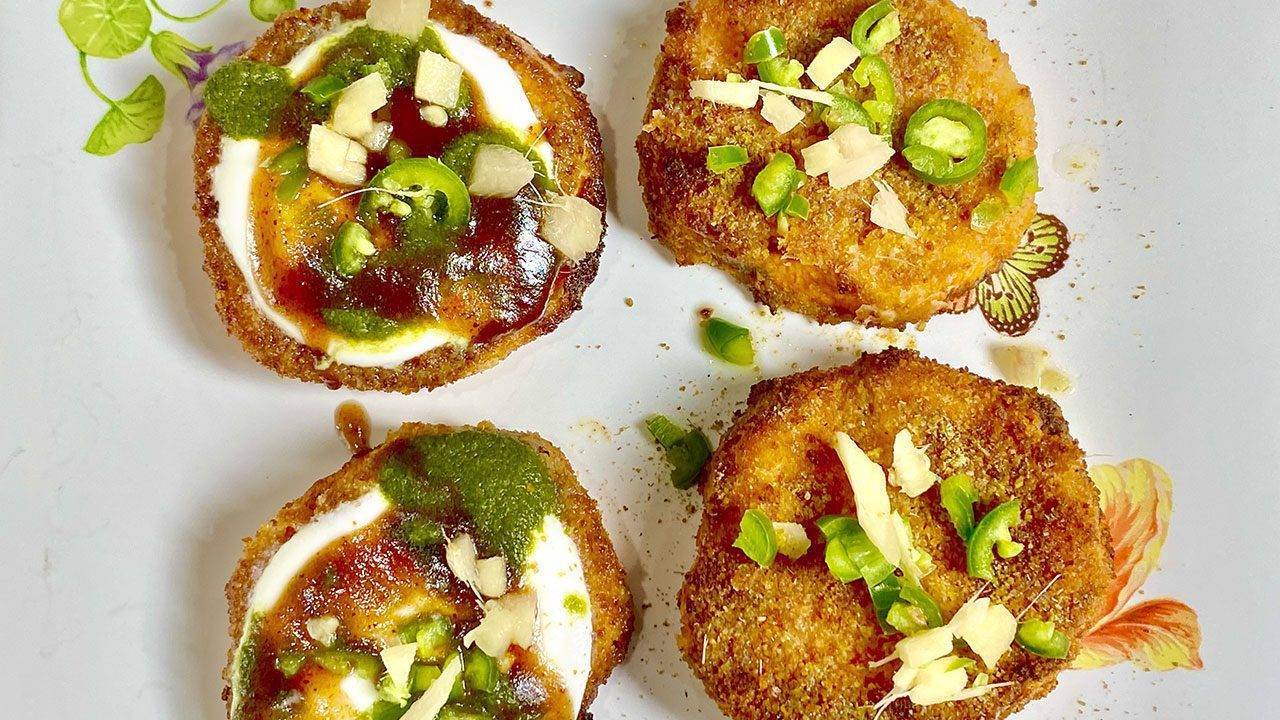
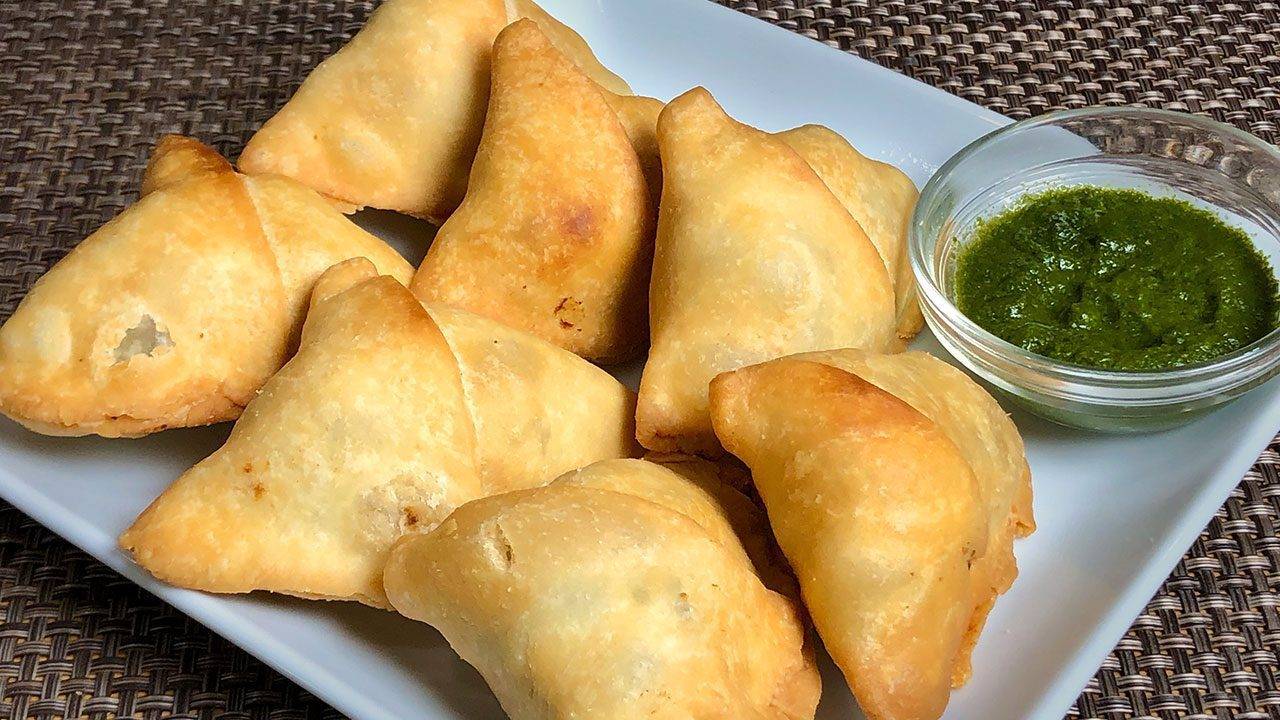
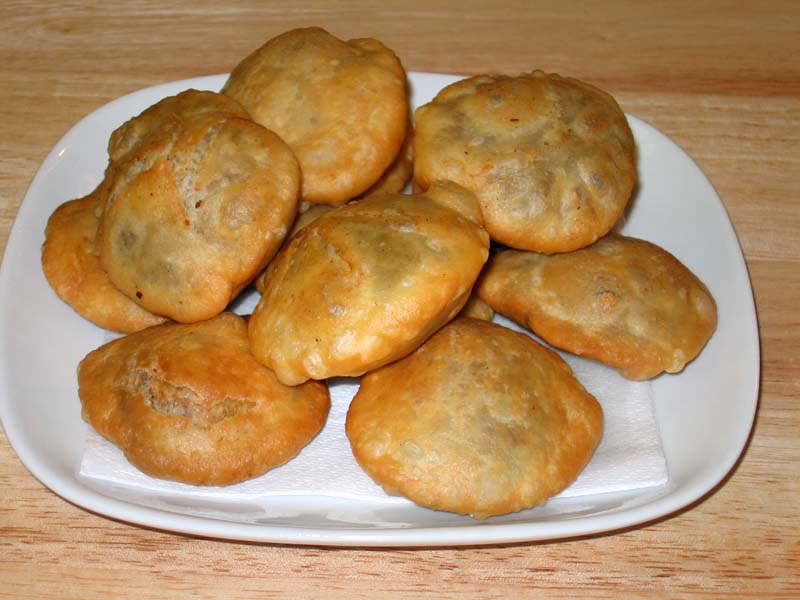
Category: Appetizers

Indian Vegetarian Appetizers: A Delightful Start to Any Meal

When it comes to starting a meal on a high note, Indian vegetarian appetizers offer a delightful and diverse range of options. These veg appetizers Indian style are not only delicious but also reflect the rich culinary heritage of India. From spicy and tangy to savory and crispy, there’s something for everyone to enjoy. Let’s dive into some of the most popular Indian veg appetizers that you can easily prepare at home.

Popular Vegetarian Appetizers

Samosa

The samosa is perhaps the most iconic Indian vegetarian appetizer. These deep-fried pastries are filled with a spiced mixture of potatoes and peas, offering a perfect blend of flavors and textures. Whether served with chutneys or as part of a larger meal, samosas are a favorite among all age groups. This veg appetizer Indian is also a great popular party recipe for any occasion. Additionally, samosas can be included in lunch box suggestions for a delightful midday meal. For those who love the tangy and spicy flavors, explore easy chat recipes that can add a delightful zing to your meal.

Pakora

Pakoras are another beloved veg appetizer Indian. These are fritters made by dipping vegetables like potatoes, or spinach in a seasoned gram flour batter and deep-frying them until golden brown. The crispiness and savory taste make pakoras a perfect snack for rainy days or festive occasions. Pakora is a vegetarian recipe that can also be enjoyed as part of a healthy Indian recipe collection if baked instead of fried. Furthermore, pakoras can be a highlight in indian street food recipes, capturing the essence of Indian street food culture. For those looking for quick and easy bites, these pakoras can also be included in the Indian snacks category.

Aloo Tikki

Aloo Tikki is a popular street food that also doubles as a great appetizer. These are patties made from boiled potatoes, spices, and herbs, shallow-fried to perfection. Often served with chutneys and yogurt, aloo tikki can be a hit at any gathering. It’s also a versatile dish that fits well in lunch box suggestions. For a twist, you can explore fusion recipes, combining aloo tikki with other cuisines to create unique flavors. For instance, making aloo tikki burgers or spring rolls can surprise your guests with innovative dishes. Aloo tikki can also be part of your healthy Indian snacks collection by altering the cooking method.

Paneer Tikka

For those who love paneer, Paneer Tikka is the ultimate Indian vegetarian appetizer. Cubes of paneer are marinated in a mixture of yogurt and spices, then grilled or baked until they acquire a smoky flavor. This appetizer is not only delicious but also packed with protein, making it an excellent choice for a high protein diet. Paneer Tikka also fits well in indian food recipes, as it’s perfect for grilling during outdoor gatherings. If you enjoy experimenting with flavors, trying fusion paneer tikka tacos can be an exciting culinary adventure. Including paneer tikka in your popular party recipe list is sure to impress guests.

Dhokla

Hailing from the western state of Gujarat, Dhokla is a steamed cake made from fermented rice and chickpea batter. Light and fluffy, this best Indian appetizer is typically garnished with mustard seeds, curry leaves, and grated coconut, offering a unique taste experience. It’s also a fantastic option for those looking for gluten-free recipes. Additionally, dhokla can be considered one of the healthy recipes due to its steamed preparation method and nutritious ingredients. It also works well as a snack, providing a quick and satisfying bite. Dhokla is a versatile dish that can be enjoyed in various forms, such as adding it to a lunch box or serving it at a party.

Enhance Your Appetizer Experience

To enhance your appetizer experience, it’s beneficial to explore related categories that complement these delightful flavors of Indian appetizers vegetarian. For example, chaat recipes can bring tangy and spicy elements to your meal, while Indian snacks provide quick and easy options that are perfect for any time of the day. If you enjoy experimenting with flavors, the fusion category offers innovative recipes that blend Indian flavors with other cuisines. Embrace the vibrant taste of India’s street food culture with street food recipes, and opt for lighter versions of your favorite appetizers with healthy recipes

For those with dietary restrictions, gluten-free options like dhokla are both delicious and nutritious. Including high protein appetizers like paneer tikka in your meal plan can help you meet your nutritional needs while enjoying tasty food. Many Indian appetizers, such as samosas and aloo tikki, are great additions to lunch boxes, ensuring a satisfying meal on the go. Hosting a party? The popular party recipe category is filled with crowd-pleasing appetizers that are sure to impress your guests. During the warmer months, grilled appetizers from the summer recipes category are a hit, while during the colder months, warming appetizers from the winter recipes category provide comfort and satisfaction.

Conclusion

Indian vegetarian appetizers are more than just starters; they are a celebration of flavors and culinary traditions. Whether you’re hosting a party or simply want to enjoy a tasty snack, these veg appetizers Indian style will never disappoint. So, gather your ingredients and try out these Indian appetizers today. And don’t forget to find vegetarian recipes related categories for more delightful recipes from Manjula’s Kitchen!

By incorporating these appetizers into your culinary repertoire, you’ll be able to enjoy a wide variety of delicious and nutritious dishes. Whether you’re looking for a quick snack, a healthy option, or a popular party recipe, there’s an Indian appetizer vegetarian to suit every occasion. Happy cooking!

Frequently Asked Questions (FAQs)

Q: What are some popular Indian vegetarian appetizers?

A: Some popular Indian vegetarian appetizers include Samosas, Pakoras, Aloo Tikki, Paneer Tikka, and Dhokla.

Q: What are the benefits of including Indian appetizers in my meal plan?

A: Including Indian appetizers vegetarian in your meal plan adds variety, flavor, and nutritional benefits. These appetizers are often rich in spices and ingredients that offer numerous health benefits.

Q: Can these appetizers be made healthier?

A: Yes, many Indian veg appetizers can be made healthier by baking instead of frying, using less oil, and incorporating more vegetables. For example, you can bake pakoras or use low-fat paneer for paneer tikka.

Q: Are there any gluten-free Indian appetizers?

A: Yes, there are several gluten-free Indian appetizers, such as Dhokla and some versions of pakoras made with gram flour. These options are great for those with gluten sensitivities.

Q: How can I incorporate these appetizers into a party menu?

A: These veg appetizers Indian style are perfect for any party menu. Serve them with a variety of chutneys and dips, include some Indian snacks, and finish with a selection of Indian desserts for a complete festive spread.

  • Khasta Kachori

    Khasta Kachori

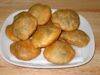
    Khasta kachori is a delicious, spicy, fried puffed pastry. Khasta Kachori is filled with spicy moong dal mixture and then deep fried. Kachori is flakey from outside and hollow inside. Kachori should be fried on low heat so it can cook through to have a nice crunch. Khasta kachori is one of the dish you can eat for any meal! Serve them for breakfast with potato curry with yogurt. kachori makes a mouthwatering appetizer and can be served with, Green Chutney, and tamarind chutney. How about serving for dinner with Aloo Dum. This is one of those recipe you make when you want to impress someone. Kachories can also be stored in air tight container for a week.

    Dough

    • 1 cup all purpose flour (maida, plain flour)
    • ¼ tsp salt
    • 2 Tbsp oil (canola, or vegetable)
    • ¼ cup cold water (more or less as needed)

    Filling

    • ¼ cup washed moong dal, yellow
    • 1 tsp fennel seeds coarsely ground (saunf)
    • 1 tsp red chilly flakes
    • ¼ tsp ginger powder (saunth)
    • ½ tsp mango powder (amchoor)
    • ⅛ tsp asafetida (hing)
    • ½ tsp salt
    • 2 Tbsp water

    Making Dough

    1. Mix the flour, salt and oil. Add the chilled water slowly, mixing with your fingers as you pour. Do not knead the dough. The dough should be soft. Cover the dough and let it sit for at least fifteen minutes.

    Filling

    1. Grind the moong dal dry, almost to a powder.

    2. Mix one tablespoon of oil to the ground dal in a frying pan and roast over medium heat for about two to three minutes or until dal changes color slightly. Stir continuously. Turn off the heat. Add all the spices mix well. Let the mixture cool off. Add two tablespoons of warm water and mix it well. Let it sit for ten minutes and cover with demp cloth.

    Making Kachories

    1. Take the dough and knead it for a minutes. Divide the dough in twelve equal parts.

    2. Take one part of the dough and with your fingers flatten the edges and make into 3-inch circle. Leaving center little thicker then edges. Mold the dough into a cup and place 1 teaspoon of filling in the center. Pull the edges of the dough to wrap the dal filling. Proceed to make all 12 balls.

    3. Let the filled ball sit for three to four minutes before rolling.
    4. Set the kachoris on a surface with the seams facing up. Using the base of your palm, slowly flatten them into about three inches in diameter.
    5. Heat the oil in frying pan over medium heat frying pan should have about one inch of oil. To check if oil is ready put a little piece of dough in the oil. Dough should sizzle, and come up very slow.
    6. Fry them on medium-low heat. After they start to puff, slowly turn them over. Fry until golden-brown on both sides. If the kachoris are fried on high heat, they will get soft and will not be crispy.
    7. Kachories can be stored for at least a week in an airtight container

    Additional Tips

    Don’t roll the kachoris with a rolling pin. Rolling pins can create small holes in the dough that let the oil seep into the kachoris, and they can also cause the kachoris to come out with one side thicker than the other.

    Variation

    Instead of using moong dal, you can use washed urad dal or chana dal. The rest of the recipe stays the same.

    Serving suggestions:

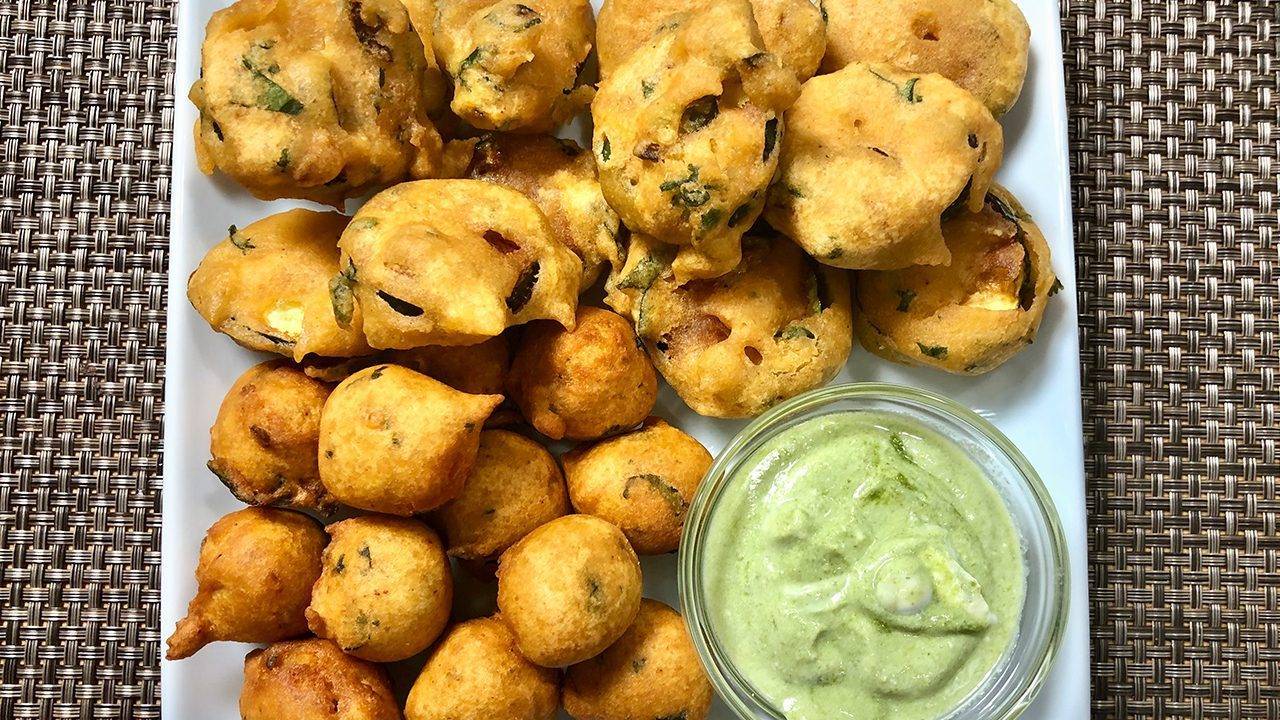
    Kachoris can be served plain, with Tamarind Chutneys, chola, or with Aloo Dum.  Serve them as a chat, pouring plain yogurt and chutney on top.

    Appetizer

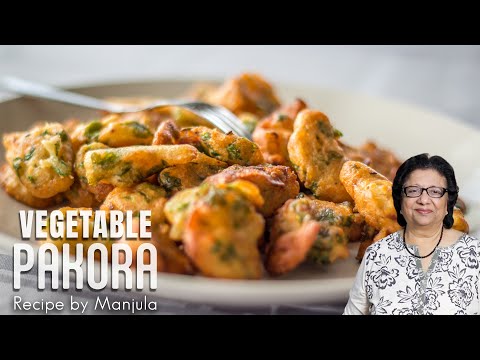
    Khasta Kachori Recipe: How to make Khasta Kachori

    Khasta Kachori, a popular Indian street food delicacy, is a deep-fried pastry filled with a spicy and flavorful stuffing. This crispy and indulgent snack is loved for its rich taste and satisfying crunch, making it a favorite among food enthusiasts.

    Khasta Kachori Recipe: 

    Rich Flavor Profile: Khasta Kachori is bursting with a medley of spices and aromatics, creating a symphony of flavors with every bite. The combination of ingredients like lentils, spices, and herbs provides a unique and indulgent taste experience.

    Satiating Snack: Despite its small size, Khasta Kachori is incredibly filling and satiating, making it an ideal snack option to curb hunger pangs between meals or as a satisfying accompaniment to tea or coffee.

    Versatile: While traditionally served as a snack, Khasta Kachori can also be enjoyed as a part of a larger meal. It pairs well with various chutneys, sauces, and accompaniments, allowing for endless culinary creativity.

    Convenience: Khasta Kachori can be prepared in advance and stored for later consumption, making it a convenient snack option for busy days or entertaining guests.

    Variations of Kachori:

    1. Mattar Ke Kachori: Mattar Kachori is a delicious, fried puff pastry filled with spicy green peas. This mouthwatering snack also can be served as part of any main meal.
    2. Raj Kachori: Raj Kachori is a spicy chaat bowl filled with delicious condiments. It has refreshing flavors and makes for a unique food experience. Guests will have fun filling their own Kachoris according to their taste palette. Served as a snack or appetizer, Raj Kachories make a beautiful presentation and are thoroughly enjoyed by just about everyone.
    3. Mawa Kachori: Mawa Kachori is an exotic dessert. This is a delicacy from the state of Rajasthan. Rajasthan is known for its rich food and culture. Pastry filled with an aromatic mixture of Mawa and nuts makes a very festive dessert.
    4. Urad Dal Kachori: Dal kachori is a delicacy from north India. Dal kachori is a spicy puffed pastry. Traditionally kachoris are sold at a sweet and snack shop. These mouthwatering Dal kachoris can be served as a snack, chaat or part of main meal, making the meal exotic.

    Tips for Making Perfect Khasta Kachori

    Prepare the Dough with Care: The key to crispy and flaky Khasta Kachori lies in the dough preparation. Use a combination of all-purpose flour (maida) and semolina (sooji) to achieve the desired texture. Ensure that the dough is firm yet pliable to prevent it from becoming too soft during frying.

    Fry at the Right Temperature: Fry the kachoris in hot oil over medium-high heat to ensure that they cook evenly and develop a golden-brown crust. Avoid overcrowding the frying pan to maintain the oil temperature and prevent the kachoris from absorbing too much oil.

    Seal the Edges Properly: To prevent the filling from leaking out during frying, seal the edges of the kachoris tightly before frying. Press the edges together firmly and ensure that there are no gaps or openings.

    Serve Fresh and Hot: Khasta Kachori is best enjoyed fresh and hot, straight out of the frying pan. Serve it with your favorite chutneys, sauces, or accompaniments for a delightful snacking experience.

    FAQs about Khasta Kachori:

    Can I make Khasta Kachori ahead of time? 

    While Khasta Kachori is best enjoyed fresh, you can prepare the dough and filling in advance and assemble the kachoris just before frying to save time.

    Can I bake Khasta Kachori instead of frying? 

    While traditional Khasta Kachori is deep-fried for that signature crispy texture, you can try baking them for a healthier alternative. However, the texture and taste may differ slightly.

    What are the best accompaniments for Khasta Kachori? 

    Khasta Kachori pairs well with a variety of chutneys such as tamarind chutney, mint chutney, or coriander chutney. It also tastes delicious with a dollop of yogurt and a sprinkle of chaat masala.

    Is Khasta Kachori suitable for vegetarians? 

    Yes, Khasta Kachori is a vegetarian dish as it contains no meat or animal products. It’s a popular choice among vegetarians and vegans alike.

    Khasta Kachori is not just a snack; it’s a culinary delight that excites your taste buds with its crispy exterior and flavorful filling. Whether enjoyed as a street food treat or homemade snack, its rich taste and versatility make it a beloved favorite in Indian cuisine. 

  • Vegetable Pakoras

    Vegetable Pakora

    Pakoras are an all-time favorite snack in India. They are perfect for a rainy day, and delicious paired with a cup of hot spicy Indian chai. Pakoras are made with a variety of vegetables dipped in a spicy besan (gram flour) batter and deep-fried. This recipe uses potatoes, cauliflower and zucchini.

    • 1 small potato, sliced thin
    • 8 cauliflower sliced
    • 1/2 zucchini, sliced thin
    • 1 cup besan (gram flour)
    • 3 tbsp rice flour (optional)
    • 1 tbsp coriander coarsely ground (dhania)
    • 1 tso cunin seeds (jeera)
    • 2 green chilies chopped
    • 2 tbsp cilantro chopped (hara dhania)
    • 1 tsp salt
    • 3/4 cup water, use as needed
    1. Mix all the dry ingredients together: besan, rice flour, coriander powder, cumin seeds, and salt. Tip: rice flour adds to the crispness.

    2. Add the water slowly to make a smooth batter (batter should be consistency of pancake batter or dosa batter).
    3. Add the green chilies and cilantro. Mix well.
    4. Heat at least one inch of oil in a frying pan over medium high heat. To test, put one drop of batter in the oil. The batter should form a small ball on the surface of the pan, but not change color right away.
    5. Dip the vegetable slices into the batter one at a time, making sure each slice is completely covered by the batter. Then drop the slices slowly into oil in the frying pan.
    6. Fry the pakoras in small batches, three to four minutes per batch. Fry the pakoras, turning occasionally, until both sides are golden brown. Repeat this process for the remaining batches.

    Tips:  If oil is too hot the pakoras will not be crisp; if the oil is not hot enough, the pakoras will be very greasy, make sure when you are putting the pakora in oil, oil should sizzle and pakora slowly float. 

    Variations:  You can use almost any vegetable when making these pakoras, such as eggplant,  cabbage, bell pepper, and different kinds of chilies! Feel free to experiment!

    Serving Suggestions:  The vegetable pakoras are best dipped in a cilantro chutney, tamarind chutney, or sprinkled with chat masala.

    Pakoras taste best when they are served hot.

    You can make the pakoras one day in advance. Do not refrigerate. When ready to eat, place on a cookie sheet and heat in a 300°F oven.

    Leftover pakoras make good sandwiches.

    Appetizer
    Indian

    Crispy and Flavorful Vegetable Pakora

    Vegetable Pakora are crispy and flavorful Indian fritters made with a variety of vegetables coated in a spiced chickpea flour batter. This vegetable pakora recipe is perfect indian appetizers or even a side dish. These pakoras are quick to make and can be enjoyed with your favorite chutneys or sauces.

    The Essence of Vegetable Pakora

    The essence of vegetable pakora lies in their crispiness and the blend of spices used in the batter. A variety of vegetables can be used, making them a versatile and customizable indian snack. The chickpea flour (besan) batter is seasoned with spices such as cumin, coriander, and turmeric, adding to the rich flavor of these Indian vegetable fritters.

    Origin and Popularity

    Pakoras are a popular snack in Indian cuisine, enjoyed across the country in various forms. They are especially loved during the monsoon season, often paired with a cup of hot tea. These vegetable pakoras are a delightful way to enjoy a variety of vegetables, making them a favorite among both adults and children.

    Why You’ll Love This Recipe

    • Crispy and Delicious: The perfect combination of a crispy exterior and flavorful interior.
    • Easy to Make: Simple ingredients and quick preparation.
    • Versatile: Use your favorite vegetables to customize the pakoras.
    • Perfect for Any Occasion: Great as a snack, appetizer, or side dish.

    Variations of Vegetable Dry Recipes

    Exploring Manjula’s Kitchen reveals a treasure trove of other delicious vegetable dry recipes that you might enjoy. Here are some related dishes that you might find interesting:

    Variations of Recipes from Manjula’s Kitchen reveal a treasure trove of other delicious recipes that you might enjoy. Here are some related recipes that you might find interesting:

    1. Methi Thepla: Spiced flatbreads made with fenugreek leaves, ideal for breakfast or as a snack. Recipe: 
    2. Aloo Paratha: Stuffed whole wheat flatbreads filled with a spiced potato mixture, perfect for breakfast or lunch. Recipe: 
    3. Punjabi Kadhi: A tangy yogurt-based curry with gram flour dumplings, seasoned with aromatic spices. Recipe: 
    4. Vegetable Curry: Vegetable curry in color and taste compliment any meal. This is a simple recipe but delicious and filled with flavors. Good way to incorporate a variety of vegetables in your meal.
    5. Besan Puda: Savory gram flour pancakes spiced with herbs and spices, perfect for a nutritious breakfast. Recipe: 

    Explore more delicious recipes on Manjula’s Kitchen

    Serving Suggestions

    Vegetable pakora can be enjoyed in various ways:

    • With Chutneys: Serve with mint chutney, tamarind chutney, or yogurt for a burst of flavor.
    • As a Snack: Perfect for tea-time or as an evening snack.
    • As an Appetizer: Great for parties and gatherings.
    • With Indian Meals: Pair with rice, dal, or any curry for a complete meal.

    Tips and Tricks

    To perfect your vegetable pakora recipe, consider these helpful tips:

    • Use Fresh Vegetables: Fresh vegetables provide the best texture and flavor.
    • Consistent Batter: Ensure the batter is thick enough to coat the vegetables without being too runny.
    • Hot Oil: Fry the pakoras in hot oil to ensure they are crispy and golden brown.
    • Drain Excess Oil: Place the fried pakoras on paper towels to drain any excess oil.

    FAQs

    Can I Bake Pakoras Instead of Frying? 

    Yes, you can bake pakoras in a preheated oven at 375°F (190°C) for about 20-25 minutes, flipping halfway through.

    How Long Do Vegetable Pakoras Last? 

    Vegetable pakoras are best enjoyed fresh, but you can store them in an airtight container in the refrigerator for up to 2 days. Reheat in the oven or on a skillet before serving.

    Is Vegetable Pakora Gluten-Free? 

    Yes, this recipe is naturally gluten-free as it is made with chickpea flour.

    Can I Add Other Vegetables? 

    Yes, you can add any of your favorite vegetables like bell peppers, spinach, or eggplant to the batter.

    What Can I Serve with Vegetable Pakora? 

    Vegetable pakoras pair well with various chutneys, yogurt, or even as a side to a main meal like rice and curry.

  • Banaras Tamatar Ki Chaat


    How to make Banarasi Tamatar Chaat Recipe – Manjula’s Kitchen


    Banarasi Tamatar Chaat is a flavorful and spicy vegan tomato-based chaat (savory snack) that originates from Banaras or Varanasi, a city in the northern part of India. It is a popular gluten free street food known for its distinctive taste and the unique combination of sweet, tangy, and spicy flavors. To prepare Banarasi Tamatar Chaat, follow this tamatar chaat recipe:

    Spicy Syrup:

    To create the syrup for our dish, start by gathering your ingredients. In a saucepan, combine water, sugar, salt, black salt, chili powder, lemon juice, and cumin powder. These elements will come together to form a flavorful and balanced syrup. Once all the ingredients are in the saucepan, place it over medium heat. The goal here is to allow the mixture to cook and meld, developing a harmonious blend of sweet, salty, spicy, and tangy flavors. Cooking it over medium heat ensures a gradual and even infusion of these elements. 

    As the saucepan warms up, keep a close eye on the mixture. Stir occasionally to help the sugar dissolve and to ensure that all the ingredients are well incorporated. The heat will play a crucial role in transforming these individual components into a cohesive syrup that will elevate the overall taste of our dish. Stir the ingredients well to ensure they are thoroughly mixed. Allow the mixture to come to a boil and then let it simmer for about 5 minutes. Keep a close eye on it to make sure the syrup reaches a sticky consistency. 

    Once the syrup achieves the desired stickiness, remove the saucepan from the heat. This syrup will be set aside and used later for garnishing. It adds a flavorful touch to our dish. Now that the syrup is ready, you can move on to the next steps of your recipe.

    Tamatar Ki Chaat:

    Let’s explore further as we create the delectable Banaras Tamatar Chaat, a delightful dish featuring the vibrant combination of tomatoes and aromatic spices. Follow these detailed steps to bring this tantalizing Tamatar ki Chaat to life.

    1. Heating the Oil:

    Begin by heating oil in a frying pan over low to medium heat. Allow it to warm up, setting the stage for the rich flavors to unfold.

    2. Adding Aromatic Ingredients:

    Once the oil reaches the right temperature, introduce cashew powder, ginger, green chili, and red chili powder. Stir-fry this aromatic mix for about 30 seconds, letting the spices infuse the oil with their essence.

    3. Incorporating Tomatoes and Spices:

    Add tomatoes to the pan, along with salt, black salt, black pepper, and cumin powder. Stir this flavorful combination for a duration of 2 minutes, allowing the spices to mingle with the tomatoes.

    4. Introducing Water and Simmering:

    Pour in half a cup of water to the pan. Bring it to a gentle boil and let it simmer over medium heat for 3 minutes or until the tomatoes slightly soften. This simmering process enhances the infusion of flavors.

    5. Adding Potatoes:

    Gently fold in the potatoes, ensuring they are coated with the aromatic tomato-spice mixture. Cover the pan and let it cook for approximately 3 minutes. Aim for the tomatoes to be soft but not mushy, and observe the oil starting to separate, a sign of the dish’s richness.

    6. Preserving Texture:

    As you stir, be mindful not to mash the tomatoes and potatoes completely. Preserving their texture is key to the appeal of Banarasi Tamatar Chaat.

    7. Final Touch:

    Elevate the flavors with a final touch. Add cilantro for freshness, garam masala for warmth, lemon juice for a zesty kick, and a hint of sugar to balance the savory notes. Mix everything thoroughly, allowing the ingredients to harmonize.

    8. Adjusting Sweetness and Tanginess:

    Before presenting your Banarasi Tamatar ki Chaat, take a moment to taste and adjust. Fine-tune the sweetness, tanginess, and salt levels to achieve a well-balanced and harmonious flavor profile.

    The Banaras Tamatar Chaat recipe is a symphony of textures and flavors. The careful combination of spices, the gentle simmering, and the final touch of freshness and warmth create a dish that captures the essence of Banaras (Varanasi), known for its rich culinary heritage. As you savor each bite of this Tamatar Chaat, you’ll experience the unique and delightful taste that defines this iconic recipe. Enjoy the journey of creating and relishing the Banarasi Tamatar ki Chaat in your own kitchen!

    If you enjoy spicy snacks, you should also try Sweet potato chaat, Khasta Kachori Besan, Crispy Vegetable Pakoras, Dahi Puri Chaat & Bread Dahi Vada

  • Potato And Cauliflower Gnocchi

    Potato and Cauliflower Gnocchi

    Gnocchi (pronounced No-chee) is a classic Italian dish. This vegan and gluten free Gnocchi is made with potato and Cauliflower. I have topped it off with a pear sauce to add my own twist to the recipe. This is Crispy on the outside and fluffy on the inside, this recipe is absolutely mouth-watering. This dish was a request from my granddaughter and I’m so glad I gave it a try.

    For Gnocchi

    • 2 cup cauliflower florets (approximately)
    • 1 cup potatoes (boiled, peeled and shredded )
    • 2 Tbsp corn starch (arrow root)
    • 2 Tbsp rice flour
    • 1/2 tsp ginger paste
    • 1/2 tsp salt
    • 1/8 tsp black pepper
    • 2 Tbsp oil

    For Pear Sauce

    • 1 pear (peeled and sliced)
    • 1/4 cup sugar
    • 1 Tbsp olive oil
    • 1/8 tsp black paper
    • 1/4 tsp salt
    • 1 Tbsp lemon juice
    • 1 tsp ginger paste

    To make the Pear Sauce

    1. Heat the pan on low medium heat, I prefer nonstick pan, cook all the sauce ingredients together, olive oil, pear, sugar, black pepper, salt, lemon juice, ginger, mix it well and cook over medium high heat.

    2. Keep stirring until sugar is melted and start caramelizing while stirring keep scraping the sides. This should take about 3-4 minutes.
    3. Caramelize sugar has nice aroma and gives sauce a good golden color. Transfer to small bowl and mash it. 

    To make Gnocchi (NOK-EE)

    1. Make sure remove the stems, boiled them till they are tender, drain the water squeeze the cauliflower to remove the access water, and pat dry.

    2. In a bowl add the cauliflower and potatoes and mash it well, add corn starch, rice flour, salt, black pepper, and ginger paste, mix it well, and knead to make a smooth dough.
    3. Divide the dough in 2 equal parts and roll them in one-inch calendar shape, if it is sticking to surface sprinkle some rice flour this will help rolling.
    4. Take the sharp knife and slice them about half inch thick
    5. Heat the non-stick flat frying pan over medium heat and oil it generously. Spread the Gnocchi do not overcrowd them it will be hard to flip, wait for about two minutes and turn them over, they should be light golden brown, and cook from other side same, Gnocchi should be golden brown both sides.
    6. Serve them pear sauce, 

    It is important to pat dry the cauliflower or air dry.

    Side Dish
    Fusion

Exit mobile version