Category: Quick & Easy
Easy Indian Recipes: Quick and Delicious Vegetarian Dishes
In today’s fast-paced world, we often find ourselves seeking meals that are quick to prepare but still bursting with flavor. Indian cuisine, known for its rich and aromatic spices, offers a plethora of options that are both easy to make and incredibly satisfying. Let’s explore some easy Indian recipes vegetarian, perfect for any occasion, ensuring that you can enjoy delicious easy Indian recipes without spending hours in the kitchen.
Paneer Bhurji
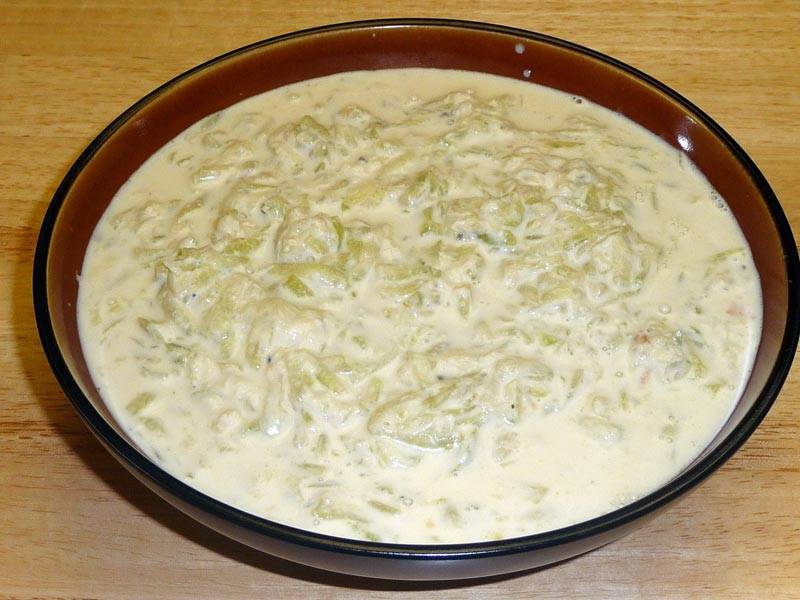
Paneer Bhurji is a delightful scramble made with crumbled paneer (Indian cottage cheese) and a mix of vegetables and spices. This dish is a staple in many Indian households and is a fantastic example of easy Indian recipes. It comes together quickly, making it ideal for a weeknight dinner or a hearty breakfast. Serve it with a side of warm roti or toast for a complete meal.
Vegetable Pulao
For a one-pot wonder, Vegetable Pulao is a go-to choice. This dish features rice cooked with a medley of vegetables and fragrant spices. It’s a shining star among easy Indian food recipes due to its simplicity and the minimal effort required. Pair it with a cooling cucumber raita from the Raita Recipes category for a refreshing touch.
Aloo Jeera
Aloo Jeera, or cumin-spiced potatoes, is a quick and flavorful dish that exemplifies Indian food recipes easy. The potatoes are sautéed with cumin seeds and a handful of spices, resulting in a dish that’s both comforting and satisfying. This recipe is perfect for those times when you need something delicious without a lot of fuss.
Enhancing Your Quick and Easy Menu
To elevate your menu, why not include some delectable options from other categories? Indian Breads like chapati or naan can be quickly prepared and make a perfect accompaniment to any meal. For those with a sweet tooth, Indian Desserts Recipes such as a speedy coconut burfi or a delightful mango lassi can provide a sweet finish to your meal. Incorporating dishes from the Healthy Recipes section, such as a simple and nutritious palak dal or a crisp salad from the Soups and Salads Recipe category, can add a healthy balance to your table.
More Easy Indian Recipes
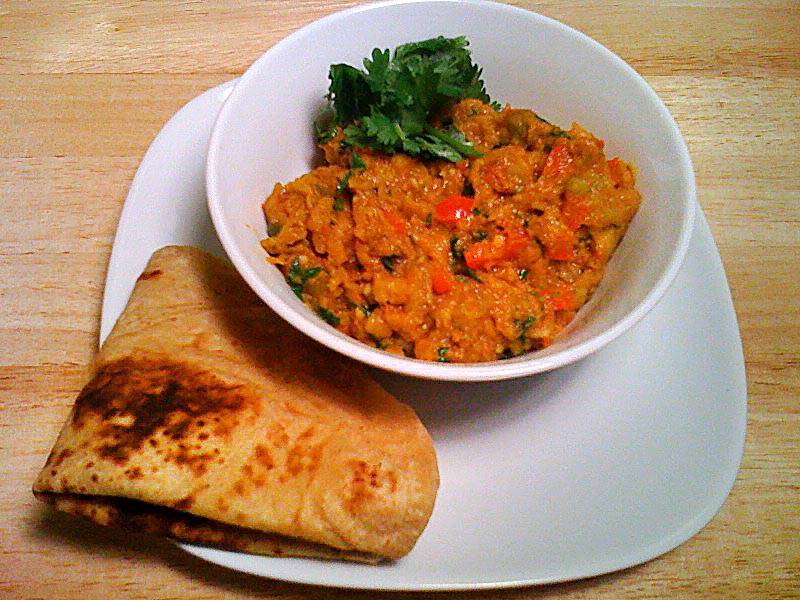
Chana Masala
Chana Masala is a popular dish featuring chickpeas cooked in a spiced tomato gravy. This dish is not only delicious but also quick to prepare, making it a favorite in the realm of easy Indian recipes vegetarian. Serve it with basmati rice or naan for a complete meal.
Moong Dal Khichdi
For a comforting and nourishing option, Moong Dal Khichdi is a must-try. This simple dish made from rice and yellow moong dal (split yellow lentils) is seasoned with basic spices and is incredibly easy to make. It’s perfect for those days when you want something light yet satisfying.
Sweet and Simple Endings
Sheera
Sheera is a traditional Indian dessert made with semolina, ghee, and sugar. It’s a quick and easy dessert that fits perfectly into the category of easy Indian food recipes. The best part? It takes just a few minutes to prepare, making it a great option for last-minute sweet cravings.
Coconut Ladoo
Another sweet treat that’s both simple and delightful is Coconut Ladoo. Made with grated coconut and condensed milk, these sweet balls are a favorite among easy Indian recipes vegetarian. They’re perfect for festivals or just as a quick dessert to satisfy your sweet tooth.
Frequently Asked Questions (FAQs)
Q: What are some popular easy Indian recipes vegetarian?
A: Some popular easy Indian recipes vegetarian include Paneer Bhurji, Vegetable Pulao, Aloo Jeera, Chana Masala, Moong Dal Khichdi, Sheera, and Coconut Ladoo. These dishes are quick to prepare and full of flavor.
Q: How can I make traditional Indian food recipes easy?
A: To make traditional Indian food recipes easy, look for recipes that require minimal ingredients and cooking time. Dishes like Paneer Bhurji, Aloo Jeera, and Moong Dal Khichdi are great examples of easy and quick Indian recipes.
Q: What are some easy Indian food recipes for beginners?
A: Some easy Indian food recipes for beginners include Vegetable Pulao, Chana Masala, and Coconut Ladoo. These recipes are straightforward and don’t require advanced cooking skills, making them perfect for those new to Indian cooking.
Q: Can I prepare easy Indian recipes in advance?
A: Yes, many easy Indian recipes can be prepared in advance. Dishes like Vegetable Pulao and Chana Masala can be made ahead of time and stored in the refrigerator. Simply reheat before serving.
Q: What are some quick Indian desserts?
A: Some quick Indian desserts recipes include Sheera and Coconut Ladoo. These desserts are easy to make and require minimal preparation time, making them perfect for when you need a sweet treat in a hurry.
Conclusion
Easy Indian recipes vegetarian offer a world of flavors and aromas without the lengthy preparation time.
Whether you’re looking for easy Indian recipes, easy Indian food recipes, or specific Indian food recipes easy, these dishes bring convenience and deliciousness to your table.
So, gather your ingredients, try out these recipes, and enjoy the rich and diverse world of Indian cuisine. Happy cooking and happy eating!
By incorporating these dishes into your menu, you’ll be able to enjoy a wide variety of delicious and nutritious foods. Whether you’re looking for quick snacks, main courses, or desserts, there’s an easy Indian recipe to suit every taste.
Don’t forget to check out Manjula’s Kitchen for more inspiration and culinary delights. Happy cooking and happy eating!
-

Vegetable Biryani
A mouthwatering Recipe to make Vegetable Biryani by Manjula’s Kitchen
Vegetable Biryani, a gluten-free delight, is a lavish rice dish featuring spiced vegetables. Enhanced by the alluring saffron aroma, this biryani is a perfect party recipe. Originating from Mughal cuisine, it has seamlessly integrated into Indian kitchens, making it an ideal choice for formal dinners or as a satisfying main meal. Vegetable Biryani is best served with pickles, raita, chutney, and even salads
Preparing Rice for Vegetable Biryani Recipe: A Fundamental Step
To kickstart the vegetable biryani recipe, meticulously wash the rice, ensuring clarity by changing the water several times. This crucial step ensures a clean base for the biryani. For optimal fluffiness, soak the rice for a minimum of 15 minutes before cooking. Once soaked, drain the rice and transfer it to a saucepan. Add water, a hint of oil, and a dash of salt, bringing the mixture to a vigorous boil. After achieving a boil, reduce the heat to low, cover the pan, and let the rice cook for approximately 15 minutes. The goal is to tender rice with evaporated water. Conclude this biryani vegetable recipe by turning off the heat and delicately fluffing the rice with a fork, creating the perfect base for your vegetable biryani.
Recipe to make Vegetable Biryani: Marinating Vegetables
Begin the recipe to make vegetable biryani by preparing vegetables and blending tomatoes into a puree, laying the foundation for a rich gravy. In a separate bowl, concoct a flavorful mix by combining yogurt, ginger, green chili, salt, turmeric, and chili powder. Stir this amalgamation well before introducing a vibrant array of vegetables—cauliflower, beans, bell pepper, carrots, paneer, cashews, ginger, and green chili. Allow this vegetable medley to marinate in the yogurt-infused blend for a harmonious union of flavors, enhancing the overall taste profile of your vegetable biryani.
Creating Flavorful Vegetable Gravy: A Crucial Element in Your Biryani Vegetable Recipe
To craft the delectable vegetable gravy, commence by heating oil in a saucepan. Gauge the oil’s readiness by adding a cumin seed; if it cracks right away, the oil is prepared. Infuse the oil with asafetida and cumin seeds. Once these seeds crackle, introduce the tomato puree to the pan, covering it to prevent splattering. Cook the tomato mixture on medium-high heat until it reduces by half, exuding a rich, concentrated flavor. At this point, introduce the marinated vegetables to the tomato puree, letting them simmer and meld their tastes for 10 to 12 minutes. Stirring intermittently ensures even cooking, resulting in tender yet distinct vegetables for your biryani.
Preheating and Assembling: Recipe to make Vegetable Biryani
As your culinary masterpiece takes shape, preheat the oven to 350 degrees Fahrenheit, creating an ideal environment for the final melding of flavors. Choose a 9″ x 9″ baking glass dish or a similar-sized round bowl as the canvas for your biryani. Commence the assembly by placing half of the cooked vegetables into the dish, forming the first layer of your flavorful creation. Spread half of the cooked rice evenly over the vegetables, creating a balanced harmony of textures. Elevate the aromatic profile by sprinkling mint and garam masala over the rice. Repeat this process with the remaining vegetables and rice, building layers that promise a symphony of tastes in every bite.
Baking the Perfect Vegetable Biryani: Culmination of Vegetable Biryani Recipe
As the assembly reaches its pinnacle, cover the pan, signifying the transition to the baking phase. Slide the dish into the preheated oven and let the magic unfold for about 30 minutes. This careful baking period allows the flavors to intermingle, creating a cohesive and mouth-watering vegetable biryani. The final touch involves sprinkling sliced almonds evenly over the rice, infusing a delightful nuttiness. Drizzle melted butter over the entire dish, ensuring a sumptuous and aromatic finish to your vegetable biryani. The result is a culinary masterpiece that delights the senses and satisfies the palate.
-
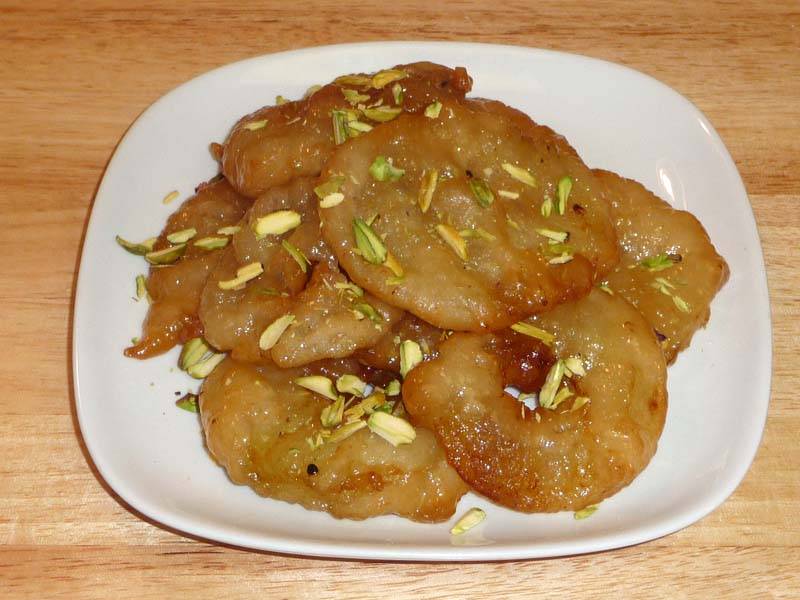
Peda

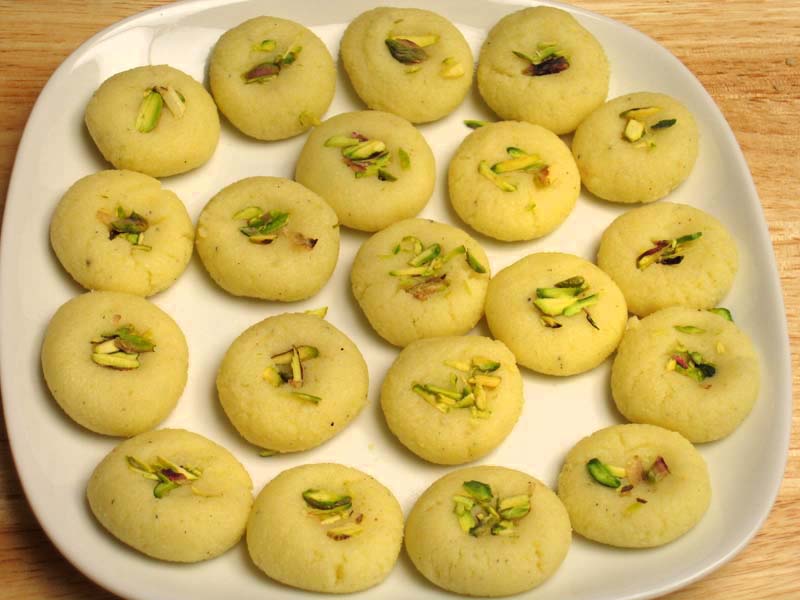
Peda, Milk Fudge
Pedas are an all-time favorite sweet snack. Pedas are like soft milk fudge. Pedas are grainy texture made with milk and sugar, flavored with cardamom. Peda can be served as a candy or as a dessert.
- 4 cupa paneer (home made)
- 1/3 cup milk powder
- 1/2 cup sugar
- 3 tbsp unsalted butter (or ghee)
- 1/4 tsp cardamom powder (ilachi)
For Garnishing
- 1 tbsp sliced pistachios
-
Check the recipe for paneer and make the paneer with whole milk. For this recipe use 4 cups of milk.
-
Heat the frying pan on medium. Add butter and let it melt. Next add milk, milk powder, and paneer. Mix it well.
- Cook mixture on medium heat stirring continuously until mixture starts leaving the sides of the frying pan and becomes like dough. This should take about 12 minutes. Now this is known as khoya.
- Transfer the khoya into a bowl and let it cool off until khoya becomes just lukewarm.
- Mix the sugar and cardamom powder into the khoya and knead it for about a minute until every thing blends together and become soft dough. Note: if you mix the sugar while khoya is hot that will make pedas soft.
-
Divide the mix into about 20 equal parts and roll them into round balls. Lightly press it down so it looks like small patty. Put few pieces of sliced pistachios on every peda.
- Pedas should be served at room temperature.
Pedas can be kept for few days at room temperature and about a month refrigerated.
Indian Peda Sweet Recipes – Manjula’s Kitchen
Peda sweet, an exquisite Indian dessert, holds a special place in the hearts of many dessert enthusiasts. The good news is, crafting this delightful treat at home is easier than you might think, especially if you’ve got some whole milk in your kitchen. Now, let’s go step-by-step process on how to make these mouthwatering peda mithai.
Prepare the Paneer:
Start by making paneer by adding lemon juice to half a cup of hot water. Boil milk on medium heat, stirring to prevent burning. When it boils, gradually add lemon juice, stirring gently. Turn off the heat when curds separate from whey. Drain using a cheesecloth-lined strainer, rinse with cold water, and squeeze out excess water. Press wrapped paneer under a heavy pan for 1 hour to remove excess water.
Get Cooking:
Begin by heating a frying pan on medium heat. Once the pan is warm, add a small amount of butter and let it melt until it becomes a golden liquid. Following this, introduce the whole milk into the pan. Sprinkle in a moderate amount of milk powder and incorporate the paneer into the mixture. Thoroughly mix these ingredients together in the pan, ensuring an even distribution. This step helps in the creation of a cohesive and flavorful mixture that will later contribute to the overall texture and taste of the dish.
Stir, Stir, Stir:
Cook the mixture over medium heat, and the key is to keep stirring consistently. Don’t take a break! Keep at it until you notice the mixture changing – it will start to pull away from the sides of the pan, transforming into a dough-like texture. This process usually takes about 12 minutes. When that happens, you’ve successfully created khoya, the essential foundation for making our delicious peda indian sweet.
Cool Off:
Transfer the khoya mixture that you’ve made into a bowl. Let it cool down until it reaches a lukewarm temperature. It’s important not to use it while it’s still hot for the next step in the recipe. Allowing it to cool ensures that the khoya’s texture and consistency are just right for the following stages of the cooking process. This cooling step is crucial to achieve the desired results in your final dish.
Sweet Blending:
Now comes the sweet part! Once the khoya is lukewarm, add in the sugar and cardamom powder. Give it a good mix and start kneading for about a minute until everything blends into a soft dough. A little tip: if you mix the sugar while the khoya is still hot, your Peda indian sweet could turn out a bit too soft. So, let the khoya cool a bit before adding the sweetness!
Shape It Up:
After preparing the khoya mix, divide it into roughly 20 equal portions. Take each portion and shape it into a round ball. Once you have your little balls, gently press them down to create a small, flat patty shape. If you want to enhance the appearance, consider placing a few slices of pistachios on top of each pera sweet. This simple step adds a touch of elegance to your homemade peda sweet, making them not only delicious but also visually appealing.
Serve at Room Temperature:
Your pera sweet are almost ready to be savored! To enhance their delicious taste, allow them to sit at room temperature. This simple step allows the flavors to fully develop, resulting in a more rich and satisfying indulgence. When you’re ready to treat yourself, serve up these delightful indian sweet pedas. You’ll likely find that they disappear swiftly, a testament to their irresistible appeal.
Storage Notes:
Amongst all the indian sweet recipes the Indian sweet peda is one of the most versatile sweets that can last for a few days at room temperature. If you want to savor the sweetness for a more extended period, refrigerate them for about a month.
In summary, making pera sweets at home is a rewarding and surprisingly simple process. From preparing the paneer to shaping the pera indian sweet, every step contributes to the rich flavor and texture of this delightful treat. So, gather your ingredients, follow these easy steps, and indulge in the joy of homemade peda mithai. Enjoy the sweetness!
To experiment more with indian sweet recipes you can try Modak, Pineapple Sandesh & Moong Dal Ladoo
-
Potato Paneer Tots

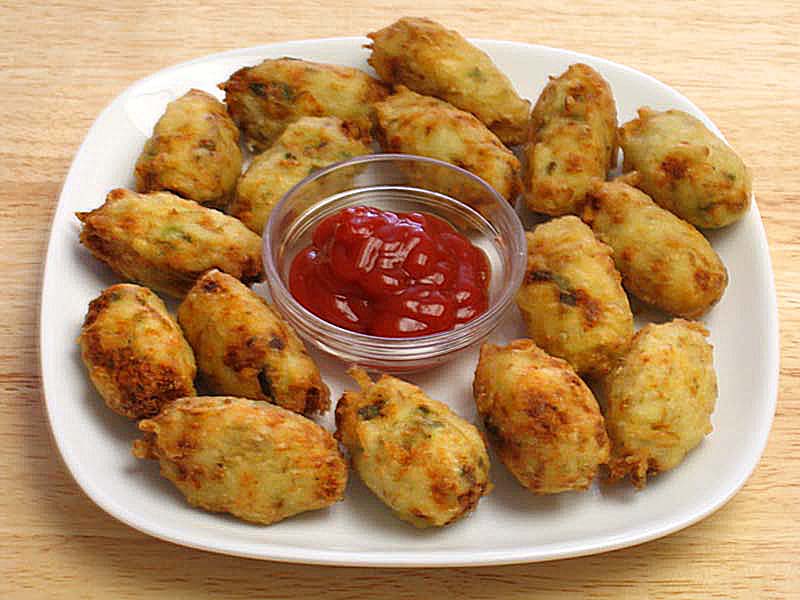
Potato Paneer Tots

Potato Paneer Tots are a great blend of potatoes, paneer and jalapeno pepper. They are appetizers which are crunchy outside and soft outside. Great tea time snack.
- 2 medium potatoes
- 1 cup crumbled paneer
- 1 tsp salt
- 1 jalapeno pepper finely chopped
- 1/4 tsp black pepper
For Batter
- 3 tbsp all purpose flour (maida, plain flour)
- 5 tbsp water use as needed
Need oil To Fry
-
Mix flour and water together and make a thin, smooth batter and keep aside.
- Peel the skin off the potatoes and shred them in a grater or food processor.
- In a pan boil the water. After it comes to boil put the shredded potatoes in the water and let it boil for two to three minutes until they are just tender. Note: don’t over cook the potatoes they will become mushy, should be able to feel the shredded potatoes
- Once cooked, drain the water and pour some cold water over the potatoes. Gently squeeze the excess water out of the potatoes, again making sure to not make the shredded potatoes mushy.
- Next mix shredded potatoes, mashed paneer, and jalapeno pepper, and salt together.
- Divide the potato mixture in about 24 equal parts and form them into bullet shape. Keep aside.
- Heat the oil in a frying pan on medium high heat. The frying pan should have at least 1 inch of oil. To check if the oil is ready, put one small piece of mix in the oil, it should sizzle and come up right away.
- Dip the potato balls in the batter one at a time and slowly drop into the frying pan. Turn them occasionally. Fry tots until golden-brown all around.
- Remove them with a slotted spoon and drain on a paper towel.
- Serve them hot with your choice of tomato ketchup or coriander (hari) chutney or tamarind (imli) chutney. They also taste great as is.
-
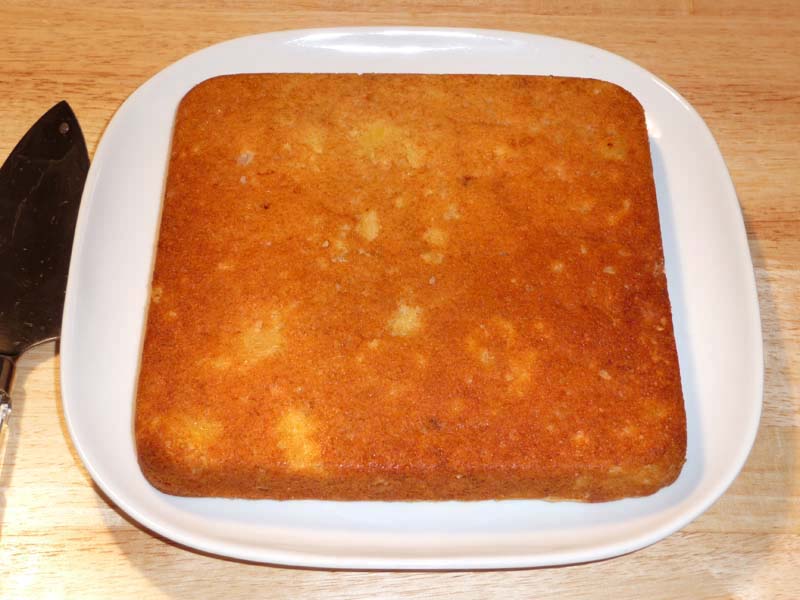
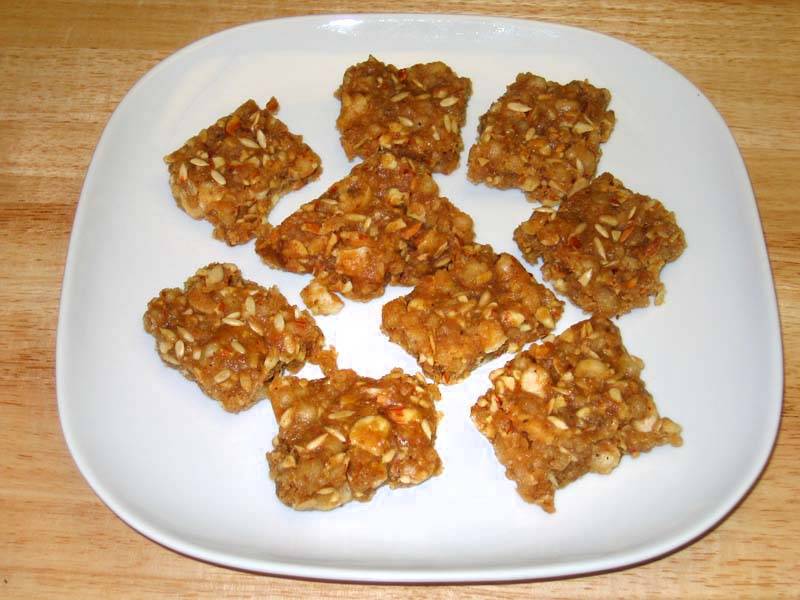
Mohan Thal

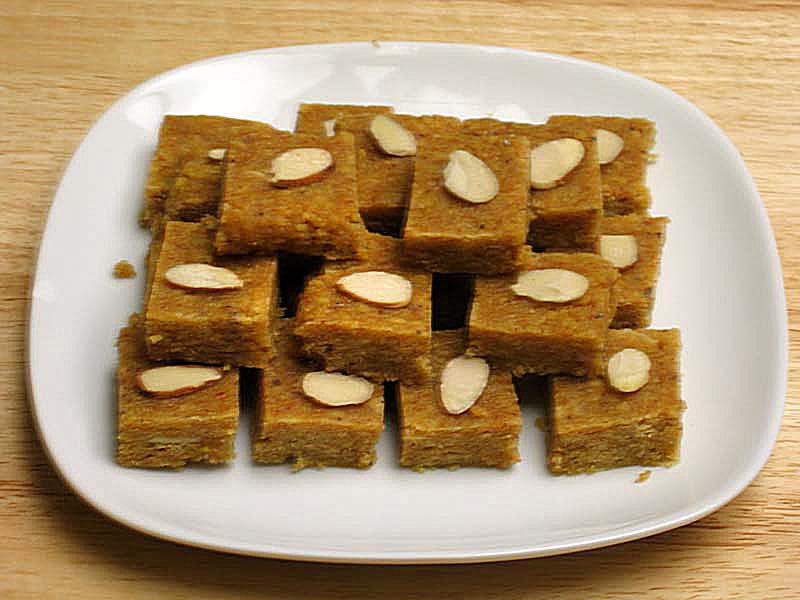
Mohan Thal (Fudge)

Mohan Thal is like a gram flour fudge with a touch of cardamom flavor and topped with sliced almonds. Mohan Thal can be served as a dessert or served with a cup of chai tea. This fudge looking candy is irresistible.
- 2 cups besan (gram flour)
- 6 tbsp unsalted butter (ghee)
- 1 tbsp warm milk
- 1/2 cup heavy cream
- 1 cup milk powder
- 1 tsp cardamom powder (ilachi)
- 1-1/4 cup sugar
- 1/2 cup water
- 2 tbsp almonds sliced
-
Melt the butter and mix with gram flour by rubbing between both palms. Texture will become like a lightly rough powder. Keep aside for at least fifteen minutes.
- Add the milk. Milk should be warm and rub the mixture again between your both palms.
- Next put the cream and milk powder in a frying pan and cook on medium heat. String continuously until mixture comes together and looks like soft dough. Remove from heat and keep aside.
- Mix the milk dough with gram flour mixture together and stir fry on medium heat until it becomes light brown in color and start giving off a sweet aroma. Tips: stir fry continuously making sure it stays powdery.
- Let it cool and add cardamom powder mix it well.
- In a saucepan, boil the sugar and water together on medium heat until syrup is 2 threads or 225 degrees F on a candy thermometer.
- Mix the syrup with flour mixture mix well and pour on a 8 inch greased plate. Do this quickly before syrup cools down.
- Mohanthal should be about ½ inch thick and shape it into a square shape on the plate. While it is still hot spread the sliced almonds evenly over the top to garnish.
-
Cut the mohanthal into 1-inch square shapes while it is still warm. Serve at room temperature.
Notes: Mmohanthal can be kept for 2 weeks or refrigerate for a month. You May also like Gulab Jamuns, Badam Ki Burfi
Mohanthal Recipe: How to Make Mohanthal Fudge
Mohan Thal, also known as Besan Barfi, is a traditional Indian dessert that hails from the state of Gujarat. This rich and decadent fudge is made from gram flour (besan), ghee (clarified butter), sugar, and flavored with cardamom and nuts.
Mohan Thal is loved for its melt-in-your-mouth texture, aromatic flavor, and irresistible sweetness, making it a favourite treat during festivals, such as Diwali, Ganesh Chaturthi, Holi or Makar Sankranti.
Why make Mohan Thal Burfi
- Fun & Savoury: Mohan Thal is a fun and savoury dish that can be enjoyed by everyone and is revered for its sweetness that has a long lasting after taste even even after consuming it 2 hours before.
- Rich Flavor Profile: Mohan Thal is infused with the warm and aromatic flavors of cardamom, saffron, and nuts, giving it a rich and complex flavor profile. The combination of sweet, nutty, and spicy notes makes Mohan Thal a truly indulgent and satisfying dessert experience.
- Easy to Make: Despite its luxurious taste and appearance, Mohan Thal is surprisingly easy to make at home with just a few simple ingredients. With a bit of patience and practice, you can recreate this traditional Indian sweet in your own kitchen and impress your family and friends.
Other Variations of Burfi:
- Til ki Burfi: It’s a burfi that incorporates sesame seeds or til and is a winter favourite for all
- Carrot Burfi: Carrot Burfi or carrot fudge is a classic Indian dessert made with carrot and milk. This burfi is packed with all the goodness of carrots.
- Badam Burfi: Badam (almond) Burfi is a healthy substitute for candy but is rich in flavor. Almond burfi can be served as dessert or snack.
- Coconut Burfi: Coconut Burfi is made with coconut powder combined with a cardamom flavored sugar syrup. It’s a scrumptious dessert.
Tips for Making Perfect Mohan Thal (Gram Flour Fudge):
- Use Good Quality Ghee: Use high-quality ghee made from pure cow’s milk for the best flavor and texture in Mohan Thal. Ghee adds richness and depth to the fudge and enhances its overall taste and aroma.
- Cook on Medium Heat: Cook the gram flour mixture on Medium heat to prevent it from burning while ensuring an even cooking. Stir the mixture constantly to prevent lumps from forming and to achieve a smooth and creamy texture.
- Cut into Uniform Pieces: Once the gram flour mixture has set, cut it into uniform pieces using a sharp knife for a neat and professional presentation. Garnish each piece with a sliver of almond or pistachio for an elegant finishing touch.
FAQs about Mohan Thal (Gram Flour Fudge):
How long does Mohan Thal stay fresh?
Mohan Thal can be stored in an airtight container at room temperature for up to 1-2 weeks. For longer storage, refrigerate the fudge in the refrigerator for up to 3-4 weeks or freeze it for up to 2-3 months.
Can I make MohanThal with nuts?
Yes, you can add nuts or substitute them with seeds such as melon seeds or pumpkin seeds if you have nut allergies or prefer a nut-free version of Mohan Thal.
Can I reduce the amount of sugar in Mohan Thal?
Yes, you can reduce the amount of sugar in MohanThal to suit your taste preferences. However, keep in mind that sugar plays a crucial role in the texture and sweetness of the fudge, so adjust the sugar quantity accordingly.
Mohan Thal (Gram Flour Fudge) is an elegant luxurious Indian sweet that’s perfect for celebrating special occasions or satisfying your sweet cravings.
With its rich flavor, melt-in-your-mouth texture, and endless variations, Mohan Thal is sure to become a favorite treat in your household. Whether enjoyed on its own or paired with a cup of chai, Mohan Thal is a timeless classic that’s cherished by sweet enthusiasts everywhere.
Stay tuned for our next exploration into the world of culinary delights!
-
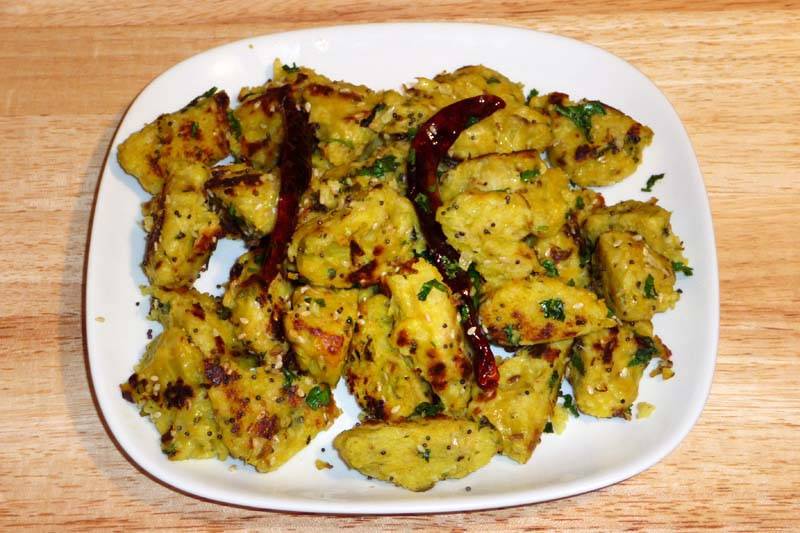
Masala French Fries

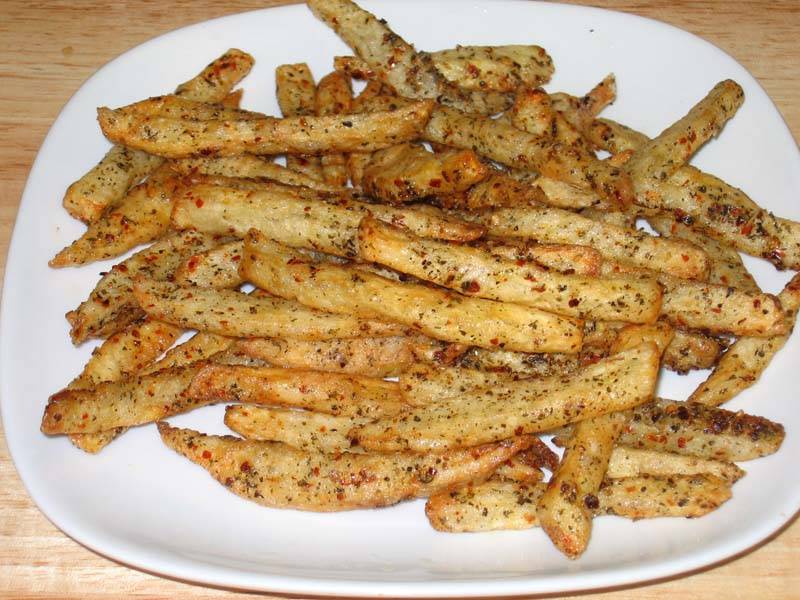
Masala French Fries

Masala French Fries are an exciting twist on french fries, and they are great to serve with cocktails or as an appetizer.
- 2 medium russet potatoes
- 2 tbsp corn starch
- 1 tsp salt
- 1/2 tsp dry mint
- 1/4 tsp black pepper
- 1/4 tsp red chili powder
- 1/8 tsp citric acid (tatre)
Oil to fry
-
Peel the potatoes wash and cut into French fries.
-
Mix the salt with potato and let it sit for about ten minutes. Drain the salt water well and lightly pat dry.
-
Mix cornstarch, salt, mint powder, citric acid, red and black pepper together. Sprinkle the spice mix over potatoes and mix well so all the fries are covered with spices.
-
Heat the oil in frying pan on medium high heat. The frying pan should have at least 1 inch of oil. To check if the oil is ready, just put potato strip in frying pan. Potato should sizzle.
- Fry the fries till they become gold in color all around, turn the fries a few times while frying.
-
Remove fries from oil and place on paper towel. Serve hot and enjoy!
Variations
Replace dry mint with dry fenugreek leaves.
Feel free to experiment.
Tips
You can make the fries few hours before serving. Heat the fries in oven at 350 degrees for seven to ten minutes before serving.
How to make Masala French Fries
Masala French Fries are a delicious variation of the classic French fries, where the crispy potato sticks are tossed in a blend of aromatic spices. This fusion of flavors adds an extra kick to the beloved snack, taking it to a whole new level of deliciousness. Whether you’re a fan of spicy foods or just looking to switch up your French fry game, Masala French Fries are a must-try appetizers!
Tips for Making Perfect Masala French Fries:
Choose the Right Potatoes: Opt for starchy potatoes like Russets or Yukon Golds, as they fry up crispier than waxy potatoes. Cut them into uniform sticks to ensure even cooking.
Soak the Potatoes: Soaking the potato sticks in cold water for about 30 minutes helps remove excess starch, resulting in crispier fries. After soaking, pat them dry thoroughly with paper towels before frying.
Double Fry Method: For extra crispy fries, use the double fry method. Fry the potato sticks at a lower temperature (around 325°F) until they are cooked through but not yet browned. Remove them from the oil, increase the temperature to 375°F, and fry again until golden brown and crispy.
Seasoning Technique: Toss the hot fries in the masala seasoning immediately after frying to ensure that the spices adhere to the surface. Adjust the amount of seasoning according to your taste preferences for the perfect flavor balance.
Serve Immediately: Masala French Fries are best enjoyed hot and fresh out of the fryer. Serve them immediately with your favorite dipping sauce or chutney for maximum enjoyment.Suggestions for Serving Masala French Fries:
Dipping Sauces: Pair Masala French Fries with a variety of dipping sauces such as ketchup, mayo, or spicy sriracha mayo for a burst of flavor.
Accompaniments: Serve Masala French Fries alongside burgers, sandwiches, or grilled meats for a tasty and satisfying meal.
Garnishes: Sprinkle chopped cilantro, grated cheese, or a squeeze of lime juice over the fries for an extra pop of flavor and visual appeal.Benefits of Enjoying Masala French Fries:
Satisfying Snack: Masala French Fries are a delicious and satisfying snack that satisfies cravings for something crispy, savory, and spicy.
Versatile: Masala French Fries can be customized with different spice blends to suit your taste preferences. Experiment with various seasonings to create your own unique flavor profile.
Quick & Easy: With just a few simple ingredients and basic cooking techniques, Masala French Fries can be whipped up at home in no time, making them a convenient and budget-friendly snack option.Variations of Masala French Fries:
Cheesy Masala Fries: Sprinkle grated cheese over hot fries and masala seasoning, then broil in the oven until the cheese is melted and bubbly for an indulgent twist.
Tandoori Masala Fries: Toss hot fries in a blend of tandoori masala spices for a bold and flavorful variation inspired by Indian cuisine.
Barbecue Masala Fries: Drizzle hot fries with barbecue sauce and sprinkle with masala seasoning for a tangy and smoky flavor combination that’s sure to please.
Crispy French Fries: Incase you aren’t into masala and spicy versions of French fries then you can go for a crispy and simple French fries.
FAQs (Frequently Asked Questions) about Masala French Fries:
Q: Can I bake Masala French Fries instead of frying them?
A: Yes, you can bake Masala French Fries in the oven for a healthier alternative. Simply toss the potato sticks in oil and masala seasoning, then spread them out in a single layer on a baking sheet. Bake at 425°F for 25-30 minutes, flipping halfway through, until crispy and golden brown.
Q: Can I make Masala French Fries ahead of time?
A: While Masala French Fries are best enjoyed fresh, you can prepare the seasoning mix in advance and store it in an airtight container until ready to use. Fry the potatoes just before serving for the crispiest results.
Q: What are some creative ways to use leftover Masala French Fries?
A: Turn leftover Masala French Fries into a tasty breakfast hash by topping them with diced veggies, and a sprinkle of cheese. Alternatively, chop them up and add them to salads, or wraps for an extra crunch.
In conclusion, Masala French Fries are a delicious and flavorful twist on the classic French fries, perfect for snacking, entertaining, or indulging in a satisfying meal. With the right ingredients, techniques, and a dash of creativity, you can easily whip up a batch of homemade Masala French Fries that will impress your taste buds and leave you craving more. So, gather your potatoes, spices, and fryer, and get ready to enjoy the irresistible goodness of Masala French Fries!
-
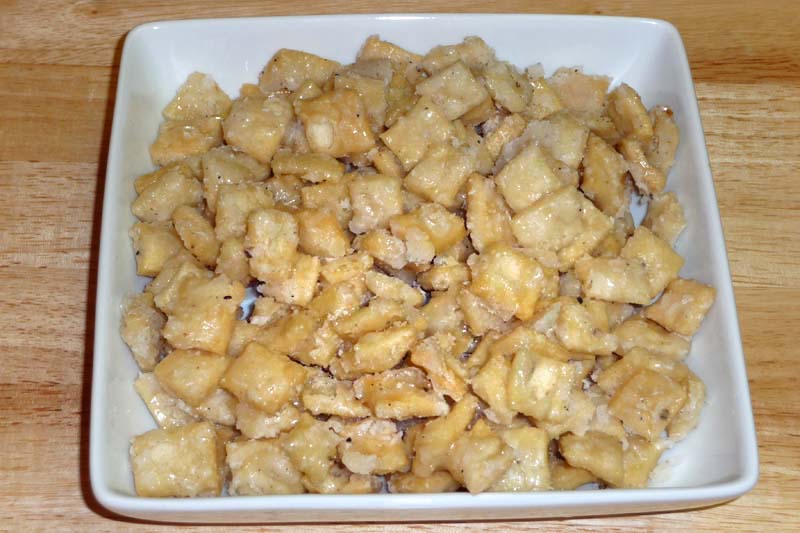
Pista Kulfi
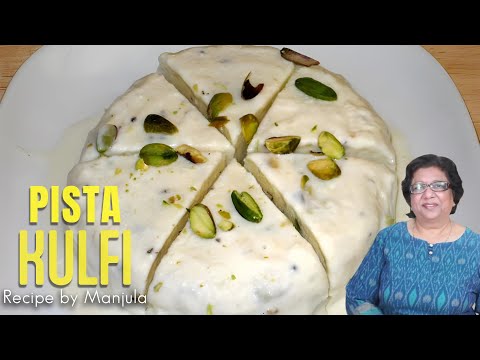
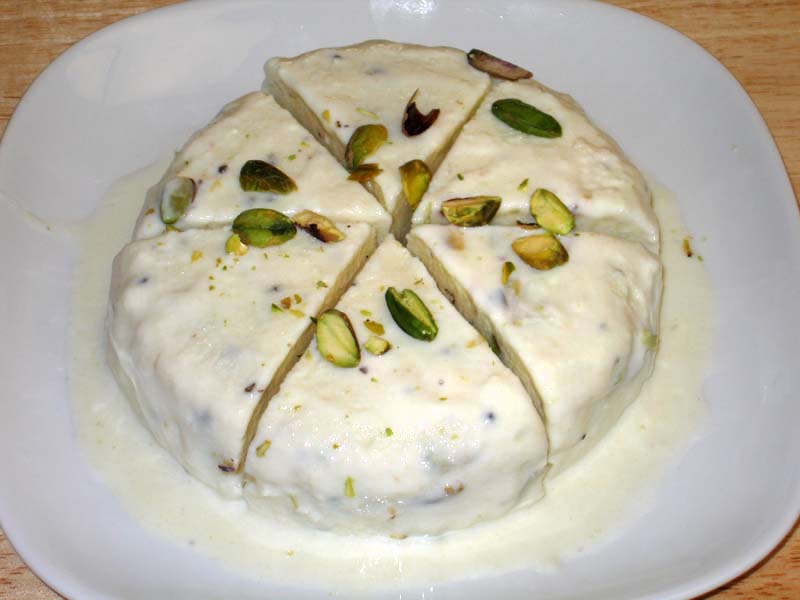
Pista Kulfi
Pista Kulfi is a very popular Indian ice cream. Kulfi comes in a variety of different flavors. Traditional kulfi is flavored with cardamom; this recipe is flavored with cardamom and pistachios. its like a summer favorite sweet snack or a dessert which is popular amongst all.
- 4 cupa whole milk
- 1 slice white bread
- 1 tsp corn starch
- 1/4 cup sugar
- 1/2 tsp coarsely ground cardamom (ilachi)
- 10 pistachios sliced
-
Remove the crust from all sides of the bread and cut the bread in small pieces.
- Blend bread pieces, cornstarch, and a 1/2 cup of milk, making smooth paste and set aside.
- Boil remaining milk (3.5 cups) in nonstick frying pan on medium high heat. Stir milk as needed to keep milk from burning on the bottom of the frying pan. Stir the sides of the pan to avoid scalding.
- After milk comes to boil, let the milk boil for another 12 minutes. The goal is to boil the milk from 3 1/2 cups to 2 1/2 cups.
- Add the bread mixture to the milk in frying the pan and cook for another 4 minutes, reducing the heat to medium. Bread and cornstarch are added to reduce the water crystallizing in kulfi during freezing.
- Next add sugar and pistachios and cook for 2 more minutes. Turn off the heat and add cardamom powder.
- Cool the milk to room temperature and pour into a bowl,
- Take cellophane wrap and place it right over the milk covering it completely. Note: It is important that the cellophane wrap touches the milk.
- Put it in freezer. It will take about 7 hours for the kulfi to be ready to serve.
Variations
Replace pistachios with almond or coconut powder.
Replace pistachios with finally chopped fruits like mangos or strawberries. Add fruits in the end after turning off the heat.
Many people enjoy eating kulfi like a Popsicle. Before freezing, pour the milk mixture in to a Popsicle mold. If you don’t have Popsicle mold use small paper cups and place cellophane wrap on top of the milk and place a Popsicle stick in center of cup and freeze.
Delight in the Creamy Goodness of Pista Kulfi
Pista Kulfi is a traditional Indian ice cream made with pistachios, milk, and aromatic spices. This pista kulfi recipe is perfect for cooling off on a hot day or enjoying a delightful dessert after a meal. The rich, creamy texture and the nutty flavour of pistachios make this dessert a favorite among many.
The Essence of Pista Kulfi
The essence of pista kulfi lies in its rich and creamy texture, achieved by slowly simmering milk until it thickens and reduces. The addition of pistachios and a touch of cardamom gives this kulfi its distinctive flavor. This pistachio ice cream is a traditional Indian dessert that brings a touch of authenticity to any occasion, making it a popular choice for festivals and celebrations.
Origin and Popularity
Kulfi, often referred to as Indian ice cream, has been a beloved dessert in India for centuries. Unlike regular ice cream, kulfi is denser and creamier due to the slow cooking process of the milk. Pista kulfi, with its rich pistachio flavor, has become one of the most popular variations of this dessert. It’s commonly enjoyed during hot summer months and is a staple in many Indian households.
Why You’ll Love This Recipe
- Rich and Creamy: The slow-simmered milk gives the kulfi a rich and creamy texture.
- Nutty Flavor: The pistachios add a delightful nutty flavor that compliments the creamy base.
- Easy to Make: Simple ingredients and straightforward steps make this recipe accessible.
- Perfect for Any Occasion: Ideal for cooling off on a hot day or serving at festive occasions.
Variations of Indian Ice Cream Recipes
Exploring Manjula’s Kitchen reveals a treasure trove of other delicious Indian ice cream recipes that you might enjoy. Here are some related desserts that you might find interesting:
- Falooda Kulfi: Falooda Kulfi is a refreshing dessert. “Falooda” looks like rice noodles and they are made with cornstarch or arrowroot. “Kulfi” is an Indian ice cream. This is a delicacy with street vendors all over India. One has to experience this delightful dessert to appreciate it. You can also serve Falooda with any ice cream of your choice. Try this recipe to enjoy as one of my favorite summertime treats!
- Malai Kulfi: Kulfi is an eggless Indian ice cream. This is a simple and delicious dessert made with milk and sugar. Kulfi is very popular with street vendors, especially in summer. This is an easy recipe to make and Kulfi is an absolute treat for both young and old.
- Pineapple Kulfi: Kulfi, a popular summer dessert, is an Indian ice cream. Adding Pineapple here is a delicious twist to traditional kulfi. Pineapple kulfi simply melts in your mouth with its creamy texture and small chunks of pineapple.
- Paneer and Rose Kulfi: Paneer and Rose Kulfi is easy to make dessert. Instead of traditionally creamy texture, this is more like a grainy and enjoyable texture.
- Rose Kulfi: A fragrant kulfi flavored with rose water and garnished with rose petals.
Serving Suggestions
Pista kulfi can be enjoyed in various ways:
- On a Stick: Serve in traditional kulfi molds or popsicle molds for a fun treat.
- In a Bowl: Scoop into bowls and garnish with chopped pistachios and saffron strands.
- With Falooda: Serve with falooda (vermicelli) and rose syrup for a classic combination.
- As a Dessert: Enjoy as a refreshing dessert after a spicy meal.
Tips and Tricks
To perfect your pista kulfi recipe, consider these helpful tips:
- Use Full-Fat Milk: Full-fat milk gives the kulfi a richer and creamier texture.
- Simmer Slowly: Simmer the milk on low heat to avoid burning and to achieve the perfect consistency.
- Grind Pistachios: Grind the pistachios finely for a smoother texture or coarsely for a crunchier bite.
- Freeze Properly: Ensure the kulfi is frozen solid before serving for the best texture.
FAQs
Can I Use Condensed Milk?
Yes, you can use condensed milk to speed up the thickening process and add extra sweetness.
How Long Does Pista Kulfi Last in the Freezer?
Pista kulfi can be stored in an airtight container in the freezer for up to 2 weeks.
Is Pista Kulfi Gluten-Free?
Yes, this recipe is naturally gluten-free as it is made with milk, sugar, and pistachios.
Can I Add Other Nuts?
Yes, you can add other nuts like almonds or cashews to enhance the flavor and texture.
What If I Don’t Have Kulfi Molds?
You can use popsicle molds, small bowls, or even paper cups to freeze the kulfi.