Tag: Breakfast Recipes

Indian Breakfast Recipes: A Healthy and Delicious Start to Your Day
Introduction
Breakfast is often considered the most important meal of the day, and Indian breakfast recipes offer a wide variety of options that are both nutritious and delicious. 

From savory to sweet, these breakfast recipes cater to diverse palates and dietary needs. 

Whether you are looking for quick indian breakfast recipes to start your day or easy breakfast recipes indian to enjoy on a leisurely morning, there’s something for everyone.
Benefits of a Nutritious Breakfast

Energy Boost: A healthy breakfast provides the energy needed to kickstart your day.
Improved Concentration: A balanced breakfast helps improve concentration and performance in daily activities.
Better Metabolism: Eating breakfast can boost your metabolism and help maintain a healthy weight.
Nutrient Intake: Breakfast is an excellent opportunity to consume essential nutrients like fiber, vitamins, and minerals.

Popular Indian Breakfast Recipes
Here’s a list of that a great on your diet and easy Indian recipes
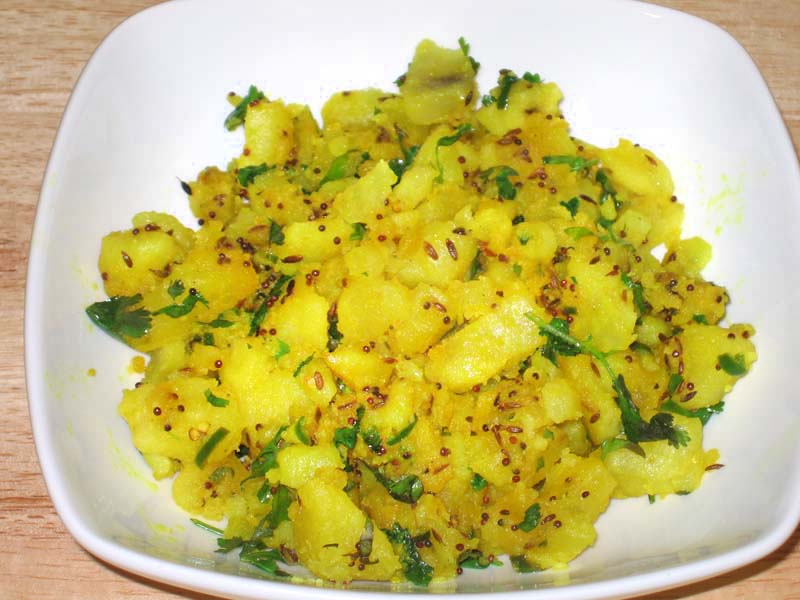
1. Poha
Poha is a popular dish to think of preparing as an Indian breakfast ideas from flattened rice, seasoned with mustard seeds, turmeric, and various vegetables. It’s light, nutritious, and perfect for a quick morning meal.
2. Upma
Upma is a savory dish made from semolina, cooked with vegetables, and flavored with mustard seeds, curry leaves, and green chilies. It’s a versatile dish that can be prepared in various ways.
3. Idli
Idli is a traditional South Indian breakfast made from fermented rice and urad dal batter, steamed to perfection. It’s often served with sambar and coconut chutney.
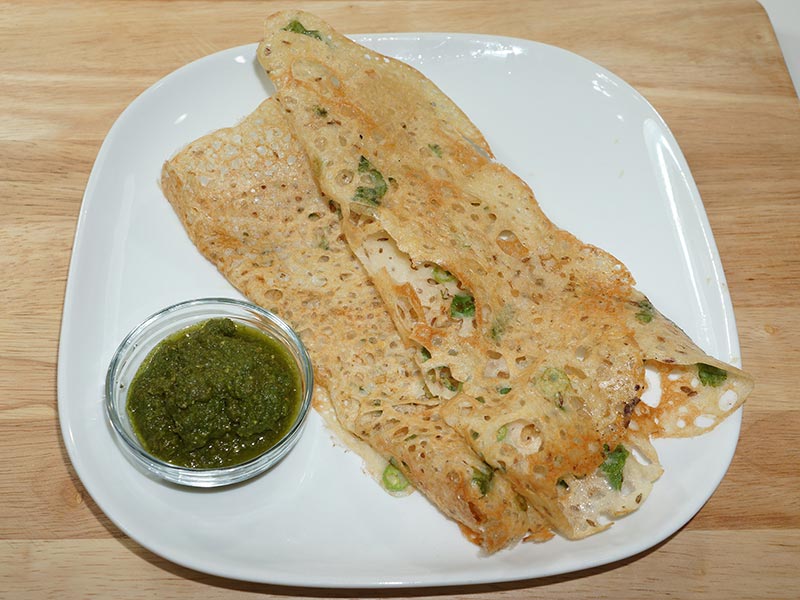
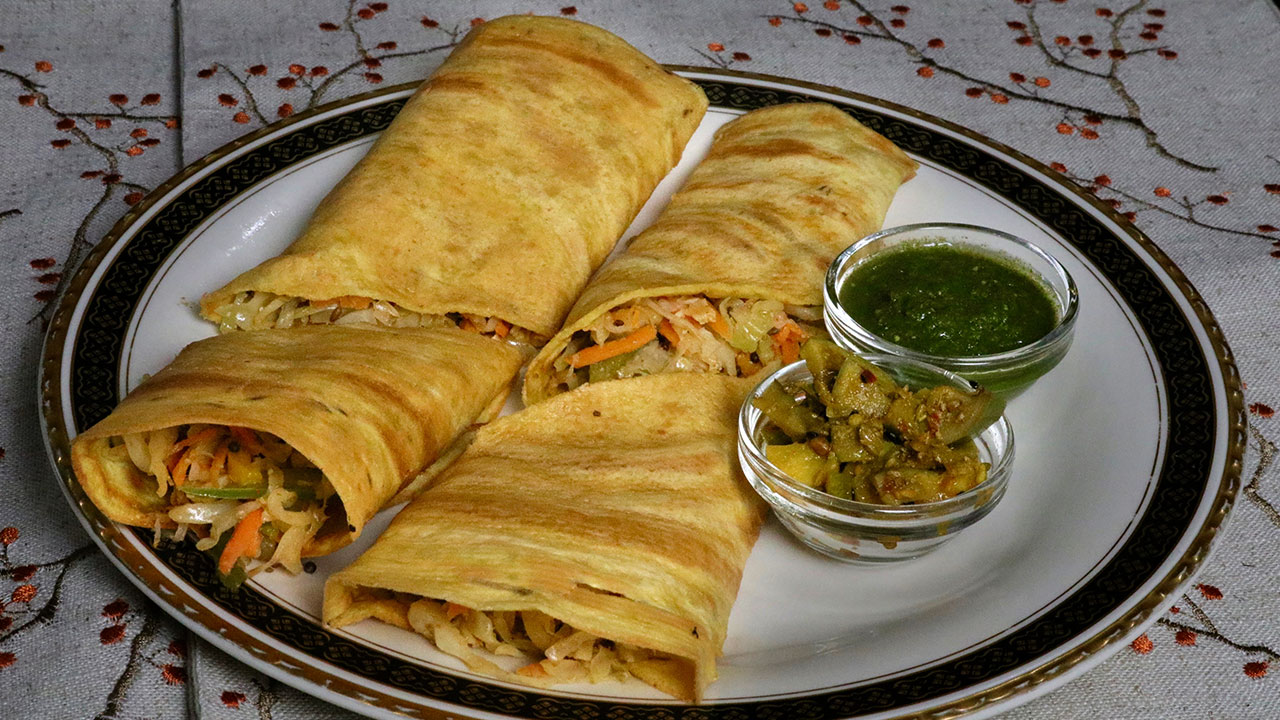
4. Dosa
Dosa is a thin, crispy pancake made from fermented rice and lentil batter. It can be stuffed with a variety of fillings, such as spiced potatoes, to make it even more delicious. It’s one of those south indian recipes that are great to taste and amazing to savor. 
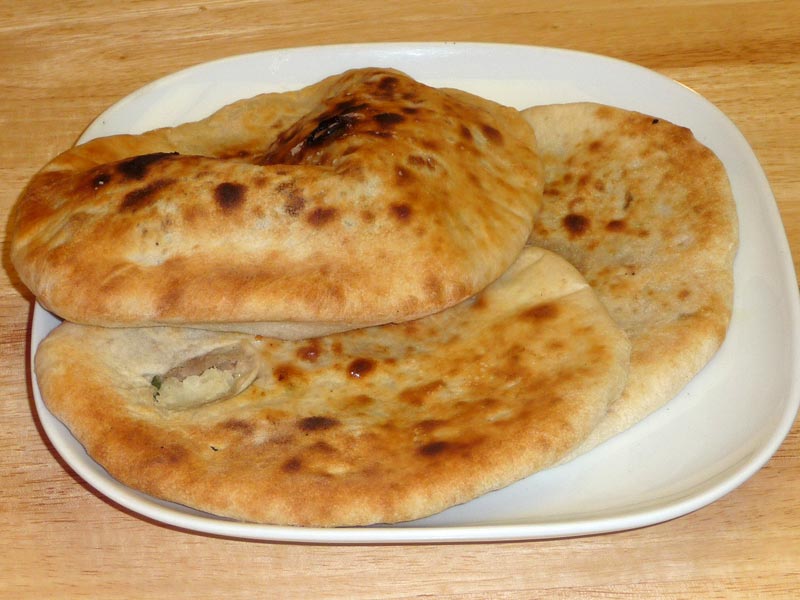
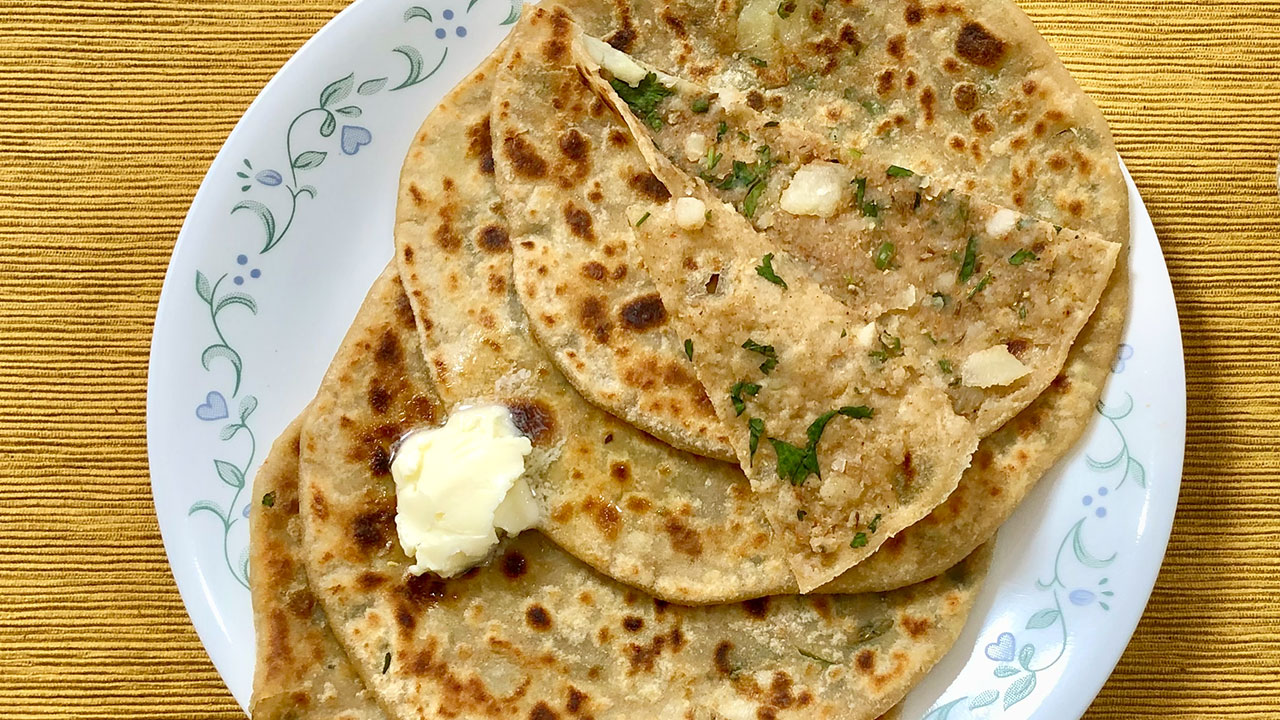
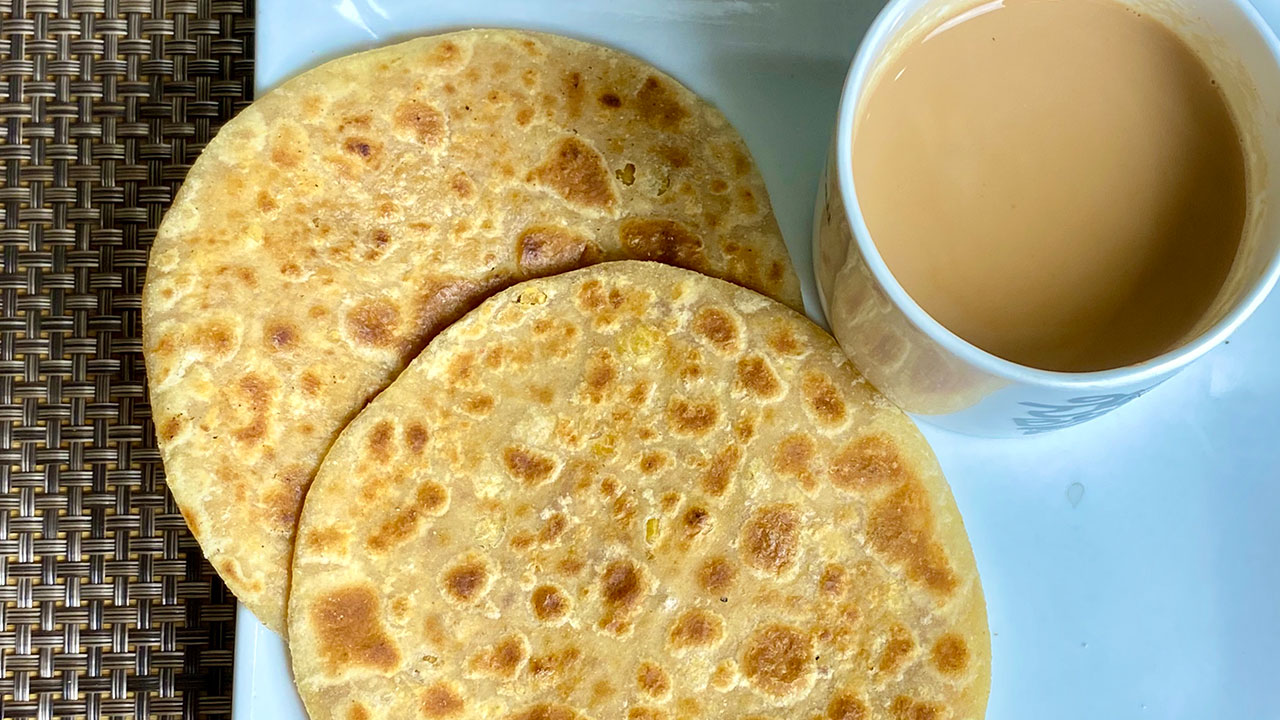
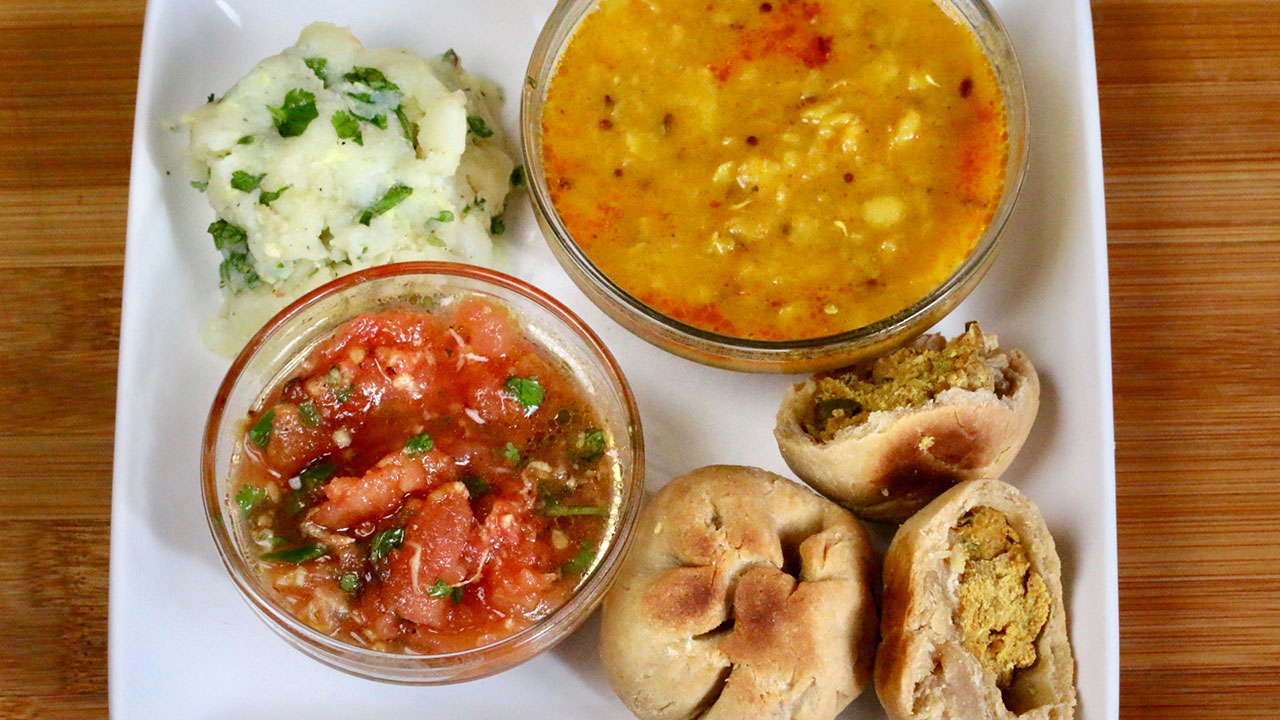
5. Paratha
Paratha is a type of flatbread that can be stuffed with various fillings like potatoes, paneer, or spinach. It’s often served with yogurt and pickles.
Easy Indian Breakfast Recipes
1. Besan Cheela
Besan cheela is a savory pancake made from gram flour, mixed with spices and vegetables. It’s a quick and healthy breakfast option.
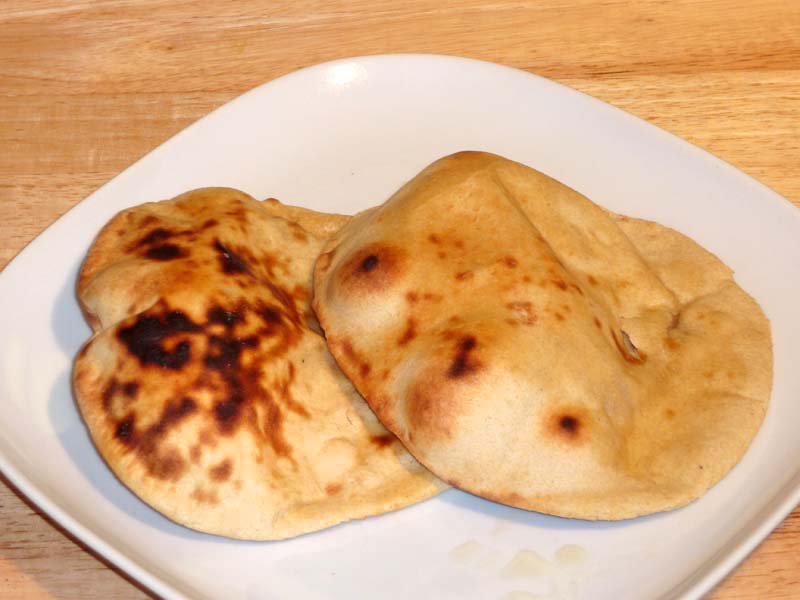
2. Aloo Paratha
Aloo paratha is a stuffed flatbread with a spiced potato filling. It’s a hearty and satisfying breakfast that can be made easily. It’s a popular dish in north indian recipes.
3. Rava Idli
Rava idli is an instant version of the traditional idli, made with semolina instead of rice. It’s quick to prepare and just as delicious.
4. Bread Upma
Bread upma is a simple dish made by sautéing bread pieces with tomatoes, and spices. It’s a great way to use up leftover bread.
Quick Indian Breakfast Recipes
1. Banana Smoothie
A banana smoothie made with yogurt, milk, and honey is a quick and nutritious breakfast option. Add some nuts and seeds for extra protein and fiber.
2. Paneer Bhurji
Paneer bhurji is a scrambled paneer dish cooked with tomatoes, and spices. It’s a quick and protein-rich breakfast.
3. Instant Oats Idli
Instant oats idli is a healthy and quick alternative to traditional idli, made with oats and yogurt. It’s perfect for busy mornings.
4. Vermicelli Upma
Vermicelli upma is a light and quick breakfast made with roasted vermicelli, vegetables, and spices. It cooks in just a few minutes.
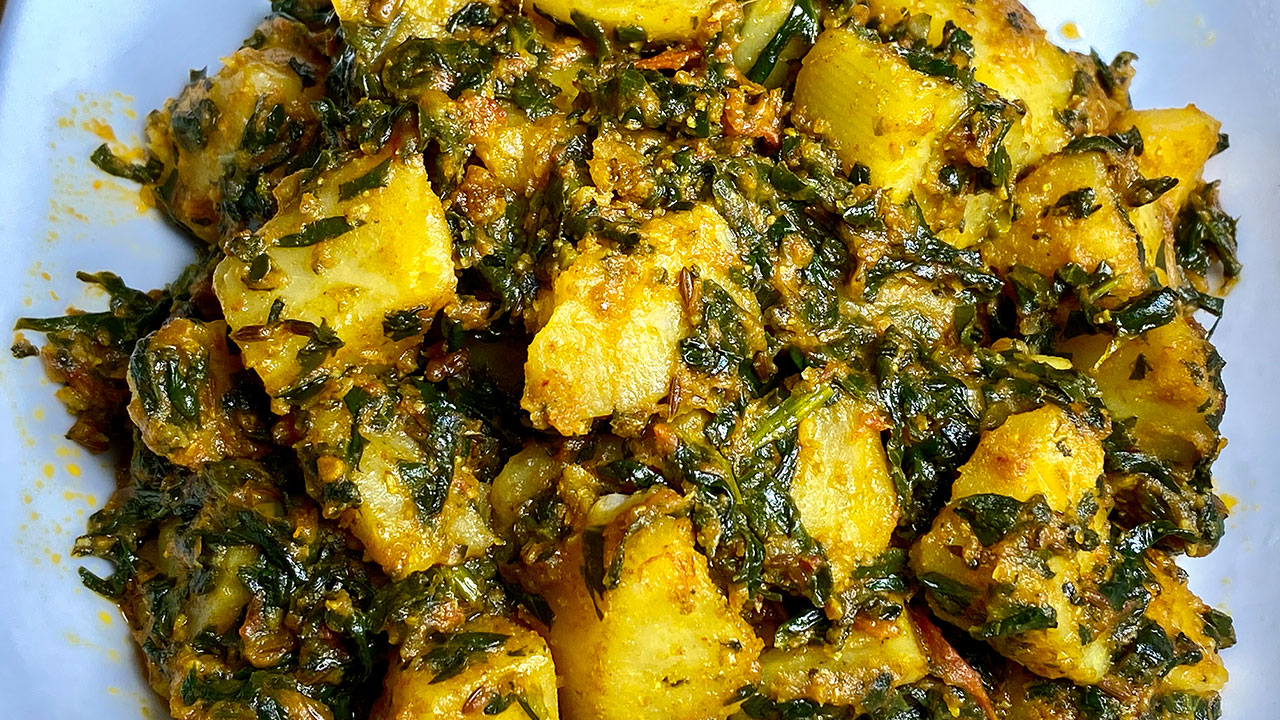
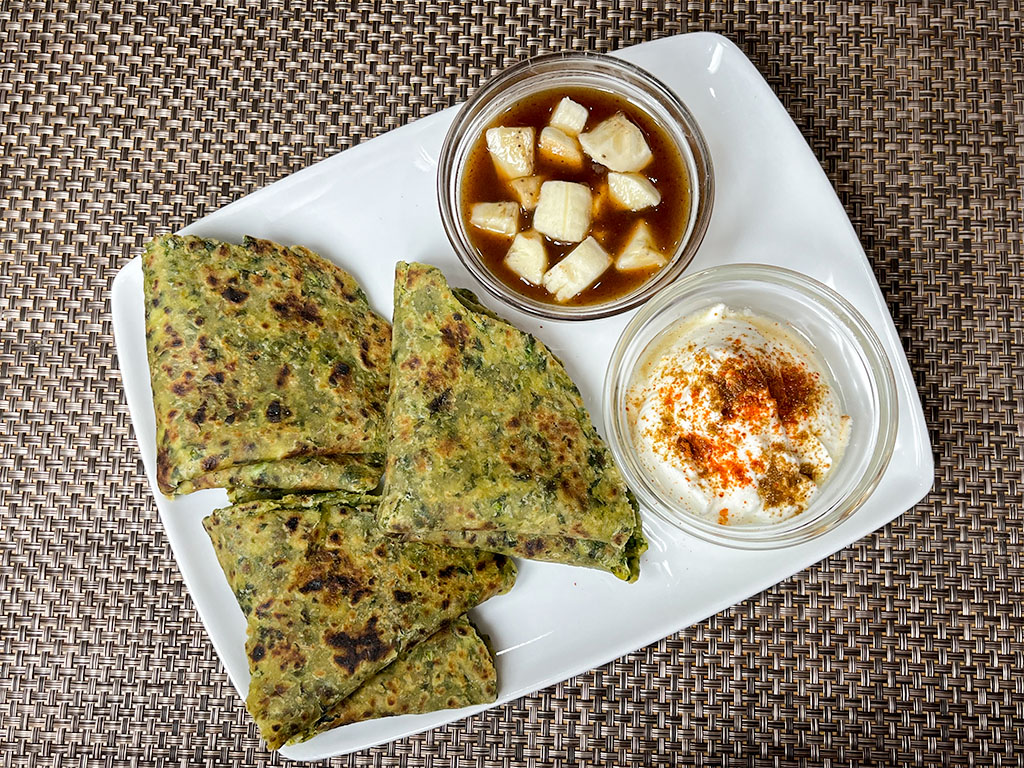
5. Methi Thepla
Methi thepla is a spiced flatbread made with fenugreek leaves and whole wheat flour. It’s quick to prepare and can be enjoyed with yogurt or pickles.
Easy Breakfast Recipes Indian
1. Moong Dal Cheela
Moong dal cheela is a savory pancake made with split green gram batter. It’s easy to prepare and packed with protein.
2. Masala Toast
Masala toast is a simple dish where bread slices are topped with a spiced vegetable mixture and toasted. It’s quick and delicious.
3. Coconut Chutney Sandwich
A coconut chutney sandwich is an easy and flavorful breakfast option. Spread coconut chutney between bread slices and enjoy.
4. Fruit Salad with Chaat Masala
A refreshing fruit salad with chaat masala is a great way to start your day. Mix your favorite fruits and sprinkle chaat masala for an extra zing.
5. Curd Rice
Curd rice is a simple and cooling dish made by mixing cooked rice with yogurt, seasoned with mustard seeds, curry leaves, and green chilies.
FAQs
Q: Which Indian food is good for breakfast? 
A: Traditional options like idli, dosa, and poha are excellent choices. They are not only delicious but also provide the necessary nutrients to start your day.
Q: How can I make my Indian breakfast healthier? 
A: Incorporate more vegetables, use whole grains, and limit the use of oil and sugar. Opt for steaming, boiling, or grilling instead of frying.
Q: Are there quick Indian breakfast recipes for busy mornings? 
A: Yes, recipes like banana smoothies, paneer bhurji, and instant oats idli are perfect for quick and nutritious breakfasts.
Conclusion
Indian cuisine offers a variety of indian breakfast recipes that are both healthy and satisfying. Whether you prefer easy indian breakfast recipes or quick indian breakfast recipes, there’s something for everyone. 

Start your day with these delicious options and enjoy the benefits of a nutritious breakfast. Explore more recipes on Manjula’s Kitchen and discover the joy of cooking nutritious and delicious food.

  • Spinach Almond Paratha

    Spinach Almond Paratha

    palak paratha

    Spinach Almond Paratha

    Spinach Almond Paratha is a delicious unleavened Indian flatbread made on a skillet. There are many variations of parathas, most of which are made with whole wheat flour. Parathas can be plain or stuffed with various fillings.
    Spinach Almond Paratha is a healthy indian recipe and tasty option. It is crispy on the outside and soft on the inside. This paratha is made with spinach, almond flour, whole wheat flour, and some spices. It can be served for indian breakfast recipe with butter, yogurt, or pickle, or as part of a meal alongside toor dal or a gravy-based dish.
    Almond Spinach Paratha has a beautiful green color and is a nutritious alternative, especially great for incorporating spinach into your diet.
    When making indian parathas, it's important to know how to roll and fold them. While rolling the dough, apply oil or ghee and fold it to create layers. This technique results in parathas that are crisp on the outside and have a soft texture inside.
    Another advantage of parathas is that they keep well, making them perfect for lunch boxes or for picnics.
    4.50 from 4 votes
    Prep Time 15 minutes
    Cook Time 15 minutes
    Course Breakfast, lunch
    Cuisine Indian
    Servings 4 people

    Ingredients
      

    • 1 cup whole wheat flour, atta
    • ½ cup almond flour – badam ka powder
    • cup chopped spinach, Palak
    • 1 tbspn oil
    • 1 tsp cumin seeds, jeera
    • ½ tsp salt
    • ¼ tsp black pepper, kali mirch
    • tsp asafetida, hing
    • ½ cup chilled water
    • ½ tsp red chili flake if you like hot and spicy
    • ¼ cup whole wheat flour for rolling paratha
    • 2 tbsp oil for cooking parathas

    Instructions
     

    • Mix all the ingredients together in a bowl, except water: flour, almond flour, chopped spinach, salt, black pepper, cumin seeds, asafetida, and oil. Add water as needed to make a firm dough (as it sits dough will get soft). Grease your palm and knead the dough until all the ingredients are combined. Let the dough sit aside for about 15 minutes.
    • Knead the dough on a lightly greased surface until it becomes soft. Divide the dough into four equal parts and form them into balls. Roll each dough ball into a 3-inch circle. Spread about 2 drops of oil on each circle and fold them into triangles. Repeat this process for all four triangles.
    • Meanwhile, heat a heavy skillet on medium heat until moderately hot. To test if the skillet is ready, sprinkle a few drops of water on it. When the water sizzles right away, the skillet is ready.
    • Take one dough ball and lightly press it on both sides on a surface dusted with dry flour. Using a rolling pin, roll the dough into a 7–8-inch circle. If the dough starts sticking, dust it with more flour.
    • Place the paratha on the skillet. When you see the color change and the paratha puffs up in different places, turn the paratha over. After a few seconds, spread 1/2 teaspoon of oil onto the paratha. Turn the paratha over again and spread another 1/2 teaspoon of oil. Using your spatula, lightly press the entire surface of the paratha to help it cook all the way through.
    • After a few seconds, flip the paratha and press with the spatula, ensuring it is golden-brown on both sides. Repeat this process for the remaining parathas.
    • For the best taste serve paratha hot, taste great with hot cup of Chai. Enjoy!

    Notes

    When making parathas, it’s important to know how to roll and fold them. While rolling the dough, apply oil or ghee and fold it to create layers. This technique results in parathas that are crisp on the outside and have a soft texture inside.
    Spinach Almond paratha taste great when cooked with ghee, (clarified butter).
    Serving suggestions:
    For breakfast serve the Spinach Almond Paratha with yogurt and pickle, or as part of a meal alongside dal or a gravy-based dish.
    Keyword Paratha, Stuffed Paratha
    Tried this recipe?Let us know how it was!

    Introduction

    Spinach Almond Paratha is a nutritious and flavorful Indian flatbread that combines the goodness of spinach and the crunch of almonds. This spinach almond paratha recipe is perfect for a healthy indian recipes breakfast, lunch, or indian dinner recipes. The addition of spinach not only enhances the nutritional value but also adds a vibrant green color, while the almonds provide a delightful crunch and a boost of healthy fats and proteins.

    The Essence of Spinach Almond Paratha

    The essence of spinach almond paratha lies in its blend of fresh spinach and finely chopped almonds. The spinach is mixed into the dough, making each bite packed with nutrients and flavor. The almonds add a unique texture and richness, making this paratha a wholesome and satisfying meal.

    Origin and Popularity

    Parathas are a staple in Indian cuisine, particularly in North India. They are enjoyed in various forms, stuffed with different fillings or mixed with ingredients like spinach and almonds. This healthy paratha recipe is a modern twist on the traditional paratha, incorporating superfoods to make it even more nutritious and delicious.

    Why You’ll Love This Recipe

    • Nutritious and Delicious: Packed with vitamins, minerals, and healthy fats from spinach and almonds.
    • Easy to Make: Simple ingredients and straightforward steps make this recipe accessible to everyone.
    • Versatile: Can be enjoyed as a main dish, side dish, or even as a snack.
    • Perfect for Any Meal: Ideal for breakfast, lunch, or dinner.

    How to Make Spinach Almond Paratha: Here’s a step-by-step guide on how to make spinach almond paratha:

    1. Prepare the Ingredients:
      • Fresh spinach, washed and finely chopped.
      • Almonds, finely chopped or ground.
      • Whole wheat flour, water, and salt for the dough.
      • Optional spices: cumin powder, garam masala, and green chilies for extra flavor.
    2. Make the Dough:
      • In a large mixing bowl, combine whole wheat flour, chopped spinach, and almonds.
      • Add salt and any optional spices.
      • Gradually add water and knead the mixture into a soft dough.
      • Cover the dough and let it rest for 15-20 minutes.
    3. Roll Out the Parathas:
      • Divide the dough into equal-sized balls.
      • Roll each ball into a flat circle using a rolling pin, dusting with flour as needed to prevent sticking.
    4. Cook the Parathas:
      • Heat a tawa or skillet over medium heat.
      • Place a rolled-out paratha on the hot tawa and cook until bubbles start to form.
      • Flip the paratha and cook the other side until golden brown spots appear.
      • Apply a small amount of oil or ghee on both sides and cook until crispy and fully cooked.
    5. Serve Hot:
      • Serve the spinach almond parathas hot with yogurt, pickles, or your favorite curry.

    Variations of Parathas

    Exploring Manjula’s Kitchen reveals a treasure trove of other delicious paratha recipes that you might enjoy. Here are some related parathas that you might find interesting:

    1. Aloo Paratha: A classic stuffed paratha with a spiced potato filling.
    2. Paneer Paratha: Paratha stuffed with a flavorful paneer (Indian cottage cheese) filling.
    3. Methi Paratha: A healthy paratha made with fresh fenugreek leaves.
    4. Gobhi Paratha: Paratha stuffed with a spiced cauliflower filling.
    5. Palak Paratha: Another spinach-based paratha, perfect for a nutritious meal.

    Serving Suggestions

    Spinach almond paratha can be enjoyed in various ways:

    • With Yogurt: Serve with plain or flavored yogurt for a cooling side.
    • With Pickles: Pair with Indian pickles for a tangy contrast.
    • With Raita: Serve with a refreshing cucumber or mint raita.
    • As a Wrap: Use the paratha as a base for wraps, adding vegetables or paneer.
    • With Curries: Enjoy with your favorite vegetarian curry.

    Tips and Tricks

    To perfect your spinach almond paratha recipe, consider these helpful tips:

    Use Fresh Ingredients: Fresh spinach and high-quality almonds enhance the flavor.

    Knead Well: Ensure the dough is well-kneaded for a soft and pliable texture.

    Rest the Dough: Letting the dough rest helps it become more elastic and easier to roll out.

    Cook on Medium Heat: Cooking on medium heat ensures the paratha is cooked through without burning.

    Customize Spices: Adjust the spices to suit your taste preferences.

    FAQs

    Can I Use Frozen Spinach?

    Yes, you can use frozen spinach. Thaw and drain it well before adding to the dough.

    How Long Does Spinach Almond Paratha Last?

    Parathas are best enjoyed fresh but can be stored in the refrigerator for up to 2 days. Reheat on a tawa before serving.

    Can I Freeze the Dough?

    Yes, you can freeze the dough for up to a month. Thaw it in the refrigerator before using.

    Is This Recipe Vegan?

    To make this recipe vegan, use oil instead of ghee for cooking the parathas.

    Can I Add Other Ingredients?

    Feel free to add other ingredients like grated carrots, beetroot, or different nuts for variety.

  • Rava Dosa

    Rava Dosa

    Rava Dosa

    Rava Dosa (South Indian Delicacy)

    Rava Dosa is a popular South Indian thin and crispy flat bread. It looks like thin crepes. This is a mouthwatering culinary delight. Rava Dosas are quick to make. They can be served as a snack or part of a main meal.
    4.67 from 3 votes
    Prep Time 10 minutes
    Cook Time 15 minutes
    Batter fermenting 30 minutes
    Total Time 25 minutes
    Course Main Course
    Cuisine Indian
    Servings 3 people

    Ingredients
      

    • 1/2 cup fine sooji samolina
    • 1/4 cup rice flour
    • 1/4 cup all-purpose-flour plain flour, maida
    • 1/2 tsp cumin seeds jeera
    • 1/2 tsp salt
    • 1/8 tsp asafetida hing
    • 1 tbsp cilantro chopped hara dhania
    • 1 green finely chopped
    • 2 cupa watwer approximately

    Instructions
     

    • Mix all three flours including semolina, rice flour and all-purpose flour. Make a thin batter using little water at a time and avoiding any lumps. Batter should have pouring consistency like buttermilk.
    • Add all other ingredients to the batter including cumin seeds, salt, asafetida, cilantro and green chili. Mix it well. Let the batter stand for about 30 minutes.
    • Heat the skillet on medium high. To check if skillet is ready sprinkle few drops of water over skillet water should sizzle. Wipe the skillet with few drops of oil.
    • Pour the batter with ladle on the skillet in a circular motion starting from the periphery to the center. Keep pouring the batter till it covers the whole skillet.
    • Note: pour the batter on the skillet from about 3 to 4 inches height. Don’t try to spread the batter otherwise the characteristic and appearance of Rava Dosa will not come. Rava Dosa should have holes like swiss cheese or have lacy look.
    • Sprinkle 1 teaspoon of oil around dosa.
    • Cook Dosa over medium heat for about 2 minutes or until Dosa becomes golden brown. Then turn the Dosa using spatula.
    • Let Dosa cook for about 1 minute from other side. Dosa will be golden brown on one side and light color on other side. Thin and crispy Rava Dosa is ready to serve.

    Notes

    Serving Suggestions
    Rava dosa is very flavorful. You may eat this snack with Hari Cilantro Chutney.
    Traditionally Rava Dosa is served with Sambar (lentil soup cooked with vegetables), and coconut chutney.
    I have the recipes for Sambar, Coconut Chutney, and Hari Cilantro Chutney on my web site.
    Tried this recipe?Let us know how it was!

    How to make Rava Dosa: Your Guide to the Perfect Crispy Delight 

    Dosa is a popular south indian delicacy which looks like a crepe. It’s like a crisp and thin pancake made of rice and urad dal batter. Traditionally Dosa is served with sambar, aloo masala and coconut chutney. It is an Indian crepe made usually through rice batter, but here we have experimented and made many alternative dosa such as Oat Dosa, Besan Dosa, Rava Dosa, Sorghum Dosa. What is Rava Dosa: This preparation is using rava and is a bread based breakfast recipe that is vegan. The preparation entails skillfully combining pan techniques and manual dexterity to achieve the perfect bread cooked on non-stick skillets.

    Mixing the Flours: Crafting the Perfect Rava Dosa Batter 

    Embark on your culinary journey to master the art of rava dosa by starting with the essential step of mixing the flours. In your quest to perfect the rava dosa recipe, combine three key flours – semolina, rice flour, and all-purpose flour. This trio forms the foundation of the batter, each contributing its unique texture and flavor.

    As you blend the flours, ensure a smooth consistency by gradually adding water to the mix, meticulously stirring to prevent the formation of lumps. Aim for a batter resembling buttermilk, with a fluidity that promises to spread effortlessly on the skillet. This foundational step lays the groundwork for the success of your dosa rava recipe, setting the stage for a culinary masterpiece.

    Flavorful Fusion: Adding the Finishing Touches to Your Dosa Rava Recipe 

    Elevate the rava dosa batter to new heights by infusing it with a harmonious medley of essential ingredients. Cumin seeds, salt, asafetida, cilantro, and green chilli converge to create a symphony of flavors that dance on the palate.

    With a thorough mix, allow the batter to rest for approximately 30 minutes—a crucial period that allows the ingredients to meld and intermingle, enhancing the overall taste and texture of your rava dosa.

    This resting period is a vital secret in the art of how to make rava dosa, imparting depth and complexity to the final dish. Embrace this moment of anticipation as the flavors marry and evolve, preparing to embark on a culinary adventure like no other.

    Sizzling Skillet: Setting the Stage for Rava Dosa Magic 

    Prepare your skillet on medium-high heat, the stage upon which the magic of rava dosa unfolds. A simple water test unveils the skillet’s readiness – when sprinkled on the surface, the water should sizzle and evaporate in an instant, signalling the perfect temperature for dosa-making.

    A touch of oil ensures a non-stick surface, laying the groundwork for the mesmerising dance of the rava dosa batter. With the skillet prepped and primed, you are poised to embark on a culinary journey filled with tantalizing aromas and mouthwatering flavors.

    Artful Pouring: Creating the Signature Look of Rava Dosa 

    With finesse and precision, pour the rava dosa batter onto the heated skillet, employing a circular motion from the edges towards the centre. The key lies in maintaining a height of 3 to 4 inches while pouring, resisting the urge to spread the batter thinly.

    This technique ensures the characteristic appearance of rava dosa – a delicate, lacy texture with enticing holes reminiscent of Swiss cheese. As the batter spreads and sizzles on the skillet, marvel at the artistry unfolding before your eyes, a testament to the skill and craftsmanship inherent in the rava dosa tradition.

    Crispy Transformation: Cooking Your Rava Dosa to Perfection 

    As the rava dosa graces the heated skillet, sprinkle a teaspoon of oil around its edges, allowing it to cook over medium heat for approximately 2 minutes until it achieves a golden brown hue. With practised precision, skillfully flip the dosa using a spatula, revealing its crispy underside to the world.

    Let it cook for an additional minute, ensuring that both sides are cooked to perfection. The end result is a thin and crispy rava dosa, a culinary masterpiece ready to tantalize your taste buds and transport you to culinary nirvana. With each bite, savor the symphony of flavors and textures that define the essence of this beloved Indian delicacy.

    In conclusion, the journey of crafting the perfect rava dosa is a culinary adventure filled with precision, skill, and a touch of artistry. From mixing the flours to savoring the crispy transformation on the skillet, each step in the process is imbued with tradition and flavor, culminating in a dish that delights the senses and nourishes the soul.

    So, gather your ingredients, fire up your skillet, and embark on a journey to discover the magic of rava dosa – a timeless classic that never fails to captivate and delight.

    Serving Suggestions: Enhancing the Rava Dosa Experience 

    Rava dosa’s aromatic profile pairs exceptionally well with Hari Cilantro Chutney. For a traditional touch, serve it alongside Sambar, a lentil soup enriched with vegetables, and coconut chutney. Explore these culinary companions to elevate your Rava Dosa feast to new heights.

  • Sambar Recipe

    Sambar Recipe

    Sambar (Spicy Lentil Soup)

    Sambar is a flavorful spicy South Indian lentil soup made with a variety of vegetables. It fits nicely with many South Indian meals, including dosas (pancakes), idlis (savory cakes), and rice. It could be said that a South Indian meal is incomplete without sambar.
    5 from 2 votes
    Course dal
    Cuisine Indian
    Servings 4 people

    Ingredients
      

    • 1/2 cup toor dal/arhar dal available in any Indian grocery store
    • 1/2 tbsp salt
    • 1/4 tbsp turmeric (haldi)
    • 2 tbsp oil
    • 1/2 tbsp cumin seeds (jeera)
    • 1/8 tbsp fenugreek seed (methi)
    • 1/4 tbsp mustard seeds (rai)
    • Pinch of asafetida (hing)
    • 10-12 curry leaves
    • 4 dry whole red chilies
    • 1 large tomato cubed in small pieces
    • 1-½ cups mixed vegetables, cute into bite-size cubes (green beans, carrots, zucchini, radishes)
    • 2 tbsp tamarind pulp
    • 1/2 tbsp salt
    • 1 tbsp sambar powder, available in any Indian grocery store

    Instructions
     

    • Wash and soak the dal in two cups of water for ten minutes or longer.
    • In a pressure cooker combine soaked dal with 2½ cups of water, salt, and turmeric. Cook over medium high heat.
    • When the pressure cooker starts to steam, reduce the heat to medium and cook for another six minutes.
    • Turn off the heat and wait until steam has escaped before opening the pressure cooker. Dal should be soft and mushy.
    • Mix the dal well enough to remove lumps. If the dal is thick, add up to one cup of water.

    Notes

    Prepare Seasoning
    1. Heat the oil in a saucepan. Test the heat by adding one cumin seed to the oil; if it cracks immediately, the oil is ready.
    2. Add cumin seeds, mustard seeds, fenugreek seeds, asafetida, red chilies, and curry leaves. Stir for a few seconds.
    3. Add tomatoes, vegetables, sambar powder, tamarind pulp and ½ cup water.
    4. Cover the pan and let the vegetables cook until they are tender over medium heat.
    5. Combine the vegetables and the dal to make the Sambar.  Sambar should be thin, like soup. If the sambar is thick, add water as needed.
    6. Cook sambar on low heat for 10-15 minutes.
    Serve Sambar with dosa, idli, rice or with any meal as a side.
    Keyword Dal
    Tried this recipe?Let us know how it was!

    How to make Sambar Masala: Sambar Recipe

    Sambar is a quintessential South Indian dish that holds a cherished place in Indian cuisine. This sambar recipe is a delightful combination of sambar dal, vegetables, and aromatic spices, creating a flavorful and nutritious sambar masala. In this comprehensive guide, we’ll explore how to make sambar step by step, incorporating tips, variations, and benefits to elevate your culinary experience.

    Tips for Perfecting Your Sambar Recipe

    • Use Fresh Ingredients: Opt for fresh spices, vegetables, and lentils to ensure the best flavor and texture in your sambar.
    • Balance the Flavors: Adjust the proportions of tamarind paste, jaggery, and salt to achieve the perfect balance of sour, sweet, and savoury notes in your sambar.
    • Experiment with Vegetables: Don’t hesitate to experiment with different combinations of vegetables to create unique variations of sambar tailored to your liking.
    • Temper with Care: Take care not to burn the spices while tempering, as it can impart a bitter taste to the sambar. Maintain medium heat and keep a close eye on the tempering process.
    • Allow for Resting Time: Let the sambar rest for a few minutes after cooking to allow the flavors to develop fully before serving.

    Variations of Sambar

    • Mixed Vegetable Sambar: Incorporate a medley of seasonal vegetables such as pumpkin, beans, and bell peppers for a colorful and nutritious twist on the classic sambar.
    • Tiffin Sambar: Prepare a thinner version of sambar specifically paired with idli, dosa, or vada, featuring a lighter consistency and a higher proportion of tamarind for tanginess.
    • Kadamba Sambar: This variation of sambar includes a diverse range of vegetables along with freshly ground spices, lending it a robust and hearty character ideal for special occasions.

    Benefits of Including Sambar in Your Diet

    • Rich in Protein: Sambar is a rich source of protein due to the inclusion of lentils, making it a nourishing option for vegetarians and vegans.
    • Loaded with Vitamins and Minerals: The array of vegetables in sambar provides essential vitamins, minerals, and dietary fibre, promoting overall health and well-being.
    • Digestive Aid: The spices and herbs in sambar, such as cumin, fenugreek, and curry leaves, possess digestive properties that aid in digestion and alleviate digestive discomfort.
    • Low in Calories: Despite its hearty and satisfying nature, sambar is relatively low in calories, making it a guilt-free indulgence for those watching their calorie intake.
    • Boosts Immunity: The antioxidants present in the spices and vegetables in sambar help strengthen the immune system and protect the body against various infections and diseases.

    FAQs (Frequently Asked Questions) About Sambar

    • Can I make sambar without tamarind paste? 

    • Yes, you can substitute tamarind paste with lemon juice or dried mango powder (amchur) for a tangy flavor in your sambar.
    • Is sambar gluten-free? 

    • Yes, sambar is naturally gluten-free as long as no wheat-based ingredients such as asafoetida powder (hing) are used in the recipe. You can use gluten-free asafoetida or omit it altogether to ensure the dish is gluten-free.
    • Can I make sambar ahead of time? 

    • Yes, you can prepare sambar in advance and store it in an airtight container in the refrigerator for up to 2-3 days. Reheat gently on the stovetop or microwave before serving.
    • Can I freeze leftover sambar? 

    • While it’s technically possible to freeze leftover sambar, the texture of the vegetables and lentils may change upon thawing, resulting in a slightly altered consistency. It’s best to consume fresh sambar for optimal taste and texture.

    If you’re looking to explore more Indian recipes, appetizers, beverages, and desserts, be sure to check out the following links on Manjula’s Kitchen. Here are some links to recipes on Manjula’s Kitchen official website: Vegetable Pakoras, Kaju Katli (Cashew Burfi), Baingan Bharta (Roasted Eggplant), Matar (Green Peas) Paneer, Besan Ladoo.

  • Aloo Naan

    Aloo Naan


    Aloo Naan

    Aloo Naan (Stuffed Potato Naan)

    Naan is very popular bread. This recipe is a tasty twist to naan stuffed with spicy mashed potatoes. Aloo naan can be served by itself or any gravy based vegetable dish.
    5 from 2 votes
    Course Bread
    Cuisine Indian

    Ingredients
      

    • 2 cup of All Purpose flour (Plain flour or maida)
    • 1 tbsp active dry yeast
    • 1 tbsp salt
    • 1 tbsp sugar
    • Pinch of baking soda
    • 2 tbsp of oil
    • 2 tbsp yogurt (curd or dahi)
    • About 3/4 cup lukewarm water use as needed
    • 2 medium potatoes
    • 1 tbsp salt adjust to taste
    • 1/2  tbsp cumin seeds (Jeera)
    • 1/2 tbsp mango powder (amchoor)
    • 1 chopped green pepper
    • 2 tbsp chopped cilantro (hara dhania)
    • 1/2  tbsp garam masala – optional
    • 2 tbsp of oil
    • 2 tbsp of clear butter or ghee to butter the Naan
    • 1/4  cup All Purpose flour for rolling

    Instructions
     

    • Dissolve yeast in 2 tablespoons of lukewarm water and let it sit for 10 minutes or until the mixture becomes frothy.
    • Add sugar, salt and baking soda to the flour and mix well.
    • Add the oil and yogurt mix it well, this will become crumbly dough.
    • Add the water/yeast mixture and add water as needed to make the dough firm. Note: After dough rises, it will become a little softer.
    • Knead until the dough is smooth. Cover the dough with damp cloth and keep it in a warm place for 3-4 hours. The dough should almost double in volume.
    • Boil 2 medium potatoes until they are tender.
    • Once cooked, drain the water and let the potatoes cool down. Note: Do not cool the potatoes under running water. Potatoes will absorb the water and become soft.
    • Next peel the skin off and mash the potatoes.
    • Add green pepper, cilantro, cumin seeds, mango powder, garam masala, and salt to the mashed potatoes and mix it well.

    Notes

    Making Naan
    1. Preheat the oven to 500 degrees with pizza stone (baking stone) for about thirty minutes so stone is hot. Using a baking/pizza stone helps get Naan close to same kind of heat as a clay tandoor.
    2. Knead the dough for about two minutes and divide the dough into six equal parts, and divide the potato mix in six parts. Potato mix should be little smaller then dough balls.
    3. Roll the dough into a 3-inch circle. Place one potato ball in the center. Pull the edges of the dough to wrap the potato filling. Proceed to make all six balls.
    4. Let the filled balls settle for 3 to 4 minutes before rolling them.
    5. Next turn the oven to high broil.
    6. Before putting the Naan in oven, oil your palms with oil and flip naan between your palms and place onto your baking/pizza stone into the oven.
    7. You can place about 2 to 3 naan on the baking/pizza stone at a time. The naan will take about 2 to 3 minutes to cook, depending upon your oven. After the naan is baked, it should become golden brown color on top.
    8. Take naan out of the oven and brush lightly with clear butter (ghee).
    9. Wait for 2 to 3 minutes before baking the next naan. It gives oven the chance to get heated again to max.
     
    Notes
    1. If you are doubling the recipe yeast should instead of two teaspoon it should be 1 ½ teaspoon same thing applies with sugar.
    2. If pizza stone is not available use baking sheet. After naan is cooked from top turn them over to cook from other side.
     
    Serving Suggestions
    Serve Naan with dal makhni, raita, chola, palak paneer. Enjoy!
    Keyword naan
    Tried this recipe?Let us know how it was!
  • Tandoori Roti

    Tandoori Roti

    Tandoori Roti

    Tandoori Roti

    Tandoori Roti is made with whole-wheat flour and traditionally cooked bread in a clay oven or tandoor. This recipe uses a regular home oven with pizza or baking stone which provides a similar effect to the tandoor. These are great to eat with gravy and vegetable preparations such as dal makhani, matar paneer etc.
    Recipe make 4 Rotis.
    5 from 2 votes
    Course Bread
    Cuisine Indian
    Servings 4 roti

    Ingredients
      

    • 1 cup whole wheat flour
    • ¼ cup all purpose flour maida
    • ¼ tsp baking soda
    • ½ tsp salt
    • ¼ tsp sugar
    • 1 ½ Tbsp oil
    • ¼ cup yogurt
    • 1/4 cup water as needed

    Also needed:

    • ¼ cup whole wheat flour for rolling
    • 2 Tbsp ghee clear butter

    Instructions
     

    • Mix the flour, baking soda, sugar, and salt together.
    • Next add the oil and yogurt and mix to make crumbly dough.
    • Add water as needed and mix to make smoother dough.
    • Knead the dough for about a minute. Set the dough aside and cover it with a damp cloth.
    • Let the dough rest for at least 30 minutes.
    • Heat the oven to 500 degrees with a pizza stone (baking stone) for about thirty minutes so the stone becomes hot. Using a baking/pizza stone will help to give roti close to same kind of heat as tandoor.
    • Next turn the oven to high broil.
    • Divide the dough into four equal parts.
    • Roll each dough piece into a smooth ball and press flat. Take each ball and press it into the dry flour on both sides makes it easy to roll.
    • Roll each dough piece into 6-inch circles.
    • If the dough sticks to the rolling pin or rolling surface, lightly dust the dough with dry flour.
    • Before putting the rolled dough into the oven, lightly wet your palms and take the rolled dough and flip them between your palms before placing them onto your baking/pizza stone in the oven.
    • You can place about 2 pieces of rolled dough on the baking/pizza stone at a time. The roti will take about 2 minutes to cook, depending upon your oven. After the roti is baked, there should be golden brown color on top.
    • Take roti out of the oven and brush lightly with clear butter (ghee).
    • Wait for 2 to 3 minutes before baking the next roti to allow the oven to reheat.

    Notes

    Serving Suggestions
    • Serve the roti hot!
    • Serve Tandoori Roti with dal, or any gravy-based dish and a side of sukhi subji complimented with chilled yogurt raita.
    Keyword clay oven, flatbread, naan, outdoor, Roti, tandoor, tandoori
    Tried this recipe?Let us know how it was!

    Ah, Tandoori Roti, the epitome of Indian bread-making mastery! Originating from the depths of tandoor ovens, these round, slightly charred breads boast a heavenly aroma and a tantalizing taste that’s hard to resist. Whether you’re enjoying them with creamy curries or savoring them on their own, Tandoori Rotis are sure to transport your taste buds to culinary nirvana.

    Tips for Making Perfect Tandoori Roti:

    Knead with Love: Start by kneading a soft and pliable dough using whole wheat flour, water, and a pinch of salt. The key to soft Tandoori Rotis lies in the dough, so don’t skimp on the kneading process. Channel your inner baker and knead with love!
    Rest and Relax: Allow the dough to rest for at least 30 minutes, covered with a damp cloth or plastic wrap. This resting period allows the gluten to relax, making the dough easier to roll out and resulting in softer rotis.
    Roll with Care: Divide the dough into equal portions and roll each portion into a smooth ball. Dust your work surface with flour and roll out each ball into a thin, round roti. Aim for a thickness of about 1/8 inch for that perfect balance of softness and chewiness.
    Heat Things Up: Preheat your oven to the highest temperature setting, ideally with a pizza stone or baking sheet placed inside. This ensures that your Tandoori Rotis bake quickly and develop that coveted charred exterior.
    Embrace the Char: Once your oven is preheated, carefully transfer the rolled-out roti onto the hot pizza stone or baking sheet. Let them bake for a few minutes until they puff up and develop those beautiful charred spots. Don’t be afraid to embrace the char— it adds depth of flavor and authenticity to your Tandoori Rotis.
    Brush with Love: As soon as your Tandoori Rotis come out of the oven, brush them generously with ghee or oil for a touch of richness and shine. This step not only enhances the flavor but also keeps the rotis soft and moist.

    Suggestions for Serving Tandoori Roti:

    Pair your freshly baked Tandoori Rotis with aromatic curries like butter paneer, paneer tikka masala, or dal makhani for a truly indulgent meal experience.
    Don’t forget to serve them alongside cooling accompaniments like cucumber raita or mint chutney to balance out the spices and add a refreshing touch to your meal.
    For a simple yet satisfying snack, tear off a piece of Tandoori Roti and dip it into your favorite dips or spreads, such as hummus or tzatziki.

    Benefits of Enjoying Tandoori Roti:

    Nutritious and Wholesome: Tandoori Rotis made with whole wheat flour are rich in fiber, vitamins, and minerals, making them a nutritious choice for any meal.
    Versatile and Adaptable: Tandoori Rotis can be enjoyed with a wide range of dishes, from creamy curries to grilled meats and veggies, making them a versatile addition to any menu.
    Authentic and Flavorful: Nothing beats the smoky aroma and distinct flavor of Tandoori Rotis baked in a hot tandoor oven. Recreate the magic at home and transport your taste buds to the streets of India with every bite.

    Variations of Tandoori Roti:

    While the classic Tandoori Roti is a timeless favorite, there are endless variations and creative twists to explore. Some popular variations include:

    Herb Tandoori Roti: Elevate the flavor of your Tandoori Rotis with a blend of fresh herbs like cilantro, mint, or parsley mixed into the dough for a burst of freshness in every bite.
    Stuffed Tandoori Roti: Take your Tandoori Rotis to the next level by stuffing them with flavorful fillings like spiced potatoes, paneer, or minced meat before baking. Simply roll out the dough, add the filling, seal the edges, and bake until golden brown and cooked through.

    FAQs (Frequently Asked Questions) about Tandoori Roti:

    Q: Can I make Tandoori Roti without a tandoor oven?

    A: Absolutely! While nothing quite compares to the authentic smoky flavor of Tandoori Rotis baked in a tandoor oven, you can achieve similar results using a hot oven or grill. Simply preheat your oven or grill to the highest temperature setting and follow the same baking process as described earlier.

    Q: Can I freeze Tandoori Roti for later use?

    A: Yes, you can freeze Tandoori Rotis once they are cooled completely. Stack them between layers of parchment paper or aluminum foil, wrap them tightly in plastic wrap, and store them in an airtight container or resealable plastic bag in the freezer. To reheat, simply thaw them in the refrigerator overnight or warm them up on a hot skillet or grill before serving.

    Q: Can I make Tandoori Rotis with gluten-free flour?

    A: While traditional Tandoori Rotis are made with whole wheat flour (atta), you can experiment with gluten-free flours like rice flour, chickpea flour, or a gluten-free flour blend to make gluten-free Tandoori Rotis. Keep in mind that the texture and flavor may vary slightly, so it may take some trial and error to achieve the perfect gluten-free version.

    In conclusion, Tandoori Roti is not just a bread—it’s a culinary adventure waiting to be explored. With its smoky aroma, soft texture, and versatile nature, Tandoori Roti has the power to raise any meal from ordinary to extraordinary. So, don your apron, fire up the oven, and get ready to embark on a flavorful journey through the vibrant world of Indian cuisine with Tandoori Roti as your trusty companion.

  • Aloo Masala Dosa

    Aloo Masala Dosa

    Aloo Masala

    Aloo (Potato) Masala

    Aloo masala is a nice compliment for any kind of dosa. The Aloo Masala can be rolled in the dosa or served as a side dish. Its a great appetizer that goes well in all kinds of meal be it breakfast, lunch or dinner.
    5 from 3 votes
    Prep Time 5 minutes
    Cook Time 10 minutes
    Total Time 15 minutes
    Servings 4 people

    Ingredients
      

    • 2 large potatoes
    • 1 tbsp oil
    • 1/8 tsp asafetida hing
    • 1/2 tsp cumin seeds jeera
    • 1/2 tsp mustard seeds rai
    • 1/2 tsp turmeric haldi
    • 1 green chili finely chopped
    • 1/2 tsp salt
    • 1 tsp lemon juice
    • 1 tbsp cilantro finely chopped hara dhania

    Instructions
     

    • Boiled the potatoes until they are soft and let cool.
    • Peel and chop the potatoes in small pieces.
    • Heat the oil in a frying pan on medium high. Test the heat by adding one cumin seed to the oil. If it cracks right away, the oil is ready.
    • Add the cumin seeds, mustard seeds and asafetida. As the seeds crack, add turmeric, potatoes, green chili, and salt. Stir-fry for a few minutes.
    • Add lemon juice and cilantro.
    • The potatoes should be slightly moist and not very dry.

    Notes

    Variations
    Try adding 2 tablespoons of shredded carrots and 1/8 cup of green peas to potato mixture.
    Taste best with Dosa, Rava Dosa, Whole wheat Dosa
     
    Tried this recipe?Let us know how it was!

    Aloo Masala Recipe: How to make Aloo Masala for Dosa

    Aloo Potato Masala, a classic gluten free South Indian filling that pairs perfectly with dosa, a popular Indian crepe. This vegan versatile dish combines the earthy goodness of potatoes with aromatic spices, creating a delicious accompaniment that’s loved by all.

    Spicy Potato Masala for Dosa

    Hearty and Satisfying: Aloo Potato Masala is a hearty and satisfying dish that’s perfect for breakfast, brunch, or any time of the day. Its comforting flavors and creamy texture make it a popular choice among both children and adults.

    Versatile Filling: Aloo Potato Masala is incredibly versatile and can be used as a filling for various Indian snacks and dishes, including dosa, samosa, and sandwich. Its bold flavors and creamy texture add depth and richness to any recipe it’s used in.

    Easy to Prepare: Making Aloo Potato Masala at home is quick and easy, requiring just a few simple ingredients and basic cooking techniques. With the right combination of spices and seasoning, you can create a delicious and flavorful filling that’s sure to impress.

    Variations of Aloo

    1. Aloo Gobi: Aloo Gobi is a delicious main dish made with potatoes, cauliflower, and a great blend of spices. Aloo Gobi can be served with various breads, such as rotis, parathas, and puris.
    2. Aloo Baingan: Aloo baingan (potato and eggplant) is a great main dish. It’s easy to make and can be served with any bread.
    3. Aloo Dum: Is an exotic rich and luxurious variant of aloo made in a curry format and incorporates the Indian cooking style of dum. 
    4. Aloo Mattar: Aloo Mattar is a popular curry based north Indian dish. Potatoes and peas with spicy gravy makes a great main course served with puris, rotis and parathas.

    Tips for Making Perfect Aloo Potato Masala:

    Boil Potatoes Until Tender: Boil the potatoes until they are fork-tender before mashing them for the Aloo Potato Masala. This ensures that the potatoes are cooked through and have a smooth and creamy texture.

    Temper the Spices: Temper whole spices such as mustard seeds, cumin seeds, and curry leaves in hot oil before adding other ingredients. This releases their flavors and aromas, enhancing the overall taste of the Aloo Potato Masala.

    Finish with Fresh Herbs: Garnish the Aloo Potato Masala with freshly chopped cilantro or coriander leaves just before serving for a burst of freshness and color. Herbs add a vibrant touch to the dish and elevate its presentation.

    FAQs about Aloo Potato Masala for Dosa:

    Can I make Aloo Potato Masala ahead of time? 

    Yes, you can prepare the Aloo Potato Masala ahead of time and store it in the refrigerator for up to 2-3 days. Reheat it gently on the stovetop or in the microwave before serving with dosa or other dishes.

    Is Aloo Potato Masala gluten-free? 

    Yes, Aloo Potato Masala is naturally gluten-free as it’s made with potatoes, vegetables, and spices, which are all gluten-free ingredients. It’s a safe and delicious option for individuals with gluten intolerance or celiac disease.

    Can I freeze Aloo Potato Masala? 

    While you can freeze Aloo Potato Masala, the texture may change slightly upon thawing. It’s best to freeze the masala in an airtight container for up to 1-2 months and thaw it in the refrigerator overnight before reheating.

    What can I serve with Aloo Potato Masala? 

    Aloo Potato Masala pairs perfectly with dosa, a South Indian crepe made from fermented rice and lentil batter. It can also be served with idli (steamed rice cakes), uttapam (Indian-style savory pancakes), or puri (deep-fried bread).

    Aloo Potato Masala is a delicious and versatile dish that’s perfect for savoring with dosa or as a filling for various Indian snacks and dishes.  Whether enjoyed for breakfast, brunch, or as a comforting meal option, its hearty flavors and creamy texture are sure to delight your taste buds and leave you craving for more. 

    So why not treat yourself to a batch of homemade Aloo Potato Masala and experience the irresistible flavors of South Indian cuisine?

    Stay tuned for more such dishes on Manjula’s Kitchen exploration into the world of culinary delights!

  • Battura

    Battura

    Battura (Fried Puffed Bread)

    Battura-(Chola Battura)

    Battura is fried puffed bread traditionally served with chola (chickpeas). The combination, called Chola Batura, is a popular snack from the state of Punjab. Chola Batura is a popular appetizer dish among youngsters.
    5 from 2 votes
    Prep Time 10 minutes
    Cook Time 15 minutes
    For Rising the dough 3 hours
    Total Time 25 minutes
    Course Main Course
    Cuisine Indian
    Servings 4 people

    Ingredients
      

    • 2 cups all-purpose flour plain flour or maida
    • 2 tbsp sooji semolina flour
    • 2 tbsp yeast
    • 1 tsp sugar
    • 1 tsp salt
    • 3 tbsp yogurt dahai, curd
    • 2 tbsp oil
    • 3/4 cup lukewarm water , use as needed

    Also need

    • 1/4 cup flour for rolling
    • oil to fry

    Instructions
     

    • Dissolve yeast in lukewarm water. Let it sit ten minutes or until the mixture becomes frothy.
    • Add sooji, sugar, and salt to the all-purpose flour and mix well. Add oil, yogurt, sugar and yeast water mix well. add water as needed to make soft pliable dough. 
    • Cover the dough and keep in a warm place three to four hours. The dough should nearly double in volume.
    • Knead the dough and divide into 8 equal parts. Shape dough into balls and roll into six- to seven circles. Dust lightly with dry flour to help with the rolling.
    • Heat  about 1″ of oil in a frying pan on high heat. Batura should be fried in very hot oil. To test, place a small piece of dough in the oil. The dough should float to the top and be light in color.
    • Place the one batura in the frying pan and press it with a skimmer it will puff up like a ball. Turn and cook until light creamy brown on both sides. Take the batura out and place them on paper towels to absorb the excess oil. Repeat for the remaining baturas.

    Notes

    Notes
    Be sure to fry baturas in hot oil. If the oil is not hot enough, the baturas will be greasy.
    Serving Suggestions
    I like to serve baturas with Punjabi Chola or Palak Paneer
    Keyword Chola Battura, Kid Friendly, Street Food
    Tried this recipe?Let us know how it was!

    Fluffy and Delicious Bhatura

    Bhatura is a fluffy and soft Indian fried bread that is often enjoyed with chole (spiced chickpeas). This bhatura recipe is easy to follow and results in perfectly puffed bread that is crispy on the outside and soft on the inside. Bhatura is a popular dish in North Indian cuisine and is often served for breakfast or as a hearty meal.

    The Essence of Bhatura

    The essence of bhatura lies in its fluffy texture and rich flavor. Made with a combination of all-purpose flour, yogurt, and a few simple ingredients, this bread is deep-fried to golden perfection. The yogurt helps in fermentation, giving the bhatura its characteristic softness and slight tanginess. This Indian fried bread is a delightful treat that pairs wonderfully with a variety of curries and dishes.

    Origin and Popularity

    Bhatura, also known as bhature, is a traditional bread from North India. It is especially popular in Punjab and Delhi, where it is often served as chole bhature – a combination of bhatura and spicy chickpeas. This dish is enjoyed for its rich flavors and satisfying texture, making it a favorite among both children and adults. The popularity of bhatura has spread across India and beyond, making it a beloved dish in many households.

    Why You’ll Love This Recipe

    • Fluffy and Soft: The perfect texture makes this bread irresistible.
    • Easy to Make: Simple ingredients and straightforward steps.
    • Versatile: Can be paired with a variety of dishes.
    • Perfect for Special Occasions: Ideal for breakfast, lunch, or festive meals.

    Variations of Vegetable Dry Recipes

    Exploring Manjula’s Kitchen reveals a treasure trove of other delicious vegetable dry recipes that you might enjoy with your fluffy bhatura. Here are some related dishes that you might find interesting:

    1. Rajma (Kidney Bean Curry): A hearty and comforting curry made with kidney beans, cooked in a flavorful tomato-based gravy.
    2. Masoor Dal: A simple and nutritious red lentil soup, seasoned with spices and perfect for a light meal.  
    3. Bhindi Masala: Spiced okra stir-fry, a quick and tasty dish that pairs well with roti or rice.
    4. Matar Paneer: Peas and cottage cheese cooked in a tomato-based gravy, a classic North Indian dish.
    5. Aloo Tikki: Spiced potato patties that are crispy on the outside and soft on the inside, perfect as a snack or appetiser. Recipe: 

    Serving Suggestions

    Bhatura can be enjoyed in various ways:

    • With Chole: The classic combination of bhature and spicy chickpeas.
    • With Curries: Pair with rich and flavorful curries like paneer butter masala or dal makhani.
    • As a Snack: Enjoy with a cup of chai and some pickles.
    • With Raita: Serve with a side of cool yogurt raita to balance the richness.

    Tips and Tricks

    To perfect your bhatura recipe, consider these helpful tips:

    • Use Fresh Ingredients: Fresh flour and yogurt will enhance the flavor and texture.
    • Knead Well: Knead the dough until it is smooth and elastic.
    • Rest the Dough: Let the dough rest for a few hours to help with fermentation.
    • Fry at the Right Temperature: Ensure the oil is hot enough to puff up the bhatura without burning.

    FAQs

    Can I Use Whole Wheat Flour Instead of All-Purpose Flour? 

    Yes, you can use whole wheat flour for a healthier version, but the texture will be slightly different.

    How Long Should I Let the Dough Rest? 

    Let the dough rest for at least 2-3 hours for better fermentation.

    Can I Bake Bhatura Instead of Frying? 

    Traditional bhatura is fried, but you can try baking them for a healthier option. However, they won’t have the same texture.

    How Do I Store Leftover Bhatura? 

    Store leftover bhatura in an airtight container at room temperature for up to 1 day. Reheat in a preheated oven or on a skillet before serving.

    What Can I Serve with Bhatura? 

    Bhatura pairs well with various curries, pickles, and raita. It is traditionally served with chole, but you can get creative with different accompaniments.

  • Punjabi Aloo Paratha

    Punjabi Aloo Paratha

    A plate of Aloo Paratha topped with a dollop of butter

    Punjabi Aloo Paratha

    Aloo Parathas make for the perfect lazy weekend brunch. Parathas can be made plain or with a variety of different fillings. A flavorful potato filling is by far the most popular. Aloo Parathas are very popular in North India, at any time of the day. In Punjab, Aloo Parathas are a staple for breakfast. Traditionally, Aloo Parathas are served with homemade butter and buttermilk known as chaas. I'm sure you are thinking that making these parathas is very time consuming. With our busy schedules and hectic mornings, how is possible to prepare these! Of course, parathas taste best when fresh off a hot skillet! An easy solution to this problem is to simply prepare part of the recipe in advance until you are ready to roll the parathas. You can prepare the dough and filling in advance and have the potato-mix filled balls ready to just start rolling. The prepared dough can be refrigerated for up to two days. Enjoy!
    This Recipe will make 4 parathas.
    4.75 from 4 votes
    Prep Time 15 minutes
    Cook Time 15 minutes
    Total Time 30 minutes
    Course Bread
    Cuisine Indian
    Servings 4 parathas

    Ingredients
      

    For the Dough

    • 1 cup whole wheat flour
    • 1 ½ tbsp oil
    • ¼ tsp salt
    • ½ cup cold water Use more as needed

    For the Potato Filling

    • 1 ½ cup potatoes mashed
    • ½ tsp salt
    • ¼ tsp red chili powder
    • ½ tsp cumin seeds Jeera
    • 2 tsp coriander powder dhania
    • tsp asafetida hing
    • ½ tsp mango powder amchoor
    • ¼ tsp garam masala
    • 1 Tbsp green chili chopped
    • 2 Tbsp cilantro chopped, dhania

    Also need.

    • ¼ cup whole wheat flour for rolling
    • 2 Tbsp oil to cook

    Instructions
     

    Making the Dough

    • Mix flour, salt, and oil, until oil is incorporated with flour well, add water slowly to make a soft dough (add water as needed).
    • Knead dough well on a lightly greased surface to make the dough soft, smooth, and pliable.
    • Set the dough aside and cover. Let the dough rest at least ten minutes.

    Filling

    • In a bowl take mash potatoes add green chilies, cilantro, cumin seeds, garam masala, mango powder, and salt, mix it well.

    Making paratha

    • Divide the dough into 4 equal parts and roll them into balls.
    • Then divide the potato filling into 4 parts and shape into balls. Potato balls should be about 1½ times larger than the dough balls.
    • Roll dough ball into a 3” circle. Place a filling ball in the center. Pull the edges of the dough to wrap it around the potato filling. Repeat to make all six balls. Let the filled balls settle three to four minutes.
    • Meanwhile heat heavy skillet on medium high heat until moderately hot. To test, sprinkle water on the skillet. If the water sizzles right away, the skillet is ready.
    • Press the filled ball lightly on dry whole wheat flour from both sides.
    • Using a rolling pin, roll the balls lightly to make six-inch circles, keeping the sealed side of the balls on top. If the dough sticks to the rolling pin or rolling surface, lightly dust the parathas with dry flour.
    • Oil the skillet and place the paratha on the skillet. When the paratha starts to change color and begins to puff up, flip it over. You will notice some olden-brown spots.
    • After a few seconds, drizzle one teaspoon of oil over the paratha, and spread with spatula. Flip the paratha again and lightly press the puffed areas with a spatula.
    • Flip again and press with a spatula making sure the paratha is golden-brown on both sides. Repeat for the remaining parathas.
    • Parathas are best served hot and crispy. They will be soft if not served hot. If you are not going to serve them right away, cool them on a wire rack to keep them from getting soggy.
    • Parathas can be kept unrefrigerated for up to two days wrapped in aluminum foil or in a covered container. For later use, parathas can be refrigerated three to four days or frozen for up to a month. Re-heat using a skillet or oven.

    Notes

    Variations
    Substitute chopped cilantro with ¼ cup finely chopped mint leaves, or experiment with your favorite herb. Be sure to pat the herbs dry before adding to the mixture.
    Serving Suggestions
    1. Parathas can be served with Tomato Chutney, Plain Yogurt, mattar Paneer, Green Chili pickle.
    2. Serve it like a Mexican quesadilla by topping it with cheese and sliced tomatoes, then folding it in half.
    Tried this recipe?Let us know how it was!
  • Zucchini Lentil Pakoras

    Zucchini Lentil Pakoras

    A plate of crispy Zucchini Lentil Pakoras served with chutney

    Zucchini Lentil Pakoras

    As pakoras are one of the most welcoming snacks all over India. It is a popular street food. Everyone has their own favorites and there are countless recipes. Pakoras are a very comforting snack especially when it is cold, and it is raining. Here, we are experiencing both and I am wishing for pakoras with a hot cup of chai, blanket and a good TV show or movie. In a particular magazine, I saw a fusion pakora recipe. Instead of using traditional beasn batter, the chef had used red lentil batter. Several times, I have used moong dal batter, but I never even thought about using red lentil. I was ready to give it a try with another pakora recipe using lentil batter. I made some changes and added chopped ginger that added a nice kick to the pakoras. They turned out to be mouthwatering appetizers: crispy on the outside and soft on the inside. These pakoras are addicting! These work as a tasty pairing with your afternoon tea or a spicy delicious snack before any meal. These pakoras have a different crispness but are very delightful. Give these pakoras a try and enjoy! These Pakoras are also vegan and gluten-free.
    This recipe will serve 4.
    5 from 1 vote
    Prep Time 10 minutes
    Cook Time 15 minutes
    Total Time 25 minutes
    Course Appetizer
    Cuisine Indian
    Servings 4 people

    Ingredients
      

    • 1 cup red lentils washed masoor dal
    • 1 zucchini medium sized, cut into thick rounds
    • 2 Tbsp green chili chopped
    • 2 Tbsp ginger finely chopped
    • 2 Tbsp cilantro chopped
    • 1 ½ tsp salt adjust to taste
    • ½ tsp red chili powder
    • Pinch of baking soda
    • 2 Tbsp corn starch

    Instructions
     

    • Soak red lentil at least for 1hours or more.
    • Pet dry zucchini slices and keep aside.
    • Blend dal to smooth batter, using just enough water needed to blend.
    • To make Pakora batter add corn starch, salt, chili powder and salt together, mix it well, whipping for few seconds. Add all the other ingredients to the batter, ginger, green chili, cilantro and mix all the ingredient well. Batter should be consistency of pancake mix, if needed add little water.
    • Heat the oil in a frying pan on medium-high heat. The frying pan should have about 1 inch of oil. To check if the oil is ready, put one drop of batter in the oil. The batter should come up but not change color right away.
    • Dip the zucchini slices into the batter one at a time, making sure it is covered by the batter completely. Then, slowly drop into the frying pan.
    • Fry the pakoras in small batches, not overlapping. The pakoras will take about 4-5 minutes to cook.
    • Turn them occasionally. Fry the pakoras until both sides are golden brown. If the oil is too hot, the pakoras will brown too fast and not get crispy.
    • Left over batter, place about one tablespoon of batter into the oil. Fry the pakoras in small batches until golden-brown.
    • The crispy, delicious pakoras are now ready to serve. I like to serve these both pakoras side by side.

    Notes

    Serving Suggestions
    Tried this recipe?Let us know how it was!
  • Aloo Palak

    Aloo Palak

    A dish of Aloo Palak, featuring potatoes and spinach cooked with spices

    Aloo Palak (Spinach with Potatoes)

    Aloo Palak is a versatile side dish that is a great complement to any meal. Aloo (potatoes) and Palak (spinach) are two vegetables I always have in my kitchen. Potatoes we all know are used in so many ways and have endless recipes. I also use spinach in many dishes. I thought I had done this recipe a long time ago, but today I made this dish for my family after some time and they enjoyed it very much and asked me if I have done this video recipe. I was looking on my website and realized I have not done this recipe yet. This is a common recipe, but this is my version of Aloo Palak. Adding fenugreek seeds and besan (gram flour) kicks off the flavor to the dish. For me and Alex, this is a comfort dish. This recipe is also vegan and gluten free. I serve this as a side dish, or I enjoy rolling it in a Roti or Paratha to make a to-go lunch. Alex especially enjoys making grilled cheese sandwiches filled with leftover Aloo Palak.
    I have done many recipes for spinach:
    Palak Paneer, Saag, Spinach Crisps, Chole Palak, Palak Puri
    This recipe will serve 4.
    4.75 from 8 votes
    Prep Time 10 minutes
    Cook Time 20 minutes
    Total Time 30 minutes
    Course Main Course
    Cuisine Indian
    Servings 4 people

    Ingredients
      

    • 2 cup potatoes cut into small pieces I used 2 medium size potatoes
    • 4 cup spinach finely chopped, approx. 8oz
    • ½ cup tomato finely chopped
    • 4 Tbsp oil
    • 1 tsp cumin seed jeera
    • ¼ tsp fenugreek seeds methi optional
    • 1 Tbsp besan gram flour
    • 1 Tbsp coriander powder dhania
    • ½ tsp red chili powder adjust to taste
    • ¼ tsp turmeric haldi
    • 1 tsp salt
    • ½ tsp mango powder amchoor

    Instructions
     

    • Heat the oil in a saucepan. The oil should be moderately hot. Add the cumin seeds as they crack add besan, and fenugreek seeds. Stir for about one minute, besan will become aromatic and will be light golden brown.
    • Next add tomato, coriander, red chili powder, and turmeric.
    • Stir-fry spice mix until spice mix starts leaving the oil. It should take about 2 minutes.
    • Add potatoes, spinach, and 1/2 cup of water, cover the pan. Let it cook over medium heat. The potatoes should be very tender but not mushy and should be covered with spinach.

    Notes

    Do stir in between besan can stick to the bottom of the pan. I did stir once in between. If needed, add a little more water.
    Aloo Palak should not be very dry, it should be moist. Add mango powder and stir, turn off the heat. Aloo Palak is ready.
    Tried this recipe?Let us know how it was!
  • Chana Dal Sweet and Sour Paratha

    Chana Dal Sweet and Sour Paratha

    Two Chana Dal Sweet and Sour Parathas served with a cup of tea

    Chana Dal Sweet and Sour Paratha

    Chana Dal Sweet and Sour Parathas is a delicious and unique blend of many flavors. These Parathas are spicy, sweet, and sour. The combination of all these flavors is simply delicious.
    The nuttiness of the coconut and sweetness of sugar, cardamom, and fennel seeds add to the flavor. My mother was very fond of sweet and sour flavors. She first asked me to make these Parathas and requested me to make the filling, telling me exactly what she wanted in the filling. I followed her instructions exactly including what spices to put in. To my surprise, the recipe came out perfect and it was exactly the flavor combination she was looking for. I made this recipe for her several times and she really enjoyed it. It felt so good to see my mom smile. She will have these Parathas with Aloo Tamatar, or just with a hot cup of Chai.
    I take great pride when making these recipes for you all. I like to make sure that when you try my recipes out, they meet your expectation! I decided to make these Parathas after 30 years. I have no idea why I waited this long. This is a wonderful flavorful breakfast dish, or you can serve with the main meal. Hope you enjoy them!
    Recipe will serve 4.
    No ratings yet
    Prep Time 10 minutes
    Cook Time 20 minutes
    Servings 4 people

    Ingredients
      

    For Dough

    • ¾ cup whole wheat flour atta
    • ¼ cup All Purpose flour plain flour or maida
    • ¼ tsp salt
    • 2 Tbsp oil
    • cup lukewarm water use as needed

    Filling

    • ½ cup chana dal
    • 1 Tbsp oil
    • tsp asafetida
    • ½ tsp salt
    • tsp cardamom powder
    • 2 Tbsp coconut powder
    • 2 ½ Tbsp sugar
    • 2 tsp mango powder amchoor
    • ½ tsp red chili powder lal mirch
    • 1 tsp fennel seed powder saunf

    Also, Need

    • 2 Tbsp of dry flour for rolling Parathas
    • 3 Tbsp oil to cook the parathas

    Instructions
     

    Dough

    • In a bowl, mix whole-wheat flour, all-purpose flour, salt and oil, mix it well rubbing with fingers; add water slowly to make soft dough. The dough should not be stick to your fingers. Cover the dough and set it aside. Let it rest at least ten minutes.

    Filling

    • Wash and cook dal in two cups of water, in Instant pot or pressure cooker for 25 minutes. Dal should be soft but not mushy. I am using instant pot.
    • Heat the oil over low medium heat in a pan add dal, and all the spices for filling fennel, red chili, mango powder, coconut powder, asafoetida, and salt, Note: if dal has extra water drains most of the water.
    • Stir continuously, and keep pressing dal, until water from dal has evaporated. Note: dal should be moist, not be powdery.
    • Turn off the heat. Let the filling cool to room temperature.

    To make Parathas

    • Take the dough and knead it for a minute. Divide the dough and filling in 10 equal parts. Dough balls and filling should be the same size.
    • Take one part of the dough and with your fingers flatten the edges and make into 3-inch circle. Leaving the center a little thicker than the edges.
    • Place a filling in the center. Pull the edges of the dough to wrap it around the peas filling. Repeat to make all balls. Let the filled balls settle three to four minutes. Note: It helps to spread the filling evenly.
    • Meanwhile heat a heavy skillet on medium-high heat until moderately hot. To test, sprinkle water on the skillet. If the water sizzles right away, the skillet is ready.
    • Press the filled ball lightly on dry whole wheat flour from both sides.
    • Using a rolling pin, roll lightly to make five-inch circles, keeping the sealed side of the balls on top. If the dough sticks to the rolling pin or rolling surface, lightly dust the parathas with dry flour.
    • Place the paratha on the skillet. When the paratha starts to change color and begins to puff up, flip it over. You will notice some golden-brown spots.
    • After a few seconds, drizzle one teaspoon of oil over the paratha. Flip the paratha again and lightly press the puffed areas with a spatula.
    • Flip again and press with a spatula making sure the paratha is golden-brown from both sides. Repeat for the remaining parathas.
    • Parathas are best served hot and crispy.

    Notes

    You will have leftover filling; you can refrigerate for up to a week or freeze for 2-3 months.
    Cooking time 20 minutes, this does not include boiling Chana Dal.
    Tried this recipe?Let us know how it was!
  • Vegetable Cheela Rolls

    Vegetable Cheela Rolls

    Vegetable Cheela Rolls recipe by Manjula

    Vegetable Cheela Rolls

    Vegetable Cheela Rolls is a healthy and delicious any-time meal. Cheela Rolls is a treat for people who are vegan and gluten free. Cheela is like a besan dosa, and can be used as a wrap and this cheela wrap with vegetables makes a wholesome meal. Cheela Rolls can be used as a snack and also for good a lunch box meal.
    4.41 from 5 votes
    Prep Time 10 minutes
    Cook Time 20 minutes
    Total Time 30 minutes
    Course Appetizer, Snack
    Cuisine Indian
    Servings 2 people

    Ingredients
      

    For Cheela

    • 1 cup besan Gram flour
    • 2 Tbsp rice flour
    • 1 tsp salt
    • 1/2 tsp cumin seeds jeera
    • 3/4 cup water to make batter
    • 4 tsp oil

    For Filling

    • 3 cup cabbage thinly sliced
    • 1/2 cup carrots shredded
    • 1/2 cup bell pepper thinly sliced
    • 2 tsp oil Canola or vegetable oil
    • 1/2 tsp cumin seeds jeera
    • 1/2 tsp mustard seeds rai
    • 2 tsp coriander powder dhania
    • 1/4 tsp chili powder
    • 1/2 tsp salt
    • 1/2 tsp sugar
    • 1 tsp lemon juice

    Instructions
     

    • Mix all the dry ingredients together, besan, rice flour, cumin seeds, and salt. Add the water slowly to make a smooth batter, consistency of Dosa batter. Set aside.
    • To make the filling: Heat the oil in frying pan over medium high heat. Oil should be moderately hot, add cumin seeds and mustard seeds, as the seeds crack. Add cabbage, carrots, and bell pepper. Stir-fry for about one minutes add all the other ingredients, coriander powder, chili powder, salt, sugar and lemon juice. Stir- fry for about three to four minutes, vegetables should be still crisp. Turn off the heat.
    • To make the Cheele: Use a heavy skillet and place on medium-high heat. Test by sprinkling a few drops of water on it. Water should sizzle right away.
    • Pour about 1/4 cup of the batter into the skillet and spread evenly with a back of spoon. Starting from the center, spiral the batter outward evenly to form a circle.
    • When batter starts to dry, gently spread one teaspoon of oil over it. Wait about 30 seconds; flip the cheela using a flat spatula.
    • Press the cheela lightly all around with the spatula to make cheela cook evenly. Turn the cheela and in the center of the cheele put about ½ cup of stir-fry diagonally and roll it.
    • Vegetable Cheela Roll is ready to serve. I like to serve this with Mango Pickle or Cilantro Chutney.
    • Enjoy!

    Notes

    In the ingredients, we need about 4 cups total of sliced vegetable (this includes the cabbage, bell pepper, and carrots)
    Suggestions
    Use or preferred vegetables and also works good with any leftover vegetables.
    Tried this recipe?Let us know how it was!

    A Comprehensive Guide to Besan Cheela Recipe with Vegetables

    Welcome to Manjula’s Kitchen, your ultimate destination for authentic Indian recipes and culinary inspiration. Today, we embark on a flavorful journey to explore the delightful world of Vegetable Cheela Rolls, a versatile and nutritious dish that is perfect for any meal of the day. Made with besan (gram flour) and a colorful assortment of vegetables, these cheelas are not only delicious but also packed with vitamins, minerals, and fibre. 

    Join us as we unravel the secrets to creating the perfect Besan Cheela Recipe with Vegetables, along with tips, variations, benefits, and answers to frequently asked questions. Vegetable cheela is a delectable gluten-free and vegan snack, perfect for appetizers or as a bread alternative, offering a flavorful option for those seeking tasty and wholesome options.

    Preparing the Batter for Vegetable Cheela 

    • Begin by preparing the batter for the besan Vegetable Cheela, the foundation of this delectable dish. In a mixing bowl, combine besan (gram flour) with water to create a smooth and lump-free batter. Add finely chopped vegetables such as carrots, bell peppers, spinach, and green chilies to the batter, along with spices like turmeric powder, cumin powder, and salt. Mix well to ensure that the vegetables are evenly distributed throughout the batter, imparting their vibrant colors and flavors.

    Cooking the Vegetable Cheela 

    • Once the batter is ready, it’s time to cook the Vegetable Cheela to perfection. Heat a non-stick skillet or tawa over medium heat and lightly grease it with oil or ghee. Pour a ladleful of the batter onto the skillet and spread it evenly in a circular motion to form a thin layer. Cook the cheela for a few minutes until the edges start to crisp up and bubbles appear on the surface. Flip the cheela using a spatula and cook the other side until golden brown and crisp. Repeat the process with the remaining batter, adjusting the heat as needed to ensure even cooking.

    Assembling the Vegetable Cheela Rolls 

    • Once all the cheelas are cooked, it’s time to assemble the besan Vegetable Cheela Rolls, adding an extra layer of flavor and texture. Place a cooked cheela on a clean surface and spread a generous layer of mint chutney or yogurt sauce over it. Add a filling of thinly sliced cucumber, tomatoes and fresh coriander leaves on one side of the cheela. Roll the cheela tightly into a cylindrical shape, securing the filling inside. Repeat the process with the remaining cheelas to create a batch of delicious besan Vegetable Cheela Rolls.
    • Tips for Perfect Vegetable Cheela Rolls Every Time 

    • Use a non-stick skillet or tawa to cook the cheelas to prevent sticking and ensure easy flipping.
    • Add a pinch of baking soda to the batter to make the cheelas light and fluffy.
    • Experiment with different vegetables and spices to customize the flavor of your cheelas according to your taste preferences.
    • Serve the besan Vegetable Cheela Rolls hot with a side of green chutney or ketchup for dipping.

    Variations of Besan Cheela Recipe with Vegetables 

    • Paneer Cheela: Add crumbled paneer (Indian cottage cheese) to the vegetable filling for added protein and richness.
    • Masala Cheela: Sprinkle chaat masala or garam masala over the cooked cheelas for an extra burst of flavor.
    • Cheese Cheela: Grate some cheese over the filling before rolling the cheelas for a gooey and indulgent twist.

    Health Benefits of Vegetable Cheela Rolls: 

    Vegetable Cheela Rolls are not only delicious but also nutritious, offering a range of health benefits:

    • Besan (gram flour) is rich in protein, fiber, and essential nutrients, making it a healthy alternative to refined flour.
    • Vegetables add vitamins, minerals, and antioxidants to the dish, promoting overall health and well-being.
    • Cheelas are low in calories and high in satiety, making them a filling and satisfying option for weight management.

    Frequently Asked Questions (FAQs) About Vegetable Cheela Rolls 

    Q: Can I make the batter for Vegetable Cheela in advance?

    A: Yes, you can prepare the batter in advance and store it in the refrigerator for up to 24 hours. Just give it a quick stir before cooking the cheelas.

    Q: Can I freeze Vegetable Cheela Rolls for later use?

    A: While it’s best to enjoy besan Vegetable Cheela Rolls fresh, you can freeze them for up to 1 month. Wrap them individually in plastic wrap or foil and store them in an airtight container. Thaw and reheat in a skillet or microwave before serving.

    Q: What other fillings can I use for Vegetable Cheela Rolls?

    A: You can get creative with the fillings for Vegetable Cheela Rolls. Try adding cooked beans, grated cheese, or leftover cooked vegetables for added flavor and variety.

    Congratulations! You have now mastered the art of making besan Vegetable Cheela Rolls, a wholesome and delicious dish that is sure to impress your family and friends. Whether enjoyed as a snack, appetizer, or light meal, these flavorful rolls are a testament to the rich culinary heritage of India. Explore more recipes and culinary inspirations on Manjula’s Kitchen and continue your culinary adventures with confidence and creativity.

    If you liked the recipe here are some other recipes that you may like too 

    Vegetable Cheela: A savory Indian pancake made with mixed vegetables and chickpea flour.

    Palak (Spinach) Paneer: A classic North Indian dish made with spinach and paneer cheese cooked in a creamy tomato-based sauce.

    Shahi Pulao (Vegetable Pulao): A flavorful rice dish made with spiced basmati rice and vegetables.

    Gobi (Cauliflower) Manchurian: Crispy cauliflower florets tossed in a tangy and spicy Indo-Chinese sauce.

    Aloo (Potato) Paratha: Whole wheat flatbread stuffed with spiced mashed potatoes and cooked on a griddle.

    Mango Lassi: A refreshing yogurt-based drink flavored with ripe mangoes and a hint of cardamom.

    Besan Ladoo: Traditional Indian sweet made with roasted chickpea flour, ghee, and sugar.

  • Litti Chokha

    Litti Chokha

    Litti Chokha

    Litti Chokha (Bihari Sattu Litti)

    Litti Chokha is an appetizer from the state of Bihar made with stuffed whole wheat dough balls with roasted chana dal and spices inside. These stuffed balls are known as Litties are usually roasted over charcoal but can also be baked. Litties are served with Chokha. Chokha is a dip prepared with mashing potato, tomato or eggplant with spices, but at my home it was always served with Dal Tadka.
    This recipe will make 8 litties.
    5 from 2 votes
    Prep Time 10 minutes
    Cook Time 30 minutes
    Total Time 40 minutes
    Course Main Course
    Cuisine Indian
    Servings 4 people

    Ingredients
      

    Dough

    • 1 cup whole wheat flour chapatti atta
    • 2 Tbsp ghee clarified butter
    • 1/2 tsp salt
    • cup About 1/3 lukewarm water

    Filling

    • 3/4 cup sattu flour of roasted chana dal, available in Indian grocery stores
    • 1/2 tsp salt adjust to taste
    • 1/8 tsp asafetida hing
    • 1/8 tsp turmeric haldi
    • 1/2 tsp red chili powder
    • 1 tsp mango powder amchoor
    • 1 tsp grated ginger
    • 1 Tbsp green chili finely chopped, adjust to taste
    • 1 tsp ghee clarified butter
    • 1/4 cup water approximately

    Potato, and Tomato Chokha

    • 1 cup medium size potato boiled peeled and roughly mashed
    • 2 medium size tomato roasted peeled and mashed, I have roasted them over the skillet
    • 1 tsp salt
    • Spices we will use half and half to make both Potato and Tomato Chokha
    • 1/4 tsp black pepper
    • 1 tsp lemon juice just for Potato Chokha
    • 2 tsp grated ginger
    • 2 Tbsp finely chopped green chilies
    • 2 Tbsp finely chopped cilantro
    • 2 Tbsp olive oil or mustard oil I prefer olive oil
    • 2 Tbsp ghee or clarified butter for serving the Litties.

    Instructions
     

    For Tomato Chokha

    • To prepare the Tomato Chokha add the spices to mashed tomatoes about 1/2 tsp salt, pinch of black pepper, 1/2 tsp ginger, 1 Tbsp green chili. 1 Tbsp cilantro and 1 Tbsp of oil mix it together. Tomato Chokha is ready set aside.

    For Potato Chokha

    • Add all the remaining spices with mashed potatoes, salt, pinch of black pepper, lemon juice, ginger, cilantro and oil, mix it well. Potato Chokha is ready, set aside.

    To Make Dough

    • Mix the flour, salt and ghee. Add water slowly to make dough. Dough should be firm but do not knead the dough. Cover the dough and let it sit for at least fifteen minutes.

    Filling

    • Mix all the ingredients together except water, sattu, salt, asafetida, turmeric, red chili powder, mango powder, ginger, green chili, and ghee, now add little water to make firm dough, dough will be little crumbly.

    Making Litti

    • Pre-heat the oven at 400 degree Fahrenheit. I am using a toaster oven or you can also use oven.
    • Divide the dough into 8 equal parts and roll them into balls. They will not be very smooth dough ball. Also, divide the filling in 8 parts filling should be little smaller then dough balls.
    • Roll the dough balls into 3-inch circle. Place one part of the filling in the center of each rolled dough, and pull the edges of the dough to wrap the filling. Proceed to make all 8 balls. Grease your palms and roll the filled balls gently between your palms.
    • Arrange the litties over greased baking sheet about one inch apart and place in toaster oven, for 10-12 minutes, turn them over and bake again for 10-12 minutes. Litties should be golden brown all around.

    Serving

    • need about 2 Tbsp ghee or clarified butter for serving the Litties.

    Notes

    I like to eat these Litties with Dal Tadka and Potato or Tomato Chokha.
    Tried this recipe?Let us know how it was!

    Litti Chokha Recipe: How to make Litti Chokha

    Litti Chokha is a traditional and an iconic appetiser and a bread format of dish from the state of Bihar in India. It consists of stuffed whole wheat dough balls (litti) served with spicy mashed vegetable mixture or chokha. This rustic and flavorful dish is a staple in Bihari cuisine and is enjoyed as a hearty meal or snack

    Litti Chokha: A traditional Bihari food

    High in Fiber: Litti Chokha is made primarily from whole wheat flour, which is rich in dietary fiber. Fiber aids in digestion, promotes gut health, and helps regulate blood sugar levels. Consuming fiber-rich foods like Litti Chokha can contribute to overall health and well-being.

    Vitamins and Minerals: Litti Chokha is often served with chokha, a spicy mashed vegetable mixture made from ingredients such as roasted eggplant, tomatoes, and potatoes. These vegetables are rich in vitamins, minerals, and antioxidants, which support immune function and promote overall health.

    Satiating and Flavorful: Litti Chokha is a satisfying and flavorful dish that combines the earthy taste of roasted wheat dough with the spicy and tangy flavors of chokha. The contrast in textures and flavors creates a delightful eating experience that is both comforting and nourishing.

    Variations of Litti Chokha:

    • Mattar Ke Kachori: Mattar Kachori is a delicious, fried puff pastry filled with spicy green peas. This mouthwatering snack also can be served as part of any main meal.
    • Pizza Paratha: Pizza has become a universal food enjoyed by all. Pizza paratha is perfect for the times when you want to enjoy homemade pizza. This is also a quick and easy recipe.
    • Dal Bati: Dal bati is a popular Rajasthani delicacy. Dal is simply soup of mixed lentils, cooked with spices. Bati is a baked, whole wheat bread roll and the combination is known as dal bati.
    • Khasta Kachori: Khasta kachori is a delicious, spicy, fried puffed pastry. Khasta Kachori is filled with spicy moong dal mixture and then deep fried. Kachori is flakey from outside and hollow inside. Kachori should be fried on low heat so it can cook through to have a nice crunch.

    Tips for Making Perfect Litti Chokha:

    Knead the Dough Well: For soft and fluffy litti, knead the dough thoroughly until it becomes smooth and elastic. Properly kneaded dough ensures that the litti hold their shape and cook evenly without becoming too dense or chewy.

    Roast Litti Over Charcoal: Traditional litti are cooked over a charcoal or wood fire, which imparts a smoky flavor and crispy texture to the outer crust. If using an oven, you can achieve a similar effect by placing the litti directly on a grill rack or using a barbecue grill.

    Use Fresh Ingredients: Use fresh and high-quality ingredients, especially for the chokha, to enhance the flavor and nutritional value of the dish. Choose ripe, firm vegetables and aromatic spices for the best results.

    Serve with Ghee: Litti Chokha is traditionally served with a generous drizzle of melted ghee (clarified butter) on top. The rich and buttery flavor of ghee complements the earthy taste of litti and adds a touch of indulgence to the dish.

    FAQs about Litti Chokha:

    Can I make Litti Chokha without sattu? 

    While sattu is the traditional filling for litti, you can substitute it with other ingredients such as besan (gram flour), crushed roasted peanuts, or mashed lentils. Experiment with different fillings to create unique variations of Litti Chokha.

    Is Litti Chokha gluten-free? 

    Litti Chokha is not gluten-free as it is made from whole wheat flour, which contains gluten. However, you can explore gluten-free alternatives for the dough, such as using a combination of gluten-free flours like rice flour, chickpea flour, and tapioca flour.

    Can I make Litti Chokha spicy? 

    Yes, you can adjust the level of spiciness in Litti Chokha according to your taste preferences by adding more or fewer green chilies or red chili powder to the chokha mixture. You can also serve Litti Chokha with a side of spicy pickle or chutney for extra heat.

    Can I make Litti Chokha ahead of time? 

    Yes, you can prepare the dough and filling for litti in advance and assemble them just before cooking. Store the prepared dough and filling separately in the refrigerator until ready to use. Leftover chokha can be stored in an airtight container in the refrigerator for up to 2-3 days.

    Litti Chokha is a delicious and wholesome dish that captures the essence of traditional Bihari cuisine. With its rich flavors, nourishing ingredients, and endless variations, Litti Chokha is sure to become a favorite among food enthusiasts. 

  • Mysore Bonda

    Mysore Bonda

    Mysore Bonda

    Mysore bondas

    Mysore bondas are south indian fried dumplings dish made with flour, yogurt and spices. They are crispy outside and fluffy inside. They make a delightful treat for any party or snack for tea time. Serve them with coconut chutney.
    No ratings yet
    Prep Time 10 minutes
    Cook Time 10 minutes
    Total Time 20 minutes
    Course Appetizer
    Cuisine Indian
    Servings 4 people

    Ingredients
      

    • 1 cup all purpose flour maida, plain flour
    • 1/4 cup rice flour
    • 1 tsp salt 1
    • 1/2 tsp baking soda
    • 1/2 tsp cumin seeds jeera
    • 1/2 cup yogurt, dahai sour curd works best
    • 3/3 cup water
    • 1 tsp finely chopped ginger
    • 1 tbsp finely chopped green chilies
    • 2 tbsp finely chopped cilantro hara dhania

    Oil to fry

    Instructions
     

    • To make batter, mix all the dry ingredients together, all-purpose flour, rice flour, salt, baking soda, and cumin seeds. Add yogurt mix it well add the water to make thick batter. Add remaining ingredients ginger, green chili, and cilantro. Set aside for about 15-20 minutes. Batter will be light and fluffy.
    • Heat the oil on medium heat. The frying pan should have about 1 inch of oil. To check if the oil is ready, put little batter in oil. The batter should sizzle and come up but not change color right away. If oil is very hot bondas will not cook through and will not be crispy.
    • Place about 2 tablespoon of batter into the oil with your fingers. Fry bondas in small batches. Fry them until golden-brown all around. This should take about 3-4 minutes.
    • Mysore bond a should be crispy from outside and should be soft inside.

    Notes

    Serve them with coconut Chutney.
    You will also enjoy Rava Idli another quick South Indian dish.
    Tried this recipe?Let us know how it was!

    Exploring the Delights of Mysore Bonda: A Flavorful South Indian Treat 

    Originating from the vibrant culinary landscape of South India, Mysore bonda is a delectable snack cherished for its crispy exterior and soft, fluffy interior. This beloved dish is a favorite among locals and has gained popularity worldwide for its irresistible taste and unique texture. Traditionally served as a tea-time snack or as part of a festive spread, Mysore bonda captivates food enthusiasts with its distinct flavors and comforting appeal.

    Directions: 

    To embark on the delightful journey of preparing Mysore bonda, follow these simple steps:

    • Gathering Ingredients: Start by assembling the necessary ingredients. You’ll need urad dal (black gram lentils), rice flour, finely chopped green chilies, chopped cilantro (coriander leaves), ginger paste, salt, and asafoetida (hing).
    • Preparing Batter: Begin by soaking urad dal in water for a few hours. Once soaked, drain the water and grind the urad dal into a smooth paste using minimal water. Transfer the paste into a mixing bowl and add rice flour, chopped green chilies, cilantro, ginger paste, salt, and a pinch of asafoetida. Mix the ingredients thoroughly to form a thick batter.
    • Frying Bonda: Heat oil in a deep frying pan or kadhai over medium heat. Once the oil is hot, take small portions of the batter and gently drop them into the oil using your fingers or a spoon. Fry the bondas until they turn golden brown and crispy on the outside, ensuring they are evenly cooked.
    • Draining Excess Oil: Once fried to perfection, remove the bondas from the oil using a slotted spoon and place them on a paper towel-lined plate to drain excess oil.
    • Serve Hot: Your crispy and fluffy Mysore bondas are now ready to be served. Enjoy them hot with coconut chutney or a tangy tomato sauce for a delightful culinary experience.

    Tips: 

    • For best results, ensure the consistency of the batter is thick enough to hold its shape when dropped into the hot oil.
    • Adding a pinch of baking soda to the batter can enhance the fluffiness of the bondas.
    • Use freshly ground urad dal for optimal taste and texture.

    Variations: 

    • Spice it up by adding grated carrots to the batter for extra flavor and crunch.
    • Experiment with different spices such as cumin seeds or curry leaves to customize the taste according to your preference.
    • For a healthier twist, try air-frying the bondas instead of deep-frying them.

    Suggestions: 

    • Serve Mysore bonda as a delightful appetizer or snack during gatherings or festive occasions.
    • Pair it with a piping hot cup of masala chai or filter coffee for an authentic South Indian culinary experience.
    • Garnish with freshly grated coconut or chopped cilantro for added visual appeal.

    FAQs: 

    Q: Can I use store-bought rice flour instead of grinding rice at home?

    A: Yes, you can use store-bought rice flour as a convenient alternative to grinding rice at home. However, freshly ground rice flour may yield better results in terms of texture and flavor.

    Q: Can I make the batter in advance and fry the bondas later?

    A: While it’s best to fry the bondas immediately after preparing the batter to retain their crispiness, you can refrigerate the batter for a few hours before frying. Just ensure to bring the batter to room temperature before frying.

    Q: Can I freeze leftover bondas for later consumption?

    A: Yes, you can freeze leftover bondas in an airtight container for up to a month. When ready to enjoy, simply reheat them in a preheated oven until heated through.

    Explore more appetizer recipes on Manjula’s Kitchen: Vegetable Samosas, Paneer Tikka, Crispy Spinach Pakoras, Mango Lassi, Masala Chai, Gulab Jamun, Kheer (Rice Pudding)

  • Rava Uttapam (Instant Sooji Uttapam)

    Rava Uttapam (Instant Sooji Uttapam)

    Rava Uttapam served with green chutney on a white plate

    Rava Uttapam (Instant Sooji Uttapam)

    I have been wanting to do a video it should be easy and more versatile, ingredients maybe you have in your pantry. Utttapam a South Indian popular dish. Traditionally Uttapam is made with rice and lentil batter, which can be a long process, soaking, grinding then fermenting the batter. Rava Uttappam, on the other hand is instant and easy to make, with a variety of vegetables of your choice. It tastes delicious also can be served for breakfast, as a snack or for dinner. Rava Uttapam will be enjoyed by all ages.
    Uttapam is like a thick Dosa or Spicy pancake topped with vegetables. If you are serving this as a traditional Uttapam serve this with sambar and coconut chutney. But Rava Uttapam can be served with any chutney or condiment. Many times, I prefer this as a light dinner and enjoy with sprinkling samber powder, giving a traditional touch. The other reason I wanted to do this recipe as I said before I wanted to do the recipe more versatile you can use this batter for making Idli, because Rava Idli can be used for making so many recipes.
    I have many related recipes on my website like Masala Idli, Idli Manchurian.
    This recipe will serve 4.
    5 from 1 vote
    Prep Time 20 minutes
    Cook Time 10 minutes
    Course Breakfast, Snack
    Cuisine Indian
    Servings 4 people

    Ingredients
      

    • 1 cup sooji coarse, semolina
    • ½ cup yogurt curd, dahai
    • ½ cup cabbage finely chopped
    • 1 cup bell pepper finely chopped (capsicum, shimala mirch)
    • 1 cup tomatoes finely chopped, remove the seeds
    • 1 Tbsp cilantro finely chopped
    • 1 Tbsp green chili finely chopped
    • 2 tsp ginger shredded, adrak
    • 1 tsp salt
    • 1 tsp ENO fruit salt

    For Seasoning

    • 1 Tbsp oil
    • ¼ tsp cumin seeds jeera
    • ¼ tsp mustard seeds rai

    Also need

    • 2 Tbsp oil to cooking

    Instructions
     

    • In a bowl mix sooji, salt, green chili, ginger, cilantro, cabbage, yogurt, and add water as needed batter should be little thicker than dosa batter.
    • In a small bowl heat the oil over medium heat, oil should be moderately hot, add cumin seeds and mustard seeds as seeds crack add to the batter, mix it well. Let the batter set aside for at least 15 minutes.
    • Add Eno Fruit Salt to the batter just before you are ready to make Uttapam and mix well. The mixture will begin light and foaming.
    • Heat the skillet over medium heat and lightly grease the skillet. Pour about 2 large spoons of batter and spread consistency should be of thick then dosa. Sprinkle about 2 tablespoons of bell pepper and tomatoes press it lightly into the batter.
    • Pour about 1 teaspoon of oil around uttapam and cover it and let it cook for about 2 minutes and turn them over, uttapam should be golden brown from bottom making crisper, and top should be cooked well but not brown. Uttapam should be cooked over low medium heat.
    • Uttapam is ready to serve. I like to sprinkle lightly samber powder to add extra flavor.

    Notes

    Serving suggestions
    • You can serve the Rava Uttapam with sambar, coconut chutney or your choice of condiment.
    Additional Notes
    • Adding tomatoes and bell pepper gives a traditional look to Uttapam.
    • I add green chilies and cilantro in the batter to keep the colors better.
    • You can choose your choice of vegetables like shredded carrots, finely chopped green beans, corn, finely chopped spinach (these are the veggies I have tried).
    • Do not cook on high heat, uttapam will not cook through.
    • If I am making Uttapam to serve as a starter I make the uttapam in small sizes, otherwise make it in about 7-inch diameter. What size you want to make it is your choice.
    Keyword Appetizers, Bhartia Khana, Bread Uttapam, Coconut Chutney, Halwa, Healthy, Homemade, Idli, Jain Food, Mandir Food, No Garlic, No Onion, Quick And Easy, Rava Dosa, Samber, Savory Pancake, Sheera, Snack, South Indian Cuisine, Swami Narayan, Vegetarian, Video Recipe
    Tried this recipe?Let us know how it was!

    Introduction to Rava Uttapam Recipe

    Rava Uttapam is a delightful quick & easy south indian bread that makes for a wholesome breakfast or a light meal. Made from semolina (rava or sooji), this dish is not only delicious but also easy to prepare. In this rava uttapam recipe, we’ll walk through the steps to create this flavorful snack. Whether you’re a beginner or a seasoned cook, how to make rava uttapam will become a breeze with this simple yet detailed recipe.

    Ingredients Preparation for Rava Uttapam

    Before we dive into the cooking process, it’s essential to gather and prepare all the necessary ingredients. For this recipe for rava uttapam, you’ll need semolina, yogurt, water, salt, asafoetida (hing), ginger, green chilies, cilantro, and vegetables like bell peppers, tomatoes.

    Tips for Ingredients Preparation:

    • Ensure the semolina is fresh for the best texture.
    • Use thick yogurt for better consistency.
    • Chop vegetables finely for even distribution.

    Making the Batter for Rava Uttapam

    To start making rava uttapam batter, take a mixing bowl and add semolina and yogurt. Gradually pour water and whisk the mixture to form a smooth batter. The batter should have a pouring consistency, neither too thick nor too thin. Add salt, asafoetida, finely chopped ginger, green chilies, and cilantro to enhance the flavor.

    Tips for Making the Batter:

    • Let the batter rest for at least 10-15 minutes to allow semolina to absorb moisture.
    • Adjust water quantity as needed to achieve the desired consistency.

    Variations for Rava Uttapam Batter:

    • For a healthier option, you can add grated carrots, spinach, or grated zucchini to the batter.
    • Experiment with spices like cumin seeds or mustard seeds for added flavor.

    Cooking Rava Uttapam on the Griddle

    Heat a non-stick skillet or griddle on medium heat and lightly grease it with oil. Once the griddle is hot, pour a ladleful of batter onto it and spread it evenly to form a small circle. Sprinkle chopped vegetables like bell peppers, tomatoes, on top of the uttapam.

    Tips for Cooking Rava Uttapam:

    • Cook on low to medium heat to ensure even cooking without burning.
    • Cover the uttapam with a lid to cook the top layer thoroughly.
    • Drizzle oil around the edges to make them crispier.

    Variations in Toppings for Rava Uttapam:

    • You can customize the toppings according to your preference. Try adding grated cheese or paneer for a richer taste.
    • For a spicy kick, sprinkle some red chili flakes or chaat masala on top.

    Serving and Presentation of Rava Uttapam

    Once the rava uttapam is cooked to perfection and turns golden brown on both sides, transfer it to a plate. Serve hot with coconut chutney, tomato chutney, or sambar for a complete South Indian breakfast experience.

    Benefits of Rava Uttapam:

    • Rava Uttapam is a nutritious breakfast option as it is made from semolina, which is rich in carbohydrates and protein.
    • It’s light on the stomach and easy to digest, making it suitable for all age groups.
    • The addition of vegetables makes it a wholesome meal, providing essential vitamins and minerals.

    FAQs (Frequently Asked Questions) about Rava Uttapam:

            Explore more appetizer recipes on Manjula’s Kitchen: Vegetable Samosas, Paneer Tikka, Crispy Spinach PakorasMango Lassi, Masala Chai, Gulab Jamun, Kheer (Rice Pudding)