Category: North Indian Recipes

North Indian Recipes: A Journey Through Flavors

There’s something irresistibly comforting about North Indian cuisine. It’s not just the rich, aromatic spices that tantalize your senses, but the sheer warmth and heartiness of the dishes that make you feel at home, no matter where you are. Today, let’s explore some North Indian recipes, perfect for any occasion, and delightfully vegetarian to boot.

Rajma Galouti Kebabs

Imagine biting into Rajma Galouti Kebabs, where the robust flavor of kidney beans meets a medley of aromatic spices. These kebabs, a wonderful example of North Indian vegetarian recipes, are perfect for starting your meal. They pair beautifully with a refreshing sip from one of the many delightful Indian beverages, perhaps a tangy aam panna or a cooling lassi.

Methi Malai Matar

The gentle bitterness of fresh fenugreek leaves mingles with the sweet pop of peas in Methi Malai Matar. This dish, creamy and subtly spiced, epitomizes the charm of North Indian food recipes. It sits wonderfully alongside a bowl of fragrant rice or warm naan, complemented by a light, crisp salad from the array of soups and salads recipes available.

Pindi Chana

For those who crave a hearty, robust dish, Pindi Chana offers chickpeas enveloped in a symphony of spices, each bite bursting with flavor. This traditional gem from North Indian recipes is best enjoyed with fluffy bhature or poori. Add a tangy, spicy pickle from the pickle chutney selection to elevate the experience.

Enhancing Your North Indian Menu

To elevate your North Indian feast, consider adding delightful Indian snacks like dhokla or kachori. These snacks bring a playful variety of textures and flavors that dance on your palate.

To end on a sweet note, indulge in Indian desserts recipes such as the delicate, syrup-soaked rasmalai or the creamy, comforting shrikhand.

For healthier options, dishes like dal makhani and bhindi masala offer deliciously light choices, perfect for those mindful of their diet.

For your next gathering, explore the wealth of recipes in the popular party recipe collection to ensure your menu impresses every guest.

More North Indian Vegetarian Recipes

Dum Aloo

Imagine baby potatoes, cooked gently until tender, then enveloped in a rich, spiced gravy that epitomizes comfort food. This is Dum Aloo, a beloved staple in North Indian vegetarian recipes. It’s a dish that not only satisfies but also invites you to savor each mouthful. Pair it with a vibrant side from the vegetables sautéed / dry recipes, like a simple yet flavorful stir-fry.

Sweet Endings: Gulab Jamun and Kheer

No meal is complete without a sweet indulgence. Gulab Jamun, those soft, syrup-drenched delights, and Kheer, a creamy rice pudding adorned with cardamom and nuts, are perfect for rounding off your feast. These desserts, highlighted in the Indian desserts recipe category, add a touch of sweetness to your culinary journey.

Frequently Asked Questions (FAQs)

Q: What are some popular North Indian recipes? 

A: Some popular North Indian recipes include Rajma Galouti Kebabs, Methi Malai Matar, Pindi Chana, Dum Aloo, Gulab Jamun, and Kheer. These dishes are flavorful, nutritious, and perfect for any occasion.

Q: How can I make traditional North Indian food suitable for a vegetarian diet? 

A: To make traditional North Indian food suitable for a vegetarian diet, try recipes like Rajma Galouti Kebabs, Methi Malai Matar, and Dum Aloo. These recipes are hearty, flavorful, and perfect for vegetarians.

Q: What are some easy North Indian vegetarian recipes? 

A: Some easy healthy vegetarian recipes include Rajma Galouti Kebabs, Methi Malai Matar, and Pindi Chana. These dishes are quick to prepare and provide the necessary nutrients for a healthy diet.

Q: Can I prepare North Indian food recipes in advance? 

A: Yes, many North Indian food recipes can be prepared in advance and stored. Dishes like Rajma Galouti Kebabs and Pindi Chana can be made ahead of time and refrigerated, while snacks like dhokla and kachori can be prepped and frozen.

Q: What are some sweet North Indian food recipes for special occasions? 

A: Some sweet North Indian food recipes for special occasions include Gulab Jamun and Kheer. These desserts are classic, easy to prepare, and perfect for celebrations.

Conclusion

North Indian recipes are a celebration of diverse flavors and rich cultural heritage. Whether you’re looking for North Indian vegetarian recipes, specific North Indian food recipes, or comprehensive vegetarian Indian recipes, these dishes will bring variety and flavor to your meals. So, gather your ingredients, try out these recipes, and enjoy the rich and diverse world of North Indian cuisine. Happy cooking and happy eating!

By incorporating these dishes into your menu, you’ll be able to enjoy a wide variety of delicious and nutritious foods. Whether you’re looking for snacks, main courses, or desserts, there’s a North Indian recipe to suit every taste. Don’t forget to check out Manjula’s Kitchen for more inspiration and culinary delights. Happy cooking and happy eating!

  • Chum Chum

    Chum Chum – Bengali Dessert

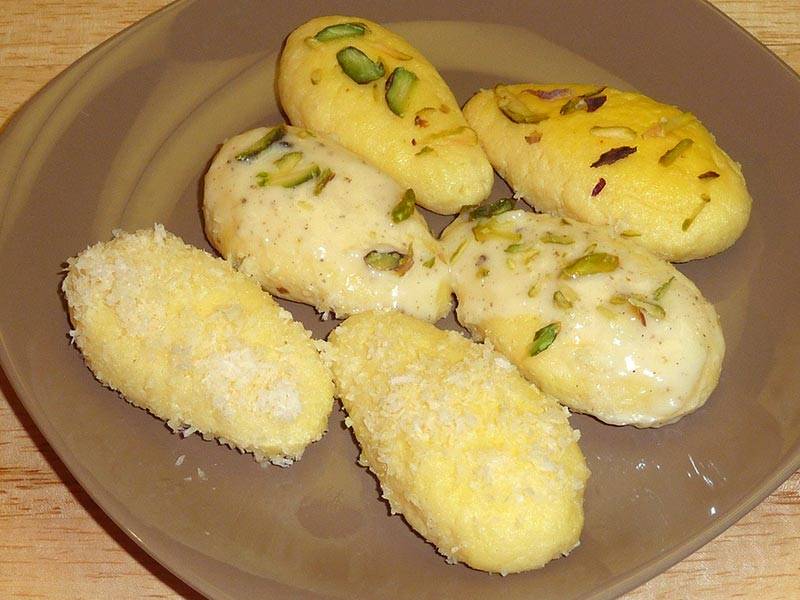
    Chum Chum is a popular Bengali (East Indian) sweet dessert that is made with Paneer, (home-made cheese). It is a versatile dish that can be served in many different variations. Here I will show you 3 different ways to serve Chum Chum, either with Pistachios, or with Coconuts or with Malai (cream).

    • 4 cups whole milk, paneer
    • 2 cups sugar
    • 5 cups water
    • 1/8 tsp cardamom powder

    Ingredients for different For Different Garnishing

    • 1 tbs pistachio
    • 1 tbs coconut powder
    • 2 tbsp cream
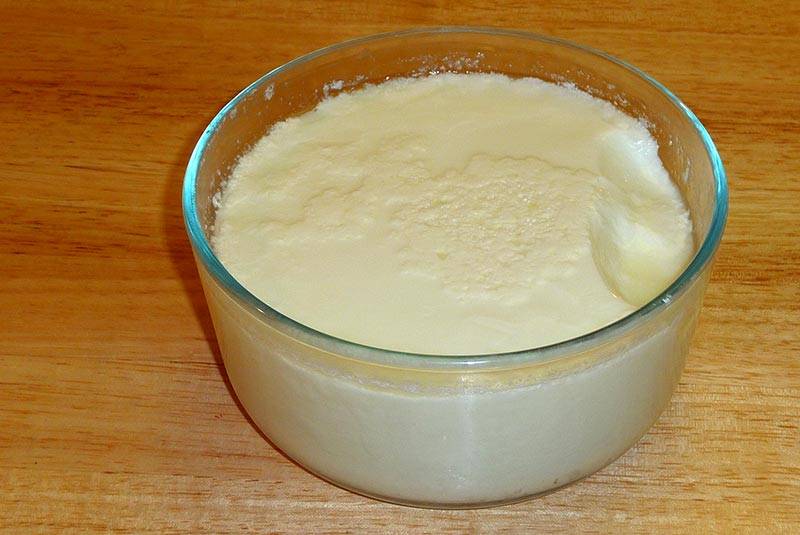
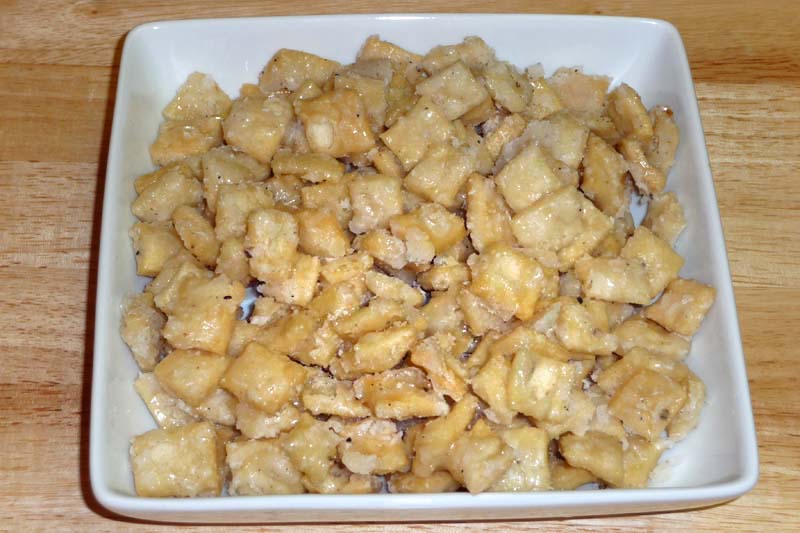
    1. Prepare paneer according to recipe “How to Make Paneer”. To test if sufficient water has been removed out of the paneer, take a little piece of paneer in your palm and rub with your fingers. You should be able to make a firm but smooth ball, after 15-20 seconds of rubbing.

    2. Place the drained paneer on a dry, clean surface and knead it for 3 to 4 minutes until it rolls into smooth soft dough. If the paneer is too crumbly, add a teaspoon of water.
    3. Divide the paneer dough into 8 equal parts and roll each one into a smooth oval shaped ball.
    4. For the syrup: In a wide saucepan, bring 5 cups of water to a boil. Add sugar and stir to dissolve completely. Use a large pan as the Chum Chums will double in volume while cooking in the syrup.
    5. Add the paneer balls to the syrup and bring it back to a boil. Then turn down the heat to medium and cover the pot. Cook for 10 minutes.
    6. Open the pot cover, turn the chum chums over and cook for another 15 minutes. Check to see if the chum chums appear firm but sponge-like (with little holes on the surface). Turn off the heat and let sit for 10 more minutes.

    7. Remove the chum chums from the syrup. Serve chill!

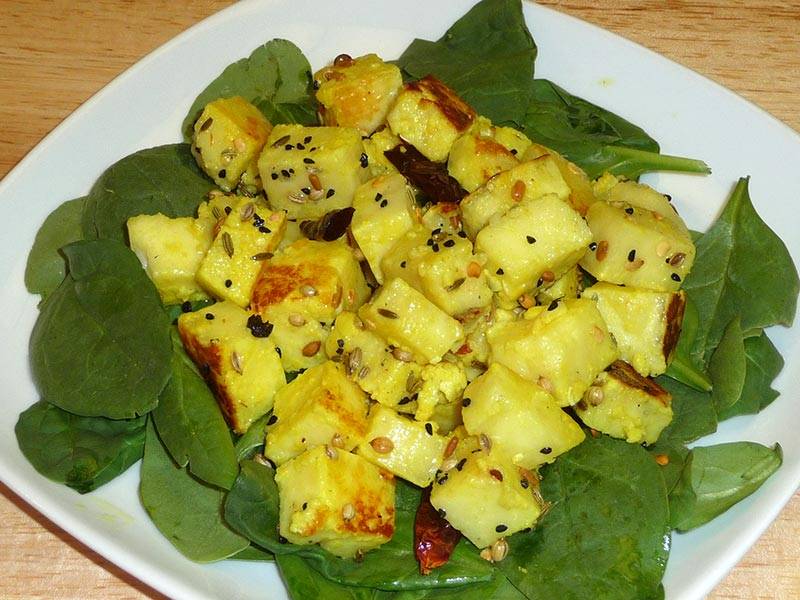
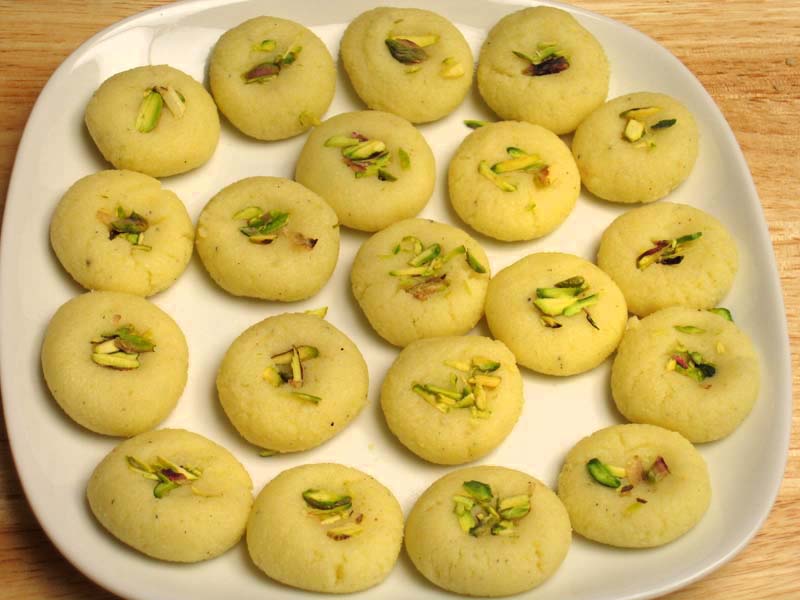
    8. Serving With Pistachios: Cover every Chum Chum with a few pieces of sliced pistachios

    9. Serving with Coconut Powder: Roll the chum chums in dry coconut

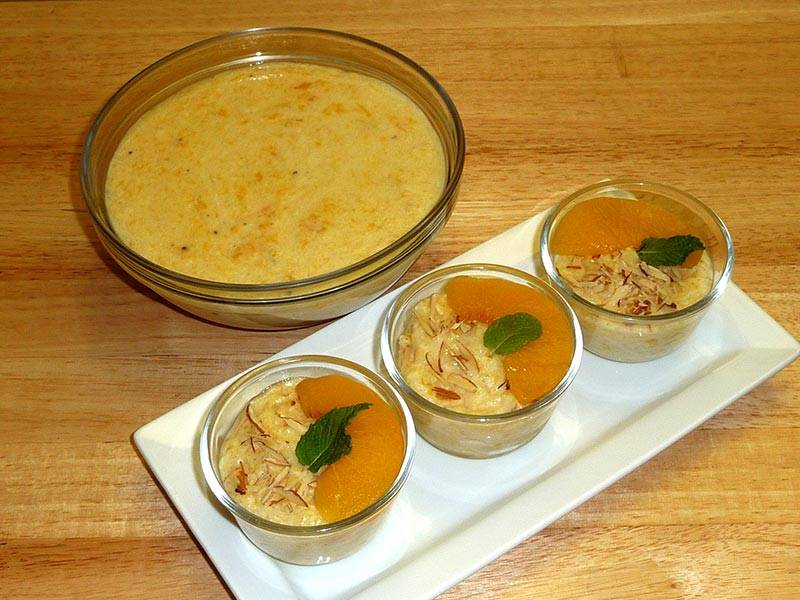
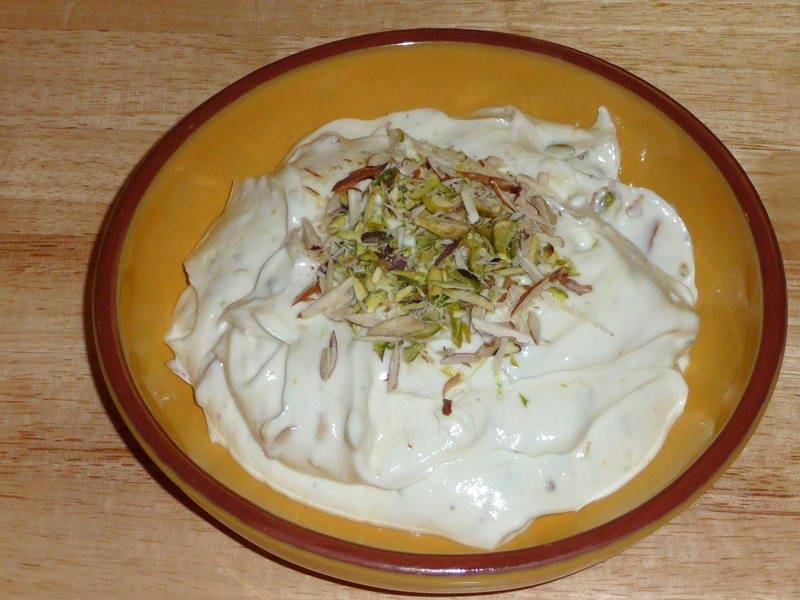
    10. Serving with Malai (cream): Boil the milk over medium heat until it reduces to ½ its volume. Stir the milk continuously so it doesn’t burn on the bottom of the pot. Add sugar, and cardamom powder. Stir for 2 minutes, and then turn off the heat. While milk is still warm pour 1 tablespoon over every Chum Chum and top with a few pieces of pistachios.

    Dessert
    Indian
    Bengali Dessert, Paneer Dessert

    How to make Chum Chum Recipe: Chum Chum Sweet

    Chum Chum is a popular Indian sweet delicacy that originates from the state of West Bengal. This soft and spongy dessert is made from paneer (Indian cottage cheese) and soaked in a sugar syrup flavored with saffron and cardamom. 

    Chum Chum is known for its delicate texture, subtle sweetness, and vibrant colors, making it a delightful treat for special occasions and celebrations. 

    Chum Chum are like a luxurious and bigger version of rasgulla although made with richer ingredients such as pistachio and other dry fruits along with garnishing done using cream. 

    Other Dessert Variations:

    1. Ras Malai: Rasmalai is a Bengali dessert consisting of soft paneer balls immersed in chilled creamy milk. Like Rasgullas, Rasmalai is also made with homemade cheese known as “paneer” or “chana”. Instead of being soaked in sugar syrup like Rasgullas, Rasmalai is soaked in sweet, flavored milk.
    1. Kala Jamun: Kala Jamun is a delicious dessert very similar to Gulab Jamun. Kala jamun is an exotic sweet dish served on special occasions. Kala Jamuns have a very unique texture as they are chewy outside and grainy inside.
    1. Bengali Rasgulla: Bengali Rasgullas are homemade paneer (Cottage cheese) sweet dish, round paneer balls soaked in sugar syrup. This is a delicacy from the state of Bengal, these are very light and delicious, you can never go wrong with Bangali Rasgulla.
    1. Jalebi: Jalebi is a warm, crispy, delicious treat. It can best be described as funnel cake. In many places jalebi is still served as a breakfast treat like pancakes. It is a treat to have jalebi and kachori for a hearty breakfast.

    Tips for Making Perfect Chum Chum:

    Use Fresh Paneer: Use fresh and homemade paneer for the best texture and flavor in your Chum Chum. Homemade paneer is softer and creamier than store-bought varieties and yields a more delicate and spongy dessert.

    Knead the Paneer Well: Knead the paneer dough thoroughly to ensure a smooth and uniform texture. Proper kneading helps to remove excess moisture from the paneer and creates a soft and pliable dough that’s easy to shape into rolls.

    Soak in Sugar Syrup: Allow the paneer rolls to soak in the sugar syrup for at least 4-6 hours or overnight for maximum flavor absorption. The longer the Chum Chum sits in the syrup, the softer and more flavorful it will become.

    Garnish Creatively: Get creative with your garnishes and decorations. Sprinkle chopped nuts, edible silver leaf (varak), or dried rose petals on top of your Chum Chum for an elegant and festive presentation.

    FAQs about Chum Chum:

    Can I make Chum Chum without paneer? 

    While paneer is the traditional main ingredient in Chum Chum, you can experiment with alternative fillings such as khoya (reduced milk solids) or ricotta cheese for a different texture and flavor profile.

    How long does Chum Chum stay fresh? 

    Chum Chum can be stored in the refrigerator for up to 3-4 days in an airtight container. However, it’s best enjoyed fresh within the first day or two for optimal taste and texture.

    Can I freeze Chum Chum? 

    While Chum Chum can be frozen, its texture may change slightly upon thawing. If freezing, wrap the Chum Chum tightly in plastic wrap or foil and store them in a freezer-safe container for up to 1-2 months. Thaw the Chum Chum in the refrigerator before serving.

    Is Chum Chum gluten-free? 

    Yes, Chum Chum is gluten-free as it does not contain any wheat or gluten-containing ingredients. However, be cautious of cross-contamination if you have a severe gluten allergy or celiac disease.

    How did Chum Chum got its name?

    The name chum chum comes from Bengal, where it originated as a sweet treat. The name mimics the sound “nom nom,” which is fitting because the sweet is soft and fluffy, and you might munch on it like that.

    Chum Chum is a delightful and versatile Indian dessert that’s perfect for celebrating special occasions or indulging in a sweet treat. With its soft and spongy texture, subtle sweetness, and endless variations, Chum Chum is sure to captivate your taste buds and leave you craving for more. 

    Whether enjoyed as a festive dessert or as a comforting indulgence, Chum Chum is a beloved sweet delicacy that’s cherished by people of all ages.

  • Achari Paneer

    Achari Paneer

    Achari Paneer is flavorful, healthy and high in protein.  Paneer is an Indian cheese, also known as chenna.  Achari paneer is very versatile and can be served as an appetizer or as an accompaniment to a main course.

    • 14oz paneer cut in ½ inch cubes ((paneer you can find in Indian grocery store))
    • 1 tbsp salt
    • 1/8 tbsp turmeric (haldi)
    • 1/4 cup  yogurt (dahi)
    • 2 tbsp olive oil
    • 4 whole red chilies Sabut lal mirch)
    • Pinch of asafetida (hing)
    • 1/4 tbsp nigella (onion seeds or kalonji)
    • 1 tbsp coriander seeds (dhania)
    • 1/4  tbsp fenugreek seeds (mathi)
    • 1/2  tbsp black pepper
    • 1/2 tbsp fennel seeds (saunf)
    • 1 ½ cup baby spinach leaves (palak)
    1. Mix paneer, yogurt, turmeric and salt. Set aside.

    2. In a frying pan over medium heat, dry roast nigella, coriander seeds, fenugreek seeds, fennel seeds, and black pepper for 1-2 minutes. Seeds will become darker in color and give off a beautiful aroma.

    3. Crush the roasted seeds using a mortar or rolling pin.  Set aside.

    4. Add oil to the same pan, at low-medium heat.  Roast red chilies till they turn a darker color.  Remove from pan and break each one into 2-3 pieces.

    5. Increase to medium heat; add asafetida, followed by paneer mixture.   Stir fry for 3-4 minutes until most of the moisture has evaporated.  Do not overcook the paneer as it will become dry.The yogurt should coat the paneer nicely so it remains moist. Turn off the heat.

    6. Add all the dry spices and mix well.

    7. Serve warm achari paneer over a bed of spinach leaves.

    Tips

    Achari paneer can be made in advance and refrigerated up to a week.   However, it tastes best when served warm.

    Appetizer
    Indian
    Achari Paneer

    What is Achari Paneer ?

    Paneer Achari isn’t quite an appetizer or snack, but it can definitely be enjoyed in those settings! It’s a delicious vegetarian dish originating in North India. The star is paneer, a soft Indian cheese, cooked in a creamy, flavorful gravy.

    The “Achari” part comes from the pickling spices used in the recipe, giving it a tangy and slightly spicy kick. It’s often enjoyed with rice or naan, a type of leavened flatbread.

    While the exact origin is unknown, achari paneer tikka recipe is believed to have emerged in North India, particularly in the regions of Punjab and Delhi. Its popularity has spread throughout the country and even internationally, capturing hearts (and taste buds) with its delightful combination of textures and flavors.

    So, while not technically an appetizer, Achari Paneer is a crowd-pleasing dish that’s perfect for sharing with friends and family. Plus, it’s naturally gluten-free thanks to the paneer, making it a great option for those with dietary restrictions.

    How to make Achari Paneer ?

    To make achari paneer masala, first, mix paneer (Indian cheese), yogurt, turmeric, and salt together and set it aside. In a pan over medium heat, dry roast nigella, coriander seeds, fenugreek seeds, fennel seeds, and black pepper for 1-2 minutes until they darken and release a nice smell. Crush these roasted seeds using a mortar or rolling pin and keep them aside.

    In the same pan, add oil over low-medium heat and roast red chilies until they darken. Remove them from the pan and break each chili into 2-3 pieces. Increase the heat to medium, add asafetida, then pour in the paneer mixture. Stir-fry for 3-4 minutes until most of the moisture evaporates, being careful not to overcook the paneer.

    Now, turn off the heat and add the crushed spices, mixing everything well. The paneer needs to be nicely coated with the yogurt to keep it moist. Serve the warm achari paneer tikka over a bed of spinach leaves for a delicious and flavorful dish. Enjoy!

    Other Paneer Variants

    Diving into Manjula’s Kitchen, a treasure trove of Indian recipes, we can discover a delectable world of paneer dishes! Here are 5 enticing paneer variations that will tantalize your taste buds:

    Butter Paneer: This classic dish features paneer cubes deep-fried to a golden crisp. Manjula’s recipe guides you through creating a rich and creamy tomato gravy infused with aromatic spices like coriander, turmeric, and red chili powder. The addition of whipped yogurt adds a touch of tang, perfectly complementing the melt-in-your-mouth paneer.

    Paneer Tikka Masala: This vibrant dish takes inspiration from the tandoor oven. Here, marinated paneer pieces are pan-fried until slightly browned, then bathed in a luxurious gravy. The gravy boasts a symphony of flavors – the sweetness of tomatoes, the warmth of red chili powder, and a hint of smokiness. A touch of cornstarch lends a delightful silky texture, making it an ideal main course with rice or naan.

    Paneer Methi (Methi Malai Paneer): This comfort food features paneer simmered in a creamy and flavorful fenugreek sauce. Manjula’s recipe uses dried fenugreek leaves (kasoori methi) to impart a unique, slightly bitter taste that beautifully complements the creamy cashew and tomato base. The addition of milk further enhances the smooth texture, making it a perfect dip for roti or a comforting side dish.

    Paneer Tomato Curry: This vibrant curry showcases the beauty of simplicity. Fresh tomatoes are blended into a smooth puree, then cooked with aromatic spices like cumin and coriander. Chunks of paneer are added to the gravy, allowing them to soak up all the delicious flavors. Bell peppers add a touch of sweetness and crunch, making this a wholesome and satisfying meal.

    Palak Paneer: This vibrant green curry is a nutritional powerhouse. Fresh spinach forms the base of the gravy, providing a rich source of iron and vitamins. Manjula’s recipe guides you through incorporating spices like ginger, garlic, and garam masala, creating a flavorful and aromatic sauce. Paneer cubes nestled in this emerald green gravy make for a visually stunning and incredibly delicious dish.

    FAQs Frequently Asked Question for Achari Paneer

    Is Achari Paneer Spicy?

    Achari paneer can range from mild to spicy, depending on the recipe. The “achari masala” itself has a kick, but the level of heat can be adjusted by controlling the amount of red chili powder used.

    What Does Achari Paneer Taste Like?

    The dominant flavors are tangy and savory, thanks to the pickling spices. You’ll also experience hints of spice, creaminess (often from yogurt or cashews), and the mild flavor of paneer itself.

    Is Achari Paneer Vegetarian?

    Yes, achari paneer is traditionally a vegetarian dish. Paneer is made from milk and the masala typically uses vegetarian ingredients.

    Is Achari Paneer Vegan?

    Not always. Some recipes incorporate yogurt or cream in the gravy. You can find vegan versions that use plant-based yogurt alternatives or coconut milk for creaminess.

  • Baklava Rolls

    Baklava Rolls

    Baklava is a Middle Eastern specialty dessert. Baklava is made in many shapes I decided to make them in rolls. Instead of honey I used sugar to glaze and flavored with cardamom. Its a nice sugary snack that is popular among many people for its consistency, texture, taste and flavor.

    • 6 sheets phyllo dough (one package weigh 1 pound and have 18 14 x 18 inches sheets)
    • 1/2 cup clarified butter
    • 1/2 cup ground almond
    • 1/2 cup ground walnuts
    • 1/4 cup coconut powder
    • 1/2 tsp cardamom powder
    • 1/3 cup sugar

    For Syrup and Garnishing

    • 3/4 cup sugar
    • 1/2 cup water
    • 1 tsp lemon juice
    • 1 tbsp pistachios sliced

    For baking I am using 8×8 baking pan.

    For Filling

    1. Combine all the dry ingredients, ground almonds, walnuts, coconut, sugar, and cardamom.

    Making the Pastry

    1. Preheat the oven 350 degree F.

    2. Work on a clean, dry, flat surface, Open the phyllo dough and take 1 sheet spread over the working surface and fold it making it double in length wise. Lightly brush the butter covering the whole sheet. You will be working with the short side.
    3. Leave about half inch of sheet across the short side and sprinkle 2 tablespoons of the filling from edge to edge evenly. Roll it like a jelly roll twice and brush lightly with butter, only the rolled part. Sprinkling again 2 tablespoons of the filling from edge to edge evenly.
    4. Roll it up carefully, after every roll brush it with butter, and place seam side down in the baking tray. Repeat the process until you finish rolling all six sheets.
    5. The pieces should fit snugly, but not squashed. With a very sharp knife, cut the roll into 3 equal pieces in length, total of 18 pieces. Lightly brush the butter over each piece.
    6. Bake the baklava for about 25 to 30 minutes until they are light golden brown in color.

    Making Syrup and Finishing

    1. Boil the sugar and water together until syrup is 220 degrees on candy thermometer or ½ thread. Add the lemon juice and cardamom powder and turn off the heat. Lemon juice keeps the syrup from crystallizing.

    2. Carefully pour the hot (but not boiling) syrup evenly over all the baklava pieces. Sprinkle few pieces of the sliced pistachios over baklava. Allow the baklava to cool before serving. Enjoy!

    Baklava is a Middle Eastern specialty. Baklava is made in many shapes I decided to make them in rolls. Instead of honey I used sugar to glaze and flavored with cardamom.

    Baklava is made using phyllo dough; it is available in frozen section in supermarkets.

    Be sure to thaw the phyllo dough using the instruction from the package, phyllo dough should be at room temperature before using. Do not open the package until you are ready to use. Unused sheets roll them in clear plastic wrap and refrigerate for next time but do need to be used within 3 to 4 days.

    You will also enjoy Mango panna cottaMango Mousse

    Dessert
    Fusion
    Delicacy, Gift Box, Middle Eastern Cuisine

  • Peach Phirni

    Peach Phirni (Rice Pudding)

    Peach phirni is a delicious dessert which is a creamy eggless pudding. Traditionally phirni is made with rice, milk and sugar. Adding peach gives a wonderful creamy smooth texture.

    • 1/4 cup rice
    • 3 cup milk
    • 3/4  cup sugar
    • 1 15 oz can of unsweetened sliced peaches
    • 1/2 tbsp corn starch
    • 1/8 tbsp cardamom powder
    • 1 tbsp sliced almonds
    • Few slices of canned peaches
    • Few mint leaves
    1. Wash rice and soaks it for fifteen minutes or more.

    2. Drain the water and blend rice to a fine texture, adding just enough milk as needed to blend. Keep aside.

    3. Drain the syrup from can peaches. Keep 4 slices of peach aside for garnish.

    4. Puree the remaining peaches with corn starch. Keep aside.

    5. Boil the milk on medium high heat and let it simmer until milk reduces to about 2 cups. After milk comes to boil it should take about 8 minutes.

    6. Take about 1/4 cup of hot milk and mix it with rice paste.

    7. Add rice solution to the boiling milk slowly and keep stirring continuously, making sure rice does not become in lumps and milk does not burn on the bottom of the pen.

    8. Cook until milk has reduced to about half in volume and rice is cooked.

    9. Next add the sugar and cardamom powder, cook for about 4 minutes on low medium heat. Turn off the heat.

    10. just after turning off the heat add the peach puree gently with cooked rice.

    11. Shift the phirni to the serving bowl and garnish with almond, and peach slices.

    12. Let it sit in refrigerator for few hours. Serve chill

    Variations

    There are so many delicious variations to this dish! Instead of peaches try making this dish using fresh mango, guava, passion fruit puree.

    Dessert
    Indian

  • How To Make Yogurt

    How To Make Yogurt – Homemade Dahi

    Homemade Yogurt tastes delicious and is very refreshing. Yogurt is high in protein and calcium. It is easy to make, you only need milk and the right culture / starter.

    • 3-1/2 cups milk
    • 2 tbsp yogurt or use the dry starter you can buy
    1. Boil the milk and let it cool down to 110 to 120 degree. You can use a candy thermometer to check the temperature, if the milk gets too hot it kills the bacteria in the culture.

    2. After milk cools down pour the milk into a bowl that you want to make the yogurt in.
    3. Add 2 tablespoons of yogurt from previously home made yogurt or use the dry yogurt starter. Package will tell you how much dry starter to use. Don’t follow the other directions from the dry starter package. Mix the yogurt with milk by stirring gently.
    4. Cover the bowl with a light blanket or folded sheet, and keep it in warm place for about 4 hours.
    5. After yogurt is set, refrigerate for at least an hour before using.

    Tips

    If you prefer more creamy mix ¼ cup of half & half milk or boil the full milk for about 5 minutes longer to reduce the milk in volume to give more creamy texture to the yogurt.

    I have tried using starters from many store bought yogurt including organic or Greek yogurt, and they don’t work. I think because store bought yogurt has many artificial additives.

    Store bought yogurt is more firm because of the pectin.

    Yogurt can be made using 1%, 2% or full milk and full milk yogurt will have more body to it.

    There are two ways to make yogurt creamier. 1) With 3 cups of milk use 1 cup of half & half milk OR 2) boil the full milk for about 5 minutes longer to reduce the milk in volume to give more creamy texture to the yogurt.

    Side Dish
    Indian
    Ghar Ka Bana Dahi, Plain Yogurt

  • Shrikhand

    Shrikhand – Sweet Flavorful Yogurt

    Shrikhand is a classic dessert of Western India. Plain yogurt is transformed into an aromatic delicacy flavored with saffron and cardamom.

    • 4 cup yogurt
    • ¾ cup sugar as needed
    • Few strands of saffron
    • 1  tbsp warm milk
    • ¼ tbsp crushed cardamom
    • 1 tbsp sliced almonds
    • 1 tbsp sliced pistachios
    1. Drain the yogurt – Put a muslin or cheese cloth over a strainer. Now pour the yogurt over muslin cloth to drain. Place a bowl underneath the strainer to collect the excess water.

    2. Next gently squeeze the excess water from yogurt. Make sure not to squeeze out the yogurt.

    3. Move the yogurt with strainer and bowl into the refrigerator for at least six hours to drain excess water.

    4. Yogurt will become thick in consistency.

    5. Dissolve the saffron in warm milk. Milk will take on the saffron color, yellowish orange.

    6. Add sugar, cardamom powder, and saffron milk to yogurt and beat well till sugar dissolves. You may use a mixer.

    7. Mix in most of the almonds and pistachios to the yogurt mix and the remaining nuts will be used for garnish.

    8. Chill the shrikhand before serving.

    9. Traditionally shrikhand is served with puri (fried flat bread).

    Notes

    When the water is draining from the yogurt, it’s suggested to keep the yogurt in the refrigerator in order to keep the yogurt from becoming more sour.

    Dessert
    Indian
    Shrikhand, Sweet Flavorful Yogurt

  • Vegetable Biryani

    A mouthwatering Recipe to make Vegetable Biryani by Manjula’s Kitchen 

    Vegetable Biryani, a gluten-free delight, is a lavish rice dish featuring spiced vegetables. Enhanced by the alluring saffron aroma, this biryani is a perfect party recipe. Originating from Mughal cuisine, it has seamlessly integrated into Indian kitchens, making it an ideal choice for formal dinners or as a satisfying main meal. Vegetable Biryani is best served with pickles, raita, chutney, and even salads

    Preparing Rice for Vegetable Biryani Recipe: A Fundamental Step 

    To kickstart the vegetable biryani recipe, meticulously wash the rice, ensuring clarity by changing the water several times. This crucial step ensures a clean base for the biryani. For optimal fluffiness, soak the rice for a minimum of 15 minutes before cooking. Once soaked, drain the rice and transfer it to a saucepan. Add water, a hint of oil, and a dash of salt, bringing the mixture to a vigorous boil. After achieving a boil, reduce the heat to low, cover the pan, and let the rice cook for approximately 15 minutes. The goal is to tender rice with evaporated water. Conclude this biryani vegetable recipe by turning off the heat and delicately fluffing the rice with a fork, creating the perfect base for your vegetable biryani.

    Recipe to make Vegetable Biryani: Marinating Vegetables 

    Begin the recipe to make vegetable biryani by preparing vegetables and blending tomatoes into a puree, laying the foundation for a rich gravy. In a separate bowl, concoct a flavorful mix by combining yogurt, ginger, green chili, salt, turmeric, and chili powder. Stir this amalgamation well before introducing a vibrant array of vegetables—cauliflower, beans, bell pepper, carrots, paneer, cashews, ginger, and green chili. Allow this vegetable medley to marinate in the yogurt-infused blend for a harmonious union of flavors, enhancing the overall taste profile of your vegetable biryani.

    Creating Flavorful Vegetable Gravy: A Crucial Element in Your Biryani Vegetable Recipe 

    To craft the delectable vegetable gravy, commence by heating oil in a saucepan. Gauge the oil’s readiness by adding a cumin seed; if it cracks right away, the oil is prepared. Infuse the oil with asafetida and cumin seeds. Once these seeds crackle, introduce the tomato puree to the pan, covering it to prevent splattering. Cook the tomato mixture on medium-high heat until it reduces by half, exuding a rich, concentrated flavor. At this point, introduce the marinated vegetables to the tomato puree, letting them simmer and meld their tastes for 10 to 12 minutes. Stirring intermittently ensures even cooking, resulting in tender yet distinct vegetables for your biryani.

    Preheating and Assembling: Recipe to make Vegetable Biryani 

    As your culinary masterpiece takes shape, preheat the oven to 350 degrees Fahrenheit, creating an ideal environment for the final melding of flavors. Choose a 9″ x 9″ baking glass dish or a similar-sized round bowl as the canvas for your biryani. Commence the assembly by placing half of the cooked vegetables into the dish, forming the first layer of your flavorful creation. Spread half of the cooked rice evenly over the vegetables, creating a balanced harmony of textures. Elevate the aromatic profile by sprinkling mint and garam masala over the rice. Repeat this process with the remaining vegetables and rice, building layers that promise a symphony of tastes in every bite.

    Baking the Perfect Vegetable Biryani: Culmination of Vegetable Biryani Recipe 

    As the assembly reaches its pinnacle, cover the pan, signifying the transition to the baking phase. Slide the dish into the preheated oven and let the magic unfold for about 30 minutes. This careful baking period allows the flavors to intermingle, creating a cohesive and mouth-watering vegetable biryani. The final touch involves sprinkling sliced almonds evenly over the rice, infusing a delightful nuttiness. Drizzle melted butter over the entire dish, ensuring a sumptuous and aromatic finish to your vegetable biryani. The result is a culinary masterpiece that delights the senses and satisfies the palate.

  • Mushroom with peas


    Mushroom with peas

    Mushroom with peas is a great side dish consisting of mushrooms and peas in a spiced tomato curry with a touch of fenugreek leaves.

    • 2 cups mushrooms sliced
    • 1 cup green peas, I am using frozen green peas
    • 1 cup diced tomatoes
    • 1 tsp shredded ginger
    • 2 tbsp fenugreek chooped leaves
    • 2 tbsp oil
    • 1 tsp cuminseeds (jeera)
    • 1/2 tsp turmeric (haldi)
    • 2 tsp coriander powder (dhania)
    • 1 tsp red pepper
    • 3/4 tsp salt
    • 1/2 tsp lemon juice
    • 1 green chili finely chopped
    1. Heat the oil in a saucepan on medium high heat. Test the heat by adding one cumin seed to the oil. If the cumin seed cracks right away, the oil is ready. Add the cumin seeds. As cumin seeds crack add turmeric. Stir-fry for a few seconds.

    2. Add tomatoes, ginger, salt, coriander, and chili powder. Cook until the tomatoes are soft and reduce to half.
    3. Add mushrooms, and peas. After coming to a boil reduce the heat to medium.
    4. Add fenugreek leaves after mushrooms have cooked half the way about 4 minutes. Cook until mushrooms and peas are tender. Close the heat.

    5. Add lemon juice and green chili if you like. Serve hot.

    Notes:

    Dicing the tomatoes will give a different texture to the curry then tomato puree.

    Fenugreek leaves can be replaced with chopped cilantro (hara dhaniya).

    To add heat to this dish, garnish with finely chopped green chilies.

    Main Course
    Indian

  • Peda


    Peda, Milk Fudge

    Pedas are an all-time favorite sweet snack. Pedas are like soft milk fudge. Pedas are grainy texture made with milk and sugar, flavored with cardamom. Peda can be served as a candy or as a dessert.

    • 4 cupa paneer (home made)
    • 1/3 cup milk powder
    • 1/2 cup sugar
    • 3 tbsp unsalted butter (or ghee)
    • 1/4 tsp cardamom powder (ilachi)

    For Garnishing

    • 1 tbsp sliced pistachios
    1. Check the recipe for paneer and make the paneer with whole milk. For this recipe use 4 cups of milk.

    2. Heat the frying pan on medium. Add butter and let it melt. Next add milk, milk powder, and paneer. Mix it well.

    3. Cook mixture on medium heat stirring continuously until mixture starts leaving the sides of the frying pan and becomes like dough. This should take about 12 minutes. Now this is known as khoya.
    4. Transfer the khoya into a bowl and let it cool off until khoya becomes just lukewarm.
    5. Mix the sugar and cardamom powder into the khoya and knead it for about a minute until every thing blends together and become soft dough. Note: if you mix the sugar while khoya is hot that will make pedas soft.
    6. Divide the mix into about 20 equal parts and roll them into round balls. Lightly press it down so it looks like small patty. Put few pieces of sliced pistachios on every peda.

    7. Pedas should be served at room temperature.

    Pedas can be kept for few days at room temperature and about a month refrigerated.

    Dessert
    Indian
    Gluten Free, Offering To God, Parsad, Peda

    Indian Peda Sweet Recipes – Manjula’s Kitchen 

    Peda sweet, an exquisite Indian dessert, holds a special place in the hearts of many dessert enthusiasts. The good news is, crafting this delightful treat at home is easier than you might think, especially if you’ve got some whole milk in your kitchen. Now, let’s go step-by-step process on how to make these mouthwatering peda mithai.

    Prepare the Paneer: 

    Start by making paneer by adding lemon juice to half a cup of hot water. Boil milk on medium heat, stirring to prevent burning. When it boils, gradually add lemon juice, stirring gently. Turn off the heat when curds separate from whey. Drain using a cheesecloth-lined strainer, rinse with cold water, and squeeze out excess water. Press wrapped paneer under a heavy pan for 1 hour to remove excess water.

    Get Cooking

    Begin by heating a frying pan on medium heat. Once the pan is warm, add a small amount of butter and let it melt until it becomes a golden liquid. Following this, introduce the whole milk into the pan. Sprinkle in a moderate amount of milk powder and incorporate the paneer into the mixture. Thoroughly mix these ingredients together in the pan, ensuring an even distribution. This step helps in the creation of a cohesive and flavorful mixture that will later contribute to the overall texture and taste of the dish.

    Stir, Stir, Stir

    Cook the mixture over medium heat, and the key is to keep stirring consistently. Don’t take a break! Keep at it until you notice the mixture changing – it will start to pull away from the sides of the pan, transforming into a dough-like texture. This process usually takes about 12 minutes. When that happens, you’ve successfully created khoya, the essential foundation for making our delicious peda indian sweet.

    Cool Off

    Transfer the khoya mixture that you’ve made into a bowl. Let it cool down until it reaches a lukewarm temperature. It’s important not to use it while it’s still hot for the next step in the recipe. Allowing it to cool ensures that the khoya’s texture and consistency are just right for the following stages of the cooking process. This cooling step is crucial to achieve the desired results in your final dish.

    Sweet Blending

    Now comes the sweet part! Once the khoya is lukewarm, add in the sugar and cardamom powder. Give it a good mix and start kneading for about a minute until everything blends into a soft dough. A little tip: if you mix the sugar while the khoya is still hot, your Peda indian sweet could turn out a bit too soft. So, let the khoya cool a bit before adding the sweetness!

    Shape It Up

    After preparing the khoya mix, divide it into roughly 20 equal portions. Take each portion and shape it into a round ball. Once you have your little balls, gently press them down to create a small, flat patty shape. If you want to enhance the appearance, consider placing a few slices of pistachios on top of each pera sweet. This simple step adds a touch of elegance to your homemade peda sweet, making them not only delicious but also visually appealing.

    Serve at Room Temperature

    Your pera sweet are almost ready to be savored! To enhance their delicious taste, allow them to sit at room temperature. This simple step allows the flavors to fully develop, resulting in a more rich and satisfying indulgence. When you’re ready to treat yourself, serve up these delightful indian sweet pedas. You’ll likely find that they disappear swiftly, a testament to their irresistible appeal.

    Storage Notes:

    Amongst all the indian sweet recipes the Indian sweet peda is one of the most versatile sweets that can last for a few days at room temperature. If you want to savor the sweetness for a more extended period, refrigerate them for about a month.

    In summary, making pera sweets at home is a rewarding and surprisingly simple process. From preparing the paneer to shaping the pera indian sweet, every step contributes to the rich flavor and texture of this delightful treat. So, gather your ingredients, follow these easy steps, and indulge in the joy of homemade peda mithai. Enjoy the sweetness!

    To experiment more with indian sweet recipes you can try Modak, Pineapple Sandesh & Moong Dal Ladoo

Exit mobile version