Tag: Breakfast Food
10+ Easy and Best Breakfast Food Recipes
Starting your day with a nutritious meal sets the tone for a productive and energetic day. Here are over ten breakfast food recipes that are easy to prepare and full of flavor.
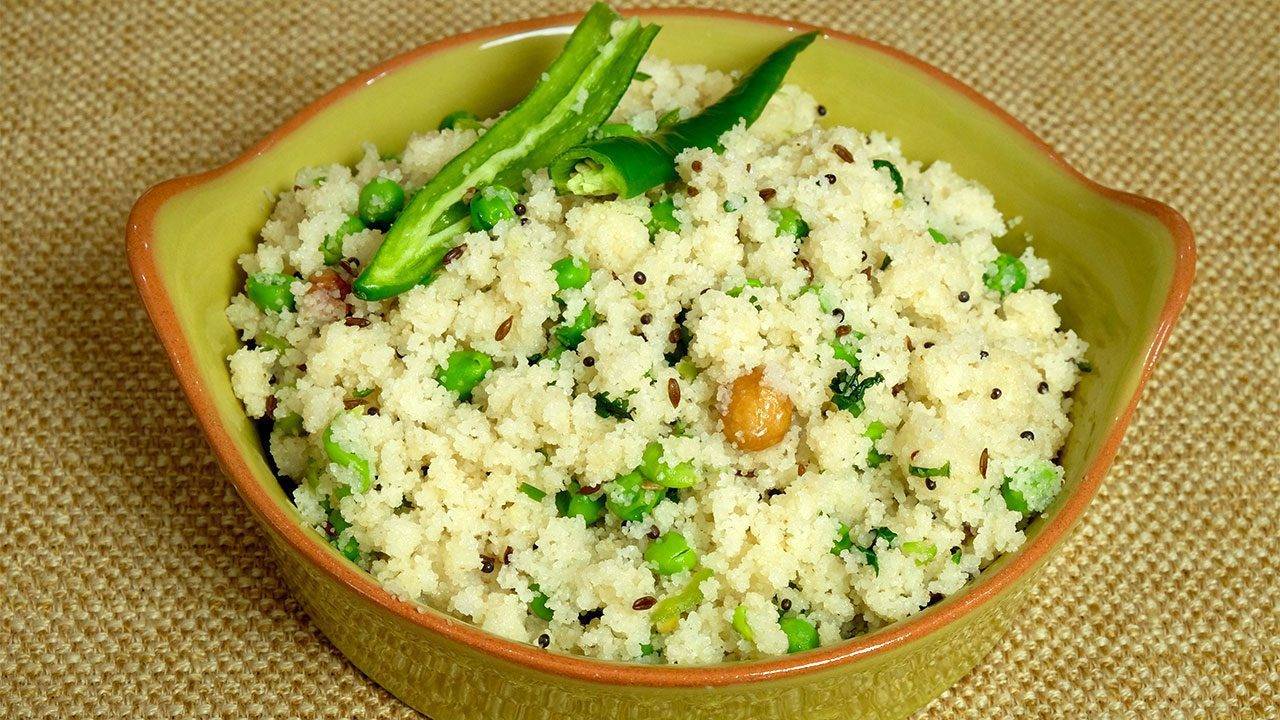
1. Vegetable Upma
Vegetable Upma is a savory semolina dish cooked with various vegetables and spices. It’s one of the best breakfast food options, providing a good balance of carbs, proteins, and vitamins.
2. Poha
Poha is flattened rice cooked with peas, potatoes, and mild spices. This healthy breakfast food is light yet filling, making it an ideal morning meal.Its a classic breakfast recipes indian style which is staple in many parts of the country.
3. Masala Oats
Masala Oats are a spicy and savory way to enjoy your oats. Packed with vegetables, this breakfast food recipe is nutritious and satisfying.
4. Dosa with Coconut Chutney
Dosa, a fermented crepe made from rice and lentils, paired with coconut chutney, makes for a delightful breakfast food. It’s crispy, light, and perfect for a quick meal. It’s among those south indian recipes which can be of a great advantage to people who are looking for an early light healthy start of the day.
5. Besan Chilla
Besan Chilla is a savory pancake made from gram flour, spices, and vegetables. This food for breakfast is high in protein and easy to prepare.
6. Paneer Paratha
Paneer Paratha is a stuffed flatbread with a filling of spiced paneer. It’s one of the best breakfast food recipes for a hearty and delicious start to the day. It’s a nice dish coming from indian paneer recipes that is hearty, filling and stumptuous.
7. Idli with Sambar
Idli, a steamed rice cake, served with sambar, a lentil-based vegetable stew, is a classic South Indian breakfast food. It’s nutritious, easy to digest, and incredibly satisfying.
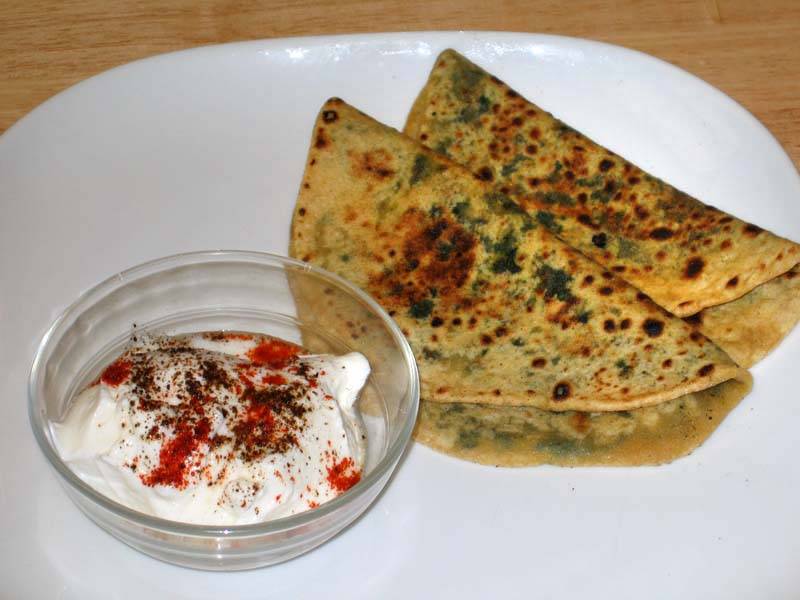
8. Methi Thepla
Methi Thepla is a spiced flatbread made with fenugreek leaves and whole wheat flour. This healthy breakfast food is not only nutritious but also delicious.
9. Sprouted Moong Salad
Sprouted Moong Salad is a fresh and crunchy option for those looking for healthy food for breakfast. It’s high in protein and fiber, making it a great choice for a morning meal.
10. Rava Dhokla
Rava Dhokla is a steamed savory cake made from semolina and yogurt. It’s a light and fluffy breakfast food recipe that’s perfect for a healthy start.
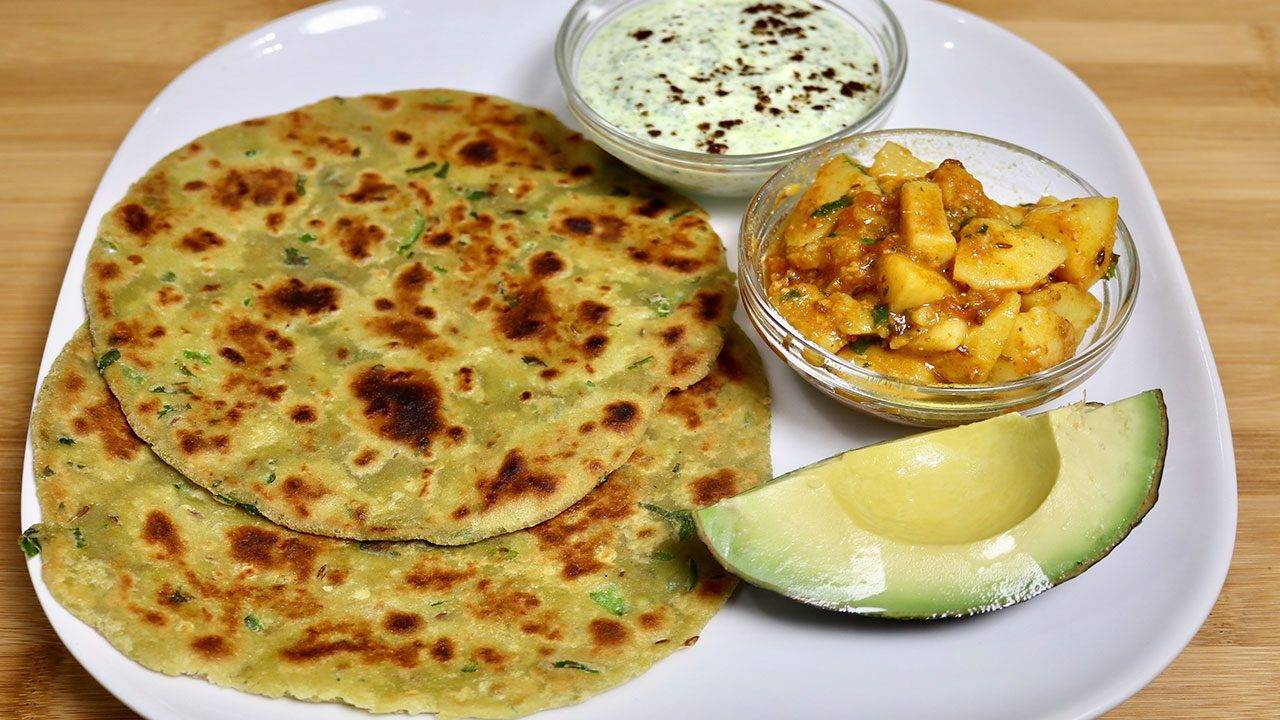
11. Aloo Paratha
Aloo Paratha is a stuffed flatbread with a spicy potato filling. This food for breakfast is comforting, filling, and easy to make.
12. Moong Dal Cheela
Moong Dal Cheela is a savory crepe made from split green gram batter. It’s one of the best breakfast food options for a protein-packed meal.
13. Pesarattu
Pesarattu is a green gram dosa that is crispy and nutritious. This breakfast food is a popular choice in Andhra Pradesh and is typically served with ginger chutney.
14. Sabudana Khichdi
Sabudana Khichdi is a dish made from tapioca pearls, peanuts, and spices. It’s a great healthy breakfast food that provides energy and nutrients.
15. Thalipeeth
Thalipeeth is a multigrain flatbread made with a mixture of flours and spices. This breakfast food recipe is hearty and flavorful.
16. Bajra Khichdi
Bajra Khichdi is a nutritious porridge made with pearl millet and lentils. It’s a wholesome food for breakfast that is perfect for colder mornings.
17. Vegetable Sandwich
A Vegetable Sandwich filled with fresh veggies, chutney, and spices makes for a quick and easy breakfast food. It’s light, nutritious, and perfect for a busy morning. It is part of indian sandwich recipes which is great for health and filling to each individual in their diet.
18. Sattu Paratha
Sattu Paratha is a stuffed flatbread with roasted gram flour filling. This breakfast food is rich in protein and fiber, making it a healthy choice.
19. Ragi Idli
Ragi Idli is a healthier variation of the traditional idli, made with finger millet flour. This healthy breakfast food is rich in calcium and fiber.
20. Dalia Upma
Dalia Upma is a broken wheat porridge cooked with vegetables and spices. It’s a nutritious and filling breakfast food recipe that keeps you full for longer.
FAQs
What is a good breakfast food?
Breakfast food options that are nutritious and easy to prepare include Vegetable Upma, Poha, and Masala Oats. These dishes provide a balanced meal to start your day.
What are some healthy breakfast food ideas?
Some healthy breakfast food ideas are Sprouted Moong Salad, Methi Thepla, and Ragi Idli. These options are rich in nutrients and perfect for a healthy start to the day.
What are easy breakfast food recipes?
Easy breakfast food recipes include Vegetable Sandwich, Besan Chilla, and Aloo Paratha. These dishes are quick to prepare and delicious.
What is the best breakfast food list?
A breakfast food list with a variety of nutritious options includes Idli with Sambar, Dosa with Coconut Chutney, and Paneer Paratha. These dishes offer a mix of flavors and nutrients to start your day right.
For more delicious and healthy breakfast food recipes, visit Manjula’s Kitchen, where you’ll find a wide range of options to suit your dietary needs and preferences.
-
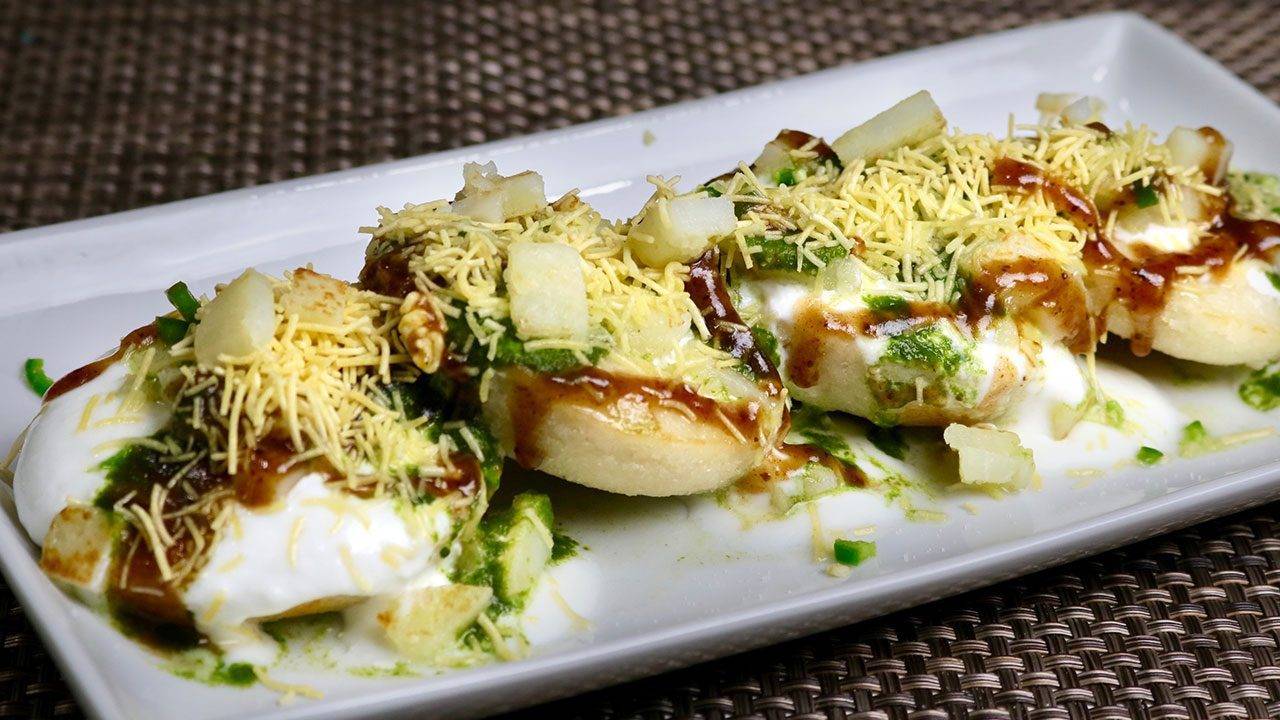
Idli Chaat (South Indian Appetizer)

Idli Chaat, South Indian Appetizer
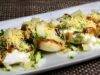
Idli Chaat is a tasty twist to traditional South Indian Idli. This can be served as an appetizer or an afternoon snack. It's quick and easy to make, with the perfect savory flavors! Try this recipe today and you will be satisfied with a great dish!
- 6 Idlies
- 1/2 cup potatoes (boiled peeled and cut into small pieces)
- 2 Tbsp oil
- 1/2 tsp salt
- 1 Tbsp green chili (finely chopped)
- 2/3 cup yogurt whipped (dahi,curd)
- 3 Tbsp hari cilantro chutney
- 3 Tbsp tamarind chutney
- 1/4 cup fine sev
I am using store bought frozen idlies or you can also use left over idlies. Make sure though frozen idlies to bring to room temperature.
- Whip the yogurt until smooth. Add a little milk as needed to make the pourable consistency.
- Heat 2 tablespoons of oil in a pan and arrange the idle do not overlap them. Cooked the idlis over medium heat, turn them about 3-4 time, till they are light golden brown both sides. This should take about 4 minutes.
- Transfer them on a plate and stir-fry the potatoes in the same pan sprinkling the 1/4 teaspoon of salt. Stir-fry the potatoes till they start getting light golden color this should take about 2 minutes.
Serving the Idli Chaat
Arrange the idlies in a serving plate, sprinkle remaining salt ¼ teaspoon. Put ½ the potatoes drizzle the yogurt, cilantro chutney and tamarind chutney. Garnish with green chilies and fine sev.
Notes
You can slice the idli in about 6 pieces and stir fry. This is another delicious way to serve to serve left over idlies.
You will also enjoy Dahi Vada, and Bhel Puri. Links for Cilantro Chutney and tamarind Chutney
Idli Chaat Recipe: A Delicious Twist to a Classic Dish
Idli Chaat is a delightful fusion of traditional South Indian idlis with a twist of chaat-inspired flavors, creating a quick and easy snack that tantalizes the taste buds with its irresistible appetizers. Idli chaat is a delightful fusion dish that combines the traditional South Indian snack of idli with the flavors of chaat, a popular street food in India. This unique blend of textures and flavors creates a mouthwatering experience that is sure to please your taste buds. In this article, we’ll explore how to make idli chaat at home, step by step.
Step 1: Preparing the Idlis
To begin making idli chaat, you’ll need freshly steamed idlis. If you don’t have idlis ready, you can prepare them using your favorite idli batter recipe. Once the idlis are steamed to perfection, allow them to cool slightly before proceeding to the next step.
Step 2: Cutting the Idlis
Once the idlis have cooled down, cut them into bite-sized pieces. This step helps to create a perfect base for the chaat toppings and ensures that each bite is filled with flavor.
Step 3: Assembling the Dahi Idli Chaat
Now comes the fun part – assembling the dahi idli chaat! Take the cut idli pieces and arrange them on a serving plate. Next, generously drizzle them with creamy yogurt, ensuring that each piece is well-coated. This adds a refreshing tanginess to the dish.
Step 4: Adding Toppings
Now, it’s time to add the toppings that will take your idli chaat to the next level. You can get creative with your toppings, but some classic choices include tomatoes, and cilantro. For an extra kick of flavor, sprinkle some chaat masala and roasted cumin powder on top.
Step 5: Garnishing
To finish off your dahi idli chaat, garnish it with a handful of nylon sev and a drizzle of tangy tamarind chutney. These final touches not only add visual appeal but also enhance the overall taste of the dish.
Tips for Making the Perfect Idli Chaat
- Use freshly steamed idlis for the best texture and flavor.
- Be generous with the yogurt and toppings to ensure every bite is bursting with taste.
- Experiment with different toppings and garnishes to customize the chaat according to your references.
Variations of Idli Chaat
- For a spicy twist, add some finely chopped green chilies or a dash of red chili powder.
- Instead of yogurt, you can use whipped cream or sour cream for a different flavor profile.
- Try adding some boiled chickpeas or sprouts for added protein and texture.
Benefits of Idli Chaat
- Idli chaat is a nutritious dish that provides a good balance of carbohydrates, protein, and vitamins.
- It’s a great way to use leftover idlis and turn them into a delicious snack or appetizer.
- The probiotics in yogurt make this dish beneficial for gut health.
FAQs (Frequently Asked Questions)
Q: Can I use store-bought idlis for this recipe?
A: Yes, you can certainly use store-bought idlis if you’re short on time. However, freshly steamed idlis will yield the best results in terms of flavor and texture.
Q: Can I make idli chaat in advance?
A: While it’s best enjoyed fresh, you can prepare the components of idli chaat in advance and assemble them just before serving to prevent the idlis from becoming soggy.
Q: Is idli chaat spicy?
A: The level of spiciness can be adjusted according to your preference. You can make it as spicy or as mild as you like by controlling the amount of green chilies or chili powder you use.
Exploring Other Recipes on Manjula’s Kitchen
If you’re looking to explore more Indian recipes, appetizers, beverages, and desserts, be sure to check out the following links on Manjula’s Kitchen. Here are some links to recipes on Manjula’s Kitchen official website: Paneer Tikka Masala, Chana Chaat (Spicy Chickpea Salad), Pav Bhaji (Spicy Vegetable Hash with Buns), Raj Kachori (Crunchy Chaat), Vegetable Biryani
Idli Chaat is a delightful dish that brings together the best of both worlds – the comforting flavors of idli and the exciting taste of chaat. With just a few simple ingredients, you can create a dish that is sure to impress your family and friends. So why not give this recipe a try and experience the deliciousness of idli chaat for yourself?
-
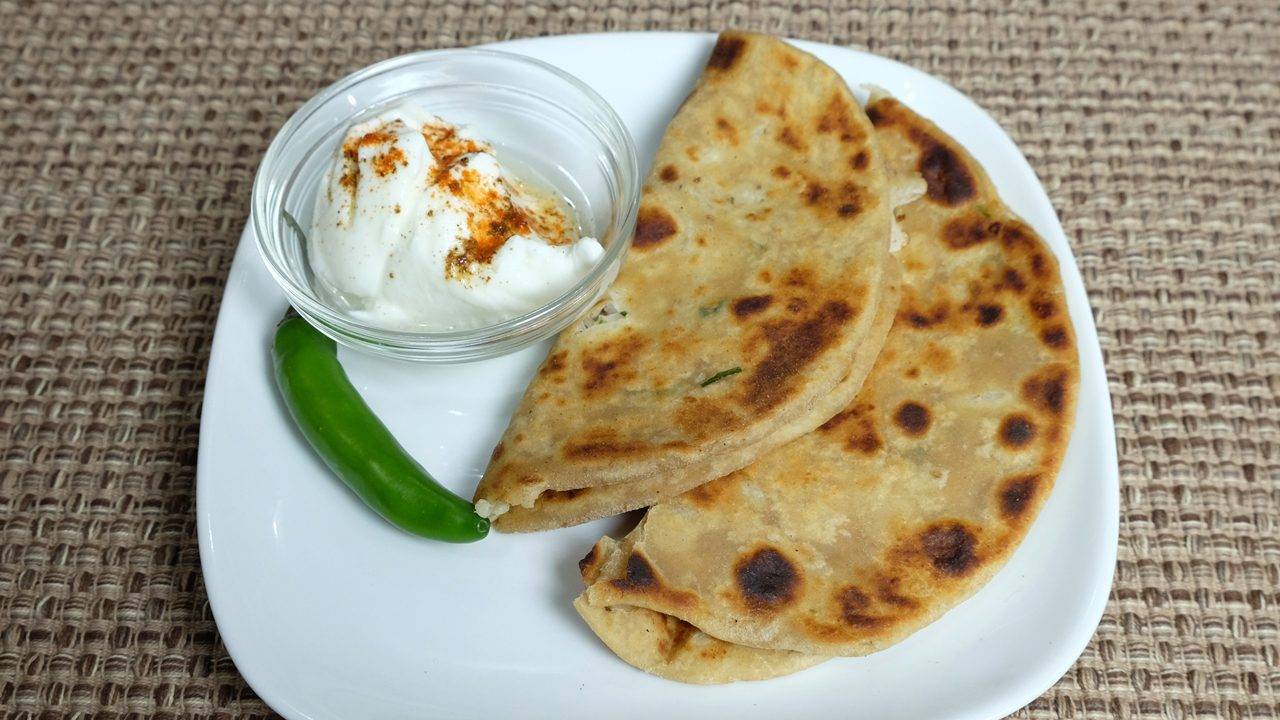
Mooli Ka Paratha (Punjabi Mooli Flat Bread)
Mooli Ka Paratha (Punjabi Mooli Flat Bread)
Mooli is a white radish or daikon. This is an exotic flat bread filled with mooli. Mooli ka paratha is a popular north Indian breakfast treat with cup of hot chai.
Dough
- 1 cup whole wheat flour, atta
- ½ teaspoon salt
- 1 tablespoon oil
- ½ cup water
For Filling
- 2 cups white radish/mooli shredded
- ½ tablespoon salt
- ½ teaspoon carom seeds / ajwain
- 2 teaspoons green chili finely chopped
- 2 tablespoons cilantro / hara dhania finely chopped
- Also need about ¼ cup whole wheat flour for rolling and 5 teaspoon oil for cooking paratha
Making the Dough
-
Mix flour, salt, and oil in a bowl add the water as needed to make soft dough. Knead the dough for about one minutes on a lightly greased surface to make soft, and pliable dough.
-
Set the dough aside for at least ten minutes.
Making the Filling
-
Shred the mooli / white radish, add the salt to shredded mooli mix it well let it sit for about 2-3 minutes. Squeeze the water as much possible from mooli. Add all filling ingredients together, carom seeds, chili and cilantro mix it well. Do this processes just before you are ready to make parathas.
Making of paratha
-
Divide the dough into four equal parts.
-
Take one part of the dough and with your fingers flatten the edges to form a three-inch circle, leaving the center a little thicker than the edges.
-
Mold the dough into a cup and place the filling in the center, filling should be little less then dough. Pull the edges of the dough to wrap the filling.
-
Heat an iron skillet or heavy skillet on medium high heat. Test by sprinkling it with a couple of drops of water. If the water sizzles right away, the skillet is ready.
-
Press the filled ball lightly on dry whole wheat flour from both sides.
-
Using a rolling pin, roll the balls lightly to make six-inch circles, keeping the sealed side of the balls on top. If the dough sticks to the rolling pin or rolling surface, lightly dust the parathas with dry flour.
-
Place the paratha on the skillet. When the paratha start to change color flip it over. You will notice some golden-brown spots.
-
After a few seconds, drizzle one teaspoon of oil over the paratha. Flip the paratha again and lightly press the paratha on the sides with a spatula, to help paratha cook through evenly.
-
Flip again and press with a spatula making sure the paratha is golden-brown on both sides. Repeat for the remaining parathas.
-
Paratha are best served hot and crispy. They will be soft if not served hot. If you are not going to serve them right away, cool them on a wire rack to keep them from getting soggy.
-
Parathas can be kept unrefrigerated for up to two days wrapped in aluminum foil or in a covered container. For later use, parathas can be refrigerated four to five days or frozen for up to a month. Re-heat using a skillet or oven.
-
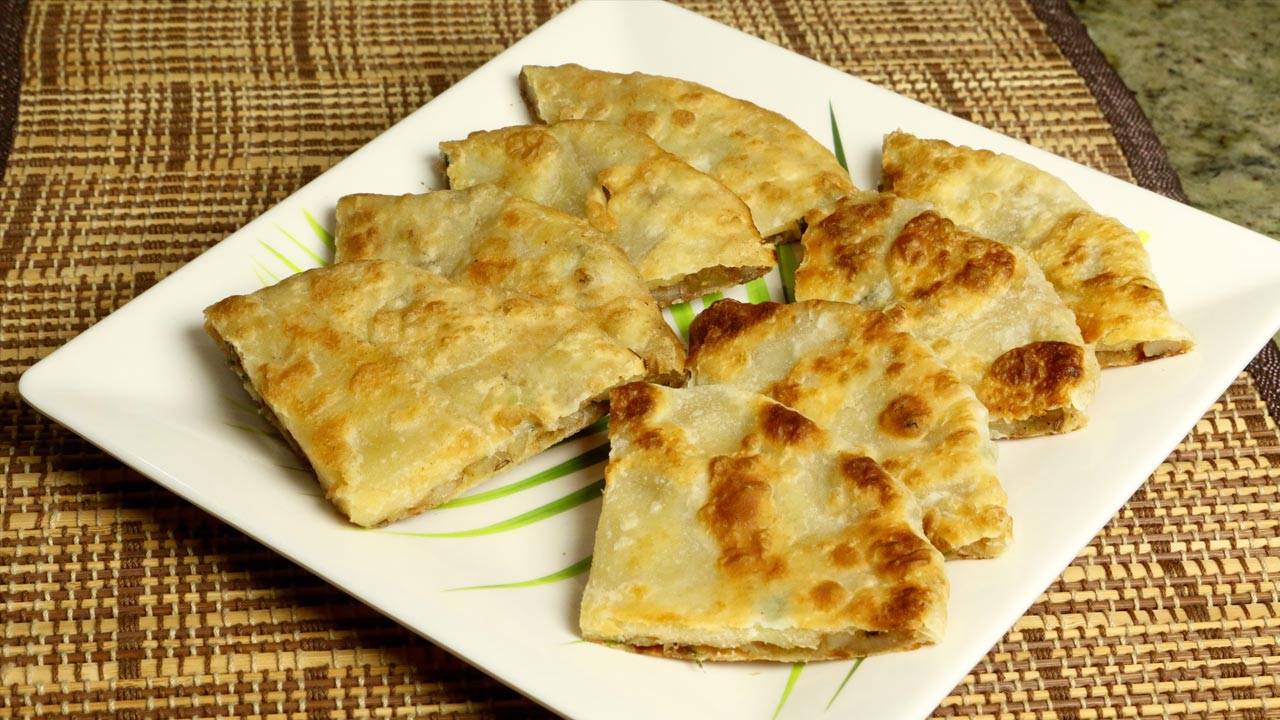
Paratha Samosa

Paratha Samosa Recipe: Introduction to Paratha Samosa Recipe
Paratha Samosa is a delightful fusion snack that combines the crispy, triangular goodness of samosas with the flaky, layered texture of parathas. It’s a savory treat perfect for appetizers, breakfast, or snacks. These samosas are made by wrapping a spicy and flavorful filling usually consisting of mashed potatoes, peas, spices, in a thinly rolled paratha dough. The stuffed parcels are then deep-fried until golden brown, resulting in a crispy exterior that encases a deliciously moist and aromatic filling.
Whether served with chutney or enjoyed on its own, Paratha Samosa is sure to tantalize your taste buds and make for a satisfying snack or meal option at any time of the day. In this Paratha Samosa recipe, we’ll be combining the deliciousness of samosas with the flakiness of parathas to create a mouthwatering fusion dish. This samosa paratha is a delightful twist on the traditional samosa, where the crispy, savory filling is enveloped in a soft, flaky paratha crust. It’s perfect for breakfast, brunch, or as a satisfying snack any time of the day. Let’s dive into the step-by-step process of making this irresistible samosa paratha recipe.
Step 1: Prepare the Filling
To begin this paratha samosa recipe, let’s first prepare the flavorful filling. Heat oil in a pan over medium heat and add cumin seeds, green peas, boiled and mashed potatoes, and a blend of spices including garam masala, turmeric powder, and coriander powder. Sauté the spices are fragrant. This aromatic filling will be the heart of our delicious samosa paratha.
Step 2: Make the Paratha Dough
While the filling is cooking, let’s prepare the dough for our samosa paratha. In a mixing bowl, combine whole wheat flour, salt, and a splash of oil. Gradually add water and knead the mixture into a smooth, pliable dough. Cover the dough and let it rest for about 15-20 minutes to allow the gluten to relax, making it easier to roll out later.
Step 3: Stuff and Shape the Parathas
Now comes the fun part – assembling the samosa paratha. Divide the dough into equal-sized balls and roll each ball into a small circle. Place a portion of the prepared filling in the center of each circle. Fold the edges of the dough over the filling to encase it completely, shaping it into a round or triangular parcel resembling a traditional samosa. Gently flatten the stuffed dough balls with your palm.
Step 4: Cook the Parathas
Heat a skillet or tawa over medium heat and carefully place the stuffed paratha samosas onto it. Cook each side until golden brown, brushing with ghee or oil for a crispy, flavorful crust. Make sure to cook the samosa parathas evenly on both sides until they are cooked through and crispy on the outside. Once done, transfer them to a plate lined with paper towels to drain any excess oil.
Step 5: Serve and Enjoy
Your delicious samosa parathas are now ready to be served hot! Garnish them with freshly chopped cilantro and serve with your favorite chutney or dipping sauce. These paratha samosas are perfect for breakfast, brunch, or as a delightful snack for any occasion. Enjoy the crispy exterior, the flavorful filling, and the comforting warmth of this fusion delicacy.
Tips for Perfect Samosa Paratha
- Ensure the filling is well-seasoned with spices to enhance the flavor of your paratha samosa.
- Use hot water while kneading the dough for softer, more pliable samosa parathas.
- Don’t overcrowd the skillet while cooking the paratha samosas to ensure even cooking and crispiness.
Variations of Samosa Paratha
- Experiment with different fillings such as minced meat, paneer, or mixed vegetables to create unique variations of samosa parathas.
- Add a dash of chaat masala or amchur (dry mango powder) to the filling for a tangy twist.
- For a cheesy indulgence, sprinkle grated cheese onto the filling before sealing the paratha samosas.
Benefits of Paratha Samosa
- Combines the flavors of two popular Indian snacks – samosas and parathas.
- Provides a hearty and satisfying meal or snack option.
- Can be customized with various fillings and spices to suit individual preferences.
Frequently Asked Questions (FAQs)
Q: Can I make the dough for samosa paratha in advance?
A: Yes, you can prepare the dough ahead of time and store it in the refrigerator for up to a day. Just make sure to bring it to room temperature before rolling out the paratha samosas.
Q: Can I freeze leftover samosa parathas?
A: Yes, you can freeze the cooked paratha samosas for later use. Simply allow them to cool completely, then store them in an airtight container or freezer bag. When ready to eat, reheat them in a skillet or oven until heated through.
Other Recipes on Manjula’s Kitchen
If you’re looking to explore more Indian recipes, appetizers, beverages, and desserts, be sure to check out the following links on Manjula’s Kitchen. Here are some links to recipes on Manjula’s Kitchen official website: khaman (besan) dhokla, rasgulla, gobi (cauliflower) manchurian, aloo tikki (potato patties), malai koftai. These recipes should offer you a flavorful experience straight from Manjula’s Kitchen.
-
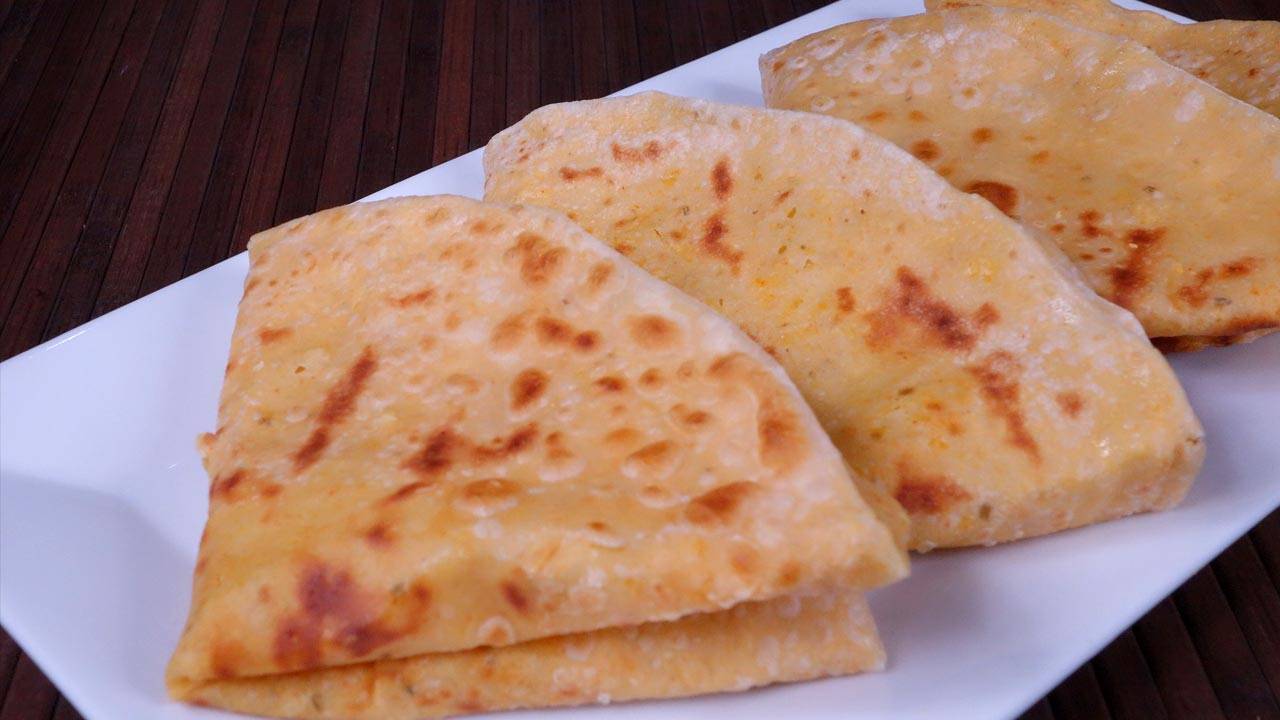
Dal Paratha (Stuffed Indian Flat Bread)

Dal Paratha (Stuffed Indian Flat Bread)
Dal Paratha, or Bikaneri Paratha, is best described as Indian stuffed flatbread. This delicious bread is filled with cooked chana dal and a variety of spices. However, unlike other stuffed parathas these are rolled super thin. These parathas are a Rajasthani delicacy. They are excellent source of protein in hot summers and are a healthy vegan option.
for Dough
- 1 cup all-purpose flour, (plain flour, Maida)
- 1/4 teaspoon salt
- 1 tablespoon oil
- About 1/3 cup lukewarm water
for Filling
- 1/2 cup chana dal, available in Indian grocery stores
- 1/2 teaspoon salt
- 1 teaspoon fennel seed powder, (saunf)
- 1/2 teaspoon red chili powder, adjust to taste
- 1/8 teaspoon asafetida (hing)
Also, Need
- 1/4 cup all-purpose flour, for rolling
- 2 tablespoons oil for cooking paratha
for Dough
-
Mix the flour, salt and oil.
-
Add the water slowly, mixing with your fingers as you pour.
-
Dough should be soft, do not knead the dough.
-
Cover the dough and let it sit for at least fifteen minutes.
for Filling
-
Boil the chana dal with two cups of water on medium-high heat. After the dal comes to a boil, reduce the heat to medium and let it cook until the dal is very soft. If needed add a little more water. Strain the dal removing the access water if needed.
-
consistency of soft dough. Consistency of dal is very important for this recipe. If dal is too soft it will be difficult to make the filling, so stir fry the dal to bring it to the right consistency. If it is too dry and crumbly add a little water.
-
In a bowl mix dal with salt, fennel powder, chili powder, and asafetida. Adjust the pepper and salt to taste. Set it aside.
Making Paratha
-
Divide the dough and filling into eight equal parts and form into balls.
-
Roll the dough ball lightly in dry flour and roll it into a 3” circle. Place a filling ball in the center. Pull the edges of the dough to wrap it around the filling. Repeat to make all eight balls. Let the filled balls settle for three to four minutes.
-
Meanwhile heat an iron or other heavy skillet on medium-high heat until moderately hot. To test, sprinkle water on the skillet. If the water sizzles right away, the skillet is ready.
-
Press the filled ball lightly on dry flour from both sides.
-
Using a rolling pin, roll the balls keeping the sealed side up. If the dough sticks to the rolling pin or rolling surface, lightly dust the parathas with dry flour; roll the paratha into a seven-inch circle.
-
Place the paratha on the skillet. When the paratha starts to change color and begins to puff up, flip it over. You will notice some golden-brown spots.
-
After a few seconds, drizzle half a teaspoon of oil over the paratha. Flip the paratha and put half a teaspoon of oil in again. Lightly press the puffed areas with a spatula. This will help Paratha to puff.
-
Flip again and press with a spatula making sure the paratha is golden-brown on both sides. Repeat for the remaining parathas.
-
Parathas are best served hot and crispy. They will be soft as they cool off.
-
Parathas can be kept unrefrigerated for up to two days wrapped in aluminum foil or in a covered container. For later use, parathas can be refrigerated for six to seven days or frozen for up to a month. Re-heat using a skillet or oven. But they taste great at room temperature.
-
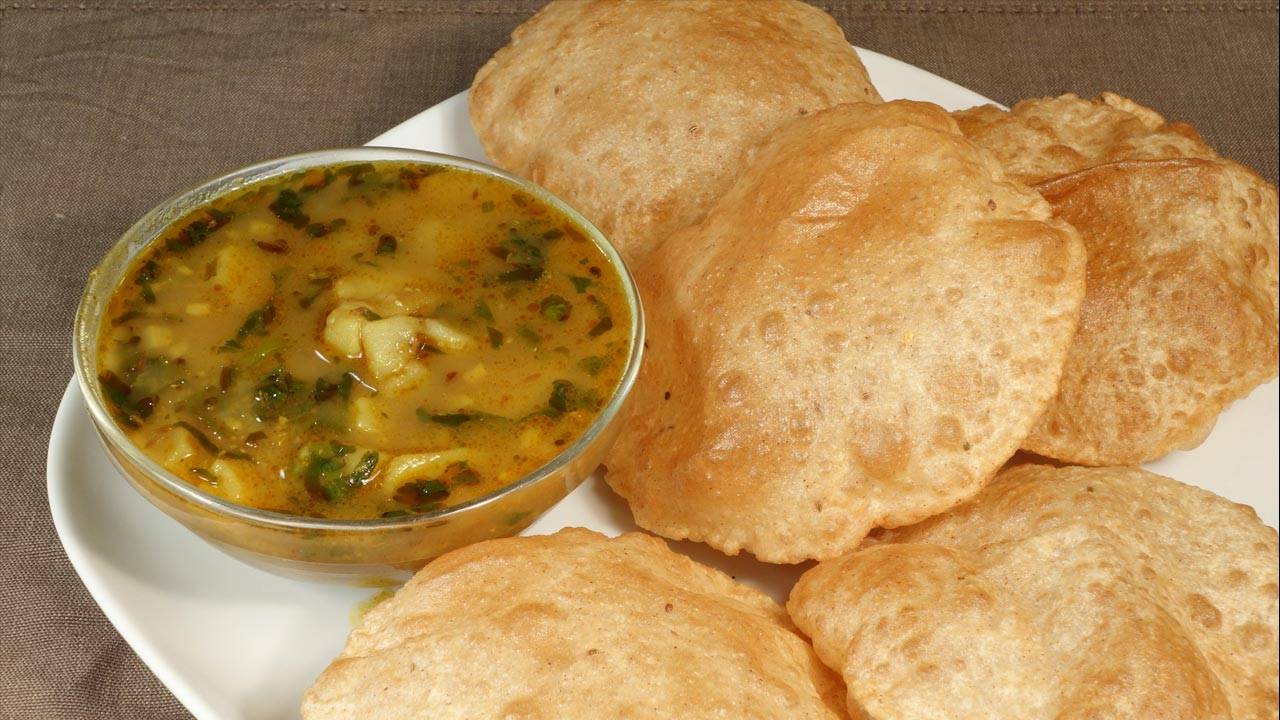
Aloo Puri (Potatoes with Fried Puffed Bread)

Aloo Puri (Potatoes with Fried Puffed Bread)
Aloo Puri, spicy potatoes with gravy and puffed whole wheat bread (puri). It is simple and makes a complete meal. This is a popular combination in North India. This can be served for a casual breakfast, lunch, or dinner.
for Aloo (Potatoes with Gravy)
- 3 medium-sized potatoes peeled and cubed in bite size, about 2 cups of cubed potato
- 1-1/2 tablespoons oil
- 1 teaspoon cumin seeds (jeera)
- 1/8 teaspoon asafetida (hing)
- 1/4 teaspoon turmeric (haldi)
- 1 teaspoon ginger chopped
- 1 green chili chopped
- 2 teaspoon coriander powder (dhania)
- 1 teaspoon of fennel seed crushed
- 1/4 teaspoon red chili powder
- 1 teaspoon salt
- 1/2 teaspoon mango powder (amchur)
- 1/4 teaspoon garam masala
- About 2 tablespoons cilantro (hara dhania) finely chopped
for Puri
- 1 cup whole wheat flour
- 1 tablespoon sooji/semolina
- 1/8 teaspoon carom seeds (ajwain)
- 1/2 teaspoon salt
- Approx. ½ cup water
Also need oil to fry
For Aloo
-
In a small bowl, mix the coriander, fennel, turmeric, chili powder, salt, ginger, and green chili with about 2 tablespoons of water. Set it aside.
-
Heat the oil in a saucepan over medium-high heat. Test the heat by adding one cumin seed to the oil. If the cumin seed cracks right away, the oil is ready. Add cumin seeds, and asafetida, as cumin seeds crack add spice mix and stir fry for about 15 seconds
-
Add potatoes mixed with spices, lower the heat to low medium, cover the pan, and let it cook for about three to four minutes stirring once in between.
-
Add about 1-1/2 cups of water and change the heat to medium-high heat. As potatoes come to a boil cover the pan lower the heat to medium and let it cook for about eight minutes.
-
Mix the potatoes and mash some potatoes as mixing the potatoes, this will thickness to the gravy. Adjust the water in the gravy to your liking; gravy will thicken as it cools.
-
Add mango powder, garam masala and cilantro. Mix it well, turn off the heat, and cover the pan.
-

Batata Vada – Aloo Bonda (Fried Potato Dumpling)

Batata Vada – Aloo Bonda (Fried Potato Dumpling)
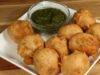
Batata Vada also known as aloo bonda, deep fried savory appetizer made with spicy potato mix. When they are serve hot they are crispy outside and soft inside. This is a very popular street food in Mumbai.
- 3 medium potatoes boiled peeled and roughly chopped (this will make 2 cups of chopped potatoes)
- 1 tablespoon oil
- 1/2 teaspoon black mustard seeds (rai)
- 7-10 curry leaves chopped, optional
- 1/4 teaspoon turmeric (haldi)
- 1 tablespoon finely chopped ginger
- 1 green chili finely chopped adjust to taste
- 2 tablespoons chopped cilantro (hara dhania)
- 1/2 teaspoon salt adjust to taste
For Batter
- 1/2 cup besan, gram flour (available in Indian grocery stores)
- 1 tablespoon rice flour
- 1/8 teaspoon asafetida (hing)
- 1/4 teaspoon baking soda
- 1/4 teaspoon red pepper
- 1/2 teaspoon salt adjust to taste
- About 1/4 cup of water
- Oil to fry
Batter
In a bowl mix besan, rice flour, salt, asafetida, pepper, and baking powder. Add water slowly to make a thick and smooth batter. Set aside.
Vada
Heat oil in a frying pan on medium heat moderately.
Add mustard seeds as the seeds crack add curry leaves, (curry leaves splatters) potatoes, ginger, green chili, turmeric, and salt.
Stir fry for about 3 minutes over medium heat. Add cilantro mix it well. Turn of the heat.
Let the potato mix cool off, divide them into about 12 pieces and make them into smooth round ball, they will be little smaller then golf ball.
Heat about 1”of oil in a frying pan on medium high heat. To check if the oil is ready, put one drop of batter in oil. The batter should come up but not change color right away.
Dip the potato balls into the batter one at a time, making sure the potato balls are completely covered with batter. Then, slowly drop them into the frying pan.
Turn them occasionally. Fry the batata vadas until all sides are golden-brown.
Batata vadas will take about four minutes to cook.
Serve them hot with cilantro chutney.
Serve them with sandwich buns using cilantro chutney as spread. Now this is known as Vada pav, another famous street food in Mumbai.
Batata Vada Recipe – An Authentic Indian Delight
Aloo bonda, a popular Indian street food, is a delectable appetizer consisting of spiced mashed potato balls coated in chickpea flour batter and fried to crispy perfection.
Introduction to Batata Vada and Aloo Bonda
Batata Vada, also known as Aloo Bonda, is a popular Indian street food that originated in the state of Maharashtra. This delightful snack consists of spiced mashed potatoes coated in a gram flour batter and deep-fried until golden brown. Loved for its crispy exterior and soft, flavorful interior, batata vada is a beloved snack enjoyed across the country. In this batata vada recipe, we will guide you through the process of making this delicious treat at home.
How to Make Batata Vada – Step by Step Guide
- Preparation of Potato Filling: To begin making batata vada, start by boiling potatoes until they are tender. Once boiled, peel and mash them in a bowl. Heat oil in a pan and add mustard seeds, cumin seeds, asafoetida, and curry leaves. Sauté until fragrant, then add mashed potatoes, turmeric powder, red chili powder, salt, and chopped coriander leaves. Mix well and cook for a few minutes. Let the filling cool down.
- Making the Gram Flour Batter: In a separate bowl, prepare the gram flour batter by mixing gram flour, rice flour, baking soda, salt, and water. Ensure a smooth consistency without any lumps. Let the batter rest for 10-15 minutes.
- Assembly of Batata Vada: Take a portion of the potato filling and shape it into small balls. Dip each ball into the prepared gram flour batter, ensuring it is evenly coated.
- Deep Frying the Vadas: Heat oil in a deep frying pan over medium heat. Once the oil is hot, carefully drop the coated potato balls into the oil and fry until they turn golden brown and crisp. Remove from oil and place them on paper towels to drain excess oil.
- Serve Hot: Your crispy and delicious batata vada or aloo bonda is ready to be served. Enjoy them hot with green chutney or tamarind chutney.
Tips for Perfect Batata Vada
- Ensure that the potato filling is well-spiced to enhance the flavor of the batata vada.
- Make sure the gram flour batter is of the right consistency; it should coat the potato filling evenly.
- Fry the vadas in hot oil to achieve a crispy exterior.
- Serve the vadas hot for the best taste and texture.
Variations of Batata Vada
- You can add crushed peanuts or cashews to the potato filling for added crunch.
- For a spicy kick, add finely chopped green chilies to the potato mixture.
- Experiment with different spices and herbs to customize the flavor according to your preference.
Benefits of Batata Vada
- Batata vada is a filling and satisfying snack that can be enjoyed any time of the day.
- Potatoes are a good source of carbohydrates, making batata vada an excellent energy booster.
- This snack is vegetarian and can be enjoyed by people of all ages.
Frequently Asked Questions (FAQs)
Q: Can I make batata vada ahead of time?
A: While batata vada is best enjoyed fresh, you can prepare the potato filling and gram flour batter in advance and fry the vadas just before serving for optimal crispiness.
Q: Can I bake batata vada instead of deep-frying?
A: While traditionally batata vada is deep-fried for that crispy texture, you can try baking them in the oven for a healthier alternative. However, the texture may vary slightly.
Other Recipes on Manjula’s Kitchen
If you’re looking to explore more Indian recipes, appetizers, beverages, and desserts, be sure to check out the following links on Manjula’s Kitchen. Here are some links to recipes on Manjula’s Kitchen official website:
Chana Chaat (Spicy Chickpea Salad) Recipe
Pav Bhaji (Spicy Vegetable Hash with Buns) Recipe
Raj Kachori (Crunchy Chaat) Recipe
These recipes should offer you a flavorful experience straight from Manjula’s Kitchen.
-

Poha (Flattened Rice)
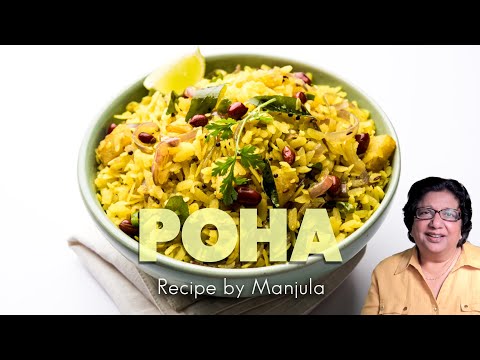
Poha (Flattens Rice)

This dish is a favorite for breakfast or as a light snack in different parts of India. Being raised in Bihar, my mother was very fond of Chudwey. She would often prepare this dish as a special snack for guests to be served with tea. I have grown up loving this recipe and thought I would share it with all of you. This is a quick and easy recipe to make and very delicious.
- 2 cups thick poha, poha is available in different thickness
- 1 cup green peas, I am using frozen
- 2 tbsp oil
- 1 tsp mustard seeds (rai)
- 3 cardamoms (ilachai)
- 1/2 tsp turmeric (haldi)
- 1/4 tsp red chili powder
- 1 green Chile finely chopped
- 1 tsp ginger finely chopped
- 1 tsp salt
- 1 tsp sugar
- 1 tsp lemon juice
- 2 tbsp cilantro finely chopped (hara dhania1)
- 2 lemon slice for garnishing
- 1/4 cup chopped tomatoes for garnishing
-
Gently wash poha in a colander and let it sit/drain for approx. 10 minutes.
-
Sprinkle turmeric, chili powder and salt and toss with a fork.
-
Wash and drain green peas and set aside.
-
Heat oil in a frying pan over medium high heat. When oil is moderately hot add mustard seeds and wait till seeds crack. Add cardamom, ginger and green chili and stir for a few seconds. Then add green peas and cook until they are tender.
- Add poha and stir-fry for 3 to 4 minutes, mixing gently. (If the poha looks too dry, add a few tablespoons of water and continue cooking).
-
Remove from heat and add lemon juice, sugar and cilantro. Mix and cover for few minutes.
Serve hot with a side of Hari Cilantro Chutney.
Tips: Poha comes in different thickness sizes, but you must use the “thick” poha for this recipe, or else it will become too mushy.
Varying brands of Poha may absorb water differently. Therefore use your judgment while cooking, to add a few tablespoons of water, if it feels too dry.
I am using frozen baby green peas, but you can use fresh or frozen of any style green peas. Just make sure that they are fully cooked before you add the poha.
-
Methi Thepla

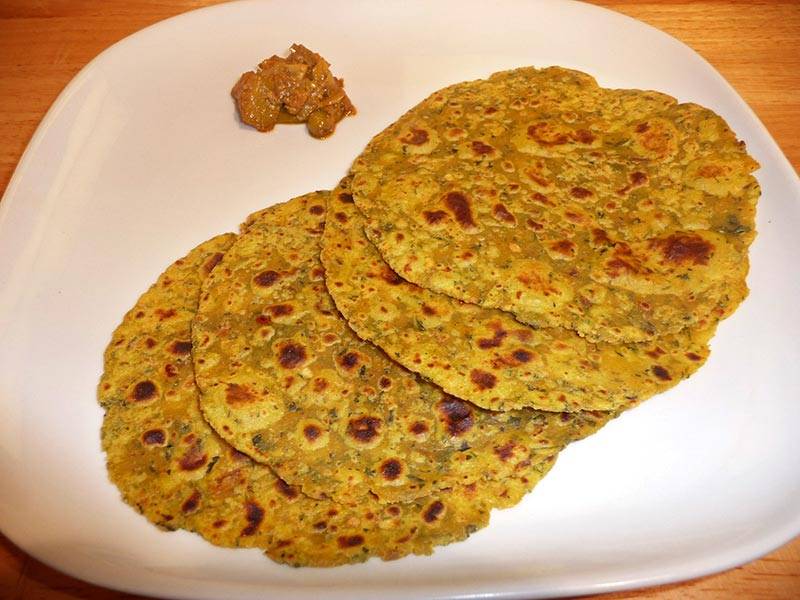
Methi Thepla
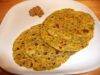
Methi Thepla is favorite snack bread from the state of Gujarati. It is very flavorful and makes a good travel or picnic food.
Ingredients:
- 1 cup whole wheat flour (atta)
- 1/4 cup gram flour (basen)
- 1/8 teaspoon asafetida (hing)
- 1/2 teaspoon cumin seeds (jeera)
- 1/2 teaspoon turmeric (haldi)
- 1 teaspoon red chili flakes adjust to taste
- 1 1/4 teaspoon salt adjust to taste
- 1/4 cup dry fenugreek leaves (kastoori methi)
- 2 tablespoons oil
- 1/4 cup yogurt (dahi)
- About 3 tablespoons of water as needed
- Approximately 1/4 cup of oil for cooking
Method
-
Mix all dry ingredients together in a bowl: flour, gram flour, asafetida, cumin seeds, turmeric, chili flakes, salt, and fenugreek leaves.
-
Add oil and yogurt to the flour mix and mix well. Add water as needed to make firm dough. Knead the dough for a minute on a lightly greased surface to make it smooth and pliable. Set the dough aside and cover it with a damp cloth. Let the dough rest at least ten minutes.
-
Divide the dough into six to eight equal parts. Using your oiled palm, roll each one into a smooth ball and press flat.
-
Take one dough ball and press it lightly on both sides on a surface covered with dry flour. Using a rolling pin, roll the dough into a circle of five to six inches. If dough starts sticking, dust it with more flour. However, do not use any dry flour toward the end of the rolling, as it will make the thepla dry.
-
Heat a skillet over medium high heat. To test, sprinkle a couple of drops of water on the skillet. It should sizzle immediately.
-
Place the thepla in the skillet. As it cooks, the dough will change color and have a dryer look. Turn the thepla over using a spatula. You should see golden-brown spots on the semi-cooked side.
-
After few seconds, spread ½ teaspoon oil onto the thepla using a spatula. Turn the thepla over. Using your spatula, lightly press the entire surface of the thepla to help it cook all the way through. It may puff up in some areas.
-
Turn over the Thepla over again and press with the spatula, making sure it is golden-brown on both sides. Remove from heat.
-
Repeat with the remaining dough, untill they are all done.
Serving Suggestions
Methi Thapla can be served plain or serve with Plain Yogurt or try with Date and Raisin Chutney, this sweet and chutney can really enhance the flavor.
Variation
This recipe uses dry fenugreek leaves, as they are available year-round. But fresh fenugreek leaves are ideal if you can find them. Substitute ½ cup fresh chopped fenugreek leaves for the dry leaves.
-
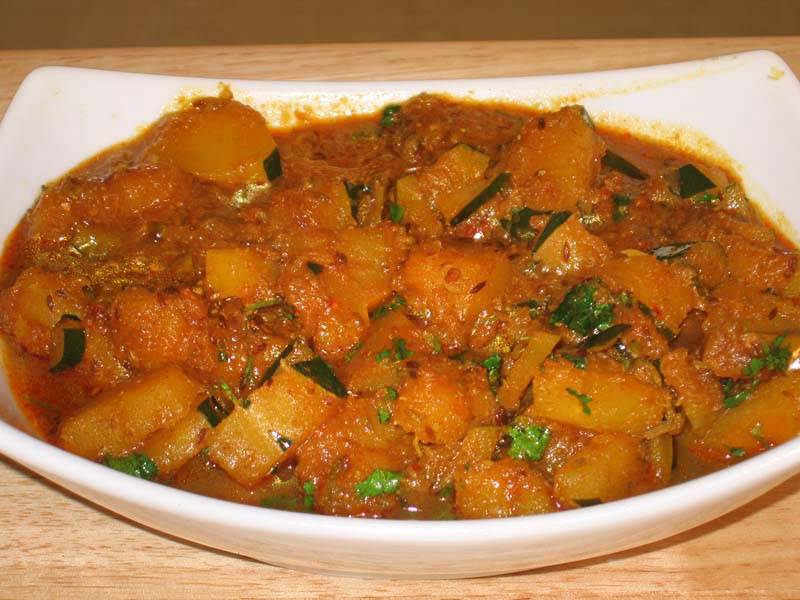
Spicy Squash – Kaddu Ki Subji

Spicy Squash
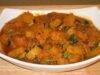
This is a north Indian dish, spicy, sweet and sour taste all in one. Typically this dish is served with puri and kachori (puri stuffed with urad dal).
- 4 cups sliced squash, I am using acorn squash (ladoo)
- 3 tbsp oil
- 1/8 tsp asafetida (hing)
- 1 tsp cumin seeds (jeera)
- 1/2 tsp fenugreek seeds (Methi dana)
- 1 tbsp coriander powder (dhania)
- 1 tbsp fennel seeds coarsely ground (saunf)
- 1/2 tsp turmeric (haldi)
- 1 tsp chili powder adjusts to taste
- 1/2 tsp paprika
- 1 tsp salt
- 4 whole dried red chilies
- 1 tbsp shredded ginger
- 1 tbsp lemon juice
- 1 tbsp mango powder
- 2 tbsp chopped cilantro (hara dhania)
-
Peel and cut the squash into cubes. Save about ¼ of the squash peel and chop them.
- In a small bowl, mix the shredded ginger, coriander powder, funnel, red chili powder, paprika, turmeric, and ¼ cup of water to make a paste.
- Heat the oil in a pan. Test the heat by adding one cumin seed to the oil; if seed cracks right away oil is ready. Add cumin seeds and asafetida after seeds crack add fenugreek seeds and red chilies and stir for a few seconds.
- Add the spice paste and stir-fry for a minute until spices start leaving the oil.
- Add the squash, squash peels, salt, and ¼ cup of water. Mix well. Cover the pan and let it cook on medium heat until the vegetables are tender. Squash will be semi mushy.
-
Make sure to stir gently every 3 to 4 minutes. Check if more water is needed.
- Lastly, add the mango powder, sugar and chopped cilantro. Mix everything and cover for a minute. Adjust the salt to your taste.
Tips: I have used acorn squash but any squash can be used whatever is available for example banana squash, butternut squash, buttercup squash etc. The only one I know does not work is spaghetti squash and pumpkin.
Suggestion: The recipe is with many blends of spices and great aroma makes a great dish to serve with plain rice. Just make the dish with extra gravy by adding more water on step 9. Serve with Puri, in North India Spicy Squash served with Urad Dal Puri.
Indian Squash Recipe | Butternut Squash Indian Recipes | Manjula’s Kitchen
Indian cuisine is renowned for its rich and diverse flavors, one such delightful gluten-free vegetable curry-based Indian Squash Recipe is spicy squash Indian curry a dish that embraces the vibrant colors and aromatic spices synonymous with Indian cooking. To start select a fresh squash, preferably Butternut or Acorn Squash, though other options like banana squash or buttercup squash can also be employed. It’s worth noting that spaghetti squash and pumpkin are not recommended for this particular squash recipe Indian.
The first step involves the preparation of the squash, a crucial task to ensure the perfect texture in the final dish. Peel and cut the squash into cubes, reserving about ¼ of the squash peel for later use. This unique touch adds both texture and visual appeal to the Butternut Squash Sabzi.
The heart of the dish lies in the aromatic spice blend that brings the Indian flavors to life. In a small bowl, combine shredded ginger, coriander powder, funnel, red chili powder, paprika, turmeric, and water to create a flavorful paste. This amalgamation of spices forms the base, infusing the squash with a medley of tastes that are quintessentially Indian.
As the pan sizzles with anticipation, heat the oil to the right temperature. A simple test with cumin seeds determines the readiness of the oil; a crackling cumin seed indicates the perfect moment. Add cumin seeds, asafetida, fenugreek seeds, and red chilies to the hot oil. The ensuing aroma is a testament to the robust flavors that will unfold.
The spice paste takes center stage as it sizzles in the pan. Stir-fry for a minute until the spices release their essence into the oil, creating a tantalizing blend. Now, it’s time for the star of the show – the cubed squash, along with the reserved squash peels. Sprinkle salt, add water, and cover the pan, allowing the vegetables to simmer and tenderize. The squash transforms into a semi-mushy consistency, absorbing the myriad spices infused in the dish.
A gentle stir every few minutes ensures even cooking, and periodic checks determine if more water is needed to maintain the desired texture. The Butternut Squash Sabzi takes shape, with the kitchen filled with the heady aroma of Indian spices.x
In the final act, add mango powder, sugar, and chopped cilantro, elevating the dish with a burst of tanginess and freshness. The amalgamation of flavors is perfected as everything melds together under the lid for a minute. A final adjustment of salt ensures the dish is tailored to individual taste preferences.
As the Butternut Squash Sabzi graces the dining table, it presents a feast for the senses. The blend of spices, the semi-mushy texture of the squash, and the infusion of mango powder create a symphony of flavors that captivate the palate. This Indian squash recipe is not just a dish; it’s a celebration of culinary prowess and cultural richness amongst all other butternut squash Indian recipes.
For those seeking variety in acorn squash recipes, this recipe seamlessly transitions to accommodate Acorn Squash. The versatility of this Indian squash recipe allows for a delightful twist using acorn squash, offering a slightly different flavor profile while still capturing the essence of Indian cuisine. Acorn squash recipes in Indian households often mirror the steps of this Butternut Squash Sabzi, proving that the charm of this dish transcends the specific type of squash used.
In the realm of squash recipes Indian cuisine has a lot to offer, this Butternut Squash Sabzi stands out as a testament to the creativity and depth of flavor inherent in Indian cooking. Its adaptability with various types of squash ensures that households can explore the rich tapestry of Indian cuisine, savoring the distinctive tastes and aromas that make every bite a culinary adventure. Whether served with plain rice or accompanied by Urad Dal Puri in North India, this spicy squash dish is a gastronomic delight that bridges the gap between tradition and innovation in the realm of Indian cooking.
If you liked this recipe then you must also try: Squash Ice Cream on Warm Squash Halwa, Butternut squash Badam Halwa, Butternut Squash & Almond Baked Crumble, Butternut Squash Risotto
-

Lemon Rice

Lemon Rice
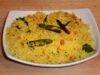
Lemon rice is a delicious south Indian dish. Lemon juice gives a very refreshing and tangy flavor to the rice.
for Rice:
- 1 cup rice
- 2 tablespoons oil
- 1 3/4 cup water
- 1/2 teaspoon salt
for Seasoning:
- 2 tablespoons oil
- 1/2 teaspoon cumin seed
- 1/2 teaspoon mustard seed
- 1/2 teaspoon turmeric
- 2 red whole red chili
- 1 green chili sliced in four long way
- 12 to 15 fresh curry leaves
- 2 tablespoons chana dal, pre-soaked in water for at least half an hour
- 1/4 cup unsalted roasted peanuts
- 1 teaspoon salt adjust to taste
- 1/4 cup lemon juice
Method
-
Wash rice gently changing water several times until the water appears clear.
-
For fluffier rice, the rice should be soaked for at least 15 minutes prior to cooking.
-
Drain the rice and put it into the saucepan. Add water, oil, and salt, and bring to a boil. Once the water is boiling reduce the heat to low and cover the pan.
-
Cook about 15 minutes, or until the rice is tender and the water has evaporated. Turn off the heat and fluff the rice with a fork.
Preparing The Seasoning:
-
Heat the oil in a frying pan on medium heat; stir-fry the peanuts for about 2 minutes until peanuts changes the color to light brown.
-
Take out the peanuts from oil and use the same oil for rest of the seasoning.
-
Add cumin seeds and mustard seeds after seeds crack add red chili, curry leaves, and green chilies, and stir for a few seconds.
-
Add the chana dal, stir-fry for about a minute.
-
Add turmeric and mix it well.
-
Add the pre-cooked rice, peanuts and sprinkle salt and lemon juice over the rice.
-
Mix gently, making sure do not break the rice and stir-fry for about 2 minutes. Rice is ready, Enjoy!
-

Gobhi Paratha

Gobhi, Gobi Paratha
Gobhi, parathas (stuffed cauliflower bread) make a great Sunday breakfast. This is my favorite paratha.
Dough
- 1 cup whole-wheat flour
- 1/2 tsp salt
- 1/2 cup water use as needed
Filling
- 2 cups shredded cauliflower
- 1/2 tsp carom seeds (ajwain)
- 1/2 tsp cumin seeds (jeera)
- 1 green chili finely chopped
- 2 tbsp cilantro chopped (hara dhania)
- 1/2 tsp salt
- 1/4 cup whole-wheat flour for rolling
- 2 tbsp oil to cook paratha
Making the Dough
-
Mix flour, salt and water together to make a soft dough (add water as needed). Knead the dough for about 2 minutes on a lightly greased surface to make soft, smooth and pliable dough.
- Set the dough aside and cover it with a damp cloth. Let the dough rest for at least ten minutes.
Making the Filling
-
Shred the cauliflower using a shredder (electric or manual). Do not use a food processor to blend the cauliflower, as it will become too moist and hard to work with.
- Squeeze the cauliflower take out as much water as possible. Add all filling ingredients together, mix it well.
Making the Paratha
-
Divide the dough and cauliflower mixture into 6 equal parts. Roll one part of the dough into a three inch circle. Place one part of the filing in the center. To wrap, pull the edges of the rolled dough together to cover the filling. Repeat to make all six balls.
- Allow each ball to settle for two minutes before rolling. (Timing is critical here. If you roll paratha just after filling, or if you leave them longer than two minutes before rolling, the cauliflower mixture will seep through the edges when rolling).
- Heat an iron skillet or heavy skillet on medium high heat. Test by sprinkling it with a couple of drops of water. If the water sizzles right away, the skillet is ready.
- Press the filled ball lightly on both sides on a surface covered with dry whole wheat flour. Keep the sealed side of the filled ball on top. Roll the ball with a light hand into 6” circles. When the dough sticks to the rolling pin or rolling surface, lightly dust with dry flour.
- Place rolled paratha on the skillet. After a few seconds, the paratha will start to change color and puff up. Flip the paratha over. You will notice some golden-brown spots on it.
- After a few seconds, spread one teaspoon of oil over the paratha. Flip the paratha again and lightly press the puffed areas with a spatula. Flip again and press with the spatula making sure the parathas are golden-brown on both sides.
- Repeat for the remaining parathas. Cool the parathas on a wire rack so they don’t get soggy.
Notes
Allow each ball to settle for two minutes before rolling. (Timing is critical here. If you roll paratha just after filling, or if you leave them longer than two minutes before rolling, the cauliflower mixture will seep through the edges when rolling).
Parathas can be kept unrefrigerated up to two days,
wrapped in aluminum foil or stored in a covered container. For later use, parathas can be refrigerated five to six days or frozen (wrapped in aluminum foil) for a month. Re-heat in a skillet or toaster oven.
Serving Suggestions
Gobhi Paratha goes well with Salted Mint Lassi, Carrot Pickle, Aloo Mattar.
-
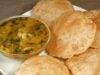
Punjabi Chole

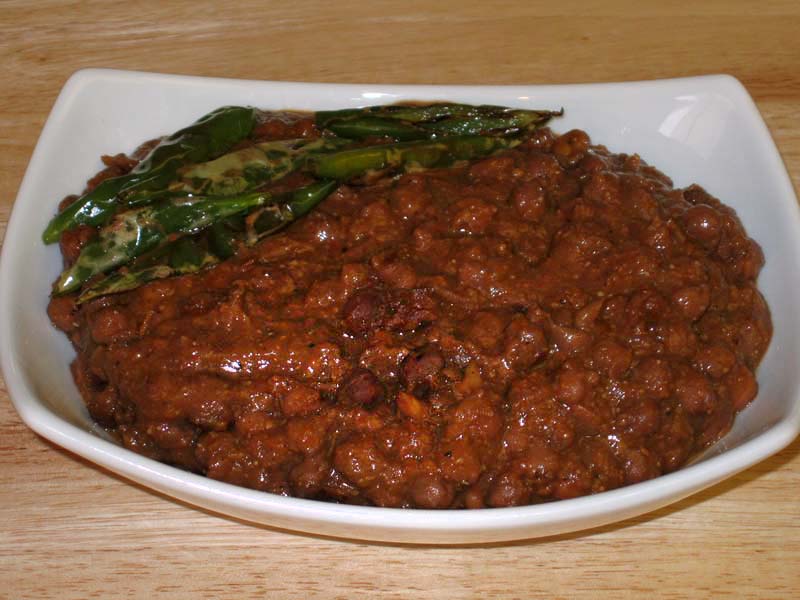
Punjabi Chole
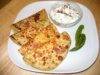
Punjabi chole are the best compliment with Baturas, and Naan. The combination is known as Chola Battura. This is a mouth-watering dish, popular with all ages. Popular street food.
- 1 cup chickpeas, garbanzo beans (kabuli chana)
- 2 teabags
- 3 tbso oil
- 1 tsp cumin seeds (jeera)
- 1 tbsp besan (gram flour)
- 2 tomatoes medium size
- 1 green chili
- 1 tbsp ginger shredded
- 1 tbsp coriander powder (dhania)
- 1/2 tsp black pepper
- 1 tsp salt
- 1/2 tsp black salt
- 1 tsp garam masala
- 1 tsp mango powder (amchoor)
For Garnishing
- 1 tbsp ginger sliced
- 1 green chili sliced long ways
-
Boil 5 cups of water with tea bags; after tea comes to boil turn down the heat to medium low. Let it boil for another 2 to 3 minutes. Take out the tea bags and keep aside.
- Wash chickpeas well and soak in tea water for about 8 hours. Chickpeas after soaking will become about 2 1/2 times the volume of the original.
- In pressure cooker add chickpeas with the water they were soaked in, plus 2 more cups of water. Close the cooker and put the pressure on. Cook on medium high heat.
- As pressure cooker starts steaming turn the heat down to medium and cook for about 15 minutes.
- Close the heat and wait until steam has stopped before opening the pressure cooker. Chickpeas should be soft and tender.
- Blend the tomatoes, ginger and green chili to make paste.
- Heat the oil in a saucepan. Test the heat by adding one cumin seed to the oil; if it cracks right away oil is ready. Add cumin seeds, and as the cumin seeds crack add basen stir-fry until basen is light gold brown.
- Next add tomato paste, coriander powder, and black pepper. Stir-fry for 2 to 3 minutes until the oil is separating from the mixture and tomato mixture should be about half in volume.
-
Add spice mix, salt, garam masala, and mango powder to chickpeas. While mixing, lightly mash the chickpeas. Adjust salt, pepper, and sourness to your taste.
- Cook on medium high heat. After choles come to boil lower the heat to medium low and put the lid on.
- Choles are ready to eat in as little as ten minutes, but for best taste let simmer for 30 minutes, stirring every 5 or 6 minutes.
- Garnish choles with shredded ginger and sliced green chili.
Homestyle Punjabi Chola Curry: A Flavorful Delight
Chola, also known as chole or chana, refers to a popular North Indian dish made from dal (lentils), specifically chickpeas, which are simmered in a flavorful blend of spices and herbs. This dish is typically enjoyed with rice, naan, or bhature.
Chola is naturally gluten-free, making it suitable for individuals with gluten sensitivities or celiac disease. It’s often included in party recipes due to its rich, hearty flavor and versatility in serving large gatherings. Additionally, chola is a favorite among vegans, as it contains no animal products and provides a substantial source of plant-based protein.
Step 1: Preparation – Punjabi Chola Recipe
Before diving into cooking the Punjabi chola, it’s essential to prepare all the ingredients. Gather punjabi chola, chickpeas, tomatoes, ginger, green chilies, and spices like cumin, coriander powder, garam masala, and amchur. Rinse the chickpeas thoroughly and soak them overnight or for at least 8 hours. Soaking helps in softening the chickpeas and reduces the cooking time. Also, finely chop tomatoes, ginger and green chilies.
Step 2: Cooking the Chickpeas – Punjabi Chole Recipe
In a pressure cooker, add the soaked chickpeas along with water, salt, and tea bags. The tea bags impart a dark color to the chickpeas, giving them an authentic Punjabi chole look. Pressure cook the chickpeas until they are soft and cooked through. Once cooked, discard the tea bags and set the chickpeas aside.
Step 3: Preparing the Base – Chola Curry Recipe
Heat oil in a pan and add cumin seeds. Let them crackle, then add Add finely chopped ginger and green chilies, and sauté for a few more minutes until the raw smell disappears. Now, add tomatoes and cook until they are soft and mushy.
Step 4: Adding Spices – Punjabi Chole Recipe
Once the tomatoes are cooked, it’s time to add the spices. Add coriander powder, cumin powder, garam masala, red chili powder, and amchur (dry mango powder). These spices lend the authentic flavors to the Punjabi chola. Stir well to combine and cook the spices for a couple of minutes until they release their aroma.
Step 5: Incorporating Chickpeas – Chola Curry Recipe
Now, add the cooked chickpeas to the pan along with a little water. Stir well to coat the chickpeas with the masala mixture. Allow the chola curry to simmer on low heat for about 10-15 minutes, allowing the flavors to meld together.
Step 6: Garnishing and Serving – Punjabi Chole Recipe
Once the chola curry has thickened to your desired consistency, garnish it with freshly chopped coriander leaves. Serve the piping hot Punjabi chole with bhature, naan, or rice for a hearty and satisfying meal.
Tips for Perfect Punjabi Chole:
- Soaking Chickpeas: Ensure you soak the chickpeas for an adequate amount of time to soften them, reducing the cooking time.
- Using Tea Bags: Adding tea bags while cooking the chickpeas gives them a rich, dark color characteristic of authentic Punjabi chole.
- Spice Levels: Adjust the amount of red chili powder and green chilies according to your preference for spice levels.
- Garnish: Freshly chopped coriander leaves add a burst of freshness to the chola curry. Don’t skip this step for the best flavor.
Variations of Punjabi Chola:
- Creamy Chola Curry: Add a splash of cream or coconut milk towards the end of cooking for a creamy texture and milder flavor.
Benefits of Punjabi Chola:
- Rich in Protein: Chickpeas are an excellent source of plant-based protein, making Punjabi chola a nutritious option for vegetarians and vegans.
- Fiber-Rich: Chickpeas are high in dietary fiber, promoting digestive health and aiding in weight management.
- Vitamins and Minerals: Chola curry is packed with essential vitamins and minerals like iron, folate, and vitamin C from tomatoes and spices.
FAQs – Punjabi Chole Recipe:
Can I use canned chickpeas instead of dried ones?
- Yes, you can use canned chickpeas for convenience, but the texture may vary slightly from using dried chickpeas.
How long can I store leftover Punjabi chole?
- Leftover chola curry can be stored in an airtight container in the refrigerator for up to 3-4 days. Reheat before serving.
For more delicious Indian recipes, check out Manjula’s Kitchen: Chole Bhature, Naan, Paneer Tikka Masala, Aloo Paratha, Vegetable Biryani.