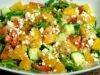
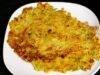
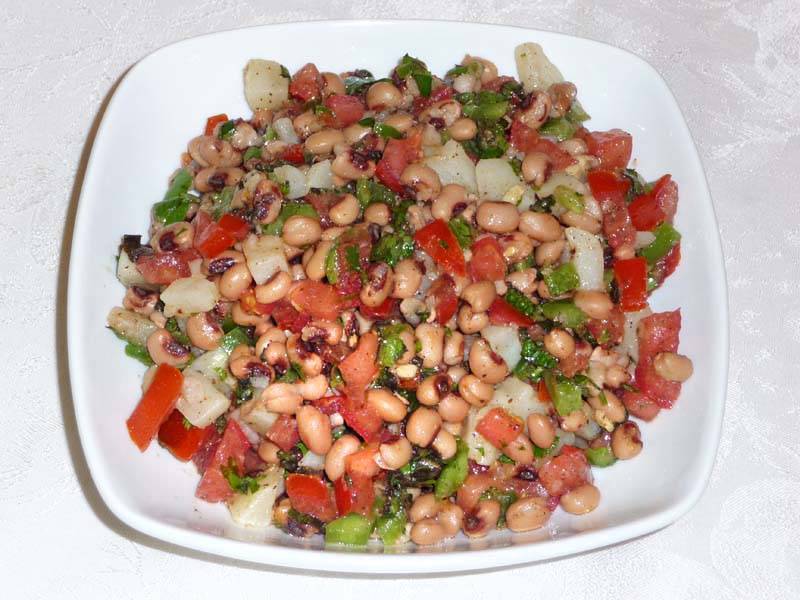
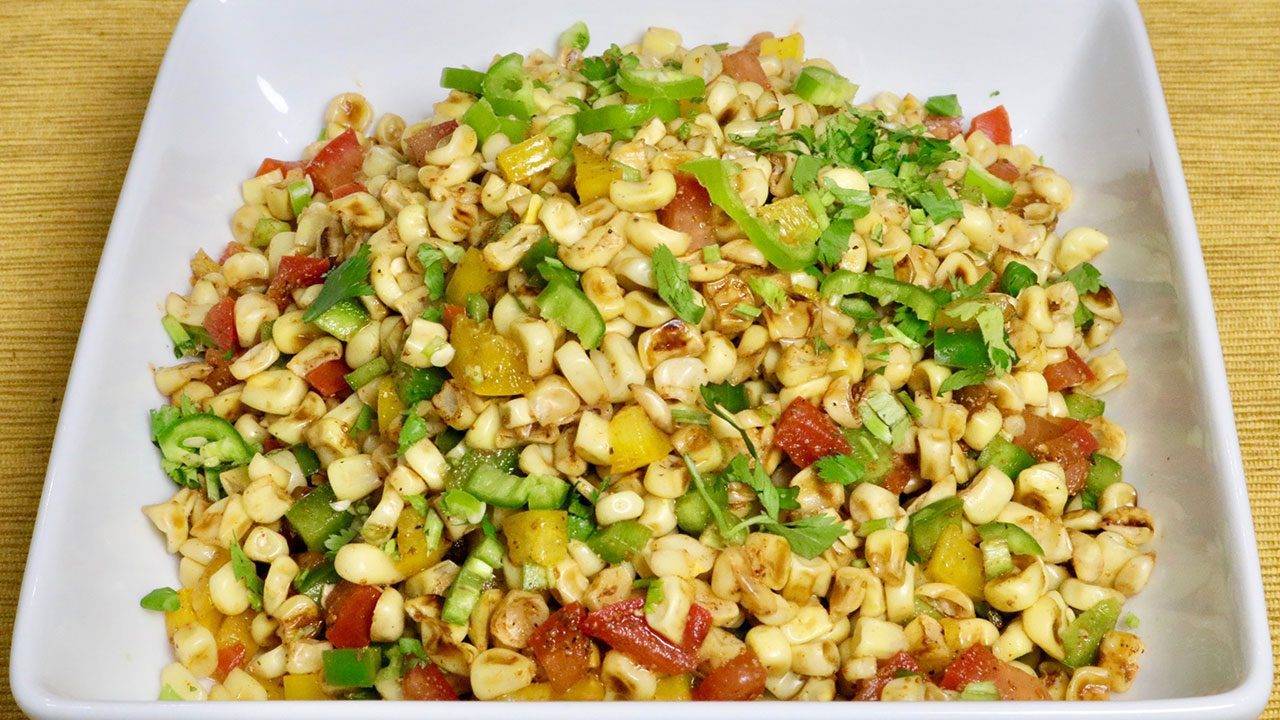
Category: Low Cholesterol Recipes

Low Cholesterol Recipes: Heart-Healthy Indian Options

Maintaining a low cholesterol diet is essential for heart health, and Indian cuisine offers a variety of low cholesterol recipes that are both delicious and nutritious. 

Whether you’re looking for low cholesterol breakfast recipes, low cholesterol diet recipes, or simply recipes for low cholesterol, this guide provides a selection of dishes perfect for a heart-healthy lifestyle. Let’s explore some fantastic low cholesterol recipes that you can incorporate into your diet.

Breakfast Recipes

Oats Porridge

Oats Porridge is a nutritious and heart- healthy breakfast ideas indian option. Made with rolled oats, milk, and fresh fruits, this dish is perfect for those looking for low cholesterol breakfast recipes. Oats are known to help lower cholesterol levels, making this a great start to your day.

Besan Chilla

Besan Chilla, or chickpea flour pancake, is a protein-rich breakfast that fits well within low cholesterol recipes. It’s quick to prepare and can be enjoyed with a side of yogurt or chutney. This dish is also suitable for those seeking low cholesterol diet recipes.

Lunch Recipes

Quinoa Salad

Quinoa Salad is a versatile dish that can be customized with various vegetables and herbs. This salad is perfect for those looking for low cholesterol recipes as it is high in protein and fiber, helping to manage hunger and maintain energy levels. It’s also an ideal option for a light lunch or dinner.

Palak Tofu

Palak Tofu is a nutritious dish made with spinach and tofu. Rich in iron and protein, this dish fits perfectly within low cholesterol diet recipes. It can be paired with a side salad for a balanced meal, making it one of the best recipes for low cholesterol for lunch.

Dinner Recipes

Moong Dal Tadka

Moong Dal Tadka is a simple yet flavorful lentil dish that fits perfectly within low cholesterol recipes. Made with split yellow lentils and a blend of spices, this dish is a staple in Indian households. It’s a nutritious and satisfying way to enjoy recipes for low cholesterol.

Vegetable Stir Fry

Vegetable Stir Fry is a quick and easy indian dinner recipes that fits well within low cholesterol diet recipes. Using a variety of colorful vegetables and minimal oil, this dish is not only healthy but also packed with nutrients. It’s a great way to enjoy low cholesterol recipes in a simple and flavorful manner.

Snack Recipes

Sprout Salad

Sprout Salad is a refreshing and nutritious snack that fits well within low cholesterol recipes. Made with sprouted legumes, fresh vegetables, and a tangy dressing, this salad is a perfect example of low cholesterol diet recipes that are healthy and delicious.

Roasted Makhana

Roasted Makhana are fox nuts that are lightly roasted and seasoned with spices. This snack is not only crunchy and addictive but also fits perfectly into the recipes for the low cholesterol category. It’s a healthy option for those mid-day cravings.

Dessert Recipes

Fruit Salad

Fruit Salad is a nutritious and refreshing dessert made with a mix of fresh fruits, spices, and lime juice. This dessert is a delightful example of low cholesterol recipes that can be enjoyed as a dessert or a snack. It’s perfect for those looking for a sweet treat that is also healthy.

Chia Seed Pudding

Chia Seed Pudding is a versatile dessert that can be flavored with vanilla, cocoa, or fruits. This dish is perfect for those seeking low cholesterol diet recipes as it uses plant-based milk and is sweetened with a sugar substitute. It’s a nutritious and satisfying way to end a meal.

Enhancing Your Low Cholesterol Menu

To make your low cholesterol menu even more delightful, consider adding dishes from related categories that complement these low cholesterol recipes. Adding healthy Indian snacks like roasted makhana and sprout salad can provide a variety of flavors and textures. For a sweet ending, explore Indian desserts such as fruit salad and chia seed pudding, made with low-cholesterol ingredients. Incorporating healthy recipes like quinoa salad and vegetable stir fry can offer lighter options for your meals. Hosting a large gathering? The popular party recipe category is filled with dishes that are sure to impress your guests and make your celebration memorable. Including North Indian recipes like palak tofu or moong dal tadka can add a touch of authenticity to your meal.

Frequently Asked Questions (FAQs)

Q: What are some popular low cholesterol breakfast recipes? 

A: Some popular low cholesterol breakfast recipes include Oats Porridge, Besan Chilla, and Vegetable Poha. These dishes are nutritious and help maintain healthy cholesterol levels.

Q: How can I make traditional Indian food low in cholesterol? 

A: To make traditional Indian food low in cholesterol, try recipes like Moong Dal Tadka, Vegetable Stir Fry, and Palak Tofu. These recipes are modified to include heart-healthy ingredients while retaining their authentic flavors.

Q: What are some low cholesterol diet recipes for a party? 

A: Some low cholesterol diet recipes for a party include Quinoa Salad, Sprout Salad, Roasted Makhana, and Fruit Salad. These dishes are flavorful and perfect for gatherings while being mindful of cholesterol levels.

Q: Can I prepare low cholesterol Indian food in advance? 

A: Yes, many low cholesterol Indian food recipes can be prepared in advance and stored. Snacks like Roasted Makhana and Sprout Salad can be made ahead of time, while dishes like Moong Dal Tadka and Vegetable Stir Fry can be prepped and refrigerated.

Q: What are some healthy options for low cholesterol Indian food? 

A: Some healthy options for low cholesterol Indian recipes include Quinoa Salad, Vegetable Stir Fry, Oats Porridge, and Besan Chilla. These dishes are high in fiber and protein, helping to maintain energy levels effectively.

Conclusion

Low cholesterol recipes are a celebration of healthy and flavorful meals. Whether you’re looking for low cholesterol breakfast recipes or low cholesterol diet recipes, these dishes will bring variety and nutrition to your meals. So, gather your ingredients, try out these recipes, and create delicious meals that are mindful of your heart health. Don’t forget to explore related categories for more delightful recipes from Manjula’s Kitchen!

By incorporating these dishes into your diet, you’ll be able to enjoy a wide variety of delicious and nutritious foods. Whether you’re looking for breakfast, snacks, main courses, or desserts, there’s a low cholesterol recipe to suit every taste. Happy cooking and healthy eating!

  • Spicy Corn Chaat

    Spicy Corn Chaat

    Craving something savory and delicious? This Spicy Corn Chaat is the perfect spicy snack that is sure to satisfy your cravings. It’s also easy and quick to prepare!

    • 16 oz frozen corn kernels (about 3-1/2 cups)
    • 1 cup green and yellow bell pepper finely chopped (use any bell pepper you have, I decide to use them for color)
    • 1/2 cup finely chopped tomato
    • 1 tsp ginger juice
    • 1 tsp salt
    • 1/2 tsp black salt (optional)
    • 1 tsp cumin seed powder (roasted)
    • 1/4 tsp black pepper
    • 1/4 tsp red chili powder
    • 1 tsp green chili (finely chopped, adjust to taste)
    • 1 Tbsp cilantro (finely chopped)
    • 1 Tbsp lemon juice
    1. Mix all the dry ingredients together, salt, black salt, roasted cumin seed powder, black pepper, and chili powder, set aside.
    2. Thaw the frozen corn kernels and lightly squeeze some water out.
    3. Coat the nonstick frying pan with oil and heat over medium high heat, put the corn kernels and stir fry for 4-5 minutes stirring continuously. Some corn will start popping and they start getting some brown spots. Turn off the heat.
    4. After corn comes to room temperature add all the ingredients, bell peppers, tomato, sprinkle the spice mix, ginger juice, cilantro and lemon juice and add the green chili to you taste. Mix them well.
    Snack
    Indian

    Spicy Corn Chaat Recipe: Step by Step Process 

    Spicy Corn Chaat is a flavorful appetizer or snack made from boiled corn kernels mixed with a blend of spices and tangy chutneys. It’s a gluten-free, low-cholesterol, and low-fat option, perfect for those looking for a healthy yet satisfying treat. This vegan dish makes for a great lunch box suggestion or a quick bite any time of the day.

    Introduction to Spicy Corn Chaat


    Indulge in the delightful flavors of spicy corn chaat with this easy-to-follow recipe. A popular street food in India, this spicy sweet corn chaat combines the sweetness of corn with tangy and spicy flavors, creating a tantalizing snack or appetizer. Learn how to make spicy corn chaat at home and treat yourself to a burst of deliciousness in every bite.

    Ingredients for Spicy Corn Chaat


    To prepare this lip-smacking spicy corn chaat recipe, you’ll need fresh or frozen corn kernels, finely chopped vegetables tomatoes, and bell peppers, green chilies for heat, chaat masala for that quintessential Indian flavor, and a squeeze of lemon juice to brighten up the dish.

    Step-by-Step Instructions for Making Spicy Corn Chaat


    1. Preparing the Corn

    Start by boiling the corn kernels until they are tender. Drain the water and set aside.

    1. Sautéing the Vegetables
      In a pan, heat some oil and add tomatoes, and bell peppers until they are soft and slightly caramelized. Add finely chopped green chilies for an extra kick of heat.
    2. Mixing the Corn and Vegetables
      Combine the boiled corn kernels with the sautéed vegetables in a mixing bowl. Toss them together gently to ensure even distribution of flavors.
    3. Seasoning with Chaat Masala
      Sprinkle generous amounts of chaat masala over the corn and vegetable mixture. This spice blend adds a burst of tanginess and complexity to the chaat.
    4. Adding Lemon Juice
      Squeeze fresh lemon juice over the chaat to enhance its flavors and add a refreshing citrusy note.
    5. Serving the Spicy Corn Chaat
      Transfer the prepared spicy corn chaat to serving bowls and garnish with fresh cilantro leaves for a pop of color and freshness. Serve immediately and enjoy the irresistible flavors of this delightful chaat.

    Tips for Making the Best Spicy Corn Chaat

    • Use fresh corn kernels for the best taste and texture, but frozen corn works well too.
    • Adjust the spiciness according to your preference by adding or reducing the amount of green chilies.
    • For added crunch, you can toss in some crushed papdi or sev just before serving.

    Variations of Spicy Corn Chaat

    • Cheesy Corn Chaat: Sprinkle grated cheese over the chaat for a creamy and indulgent twist.
    • Avocado Corn Chaat: Add diced avocado to the chaat for a buttery texture and extra creaminess.
    • Spicy Corn Salad: Skip the chaat masala and lemon juice, and toss the corn and vegetables with a zesty vinaigrette for a refreshing salad.

    Benefits of Spicy Corn Chaat


    Spicy corn chaat is not only delicious but also nutritious. Corn is a good source of fiber, vitamins, and minerals, while the vegetables add an array of nutrients. This chaat makes for a wholesome snack or appetizer that is both satisfying and nourishing.

    FAQs (Frequently Asked Questions)


    Q: Can I make spicy corn chaat ahead of time?

    A: While it’s best enjoyed fresh, you can prepare the components ahead of time and assemble the chaat just before serving to maintain its crunchiness and flavors.

    Q: Can I use canned corn for this recipe?

    A: While fresh or frozen corn is preferable, you can use canned corn if that’s what you have on hand. Just make sure to drain and rinse the corn before using it in the chaat.

    Q: Is spicy corn chaat suitable for vegetarians and vegans?

    A: Yes, this recipe is completely vegetarian and vegan-friendly, as it only contains plant-based ingredients.

    If you liked the recipe here are some other recipes that you may like too 

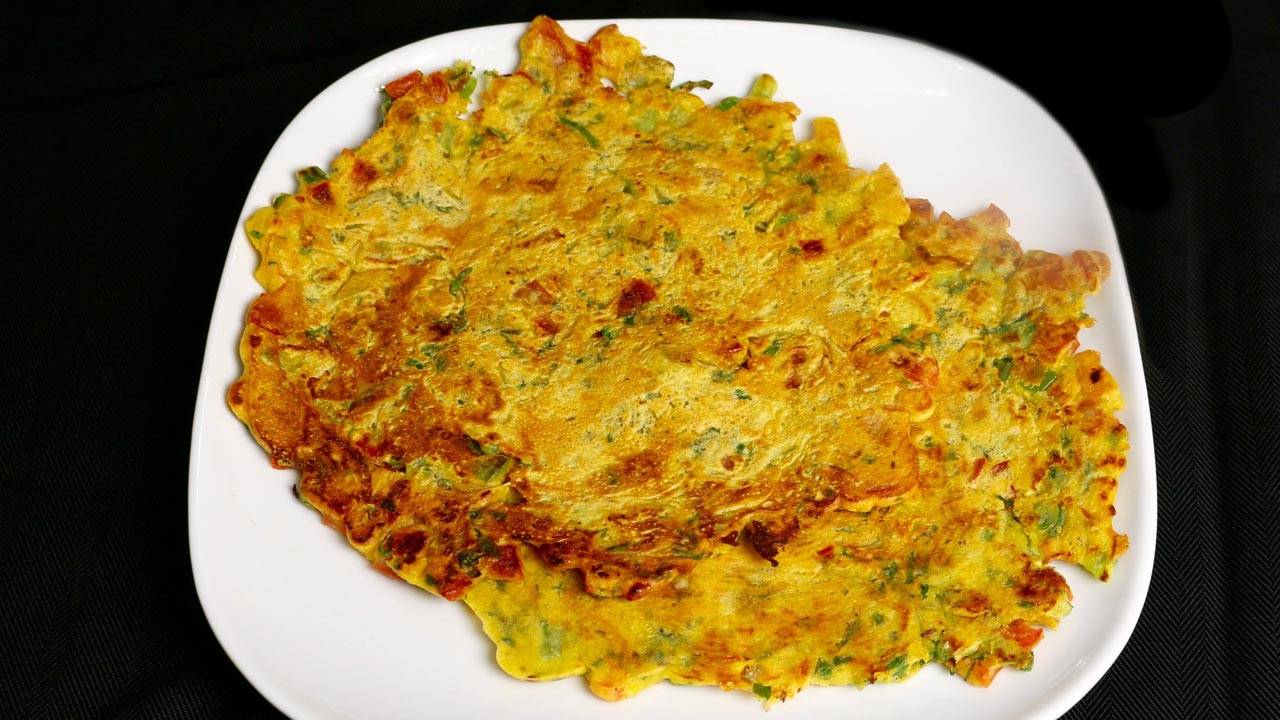
    Vegetable Cheela: A savory Indian pancake made with mixed vegetables and chickpea flour.

    Palak (Spinach) Paneer: A classic North Indian dish made with spinach and paneer cheese cooked in a creamy tomato-based sauce.

    Shahi Pulao (Vegetable Pulao): A flavorful rice dish made with spiced basmati rice and vegetables.

    Gobi (Cauliflower) Manchurian: Crispy cauliflower florets tossed in a tangy and spicy Indo-Chinese sauce.

    Aloo (Potato) Paratha: Whole wheat flatbread stuffed with spiced mashed potatoes and cooked on a griddle.

    Mango Lassi: A refreshing yogurt-based drink flavored with ripe mangoes and a hint of cardamom.

    Besan Ladoo: Traditional Indian sweet made with roasted chickpea flour, ghee, and sugar.

  • Mediterranean Quinoa Salad

    Mediterranean Quinoa Salad

    Quinoa salad is a healthy and delicious salad. This bright and colorful salad is also a great summertime recipe. For this particular salad, I made my own homemade dressing with ginger. Ginger gives a refreshing kick to the salad. Quinoa is naturally gluten free and also high in protein.

    • 1/2 cup quinoa
    • 1 cup water
    • 1 large romaine lettuce chopped, discard the outside leaves
    • 2 cup arugula
    • 1 cup English cucumber cut into 1/4-inch cubes
    • 1 medium size tomato diced
    • 1 orange peeled and diced
    • About 1/4 cup feta cheese

    Dressing

    • 1 tablespoon vinegar, I am using rice vinegar
    • 2 tablespoons lemon juice
    • 2 tablespoons olive oil
    • 1 teaspoon sugar
    • 1/2 teaspoon salt
    • 1/4 teaspoon black pepper
    • 1/4 teaspoon mustard (rai) powder
    • 1 teaspoon ginger juice*
    1. For dressing: add all the dressing ingredients together mix it well making sure sugar is dissolved. Set aside. * To make ginger juice shred the ginger using fine shredder or zester, and squeeze the juice with fingers.

    2. Bring quinoa and water to a boil in a saucepan. Reduce heat to medium-low, cover, and simmer until all the water has been absorbed, this will take about 12 minutes. Set aside to cool.

    3. In a salad bowl layered all the ingredients, spread the lettuce, arugula, quinoa save about 1/4 cup, then cucumber, tomatoes, and orange. Drizzle the salad dressing, sprinkle the saved quinoa and the last spread the feta cheese.

    Salad, Soup
    Indian

  • Khaman (Besan) Dhokla

    Khaman (Besan) Dhokla

    Khaman (Besan) dhokla, is a tasty Gujarati snack. This salty vegan, gluten free snack has a texture similar to cake. This is a popular street food in Gujarat.  The best snacks are usually easy and quick to make. This is a delicious guilt-free snack, or side dish that can go with any meal.

    • 1-1/2 cups besan (Gram flour)
    • 2 tablespoons Sooji (rava, Semolina)
    • 1/2 teaspoon Citric acid
    • 1/8 teaspoon asafetida (hing)
    • 1/4 teaspoon turmeric (haldi)
    • 3 teaspoons sugar
    • 1 teaspoon ginger paste
    • 1 green chili finely chopped
    • 1 teaspoon salt
    • 1-1/4 cups water use as needed to make pouring consistency
    • 2-1/2 teaspoons Eno (fruit Salt)

    For Seasoning:

    • 2 tablespoons oil
    • 1/2 teaspoon mustard seeds (rai)
    • 1/2 teaspoon sesame seeds (til)
    • 4-5 curry leaves optional
    • 2 green chili seeded and cut into 4 length wise

    Also need 2-3 tablespoons hot water

    Utensils to steam Dhokla

    • Dhokla maker – or, if you don’t have that, use all three of the following: that’s what I am also using
    • Covered pan large enough to hold round cake rack
    • Round cake-cooling rack
    • Round 9” cake pan
    1. Sift the besan, and make batter should be smooth and pouring consistency. Add all the ingredients except the ENO to the batter sooji, salt, sugar, asafetida, ginger, citric acid and green chili, mix it well, if needed add little more water. Set aside. We will add the ENO just before steaming.

    2. Grease the cake pan and set aside.

    3. Set the cake rack in the pan. Add water, just enough to touch the cake rack, and bring to a boil. This will be used to steam the dhokla.

    4. When the water boils, turn down the heat to medium.

    5. Add the ENO to the batter and beat the batter for a minute, batter will become airy and frothy. Quickly pour batter into a greased cake pan. Place the cake pan into the saucepan over the cake rack. Cover the pan. Steam for about 8 minutes on medium heat. Do not open the pen in between.

    6. Check Dhokla with a knife. If the knife comes out clean, dhokla is ready. Turn off the heat and let it sit over the stem for 4-5 minutes covered.

    Prepare the seasoning

    1. Heat oil in a small pan over medium heat moderately. Add mustard seeds, and sesame seeds stir for 3-4 seconds, add green chili stir and curry leaves, stir for few seconds. Cover the pan and turn off the heat. Careful curry leaves will splatter.

    2. First drizzle the hot water over dhokla this will keep the dhokla moist. Then drizzle the seasoning over.

    3. Cut them in squares.

    4. Serve with Hari cilantro chutney. Taste best when it is served warm.

    Suggestion

    1. Khaman Dhokla can be refrigerated for a few days. Before serving, heat Dhokla in a microwave or heat over steam.
    Appetizer
    Indian

    Instructions for How to make Khaman Dhokla

    Khaman Dhokla is a steamed savory cake made from fermented chickpea flour batter, typically served as an appetizer or snack in Indian cuisine. It’s a versatile dish that fits well within various dietary preferences such as being suitable for diabetics, low cholesterol, low fat, lunch box suggestions, street food recipes, and vegan diets.

    This light and fluffy snack is perfect for those looking for healthier options due to its low-fat content and absence of cholesterol. It can also be an ideal addition to lunch boxes, providing a nutritious and flavorful alternative to traditional snacks. Moreover, Khaman Dhokla’s vegan ingredients make it inclusive for those adhering to plant-based diets.

    With its savory taste and soft texture, Khaman Dhokla is a popular choice for street food enthusiasts seeking satisfying yet wholesome options. Its ability to cater to various dietary needs while offering delicious flavors makes it a versatile and beloved dish in Indian cuisine.

    Understanding the Method: 

    To begin our journey towards mastering Khaman Dhokla, it’s essential to understand the method behind its preparation. The process involves creating a smooth batter from besan (gram flour) along with a blend of spices and other ingredients. The batter is then steamed until it rises and cooks to perfection. Let’s delve into the detailed steps involved in making this savory delight:

    • Preparing the Batter: 

      • Sift the besan to ensure a smooth texture.
      • Gradually add water to achieve a pouring consistency, ensuring there are no lumps.
      • Incorporate additional ingredients such as sooji (semolina), salt, sugar, asafetida, ginger, citric acid, and green chili, mixing thoroughly.
      • Adjust the batter consistency if necessary by adding a little more water.
      • Set aside the batter and refrain from adding ENO (fruit salt) at this stage.
    • Setting up for Steaming:

      • Grease a cake pan and set it aside.
      • Place a cake rack inside a saucepan and add water, ensuring it touches the cake rack.
      • Bring the water to a boil over medium heat.
    • Adding ENO and Steaming: 

      • Just before steaming, add ENO to the batter and beat vigorously for a minute until the batter becomes airy and frothy.
      • Quickly pour the batter into the greased cake pan and place it inside the saucepan over the cake rack.
      • Cover the saucepan and steam the dhokla for approximately 8 minutes on medium heat without opening the lid.
      • To check for doneness, insert a knife into the dhokla; if it comes out clean, the dhokla is ready.
      • Turn off the heat and let the dhokla sit over the steam for 4-5 minutes, covered.
    • Preparing the Seasoning:

      • Heat oil in a small pan over medium heat.
      • Add mustard seeds and sesame seeds, stirring for a few seconds until they begin to crackle.
      • Incorporate green chilies and curry leaves, stirring briefly.
      • Cover the pan and turn off the heat, being cautious as curry leaves may splatter.
    • Finishing Touches and Serving: 

      • Drizzle hot water over the steamed dhokla to keep it moist.
      • Pour the prepared seasoning over the dhokla.
      • Cut the dhokla into squares for serving.
      • Serve warm with Hari cilantro chutney for a delightful culinary experience.

    Tips for Perfecting Khaman Dhokla:

    Now that we’ve outlined the method, let’s delve into some essential tips to ensure your Khaman Dhokla turns out perfect every time:

    • Consistency is Key: Achieving the right consistency of the batter is crucial for fluffy dhoklas. Aim for a smooth, lump-free batter with a pouring consistency.
    • Timeliness: Once ENO is added to the batter, it should be steamed immediately to ensure the dhokla rises properly.
    • Steaming Technique: Maintain a medium heat while steaming and resist the urge to open the lid during the steaming process, as this may affect the dhokla’s texture.
    • Seasoning Sensation: The tempering or seasoning adds an extra layer of flavor to the dhokla. Ensure the mustard seeds crackle and the curry leaves release their aroma for the perfect seasoning.
    • Serving Suggestions: Khaman Dhokla tastes best when served warm with fresh Hari cilantro chutney. The combination of flavors elevates the culinary experience.

    Frequently Asked Questions (FAQs):

    Here are some common queries regarding Khaman Dhokla along with their answers:

    Can I make Khaman Dhokla in advance? 

    Yes, you can prepare Khaman Dhokla in advance and refrigerate it for a few days. Before serving, reheat the dhokla either in a microwave or by steaming.

    Can I customize the spice level of Khaman Dhokla? 

    Absolutely! Feel free to adjust the quantity of green chilies according to your spice preference. You can also omit them altogether for a milder flavor.

    What can I serve with Khaman Dhokla besides chutney? 

    Khaman Dhokla pairs well with a variety of accompaniments such as tamarind chutney, mint chutney, or even a tangy tomato-based sauce.

    Can I freeze Khaman Dhokla for later use? 

    While it’s best enjoyed fresh, you can freeze Khaman Dhokla for a short period. Ensure it is tightly wrapped to prevent freezer burn, and thaw it thoroughly before reheating.

    Health Benefits of Khaman Dhokla: 

    Apart from its delicious taste, Khaman Dhokla offers several health benefits

    • Rich in Protein: Gram flour, the main ingredient in Khaman Dhokla, is an excellent source of plant-based protein, making it a nutritious snack or meal option.
    • Low in Calories: Steamed rather than fried, Khaman Dhokla is relatively low in calories compared to other fried snacks, making it a healthier choice for weight-conscious individuals.
    • Gluten-Free: Since Khaman Dhokla is made from gram flour, it is naturally gluten-free, catering to individuals with gluten intolerance or celiac disease.
    • Easy to Digest: The steaming process makes Khaman Dhokla light and easy to digest, making it suitable for individuals with digestive sensitivities.

    Mastering the art of making Khaman Dhokla is a rewarding culinary journey. By following the detailed method, incorporating essential tips, and exploring serving suggestions and health benefits, you can elevate your dhokla-making skills to new heights. Whether enjoyed as a snack, breakfast item, or party appetizer, Khaman Dhokla is sure to tantalize your taste buds and leave you craving for more. So, gather your ingredients, embark on this flavorful adventure, and savor the joy of creating and indulging in homemade Khaman Dhokla!

    If you’re looking to explore more Indian recipes, appetizers, beverages, and desserts, be sure to check out the following links on Manjula’s Kitchen. Here are some links to recipes on Manjula’s Kitchen official website: Vegetable Pakoras, Kaju Katli (Cashew Burfi), Baingan Bharta (Roasted Eggplant), Matar (Green Peas) Paneer, Besan Ladoo.


  • Eggless Omelet (Vegan)

    Eggless Omelet (Vegan)

    This Eggless Omelet is similar to a variation of besan chila. I combine lots of vegetables including bell pepper, spinach, and tomatoes and then add in some light spices. Now you have a healthy and delicious choice for breakfast or light lunch. It is also vegan and gluten free!

    • 3/4 cup besan (gram flour) available in Indian grocery stores
    • 1/2 teaspoon salt
    • 1/2 teaspoon cumin seeds (jeera)
    • 1/8 teaspoon black pepper
    • 1 green chili finely chopped, optional
    • 1/2 cup tomato seeded and finely chopped
    • 1/2 cup finely chopped spinach
    • 1/2 cup finely chopped bell pepper
    • 1/2 cup water to make batter
    • 2 tablespoons oil

    Use vegetables quantity as a guide line, it can be little more or less, also change the vegetables to your choice.

    1. Mix all the dry ingredients together: besan, cumin seeds, black pepper and salt. Add the water slowly to make a smooth batter, the consistency of pancake batter or Dosa batter. Add the green chilies, tomato, spinach, and bell pepper. Mix well.

    2. Heat the skillet on medium heat (Use a non-stick skillet) skillet should be moderately hot. Test by sprinkling a few drops of water on it. Water should sizzle right away.

    3. Pour approx. 1/2cup of the batter mixture into the skillet and spread evenly with the back of a spoon. Starting from the center, spiral the batter outward evenly to form a circle about 7” in diameter.

    4. When the batter starts to dry, gently spread about two teaspoons of oil over it. Wait about 30 seconds; flip the omelet using a flat spatula.

    5. Press the omelet lightly all around with the spatula to make the omelet cook evenly. Turn the omelet three or four times, until cook well and golden brown on both sides.

    6. Repeat for the remaining omelet.

    Serve this with mint chutney

    Bread
    Indian

  • Spinach Couscous Salad

    Spinach Couscous Salad

    There's nothing like a fresh salad. They are healthy and contrary to popular belief they can be quite filling and extremely satisfying! Spinach Couscous Salad is made with fresh spinach, arugula, couscous, sliced red grapes, cheese crumbles, pecans and my special house-dressing!

    • 1/2 cup couscous
    • 1 tablespoon oil
    • 1/4 teaspoon salt
    • 2 cups spinach, steamed removed and roughly chopped
    • 2 cups arugula roughly chopped
    • 1/4 cup pecans roasted and roughly chopped
    • 1/2 cup seedless red grapes cut in half
    • 1/2 cup pear cut into bite size pieces
    • 3 tablespoons feta cheese crumbled
    • 2/3 cup water

    Dressing

    • 2 tablespoons balsamic vinegar
    • 2 tablespoons olive oil
    • 2 teaspoons sugar
    • ½ teaspoon salt
    • ¼ teaspoon black pepper
    • ½ teaspoon mustard (rai) powder
    • 1 teaspoon ginger juice*
    1. For dressing: add all the dressing ingredients together mix it well making sure sugar is dissolved. Set aside. * To make ginger juice shred the ginger using fine shredder or zester, and squeeze the juice with fingers.

    2. Boil the water in a saucepan over medium high heat with oil and salt. Add couscous mix it, cover the pan and turn off the heat. Couscous should be ready in about 5-6 minutes, fluff couscous with a fork. Set aside.

    3. Toss spinach, arugula, couscous, pecans, and grapes together pour the dressing over and toss, sprinkle the feta cheese.

    Salad
    Indian

  • Kale and Tofu Salad

    Kale and Tofu Salad

    This delicious Kale and Tofu salad with apple wedges, cranberries and ginger dressing will compliment any meal. This salad is nutritious, healthy, tasty and full of flavor.

    • 2 cups Kale stalks removed and leaves thinly sliced
    • Approx. 5 oz firm tofu in small cubes, pat dry, this will make about 1 cup
    • 1/2 apple thin sliced makes about 1/2 cup of sliced apple
    • 1/2 cup cucumber cubed in small pieces
    • 2 tablespoons dry cranberry
    • 2 tablespoons sliced almonds toasted
    • 1-1/2 tablespoon olive oil divided
    • 1 tablespoon ginger juice
    • 1 teaspoon lemon juice
    • 1/2 teaspoon salt
    • 1/4 teaspoon black pepper
    • 1/2 teaspoon sugar
    1. Pet dry the tofu well, heat ½ tablespoon of oil over medium heat in a small frying pan and stir fry cubed tofu until it is light brown. Let it sit until tofu is at room temperature before adding to the salad.

    2. For dressing! In a small bowl add remaining oil, ginger juice, lemon juice, black pepper, salt and sugar, mix it well.

    3. In a bowl add the kale, and pour the dressing over kale rub until the kale starts to soften. It will take about 1-2 minute. Let it sit for about 15 minutes, kale is nicely marinated.

    4. In a salad bowl add kale, tofu, apple, cucumber and cranberries toss it well.

    5. Add the sliced almonds for a nice crunch.

    You will sure enjoy this kale salad for a light and healthy side dish.

    Salad
    Indian

  • Stir-Fry Cabbage Salad

    Stir-Fry Cabbage Salad

    Stir-Fry Cabbage salad is a healthy mix of cabbage, carrots, beans and bell pepper, garnish with coconut. This color full crunchy salad is low in calories and very satisfying.

    Ingredients

    • 2 cups cabbage cut into thin slices
    • 1/2 cup carrots cut into thin slices
    • 1/2 cup red and green bell pepper cut into thin slices
    • 1/4 cup green beans cut in half  lengthwise and then into pieces 1½” long
    • 2 teaspoons oil
    • 1/2 teaspoon mustard seeds
    • 2 whole red peppers
    • Few leaves of curry leaves
    • 1/4 teaspoon salt adjust to taste
    • Pinch of sugar
    • 1/4 teaspoon lemon juice
    • 2 tablespoon shredded coconut

    Method

    1. Heat the oil in frying pan over medium high heat.

    2. Add mustard seeds, and curry leaves. Add the red pepper as the seeds crack. (As you add the curry leaves it will splatter; be careful.) Add cabbage, carrots, bell pepper, and beans. Stir-fry three to four minutes, until the vegetables are crisp but not overcooked.

    3. Turn off the heat, add salt, lemon juice and coconut,  mix well.

    4. Serve warm or at room temperature.

    Variations

    Replace the coconut with roasted crushed peanuts.

    Salad
    Indian

  • Stuffed Karela (Bitter Melon)

    Stuffed Karela (Bitter Melon)

    Stuffed karela makes a great side dish to any meal. Karelas have many health benefits including a home remedy for diabetes.

    For the Marinate:

    • 4 karela (bitter melon )
    • 1 tbsp salt
    • 1 tbsp lemon juice

    For the Filling

    • 2 tbsp oil
    • 1 tsp cumin seeds (jeera)
    • 1/8 tsp asafetida (hing)
    • 2 tbsp besan (gram flour)
    • 1 tbsp coriander powder (dhania)
    • 1 tbso fennel seed powder (saunf)
    • 1-1/2 tsp salt
    • 1/2 tsp turmeric (haldi)
    • 1/2 tsp red chili powder
    • 1-1/2 tbsp mango powder (amchoor)

    For Cooking

    • 2 tbsp oil
    • 1/2 tsp salt
    • also need thread to wrap

    Preparing the Kerala

    1. Wash karelas thoroughly and using a knife, scrape the skin. Set the scrapes aside.
    2. Make a slit in the karelas length wise and remove the seeds. Add karelas and the skin scrapings to a bowl. Mix and sprinkle with salt and lemon juice. Let it marinate for at least an hour.
    3. Squeeze the karelas to remove all the marinade. Wash karelas twice with hot water and then squeeze out all the water. Separate the scrapings from the whole karelas.

    Preparing the Filling:

    1. Heat the oil in a saucepan. Test the heat by adding one cumin seed to the oil; if the seed cracks right away, the oil is ready. Add the cumin seeds and asafetida to the oil. After the cumin seeds crack, add the karela scrapings and stir fry for about 2 minutes.
    2. Add gram flour (besan) and stir-fry for another minute.
    3. Add all the remaining dry spices: coriander powder, fennel powder, turmeric, chili powder, and mango powder. Sauté for a minute and then turn off the heat.
    4. Stuff the split karelas with this spice mixture (there should be some spice mix remaining, which will be used later). Tie the karelas with a thread so that the stuffing does not come out while cooking.

    Cooking the Stuffed karelas:

    1. Add 2 tablespoons of oil in a sauce pan over medium heat. Spread the stuffed karelas in the pan and sprinkle with salt. Cover the pan and let it cook for about 2 minutes.
    2. Turn the karelas over to the uncooked side and cook for about 1 minute. Repeat until all four sides of the karelas are cooked.
    3. Sprinkle 2 tablespoons of water and the remaining spice mixture over the karelas. Cover the pan and let it cook for 2 more minutes.
    4. Remove the lid to see if the karelas are tender. Gently turn them over a few more times, making sure they are covered with the spice mixture.

    Notes

    Stuffed karela can be served hot or cold and can be refrigerated up to a week.

    Variations

    For a slightly sweeter taste add 2 tablespoons of sugar to the cooked spice filling, prior to stuffing the karela.

    I like to Serve Karela with Urad Dal Tadka, Mixed Dal, Dal Makhini and Rice

    Side Dish
    Indian
    Bitter Melon, Diabetic Friendly, Healthy Side Dish

  • Lentil Vegetable Soup

    Lentil Vegetable Soup

    Lentil soup is healthy and very satisfying dish. Its a great soup for lunch served with bread.

    Ingredients:

    • 1/2 cup lentils (masoor dal)
    • 1 cup of carrots, sliced in 1/2-inch pieces
    • 1/2  cup of green string beans, sliced ½ inch pieces
    • 1 cup of celery, sliced in ½ inch pieces
    • 3 medium size tomatoes cut into 8 pieces
    • About ½ inch ginger thin sliced
    • 1½ teaspoon salt
    • 1/2 teaspoon turmeric (haldi)
    • 1/2  teaspoon black pepper

    Chaunk (seasoning):

    • 2 tablespoon clarified butter (ghee) or 2 tablespoons oil
    • 1/2 teaspoon cumin seed (jeera)
    • 1/2  teaspoon garam masala
    • Half a lemon

    Method:

    1. Wash lentils and soak in 2 cups of water for 1 hour or longer. Once soaked, the lentils should be about double in volume.

    2. Heat 4 cups of water in a pressure cooker on medium high heat. Next add soaked lentils, salt, turmeric, black pepper, ginger, carrots, green beans, celery, and tomatoes.

    3. Close the pressure cooker and put the weight on (or seal the exhaust).

    4. As the pressure cooker starts steaming turn the heat down to medium and cook for about 6 minutes.

    5. Turn off the heat and wait until the steam has stopped before opening the pressure cooker.

    6. Mix dal well, if dal is thick add more boiling water and make the consistency as you desire. Soup should be chunky.

    Chaunk (seasoning):

    1. For seasoning (chaunk) heat the butter in a small saucepan, add cumin seeds and wait until cumin seed crack. Then pour it over the soup.

    2. Add garam masala to the soup and mix it well.

    3. Before serving squeeze, a few drops of lemon juice.

    Soup
    Indian

    Introduction to Lentil Vegetable Soup:

    Lentil Vegetable Soup is a nutritious and hearty dish that combines lentils with various vegetables to create a flavorful and satisfying meal. It is suitable for individuals with diabetes, as it is low in cholesterol, low in fat, and gluten-free. Additionally, it is high in protein, making it a great option for those looking to increase their protein intake. This soup is perfect for winter months and can be easily packed into lunch boxes for a nutritious meal on the go. It is a wholesome option for anyone looking for a healthy and filling soup or salad option.

    Lentil Vegetable Soup is a comforting and nutritious dish that is perfect for chilly days or whenever you’re craving a hearty meal. Packed with protein-rich lentils and a variety of colorful vegetables, this soup is not only delicious but also easy to make. In this recipe, we’ll show you how to make red lentil vegetable soup step by step, so you can enjoy its warmth and goodness at home.

    Step 1: Gathering Ingredients:

    To begin making Lentil Vegetable Soup, gather all the necessary ingredients. You’ll need red lentils, mixed vegetables such as carrots, celery, and bell peppers, along with tomatoes. Having all the ingredients prepared and ready will make the cooking process smoother and more efficient.

    Step 2: Preparation of Vegetables:

    Start by washing and chopping the vegetables for the soup. Dice the carrots, celery, and bell peppers into small, bite-sized pieces. Finely chop tomatoes, mince and dice the tomatoes. Preparing the vegetables in advance ensures that they cook evenly and helps to build layers of flavor in the soup.

    Step 3: Sauteing Aromatics:

    In a large pot or Dutch oven, heat olive oil over medium heat. Then, add the minced and cook for another minute until aromatic. The combination forms the base of the soup and adds depth of flavor.

    Step 4: Adding Vegetables and Lentils:

    Once the aromatics are sautéed, add the chopped vegetables to the pot. Stir well to coat the vegetables with mixture. Then, add the rinsed red lentils to the pot along with vegetable broth or water. Stir everything together and bring the soup to a gentle simmer.

    Step 5: Simmering the Soup:

    Let the Lentil Vegetable Soup simmer over medium-low heat for about 20-25 minutes, or until the lentils and vegetables are tender. Stir occasionally to prevent the lentils from sticking to the bottom of the pot. The soup will thicken as it cooks, creating a hearty and satisfying texture.

    Step 6: Seasoning and Adjustments:

    Once the soup is cooked through, season it with salt, pepper, and any other desired herbs or spices such as thyme, oregano, or bay leaves. Taste and adjust the seasoning according to your preference. You can also add a splash of lemon juice for a hint of acidity and brightness.

    Step 7: Finishing Touches:

    Before serving, garnish the Lentil Vegetable Soup with freshly chopped parsley or cilantro for a pop of color and freshness. Ladle the hot soup into bowls and serve with crusty bread or crackers for a complete meal. This hearty and nutritious soup is sure to warm you up from the inside out.

    Tips for Making the Best Lentil Vegetable Soup:

    Use Fresh Ingredients: Fresh vegetables and herbs will give the soup the best flavor and texture.

    Don’t Overcook Lentils: Be careful not to overcook the lentils, as they can become mushy. Cook until they are tender but still hold their shape.

    Adjust Consistency: If the soup is too thick, you can thin it out with more vegetable broth or water. If it’s too thin, let it simmer for longer to reduce and thicken.

    Variations of Lentil Vegetable Soup:

    Curried Lentil Vegetable Soup: Add curry powder or paste to the soup for a spicy and aromatic twist.

    Coconut Lentil Vegetable Soup: Stir in coconut milk for a creamy and indulgent flavor.

    Italian Lentil Vegetable Soup: Add diced tomatoes, cannellini beans, and Italian herbs such as basil and rosemary for an Italian-inspired version of the soup.

    Benefits of Including Lentil Vegetable Soup in Your Diet:

    Rich in Protein: Lentils are a great source of plant-based protein, making this soup a filling and satisfying meal.

    Loaded with Fiber: Both lentils and vegetables are high in fiber, which promotes digestive health and helps keep you feeling full and satisfied.

    Packed with Vitamins and Minerals: Lentil Vegetable Soup is packed with essential nutrients such as vitamin C, vitamin A, iron, and potassium, contributing to overall health and well-being.

    Frequently Asked Questions (FAQs) about Lentil Vegetable Soup:

    Q: Can I freeze Lentil Vegetable Soup?

    A: Yes, Lentil Vegetable Soup freezes well. Let it cool completely before transferring to freezer-safe containers. Thaw in the refrigerator overnight before reheating.

    Q: Can I use other types of lentils in this soup?

    A: Yes, you can use other varieties of lentils such as green lentils or brown lentils if you prefer. Keep in mind that cooking times may vary.

    Q: Is Lentil Vegetable Soup gluten-free?

    A: Yes, Lentil Vegetable Soup is naturally gluten-free, making it suitable for those with gluten intolerance or celiac disease.

    For more delicious soup recipes, visit Manjula’s Kitchen. Explore a variety of vegetarian soups, including lentil soups, vegetable soups, and more, to warm up your soul and tantalize your taste buds.

  • Black Eyed Pea Salad

    Black Eyed Pea Salad

    Black-eyed pea salad is colorful and delicious, with ginger dressing for a nice tangy flavor. It works well for a quick & easy light lunch. Black-eyed pea salads are easy to make.

    Ingredients:

    • 1 15 oz can of black-eyed peas (lobhia)
    • 1 medium russet boiled potatoes, peeled and chopped into small cubes (about double the size of blacked eyed peas)
    • 1/4  cup chopped green bell pepper (about double the size of blacked eyed peas)
    • 2 medium seeded and finely chopped tomatoes
    • 1 green chili seeded and chopped (hari mirch)
    • About 1 teaspoon thinly sliced fresh ginger (adrack)
    • 2 tablespoon finely chopped mint (podina)
    • 2 tablespoon finely chopped cilantro (hara dhania)
    • 1 tablespoon oil

    for Salad Dressing:

    • 2 tablespoon olive oil
    • 1 tablespoon lemon juice
    • 1 tablespoon ginger juice
    • 3/4  teaspoon salt adjust to taste
    • 1/2  teaspoon black pepper
    • 1/2  teaspoon roasted ground cumin seed

    Method

    1. Drain and wash the black-eyed peas.

    2. Heat the oil on medium high heat. Add black-eyed peas, and potatoes. Stir-fry for two minutes.

    3. Turn off the heat and let it come to room temperature.

    4. Mix black-eyed peas with the chopped potatoes, tomatoes, bell peppers, and herbs.

    5. Mix all the salad dressing ingredients together.

    6. Mix the salad and dressing and let the salad marinate ten minutes before serving.

    Salad
    Indian

  • Asparagus With Ginger

    Asparagus Ginger Stir Fry: A Flavorful Delight

    Asparagus Ginger is a flavorful appetizer that caters to various dietary needs, including being suitable for those who are diabetic, gluten-free, and seeking low-cholesterol and low-fat options. Additionally, it’s a vegan dish featuring fresh asparagus delicately sautéed with aromatic ginger, highlighting the natural flavors of the vegetables without added fats. 

    In this recipe, we combine the vibrant flavors of asparagus and ginger to create a delightful stir-fry dish that is both nutritious and delicious. Asparagus, with its tender spears, brings a unique earthy flavor, while ginger adds a refreshing zing, making this dish a perfect addition to any meal.

    Step 1: Preparing the Ingredients

    To begin, gather all the necessary ingredients for this asparagus ginger recipe. You will need fresh asparagus, ginger, oil, salt, and pepper. Wash the asparagus thoroughly and trim off the tough ends. Peel and finely chop the ginger, ensuring you have enough to infuse the dish with its aromatic flavor.

    Step 2: Sautéing the Asparagus and Ginger

    In a skillet or wok, heat some oil over medium-high heat. Add the chopped ginger to the hot oil and sauté for a minute or two until it becomes fragrant. The aroma of the ginger asparagus combination will start to fill your kitchen, enticing your senses and preparing you for the delightful dish to come.

    Step 3: Adding the Asparagus

    Once the ginger is aromatic, add the trimmed asparagus spears to the skillet. Stir-fry the asparagus and ginger together, ensuring that the spears are coated evenly with the ginger-infused oil. Season with salt and pepper to taste, enhancing the natural flavors of the dish.

    Step 4: Cooking to Perfection

    Continue to stir-fry the asparagus ginger stir-fry over medium-high heat until the asparagus is tender yet still crisp, typically for about 5-7 minutes. Be mindful not to overcook the asparagus, as you want to preserve its vibrant green color and crisp texture, providing a satisfying crunch with every bite.

    Step 5: Serving and Enjoying

    Once the asparagus and ginger are cooked to perfection, transfer the stir-fry to a serving dish and garnish with some freshly chopped cilantro or sesame seeds for an added touch of flavor and visual appeal. Serve hot alongside your favorite main course or enjoy it as a standalone dish.

    Tips for Success

    • For an extra burst of flavor, you can add minced garlic along with the ginger.
    • Feel free to incorporate other vegetables such as bell peppers or snap peas for added color and variety.
    • Adjust the seasoning according to your taste preferences, adding more ginger for a stronger flavor or a dash of soy sauce for added depth.

    Variations to Explore

    • For a spicy kick, sprinkle some red pepper flakes or drizzle with chili oil before serving.
    • Experiment with different cooking methods such as grilling or roasting the asparagus for a change in texture and flavor.

    Benefits of Asparagus and Ginger

    Asparagus is a nutrient-dense vegetable rich in vitamins A, C, and K, as well as folate and fiber. It supports digestive health, aids in weight loss, and is packed with antioxidants that promote overall well-being. Ginger, on the other hand, is renowned for its anti-inflammatory and immune-boosting properties. It aids in digestion, relieves nausea, and may even help alleviate muscle pain and soreness.

    FAQs (Frequently Asked Questions)

    Q: Can I use frozen asparagus for this recipe?

    A: While fresh asparagus is preferable for its flavor and texture, you can certainly use frozen asparagus if that’s what you have on hand. Just be sure to thaw it thoroughly before cooking and adjust the cooking time accordingly.

    Q: How do I store leftover asparagus ginger stir-fry?

    A: Store any leftovers in an airtight container in the refrigerator for up to 2-3 days. Reheat gently in the microwave or on the stovetop until heated through before serving.

    Q: Can I make this dish ahead of time?

    A: While this dish is best enjoyed fresh, you can prepare the ingredients ahead of time and stir-fry them just before serving to retain the optimal texture and flavor.

    More Recipes to Explore (H2)

    If you enjoyed making these masala peanuts, why not try your hand at some other mouthwatering recipes from Manjula’s Kitchen?

    Explore these recipes and more for a culinary journey through the vibrant and diverse flavors of Indian cuisine.

  • Potato Curry with Yogurt Gravy

    Potato Curry With Yogurt

    This recipe consists of potatoes combined with a creamy yogurt gravy its a nice creamy gluten-free recipe. It tastes great with Puris.

    • 2 large boiled potatoes
    • 2 tbsp oil
    • 1/2 tsp cumin seeds (jeera)
    • 1/8 tsp asafetida (hing)
    • 2 tsp besan (gram flour)
    • 1 bay leaf
    • 4 tbsp yogurt (dani, curd)
    • 1 tsp grated ginger
    • 1 tsp green chili finely chopped
    • 1 tbsp doriander powder (dhania)
    • 1/2 tsp turmeric (haldi)
    • 1/2 tsp peprika
    • 1/4 cup cilantro finely chopped (hara dhania)
    • 1-1/2 cup water use as needed
    1. Boil the potatoes until they are tender. Peel and cut them in bite size pieces.

    2. Mix the yogurt, ginger, green chilies, turmeric powder, coriander powder and paprika into a paste. Set aside.

    3. Heat the oil in a saucepan. Test the heat by adding one cumin seed to the oil. If the cumin seed cracks right away, the oil is ready. Add the cumin seeds and asafetida. After the cumin seeds crack, add the bay leaf and besan (gram flour). Stir for about half a minute until the besan (gram flour) is golden-brown.
    4. Add the yogurt paste and stir-fry for about 2 minutes on medium heat until the paste starts leaving the oil from the sides.
    5. Add about one cup of water. After the gravy boils, let it cook on low-medium heat for 4 to 5 minutes. Adjust the water in gravy to your liking.dd the potatoes and let it cook for 2-3 minutes.

    6. Add the cilantro and salt and continue to cook for a few minutes. Serve with any kind of bread.

    Suggestions

    Use variety of vegetables, such as green peas, carrots, and cauliflowers, as a substitute for the potatoes. The recipe for the gravy remains the same. Serve with Matar Paratha, Gobi Paratha.

    Main Course
    Indian
    Aloo With Dahi, Easy, Kid Friendly, Spicy Potatoes

Exit mobile version