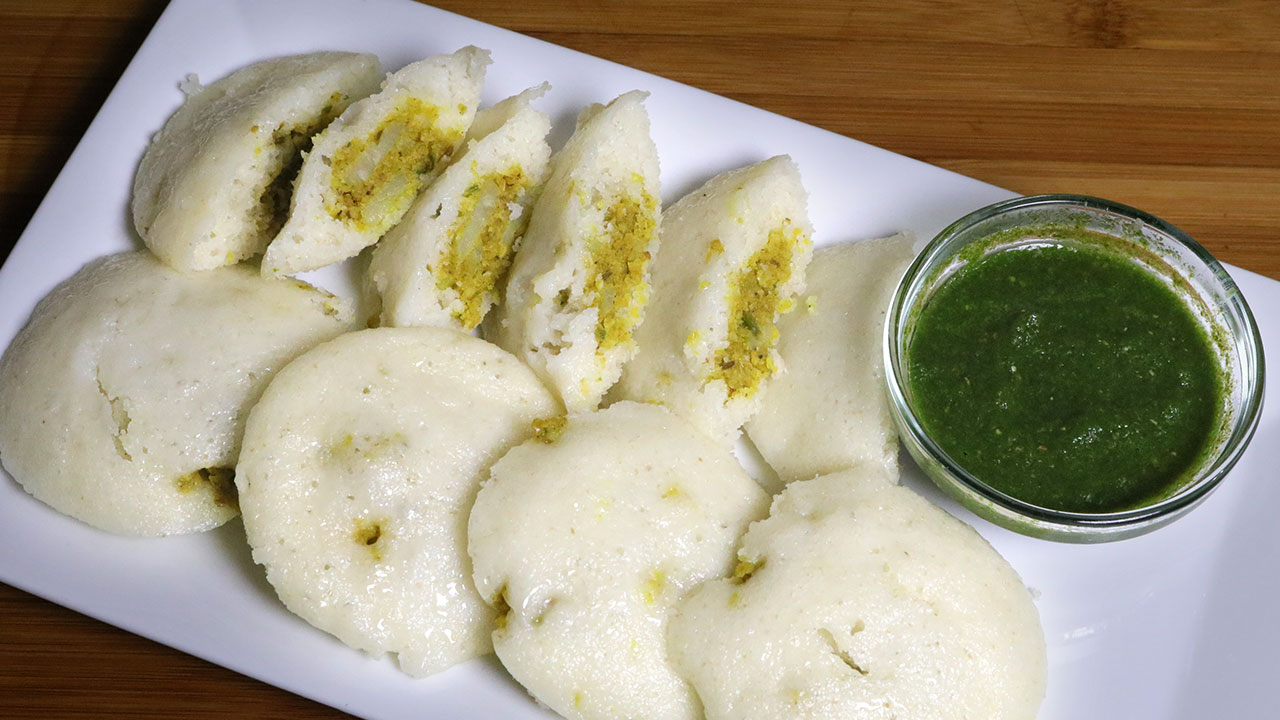
Indian street food is a delightful culinary adventure, filled with vibrant flavors and exciting textures. From crispy indian snacks to tangy chaats, these recipes bring the essence of Indian streets into your kitchen. Let’s explore over 50 Indian street food recipes that are easy to make at home, with a special focus on vegetarian options.
Pani Puri
Pani Puri, also known as Golgappa, is a beloved street food across India. This dish consists of crispy puris filled with spicy, tangy water, tamarind chutney, and a mixture of potatoes and chickpeas. It’s an excellent example of vegetarian Indian street food recipes that offer a burst of flavors in every bite.
Pav Bhaji
Another classic, Pav Bhaji, is a spicy mashed vegetable curry served with buttered pav (bread rolls). This dish is a staple in Indian street food recipes and can be easily made at home. The bhaji is cooked with a blend of spices, giving it a rich and flavorful profile.
Enhancing Your Street Food Menu
To create an authentic street food experience, consider adding a variety of dishes from related categories. Chaat Recipes like Bhel Puri and Sev Puri offer a delightful mix of tangy, sweet, and spicy flavors. For a sweet finish, try Indian Desserts Recipes like Jalebi or Rabri, which complement the savory snacks perfectly. Incorporating Healthy Recipes such as sprouted moong chaat or fruit chaats can provide a nutritious twist to your street food spread.
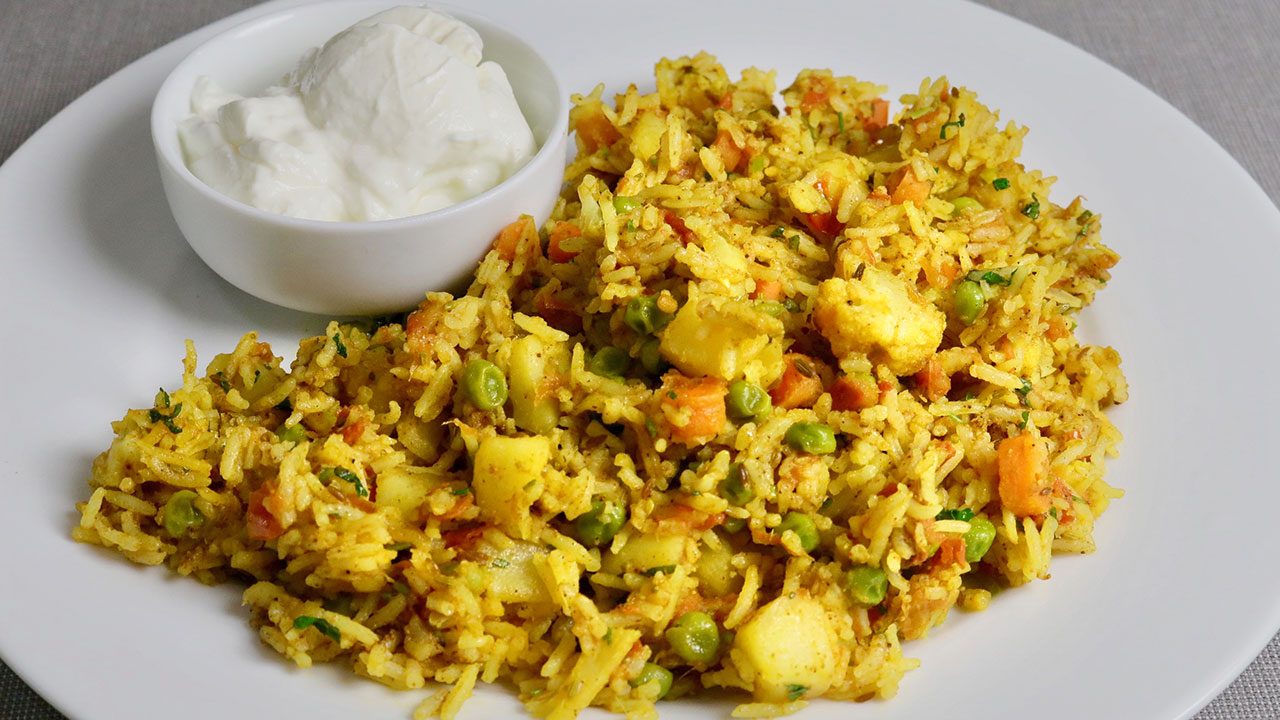
More Easy Indian Street Food Recipes
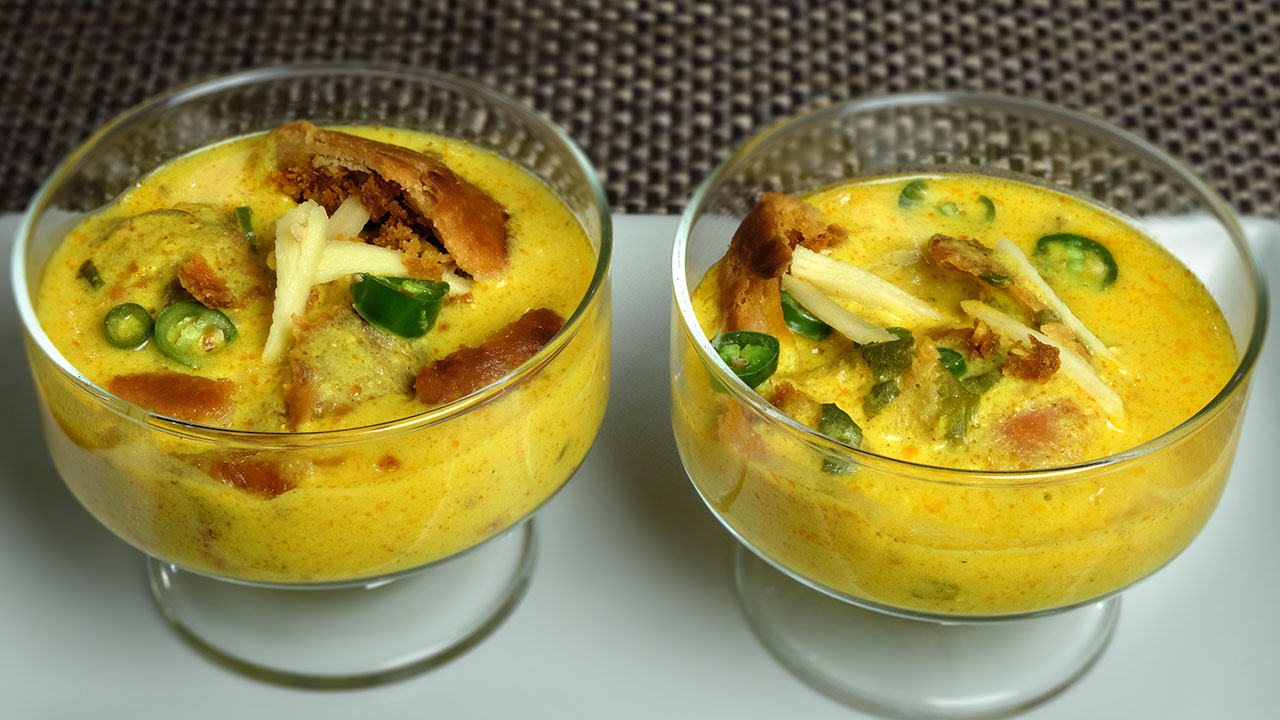
Dahi Bhalla
Dahi Bhalla is a refreshing and flavorful dish made with lentil dumplings soaked in yogurt and topped with various chutneys and spices. This dish exemplifies easy Indian street food recipes that are both delicious and light. It’s perfect for a hot summer day or as a starter for any meal.
Vada Pav
Vada Pav is often referred to as the Indian burger. It consists of a spicy potato fritter (vada) sandwiched between a bun (pav) with chutneys. This iconic street food from Mumbai is a must-try and falls under street food recipes Indian that are easy to replicate at home.
Sweet and Spicy Endings
Jalebi
Jalebi is a spiral-shaped sweet made from fermented batter, deep-fried, and soaked in sugar syrup. It’s crispy on the outside and juicy on the inside, making it a favorite in Indian street food recipes. Enjoy it warm for the best experience.
Kulfi
For a creamy, cold dessert, Kulfi is the way to go. This traditional Indian ice cream is flavored with cardamom, saffron, and pistachios, offering a rich and indulgent end to your street food meal.
Frequently Asked Questions (FAQs)
Q: What are some popular Indian street food recipes?
A: Some popular Indian street food recipes include Pani Puri, Pav Bhaji, Dahi Bhalla, Vada Pav, Jalebi, and Kulfi. These dishes are full of flavor and bring the essence of Indian streets into your home.
Q: How can I make vegetarian Indian street food recipes at home?
A: To make vegetarian Indian street food recipes at home, use fresh vegetables, a variety of spices, and traditional cooking techniques. Dishes like Pani Puri, Pav Bhaji, and Dahi Bhalla are excellent healthy vegetarian recipes.
Q: What are some easy Indian street food recipes for beginners?
A: Some easy Indian street food recipes for beginners include Vada Pav, Dahi Bhalla, and Jalebi. These recipes are straightforward and don’t require advanced cooking skills, making them perfect for those new to Indian street food.
Q: Can I prepare Indian street food recipes in advance?
A: Yes, many Indian street food recipes can be prepared in advance. For example, you can make the puris for Pani Puri, the bhaji for Pav Bhaji, and the batter for Jalebi ahead of time. Store them properly and assemble when ready to serve.
Q: What are some sweet dishes that pair well with Indian street food?
A: Some sweet dishes that pair well with Indian street food include Jalebi, Rabri, and Kulfi. These desserts provide a sweet contrast to the savory and spicy flavors of the main dishes.
Conclusion
Exploring the world of Indian street food recipes is an exciting journey filled with bold flavors and vibrant aromas. Whether you’re looking for vegetarian Indian street food recipes, specific easy Indian street food recipes, or simply want to recreate the street food magic at home, these dishes will bring joy to your table. So, gather your ingredients, try out these recipes, and enjoy the rich and diverse world of Indian street food. Happy cooking and happy eating!
By incorporating these recipes into your menu, you’ll be able to enjoy a wide variety of delicious and nutritious foods. Whether you’re preparing snacks, main courses, or desserts, there’s a street food recipe Indian to suit every taste. Don’t forget to find vegetarian recipes out Manjula’s Kitchen for more inspiration and culinary delights. Happy cooking and happy eating!
Achari Mathries, is a traditional staple snack in North India. They are usually served with spicy pickles, but in this recipe I have added mango pickle spices in the dough instead to add a tangy flavor to the mathri itself. With my family, mathries are a must have while travelling, and now with Achari Mathri, we no longer need the pickle, so it becomes one less thing to carry.
Mix all the ingredients except the water. Add the water little at a time, kneading into a firm dough. Cover the dough and set aside for 15 minutes or more.Prick them with a fork all over the rolled dough, so the Mathries do not puff when frying, and Mathries stay crisp.
Divide the dough into 3 equal parts. Take each part of the dough and make a flat ball shape. Roll them into about 12-inch circles and thickness of salted crackers.
Take a cookie cutter and cut them in rounds. I am using 2-1/2 inch cookie cutter. Use the size and shape to your choice.
Heat the oil in a frying pan on medium heat. The frying pan should have at least 1 inch of oil. To check if the oil is ready, put a small piece of dough in the oil. The dough should make the oil sizzle and come up slowly.
Make sure to place just enough mathris in the oil it should be easy to turn them. Fry the mathris until both sides are light golden-brown. This should take about 7-8 minutes.
Notes
Tip
Achari Mathries can be stored for a couple of months in airtight containers.
If the mathries are cooked on high heat, they will be soft.
Ragda Puri is a chaat dish that will leave you licking your fingers. Made with crunchy puris, ragda, and chutney, this recipe is the perfect addition to any chaat menu. This appetizer is easy to make and tastes delicious.
Wash and soak vatana in three cups of water for at least 8 hours. After soaking vatana will be about 2 1/2 times the volume of the original.
Put the vatana in a pressure cooker with 2½ cups of water. When the pressure cooker starts to steam, turn the heat down to medium and cook for 10 minutes. Turn off the heat and wait until steam has stopped before opening the pressure cooker. Vatana should be soft and tender. I have used instant pot, because it is more convenient.
Blend cilantro, green chilies, and ginger, tamarind chutney, and lemon juice.
Mix cilantro paste and all the spices, salt, black salt, sugar, black pepper and finely chopped green chili this is optional, to boiled vatana mix the spices well. This is known Ragda. Add hot water if needed Ragda should not be very dry it should have thick gravy, Ragda thickens in consistency as it cools.
For serving, make a small hole on top of each puri and arrange them on a platter. Stuff them with the ragda. Drizzle with tamarind chutney and sev.
Notes
Ragda Puri Chaat can be prepared few days in advance When you are craving for chaat.This is a Healthy Chaat, Ragda has no oil, and can be served by itself, over crackers, over bread, roll with any indian flat bread, or make sandwich .Check the recipe for Pani Puri , and Tamarind Chutney
Ragda Puri Chaat Recipe: A Burst of Flavor in Every Bite
Ragda Puri Chaat is a popular veganquick & easy street food in India, beloved for its medley of flavors and textures. This delectable appetizer consists of crispy puris (fried dough balls) served with ragda, a spicy and tangy curry made from dried white peas. Topped with an assortment of chutneys and sev (crispy chickpea flour noodles), This Chaat is a true delight for the taste buds. In this recipe, we’ll explore how to make it at home, bringing the authentic flavors of the streets right to your kitchen.
Preparation of Ragda Puri Chaat:
Begin by soaking dried white peas in water for at least 8 hours or overnight until they become soft. Once soaked, drain the peas and rinse them thoroughly. Then, in a pressure cooker, cook the soaked peas with water, salt, turmeric, and a pinch of baking soda until they are tender and well-cooked. Allow the pressure to release naturally before opening the cooker.
Tips for Making Perfect Ragda Puri:
Soaking the dried white peas overnight ensures that they cook evenly and become tender.
Adding a pinch of baking soda while cooking the peas helps to soften them faster.
Be sure to cook the peas until they are completely tender but not mushy.
Adjust the consistency of the ragda according to your preference by adding more or less water during cooking.
Assembly of Ragda Puri Chaat:
Once the ragda is ready, it’s time to assemble the chaat. Take crispy puris and gently crack them open to create a cavity for the filling. Place a spoonful of ragda inside each puri, ensuring that it fills the cavity generously. Next, drizzle some green chutney and tamarind chutney over the ragda-filled puris for a burst of flavor. Sprinkle tomatoes, and cilantro on top for added freshness and crunch. Finally, garnish with sev and a squeeze of lemon juice to complete.
Variations of Ragda Puri Chaat:
Spicy Ragda Puri: If you prefer a spicier chaat, add more green chilies or red chili powder to the ragda mixture. You can also top the puris with finely chopped green chilies for an extra kick.
Healthy Ragda Puri: For a healthier version, you can use baked puris instead of fried ones. You can also add boiled sprouts or boiled potatoes to the ragda for added nutrition.
Cheese Ragda Puri: For a decadent twist, sprinkle some grated cheese on top of the assembled chaat. The melted cheese adds a creamy and indulgent touch to the dish.
Benefits of Ragda Puri Chaat:
It is not only delicious but also nutritious. The dried white peas used in the ragda are rich in protein and fiber, making this dish a filling and satisfying option. Additionally, the assortment of fresh vegetables and chutneys adds essential vitamins and minerals to the chaat, making it a wholesome snack or appetizer.
FAQs about Ragda Puri Chaat:
Q: Can I make Ragda Puri Chaat in advance?
A: While you can prepare the ragda and chutneys in advance, it’s best to assemble the chaat just before serving to ensure that the puris remain crispy.
Q: Can I customize the toppings in Ragda Puri Chaat?
A: Absolutely! Feel free to experiment with different toppings such as grated carrots, boiled chickpeas, or chopped bell peppers to create your own unique version of Ragda Puri Chaat.
Q: Is Ragda Puri Chaat suitable for vegetarians?
A: Yes, it is a vegetarian dish that is enjoyed by people of all dietary preferences.
With its vibrant colors, bold flavors, and irresistible crunch is sure to become a favorite among your family and friends. Whether you’re serving it as a snack, appetizer, or light meal, this iconic street food is guaranteed to leave everyone craving for more. So why wait? Gather your ingredients and treat yourself to a taste of India with Ragda Puri Chaat today!
Other Recipes on Manjula’s Kitchen
If you’re looking to explore more Indian recipes, appetizers, beverages, and desserts, be sure to check out the following links on Manjula’s Kitchen. Here are some links to recipes on Manjula’s Kitchen official website:
This recipe is a little twist to an authentic breakfast delicacy in Sindhi homes. This style of serving makes this dish perfect for a party gathering as a nice munchy snack. I was inspired to do this recipe from when this was served to me in Jaipur while I was visiting my daughter-in-law family.
Crisp Puries known as Pakwan: Mix flour, sooji, salt, cumin seeds, and oil. Add enough water to make firm dough. Knead the dough well. Set the dough aside and let it sit for at least 15 minutes or longer.
Divide the dough in 10 equal parts, Roll the dough into about 5-inch diameter. If the dough is sticking to the rolling pin or rolling surface, put couple of drops of oil on the rolling pin and a couple of drops of oil on the surface.
Prick the rolled dough all over with a fork. This will limit puries from puffing and make them crisp. Cut them in 6 pieces giving them in triangle shape.
Heat the oil in a frying pan over medium heat. The frying pan should have at about 1 inch of oil. To check if the oil is ready, put a small piece of dough in the oil. The dough should sizzle and come up slowly.
Fry few triangles at time not crowding them. Fry until both sides are a light golden-brown. Transfer triangles over paper towel, it will absorb the extra oil.
For Dal
Wash and soak chana dal for at least 2 hours in 3 cups of water.
Drain the water, heat the oil in pressure cooker over medium heat, when oil is moderately hot add cumin seeds. As seeds crack add dal, 2 cups of water, salt, turmeric, green chili, and ginger, close the cooker and cook over medium high heat.
As the pressure cooker starts steaming turn the heat down to medium and cook for about 4 minutes. Turn off the heat and wait until steam has stopped before opening the pressure cooker.
Dal should be soft well-cooked but not mushy. Add black pepper, mango powder and garam masala, mix it well. Dal should be thick in consistency.
Serving Suggestion
Serve pakwan with hot dal with drizzle of tamarind chutney, topping with cucumber. Cucumber gives them nice crunch.
Notes
Notes: After the triangle chips cool to room temperature they should be crisp. Chips can be stored in airtight container for 1 month.
Dal Pakwan, a vegan delight, is a flavorful Indian street food combining crispy fried bread with spiced lentil dip, perfect for appetizers or snacks.In this recipe, we’ll explore the delightful flavors of Dal Pakwan Chaat, a popular Sindhi dish that combines crispy fried pakwan (crackers) with savory lentil curry, topped with tantalizing chutneys and fresh garnishes. This Dal Pakwan Chaat recipe is perfect for a weekend brunch, a festive occasion, or simply as a satisfying snack. Let’s dive into how to make this mouthwatering dish step by step.
Step 1: Making Mini Dal Pakwan
To start off our dal pakwan chaat recipe, we first prepare the mini pakwan. Mini pakwan is a smaller version of the traditional pakwan, making it easier to enjoy as a chaat. Follow this Mini Dal Pakwan recipe to make crispy and delicious mini pakwan crackers.
Step 2: Preparing the Dal
Now, let’s move on to preparing the flavorful lentil curry, or dal, for our chaat. For this dal pakwan chaat, we’ll be using a simple and delicious recipe for Moong Dal (split yellow lentils). Follow the instructions in the recipe to cook the moong dal to a creamy consistency with aromatic spices.
Step 3: Assembling the Dal Pakwan Chaat
Once you have your mini pakwan and dal ready, it’s time to assemble the dal pakwan chaat. Take a serving plate and arrange the mini pakwan crackers on it. Next, ladle some warm moong dal over the pakwan.
Step 4: Adding Toppings and Garnishes
Now comes the fun part – adding toppings and garnishes to enhance the flavor and texture of our dal pakwan chaat. Drizzle some tangy tamarind chutney and spicy green chutney over the dal. Sprinkle tomatoes, and green chilies for freshness and crunch. Finally, garnish with a generous amount of chopped cilantro and a sprinkle of chaat masala for an extra burst of flavor.
Step 5: Serving the Dal Pakwan Chaat
Your dal pakwan chaat is now ready to be served! Enjoy it as a flavorful appetizer, a light meal, or a festive snack. Serve immediately to ensure the pakwan stays crispy and the dal remains warm and comforting.
Tips for Perfect Dal Pakwan Chaat
Crispy Pakwan: Make sure to fry the mini pakwan until they are golden brown and crispy to provide the perfect base for the chaat.
Creamy Dal: Cook the moong dal until it is soft and creamy but not mushy, ensuring a smooth texture for the chaat.
Balanced Flavors: Adjust the amount of chutneys and spices according to your taste preferences to achieve a perfect balance of sweet, tangy, and spicy flavors.
Variations of Dal Pakwan Chaat
Protein Variation: Experiment with different types of lentils such as chana dal (split chickpeas) or masoor dal (red lentils) to create unique variations of dal pakwan chaat.
Topping Varieties: Get creative with toppings by adding ingredients like grated cheese, sev (crispy chickpea noodles), or pomegranate seeds for added texture and flavor.
Healthy Twist: For a healthier version, you can bake the pakwan instead of frying them and use less oil in the preparation of the dal.
Benefits of Dal Pakwan Chaat
Rich in Protein: Moong dal is a good source of plant-based protein, making dal pakwan chaat a nutritious option, especially for vegetarians and vegans.
Balanced Meal: With a combination of lentils, grains (pakwan), and fresh vegetables, dal pakwan chaat provides a well-balanced meal with essential nutrients.
Satisfying Snack: Whether enjoyed as a snack or a light meal, dal pakwan chaat is sure to satisfy your cravings with its delicious flavors and crispy textures.
FAQs (Frequently Asked Questions)
Q: Can I make the pakwan in advance?
A: Yes, you can make the mini pakwan crackers in advance and store them in an airtight container once cooled. Just reheat them in the oven before serving to regain their crispiness.
Q: Can I use canned lentils for the dal?
A: While fresh lentils are recommended for the best flavor and texture, you can use canned lentils as a shortcut. Just make sure to rinse them thoroughly before using and adjust the seasoning accordingly.
Q: Is dal pakwan chaat gluten-free?
A: The dal itself is gluten-free, but the pakwan crackers are made with wheat flour, so if you need a gluten-free option, you can try using a gluten-free flour blend to make the pakwan.
Explore More Recipes
Appetizers: Check out this recipe for Vegetable Samosa, a popular Indian appetizer filled with a spicy vegetable filling, perfect for serving alongside dal pakwan chaat.
Beverages: Pair your dal pakwan chaat with a refreshing Mango Lassi – a creamy yogurt-based drink flavored with ripe mangoes, ideal for cooling down after enjoying spicy chaat.
Desserts: End your meal on a sweet note with this recipe for Gulab Jamun, soft and spongy milk-based dumplings soaked in a fragrant rose syrup, a classic Indian dessert loved by all.
Conclusion
With its combination of crispy pakwan, creamy dal, and flavorful toppings, dal pakwan chaat is a delightful dish that tantalizes the taste buds with every bite. Whether enjoyed as a snack, appetizer, or light meal, this chaat is sure to become a favorite in your culinary repertoire. So gather your ingredients and get ready to savor the irresistible flavors of dal pakwan chaat!
Other Recipes on Manjula’s Kitchen
If you’re looking to explore more Indian recipes, appetizers, beverages, and desserts, be sure to check out the following links on Manjula’s Kitchen. Here are some links to recipes on Manjula’s Kitchen official website:
Tawa Pulao is a popular street dish of Mumbai that is very similar in style to Pav Bhaji. The secret behind this flavorful Tawa Pulao is that it’s mixture of spices that creates the perfect balance of flavors. The recipe incorporates vegetables that are still crunchy and not mushy like Pav Bhaji. This is a one dish meal and also a good lunch box meal.
Boil the vegetables, potatoes, cauliflower, carrot, and green peas in 2 cups of water till they are tender and not mushy. Drain the water and set aside.
Heat the oil in a wide flat frying pan, on medium heat, oil should be moderately hot add cumin seeds, as cumin seeds crack add tomatoes, and cook till they are very soft and tender.
Add all the spices except garam masala, add turmeric, red chili powder, fennel seeds, ginger, green chili, and salt mix it well.
Add the vegetables, mix it and let it cook for few minutes.
Add the cooked rice mix it well, if it looks dry add little water and mix it very gently and let it cook for few minutes, keep stirring.
Turn off the heat, add garam masala, cilantro, and lemon juice, and stir gently making sure rice and vegetables are coated with spices evenly.
Notes
Notes: I said I am making Pav Bhaji Pulao, then where is Pav Bhaji masala, fennel seed powder and garam masala together makes a Pav Bhaji Masala.Most of the time I add garam masala in the end, I don’t like to add the garam masala in beginning and cook with. When you add garam masala in the end it gives batter taste and aroma. I like to serve Tawa Pulao with yogurt.This recipe is so convenient that you can even use left over rice to make it.
Mumbai Style Tawa Pulao Recipe: Mastering Art of Pav Bhaji Pulao
Tawa Pulao, a beloved street food from Mumbai, bears a resemblance to Pav Bhaji but stands out with its unique blend of spices, offering a perfect balance of flavors. Tawa Pulao is a gluten-free, quick & easy rice-based veganstreet food that is ideal as a lunch box option.
1. Vegetable Preparation: Boiling and Draining for Perfect Tawa Pulao
To embark on your journey of how to make pav bhaji pulao, start by boiling a medley of vegetables – potatoes, cauliflower, carrot, and green peas – in 2 cups of water until they reach a tender yet firm consistency, ensuring they don’t become mushy. Once cooked to perfection, drain the water and set the vegetables aside, ready to infuse their flavors into the tantalizing tawa pulao.
In a wide flat frying pan, heat oil over medium heat until moderately hot. Infuse the essence of Mumbai into your tawa pulao by adding cumin seeds to the sizzling oil. As the cumin seeds crackle, introduce tomatoes and cook until they reach a soft and tender state, releasing their rich flavors into the mix.
3. Spiced Symphony: Seasoning Your Tava Pulao with Mumbai’s Flavors
Elevate the aroma and taste of your tawa pulao by adding an array of spices. Sprinkle turmeric, red chili powder, and fennel seeds into the pan, along with ginger, green chilli, and salt. Stirring well, ensure the spices coat the ingredients evenly, infusing the pulao with Mumbai’s signature spice profile.
4. Vegetable Fusion: Introducing the Cooked Vegetables into Tava Pulao
Once the spices have melded into a fragrant blend, introduce the boiled vegetables into the pan. Mix them gently with the spice-infused base and allow them to cook together for a few minutes, allowing the flavors to intermingle and elevate the essence of Mumbai-style tawa pulao.
5. Rice Integration: Blending Cooked Rice for the Perfect Tawa Pulav Texture
Add the cooked rice to the pan, gently folding it into the vegetable-spice mixture. If the pulao appears dry, add a splash of water to achieve the desired consistency. Allow the rice and vegetables to cook together for a few minutes, stirring continuously to ensure even distribution of flavors.
6. Final Touch: Infusing Mumbai’s Essence with Garam Masala and Fresh Herbs
As the aroma of your tawa pulao fills the air, turn off the heat and add a dash of garam masala, freshly chopped cilantro, and a squeeze of lemon juice. Gently stir the pulao, ensuring every grain of rice and every vegetable is coated with the aromatic blend of spices. This final touch infuses your pav bhaji pulao with Mumbai’s essence, ready to tantalize your taste buds.
Unlock the flavors of Mumbai with this authentic tawa pulao recipe, perfect for any occasion. Whether you call it tava pulao, tawa pulav, or tawa pulao, this Mumbai-style delicacy is sure to become a favorite in your culinary repertoire. Enjoy the convenience of this versatile recipe, perfect for using leftover rice and satisfying your craving for Mumbai’s street food delights.
Baked vegetable Idli makes for a healthy and delicious appetizer or side dish. They are very eye-catching and great to present at a gathering for guests to pop into their mouth. They are the perfect addition to any menu because they are so easy to make. Idlies have a unique texture because they are soft but also slightly crisp on the bottom. Baked vegetable idli are best served with coconut chutney if served as an appetizer or with sambar if served with the main meal.
1/2cupbell pepperfinely chopped, capsicum, I am using green and yellow for color
1green chilifinely chopped
1piecegingerfinely grated
2Tbspcilantrochopped, hara dhania
1cupwateras needed
1tspENOfruit salt
1tspsalt
For Seasoning
1Tbspoil
1/4tspcumin seedsjeera
1/4tspmustard seedsrai
Instructions
Preheat the oven at 350 degrees (F).
Seasoning: heat the oil moderately in a saucepan. Add mustard and cumin seeds, as the seeds crack turn off the heat and set aside.
I am using mini cupcake tray, will make 24 idli, oil it and set aside.
Mix sooji, salt, yogurt, and water (as needed) to make a pancake-like batter. Set aside for at least 30 minutes.
Add the vegetables bell pepper, carrots, ginger, green chili, and cilantro. Add the seasoning and mix. The batter thickens as the semolina absorbs the water. At this point, add a little more water if it is too thick.
Add Eno Fruit Salt to the batter and mix well. The mixture will begin foaming. Immediately begin pouring into the cupcake tray. Place the tray in oven.
Bake the idlies for five minutes, then lay over the aluminum foil. Bake it again for 15 minutes. Idlies should be lightly brown from the sides.
Cool for few minutes before removing each individual idli. They should come out easily and not stick to the tray. The idlis should be spongy, and light golden color from the sides and bottom.
Notes
Notes: First, I baked the idlies without covering, then after 5 minutes I covered the Idlies, if you don’t cover Idlies, they will be dry and will lose the softness and texture.you can prepare Idlies 2-3 days in advance, after they cool of refrigerate them in air tight container.Before serving heat the Idlies in microwave for about two minutes. Idlies will be soft. Baked vegetable idli are best served with coconut chutney if served as an appetizer or with sambar if served with the main meal.
Keyword Kid Friendly, Rava Idli, Snack, South Indian Cuisine
Baked Vegetable Idli Recipe: A Healthy Twist to Classic South Indian Cuisine
Baked Vegetable Idli is a versatile dish that perfectly fits various occasions and preferences. It serves as an ideal choice for appetizers, breakfast recipes, and even as a lunch box suggestion. During festive seasons like Diwali and Navaratri, it can be a delightful addition to the menu. Its kid-friendly nature makes it a hit among children, while its ease of preparation qualifies it as a quick and easy snack option. Additionally, its nutritious blend of vegetables adds a healthy touch, making it suitable for party recipes as well.
Introduction to Baked Vegetable Idli Recipe
If you’re looking to add a nutritious twist to your traditional South Indian breakfast, look no further than this delightful baked vegetable idli recipe. Vegetable idli is a beloved dish in Indian cuisine, cherished for its soft texture and aromatic flavors. In this rendition, we’ll explore how to make vegetable idli even healthier by baking it instead of the traditional steaming method. Packed with the goodness of assorted vegetables and aromatic spices, these baked vegetable idlis are not only delicious but also a wholesome treat for the entire family.
Step-by-Step Guide on How to Make Vegetable Idli
Preparing the Batter for Baked Vegetable Idli
To start making baked vegetable idli, begin by soaking idli rice and split urad dal separately for about 4-6 hours. Once soaked, drain the water and grind them separately to a smooth consistency. Mix both the batters together in a large bowl and add some salt. Allow the batter to ferment overnight, ensuring it doubles in volume. Fermentation is crucial for the characteristic fluffy texture of idlis.
Incorporating Assorted Vegetables for Added Nutrition
While the batter ferments, prepare your choice of vegetables. Carrots, peas, bell peppers, and corn work wonderfully in this recipe. Finely chop or grate the vegetables and sauté them lightly with some mustard seeds, curry leaves, and green chilies for a burst of flavor. Once the vegetables are tender, mix them into the fermented idli batter.
Baking the Vegetable Idlis to Perfection
Preheat your oven to 350°F (175°C) and grease an idli tray with some oil. Pour the vegetable-laden batter into the idli molds, filling them about three-fourths of the way. Place the tray in the preheated oven and bake for 20-25 minutes or until the idlis are cooked through and have a golden hue on top. Once done, remove the tray from the oven and allow the idlis to cool slightly before unmolding them.
Serve and Enjoy the Baked Vegetable Idlis
Once cooled, gently remove the baked vegetable idlis from the molds and serve them warm with a side of coconut chutney or sambar for an authentic South Indian experience. These idlis make for a nutritious breakfast option or a wholesome snack any time of the day. Their vibrant colors and enticing aroma are sure to make them a hit with your family and friends.
Tips for Making Perfect Baked Vegetable Idlis
Ensure the batter is well-fermented for soft and fluffy idlis.
Don’t overmix the batter after adding vegetables to retain their crunchiness.
Adjust the baking time according to your oven as the temperature may vary.
Variations of Baked Vegetable Idli Recipe
Cheese-Stuffed Baked Vegetable Idlis: Add a surprise element by stuffing the idlis with cheese before baking for a gooey, indulgent twist.
Spinach and Fenugreek Baked Idlis: Boost the nutritional value by adding finely chopped spinach and fenugreek leaves to the batter for an extra dose of vitamins and minerals.
Masala Baked Idlis: Infuse the idlis with the flavors of garam masala, cumin, and coriander for a spicier variation.
Benefits of Including Baked Vegetable Idlis in Your Diet
Nutrient-Rich: Packed with vitamins, minerals, and fiber from assorted vegetables, baked vegetable idlis make for a wholesome and balanced meal.
Low in Calories: Baking eliminates the need for excess oil, making these idlis a healthier alternative to their fried counterparts.
Suitable for All Ages: From toddlers to seniors, everyone can enjoy these soft and easily digestible idlis as part of a well-rounded diet.
Frequently Asked Questions (FAQs) About Baked Vegetable Idlis
Q: Can I use any other vegetables apart from the ones mentioned in the recipe?
A: Absolutely! Feel free to experiment with your favorite vegetables or whatever you have on hand. Just ensure they are finely chopped or grated for even distribution.
Q: Can I make the batter in advance and store it for later use?
A: Yes, you can prepare the batter in advance and store it in the refrigerator for up to 2-3 days. Remember to bring it to room temperature before baking the idlis.
Q: Can I freeze the baked vegetable idlis?
A: While it’s best to consume them fresh, you can freeze the baked idlis in an airtight container for up to a month. Reheat them in the microwave or oven before serving.
Explore More Recipes from Manjula’s Kitchen
Appetizers: Try out the flavorful Spinach Cheese Balls for a delectable appetizer that’s sure to impress your guests.
Beverages: Quench your thirst with the refreshing Mango Lassi, a classic Indian yogurt-based drink bursting with tropical flavors.
Desserts: Indulge your sweet tooth with the decadent Gulab Jamun, soft and spongy milk dumplings soaked in a fragrant sugar syrup.
With this comprehensive guide, you’re all set to whip up a batch of wholesome baked vegetable idlis that are as nutritious as they are delicious. Whether enjoyed for breakfast, as a snack, or even as part of a meal, these idlis are sure to become a favorite in your culinary repertoire.
Crispy Vegetable Pakoras are probably my all-time favorite and satisfying appetizer. They are perfect for any occasion, not to mention they are a favorite with all –young or old! These bite-sized snacks are fried to crispy golden-brown perfection. I serve pakoras with tamarind or cilantro chutney. When cooked right they are crispy on the outside and soft on the inside. These pakoras also have the added benefits of being vegan and gluten-free.I have many fond memories of my mother cooking pakoras when I was a child. There was no special occasion that warranted her whipping up a batch of pakoras. Sometimes she would just come up with an excuse – be it the weather (especially if it was cold & rainy!) or if she simply wanted something savory and spicy. Pakoras were also a staple in our household when guests would unexpectedly show up at our house.Vegetable Pakoras are easy and quick to make, not to mention you can use a variety of vegetables to make them. I can tell you from personal experience that these pakoras are extremely addicting! Try pairing these pakoras with your afternoon tea or as a spicy delicious snack!This recipe will serve 4.
12green beanscut into half then cut them vertically
½red bell peppersliced into about quarter inch thick
⅓cupbesanBengal gram flour
2Tbspcorn starcharrow root
2Tbsprice flour
2tspcoriander powderdhania
¼tspmango powderamchoor
¼tspred chili powder
⅛tspbaking soda
½tspsalt
Instructions
First prepare the vegetables: okras, wash and pat dry, cut off the tops and bottom. Then cut the okras vertically into four slices. Bell pepper slice into about quarter inch thick, making julienne, and cut the green beans into half then cut them vertically.
Next! Prepare pakora mix, mix all the dry ingredients together, besan, corn starch rice flour, and baking soda, mix them well. Rice flour, corn starch and baking soda will add the extra crispness to pakoras.
Now add the other spices, coriander powder, mango powder, red chili powder and salt. Mix all the ingredients well.
Sprinkle the dry mix over vegetables mix them well add water little at a time as needed to coat the vegetables nicely with besan spice mix, vegetables should be coated well. I added about 1/4th cup of water.
Heat at least one inch of oil in a frying pan over medium high heat. To test, put one drop of batter in the oil. The batter should come up slowly. Drop the pakoas slowly one at a time. Put few pakoras at a time don’t overlap the pakoras.
Fry the pakoras until they turn golden brown, turning them occasionally. This should take about 6 minutes.
Take them out over paper towel to absorb the extra oil.
Ram Ladoo is a popular Delhi street food. Ram Ladoo is a delicious snack. Moong dal pakoras served with cilantro chutney and topped with shredded radish. These ladoos takes on the flavor of chutney and radish, this is what makes this dish a yummy and lip-smacking chaat.
Wash and Soak moong and chana dal in three cups of water for about 4 hours after soaking this will become about twice in volume.
Drain the water, and grind dal without adding any water, do not grind dal to fine paste, dal should be little grainy.
Take out the dal in a mixing bowl and beat the batter for couple of minutes, till it is fluffy. This will aerate the batter to make soft ladoos. Laddos are crispy outside and soft inside. Add all the ingredients, asafetida, cumin seeds, salt, ginger, green chili, and cilantro. Whip it again. The more air is incorporated in the batter the fluffier ladoos will be.
Heat the oil in a frying pan on medium high heat. The frying pan should have about 1 inch of oil. To check if the oil is ready, put one drop of batter in oil. The batter should sizzle and come up but not change color right away. If oil is very hot Ram Ladoo will not cook through and will not be crispy.
Place about 1 tablespoon of batter into the oil. Fry the Ram Ladoos in small batches. Fry them until golden-brown all around.
Ram Ladoo should be crispy from outside and should be soft inside.
Take them out over paper towel, this absorb the access oil.
Ram Ladoos should be served hot, to serve the Ram Ladoos, drizzle the chaat masala, cilantro chutney, and grated radish and little chat masala again.
Notes
Preparation time does not include soaking time.
Keyword Chaat, Chana Dal Pakoras, Easy To Make, Gluten Free, Homemade, Jain Food, Moong Dal Pakoras, Party Food, Sattvik Food, Snack, Tea Time Snack, Vegan, Vegetarian
Stuffed Masala Rava Idli, Spicy Chana Dal Stuffing, Healthy Snack, Easy Idli Recipe
Stuffed Idli is a delicious and healthy snack. For the filling, I used spicy chana dal stuffing which makes it unique and also flavorful. I like to serve stuffed Idli with tea or as an appetizer with a side of cilantro chutney. This also makes a great lunch box meal as it is very healthy and satisfying.This recipe will make about 14 Idlies.
Utensils for Making Idlis, Idli stand, or Alternatively, an egg poacher can work just as well, if you do not have an Idli stand.
Instructions
For stuffing soak dal for at least 3 hours, drain the water.
Grind all the stuffing mix except potato in a grinder to make coarse paste, do not use any water I like to use food processer. Stuffing should be moist. Add potatoes and mix it well, Set aside.
Mix sooji, salt, and yogurt, add water as needed to make a pancake-like batter. Set aside for at least 30 minutes.
To make stuffed idli, grease the idly plate. Add Eno Fruit Salt to the batter and mix well. The mixture will begin foaming. Immediately begin pouring into the Idli trays.
pour about 1 tablespoon of batter and spread evenly. Now add 2 teaspoons of masala and pour over about one tablespoon idly batter covering the filling. Repeat the process. Place the stand into the steaming pot.
Cover the pot and steam idles for about 12 minutes on medium heat. Insert a fork in the center of one idli. If the fork comes out clean, remove the stand from the pot. Do not overcook idles, as they will lose their softness and dry out as they cool.
Cool for just a few minutes before removing each individual idli. They should come out easily and not stick to the mold. Idles should be spongy and soft.
Notes
SuggestionsStuffed Idli can be refrigerated for a week or freeze them for about a month. I like to brush the Idli lightly with butter before serving. Serve them your choice of chutney, Coconut Chutney, Hari Cilantro Chutney, Peanut Chutney
Masala Stuffed Idli Recipe: A Delicious Twist on Traditional Idlis
Indulge in the delightful fusion of flavors with this masala stuffed idli recipe. These stuffed masala idlis offer a tantalizing twist to the traditional South Indian favorite snacks. Bursting with aromatic spices and savory fillings, these idlis are sure to be a hit at your dining table.
Prepare the Stuffing: First, soak the dal for at least 3 hours. This allows the dal to soften and become easier to grind. After soaking, drain the water completely. Next, grind all the ingredients for the stuffing mix (except the potatoes) in a grinder or food processor. Aim for a coarse paste consistency, and avoid adding any water during grinding. The natural moisture from the ingredients should be enough. Once you have a coarse paste, add the boiled and mashed potatoes to the mix. Combine everything well by hand until the stuffing is evenly distributed and moist. Set the stuffing aside while you prepare the batter.
Make the Batter: In a separate bowl, combine the sooji (semolina), salt, and yogurt. Start by mixing these dry ingredients together. Then, gradually add water while mixing. You want the batter to reach a pancake-like consistency, thick enough to coat the back of a spoon but still pourable. Once you achieve the desired consistency, set the batter aside to rest for at least 30 minutes. This resting time allows the sooji to soften and absorb the liquids, resulting in fluffier idlis.
Assemble and Steam the Idlis: Now it’s time to assemble your stuffed idlis. Begin by greasing your idli plates to prevent sticking. Next, add Eno Fruit Salt to the batter and mix it in quickly and gently. The Eno will cause the batter to foam and rise. This is why it’s important to work quickly after adding it. Immediately spoon the batter into the greased idli molds.
Fill and Steam: Here comes the stuffing! Add about 1 tablespoon of batter to each idli mold and spread it evenly to create a base. Now, place 2 teaspoons of your prepared stuffing mixture in the center of the batter. Finally, top the stuffing with another 1 tablespoon of batter, covering the filling completely. Repeat this process for all the idli molds. Once filled, carefully place the idli stand into a steamer pot.
Steaming and Checking for Doneness: Cover the steamer pot with a lid and turn on the heat to medium. Steam the idlis for approximately 12 minutes. To check for doneness, insert a fork into the center of one idli. If the fork comes out clean without any batter residue, your idlis are cooked through. Be mindful not to overcook them, as they can become dry and lose their soft texture as they cool.
Serve and Enjoy: Once cooked, remove the idli stand from the steamer and let the idlis cool for just a few minutes before attempting to remove them from the molds. They should come out easily without sticking. Now you can enjoy your delicious homemade stuffed idlis!
Variations to Try
For a spicy kick, consider adding a teaspoon of red chili powder or finely chopped green chilies to the masala filling. You can also experiment with different vegetables such as bell peppers, cauliflower, or spinach to create your unique variations of masala stuffed idli.
Tips for Perfect Stuffed Idlis
Ensure that the idli batter is well-fermented for soft and fluffy idlis.
Use a non-stick idli mold or grease the molds lightly with oil to prevent sticking.
Be gentle while stuffing the idlis to avoid breaking them.
Steam the idlis on medium heat for the best results.
Benefits of Masala Stuffed Idlis
Provides a wholesome and nutritious meal, packed with the goodness of vegetables and spices.
Offers a creative twist to traditional idlis, appealing to both kids and adults alike.
Can be customized to suit individual taste preferences and dietary requirements.
Makes for a convenient and portable meal option for on-the-go consumption.
FAQs (Frequently Asked Questions)
Q: Can I make the masala filling in advance?
A: Yes, you can prepare the masala filling ahead of time and store it in the refrigerator for up to 2 days. Simply reheat it before stuffing the idlis.
Q: Can I freeze stuffed idlis for later use?
A: Yes, you can freeze leftover stuffed idlis in an airtight container for up to a month. Thaw them in the refrigerator overnight and steam them again before serving.
Chilli Paneer is a popular Indo-Chinese dish. Chilli Paneer makes a spicy flavorful starter at parties especially for many of my friends who enjoy the spicy food. Chilli Paneer can also be served as a side dish. This is absolutely delicious and easy to make spicy snack savored by all.
1cupbell peppersliced, capsicum, Shimla mirch, I am using yellow and green bell pepper for color
For Batter
2Tbspall-purpose flourplain flour, maida
2Tbspcorn starch or arrow root powder
1/2tspsalt
For Sauce
2Tbspoilcanola or vegetable oil
1Tbspgingershredded, adrak
1Tbspgreen chilichopped
1tspchili flakes
2Tbspsoy sauce
1Tbspvinegar
1Tbsptomato paste
1-1/2tspcorn starch or arrow root powder
1/2cupwater
Instructions
I am using store bought paneer, texture is not very soft to give the paneer softer texture soak the paneer for at least 10 minutes in hot water with few drops of lemon juice.
To make batter mix flour, corn starch, and salt in a bowl. Add the water slowly to make a smooth batter (batter should be consistency of pancake batter or dosa batter).
Heat at least 1/2 inch of oil in a frying pan over medium high heat. Oil should be moderately hot.
Dip the paneer into the batter, making sure it is completely covered by the batter. Then drop the paneer pieces slowly into oil in the frying pan. (do not overlap them)
Fry the paneer in small batches. Fry them turning occasionally, until they are very light golden brown. Take them out over paper towel.
Do same with bell pepper.
For sauce heat the oil in sauce pan over medium heat; add ginger, and green chili stir for about one minutes. Add all the ingredients for sauce except corn starch, (soy sauce, vinegar, chili flakes, and tomato paste), Stir for 1 minutes. mix water and corn starch and add to the sauce. Cook for another two minutes, sauce should be thick consistency. Sauce gets thicker as it sits.
Add paneer, and bell pepper into sauce and serve hot.
Chilli Paneer is a delectable appetizer commonly found in party recipes and snack menus. It’s a savory Indo-Chinese dish that combines the succulence of paneer (Indian cottage cheese) with a flavorful chili-infused sauce. The dish typically involves frying paneer cubes until they’re golden brown and then tossing them in a tantalizing sauce made from chili peppers, ginger, soy sauce, and other spices.
The result is a mouthwatering fusion of textures and flavors, with the paneer offering a creamy contrast to the spicy kick of the sauce. Chilli Paneer is a perfect addition to any gathering, offering a delightful combination of heat, sweetness, and tanginess that’s sure to please any palate.
Indulge in the delectable flavors of chilli paneer with this easy-to-follow recipe paneer chilli. Whether you’re a fan of Indo-Chinese cuisine or simply looking to add a spicy twist to your meal, this dish is sure to satisfy your taste buds. Made with succulent cubes of paneer (Indian cottage cheese) and a flavorful blend of spices, this chilli paneer recipe is a crowd-pleaser.
Step 1: Preparing the Ingredients
Before diving into the cooking process, gather all the necessary ingredients for making chilli paneer. You’ll need fresh paneer, vibrant bell peppers, ginger, green chilies, soy sauce, chili sauce, ketchup, cornstarch, and a few pantry staples like salt and oil. Ensure that your ingredients are prepped and ready to go before you start cooking.
Step 2: Marinating the Paneer
Begin by marinating the paneer cubes in a tantalizing mixture of soy sauce, chili sauce, and cornstarch. This step allows the paneer to absorb the flavors, resulting in a more vibrant and flavorful dish. Let the paneer marinate for at least 15-20 minutes to ensure maximum flavor infusion.
Step 3: Stir-frying the Ingredients
Heat oil in a pan or wok over medium-high heat. Add finely chopped garlic, ginger, and green chilies to the hot oil, and sauté until fragrant. Then, toss in the diced bell peppers, stirring constantly until they’re slightly softened yet still retain their crunch. This colorful medley of vegetables adds both flavor and texture to the paneer chilli.
Step 4: Adding the Marinated Paneer
Once the vegetables are cooked to perfection, gently add the marinated paneer cubes to the pan. Be careful not to overcrowd the pan, as you want the paneer to brown evenly. Allow the paneer to cook undisturbed for a few minutes, allowing it to develop a golden crust before flipping each piece to ensure even cooking.
Step 5: Sauce Preparation
In a separate bowl, mix together soy sauce, chili sauce, and ketchup to create a savory and tangy sauce for the chilli paneer. Adjust the quantities according to your preference for spiciness and sweetness. Once combined, pour the sauce over the cooked paneer and vegetables, tossing everything together until evenly coated.
Step 6: Garnishing and Serving
To finish off this mouthwatering dish, garnish the chilli paneer and fresh coriander leaves. These vibrant greens not only add a pop of color but also enhance the overall flavor profile of the dish. Serve the cheese chilli paneer hot with steamed rice or crispy noodles for a complete and satisfying meal experience.
Tips for Perfect Chilli Paneer:
For extra heat, add more green chilies or a dash of hot sauce to the dish.
To make the chilli paneer more indulgent, sprinkle some grated cheese on top just before serving for a cheesy twist.
Experiment with different vegetables like mushrooms, broccoli, or baby corn to customize the dish to your liking.
Variations of Chilli Paneer:
Dry Chilli Paneer: If you prefer a drier version of chilli paneer, simply reduce the amount of sauce added to the dish. This results in a more intense flavor and a slightly crispy texture.
Gravy Chilli Paneer: To create a saucier version of chilli paneer, add more water or vegetable broth to the sauce mixture and simmer until it reaches your desired consistency. This is perfect for drizzling over steamed rice or noodles.
Benefits of Chilli Paneer:
High Protein: Paneer is a rich source of protein, making it an excellent choice for vegetarians and vegans looking to increase their protein intake.
Rich in Calcium: Paneer is also loaded with calcium, which is essential for maintaining strong and healthy bones.
Versatile: Chilli paneer can be enjoyed as a standalone dish or paired with other Indian or Chinese favorites like fried rice or noodles.
FAQs about Chilli Paneer:
Q: Can I use tofu instead of paneer in this recipe?
A: Yes, you can easily substitute tofu for paneer if you’re looking for a vegan alternative. Just make sure to press the tofu to remove excess moisture before marinating and cooking.
Q: How spicy is this dish?
A: The spiciness of chilli paneer can be adjusted according to your preference. Feel free to increase or decrease the amount of green chilies or chili sauce to suit your taste buds.
Q: Can I make this dish ahead of time?
A: While chilli paneer is best enjoyed fresh, you can prepare the ingredients ahead of time and store them separately in the refrigerator. Simply stir-fry everything together just before serving for optimal flavor and texture.
Other Recipes on Manjula’s Kitchen
If you’re looking to explore more Indian recipes, appetizers, beverages, and desserts, be sure to check out the following links on Manjula’s Kitchen. Here are some links to recipes on Manjula’s Kitchen official website:
Falooda is best described as a dessertbeverage which is really corn vermicelli. This is a delicious combination of layered Falooda with milk, sweet basil and vanilla ice-cream. I like to serve this with mango. This can be an any-time snack! Falooda is popular with Mumbai road side street food. This chilled beverage-dessert is the perfect way to cool off in the summer heat.
Boil the milk with 2 tablespoons of sugar for about 15 minutes after milk comes to boil or until till it reduces to about 1-1/2 cup. After milk cool off refrigerate, milk should be chill.
Cook the falooda in boiling water, till they are soft! Strain, and chopped them in few pieces and keep aside to cool. Then refrigerator till needed, and it is chilled.
Add about 2 table spoons of sugar to mango pulp or as needed depends on sweetness of mango. Refrigerate the mango pulp and chopped mango, till you are ready to use.
soak the basil seeds/ tukmaria in a bowl in about ¼ cup of water making sure seeds are completely submerge. They will soon start to swell and look transparent. Strain and keep aside in a small bowl.
Milk and falooda should be refrigerated till you are ready to use, you can prepare them in advance as they can be refrigerated for 3-4 days.
Time to assemble the falooda, it is layered beverage-desert, take a tall glass first put 2-3 tablespoons of mango pulp, few spoons of falooda, about 2 spoons of baisel seeds, pour about ¼ cup of milk, about 1or 2 scoops of ice-cream, again some falooda and garnish with chopped mango.
Craving something savory and delicious? This Spicy Corn Chaat is the perfect spicy snack that is sure to satisfy your cravings. It's also easy and quick to prepare!
1cupgreen and yellow bell pepper finely choppeduse any bell pepper you have, I decide to use them for color
1/2cupfinely chopped tomato
1tspginger juice
1tspsalt
1/2tspblack saltoptional
1tspcumin seed powderroasted
1/4tspblack pepper
1/4tspred chili powder
1tspgreen chilifinely chopped, adjust to taste
1Tbspcilantrofinely chopped
1Tbsplemon juice
Instructions
Mix all the dry ingredients together, salt, black salt, roasted cumin seed powder, black pepper, and chili powder, set aside.
Thaw the frozen corn kernels and lightly squeeze some water out.
Coat the nonstick frying pan with oil and heat over medium high heat, put the corn kernels and stir fry for 4-5 minutes stirring continuously. Some corn will start popping and they start getting some brown spots. Turn off the heat.
After corn comes to room temperature add all the ingredients, bell peppers, tomato, sprinkle the spice mix, ginger juice, cilantro and lemon juice and add the green chili to you taste. Mix them well.
Spicy Corn Chaat is a flavorful appetizer or snack made from boiled corn kernels mixed with a blend of spices and tangy chutneys. It’s a gluten-free, low-cholesterol, and low-fat option, perfect for those looking for a healthy yet satisfying treat. This vegan dish makes for a great lunch box suggestion or a quick bite any time of the day.
Introduction to Spicy Corn Chaat
Indulge in the delightful flavors of spicy corn chaat with this easy-to-follow recipe. A popular street food in India, this spicy sweet corn chaat combines the sweetness of corn with tangy and spicy flavors, creating a tantalizing snack or appetizer. Learn how to make spicy corn chaat at home and treat yourself to a burst of deliciousness in every bite.
Ingredients for Spicy Corn Chaat
To prepare this lip-smacking spicy corn chaat recipe, you’ll need fresh or frozen corn kernels, finely chopped vegetables tomatoes, and bell peppers, green chilies for heat, chaat masala for that quintessential Indian flavor, and a squeeze of lemon juice to brighten up the dish.
Step-by-Step Instructions for Making Spicy Corn Chaat
1. Preparing the Corn Start by boiling the corn kernels until they are tender. Drain the water and set aside.
Sautéing the Vegetables In a pan, heat some oil and add tomatoes, and bell peppers until they are soft and slightly caramelized. Add finely chopped green chilies for an extra kick of heat.
Mixing the Corn and Vegetables Combine the boiled corn kernels with the sautéed vegetables in a mixing bowl. Toss them together gently to ensure even distribution of flavors.
Seasoning with Chaat Masala Sprinkle generous amounts of chaat masala over the corn and vegetable mixture. This spice blend adds a burst of tanginess and complexity to the chaat.
Adding Lemon Juice Squeeze fresh lemon juice over the chaat to enhance its flavors and add a refreshing citrusy note.
Serving the Spicy Corn Chaat Transfer the prepared spicy corn chaat to serving bowls and garnish with fresh cilantro leaves for a pop of color and freshness. Serve immediately and enjoy the irresistible flavors of this delightful chaat.
Tips for Making the Best Spicy Corn Chaat
Use fresh corn kernels for the best taste and texture, but frozen corn works well too.
Adjust the spiciness according to your preference by adding or reducing the amount of green chilies.
For added crunch, you can toss in some crushed papdi or sev just before serving.
Variations of Spicy Corn Chaat
Cheesy Corn Chaat: Sprinkle grated cheese over the chaat for a creamy and indulgent twist.
Avocado Corn Chaat: Add diced avocado to the chaat for a buttery texture and extra creaminess.
Spicy Corn Salad: Skip the chaat masala and lemon juice, and toss the corn and vegetables with a zesty vinaigrette for a refreshing salad.
Benefits of Spicy Corn Chaat
Spicy corn chaat is not only delicious but also nutritious. Corn is a good source of fiber, vitamins, and minerals, while the vegetables add an array of nutrients. This chaat makes for a wholesome snack or appetizer that is both satisfying and nourishing.
FAQs (Frequently Asked Questions)
Q: Can I make spicy corn chaat ahead of time?
A: While it’s best enjoyed fresh, you can prepare the components ahead of time and assemble the chaat just before serving to maintain its crunchiness and flavors.
Q: Can I use canned corn for this recipe?
A: While fresh or frozen corn is preferable, you can use canned corn if that’s what you have on hand. Just make sure to drain and rinse the corn before using it in the chaat.
Q: Is spicy corn chaat suitable for vegetarians and vegans?
A: Yes, this recipe is completely vegetarian and vegan-friendly, as it only contains plant-based ingredients.
If you liked the recipe here are some other recipes that you may like too
Vegetable Cheela: A savory Indian pancake made with mixed vegetables and chickpea flour.
Palak (Spinach) Paneer: A classic North Indian dish made with spinach and paneer cheese cooked in a creamy tomato-based sauce.
150gramsBroccoli10-12 florets – this will make 1/3rd cup of broccoli paste
1Tbspbutter
1bay leaf
1/2Tbspplain flourMaida
150mlMilk
1/3cupMashed and boiled potatoes
Salt to taste
1tspChili flakes
1/2tspblack pepper powderfinely crushed
1cupgrated paneer
1/4cupcornflour
1/2cupbreadcrumbs
Oil for frying
Instructions
To make broccoli paste with white sauce
Boil the milk and cook broccoli for 5-7 mins or till it has become tender. Strain broccoli and keep aside the milk to use in the white sauce.
Once broccoli is cool down at room temperature, grind it in a mixer.
To Make Fritters
Take a frying pan, add 1tbsp butter and 1 bay leaf in it. After 30sec add broccoli paste in it. Fry them for 3-4 mins.
Add maida to it and after saute it for 1 minute, add the milk kept aside slowly so that there are no lumps. Stir continuously. Simmer for 3-4 mins. Add potatoes, salt, black pepper and chili flakes in this mixture and keep saute it until it becomes dry enough to make balls out of it.
Switch off the flame and add grated paneer in it. Keep this mix in a container, cling wrap it and refrigerate it for 30 mins.
Scoop out a spoonful of the mix and make the oval shape of it. Keep it on a plate.
Make cornflour slurry with water. Dip the oval shape paneer broccoli mix in cornflour paste and then in breadcrumbs and deep fry them.
Serve the hot Paneer Broccoli fritters with tomato ketchup.
Notes
Adding potato will give binding to the mixture and give a good shape to fritters. Also please remove bay leaf from the mixture after adding paneer in it and keep it in the fridge.
Chana Chaat is a healthy and delicious snack. I am using kala chana for this recipe. Kala chana looks like chickpeas, but brown in color. This is a delightfully sweet and tangy snack. Channa Chaat will also make a very enjoyable lunch box meal.
1/4cuptamarind pulpthis is available in India grocery store or you can make it at home soaking the tamarind and squeeze the pulp. But not the concentrated tamarind
1tspred chili powder
1tspsalt
1tspblack salt
1Tbspsugar
2tsproasted cumin seed powderbhuna jeera
1cuppotatoboiled peeled and cut in small pieces
1/2cupcucumberchopped in small pieces
1/2cuptomatoeschopped in small pieces
For garnishing
1Tbspgingerfinely chopped
1Tbspgreen chiliesfinely chopped
5-6wedges of lemon
Instructions
Wash and soak kala chana in approx. 4 cups of water, for at least 4 hours. The kala chana will double in volume after soaking.
In pressure cooker cook kala chana with 2 cups of water over medium high heat. As pressure cooker starts steaming turn the heat down to low medium and cook for about 15 minutes. Close the heat and wait until steam has stopped before opening the pressure cooker. Chana should be soft and tender.
Drain the water and save it for later use, this water is high in protein and can be used for making the soup or dals.
Heat the oil in a sauce pan over medium high heat. Add the chana, stir for few seconds. Add ginger and green chili, coriander powder, sauté for about 1 minutes.
Add salt, black salt, red chili powder, and sugar, add tamarind pulp. Cook for 3-4 minutes over low heat. If needed use few spoons of water, Chana mix should be moist. Turn off the heat.
Assemble the Kala Chana Chaat, add chopped potatoes, tomatoes, and cucumber, drizzle the roasted cumin seeds powder and mix it well. If desired garnish with sliced ginger, green chilies and drizzle the lemon juice.
Notes
Prep Time of 10 minutes does not include soaking time.Suggestions You can serve chana chaat without adding the veggies, it tastes delicious. You can always adjust quantity of veggies to your choice. Also adjust the green chili and red pepper to your choice. After spicing the chana mix with cooked plain rice to make spicy delicious meal.
Recipe for Chana Chaat: Elevate Your Snack Game with This Delicious Dish
Chana chaat is a quintessential Indian street food known for its burst of flavors and satisfying crunch. This recipe for chana chaat brings together the wholesome goodness of kala chana (black chickpeas) with an array of spices and fresh vegetables, creating a dish that’s both nutritious and delicious. Whether enjoyed as a snack, appetizer, or light meal, chana chaat is sure to tantalize your taste buds and leave you craving for more.
To begin your culinary journey with chana chaat, start by washing and soaking kala chana in water for at least 4 hours. This step is crucial as it helps the chana soften and swell, enhancing its texture and flavor. Once soaked, cook the kala chana in a pressure cooker until tender and soft. The aroma of freshly cooked chana will fill your kitchen, setting the stage for the flavorful dish that is to come.
Now, it’s time to infuse the cooked chana with a medley of spices. Heat oil in a saucepan and sauté ginger, green chili, and coriander powder until fragrant. Then, add the cooked chana along with salt, black salt, red chili powder, sugar, and tangy tamarind pulp. Allow the spices to meld together, coating the chana in a burst of savory and tangy flavors. Adjust the seasoning according to your taste preferences, adding more spice for a fiery kick or dialing it down for a milder flavor profile.
Once the chana is well-coated with the spice mixture, it’s time to assemble the chana chaat. Add chopped potatoes, tomatoes, and cucumber to the chana mixture, creating a colorful and vibrant medley of flavors and textures. For an extra burst of flavor, sprinkle roasted cumin seeds powder over the chaat, adding a depth of earthy aroma to the dish. Finally, garnish with sliced ginger, green chilies, and a squeeze of fresh lemon juice to brighten up the flavors.
Variations:
Sprouted Chana Chaat: For a healthier twist, use sprouted chana instead of cooked chana. Sprouted chana is rich in nutrients and adds a delightful crunch to the chaat.
Fruit Chaat: Incorporate seasonal fruits like apples, grapes, and pomegranate seeds into the chaat for a refreshing and fruity twist.
Yogurt Chaat: Drizzle some creamy yogurt over the chana chaat for a creamy and tangy variation. Top it off with some mint chutney and tamarind chutney for an extra burst of flavor.
Tips:
Save the Cooking Water: The water leftover from cooking the chana is rich in protein and can be used to make soups or dals, adding a nutritious boost to your meals.
Adjust Seasoning: Feel free to adjust the spices and seasoning according to your taste preferences. Experiment with different combinations to create your perfect flavor profile.
Serve with Rice: For a hearty meal, serve the spiced chana mixture with cooked plain rice, creating a satisfying and flavorful dish that’s perfect for lunch or dinner.
Benefits:
High in Protein: Kala chana is rich in protein, making chana chaat a nutritious and filling snack option.
Rich in Fiber: The addition of fresh vegetables like tomatoes, cucumbers, and potatoes adds fiber to the dish, aiding in digestion and promoting overall gut health.
Packed with Flavor: The blend of spices and tangy tamarind pulp creates a flavor explosion in every bite, making chana chaat a truly irresistible snack option.
FAQ:
Can I Make Chana Chaat Ahead of Time?
Yes, you can prepare the chana mixture ahead of time and refrigerate it. Simply assemble the chaat with fresh vegetables and spices before serving.
Can I Skip Adding Veggies to Chana Chaat?
While vegetables add freshness and texture to the chaat, you can certainly enjoy chana chaat without them. Adjust the recipe according to your taste preferences.
How Long Does Chana Chaat Last in the Refrigerator?
Chana chaat can be stored in the refrigerator for 2-3 days. Make sure to store it in an airtight container to maintain its freshness.
In conclusion, chana chaat is a delightful dish that combines the goodness of kala chana with a burst of spices and fresh vegetables. With this recipe of chana chaat mastered, you’ll have a versatile snack that’s perfect for any occasion. So, roll up your sleeves, gather your ingredients, and embark on a flavorful culinary adventure with chana chaat.
Kachori topped with Kadhi this is a Rajasthani specialty appetizer that is simply delicious. There are times that we like to indulge ourselves or want to make a special treat for guests at parties, but there is not enough time in the day to prepare such dishes. For times like this, I like to make semi-homemade recipes. This dish is perfect for this and can be presented beautifully.
4peicesDal KachoriUsing frozen Kachori, which are readily available in Indian grocery stores.
For Kadhi
1cupyogurt
1/4cupbesangram flour
2Tbspoilcanola or vegetable oil
1/2tspcumin seedsjeera
1/8tspasafetidahing
1/2tspfenugreek seedsmathi
1/2tspturmerichaldi
1/2tspred chili powder
1tspsalt
2Tbspcilantrofinely chopped, hara dhania
1/4tspgram masala
4cupswater
For garnishing
1Tbspgingerthinly sliced
1Tbspgreen chiliesthinly sliced
2tsplemon juice
1/4tspsalt
Instructions
For garnishing mix all the ingredients together before we start the Kadhi, this will get enough time to marinate ginger and green chili. Set aside.
Mix besan and turmeric with yogurt until smooth, this should be lump free. Add three cups of water slowly and mix well.
Heat the oil in a saucepan. Test the heat by adding one cumin seed to the oil. If the cumin seeds crack right away, the oil is ready. Add cumin seeds and asafetida.
When the cumin seeds crack, turn off the heat and add fenugreek seeds, and red chili powder. Stir for a few seconds. Add the yogurt mixture and turn the heat to medium. Keep stirring until the kadhi comes to a boil.
Add remaining water and let it come to boil. Add salt. Turn the heat to medium low. Let the kadhi cook about 20-30 minutes, stir occasionally. If needed to adjust thickness, add boiled water. Kadhi should be pourable consistency. Add garam masala, and cilantro, mix and turn off the heat.
While the Kadhi is cooking bake, or fry the kachories per the instructions on the box. I have baked the kachori. Let them cool of then break it open.
Serve Kadhi over Kachori and garnish with marinated green chili and ginger pieces.
Notes
Instead of frozen kachori, you can also make these fresh Kachori at home using my recipe.
Rajasthani Kadhi Kachori Recipe: A Delectable Fusion Dish Rajasthani semi-homemade
Kachori Kadhi is a versatile dish perfect for various occasions, whether as an appetizer, a flavorful addition to a lunch box suggestion, a delightful option for party recipes, or a quick & easychaat. Rajasthani kadhi kachori is a beloved delicacy that combines the richness of kadhi with the crispiness of kachori. This recipe brings together the tangy flavors of the kadhi gravy with the spicy and aromatic kachoris, creating a symphony of taste that will tantalize your taste buds. Let’s delve into how to prepare this mouthwatering dish step by step.
Preparing the Kadhi for Kachori Kadhi: A Flavorful Base
To begin with, let’s prepare the kadhi kachori base, the kadhi. In a mixing bowl, whisk together yogurt, gram flour, and water until smooth. This mixture forms the base of the kadhi gravy, providing a creamy texture and tangy flavor.
Next, heat oil in a pan and add mustard seeds, cumin seeds, fenugreek seeds, and asafoetida. These tempering ingredients infuse the kadhi with aromatic flavors and add depth to the dish. Stir in chopped ginger, green chilies, and curry leaves for an extra kick of spice and fragrance.
Now, pour the yogurt mixture into the pan and let it simmer over medium heat. Stir continuously to prevent lumps from forming and to ensure that the kadhi thickens evenly. As it cooks, the kadhi will develop a rich consistency and absorb the flavors of the spices.
Frying the Kachoris: Adding Crunch to the Kadhi Kachori
While the kadhi simmers, let’s move on to preparing the kachoris. Heat oil in a separate pan for deep frying. Meanwhile, take the kachori dough and divide it into small balls. Flatten each ball with your palms to form discs, then fill them with a spicy lentil mixture made of soaked and ground lentils mixed with spices like rajasthani kachori with kadhi.
Once the oil is hot, carefully slide the stuffed kachoris into the pan and fry until golden brown and crisp. The kachoris will puff up beautifully as they cook, creating a delightful contrast of textures when paired with the creamy kadhi gravy.
Serving the Rajasthani Kadhi Kachori: A Gastronomic Delight
Once both the kadhi and kachoris are ready, it’s time to assemble this divine dish. Ladle the hot kadhi into serving bowls and place a couple of freshly fried kachoris on the side. Garnish with chopped cilantro and serve hot.
The combination of the tangy, creamy kadhi and the crispy, flavorful kachoris is sure to impress your taste buds and leave you craving more. Enjoy this Rajasthani delicacy with steamed rice or as a standalone meal for a truly satisfying culinary experience.
Tips for Perfect Kadhi Kachori: Enhancing Flavor and Texture
Ensure that the yogurt is fresh and not too sour for a balanced flavor in the kadhi.
Fry the kachoris on medium heat to ensure they cook through evenly without burning.
You can customize the spice level of the kadhi and kachoris according to your preference by adjusting the amount of green chilies and red chili powder.
Variations of Kadhi Kachori: Experimenting with Flavors
For a healthier twist, you can bake the kachoris instead of deep frying them.
Add finely chopped vegetables like carrots, and peas to the kachori filling for added nutrition and flavor.
Experiment with different types of lentils for the kachori stuffing, such as moong dal or chana dal, to create unique variations of this dish.
Benefits of Kadhi Kachori: Nutritious and Delicious
Yogurt, the main ingredient in kadhi, is rich in probiotics that promote gut health and digestion.
Gram flour used in the kadhi is a good source of protein and fiber, making this dish filling and nutritious.
Lentils used in the kachori filling provide a healthy dose of plant-based protein and essential nutrients.
FAQs About Kadhi Kachori: Answering Your Queries
Q: Can I make the kadhi ahead of time?
A: Yes, you can prepare the kadhi in advance and reheat it before serving. Just make sure to adjust the consistency by adding water if it thickens too much upon reheating.
Q: Can I freeze leftover kachoris?
A: Yes, you can freeze leftover kachoris for up to a month. Reheat them in a preheated oven until crispy before serving.
Q: Can I use store-bought kachoris instead of making them from scratch?
A: While homemade kachoris are ideal for the best flavor and texture, you can certainly use store-bought ones as a time-saving option.
Crispy aloo pakoras, or crispy potato fritters are a flavorful and delicious snack specially when it is served with cilantro chutney, and hot cup of chai. They are easy and quick to make. Welcome your surprise guest and treat them with these mouthwatering crispy aloo pakoras.
2cups potatoes wash, peeled and finely chopped, aloo
1/2cup besan
2tablespoons rice flour
2tablespoons corn starch
1 tablespoon fennel seeds crushed, saunf
1 tablespoon coriander seed crushed, dhania
1/4teaspoon turmeric, haldi
1/4 teaspoon mango powder, amchoor
1/8teaspoon asafetida, hing
1-1/2teaspoons red chili flakes
1tablespoon ginger finely chopped, adrak
2 tablespoons cilantro chopped, hara dhania
1tablespoon oil
1teaspoon salt
Also need oil to fry
Instructions
Wash and peel the potatoes and cut them in very small cubes, and soak them in cold water.
Mix all the ingredients together except salt and potatoes.
Drain the water from potatoes, add the spice mix and mix it well. Add water as needed making sure the spice mix stick to the potatoes uniformly.
Now add the salt and mix it well.
Heat the oil in a frying pan on medium high heat.
The frying pan should have at least 1 inch of oil. To check if the oil is ready, put one piece of potato in the oil. The potato should raise to the top but not change color right away.
Oil your fingers it helps dropping the potatoes in the frying pan.
While putting the potatoes into oil, loosen them with your fingers to make sure the potatoes are separated and do not form clutter. Potatoes should be separated while frying.
Fry the potatoes until they turn light brown, turning them occasionally.
When they are done cooking, take them out of the oil with a slotted spoon. Place them on a paper towel to absorb the extra oil.
How to Make Crispy Aloo Pakora: A Step-by-Step Guide
Crispy Aloo Pakoras are delightful appetizers that cater to various dietary preferences and occasions. These gluten-free treats are perfect for both kids and adults alike, offering a quick and easy snack option, ideal for street food cravings. Made with vegan ingredients, these pakoras are not only delicious but also suitable for those following a plant-based diet. Enjoy the crispy goodness of these flavorful potato fritters without any worries about gluten, making them a versatile and inclusive snack for everyone to relish.
Introduction to Crispy Aloo Pakora Recipe
In this crispy aloo pakora recipe, we’ll explore the secrets to achieving the perfect texture and flavor for these beloved Indian snacks. Aloo pakora is crispy on the outside and soft on the inside, these pakoras are a delightful treat for any occasion. Whether you’re looking for a quick snack or planning a party menu, these pakoras are sure to impress. Let’s dive into how to make crispy aloo pakora with this step-by-step guide.
Step 1: Prepare the Ingredients
To start making crispy aloo pakoras, gather the following ingredients: potatoes, chickpea flour (besan), rice flour, salt, cumin seeds, chili powder, asafoetida (hing), and water. Peel and slice the potatoes thinly, ensuring they’re uniform in thickness for even frying. Mix the chickpea flour, rice flour, salt, cumin seeds, chili powder, and asafoetida in a bowl. These ingredients will ensure your aloo pakoras crispy and full of flavor.
Step 2: Coat the Potatoes
Dip the potato slices into the prepared batter, ensuring each slice is thoroughly coated. The batter will help create that signature crispy texture when fried. Make sure the batter evenly covers each slice to achieve crispy aloo pakoras.
Step 3: Heat the Oil
In a deep frying pan, heat oil over medium heat. The key to how to make aloo pakora crispy is ensuring the oil is hot enough before frying. To test if the oil is ready, drop a small amount of batter into the oil; if it sizzles and rises to the surface, the oil is hot enough for frying.
Step 4: Fry the Pakoras
Carefully place the coated potato slices into the hot oil, ensuring not to overcrowd the pan. Fry the pakoras in batches, flipping them occasionally to ensure even cooking. Fry until they turn golden brown and crispy on all sides. Once done, remove them from the oil and place them on a paper towel to drain excess oil.
Step 5: Serve and Enjoy
Your crispy aloo pakoras are now ready to be served! Enjoy them hot with your favorite chutney or sauce. These pakoras make for a perfect appetizer or snack, guaranteed to please everyone with their irresistible crunchiness and delicious flavor.
Tips for Making Crispy Aloo Pakoras
Thinly slice the potatoes: Slicing the potatoes thinly ensures they cook evenly and become crispy when fried.
Maintain the oil temperature: Keep an eye on the oil temperature to ensure it remains hot throughout the frying process, resulting in crispy pakoras.
Use a slotted spoon: When frying the pakoras, use a slotted spoon to carefully flip them and remove them from the oil, ensuring they cook evenly and are not soggy.
Variations of Aloo Pakora Recipe
Mixed Vegetable Pakoras: Add other vegetables like spinach, or cauliflower to the batter for a variation in flavor and texture.
Spice Level: Adjust the amount of chili powder according to your spice preference. You can also add finely chopped green chilies for an extra kick.
Cheese Stuffed Pakoras: Place a small cube of cheese between two potato slices before dipping them in the batter for a gooey and indulgent twist.
Benefits of Aloo Pakoras
Rich in Carbohydrates: Potatoes are a good source of carbohydrates, providing energy to keep you feeling full and satisfied.
High in Fiber: Chickpea flour used in the batter is high in fiber, aiding in digestion and promoting gut health.
Vitamins and Minerals: Potatoes contain essential vitamins and minerals such as vitamin C, potassium, and B vitamins, contributing to overall health and well-being.
FAQs about Aloo Pakoras
Can I make aloo pakoras ahead of time?
Yes, you can prepare the batter and slice the potatoes ahead of time. Fry the pakoras just before serving for the best results.
Can I bake aloo pakoras instead of frying them?
While frying gives the pakoras their characteristic crispiness, you can try baking them for a healthier alternative. However, the texture may differ slightly.
How do I store leftover pakoras?
Allow them to cool completely, then store them in an airtight container in the refrigerator. Reheat them in the oven or microwave before serving for the best taste and texture.
To provide the best experiences, we use technologies like cookies to store and/or access device information. Consenting to these technologies will allow us to process data such as browsing behavior or unique IDs on this site. Not consenting or withdrawing consent, may adversely affect certain features and functions.
Functional
Always active
The technical storage or access is strictly necessary for the legitimate purpose of enabling the use of a specific service explicitly requested by the subscriber or user, or for the sole purpose of carrying out the transmission of a communication over an electronic communications network.
Preferences
The technical storage or access is necessary for the legitimate purpose of storing preferences that are not requested by the subscriber or user.
Statistics
The technical storage or access that is used exclusively for statistical purposes.The technical storage or access that is used exclusively for anonymous statistical purposes. Without a subpoena, voluntary compliance on the part of your Internet Service Provider, or additional records from a third party, information stored or retrieved for this purpose alone cannot usually be used to identify you.
Marketing
The technical storage or access is required to create user profiles to send advertising, or to track the user on a website or across several websites for similar marketing purposes.
To provide the best experiences, we and our partners use technologies like cookies to store and/or access device information. Consenting to these technologies will allow us and our partners to process personal data such as browsing behavior or unique IDs on this site and show (non-) personalized ads. Not consenting or withdrawing consent, may adversely affect certain features and functions.
Click below to consent to the above or make granular choices. Your choices will be applied to this site only. You can change your settings at any time, including withdrawing your consent, by using the toggles on the Cookie Policy, or by clicking on the manage consent button at the bottom of the screen.
Functional
Always active
The technical storage or access is strictly necessary for the legitimate purpose of enabling the use of a specific service explicitly requested by the subscriber or user, or for the sole purpose of carrying out the transmission of a communication over an electronic communications network.
Preferences
The technical storage or access is necessary for the legitimate purpose of storing preferences that are not requested by the subscriber or user.
Statistics
The technical storage or access that is used exclusively for statistical purposes.The technical storage or access that is used exclusively for anonymous statistical purposes. Without a subpoena, voluntary compliance on the part of your Internet Service Provider, or additional records from a third party, information stored or retrieved for this purpose alone cannot usually be used to identify you.
Marketing
The technical storage or access is required to create user profiles to send advertising, or to track the user on a website or across several websites for similar marketing purposes.