Category: Easy Appetizers
Easy Appetizers: Delightful and Simple Indian Starters
Appetizers set the tone for a meal, offering a tantalizing preview of what’s to come. When it comes to easy appetizers, Indian cuisine provides a plethora of options that are both flavorful and straightforward to prepare.
From crispy fritters to tangy chaat, these Indian veg appetizers are perfect for any occasion. Whether you need quick and easy appetizers for a party or best easy appetizers to impress your guests, there’s something to suit every palate.
Benefits of Appetizers
- Stimulate Appetite: Appetizers prepare the stomach for the main course recipes.
- Social Interaction: Small bites are perfect for social gatherings and encourage conversation.
- Variety: They offer a variety of flavors and textures in a single meal.
- Portion Control: Appetizers can help in controlling portion sizes and preventing overeating.
Popular Indian Appetizers
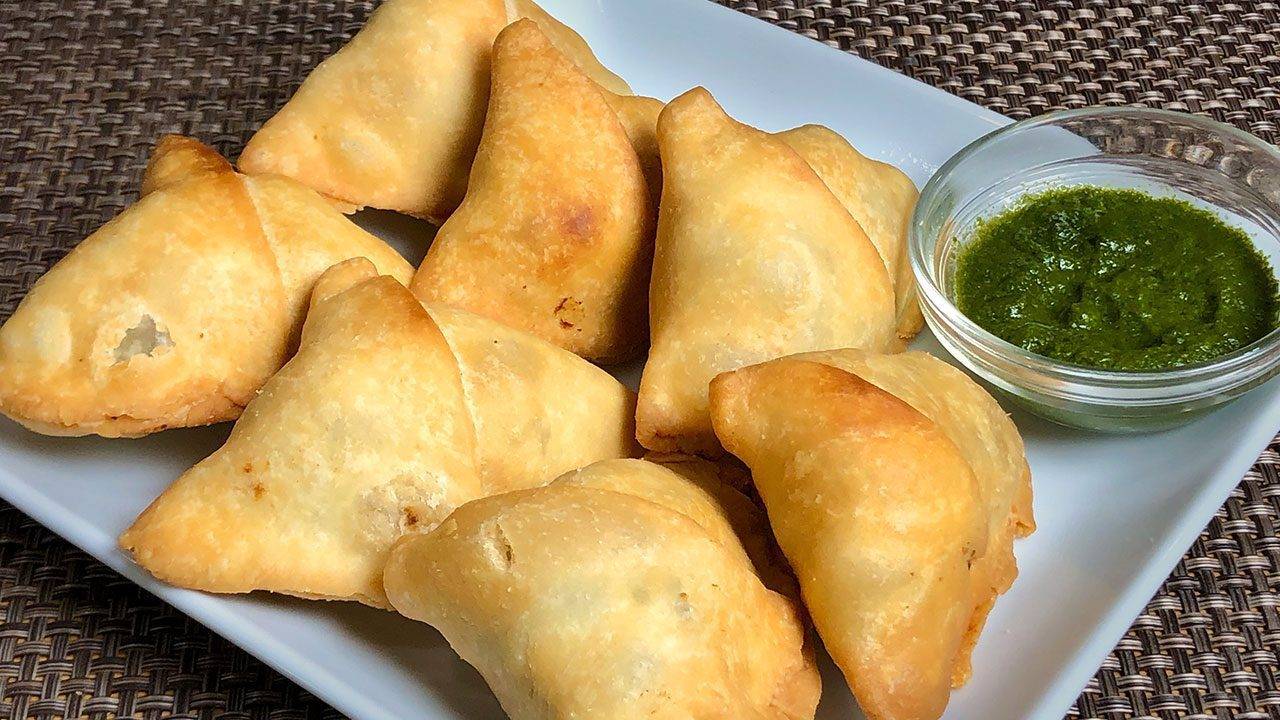
1. Samosas
Samosas are quintessential easy Indian appetizers. These Indian snacks recipes are crispy, deep-fried pastries stuffed with spiced potatoes, peas, and sometimes lentils. They are perfect for any gathering and are loved by all.
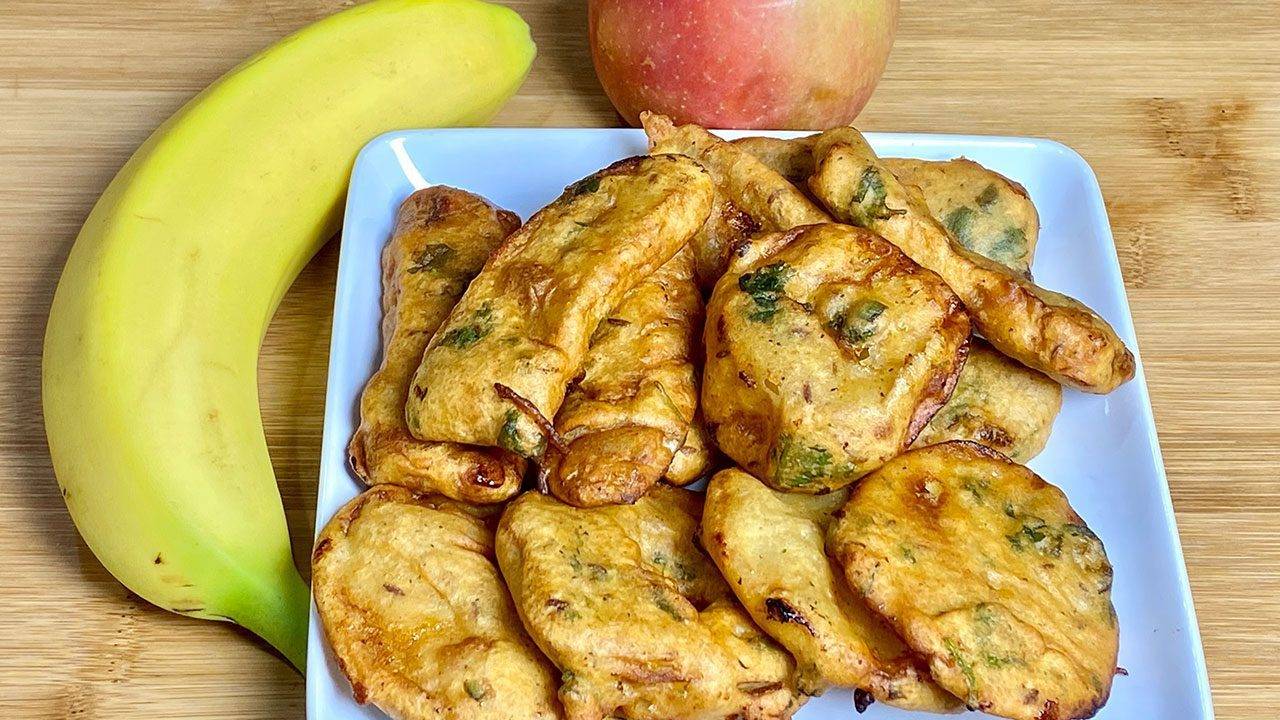
2. Pakoras
Pakoras are fritters made from vegetables like potatoes, and spinach, dipped in gram flour batter and deep-fried until golden. They are ideal quick and easy appetizers for rainy days.
3. Paneer Tikka
Paneer tikka is a popular appetizer where cubes of paneer (Indian cottage cheese) are marinated in spices and grilled. It’s one of the appetizers recipe that’s both healthy and delicious.
4. Aloo Tikki
Aloo tikki are spiced potato patties that are shallow-fried to perfection. They are often served with indian chutney and yogurt, making them a perfect quick easy appetizer.
5. Dahi Puri
Dahi puri is a delightful chaat item where small puris are filled with yogurt, chutneys, and spiced potatoes. It’s a burst of flavors in a single bite, making it a fantastic appetizer easy to prepare.
Quick and Easy Appetizers
1. Masala Papad
Masala papad is a simple yet tasty appetizer where roasted or fried papads are topped with tomatoes, and spices. It’s ready in minutes and offers a delightful crunch.
2. Veg Spring Rolls
Veg spring rolls are a quick appetizer filled with stir-fried vegetables wrapped in thin sheets and deep-fried. They are crispy and can be served with a variety of dipping sauces.
3. Cheese Balls
Cheese balls are made with mashed potatoes and cheese, rolled into balls, and deep-fried until golden brown. They are a hit among both kids and adults.
4. Hara Bhara Kabab
Hara bhara kabab is a healthy appetizer made from spinach, peas, and potatoes, shaped into patties, and shallow-fried. It’s nutritious and quick to prepare.
5. Chilli Paneer
Chilli paneer is a spicy Indo-Chinese appetizer made from paneer cubes tossed in a tangy and spicy sauce with bell peppers. It’s a crowd-pleaser and easy to whip up.
Best Easy Appetizers
1. Corn Chaat
Corn chaat is a quick and healthy appetizer made from boiled corn kernels mixed with tomatoes, and spices. It’s a refreshing start to any meal and a great chaat recipe for starters.
2. Sev Puri
Sev puri is a popular street food where flat puris are topped with diced potatoes, chutneys, and sev (crispy chickpea noodles). It’s a perfect blend of sweet, spicy, and tangy flavors.
3. Spinach and Cheese Croquettes
Spinach and cheese croquettes are crispy on the outside and creamy on the inside. They are made from spinach and cheese, coated with breadcrumbs, and deep-fried.
4. Stuffed Mushrooms
Stuffed mushrooms are a simple yet elegant appetizer. Mushrooms are filled with a mixture of vegetables and cheese, baked until golden and bubbly.
5. Mini Uttapam
Mini uttapam are small, thick pancakes made from fermented rice and lentil batter, topped with chopped vegetables. They are a nutritious and easy appetizer.
Quick Easy Appetizers
1. Tomato Basil Bruschetta
Tomato basil bruschetta is an easy Italian appetizer that can be given an Indian twist with the addition of some Indian spices. It’s quick to prepare and bursting with flavor.
2. Chana Chaat
Chana chaat is a tangy and spicy chickpea salad mixed with tomatoes, and chaat masala. It’s a protein-packed appetizer that’s ready in no time.
3. Bread Pizza
Bread pizza is a quick and easy appetizer where bread slices are topped with pizza sauce, vegetables, and cheese, then baked until the cheese melts.
4. Vegetable Cutlets
Vegetable cutlets are a versatile appetizer made from mixed vegetables and spices, shaped into patties, and shallow-fried. They can be served with ketchup or green chutney.
5. Mango Salsa
Mango salsa is a refreshing appetizer made from ripe mangoes, bell peppers, and cilantro, tossed with lime juice. It’s a perfect blend of sweet and tangy flavors.
Appetizers Easy
1. Roasted Chickpeas
Roasted chickpeas are a healthy and easy appetizer. Chickpeas are seasoned with spices and roasted until crispy. They are a great snack to munch on.
2. Cucumber Sandwiches
Cucumber sandwiches are light and refreshing appetizers made from slices of cucumber and cream cheese between pieces of bread. They are perfect for summer parties.
3. Fruit Skewers
Fruit skewers are an easy and healthy appetizer. Fresh fruits are threaded onto skewers and served with a yogurt dip.
4. Avocado Toast
Avocado toast is a simple and trendy appetizer. Mashed avocado is spread on toasted bread and topped with spices, making it a nutritious and delicious start.
5. Caprese Salad
Caprese salad is a classic Italian appetizer that’s easy to prepare. Fresh mozzarella, tomatoes, and basil are drizzled with olive oil and balsamic vinegar.
FAQs
Q: What is the simplest appetizer?
A: Masala papad is one of the simplest appetizers you can prepare. It requires minimal ingredients and is ready in minutes.
Q: What are small appetizers called?
A: Small appetizers are often referred to as canapés, hors d’oeuvres, or tapas, depending on the cuisine.
Conclusion
Indian cuisine offers a wide array of vegetarian appetizers recipes that are perfect for any occasion. Whether you need quick and easy appetizers or the best easy appetizers for a party, these recipes will impress your guests and satisfy your taste buds. Enjoy the variety and flavors that easy Indian appetizers bring to your table. For more interesting recipes and dishes check out Manjula’s Kitchen.
-
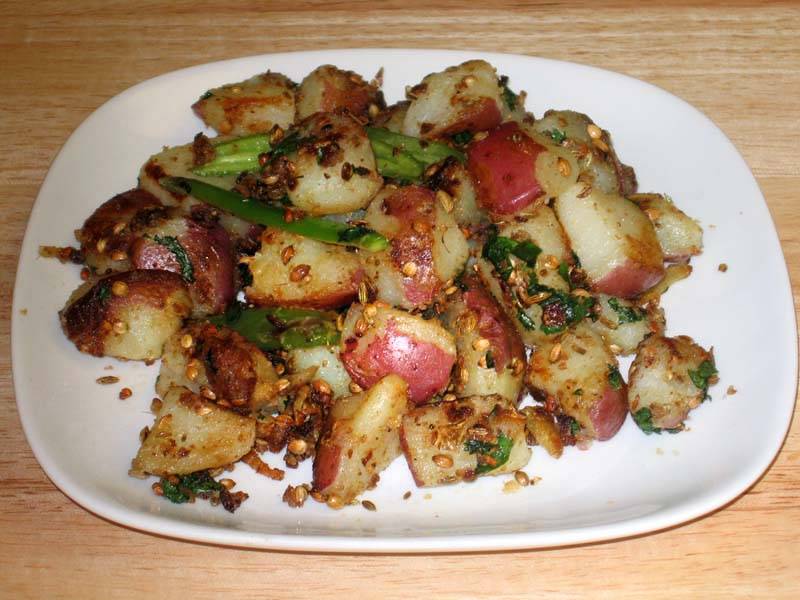
Spicy Potatoes

Spicy potatoes
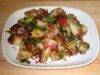
Spicy potatoes are a wonderful dish to serve as an appetizer, snack, or side dish.
- 3 medium red potatoes
- 2 tbsp oil
- 1/2 tsp cumin seeds (jeera)
- 1 tsp crushed coriander seed (dhania)
- 1 tsp crushed fennel seed (saunf)
- 1/4 tsp fenugreek seeds (mathi)
- 1 tsp shredded ginger
- 1/4 tsp black pepper
- 2 green chilies, seeded and sliced long ways
- 1 tsp salt
- 2 tsp lemon juice
- 2 tbsp chopped cilantro (hara dhania)
-
Peel strips of skin from the potatoes; leave some of the skin to provide color. Cut the potatoes into bite-size cubes.
- Put the potatoes and one teaspoon salt into a pot. Cover with water and cook on medium high until tender but not mushy. Once the potatoes are cooked, drain the water and set aside.
- Heat the oil in a frying pan over medium high heat. Test the heat by adding one cumin seed to the oil; if it cracks right away, the oil is ready. Add cumin seeds. When the cumin seeds crack, add the coriander, fennel, fenugreek seeds, and shredded ginger. Stir-fry for about half a minute.
- Add potatoes and stir-fry the mixture over medium heat until they are a light golden brown.
- Add salt, black pepper, and green chili. Roast another two to three minutes. Turn off the heat and add lemon juice and the cilantro mixture. Adjust salt, lemon, and pepper to your taste.
Note
I use red potatoes because they are firmer and don’t get mushy.
Serve with Chai or Lemonade
How to Make Spicy Potato Curry
Spicy Potato Curry is a flavorful dish made with tender potatoes cooked in a spicy and aromatic gravy. It’s a popular appetizer or side dish in Indian cuisine, commonly enjoyed with rice or bread. This gluten-free and vegan recipe is quick and easy to prepare, making it perfect for a delicious and satisfying meal.
Step 1: Prep the Ingredients
Start by gathering all the ingredients needed for the spicy potato curry. You’ll require potatoes, tomatoes, ginger, green chilies, and a blend of spices such as cumin seeds, turmeric, coriander powder, and garam masala. Peel and chop the potatoes into bite-sized pieces, dice the tomatoes, mince the ginger, and slice the green chilies.
Step 2: Sauté the Aromatics
Heat some oil in a pan over medium heat. Add the spices like cumin seeds and let them sizzle for a few seconds until fragrant. Then, toss in the minced ginger and sliced green chilies. Sauté them until they release their aroma and turn golden brown, infusing the oil with their flavors.
Step 3: Add the Potatoes
Now, add the chopped potatoes to the pan. Stir well to coat them evenly with the aromatic oil and spices. Allow the potatoes to cook for a few minutes, stirring occasionally, until they start to lightly brown around the edges.
Step 4: Incorporate the Tomatoes
Once the potatoes are partially cooked, add the diced tomatoes to the pan. Mix everything together gently, ensuring the tomatoes are evenly distributed among the potatoes. The tomatoes will add a tangy sweetness to the dish, balancing out the heat from the spices.
Step 5: Season and Simmer
Now, it’s time to season the spicy potato curry with salt, turmeric, coriander powder, and garam masala. Stir well to combine all the ingredients. Then, cover the pan with a lid and let the curry simmer on low heat until the potatoes are fully cooked and tender, and the flavors have melded together beautifully.
Step 6: Serve and Enjoy
Once the spicy potato curry is ready, remove it from the heat and garnish with freshly chopped cilantro leaves for a burst of freshness and color. Serve the curry hot with steamed rice or warm rotis for a satisfying meal that will surely delight your taste buds.
Tips for Making the Best Spicy Potato Curry:
- Adjust the amount of green chilies according to your spice preference. For a milder curry, use fewer chilies, or remove the seeds to reduce the heat.
- To enhance the flavor, you can add a splash of lemon juice or a dollop of coconut milk towards the end of cooking.
- For added texture and nutrition, throw in some vegetables like peas, carrots, or bell peppers along with the potatoes.
- Feel free to customize the spices to suit your taste. You can experiment with adding spices like mustard seeds, fenugreek seeds, or curry leaves for a different flavor profile.
Variations of Spicy Potato Curry:
- Creamy Spicy Potato Curry: Stir in some coconut milk or cashew cream to create a lusciously creamy texture.
- Spicy Potato and Chickpea Curry: Add cooked chickpeas to the curry for an extra dose of protein and heartiness.
- Spicy Potato and Spinach Curry: Throw in a handful of fresh spinach leaves during the last few minutes of cooking for a nutritious twist.
Benefits of Spicy Potato Curry:
- Potatoes are a good source of vitamins and minerals, including vitamin C, potassium, and B vitamins.
- The spices used in this curry, such as turmeric and cumin, are known for their anti-inflammatory and digestive benefits.
- This dish is vegan-friendly and can be enjoyed by individuals following a plant-based diet.
FAQs:
Q: Can I make this curry ahead of time?
A: Yes, you can prepare the curry ahead of time and store it in an airtight container in the refrigerator for up to 2-3 days. Reheat it gently on the stovetop or in the microwave before serving.
Q: Can I freeze leftover curry?
A: Absolutely! This curry freezes well. Allow it to cool completely, then transfer it to a freezer-safe container and freeze for up to 3 months. Thaw overnight in the refrigerator before reheating.
Q: Can I use sweet potatoes instead of regular potatoes?
A: Yes, you can substitute sweet potatoes for regular potatoes if you prefer. Just keep in mind that sweet potatoes have a sweeter flavor, which will slightly alter the taste of the curry.
Explore More Delectable Recipes
For more mouthwatering recipes and culinary inspiration, explore the following links from Manjula’s Kitchen:
Crispy Spinach Pakoras, Vegetable Biryani, Paneer Tikka Masala, Vegetable Pakoras, Baingan Bharta (Roasted Eggplant) & Matar (Green Peas) Paneer.
-
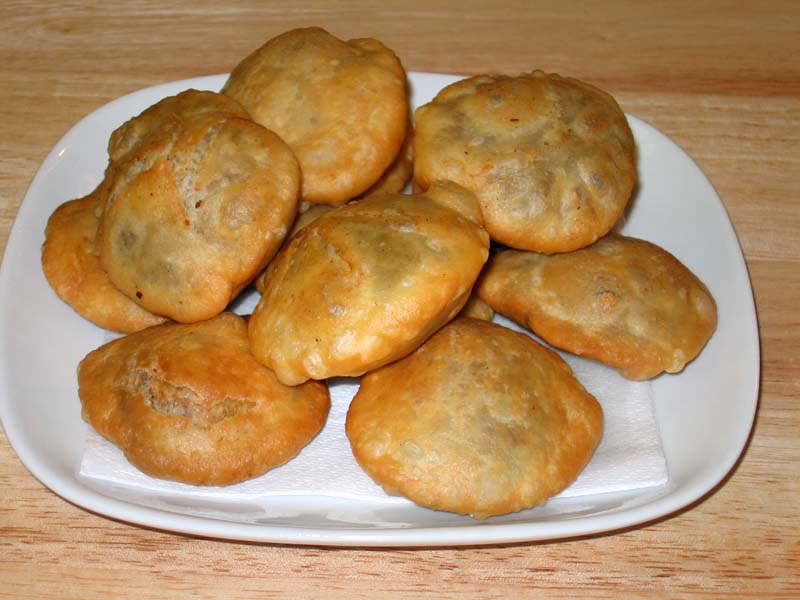
Khasta Kachori

Khasta Kachori

Khasta kachori is a delicious, spicy, fried puffed pastry. Khasta Kachori is filled with spicy moong dal mixture and then deep fried. Kachori is flakey from outside and hollow inside. Kachori should be fried on low heat so it can cook through to have a nice crunch. Khasta kachori is one of the dish you can eat for any meal! Serve them for breakfast with potato curry with yogurt. kachori makes a mouthwatering appetizer and can be served with, Green Chutney, and tamarind chutney. How about serving for dinner with Aloo Dum. This is one of those recipe you make when you want to impress someone. Kachories can also be stored in air tight container for a week.
Dough
- 1 cup all purpose flour (maida, plain flour)
- ¼ tsp salt
- 2 Tbsp oil (canola, or vegetable)
- ¼ cup cold water (more or less as needed)
Filling
- ¼ cup washed moong dal, yellow
- 1 tsp fennel seeds coarsely ground (saunf)
- 1 tsp red chilly flakes
- ¼ tsp ginger powder (saunth)
- ½ tsp mango powder (amchoor)
- ⅛ tsp asafetida (hing)
- ½ tsp salt
- 2 Tbsp water
Making Dough
-
Mix the flour, salt and oil. Add the chilled water slowly, mixing with your fingers as you pour. Do not knead the dough. The dough should be soft. Cover the dough and let it sit for at least fifteen minutes.
Filling
-
Grind the moong dal dry, almost to a powder.
-
Mix one tablespoon of oil to the ground dal in a frying pan and roast over medium heat for about two to three minutes or until dal changes color slightly. Stir continuously. Turn off the heat. Add all the spices mix well. Let the mixture cool off. Add two tablespoons of warm water and mix it well. Let it sit for ten minutes and cover with demp cloth.
Making Kachories
-
Take the dough and knead it for a minutes. Divide the dough in twelve equal parts.
-
Take one part of the dough and with your fingers flatten the edges and make into 3-inch circle. Leaving center little thicker then edges. Mold the dough into a cup and place 1 teaspoon of filling in the center. Pull the edges of the dough to wrap the dal filling. Proceed to make all 12 balls.
- Let the filled ball sit for three to four minutes before rolling.
- Set the kachoris on a surface with the seams facing up. Using the base of your palm, slowly flatten them into about three inches in diameter.
- Heat the oil in frying pan over medium heat frying pan should have about one inch of oil. To check if oil is ready put a little piece of dough in the oil. Dough should sizzle, and come up very slow.
- Fry them on medium-low heat. After they start to puff, slowly turn them over. Fry until golden-brown on both sides. If the kachoris are fried on high heat, they will get soft and will not be crispy.
- Kachories can be stored for at least a week in an airtight container
Additional Tips
Don’t roll the kachoris with a rolling pin. Rolling pins can create small holes in the dough that let the oil seep into the kachoris, and they can also cause the kachoris to come out with one side thicker than the other.
Variation
Instead of using moong dal, you can use washed urad dal or chana dal. The rest of the recipe stays the same.
Serving suggestions:
Kachoris can be served plain, with Tamarind Chutneys, chola, or with Aloo Dum. Serve them as a chat, pouring plain yogurt and chutney on top.
Khasta Kachori Recipe: How to make Khasta Kachori
Khasta Kachori, a popular Indian street food delicacy, is a deep-fried pastry filled with a spicy and flavorful stuffing. This crispy and indulgent snack is loved for its rich taste and satisfying crunch, making it a favorite among food enthusiasts.
Khasta Kachori Recipe:
Rich Flavor Profile: Khasta Kachori is bursting with a medley of spices and aromatics, creating a symphony of flavors with every bite. The combination of ingredients like lentils, spices, and herbs provides a unique and indulgent taste experience.
Satiating Snack: Despite its small size, Khasta Kachori is incredibly filling and satiating, making it an ideal snack option to curb hunger pangs between meals or as a satisfying accompaniment to tea or coffee.
Versatile: While traditionally served as a snack, Khasta Kachori can also be enjoyed as a part of a larger meal. It pairs well with various chutneys, sauces, and accompaniments, allowing for endless culinary creativity.
Convenience: Khasta Kachori can be prepared in advance and stored for later consumption, making it a convenient snack option for busy days or entertaining guests.
Variations of Kachori:
- Mattar Ke Kachori: Mattar Kachori is a delicious, fried puff pastry filled with spicy green peas. This mouthwatering snack also can be served as part of any main meal.
- Raj Kachori: Raj Kachori is a spicy chaat bowl filled with delicious condiments. It has refreshing flavors and makes for a unique food experience. Guests will have fun filling their own Kachoris according to their taste palette. Served as a snack or appetizer, Raj Kachories make a beautiful presentation and are thoroughly enjoyed by just about everyone.
- Mawa Kachori: Mawa Kachori is an exotic dessert. This is a delicacy from the state of Rajasthan. Rajasthan is known for its rich food and culture. Pastry filled with an aromatic mixture of Mawa and nuts makes a very festive dessert.
- Urad Dal Kachori: Dal kachori is a delicacy from north India. Dal kachori is a spicy puffed pastry. Traditionally kachoris are sold at a sweet and snack shop. These mouthwatering Dal kachoris can be served as a snack, chaat or part of main meal, making the meal exotic.
Tips for Making Perfect Khasta Kachori
Prepare the Dough with Care: The key to crispy and flaky Khasta Kachori lies in the dough preparation. Use a combination of all-purpose flour (maida) and semolina (sooji) to achieve the desired texture. Ensure that the dough is firm yet pliable to prevent it from becoming too soft during frying.
Fry at the Right Temperature: Fry the kachoris in hot oil over medium-high heat to ensure that they cook evenly and develop a golden-brown crust. Avoid overcrowding the frying pan to maintain the oil temperature and prevent the kachoris from absorbing too much oil.
Seal the Edges Properly: To prevent the filling from leaking out during frying, seal the edges of the kachoris tightly before frying. Press the edges together firmly and ensure that there are no gaps or openings.
Serve Fresh and Hot: Khasta Kachori is best enjoyed fresh and hot, straight out of the frying pan. Serve it with your favorite chutneys, sauces, or accompaniments for a delightful snacking experience.
FAQs about Khasta Kachori:
Can I make Khasta Kachori ahead of time?
While Khasta Kachori is best enjoyed fresh, you can prepare the dough and filling in advance and assemble the kachoris just before frying to save time.
Can I bake Khasta Kachori instead of frying?
While traditional Khasta Kachori is deep-fried for that signature crispy texture, you can try baking them for a healthier alternative. However, the texture and taste may differ slightly.
What are the best accompaniments for Khasta Kachori?
Khasta Kachori pairs well with a variety of chutneys such as tamarind chutney, mint chutney, or coriander chutney. It also tastes delicious with a dollop of yogurt and a sprinkle of chaat masala.
Is Khasta Kachori suitable for vegetarians?
Yes, Khasta Kachori is a vegetarian dish as it contains no meat or animal products. It’s a popular choice among vegetarians and vegans alike.
Khasta Kachori is not just a snack; it’s a culinary delight that excites your taste buds with its crispy exterior and flavorful filling. Whether enjoyed as a street food treat or homemade snack, its rich taste and versatility make it a beloved favorite in Indian cuisine.
-
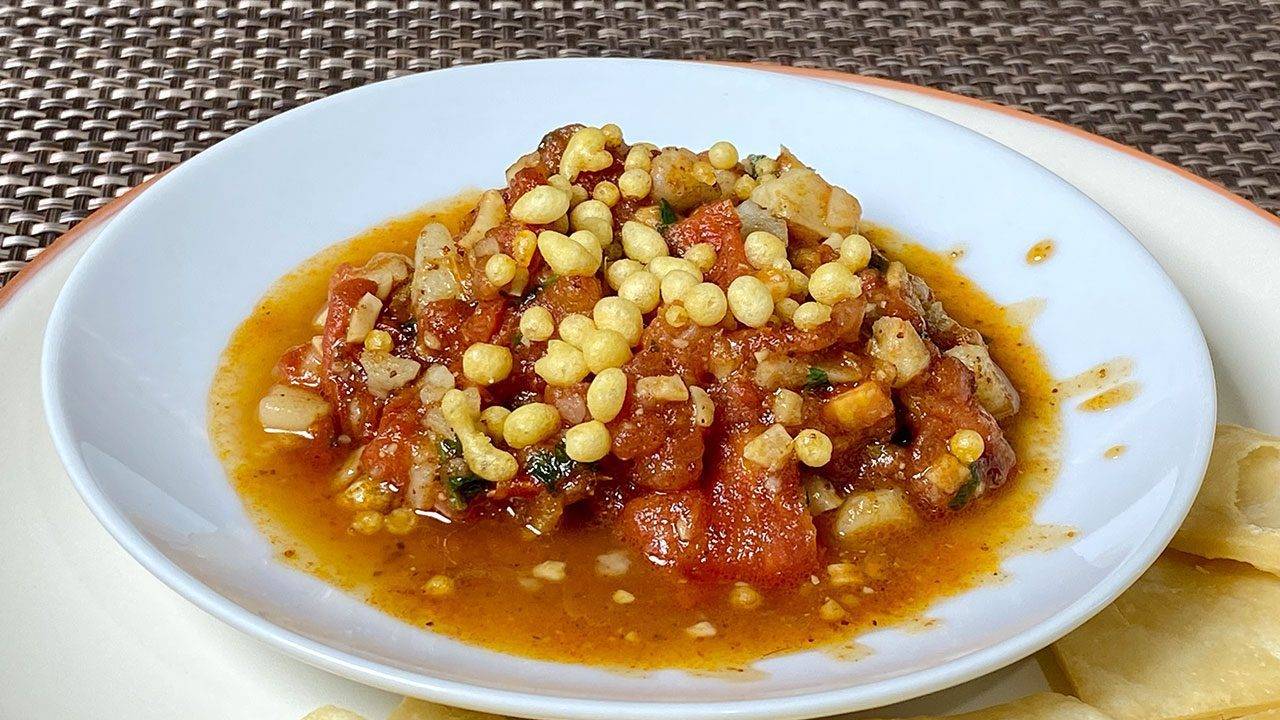
Banaras Tamatar Ki Chaat
How to make Banarasi Tamatar Chaat Recipe – Manjula’s Kitchen
Banarasi Tamatar Chaat is a flavorful and spicy vegan tomato-based chaat (savory snack) that originates from Banaras or Varanasi, a city in the northern part of India. It is a popular gluten free street food known for its distinctive taste and the unique combination of sweet, tangy, and spicy flavors. To prepare Banarasi Tamatar Chaat, follow this tamatar chaat recipe:Spicy Syrup:
To create the syrup for our dish, start by gathering your ingredients. In a saucepan, combine water, sugar, salt, black salt, chili powder, lemon juice, and cumin powder. These elements will come together to form a flavorful and balanced syrup. Once all the ingredients are in the saucepan, place it over medium heat. The goal here is to allow the mixture to cook and meld, developing a harmonious blend of sweet, salty, spicy, and tangy flavors. Cooking it over medium heat ensures a gradual and even infusion of these elements.
As the saucepan warms up, keep a close eye on the mixture. Stir occasionally to help the sugar dissolve and to ensure that all the ingredients are well incorporated. The heat will play a crucial role in transforming these individual components into a cohesive syrup that will elevate the overall taste of our dish. Stir the ingredients well to ensure they are thoroughly mixed. Allow the mixture to come to a boil and then let it simmer for about 5 minutes. Keep a close eye on it to make sure the syrup reaches a sticky consistency.
Once the syrup achieves the desired stickiness, remove the saucepan from the heat. This syrup will be set aside and used later for garnishing. It adds a flavorful touch to our dish. Now that the syrup is ready, you can move on to the next steps of your recipe.
Tamatar Ki Chaat:
Let’s explore further as we create the delectable Banaras Tamatar Chaat, a delightful dish featuring the vibrant combination of tomatoes and aromatic spices. Follow these detailed steps to bring this tantalizing Tamatar ki Chaat to life.
1. Heating the Oil:
Begin by heating oil in a frying pan over low to medium heat. Allow it to warm up, setting the stage for the rich flavors to unfold.
2. Adding Aromatic Ingredients:
Once the oil reaches the right temperature, introduce cashew powder, ginger, green chili, and red chili powder. Stir-fry this aromatic mix for about 30 seconds, letting the spices infuse the oil with their essence.
3. Incorporating Tomatoes and Spices:
Add tomatoes to the pan, along with salt, black salt, black pepper, and cumin powder. Stir this flavorful combination for a duration of 2 minutes, allowing the spices to mingle with the tomatoes.
4. Introducing Water and Simmering:
Pour in half a cup of water to the pan. Bring it to a gentle boil and let it simmer over medium heat for 3 minutes or until the tomatoes slightly soften. This simmering process enhances the infusion of flavors.
5. Adding Potatoes:
Gently fold in the potatoes, ensuring they are coated with the aromatic tomato-spice mixture. Cover the pan and let it cook for approximately 3 minutes. Aim for the tomatoes to be soft but not mushy, and observe the oil starting to separate, a sign of the dish’s richness.
6. Preserving Texture:
As you stir, be mindful not to mash the tomatoes and potatoes completely. Preserving their texture is key to the appeal of Banarasi Tamatar Chaat.
7. Final Touch:
Elevate the flavors with a final touch. Add cilantro for freshness, garam masala for warmth, lemon juice for a zesty kick, and a hint of sugar to balance the savory notes. Mix everything thoroughly, allowing the ingredients to harmonize.
8. Adjusting Sweetness and Tanginess:
Before presenting your Banarasi Tamatar ki Chaat, take a moment to taste and adjust. Fine-tune the sweetness, tanginess, and salt levels to achieve a well-balanced and harmonious flavor profile.
The Banaras Tamatar Chaat recipe is a symphony of textures and flavors. The careful combination of spices, the gentle simmering, and the final touch of freshness and warmth create a dish that captures the essence of Banaras (Varanasi), known for its rich culinary heritage. As you savor each bite of this Tamatar Chaat, you’ll experience the unique and delightful taste that defines this iconic recipe. Enjoy the journey of creating and relishing the Banarasi Tamatar ki Chaat in your own kitchen!
If you enjoy spicy snacks, you should also try Sweet potato chaat, Khasta Kachori Besan, Crispy Vegetable Pakoras, Dahi Puri Chaat & Bread Dahi Vada
-
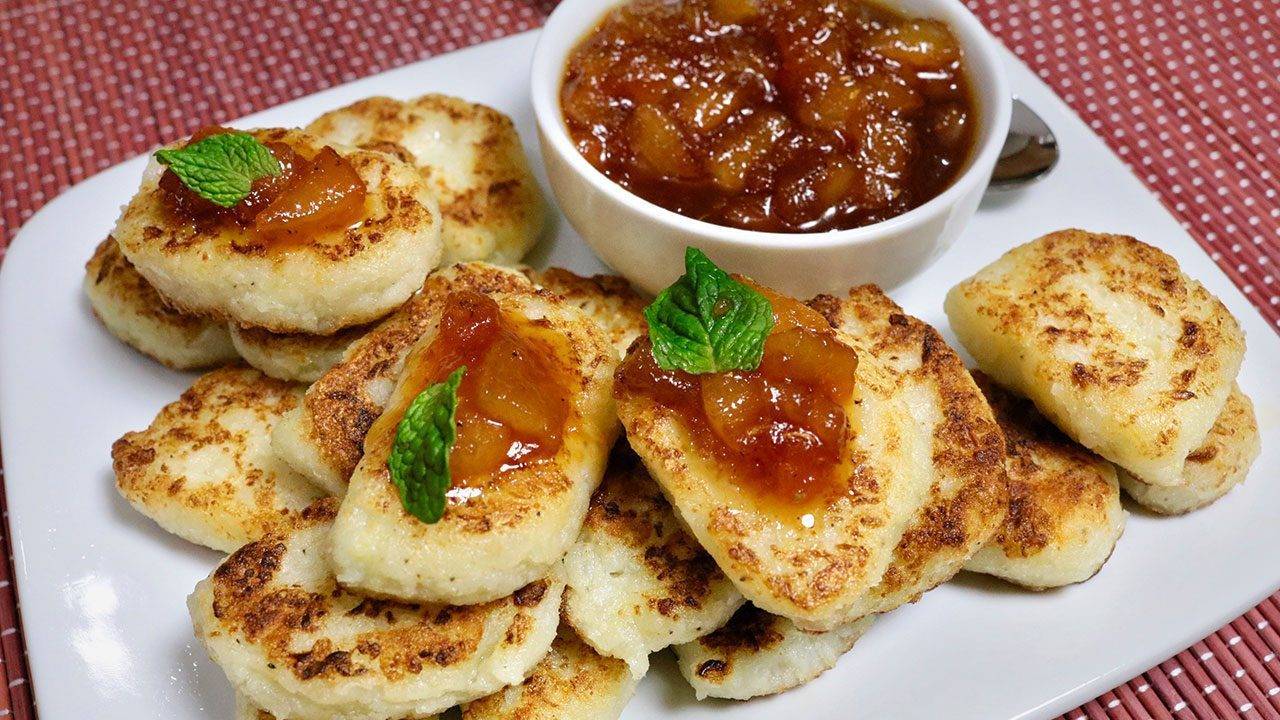
Potato And Cauliflower Gnocchi

Potato and Cauliflower Gnocchi

Gnocchi (pronounced No-chee) is a classic Italian dish. This vegan and gluten free Gnocchi is made with potato and Cauliflower. I have topped it off with a pear sauce to add my own twist to the recipe. This is Crispy on the outside and fluffy on the inside, this recipe is absolutely mouth-watering. This dish was a request from my granddaughter and I’m so glad I gave it a try.
For Gnocchi
- 2 cup cauliflower florets (approximately)
- 1 cup potatoes (boiled, peeled and shredded )
- 2 Tbsp corn starch (arrow root)
- 2 Tbsp rice flour
- 1/2 tsp ginger paste
- 1/2 tsp salt
- 1/8 tsp black pepper
- 2 Tbsp oil
For Pear Sauce
- 1 pear (peeled and sliced)
- 1/4 cup sugar
- 1 Tbsp olive oil
- 1/8 tsp black paper
- 1/4 tsp salt
- 1 Tbsp lemon juice
- 1 tsp ginger paste
To make the Pear Sauce
-
Heat the pan on low medium heat, I prefer nonstick pan, cook all the sauce ingredients together, olive oil, pear, sugar, black pepper, salt, lemon juice, ginger, mix it well and cook over medium high heat.
- Keep stirring until sugar is melted and start caramelizing while stirring keep scraping the sides. This should take about 3-4 minutes.
- Caramelize sugar has nice aroma and gives sauce a good golden color. Transfer to small bowl and mash it.
To make Gnocchi (NOK-EE)
-
Make sure remove the stems, boiled them till they are tender, drain the water squeeze the cauliflower to remove the access water, and pat dry.
- In a bowl add the cauliflower and potatoes and mash it well, add corn starch, rice flour, salt, black pepper, and ginger paste, mix it well, and knead to make a smooth dough.
- Divide the dough in 2 equal parts and roll them in one-inch calendar shape, if it is sticking to surface sprinkle some rice flour this will help rolling.
- Take the sharp knife and slice them about half inch thick
- Heat the non-stick flat frying pan over medium heat and oil it generously. Spread the Gnocchi do not overcrowd them it will be hard to flip, wait for about two minutes and turn them over, they should be light golden brown, and cook from other side same, Gnocchi should be golden brown both sides.
- Serve them pear sauce,
It is important to pat dry the cauliflower or air dry.
-
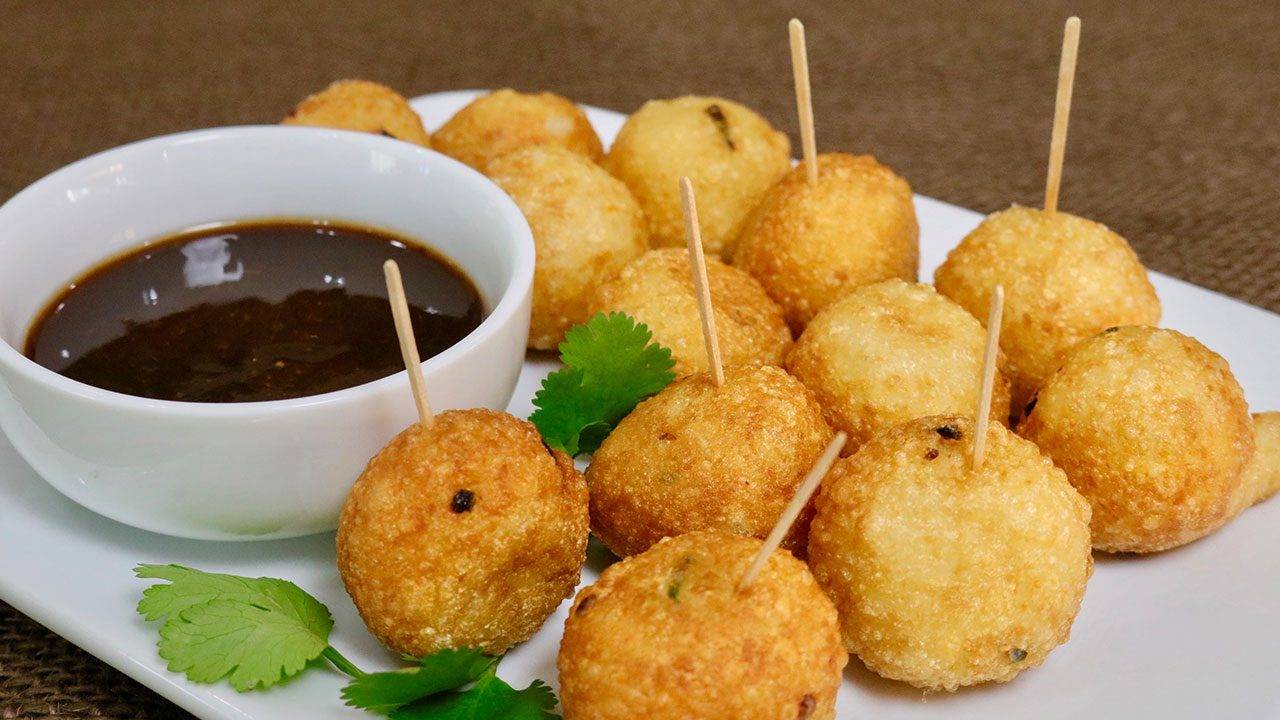
Crispy Potato Balls

Crispy Potato Balls, Potato Nuggets

These bite-sized appetizers are the perfect snack to serve as a tea time snack or starter at a dinner party. Crispy on the outside and soft on the inside, these potato balls are just what you need to satisfy your taste buds. This recipe is my younger sister Kumkum’s recipe, and I am so glad to be sharing it today.
- 2 cup potatoes (boiled, peeled and finely shredded)
- 3 Tbsp corn starch
- 1/2 tsp salt
- 1 tsp ginger (finely shredded)
- 1 Tbsp green chili (finely chopped)
- 2 tsp oil
-
In a bowl mix potato, about 2-1/2 tablespoons corn starch, and salt. Oil your palm and knead the potatoes, making into very smooth dough, if needed oil your palm again. Add the ginger and green chili and knead it again to incorporate all the ingredients together. If needed oil your palm again and dust the corn starch over the dough as needed.
- Divide the dough into 20 pieces and roll them between your palms, making them into smooth balls.
- Heat the oil in a frying pan on medium heat. The frying pan should have about 1 inch of oil. To check if the oil is ready, put little batter in the oil. The batter should raise to the top but not change color right away.
- Drop the potato balls slowly in the oil making sure don’t overlap them.
- Fry the potato balls until they turn golden brown, turning them occasionally. This should take about 6-8 minutes.
- When they are golden brown, take them out with a slotted spoon. Place them on a paper towel to absorb the extra oil.
- Crispy Potato balls will be crispy outside and soft inside, that is texture you are looking for this recipe.
Serving Suggestion,
Serve with tamarind chutney, recipe is on my website.
How to make Crispy Potato Balls Recipe
Crispy Potato Balls is a culinary masterpiece that combines the crispiness of a golden exterior with an irresistibly soft interior. Elevate your snacking experience with this easy-to-follow How to Make Crispy Potato Balls recipe formulated at Manjula’s kitchen that transforms humble potatoes into crunchy delights. In the world of culinary delights, few snacks match the universal appeal of Crispy Crunchy Potato Balls. This appetizer recipe is a testament to simplicity and sophistication, as simple ingredients transform into a crispy exterior enveloping a soft, flavorful core.
Step 1: Preparing the Potato Dough:
In the first step of how to make crispy potato balls recipe, we work on crafting the foundation of our Crispy Crunchy Potato Balls. Potatoes, boiled to perfection and finely shredded, lay the groundwork for the following gastronomic delight. To this, we add enigmatic corn starch. This culinary secret weapon bestows the coveted crunchiness upon our crispy potato balls.
The process begins with a harmonious mingling of potato cornstarch with a dash of salt in a mixing bowl. Facilitate the cohesion of these elements with a touch of oil to our palms. Kneading the potatoes with the gentle guidance of oiled hands, we sculpt them into a velvety-smooth dough, a canvas ready to absorb the nuanced flavors we will introduce.
The stage is set, and with meticulous care, we incorporate the finely shredded ginger and finely chopped green chili into the potato dough. Each addition contributes to a symphony of flavors, infusing the dough with layers of complexity and a subtle kick that promises to tantalize the taste buds.
Step 2: Shaping into Smooth Balls:
With our potato dough now a harmonious blend of textures and tastes, we move to the second act of our culinary performance. Dividing the dough into twenty equal portions, shaping them into uniform balls. The palms become the instrument, delicately rolling each part to perfection, ensuring a seamless and consistent experience with every bite. As the balls form, anticipation builds, for they are destined for the sizzling embrace of hot oil.
Step 3: Frying the Potato Balls
Put oil in the frying pan generously filled with approximately one inch of oil. As we gently release a tiny droplet of batter into the oil, we see the silent cues of readiness – the batter should ascend to the surface. The potato balls descend into the oil with precision and care, a symphony of sizzles marking their journey to golden perfection. The medium-intensity heat caresses the balls, coaxing them to transform into golden brown perfection. Occasional turns in the oil ensure an even, golden-brown hue.
Step 4: Golden Brown Perfection:
Our potato balls appear transformed after a brief time in the hot embrace of oil. The once unassuming dough has metamorphosed into golden, crispy, crunchy potato balls on the outside and lusciously soft within. This moment, marked by a divine golden-brown hue, signals the culmination of our culinary alchemy. With the grace of a culinary maestro, we retrieve the golden orbs from the pan, employing a slotted spoon as our instrument. Placing them on a paper towel-lined stage, we allow the excess oil to gracefully exit the scene, leaving only the essence of crispy perfection.
Step 5: Serving Crispy Potato Balls
Finally, the Crispy Potato Balls, now adorned in their golden glory, await their moment on the dining table. With a promise of a crispy exterior and a soft, flavourful interior, each ball invites us to savor the fruits of our culinary endeavors. The symphony of textures and tastes, meticulously crafted through each step, culminates in a dish that transcends the ordinary and is best served with tamarind chutney, hari chutney, or mint chutney.
-
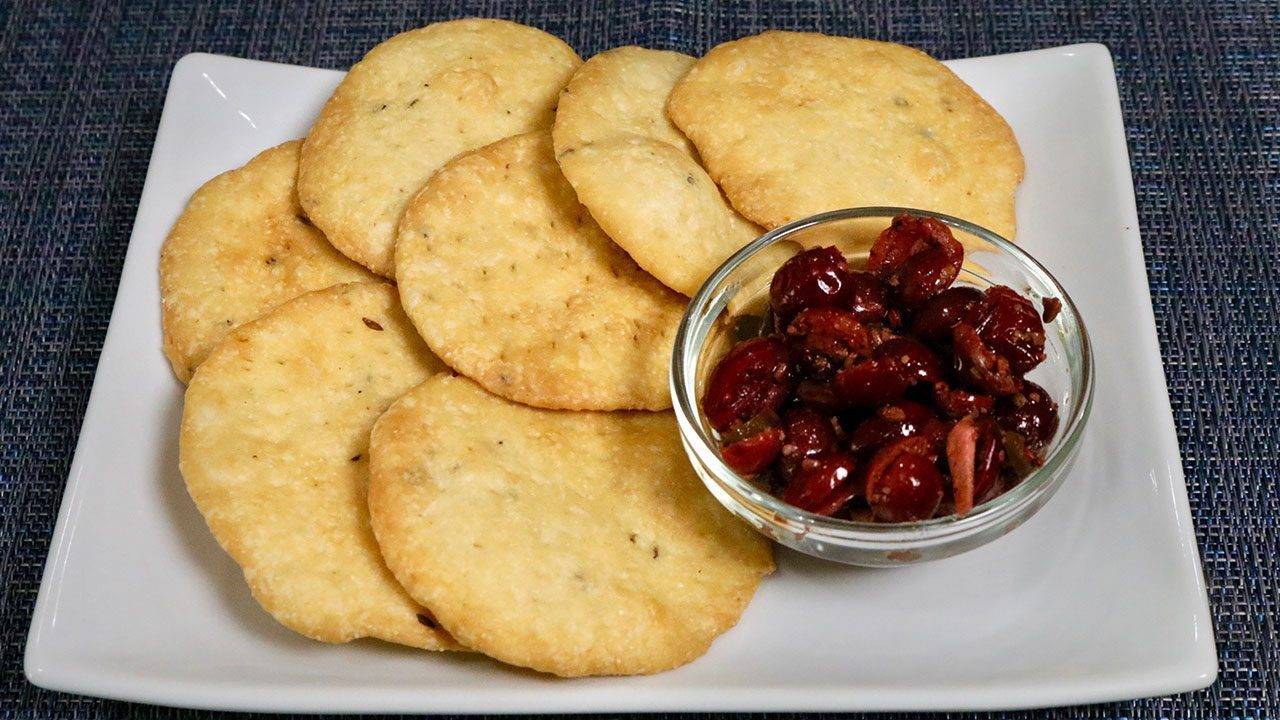
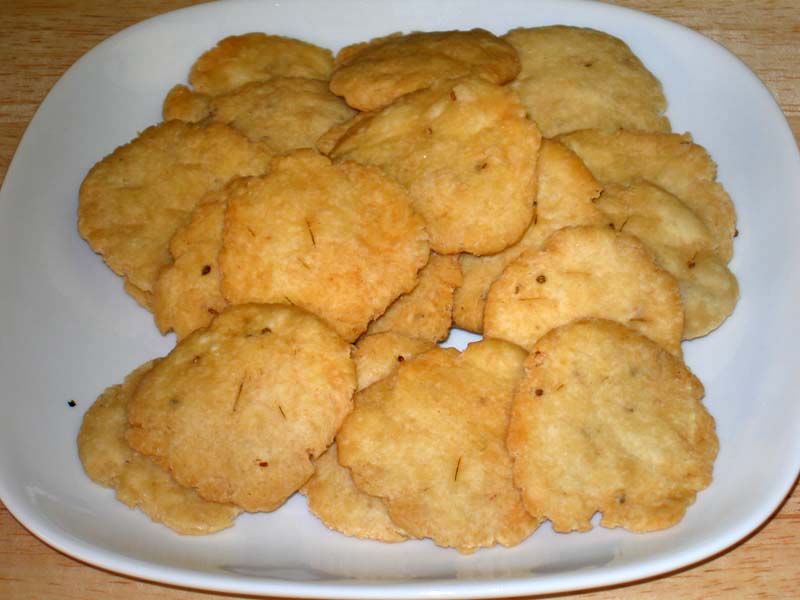
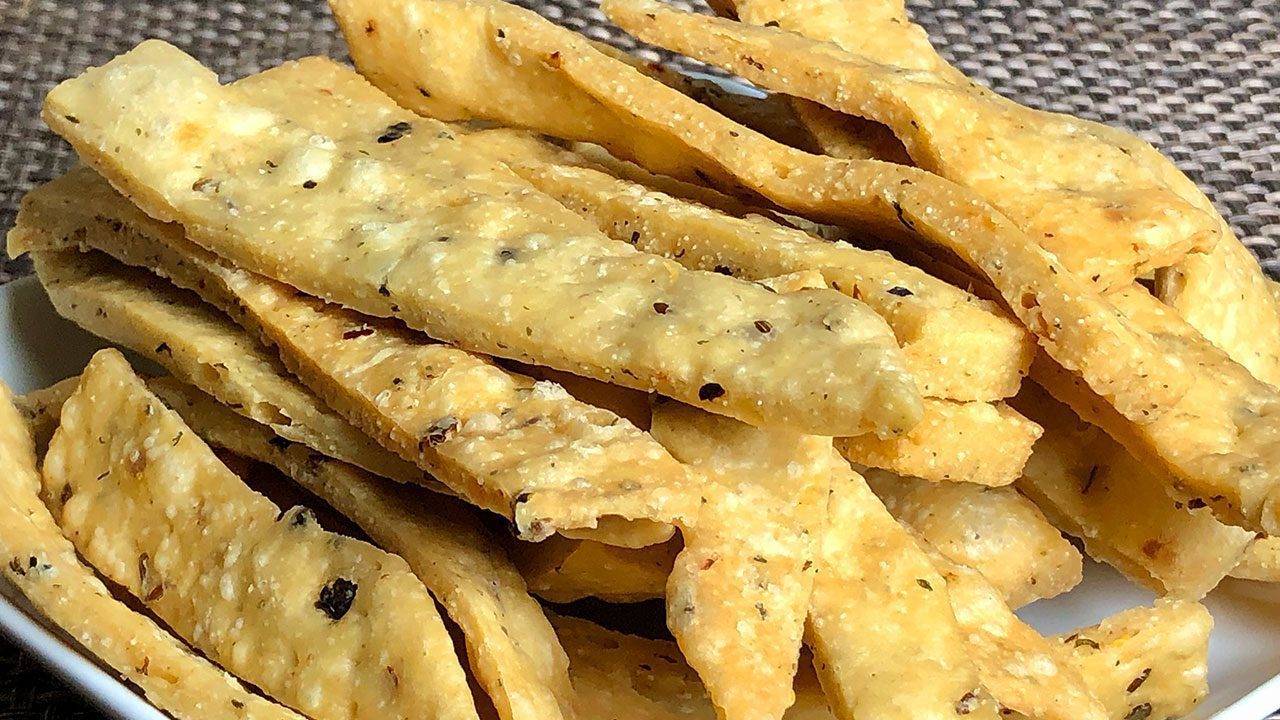
Khasta Mathri

Khasta Mathri – Indian Savory Crackers

Khasta Mathri is a popular, classic savory snack. You can serve these Mathries with pickle at tea time or you can enjoy as is! For all the upcoming holidays, Mathries make a good snack to have around to serve to all guests. They also make for a simple but special homemade gift.
- 1 cup all-purpose flour (maida or plain flour)
- 2 Tbsp sooji (semolina flour)
- 1/2 tsp salt
- 1/4 tsp black pepper (crushed)
- 1/4 tsp cumin seeds (jeera)
- 2 Tbsp oil (canola or vegetable oil)
- 1/2 cup chilled water
- 2 drops lemon juice
- oil to fry
-
Mix the flour, sooji, salt, black pepper, cumin seeds, lemon drops and oil. Note lemon should be just 2-3 drops, we are not adding this to flavor, lemon is added to give the crispness, also Mathries will absorbed less oil.
- Add the chilled water slowly, mixing with your fingers as you pour. Do not knead the dough. The dough should be soft.
-
Cover the dough and let it sit for at least fifteen minutes. Divide the dough into about 20 equal parts, I decided to make 14.
- Take each part of the dough and make a flat ball shape. Roll them into 2-inch circles. Prick each mathri with a fork about 6-8 places, both sides each, to prevent puffing the mathri when frying.
- Heat the oil in a frying pan on low medium heat. The frying pan should have at least 1 inch of oil. To check if the oil is ready, put a small piece of dough in the oil. The dough should make the oil sizzle and come up slowly.
-
Fry mathri in batches, making sure to place just enough mathri to cover the frying oil. Fry them until both sides are a light golden-brown. This should take about 5-7 minutes. Take them out over paper towel, which will absorb the extra oil
Suggestions
Serve the Khasta Mathri with cranberry pickle, or Chatpata Aloo
Khasta Mathris can be stored for a couple of months in airtight containers.
If the mathris are cooked on high heat, they will be soft.
Khasta Mathri Recipe: How to make Khasta Mathri
Khasta Mathri is a popular Indian savory snack enjoyed across India, particularly during festivals, tea-time, or as a crunchy accompaniment to meals.
These golden-brown, flaky crackers are known for their irresistible crispiness and rich flavour, making them a favorite among snack lovers of all ages.
Made from a simple dough of all-purpose flour, ghee (clarified butter), and spices, Khasta Mathri is deep-fried to perfection, resulting in a crunchy texture and aromatic taste.
Khasta Mathri for Festive Season
Crunchy Texture: Khasta Mathri’s signature feature is the crunchy and flaky texture, which provides a delightful snacking experience with every bite. The layers of dough create a light and airy interior, while the deep-frying process gives the crackers a golden-brown exterior that’s irresistibly crispy.
Rich Flavor: Despite its simple ingredients, Khasta Mathri is packed with flavor, thanks to the addition of aromatic spices such as ajwain (carom seeds), black pepper, and cumin seeds. These spices lend a warm and fragrant aroma to the crackers, enhancing their overall taste and appeal.
Long Shelf Life: Khasta Mathri has a long shelf life and can be stored in an airtight container for several weeks without losing its crispiness or flavor. This makes Khasta Mathri an ideal snack for travel, picnics, and gatherings, as it can be prepared in advance and enjoyed on-the-go.
Versatile Snack: Khasta Mathri is a versatile snack that can be enjoyed on its own or paired with various accompaniments. Serve Khasta Mathri with a cup of hot tea or chai for a classic tea-time snack, or pair it with chutney, pickle, or yogurt for added flavor and contrast.
Other Variations of Mathri:
- Namkeen Mathri: Mathri (Salted Crackers) are similar to salted crisp crackers and are a very popular afternoon snack. Traditionally, mathris are served with spicy pickles.
- Aachari Mathri: Achari Mathries, is a traditional staple snack in North India. They are usually served with spicy pickles, but in this recipe we have added mango pickle spices in the dough instead to add a tangy flavor to the mathri itself.
- Masala Mathri: Enhance the flavor of Mathri by adding a blend of spices and herbs such as garam masala, turmeric, and coriander powder to the dough. Masala Mathri has a complex and aromatic taste that’s sure to impress your taste buds.
Tips for Making Perfect Khasta Mathri:
Rest the Dough: Allow the Khasta Mathri dough to rest for at least 15 minutes before rolling and shaping to relax the gluten and improve the texture of the crackers. Resting the dough allows the flavors to meld together, resulting in a more flavorful Khasta Mathri.
Roll Evenly: Roll out the Khasta Mathri dough into thin, even discs to ensure uniform cooking and crispiness. Use a rolling pin and a dusting of flour to prevent sticking and achieve the desired thickness.
Fry at the Right Temperature: Fry the Khasta Mathri in hot oil at the correct temperature to ensure that they cook evenly and become golden brown and crispy. Avoid overcrowding the frying pan or kadai to maintain the temperature of the oil.
FAQs about Khasta Mathri:
How do I store Khasta Mathri?
Store Khasta Mathri in an airtight container at room temperature for up to 2-3 weeks. Line the container with parchment paper or tissue paper to absorb any excess moisture and maintain the crispiness of the crackers.
Can I freeze Khasta Mathri dough?
Yes, you can freeze Khasta Mathri dough for future use. Shape the dough into a ball, wrap it tightly in plastic wrap or aluminium foil, and store it in an airtight container or freezer bag. Thaw the dough in the refrigerator overnight before rolling and shaping.
What can I serve with Khasta Mathri?
Khasta Mathri pairs well with a variety of accompaniments such as chutney, pickle, yogurt, or tea. Serve Khasta Mathri alongside your favorite dipping sauces or enjoy them on their own as a crunchy and flavorful snack.
Khasta Mathri is a delicious and versatile snack that’s perfect for any occasion. Whether enjoyed as a tea-time treat, party snack, or crunchy accompaniment to meals, Khasta Mathri offers a delightful combination of crispy texture and bold flavors. With its customizable variations, long shelf life, and simple preparation, Khasta Mathri is sure to become a favorite in your snack preparation.
-
Potato Soup

Potato Soup (Aloo Ki Kadhi)
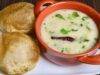
Potato soup is very comforting and delicious. At my home this was known as Aloo Ki Kadhi. This soup was served with Puri which is an Indian whole wheat fried bread. Potato Soup is mildly flavored and easy to make.
- 1/2 potato (boiled, peeled and mashed)
- 1/2 cup yogurt
- 1 cup potatoes (boiled peeled and cut into small pieces)
- 2 Tbsp oil (canola or vegetable oil)
- 1 tsp cumin seeds (jeera)
- 1 Tbsp all-purpose flour (maida or plain flour)
- 1/4 tsp fenugreek seeds (dana mathi)
- 1/4 tsp black pepper (kali mirch)
- 1 bay leave (tajpat)
- 1 dry red chili broken into 2 pieces
- 2 tsp ginger paste
- 1 tsp salt
- 1/4 tsp garam masala
- 2 Tbsp finely chopped cilantro (hara dhania)
- Mix mashed potatoes, yogurt, ginger juice, and black pepper well add about 1 cup of water and make a smooth batter. Set aside.
- Heat the oil in a saucepan over medium high heat. Oil should be moderately hot, when you add the cumin seeds they should crack right of way. Add cumin seeds as they crack add fenugreek seeds, and all-purpose flour, stir for 1-2 minutes until all-purpose flour become very light brown.
- Add red chili and bay leave, brake in 2 pieces, stir and add yogurt mix and mix it well. Turn the heat to low medium.
- Add potatoes and about 2 cups of water and let it cook for about 5 minutes. Stir occasionally. Add salt, garam masala and cilantro, lower the heat to low and let it cook for 2 more minutes.
- Adjust the thickness of the soup to your taste.
- Potato soup is ready. Enjoy!
This is best served with Puri (puffed fried bread).