

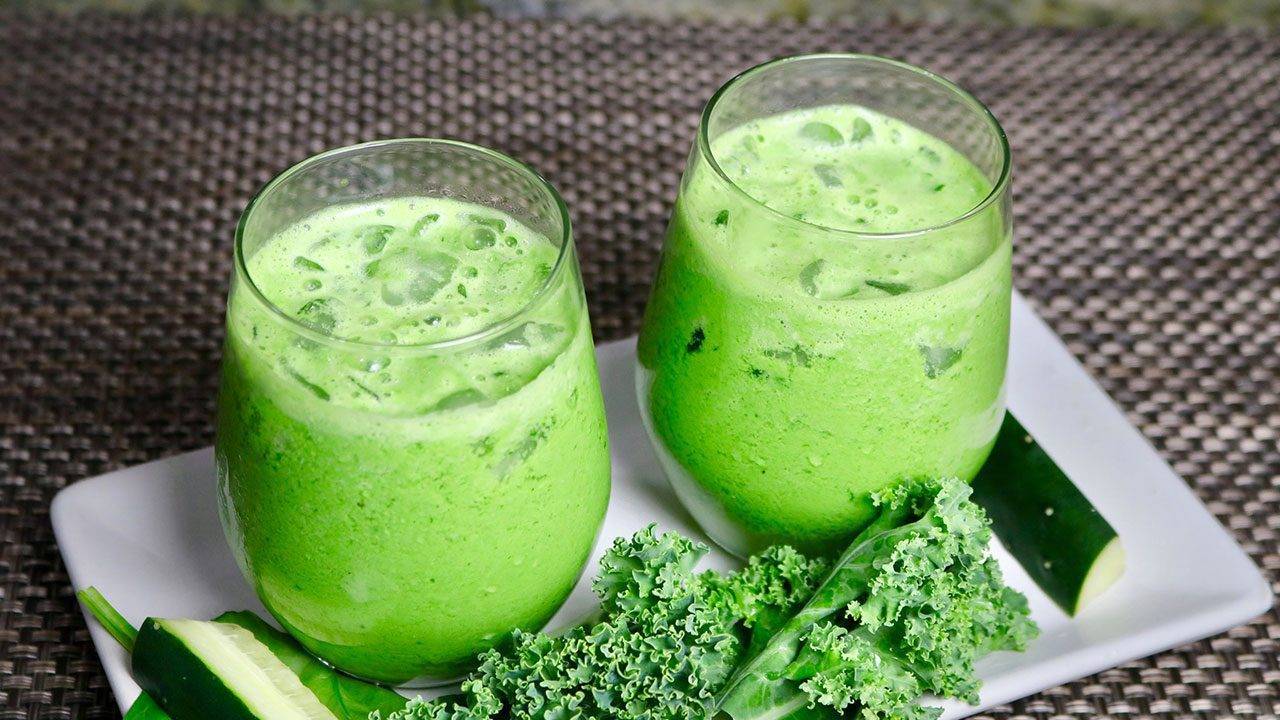
You will also enjoy Mango Lassi , Chai, Mint Lemonade,
,
Finding recipes that are both nutritious and appealing to kids can be challenging. Indian cuisine offers a variety of vegetarian recipes for kids that are both delicious and easy to prepare. Whether you’re looking for vegetarian kid-friendly recipes, Indian food for kids, or specific Indian recipes for kids, Manjula’s Kitchen provides an extensive collection of dishes to suit every palate. Let’s explore some fantastic recipes that will make mealtimes enjoyable for your little ones.
Aloo Paratha is a popular Indian flatbread stuffed with spiced mashed potatoes. This dish is a classic example of vegetarian recipes for kids that are both hearty and satisfying. Serve it with yogurt and a bit of butter for a complete meal. The soft texture and mild spices make it appealing to children.
Paneer Butter Masala is a rich and creamy curry made with paneer (Indian cottage cheese) cooked in a tomato and cream sauce. This dish is a favorite among vegetarian kid-friendly recipes. Serve it with naan or jeera rice to make it a meal your kids will love.
Vegetable Pulao is a fragrant and flavorful rice dish cooked with a variety of vegetables and mild spices. This dish is perfect for kids who enjoy rice. It’s a nutritious and delicious option in the category of vegan Indian food for kids. The colorful vegetables make it visually appealing as well.
Chole is a mild chickpea curry that is both tasty and nutritious. This dish is ideal for those looking for easy indian vegetarian recipes for kids. Serve it with rice or roti for a wholesome meal. The soft texture of chickpeas makes it easy for kids to eat and enjoy.
Moong Dal Khichdi is a simple and healthy dish made with rice and split yellow lentils. It’s one of the best vegetarian kid-friendly recipes as it is easy to digest and packed with nutrients. This dish can be served with a dollop of ghee and a side of yogurt.
Palak Paneer is a nutritious dish made with spinach and paneer. It’s a great way to introduce leafy greens to your child’s diet. This dish is a fantastic example of vegetarian Indian recipes for kids that are both healthy and delicious. Serve it with chapati or rice.
Besan Chilla, or chickpea flour pancake, is a quick and easy option that fits well within vegetarian recipes for kids. Made with chickpea flour and a variety of vegetables, this dish is a nutritious choice. It can be enjoyed with a side of green chutney and is perfect for breakfast or a snack.
Masala Dosa is a thin, crispy crepe made from fermented rice and urad dal batter, filled with a spiced potato mixture. This dish is a favorite in Indian food for kids. The crispy exterior and soft filling make it a hit with children. Serve it with coconut chutney and sambar.
Samosas are crispy pastries filled with spiced potatoes and peas. This snack is a favorite among vegetarian Indian recipes for kids and is perfect for lunchboxes or as an after-school snack. Serve them with tamarind or mint chutney for added flavor.
Pakoras are deep-fried fritters made with vegetables like spinach, potatoes, and cauliflower. This snack is a popular item in the vegetarian kid-friendly recipes category and is perfect for tea-time or as an appetizer. Serve pakoras with a side of green chutney.
Gulab Jamun are soft, deep-fried balls made from khoya (dried milk) soaked in a sweet syrup flavored with cardamom and rose water. This dessert is a staple in traditional Indian food for kids and is often enjoyed during festivals and special occasions. The melt-in-your-mouth texture and sweet flavor make it a favorite among many.
Kheer is a creamy rice pudding flavored with cardamom and garnished with nuts and raisins. This dessert is a classic in north indian vegetarian recipes for kids and is easy to prepare. Kheer is a perfect ending to any meal and is often enjoyed during celebrations.
To elevate your kid-friendly menu, consider adding dishes from various categories that enhance these vegetarian recipes for kids. Including Indian snacks like samosas and pakoras can introduce a variety of flavors and textures.
For a sweet finish, explore Indian desserts such as gulab jamun and kheer. Offering nutritious recipes like moong dal khichdi and palak paneer can provide lighter meal options.
Planning a kids’ party? The popular party recipe category offers numerous dishes that are sure to delight your young guests and make your celebration unforgettable. Incorporating North Indian recipes like aloo paratha or paneer butter masala can bring an authentic touch to your meal.
A: Some popular vegetarian recipes for kids include Aloo Paratha, Paneer Butter Masala, Vegetable Pulao, Chole, Moong Dal Khichdi, Palak Paneer, Besan Chilla, Masala Dosa, Samosas, Pakoras, Gulab Jamun, and Kheer. These dishes are flavorful, nutritious, and perfect for children.
A: To make traditional Indian food suitable for kids, try recipes like Aloo Paratha, Paneer Butter Masala, and Moong Dal Khichdi. These recipes are mild in spices and easy to eat, making them perfect for children.
A: Some easy Indian recipes for kids include Besan Chilla, Masala Dosa, Vegetable Pulao, and Samosas. These dishes are quick to prepare and provide the necessary nutrients for growing children.
A: Yes, many Indian recipes for kids can be prepared in advance and stored. Dishes like Vegetable Pulao and Chole can be made ahead of time and refrigerated, while snacks like Samosas and Pakoras can be prepped and frozen.
A: Some healthy vegetarian kid-friendly recipes include Moong Dal Khichdi, Palak Paneer, Besan Chilla, and Vegetable Pulao. These dishes are nutritious, mild in flavor, and perfect for maintaining a healthy diet for kids.
Vegetarian recipes for kids are a celebration of diverse flavors and nutritious ingredients. Whether you’re looking for vegetarian kid-friendly recipes, Indian food for kids, or specific Indian recipes for kids, these dishes will bring variety and flavor to your meals. So, gather your ingredients, try out these recipes, and enjoy the rich and diverse world of Indian food for children. Happy cooking and happy eating!
By incorporating these dishes into your menu, you’ll be able to enjoy a wide variety of delicious and nutritious foods that your kids will love. Whether you’re looking for snacks, main courses, or desserts, there’s a vegetarian recipe for kids to suit every taste. Don’t forget to check out Manjula’s Kitchen for more inspiration and culinary delights. Happy cooking and happy eating!
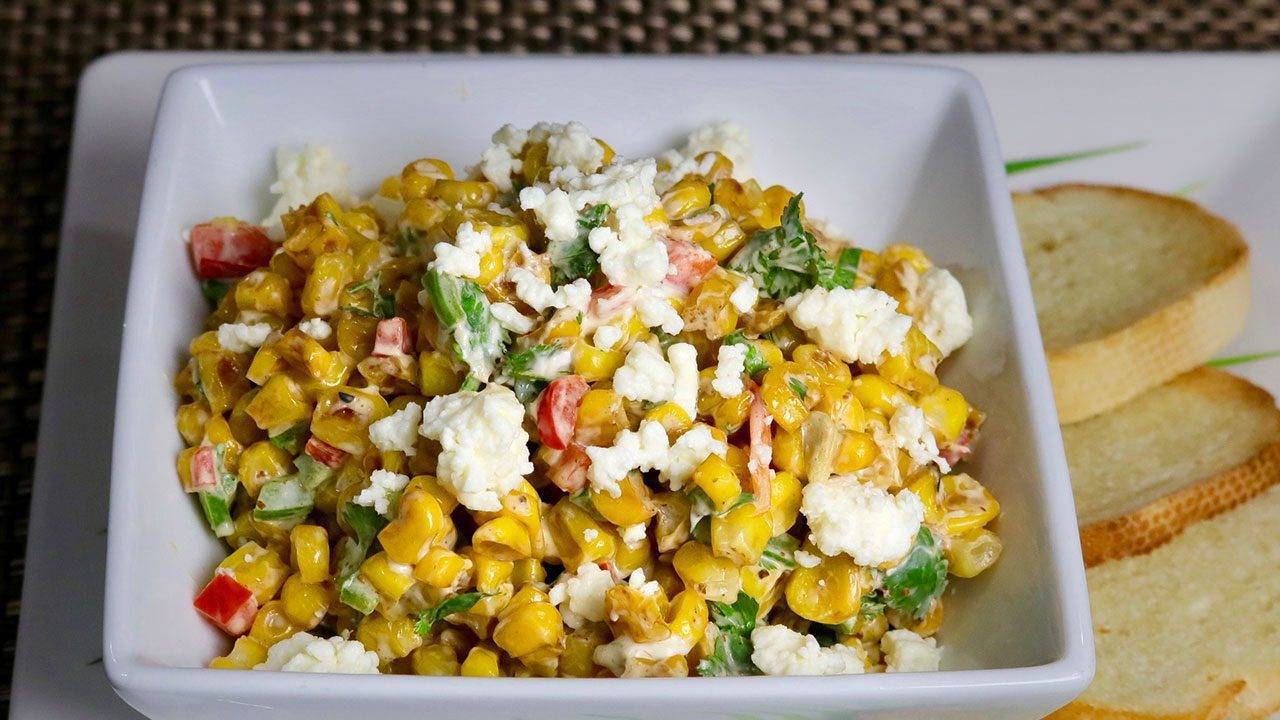

Spicy Corn is a very enjoyable snack and not only that, but this is a quick and easy recipe to make. Make it as spicy or as mild as your heart desires. Best of all, you can also serve this as a side dish. Enjoy the spicy corn for a beautiful picnic or outdoor get together. You can also serve this over crisp slices of bread.
Use the flat bottom-heavy frying pan, lightly oil it and heat over medium high heat, put the corn kernels and stir fry for 4-5 minutes stirring continuously. While stir frying kernels will be getting some light and some dark brown color, some of the kernels will pop like you are grilling.
Turn off the heat, and add salt, cumin seed powder, cilantro, green chili, red bell pepper, lemon juice, and cream cheese mix it well. Sprinkle feta cheese.
Spicy corn taste best when it is served warm but can be served at room temperature.
Spicy Corn works great for picnic or outdoor get together. Also try Aloo Poori, Lemonade, or Watermelon Cooler
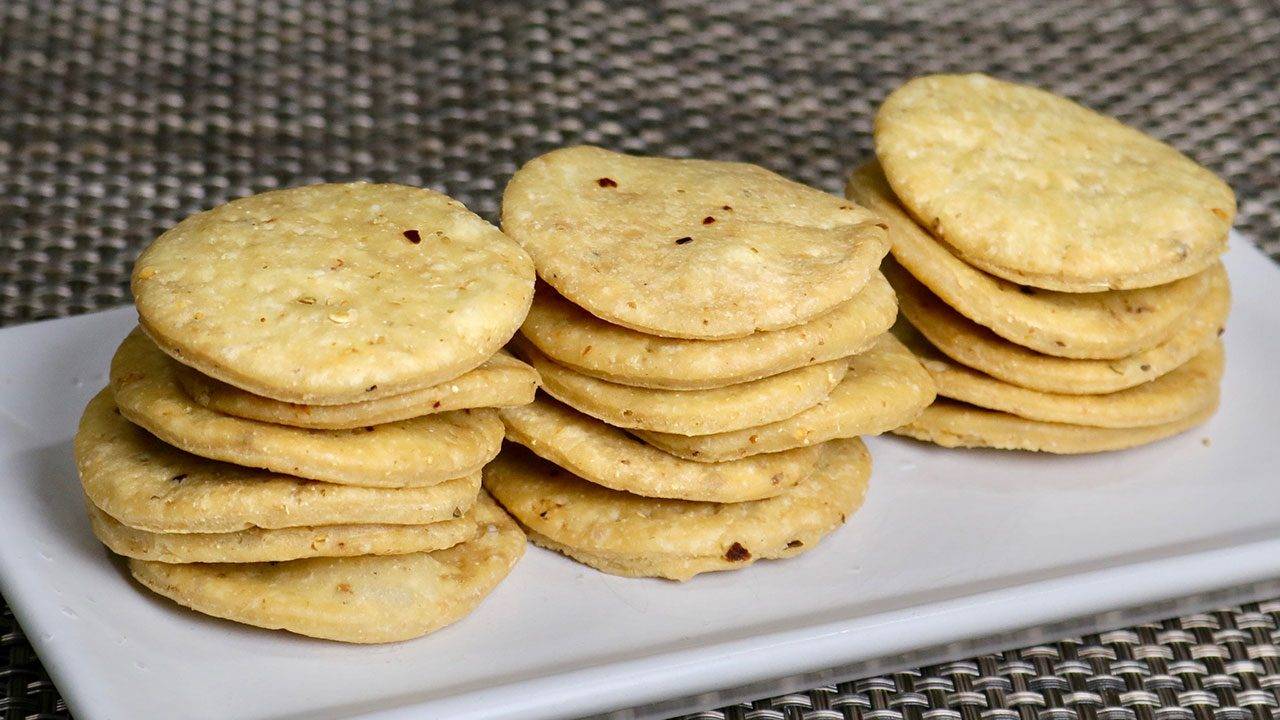


Achari Mathries, is a traditional staple snack in North India. They are usually served with spicy pickles, but in this recipe I have added mango pickle spices in the dough instead to add a tangy flavor to the mathri itself. With my family, mathries are a must have while travelling, and now with Achari Mathri, we no longer need the pickle, so it becomes one less thing to carry.
Mix all the ingredients except the water. Add the water little at a time, kneading into a firm dough. Cover the dough and set aside for 15 minutes or more.
Prick them with a fork all over the rolled dough, so the Mathries do not puff when frying, and Mathries stay crisp.
Divide the dough into 3 equal parts. Take each part of the dough and make a flat ball shape. Roll them into about 12-inch circles and thickness of salted crackers.
Take a cookie cutter and cut them in rounds. I am using 2-1/2 inch cookie cutter. Use the size and shape to your choice.
Heat the oil in a frying pan on medium heat. The frying pan should have at least 1 inch of oil. To check if the oil is ready, put a small piece of dough in the oil. The dough should make the oil sizzle and come up slowly.
Make sure to place just enough mathris in the oil it should be easy to turn them. Fry the mathris until both sides are light golden-brown. This should take about 7-8 minutes.
Tip
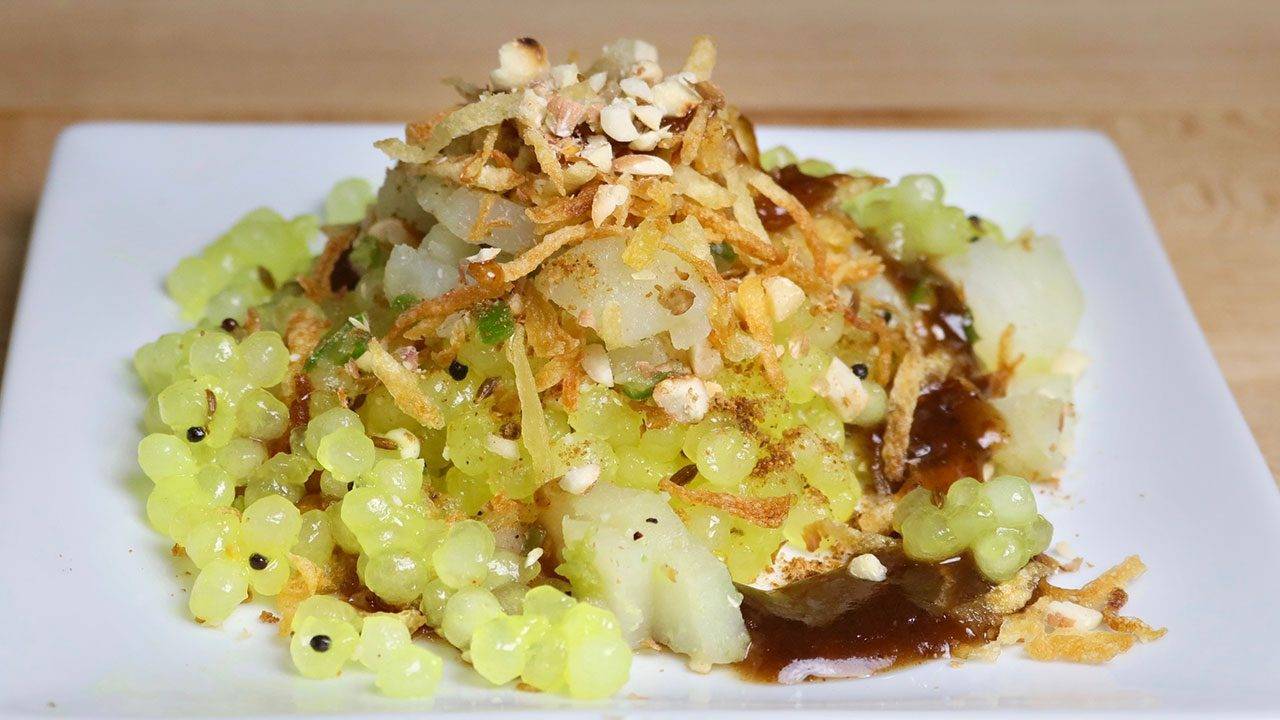


Sabudana Bhel this is a delicious appetizer or also can be served with afternoon tea. Sabudana Bhel or I like to call this chaat is an elegant looking dish, that will sure to impress all your family and friends.
Wash sabudana (tapioca) changing the water 2-3 time and soak with one cup of water, soak 8 hours or more. Sabudana will become all most four time in volume and will be soft.
Suggestion, this is a easy recipe, you can prepare every thing in advance, cooked sabudana can be refrigerator for up to a week. Aloo Lacha and tamarind chutney can be stored for months.
Sabudana Bhel is a quick & easy, gluten-free, and vegan snack with flavors reminiscent of chaat, perfect for Krishna Janmashtami and Navaratri celebrations, offering a delightful appetizer option. In this recipe, we’ll learn how to make sabudana bhel chaat, a delightful and crunchy snack that’s perfect for any occasion. Sabudana, also known as tapioca pearls, is the star ingredient here, lending its unique texture and taste to create a mouthwatering dish. This sabudana bhel recipe combines the traditional flavors of bhel with the subtle nuttiness of sabudana, resulting in a tantalizing treat that’s sure to please your taste buds. Whether you’re looking for a tasty snack to enjoy with your evening tea or planning a party menu, this crispy sabudana bhel is sure to be a hit.
To begin making the sabudana bhel, start by soaking the sabudana pearls in water for a few hours until they turn soft and plump. Once the sabudana pearls have soaked well, drain any excess water and spread them out on a clean kitchen towel to remove any excess moisture. Now, heat oil in a pan and fry the sabudana pearls until they turn crispy and golden brown. This step is crucial for achieving that perfect crunch in your sabudana bhel chaat.
Next, it’s time to add some crunchy elements to our sabudana bhel mixture. You can use a variety of ingredients such as roasted peanuts, tomatoes, and crunchy sev. These ingredients not only add texture to the dish but also enhance its flavor profile. Feel free to adjust the quantities according to your preference, but make sure to include a good mix of flavors and textures for the best results.
Once you’ve assembled all the crunchy elements, it’s time to season your sabudana bhel mixture. You can use a combination of spices such as chaat masala, red chili powder, roasted cumin powder, and black salt to add a burst of flavor to the dish. Additionally, you can squeeze some fresh lemon juice over the mixture to give it a tangy twist. Mix everything together until well combined, ensuring that the sabudana pearls are evenly coated with the seasoning.
Finally, garnish your sabudana bhel chaat with some fresh coriander leaves and a sprinkle of nylon sev for an extra crunch. You can also add some pomegranate arils or grated coconut for a pop of color and flavor. Serve the crispy sabudana bhel immediately in individual serving bowls or plates, garnished with some more sev on top for added crunchiness. Pair it with a cup of hot tea or your favorite chutney for a truly satisfying snacking experience.
A: While it’s best to serve sabudana bhel chaat immediately after preparing it to enjoy its crispiness, you can prepare the sabudana mixture in advance and assemble the bhel just before serving to prevent it from becoming soggy.
A: It’s not recommended to store leftover sabudana bhel as it tends to lose its crispiness over time. However, if you have any leftover mixture, you can refrigerate it in an airtight container for up to a day and reheat it in the oven before serving.
A: Yes, sabudana bhel is a popular dish consumed during fasting days, especially during festivals like Navratri. Just ensure that you use sendha namak (rock salt) instead of regular salt if you’re making it for fasting purposes.
A: While frying the sabudana pearls adds a crispy texture to the sabudana bhel, you can try alternative cooking methods such as roasting or air-frying for a healthier version of the dish.
A: While sabudana bhel chaat is typically served as a snack or appetizer, you can definitely enjoy it as a light meal, especially when paired with some yogurt or a side salad for added nutrition.
If you’re looking to explore more Indian recipes, appetizers, beverages, and desserts, be sure to check out the following links on Manjula’s Kitchen. Here are some links to recipes on Manjula’s Kitchen official website:
Chana Chaat (Spicy Chickpea Salad) Recipe
Pav Bhaji (Spicy Vegetable Hash with Buns) Recipe
Raj Kachori (Crunchy Chaat) Recipe
These recipes should offer you a flavorful experience straight from Manjula’s Kitchen.
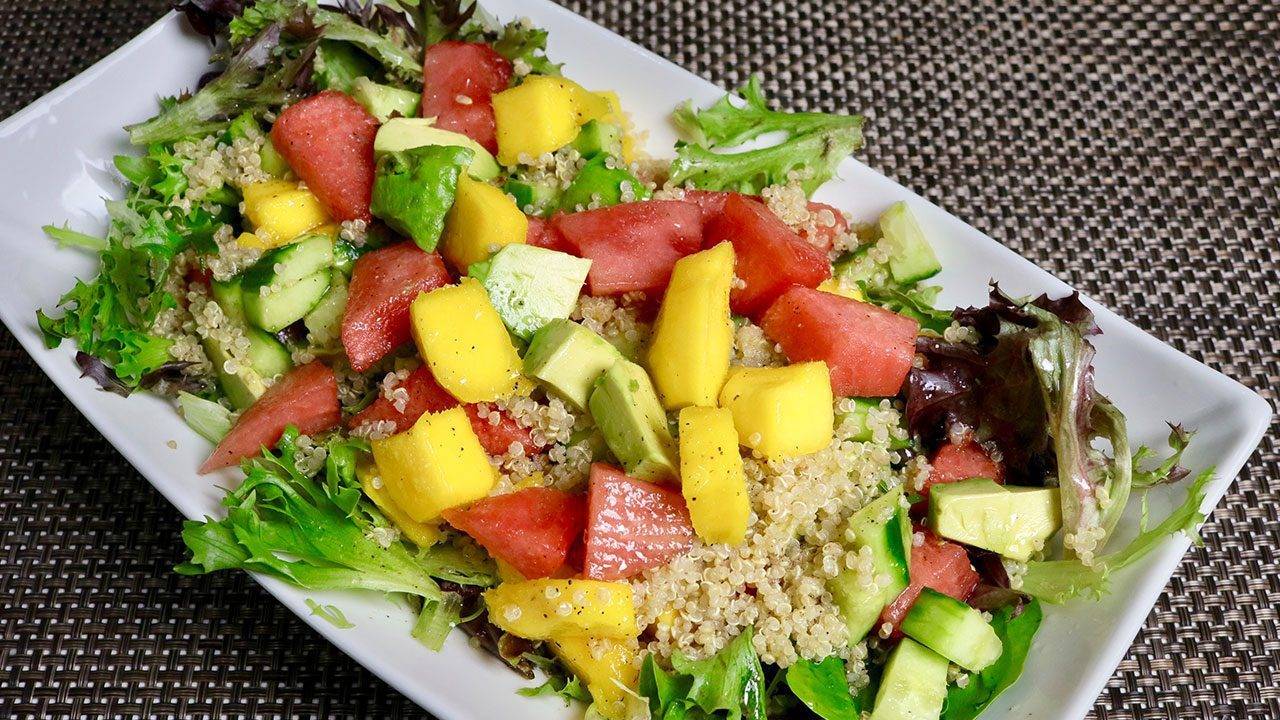


Spring Quinoa Fruit Salad just perfect for the start of Spring! This is a vibrant, fresh fruit salad with quinoa and homemade ginger and lemon dressing. It is the perfect go-to recipe if you are looking for something simple, light and refreshing in this warmer weather. The quinoa and fruit make it a healthy choice for those who want to eat clean. It also makes for a beautiful presentation, with the watermelon, mangoes, and avocado!
For dressing: add all the dressing ingredients together mix it well making sure sugar is dissolved. Set aside. * To make ginger juice shred the ginger using fine shredder or zester and squeeze the juice with fingers.
Suggestions: use your choice of fruits, salad measurements are just for suggestion,
Quinoa, can be prepared in advance, I make quinoa always extra and I use the quinoa with almost every salad I make.
Salad dressing also can be prepare in advance, this is very light dressing. I make this dressing in large quantity, I always have ready to use.
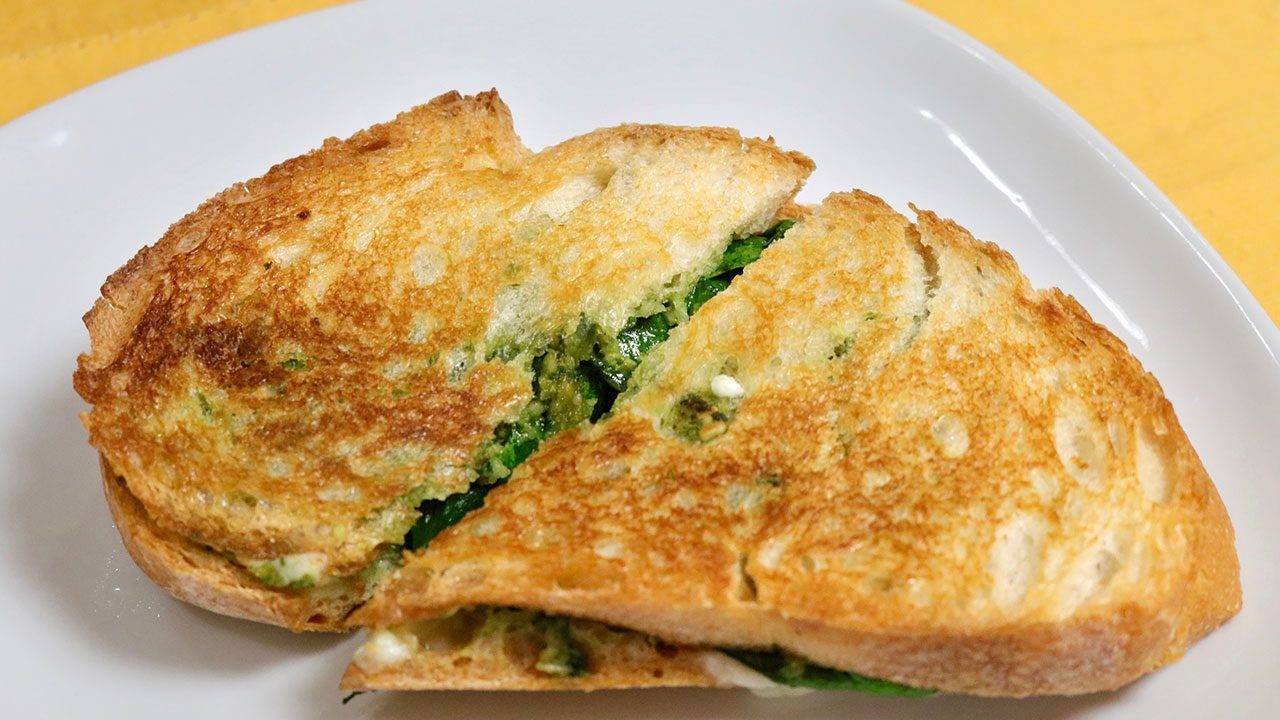


For this delicious Caprese Sandwich, I have been experimenting with pesto lately and tried out this sandwich after my granddaughter requested me to make it for her. This recipe is super easy to put together on the go and it makes for the perfect lunchbox or tiffin meal.
To make the pesto, combine the basil, pine nuts, black pepper, salt and oil in a food processor. Blend until the mixture is well blended but still has some texture, pausing to scrape down the sides as necessary. Now add the lemon juice mix it and set aside.
Notes: I usually make extra pesto, pesto can be refrigerated for about a week. You can also freeze pest, I like to freeze in ice cube try. Once frozen, transfer to a freezer bag, then you can thaw only as much as you need later.
Use your choice of bread.
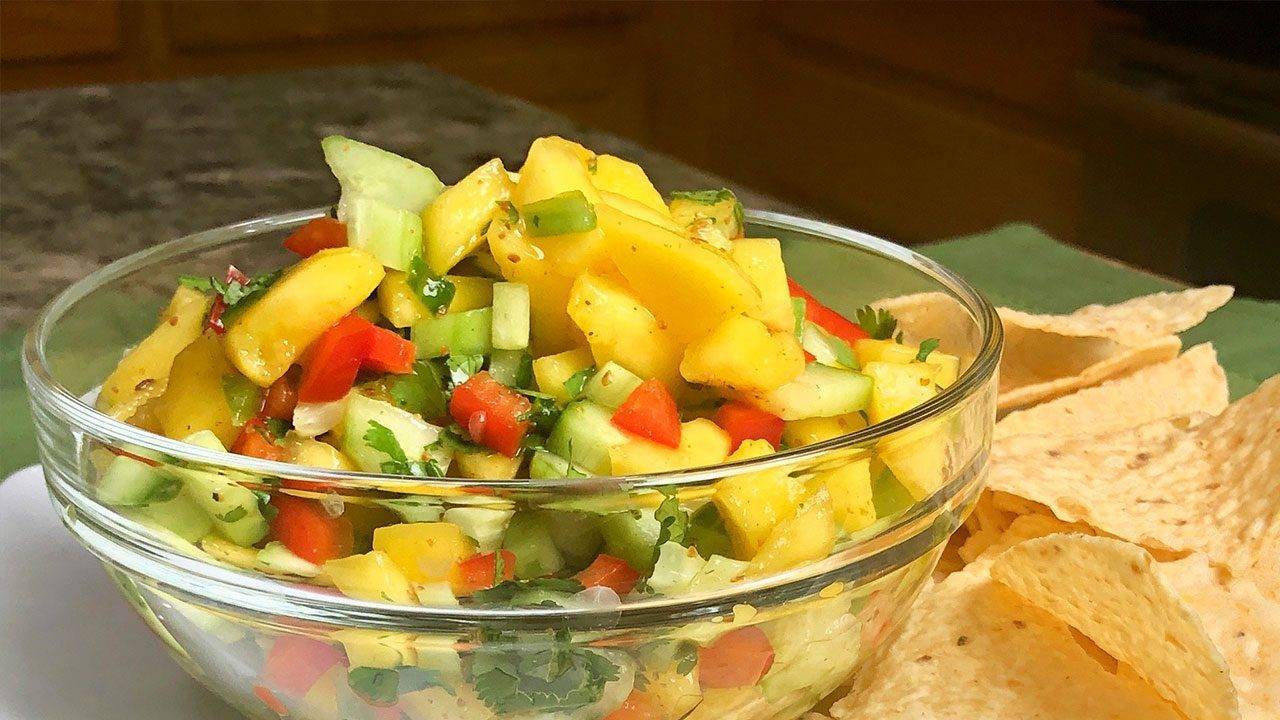

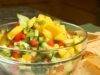
Who doesn't enjoy chips & salsa? This simple and colorful mango salsa is super easy to make! It’s sweet, spicy and absolutely delicious. Serve this fresh mango salsa with chips or with a plate of tacos. You can even serve this as a fresh salad which will compliment a variety of meals be it lunch breakfast or dinner !
In a serving bowl, combine mango, bell pepper, cucumber, cilantro and jalapeño. Drizzle with salt, cumin powder and lime juice, mix well. For best flavor, let the salsa rest for about 10 minutes.
Notes: Mango salsa also can be served as salad and will compliment any meal. I enjoy Mango Salsa with Puries, and side of Mexican Rice.
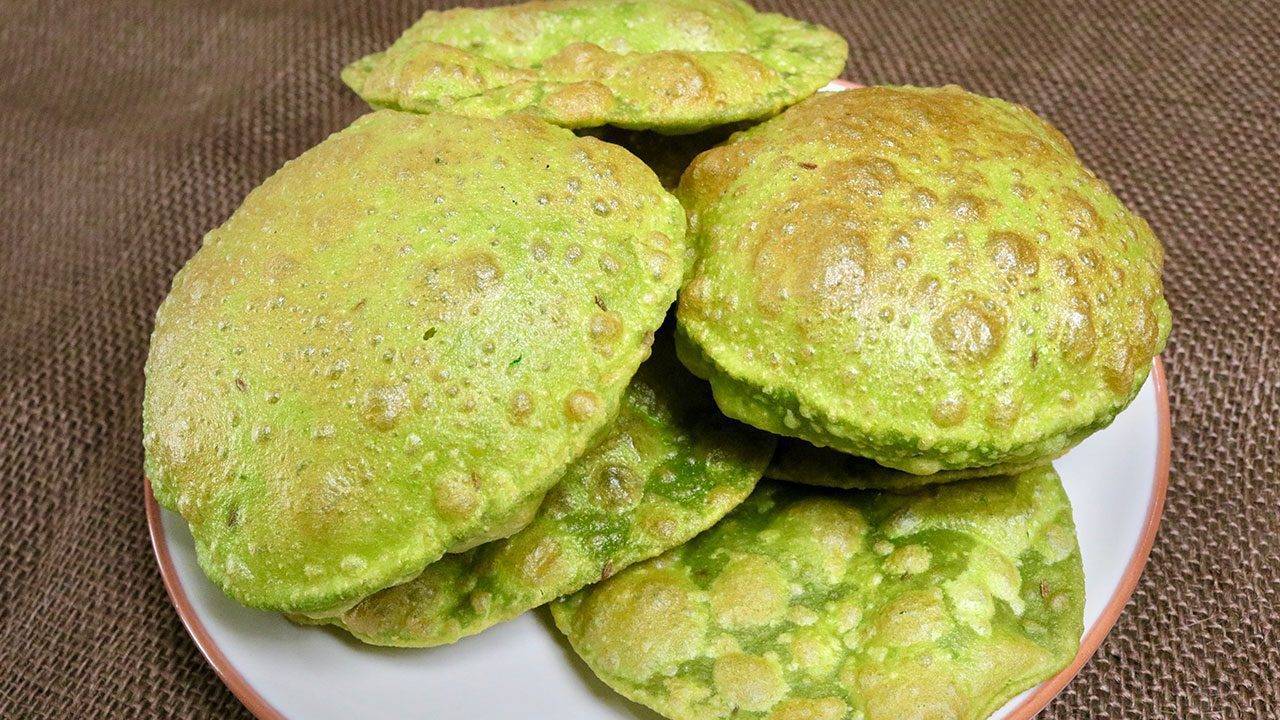


Palak (Spinach) Puri is a whole wheat fried bread made with many different flavors. Adding the spinach with a few spices makes the Puri very yummy and healthy. These puris can be served with any meal and add a nice green color to any menu. You can also serve them with afternoon tea or even pack them up for a lunch box meal.
Blend the spinach, ginger and green chili with about 1/4 cup of water, use more if needed.
Take the puris out and place them on paper towels to absorb the excess oil. Repeat the process for remaining puries.
Try this menu for next get together with using Palak Puri, Cabbage Kofta, Aloo Gobhi, Boondi Ka Raita, Jeera Rice.
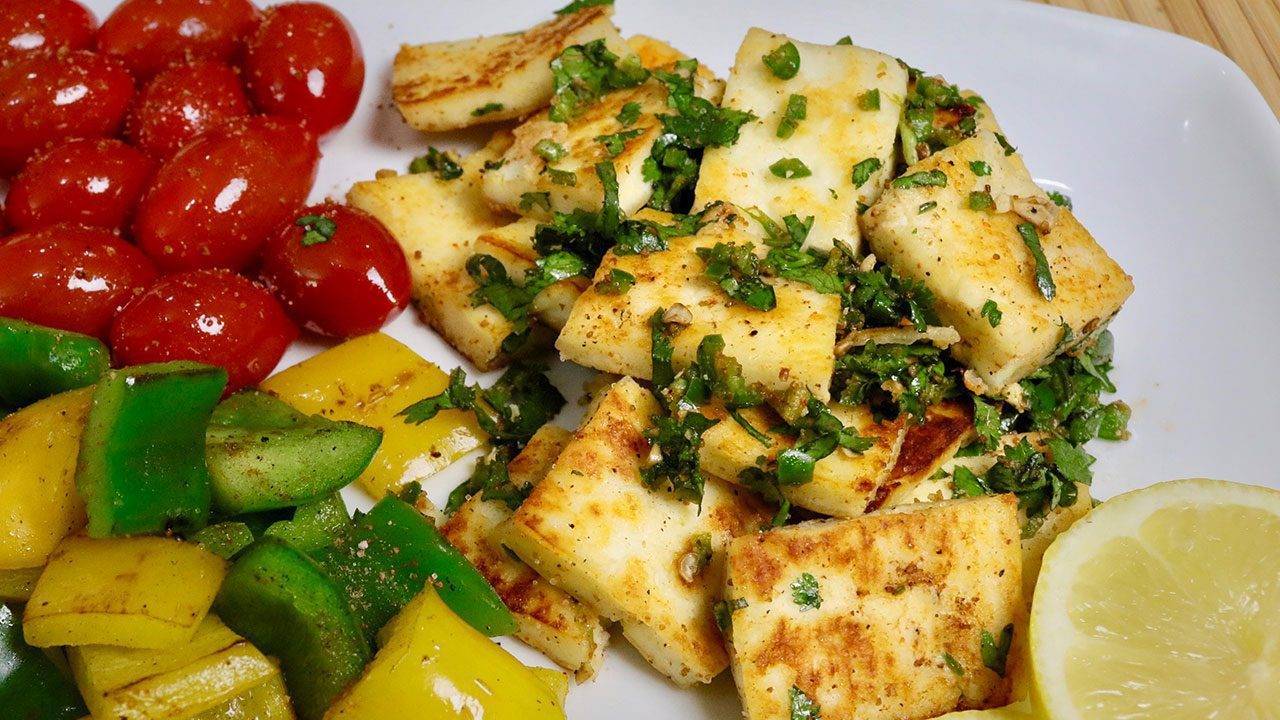
Grilled paneer recipe is a delightful way to enjoy the rich flavors of Indian cuisine. Grilled paneer is a versatile dish that is kid friendly, quick & easy, party recipe that can be served as an appetizer, side dish, or even a main course. This recipe combines the creaminess of paneer with the smoky char of the grill, resulting in a dish that is both flavorful and satisfying. Whether you’re hosting a backyard barbecue or simply craving a taste of India, this Indian grilled paneer recipe is sure to please your palate.
When it comes to Indian cuisine, grilled paneer holds a special place in the hearts of many food enthusiasts. The process of grilling adds a depth of flavor to the paneer, while still allowing its creamy texture to shine through. This paneer grilled recipe is perfect for those looking to add a touch of Indian flair to their meals. By marinating the paneer in a blend of spices and yogurt, you’ll create a dish that is bursting with flavor from the very first bite.
To begin, place the cubed paneer in a large bowl and set aside. In a separate bowl, whisk together the yogurt, olive oil, lemon juice, ground cumin, ground coriander, turmeric, salt, and pepper. Pour the marinade over the paneer, making sure to coat each piece evenly. Cover the bowl and let the paneer marinate in the refrigerator for at least 30 minutes, allowing the flavors to meld together.
Once the paneer has finished marinating, preheat your grill to medium-high heat. Thread the paneer cubes onto skewers, leaving a small amount of space between each piece. This will allow the heat to circulate evenly around the paneer, ensuring that it cooks evenly on all sides. Place the skewers on the grill and cook for 2-3 minutes per side, or until the paneer is lightly charred and heated through.
Use firm or extra-firm paneer for grilling, as softer varieties may crumble on the grill.
Soak wooden skewers in water for at least 30 minutes before threading the paneer to prevent them from burning.
Experiment with different marinade ingredients, such as ginger, chili powder, or garam masala, to customize the flavor of your grilled paneer.
While this Indian grilled paneer recipe is delicious as is, feel free to get creative with your marinade and seasoning choices. For a spicy kick, add chopped green chilies or a dash of cayenne pepper to the marinade. You can also incorporate fresh herbs like cilantro or mint for a burst of freshness. Serve the grilled paneer with a side of mint chutney or tamarind sauce for an extra layer of flavor.
Grilled paneer is not only delicious, but it also offers several health benefits. Paneer is a good source of protein, calcium, and phosphorus, making it an excellent addition to a balanced diet. Grilling the paneer helps to retain its nutrients while adding a smoky flavor that enhances its overall taste. Additionally, paneer is low in carbohydrates, making it a suitable option for those following a low-carb or keto diet.
Yes, you can grill paneer directly on the grill grates or use a grill basket to prevent it from falling through.
Grilled paneer can be stored in the refrigerator for up to 3-4 days. Simply reheat it in the microwave or on the grill before serving.
While you can freeze grilled paneer, its texture may change slightly upon thawing. It’s best to freeze the paneer before grilling and marinating it.
Yes, you can bake paneer in the oven at 400°F for 15-20 minutes, or until it is lightly browned and heated through.
If you’re looking to explore more Indian recipes, appetizers, beverages, and desserts, be sure to check out the following links on Manjula’s Kitchen. Here are some links to recipes on Manjula’s Kitchen official website: Paneer Tikka Masala, Chana Chaat (Spicy Chickpea Salad), Pav Bhaji (Spicy Vegetable Hash with Buns), Raj Kachori (Crunchy Chaat), Vegetable Biryani. These recipes should offer you a flavorful experience straight from Manjula’s Kitchen.
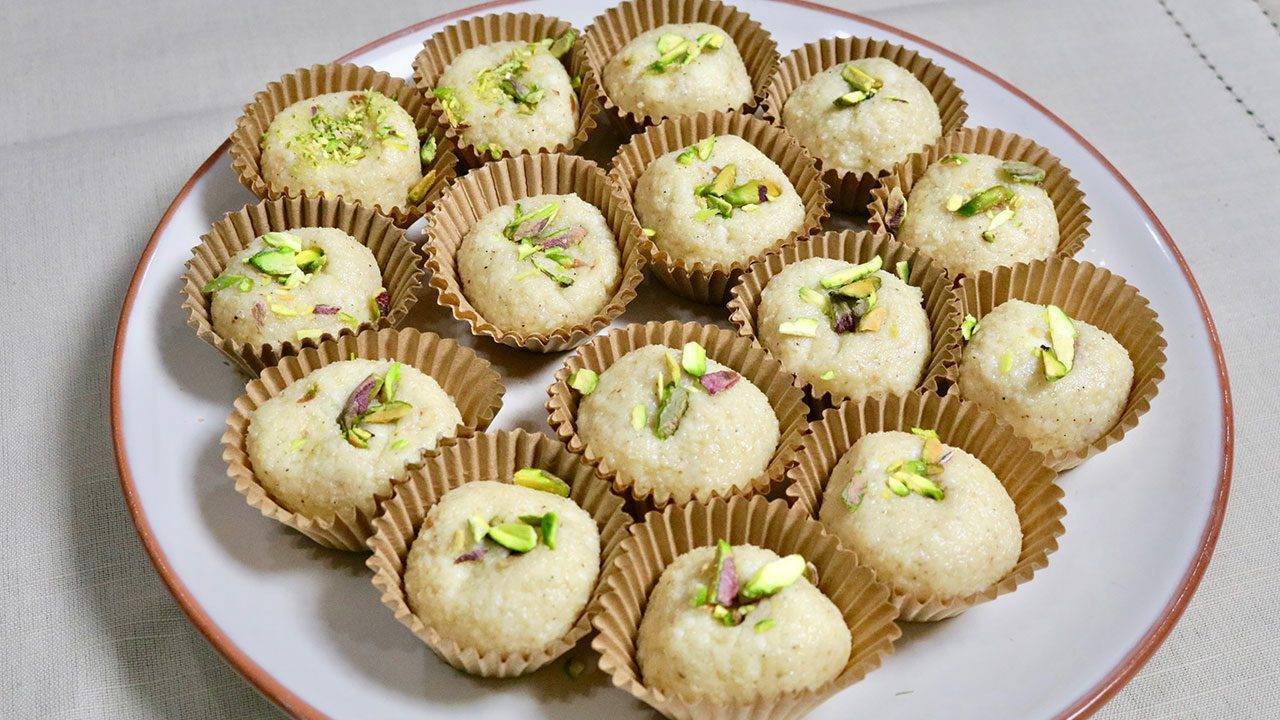


Paneer Malai Ladoo is a rich and delicious homemade sweet dessert. Paneer Ladoos have a creamy texture and they taste amazing! This dessert is perfect for people with a sophisticated palette and is super easy to prepare.
I used 4 cups of whole milk to make 1 cup of paneer. I have done the recipe earlier how to make Paneer.
Paneer Ladoos taste best when they are served chilled.
Notes: if ladoo mix is dry add warm milk before adding the sugar.
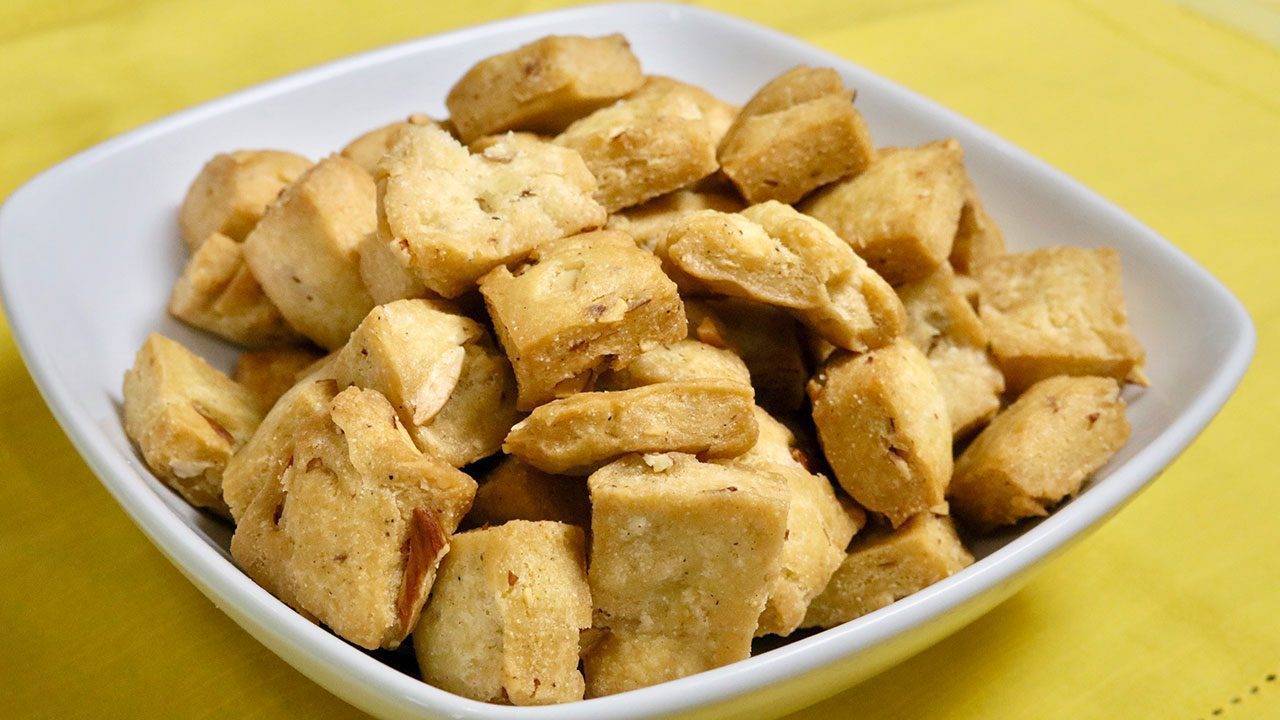


A traditional tea-time biscuit-like snack often made during festive occasions, shakarpara is the perfect sweet for any party like gathering. They are deep-fried sugar crisps with almonds and hint of cardamom, which adds to their unique flavor. This is one of those snacks that you won’t be able to stop munching on.
Mix flour, sooji, sugar, salt, baking soda, cardamom powder, almonds and oil in a bowl and make a stiff dough adding water slowly as needed. Knead it well. Cover the dough and set aside for 15 minutes or more.
Keep stirring occasionally, fry the shakkar paras until both sides are golden-brown. Frying time should be about 6-8 minutes.
Let the shakkar paras comes to the room temperature, they should be crisp.
Notes: don’t fry shakerparas on high heat otherwise they will be soft.
Shakarpara are a perfect gifting idea for the holiday season since they have a long shelf life.
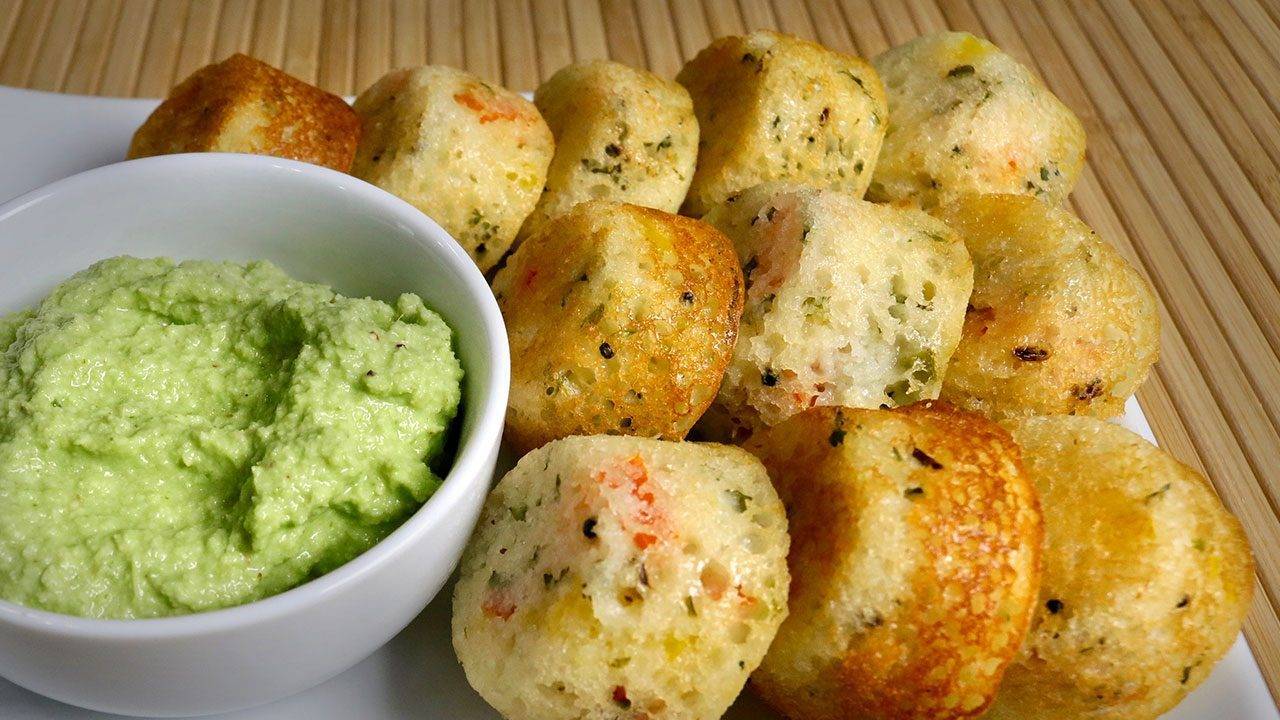


Baked vegetable Idli makes for a healthy and delicious appetizer or side dish. They are very eye-catching and great to present at a gathering for guests to pop into their mouth. They are the perfect addition to any menu because they are so easy to make. Idlies have a unique texture because they are soft but also slightly crisp on the bottom. Baked vegetable idli are best served with coconut chutney if served as an appetizer or with sambar if served with the main meal.
Preheat the oven at 350 degrees (F).
Notes:
First, I baked the idlies without covering, then after 5 minutes I covered the Idlies, if you don’t cover Idlies, they will be dry and will lose the softness and texture.
you can prepare Idlies 2-3 days in advance, after they cool of refrigerate them in air tight container.
Before serving heat the Idlies in microwave for about two minutes. Idlies will be soft. Baked vegetable idli are best served with coconut chutney if served as an appetizer or with sambar if served with the main meal.
Baked Vegetable Idli is a versatile dish that perfectly fits various occasions and preferences. It serves as an ideal choice for appetizers, breakfast recipes, and even as a lunch box suggestion. During festive seasons like Diwali and Navaratri, it can be a delightful addition to the menu. Its kid-friendly nature makes it a hit among children, while its ease of preparation qualifies it as a quick and easy snack option. Additionally, its nutritious blend of vegetables adds a healthy touch, making it suitable for party recipes as well.
If you’re looking to add a nutritious twist to your traditional South Indian breakfast, look no further than this delightful baked vegetable idli recipe. Vegetable idli is a beloved dish in Indian cuisine, cherished for its soft texture and aromatic flavors. In this rendition, we’ll explore how to make vegetable idli even healthier by baking it instead of the traditional steaming method. Packed with the goodness of assorted vegetables and aromatic spices, these baked vegetable idlis are not only delicious but also a wholesome treat for the entire family.
To start making baked vegetable idli, begin by soaking idli rice and split urad dal separately for about 4-6 hours. Once soaked, drain the water and grind them separately to a smooth consistency. Mix both the batters together in a large bowl and add some salt. Allow the batter to ferment overnight, ensuring it doubles in volume. Fermentation is crucial for the characteristic fluffy texture of idlis.
While the batter ferments, prepare your choice of vegetables. Carrots, peas, bell peppers, and corn work wonderfully in this recipe. Finely chop or grate the vegetables and sauté them lightly with some mustard seeds, curry leaves, and green chilies for a burst of flavor. Once the vegetables are tender, mix them into the fermented idli batter.
Preheat your oven to 350°F (175°C) and grease an idli tray with some oil. Pour the vegetable-laden batter into the idli molds, filling them about three-fourths of the way. Place the tray in the preheated oven and bake for 20-25 minutes or until the idlis are cooked through and have a golden hue on top. Once done, remove the tray from the oven and allow the idlis to cool slightly before unmolding them.
Once cooled, gently remove the baked vegetable idlis from the molds and serve them warm with a side of coconut chutney or sambar for an authentic South Indian experience. These idlis make for a nutritious breakfast option or a wholesome snack any time of the day. Their vibrant colors and enticing aroma are sure to make them a hit with your family and friends.
A: Absolutely! Feel free to experiment with your favorite vegetables or whatever you have on hand. Just ensure they are finely chopped or grated for even distribution.
A: Yes, you can prepare the batter in advance and store it in the refrigerator for up to 2-3 days. Remember to bring it to room temperature before baking the idlis.
A: While it’s best to consume them fresh, you can freeze the baked idlis in an airtight container for up to a month. Reheat them in the microwave or oven before serving.
With this comprehensive guide, you’re all set to whip up a batch of wholesome baked vegetable idlis that are as nutritious as they are delicious. Whether enjoyed for breakfast, as a snack, or even as part of a meal, these idlis are sure to become a favorite in your culinary repertoire.
If you enjoyed making these masala peanuts, why not try your hand at some other mouthwatering recipes from Manjula’s Kitchen? Vegetable Pakoras, Paneer Tikka, Aloo Gobi (Potato Cauliflower), Samosa, Mango Lassi
Explore these recipes and more for a culinary journey through the vibrant and diverse flavors of Indian cuisine.
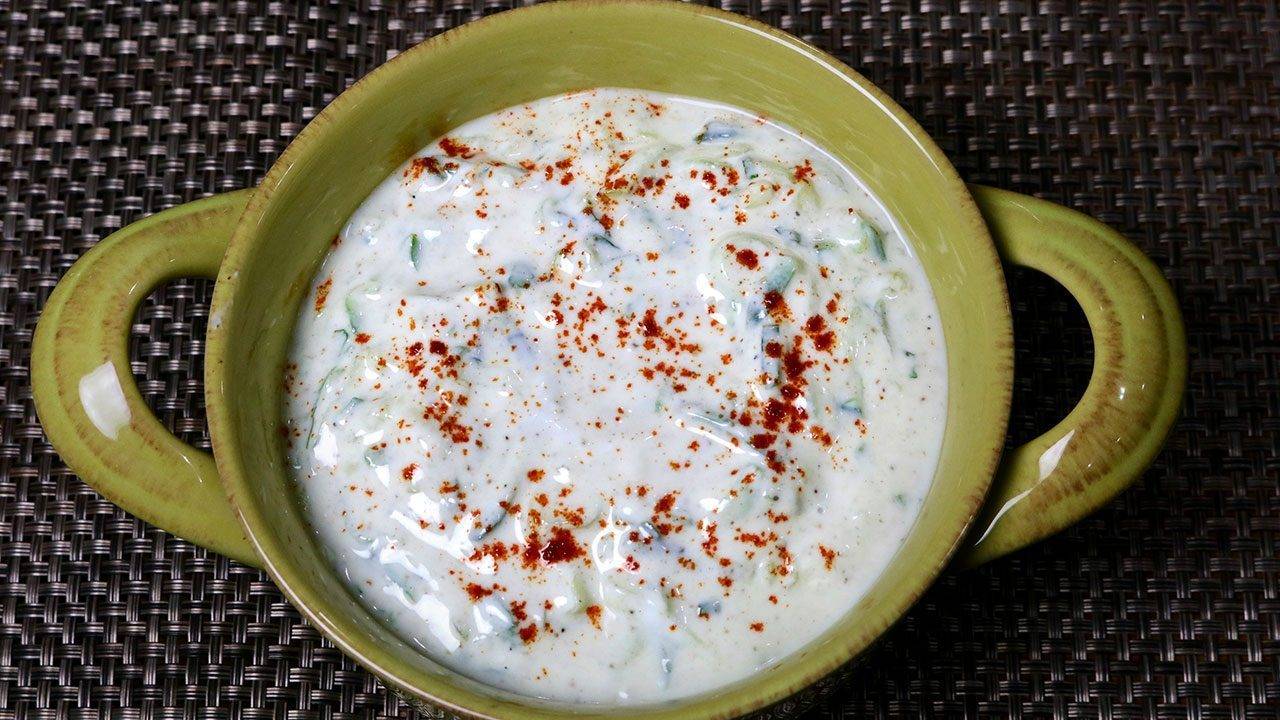

Cucumber Raita is a delightful refreshing side dish and compliment to any meal. Raita is made so many ways, but the main ingredient is always the yogurt. Cucumber raita is one of my favorites especially during the summer. This is a quick and easy recipe. I also like to serve cucumber raita as a spread or dipping sauce.
In a bowel beat the yogurt until it is smooth and creamy.
Notes
Use the measurements for your guide line, especially in this recipe you can adjust all the ingredients to your taste easily.
What is Raita: Raita is an accompaniment for any Indian meal and can be created in the form of Vegetable Raita, Spinach Raita, Boondi ka Raita, Pumpkin Raita & Lauki ka Raita. Here we are focussing on making Cucumber Raita alternatively referred to as Kheera Raita, it is a simple quick & easy, gluten free, kid friendly, and nutritious yogurt-based recipe featuring cucumber (either chopped or grated) and a selection of Indian spice powders.
In this essential step of creating cucumber raita, start by taking a bowl, a fundamental vessel in the art of crafting this versatile condiment. Vigorously beat the yogurt until it achieves a smooth and creamy consistency, as outlined in the cucumber raita recipe. This initial phase not only sets the stage for the delightful texture that characterizes well-prepared raita but also forms the cornerstone of what is raita – a harmonious blend of yogurt and flavorful ingredients.
Begin by peeling and shredding the cucumber, a crucial element in the cucumber raita recipe. The cucumber, when finely shredded, contributes a refreshing and hydrating quality to the raita, enhancing both its taste and texture.
Combine the shredded cucumber with a blend of essential ingredients to form the heart of the cucumber raita recipe. Add a pinch of salt, black salt, cumin powder, finely chopped green chili, and mint leaves to the beaten yogurt. Gently mix these components, ensuring a harmonious amalgamation that brings out the unique flavors of each ingredient.
For individuals unacquainted with the culinary world of India, raita stands as a venerable traditional condiment, with its foundation resting on the velvety canvas of yogurt. This versatile accompaniment holds a distinguished place in Indian cuisine, offering a cooling and harmonious contrast to the robust flavors of spicy or highly seasoned main courses. Raita, in its various forms, serves as a multifaceted companion, enriching the dining experience by not only providing a soothing respite but also enhancing the overall gastronomic journey.
Among the diverse array of raita variations, cucumber raita emerges as a particularly popular and refreshing choice. This delightful rendition introduces the crispness and succulence of cucumber into the creamy tapestry of yogurt, creating a harmonious fusion of textures and flavors. The cool and hydrating properties of cucumber perfectly complement the tanginess of the yogurt, offering a palate-cleansing experience that balances and enhances the overall meal.
Cucumber raita is not only a culinary delight but also serves as a testament to the artistry inherent in Indian gastronomy. Its simplicity is deceptive, for within the seemingly uncomplicated blend of yogurt and cucumber lies a symphony of tastes and textures that elevate the dining experience. Whether enjoyed alongside aromatic biryanis, spicy curries, or as a refreshing dip for flatbreads, cucumber raita stands as a testament to the ingenious ways in which Indian cuisine balances and enhances flavors, making it a cherished and indispensable element of the culinary tapestry.
As a finishing touch to your cucumber raita, garnish it with a sprinkle of chili powder and a few additional mint leaves. This not only enhances the visual appeal of the raita but also adds a subtle kick of spice and an extra burst of freshness. Serve the cucumber raita chilled to maximize its cooling effect, making it a perfect pair well with Vegetable Pulao, Veg Biryani, Chole Biryani, Paneer Pulao, or any other rice preparation.
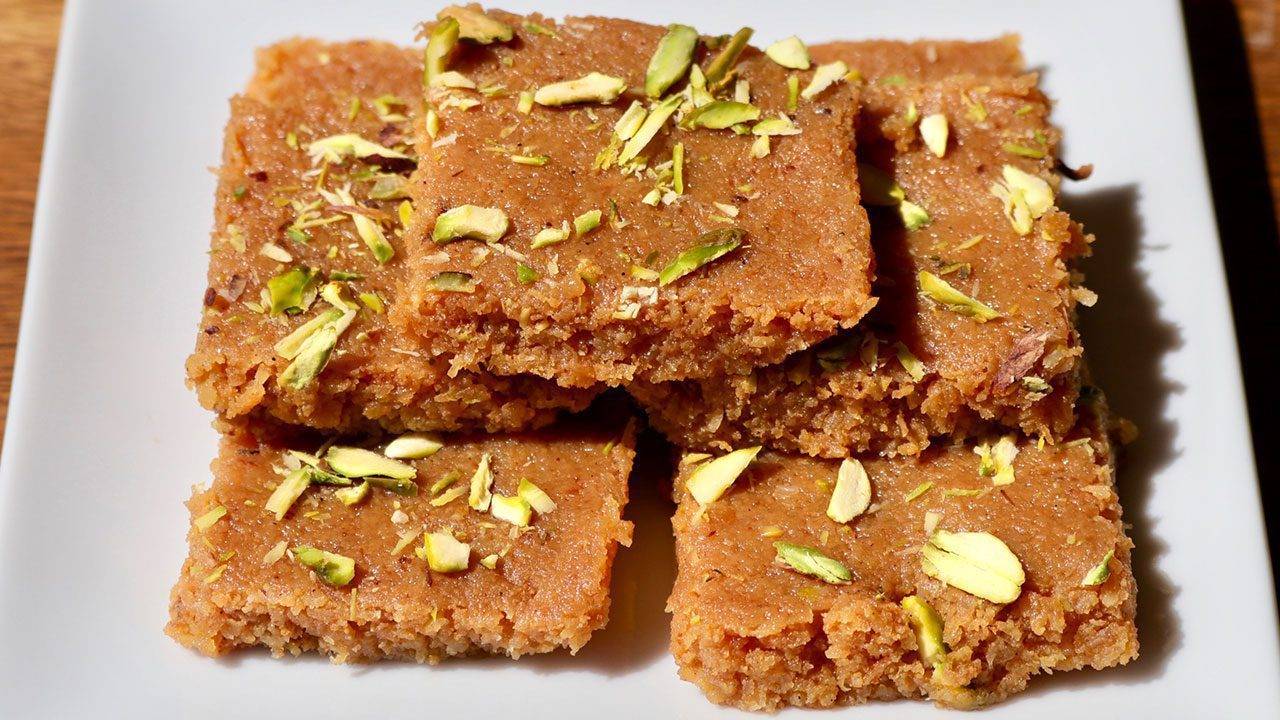

Nariyal Burfi is simple and delicious dessert that only requires a few ingredients! It is super easy to make, and you can serve this as sweet snack in the form of candy. I make this burfi with caramelized sugar which gives a nice twist to the burfi itself.
Soak the coconut in boiling milk for about 30 minutes.
In a flat heavy bottom pan, over medium high heat melt one teaspoon of butter, add sugar, spread evenly in pan.
After sugar start melting, keep stirring the sugar continuously till sugar start melting and changing the color to light brown. Turn off the heat as soon it comes to golden brown in color. This should take 4 minutes. Note: when sugar starts melting it changes the color very quickly and it can easily burn.
Notes
Caramelizing the sugar adds a very unique taste to Burfi, something every one talk about.
Leave for 3-4 hours before cutting them into pieces. Cut them into your desired shape. I like to cut them in 1 inch squares.
You will also enjoy few of these recipes, they are easy, has a long shelf life and also great gift ideas, Moong Dal Ladoo, Almond Brittle, Spicy Cashews,
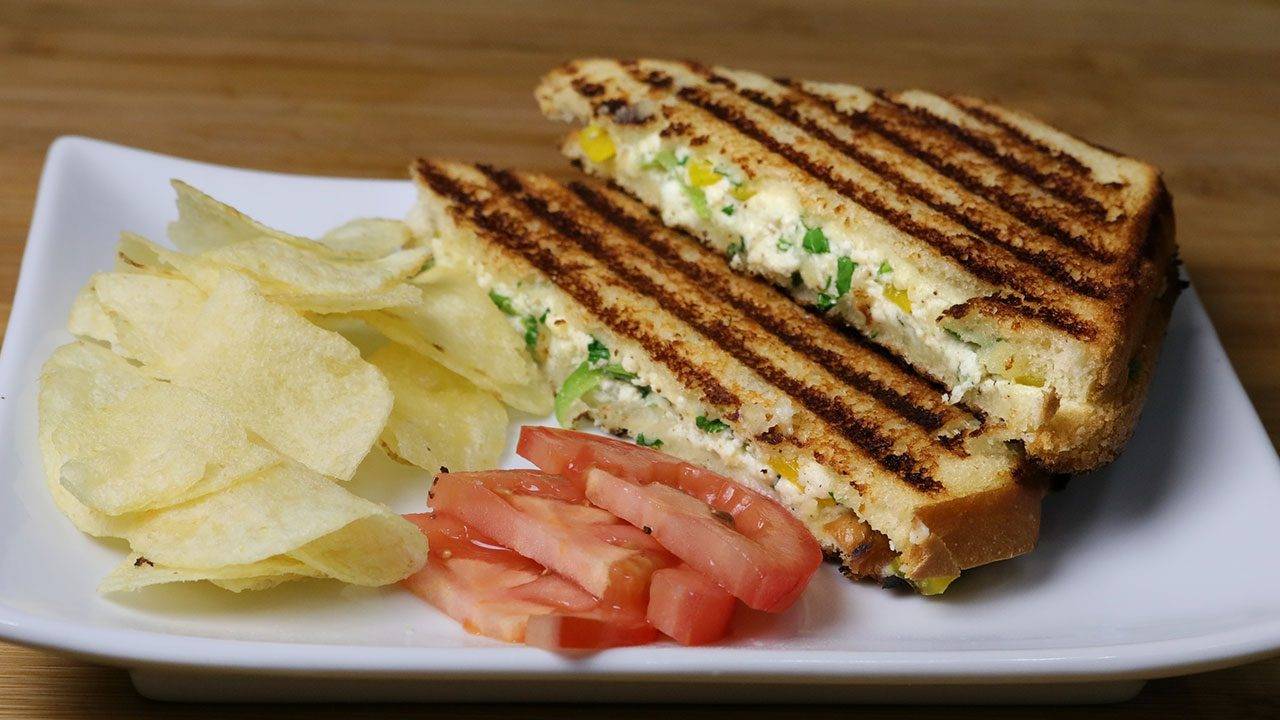


Paneer Sandwich is a quick and easy to make. Paneer Sandwich is healthy and tastes delicious. This is a perfect lunch box option, especially for the kids.
Knead the paneer, add all the ingredients and mix it well.
Spread paneer mix over 2 slice of bread and cover with other slice of bread.
spread the butter lightly on top side of the sandwich, other side we will put the butter after putting the sandwich in sandwich maker. I am using stove top sandwich maker you can use electric, or make it over skillet.
Notes
Paneer Sandwich can be served for breakfast, lunch or as a snack. Served any which way, it tastes delicious.
Some more ideas for lunch box Masala Idli, Masala Khichdi, Chickpea Pulav
Paneer Sandwich is a quick & easy snacks to make. Paneer Sandwich is healthy and tastes delicious. It’s a perfect lunch box option, especially for the kids.
Step into the vibrant world of Indian cuisine with a culinary gem – the paneer sandwich. More than just a simple snack, this versatile dish is a symphony of textures and flavors, perfect for satisfying hungry hearts and adventurous palates. Today, we delve into the paneer sandwich recipe, unlocking its secrets and guiding you towards crafting your own cheese paneer sandwich masterpiece.
The journey begins with the heart of the sandwich, the paneer. Crumble fresh paneer with gentle hands, preserving its delicate texture. Then, comes the magic – a medley of carefully chosen ingredients. Aromatic cumin, vibrant coriander, warm turmeric, and the depth of garam masala weave their magic, creating a flavor-packed paneer mixture. Don’t forget the zing of fresh ginger and cilantro, adding a burst of brightness that awakens the senses. As you knead, imagine these flavors uniting, forming the foundation of your unforgettable paneer sandwich experience.
Now, onto the stage where artistry meets appetite. Select two slices of your favorite bread – fluffy white, rustic whole wheat, or even toasted sourdough. Generously spread your flavor-packed paneer mixture onto one slice, creating the heart of your cheese paneer sandwich. Choose your cheese wisely! A creamy mozzarella adds richness, while a sharp cheddar brings a delightful tang. Experiment with Gouda, Monterey Jack, or even paneer itself for a truly unique twist. Finally, bring the two slices together, gently pressing them to form a harmonious marriage of textures and flavors. This step encapsulates the essence of a well-balanced paneer cheese sandwich, setting the stage for a symphony of culinary delight.
The moment of truth arrives! To transform your creation into golden perfection, heat up a pan or your trusty griddle. Butter one side of your sandwich – remember, fat is flavor! Carefully place it on the hot surface, letting the sizzling magic begin. As the bread gets crisp and golden brown, resist the urge to peek – let the anticipation build! Flip the sandwich, spreading butter on the other side for even more deliciousness. Cook until both sides are kissed by heat, achieving that irresistible crispy-yet-soft texture. This is where the art of sandwich-making shines, and you’re the maestro!
The final flourish! Take your masterpiece off the heat and let it rest for a moment. As you do, spread a thin layer of butter on the untouched side, allowing it to melt and mingle with the golden crust. This adds a touch of luxurious richness, elevating your paneer cheese sandwich to a level of indulgence that is hard to resist. Now, the grand unveiling: cut your creation in half, releasing the enticing aroma of warm bread, spiced paneer, and melty cheese. Each bite is a symphony of textures and flavors, a delightful interplay between the creamy paneer, the tangy cheese, the crisp bread, and the burst of spices. Savor each mouthful, knowing you’ve conquered the art of the paneer sandwich.
Remember, the paneer sandwich recipe is just a starting point. Don’t be afraid to experiment with different spices, cheeses, and even vegetables like chopped bell peppers, or sliced cucumbers. Add a dollop of mint chutney for a burst of freshness, or a drizzle of tamarind chutney for a tangy twist. Explore the endless possibilities and create your own signature paneer sandwich masterpiece.
With each bite, you’ll not only be satisfying your hunger but also embarking on a delicious journey of culinary discovery. So, grab your ingredients, unleash your creativity, and conquer the world of the paneer sandwich, one flavorful creation at a time!
If you liked this recipe you must try these quick & easy recipe too: Grilled Caprese Sandwich, Spicy Chickpea Patty Sandwich, Grilled Potato Sandwich, Dabeli Spicy Potato Sandwich & Falafel Sandwich
