Print
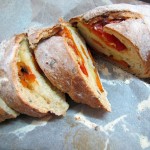
Colorful Antipasti Bread
This Colorful Antipasti Bread is a delicious, beautiful, and most importantly fun bread to make! (I received the original recipe from Oren Giron)
Ingredients
For the dough:
- 1 Kg of sifted white flour (for the best results use Bread Flour, if you can't find any, regular white flour will do the trick)
- 30 gr dry yeast
- 450-600 milliliters of lukewarm water (depending on how moist the flour is)
- a bundle of fresh Basil chopped
- 50 gr of sugar
- 20 gr of salt
- 100 gr grated Parmesan cheese
For the filling:
- 3 courgettis, sliced and lightly roasted in the oven
- 2 red peppers, roasted and pealed
- 2 small sweet potatoes roasted in the oven
- (you can also use an eggplant sliced and roasted, or other veggies you like roasted in the oven)
Instructions
Method
- Roast and prepare the vegetable filling you intend on using in the bread.
- Place all of the dough's ingredients in a mixer bowl with 450ml of water and start mixing. If dough seems a little dry add a bit more water until it forms into a smooth soft ball (but no more than 600ml), this should take about 10 minutes. you can also do this by hand.
- Place the dough in a bowl, cover it and let it rise until volume has doubled. This takes about one hour, depending on the weather :)
- Preheat the oven to 200C.
- Divide the dough into 3 equal pieces and roll out each one into a rectangle (do not over knead the dough, or it will turn elastic and hard to work with).
- Place a third of the vegetables on each rectangle leaving the edges empty (see photo).
- Fold each vegetable topped rectangle into an oval shaped loaf (see photo).
- Place loaf on baking dish lined with a baking sheet, cover and let rise until the loaf doubles in volume.
- Dust the tops of the loafs with flour and make small incisions on top with a knife.
- Bake for 230C for 15 minutes and then reduce to 200C for about 20 minutes.
- Take a peek in the oven near the end, when the bread is nice and brown (the bottom too) its ready.
- Let cool before slicing.
